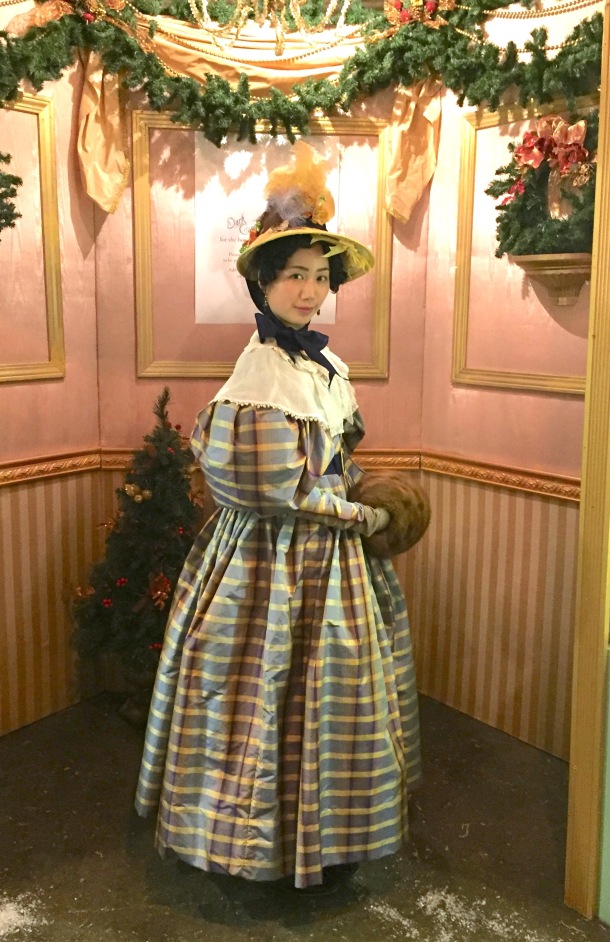
As promised in my last post about the Gigot Girl Gang visiting the Dickens Fair, here are construction details about my 1830s Romantic Era day dress, made out of a plaid silk taffeta. Undergarments and accessories and the various vendors I used are also detailed in this post. The sections are: materials, pattern, construction, belt, bonnet, pelerine, undergarments, hair, accessories, project costs, and vendor list.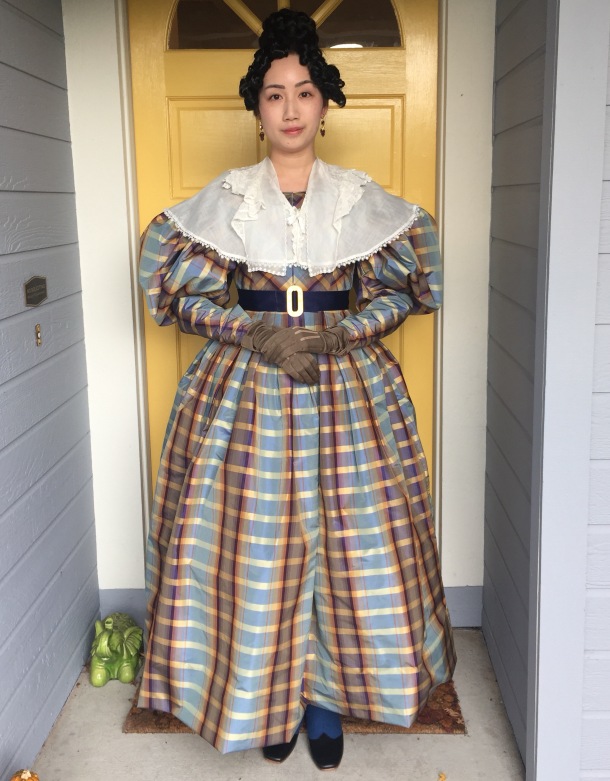
MATERIALS
My dress is made of a plaid silk taffeta, with the bodice lined in polished cotton, with an interlining of stiff cotton organdy. (In retrospect the organdy was a little too stiff and I’d use something softer next time). The skirt is unlined. The sleeves are lined with polished cotton as well. Because the sleeves are so large and so much material is pleated into the armscye, I think if I were to make this dress again I would not line the sleeves to reduce bulk. The silk from Fabric Mart Fabrics was advertised as “navy and yellow” but ended up being closer to purple and even more gorgeous than I expected. It changed colors depending on the light.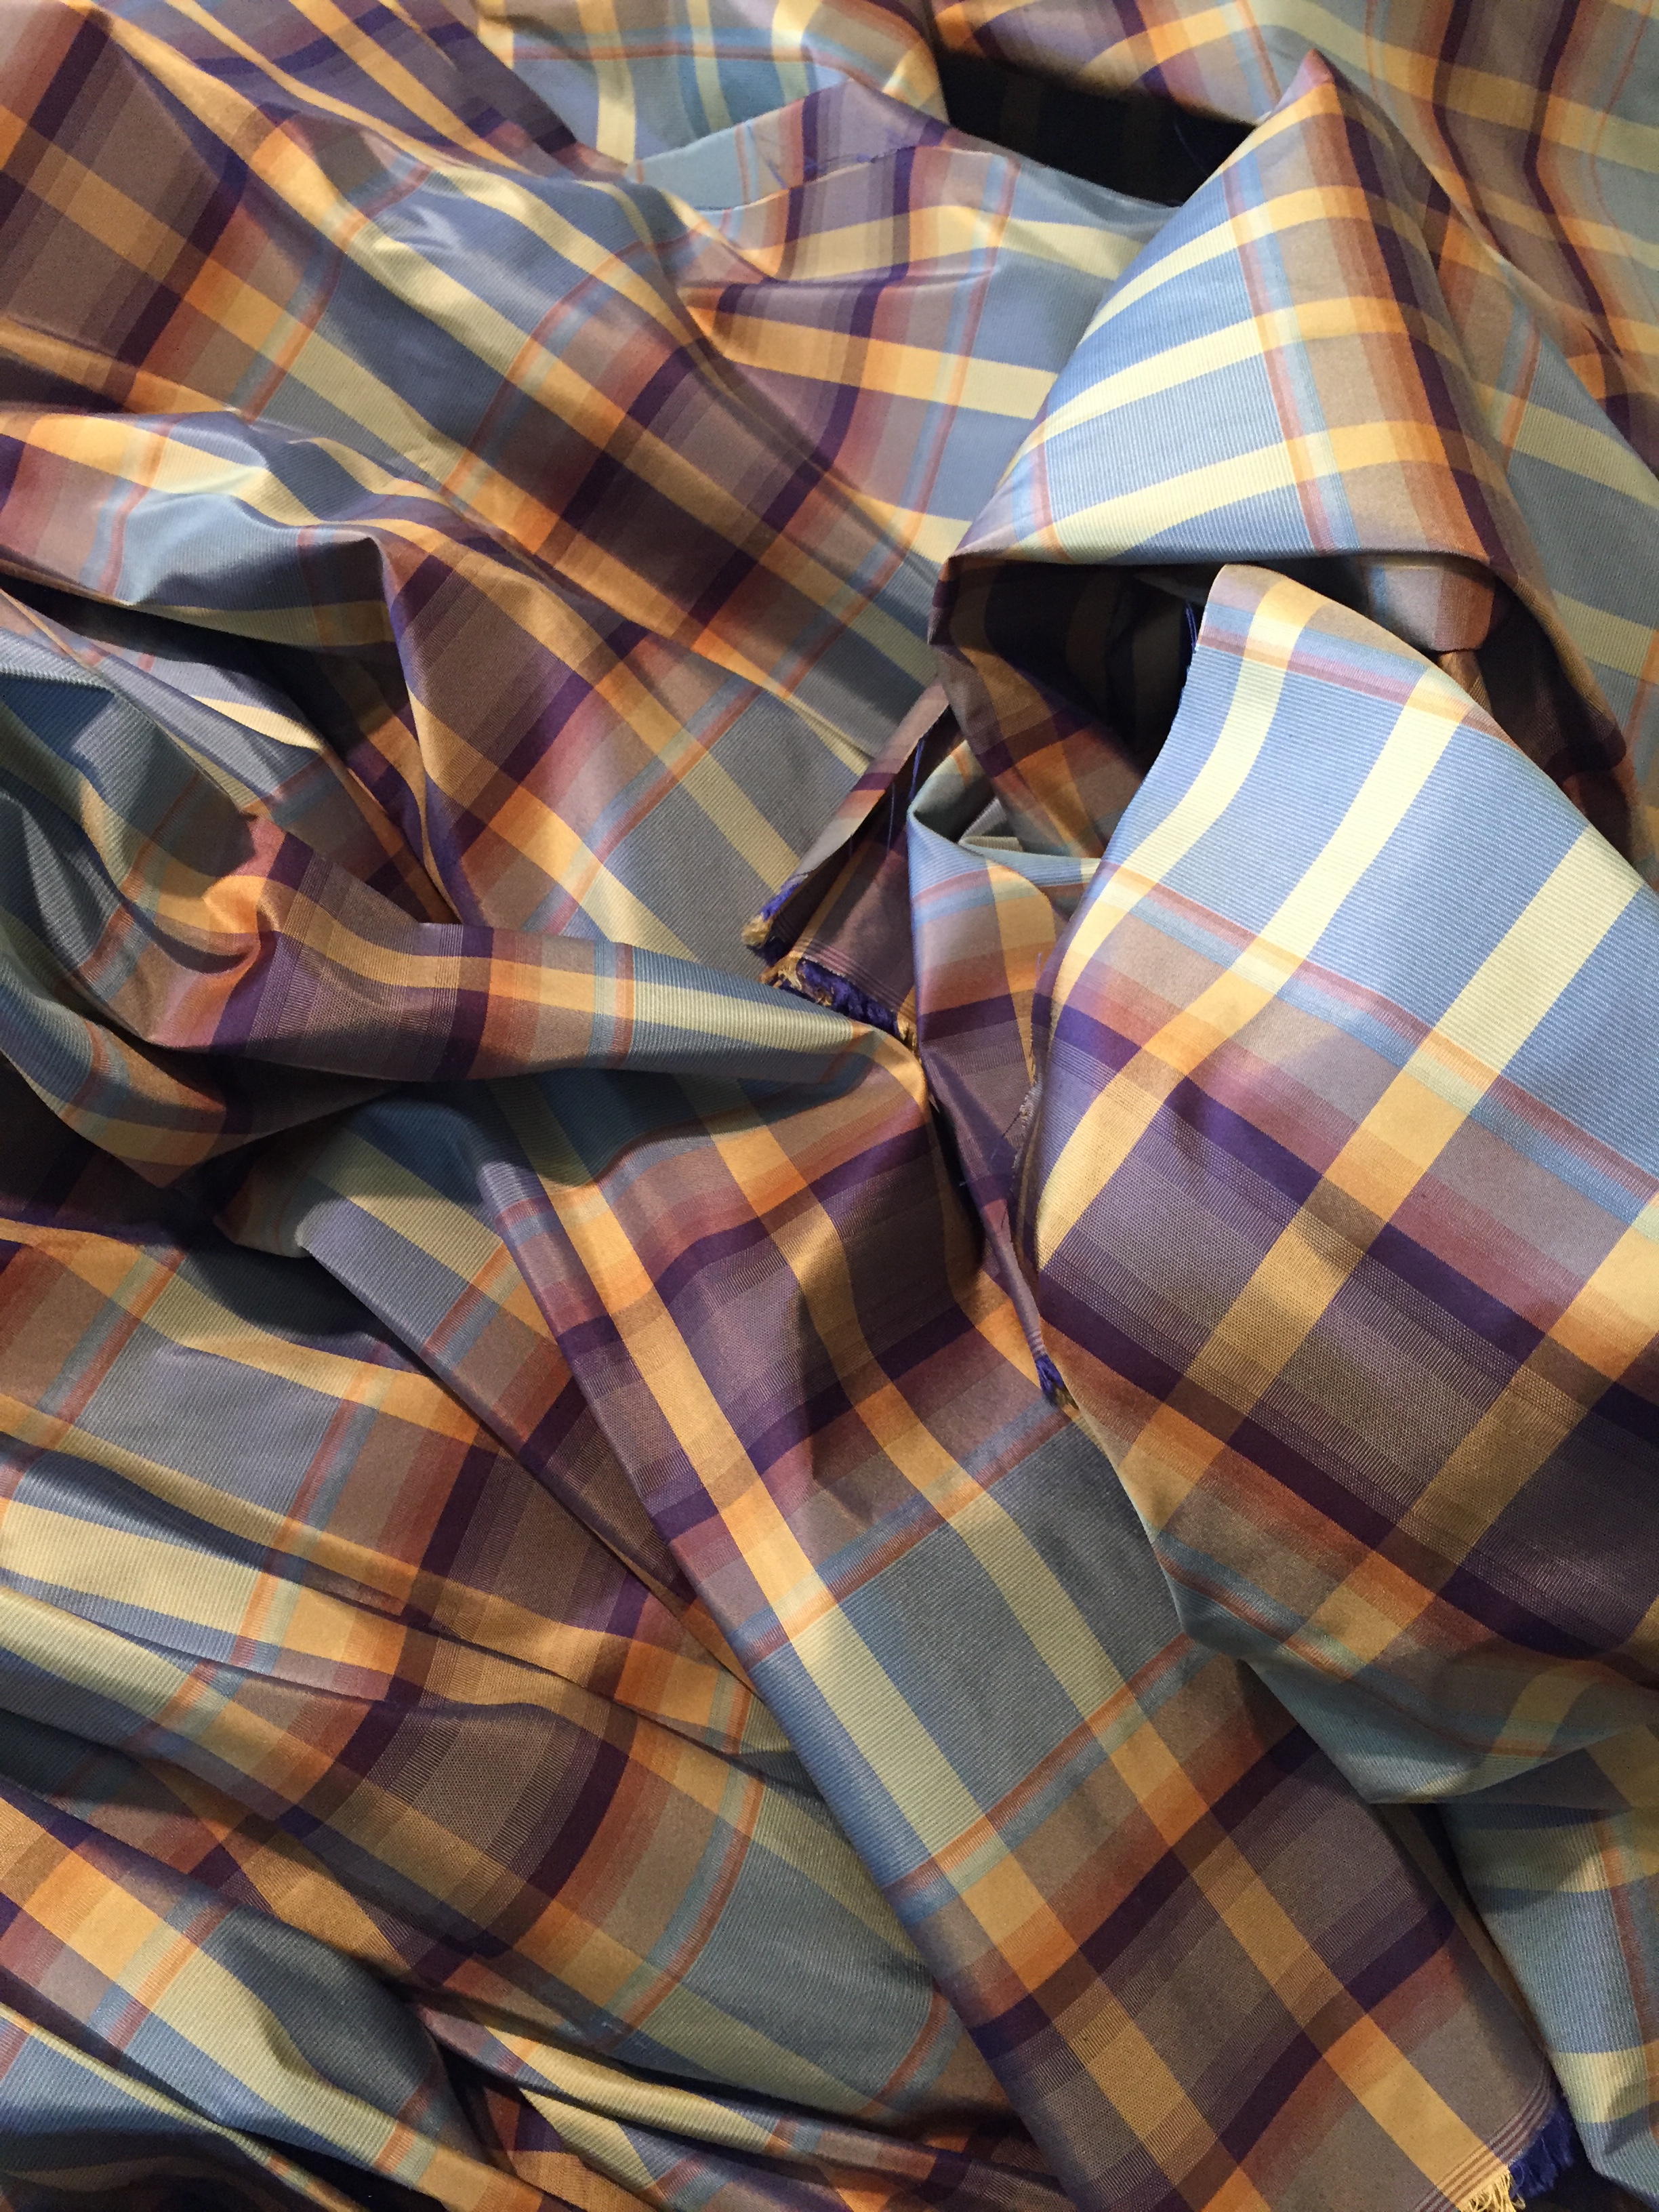
If silk is not in your budget, many beautiful gowns from this period were made in cotton prints. In my experience, silk shantung in dark colors or busy prints will hide the slubs pretty well if you can’t afford smooth taffeta. (Silk shantung has fewer slubs than dupioni).
PATTERN
I used the Truly Victorian TV455 1830s Romantic Era pattern to make my dress. I previously used this pattern to make an evening version of the 1830s dress. I find TV patterns fit very well as long as you follow their instructions to pick the right bodice pieces for your measurements. I have found though, that many TV patterns run long in the bodice (even though I am not shortwaisted), so I recommend trimming any excess off the bottom to avoid having the waist of your skirt sit too low and look unflattering. Definitely make a mockup to ensure a good fit. Below is a photo of my final pattern overlaid on the original pattern. As you can see, I had to shorten the bodice quite a lot at the bottom. I also raised the neckline a little (personal preference) and took in the shoulders because mine are narrow.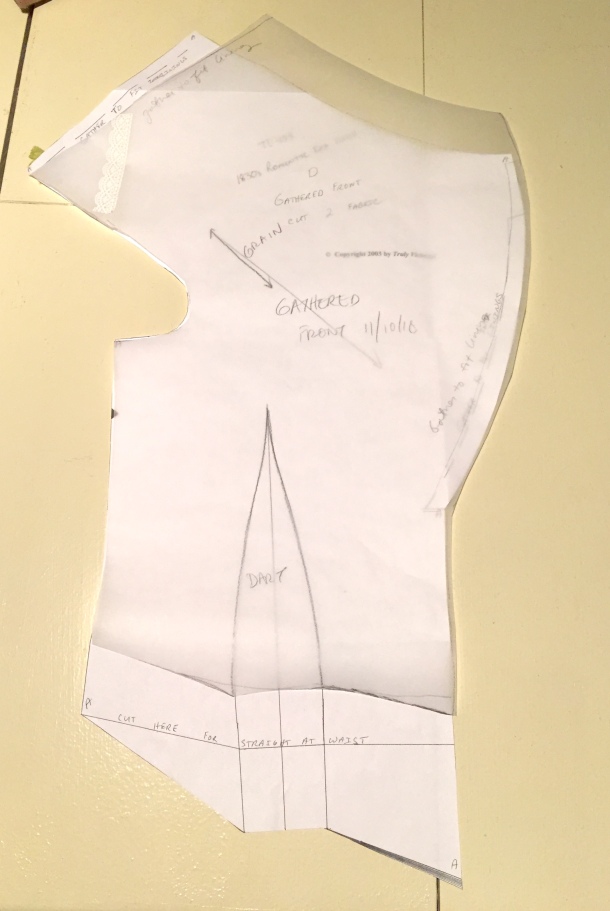
One other change I made was that instead of using the included skirt pattern I just used 3 panels of my fabric. That way I could have seams on each side (where I added pockets), and a seam down the back for an opening.
The TV pattern includes sleeve patterns for day and evening looks. (I have not tried it myself, but Black Snail makes an 1830s evening dress pattern as well).
CONSTRUCTION
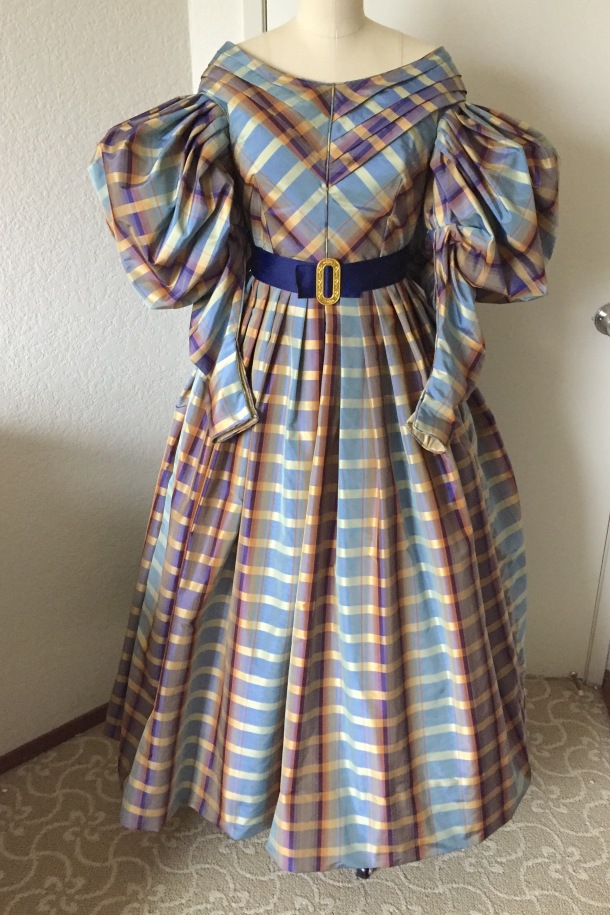
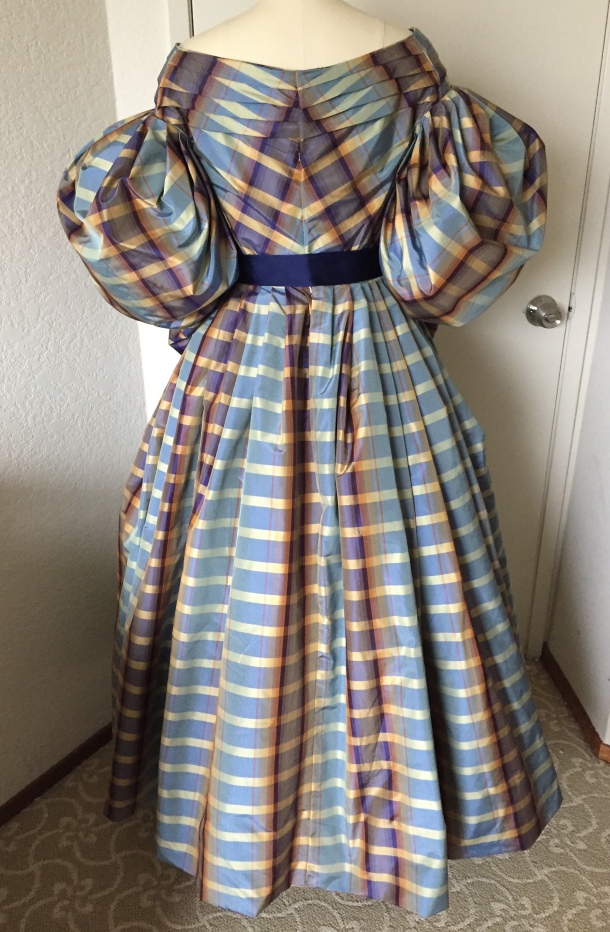
I’m not going to lie, pattern-matching a non-symmetrical plaid is not easy. But it makes a really beautiful effect in the end. Look at the front and back of the bodice!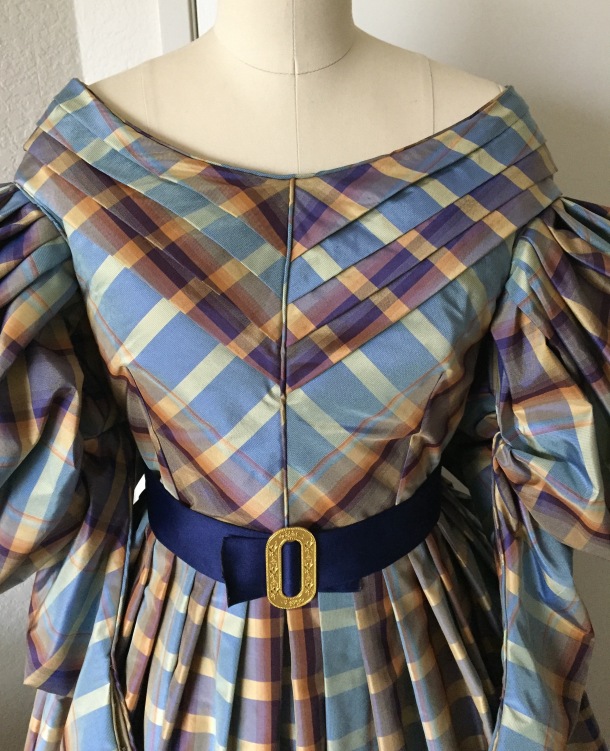
(I should have taken photos before wearing it and getting it all wrinkled!)
I normally hate doing piping, but it was really part of the look for this era, so I piped the front center seam, the neckline, the armscyes, the shoulders, the sleeves, the side seams, and the cuffs.
Do yourself a favor and buy a piping foot. I did not have a piping or zipper foot that fit my antique sewing machine, and it was um, difficult.
The skirt is knife-pleated and sewn directly to the bodice bottom. I hid a pocket in each side seam of the skirt, and the back opening has a placket. I could have done cartridge-pleating for the skirt but decided it was too much hand sewing to handle this time. (If you want to do cartridge pleating, using gingham ribbon across the top makes an easy guide, as described in my post about how I made my 1840s dress). I increased the density of the pleats in the back of the skirt to subtly increase the “poof” in the back.
The hem is folded up, and up again, to make a deep facing for extra structure. Can you see where the tiny stitches are?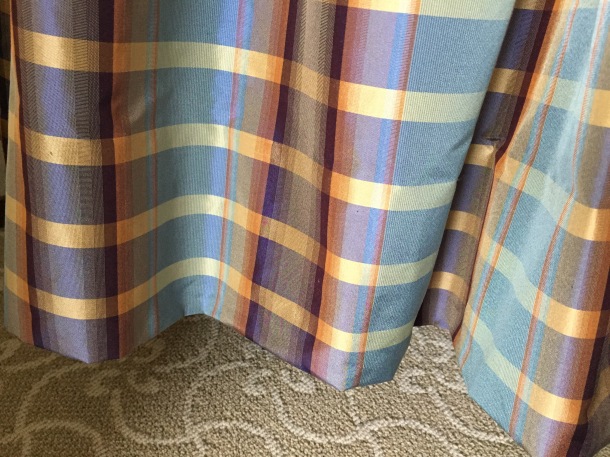
How about now? =)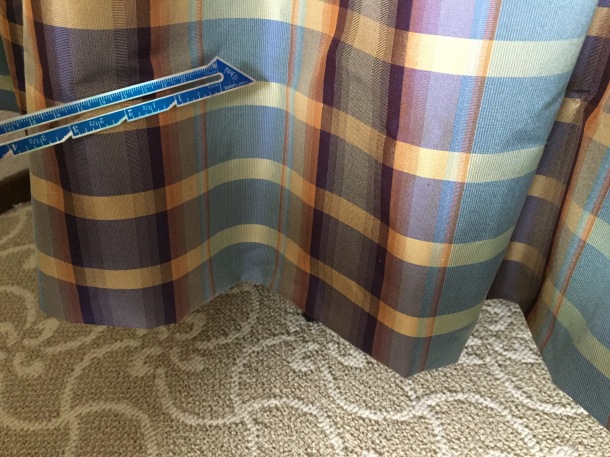
The back of the dress closes with hooks and eyes. I use the kind meant for skirts for extra strength, instead of the tiny hooks and eyes.
I’m showing you a photo of the bodice in progress so you don’t repeat a mistake that I made.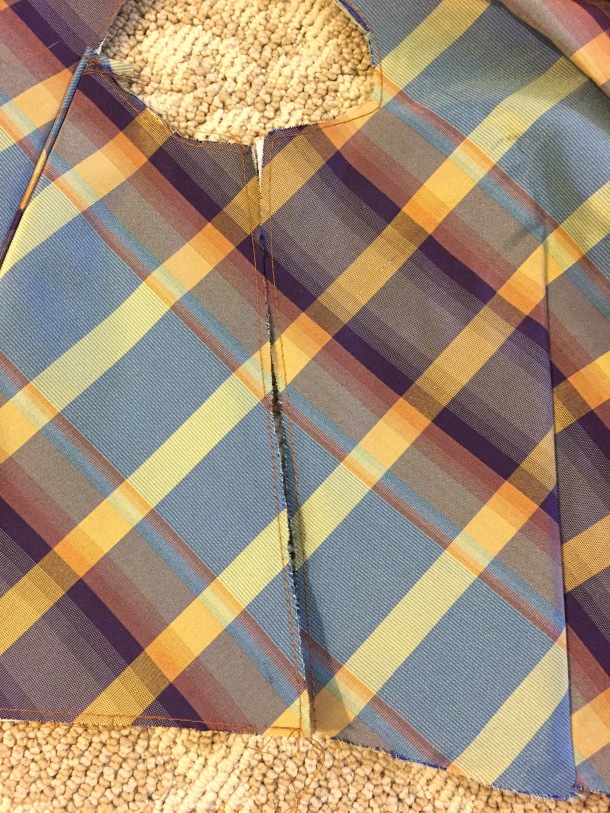
Above is a photo of pattern pieces cut out. I had carefully pattern-matched everything so that the front, side, and back pieces would line up continuously like a barber pole. However, I forgot to take into account seam allowance! The photo below shows the pieces sewn together; whomp whomp. I had already flat-lined, pleated, and piped the front and back so I didn’t want to recut. 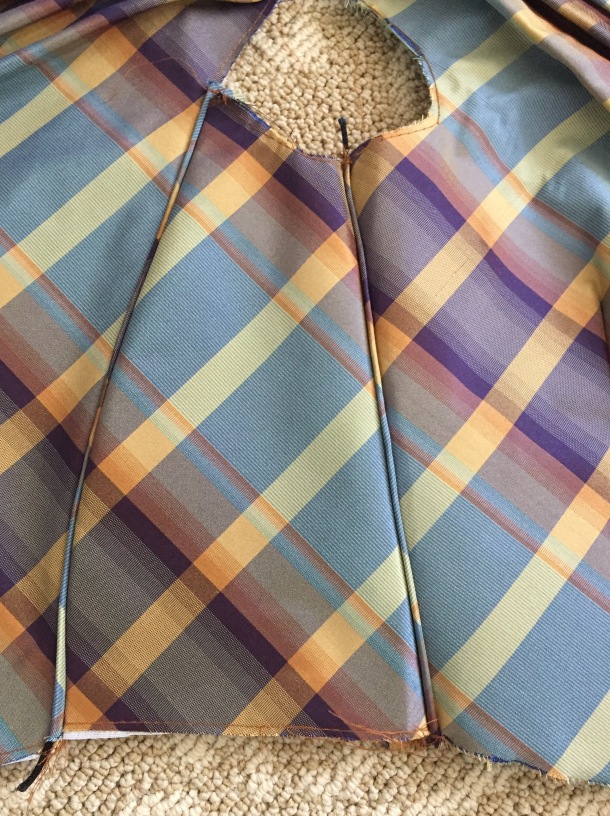
Matching plaids and pleats while taking into account curvature and sandwiching piping made me rethink the life choices that brought me to this point). Everything was done symmetrically so it still looks good enough for me, even though it’s not the way I envisioned.
I forgot to take a photo of the interior, but my silk is flatlined with my interlining (cotton organdy), and the polished cotton lining is sewn separately and whipstitched in. The boning is sewn to the seams of the lining. (I also used pre-cased plastic boning to save on time). This is not the most historically accurate method, but made a clean interior and I didn’t have to do much hand-sewing to whip down raw edges.
BELT
The belt consist of a long piece of vintage ribbon, cut to my size and sealed at the ends with Fray Check, and a reproduction metal buckle. Some of the ladies in our group used antique buckles found on eBay, but reproductions are easily available. Mine is a gold oval one with bees purchased from Kansas Mercantile, which is also available from Ensembles of the Past on Etsy. The ribbon I used is a wide and thick rayon ribbon I bought from a vendor at Costume College. It was too wide but I folded one side down to fit.
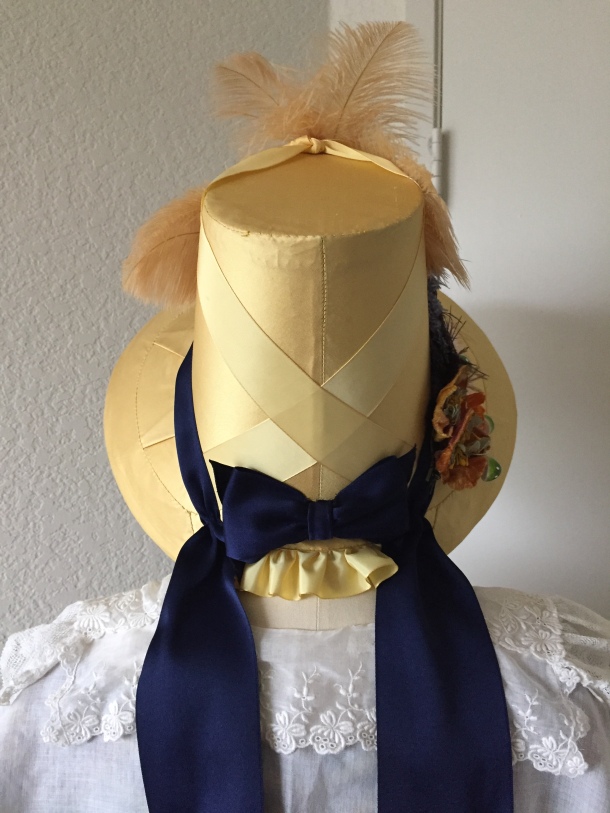
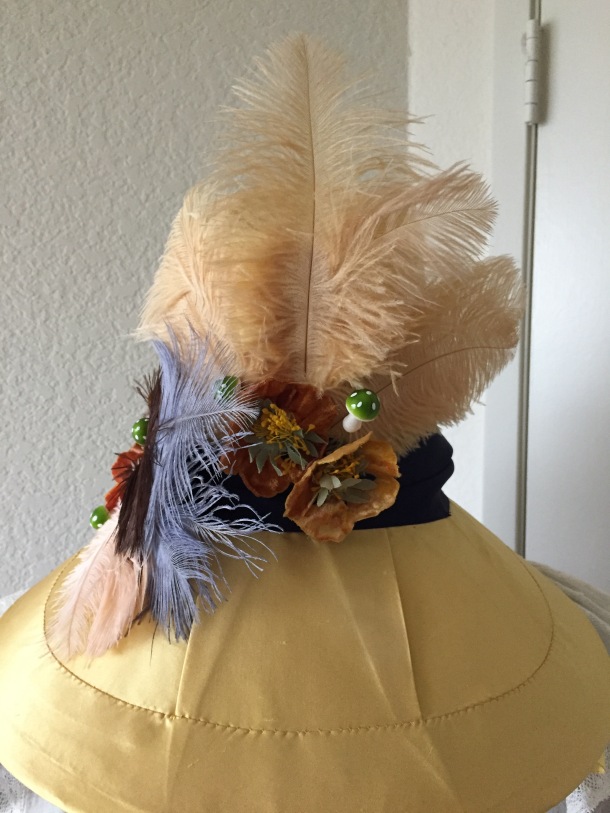
BONNET
No respectable lady would go outdoors without a head covering, and the 1830s is a great period for putting a lot of outrageous thing onto your hat. Lynn McMasters and Black Snail both make Romantic bonnet patterns if you want to try your hand at millinery. I was recovering from an injury and could not hand-sew a buckram form when I put together my ensemble so I commissioned a bonnet from House of Loli on Etsy. I sent her some yellow and cream silk taffeta for the bonnet, and then added vintage flowers and mushrooms and feathers to to it.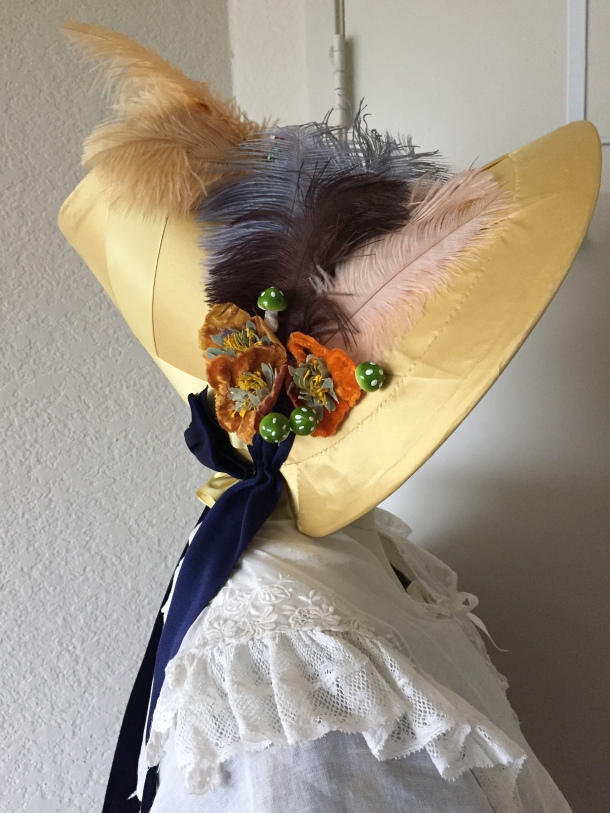

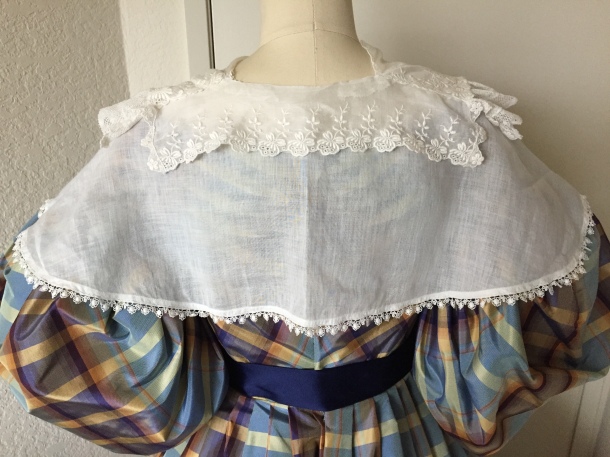
PELERINE
Period ensembles often include a little cape over the dress, either made of the same fabric as the gown, or a fine cotton. I made mine by assembling a few vintage lace collars together to make it look like one pelerine. If you look at my previous post of the Gigot Girl Gang you’ll see that there are lots of options to making one of your own style: small, big, transparent, or opaque. Mine closes with a little bit of silk ribbon. I think for future wearings I will use something heavier to weight it down, like a brooch, because my pelerine kept going askew.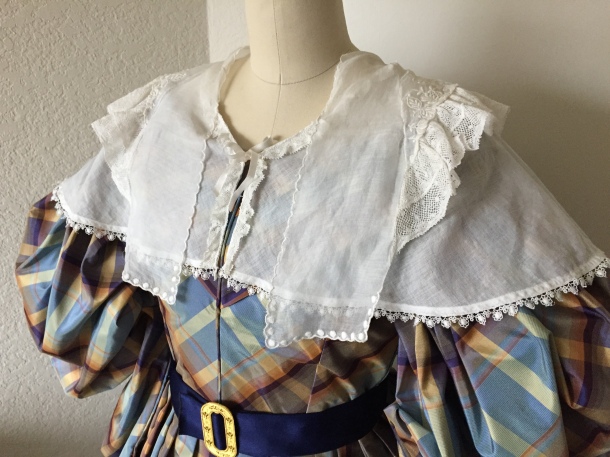
UNDERGARMENTS
The undergarments needed for the whole ensemble are a chemise, stays, corded petticoat, tucked petticoat, and sleeve plumpers. 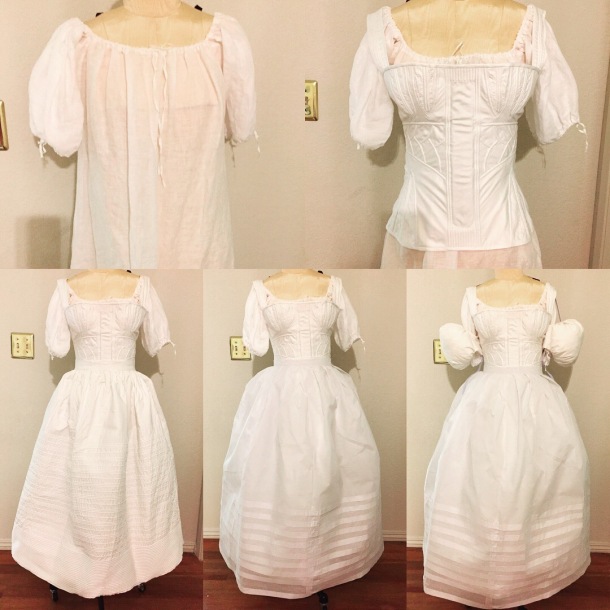
I’m too lazy to make a new chemise for each era, so I have a drawstring one that allows me to change the neckline for each gown. I have details on how I made by hacking an 18th century American Duchess pattern in a previous post.
I don’t like making any sort of corsetry, so I purchased the Charlotte stays from Redthreaded. They are very soft and comfortable because they rely on cording and a curved busk instead of boning. If you are on a budget or want more support using steel, Redthreaded also sells ready-made 1830s stays. My stays from the Atelier line are an investment, but they truly are a work of art, and I plan to use them for 1820s and 1840s garments as well.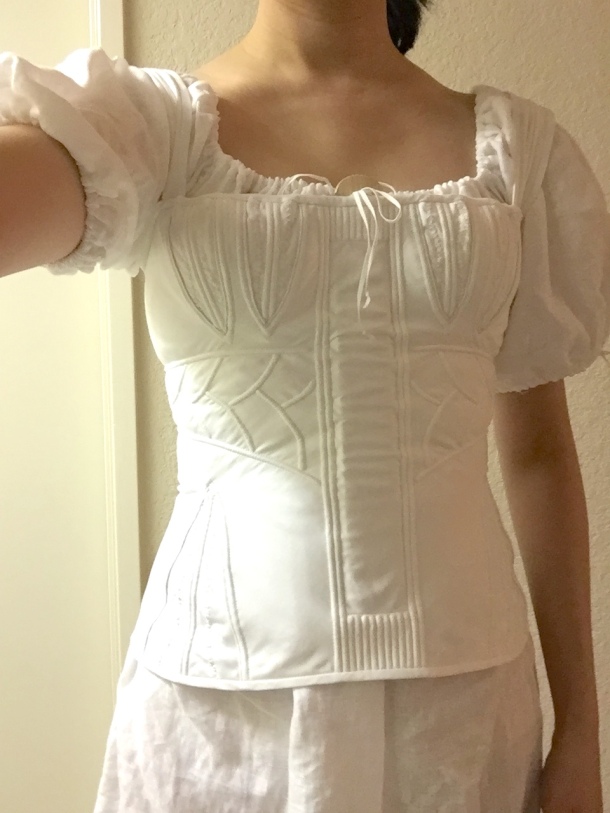
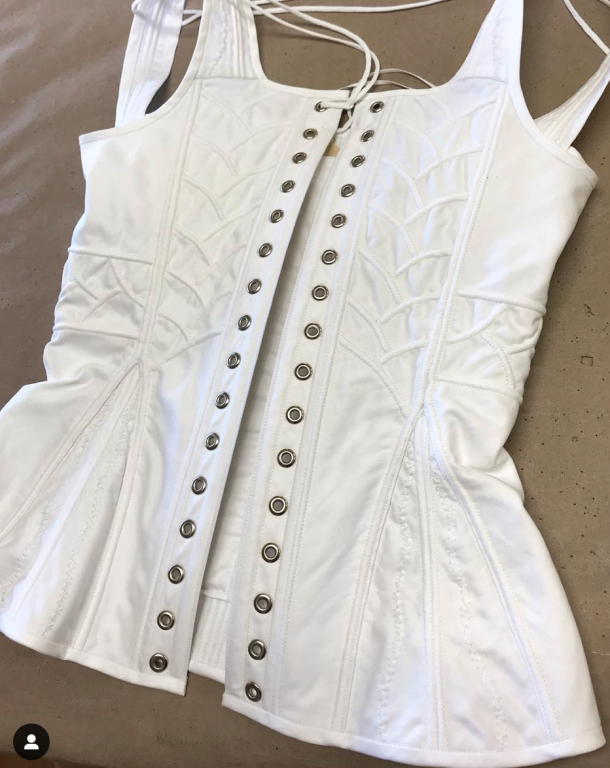
Photo by Redthreaded
If you want to make your own stays, Black Snail has a pattern for the stays (which also includes a pattern for a chemise, corded petticoat, and plumpers).
I purchased my corded petticoat from Hand Stitches in Time during a sale, but even at full price they would be worth it to avoid what is to me a very tedious task of sewing in all those cording channels! Mine is the 60 row corded petticoat. However, if you want to make your own petticoat I have heard great things about the corded petticoat workbook from Historical Sewing.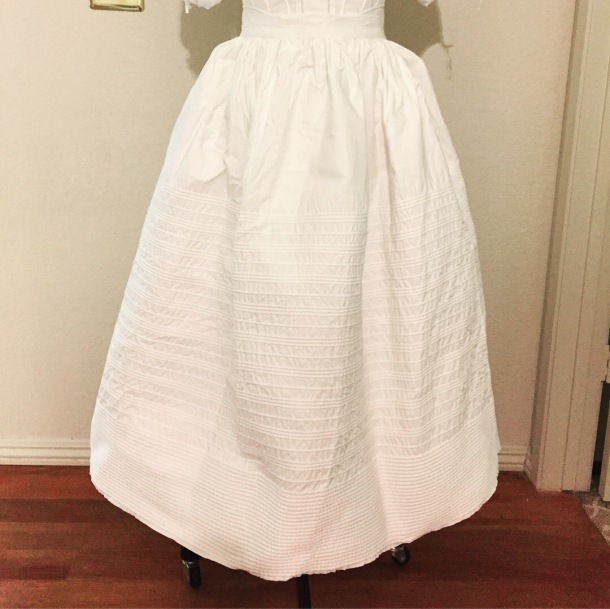
Over the corded petticoat I wore a tucked petticoat that I made out of cotton organdy. It is very simple to make. Take 2 long rectangles of fabric and sew into a tube. Hem the bottom. Mark parallel lines around one end of the tube and make as many tucks as you wish until the petticoat is the length you want. Pleat the top into a waistband. To determine how long of a rectangle you should make, determine the length you want your petticoat to be (waist to mid-calf) and add 1 inch for each tuck you want to make.
You will want to dip both petticoats in starch, let them air-dry, and iron them for maximum poof! You know they’re ready when they can stand up by themselves like petticoat ghosts. I find it handy to let them dry upside-down in the shower using skirt hangers.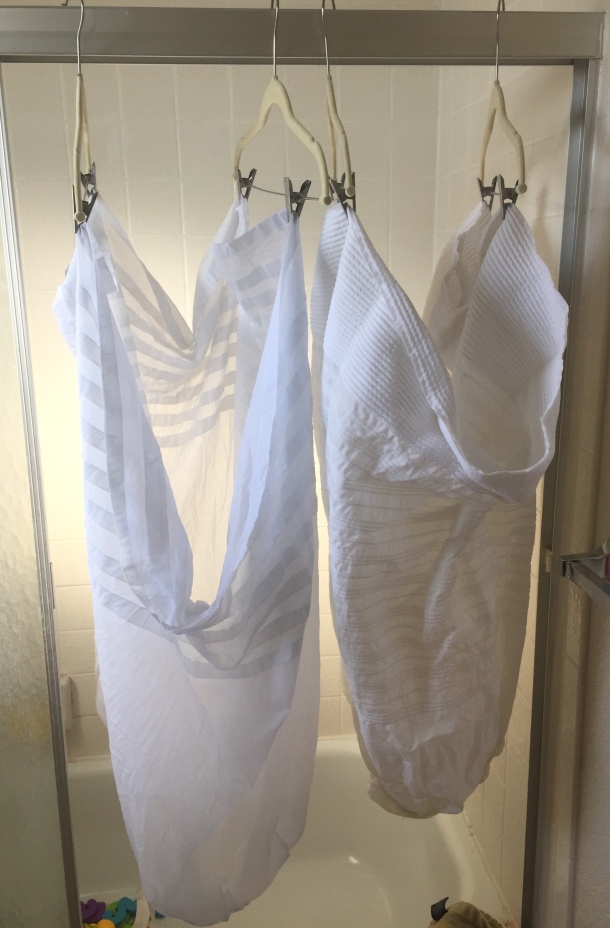
The last bit of undergarments is the sleeve plumpers. The last time I made an 1830s dress I had to figure out the sleeve supports myself, and they ended up being a little odd. Abby of American Duchess has a plumper pattern that is much easier to use, and I highly recommend it. She has a PDF pattern and Youtube video that shows how they are made. I did a little experiment when making mine.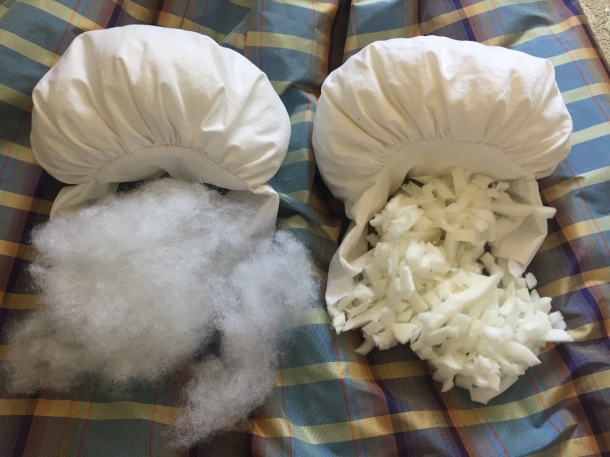
The one on the left (above) is stuffed with Polyfil. The one on the right is stuffed with shredded memory foam. The one on the right is a bit lumpier, but compresses more easily for stuffing into the armhole in the dress. (A historically correct method would be to use feathers or down). I could have made my plumpers even bigger but I was afraid of not being able to get them through the armhole. 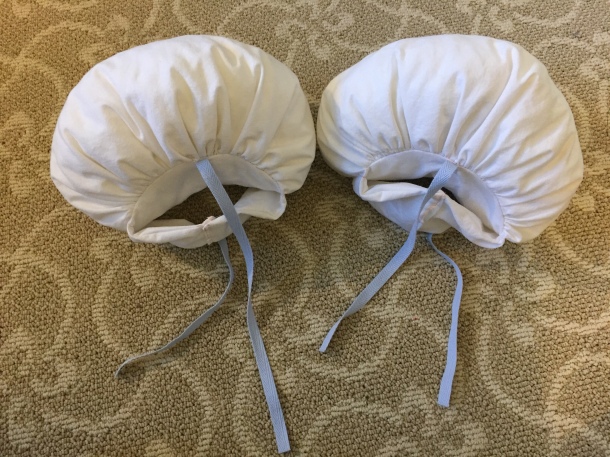
As described in Abby’s video, there are ties to tie them to the dress so they don’t move around. In some museum photos you’ll see the plumpers tied to the stays (I believe mainly to show them off), but it is much easier to put the plumpers into the dress and then put the dress on, than to try to get the dress over the pumpers while you’re wearing them!
HAIR
My hairstyle consists of mainly false hair. I have a large braided hair bun on top of my head and 2 curled hair clips in the front, based on the style in this 1835 portrait by August Canzi.


The bun is easy to make. Just take false braiding hair (I use the Sassy brand from Sally Beauty Supply), make a thick braid, and wrap it around a hair donut.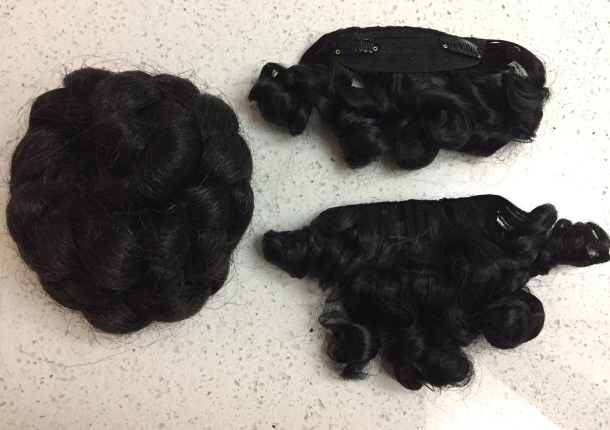
The front clips are made from 2 “side swept bang clips” you can buy on Amazon or eBay. Just make sure you get “side swept” bangs instead of regular ones because they are longer. Wrap the hair in curlers and dip into boiling water for 10 seconds to set the curls. Put on a towel to dry and take the curlers out when they are completely dry.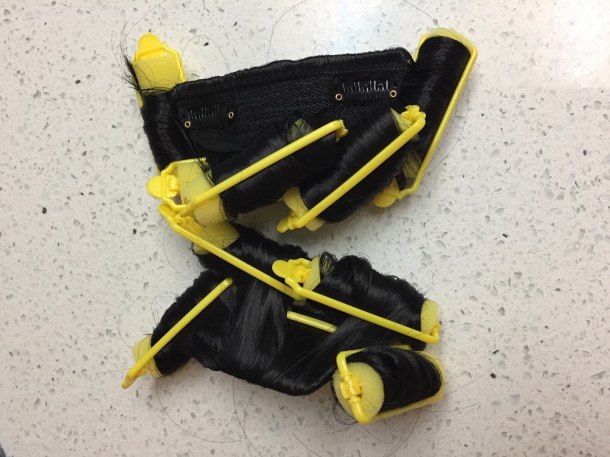
The bun is bobby-pinned onto my head while the bangs have wig clips already pre-attached.
If you have long hair, make 2 braids that cross over the top of your head and pin them down to act as anchors for the bun. I have shorter hair cut into layers that makes braiding difficult, so I made a small bun as an anchor, and pomaded all the shorter hairs into place.
The 1830s is full of elaborate hairstyles involving Apollo knots, fancy loops and braids, flowers, etc. You might have fun exploring those for evening ensembles, but if you want simple and easy the bun and bang clips are the fastest way to get the look.
OTHER ACCESSORIES
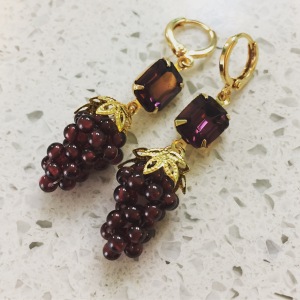
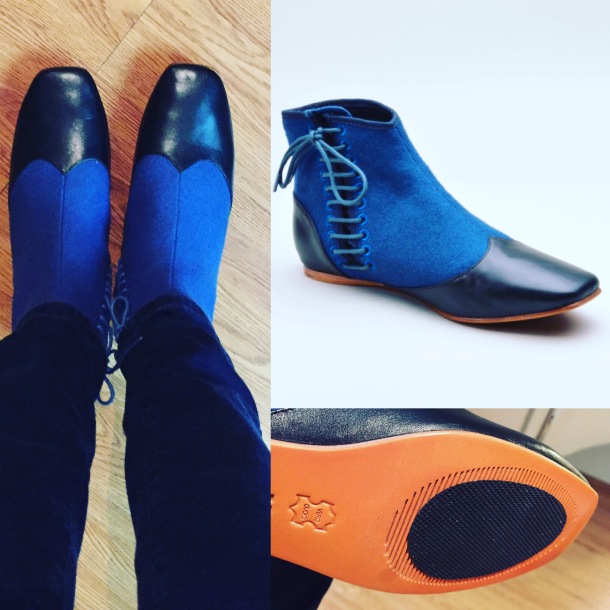
Besides the belt and bonnet, my other accessories were a round vintage fur muff, grape cluster earrings by The Lady Detalle, and a brooch from American Duchess, given to members of our Gigot Girl Gang. My shoes were the Gettysburg from American Duchess. (I added insoles and a non-slip adhesive pad to the bottom of the shoes). I also had silk stockings and a pair of silk gloves from the 1930s.


PROJECT COSTS
If you are starting from scratch, and especially if you plan to outsource all your undergarments, having a full 1830s garment can be quite the investment. However, you don’t have to have 1830s stays. Some of the other ladies cheat with Victorian corsets from later eras. Long-line Regency stays would work as well. I use a chemise from another time period. You can fake having a corded petticoat by using enough starched petticoats or by putting horsehair crinoline into your skirt. You might be able to retrim a bonnet you already have. Instead of a perlerine maybe you have a nice shawl. You probably have some flat shoes that could pass. (Square-toed modern ballet flats are perfectly acceptable for 1830s; just add some ribbon ties). The muff and jewelry are optional. If this isn’t your first costume rodeo and you already have a lot of similar items, don’t feel like you need a whole new set of undergarments. Since it’s possible to “make do,” I’m giving the cost of just the dress. (I don’t want you to have sticker shock at the entire ensemble that I have been collecting for a while, and be discouraged. Repeat after me: You don’t need all new stuff to have a good time).
- 8 yards silk taffeta: $84.99 + $7.50 shipping from Fabric Mart Fabrics. (Make sure you get on their mailing list to be notified of their crazy sales. I am able to afford silk dresses because I wait until silk drops to ~$10/yard).
- TV pattern: $0 (used already for a prior 1830s dress)
- Navy thread: $1.80 from Fabric Mart Fabrics
- Belt buckle: $13.59 including shipping from Kansas Mercantile
- Navy ribbon spool: ~$4 from Costume College vendor (with plenty left over)
- 3 yards polished cotton for bodice and sleeve lining: ~$5 from garage sale
- 1 yard cotton organdy for bodice interlining: ~$5
- Hooks and eyes, other thread, cord, etc. from stash: $5
Total for dress: $126.88 (not awful for a huge silk dress, with leftover silk and ribbon for other projects!)
I made the plumpers from materials left over from other projects, so it was “free.” The organdy for making the tucked petticoat is about $5/yard from Vogue Fabrics. (Depending on your size you will probably use 3-4 yards).
Other items you may already have: stays, chemise, petticoats, bonnet, shoes, stockings, gloves, jewelry. Be creative; I reuse my accessories and undergarments for various outfits and eras all the time!
VENDORS
- Redthreaded for your corsetry needs
- Hand Stitches in Time for corded and tucked petticoats
- House of Loli for bonnets (I also recommend Lydia Fast)
- American Duchess for shoes and stockings
- The Lady Detalle for jewelry (I also recommend In the Long Run and Dames a la Mode)
- Black Snail and Truly Victorian and Historical Sewing for patterns
- Kansas Mercantile and Ensembles of the Past for reproduction buckles
- Fabric Mart Fabrics for silk (I also recommend Renaissance Fabrics and Burnley and Trowbridge)
Happy sewing!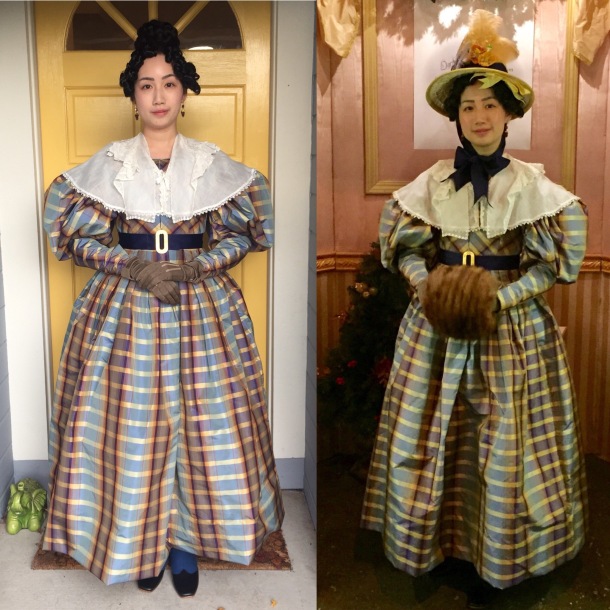


 12-14-19")

Oh my I just love this post so very informative. Your creations are drool worthy. Thanks so much for sharing all that you do. Merry Christmas from Canada
Thank you! You’re so welcome and I’m glad you find my blog of interest!
You look fantastic! Your outfit is amazing. You have inspired me to sew my own 1830s dress. I like the way you made the skirt out of 3 panels of your fabric. Were the panels 45″ ? I am trying to figure out how wide around the skirt should be.
Thank you! My panels were 55″ but I think that was probably a little more than necessary for my size. If you want to see what a skirt with 3 panels of 45″ inch looks like my 1840s fan front was made that way: https://freshfrippery.com/2015/12/21/1840s-fan-front-dress-at-dickens-fair/
Personally I think 45″ is a little narrow and 55″ is a little wide, but it depends on your tastes and your height. If you are petite you can have a smaller width.
Pingback: 2018 Costuming Year in Review | Fresh Frippery
Gorgeous work, I so love this dress! Such a fantastic and thorough post too! And aw, so glad you love your grape earrings from LadyDetalle! (*blushes*)
Thank you! I’m so glad you like this post! I wore my earrings again this past weekend and got complimented again!
Pingback: 1830s Cotton Day Dress | Fresh Frippery
Absolutely beautiful!
Thanks Shelli!
Pingback: 1830s Dresses at the Romantics Picnic | Fresh Frippery
Pingback: 1830s Romantic Dress (Part 2): Sleeve Support Poufs | Fresh Frippery