Search Results for: gibson

Wedgewood Blue Gibson Girl Gown and Undergarments

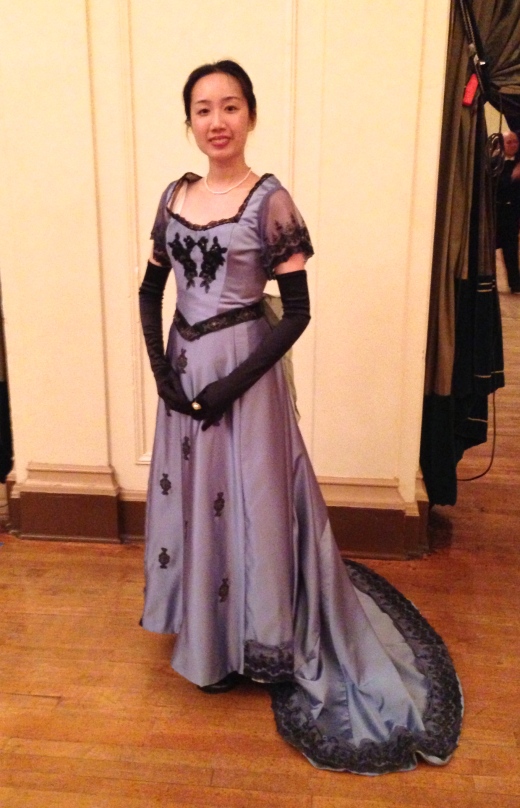
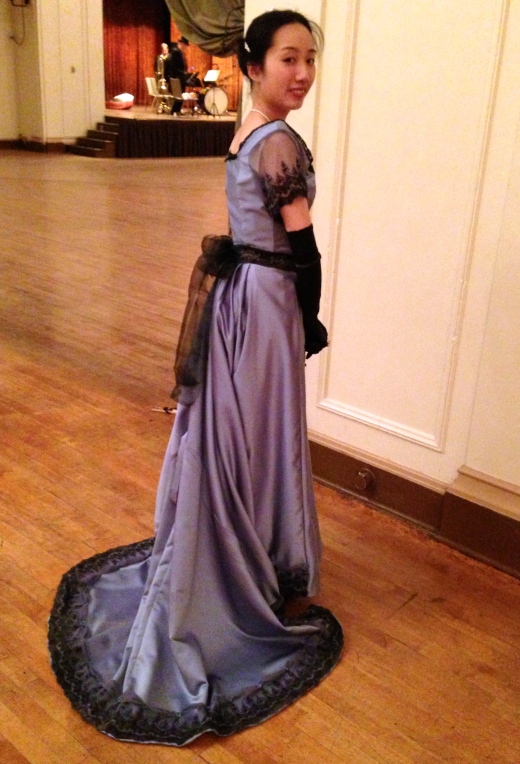
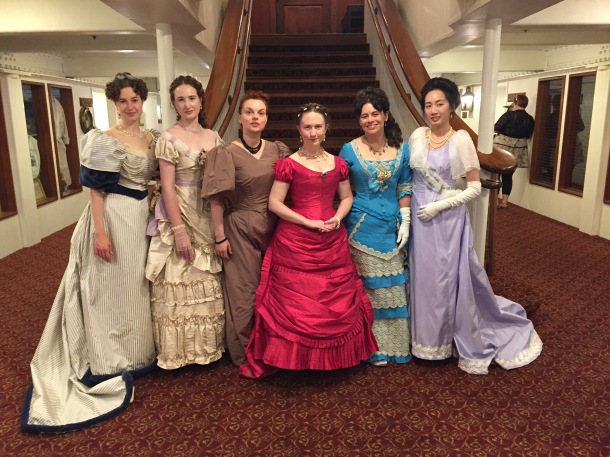
I attended a dinner party on the Delta King River Boat in Sacramento. The event was hosted by the GBACG and people were encouraged to wear clothing from 1870-1900. I decided to make a Gibson Girl dress out of a Wedgwood blue silk taffeta, trimmed with white lace.IMG_2870IMG_2856
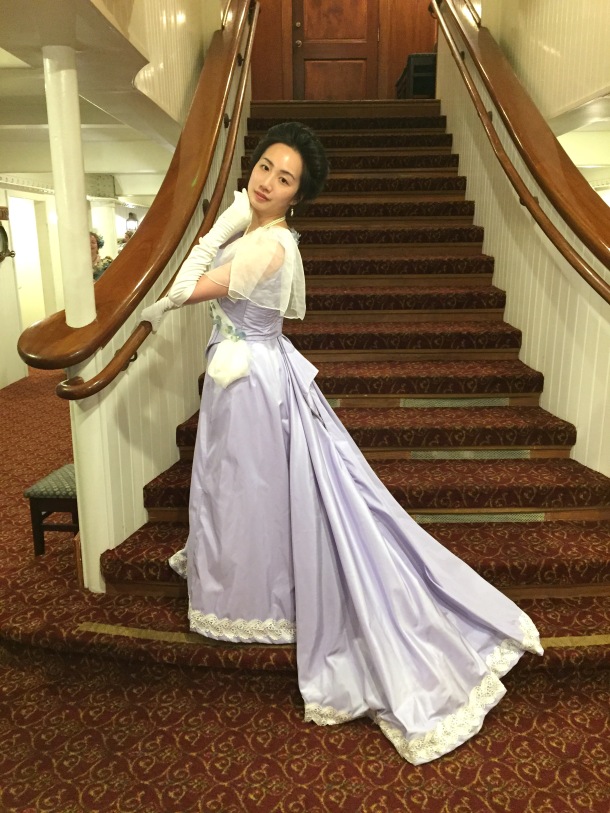
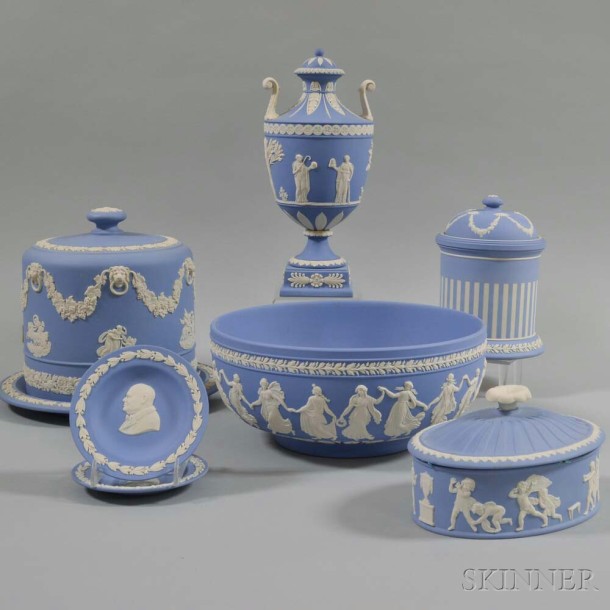
My inspiration was the famous Wedgewood pottery. IMG_1670.JPG
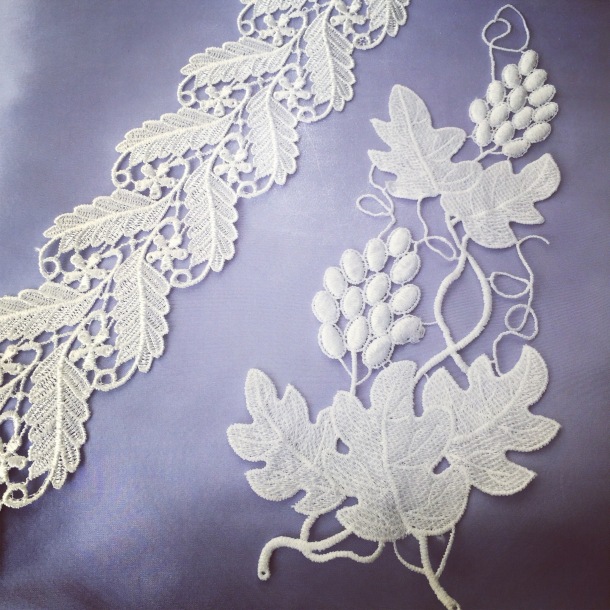
I have some additional appliqués I purchased that I didn’t have time to add for this event, but will for the next wearing to make it even more like pottery. IMG_2096.JPG
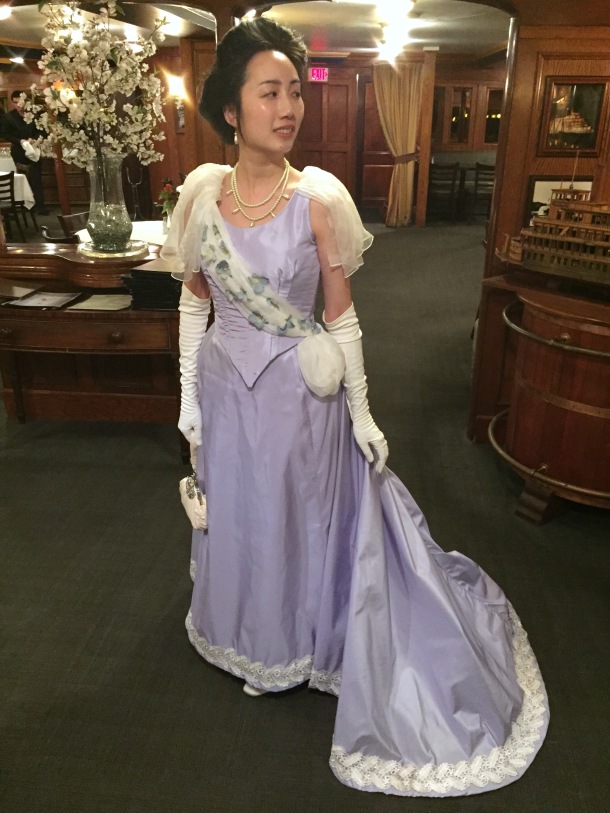
The bodice is made with Truly Victorian’s 1892 ball gown bodice and 1893 bell skirt patterns. I found the fit of both to be good, but the bodice is very long and I had to cut a bit from the bottom, even though I am long-waisted.IMG_2796
Some bodice in-progress photos that show the amount that needed to be trimmed:

My jewelry is by In the Long Run. My gloves are vintage and the purse is from a bridal shop. I am wearing Tissots from American Duchess.IMG_2742
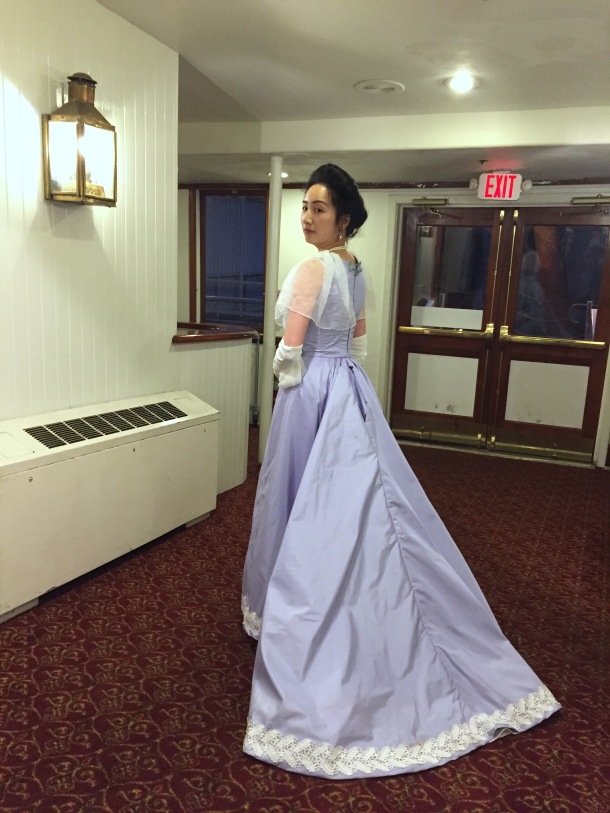
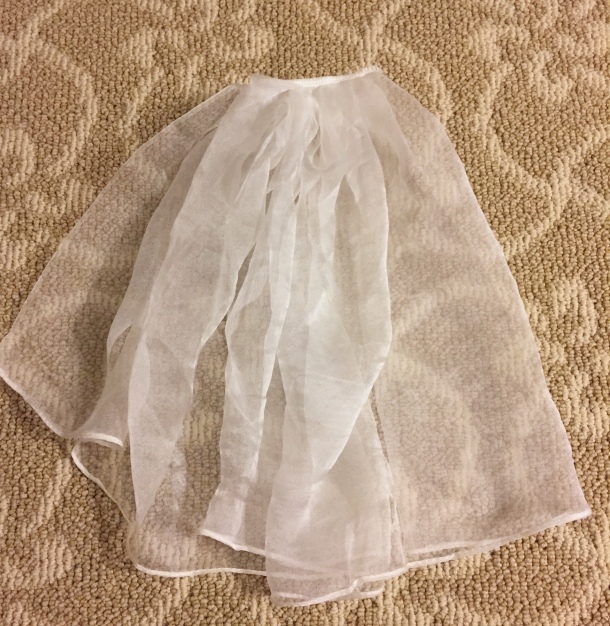
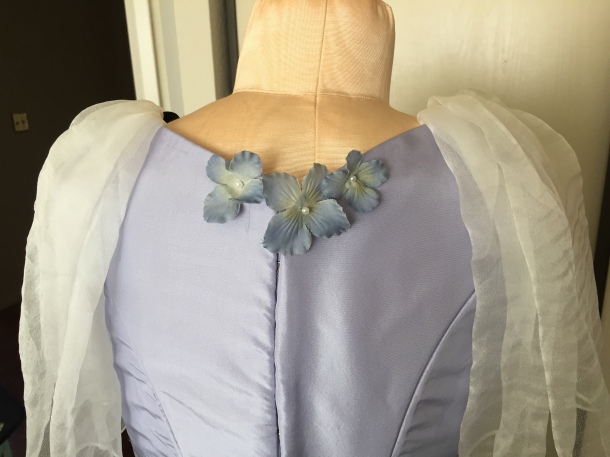
I did not use the sleeve pattern that came with the bodice pattern. Instead I gathered up a rectangle of silk chiffon to make flowing sleeves.IMG_2727
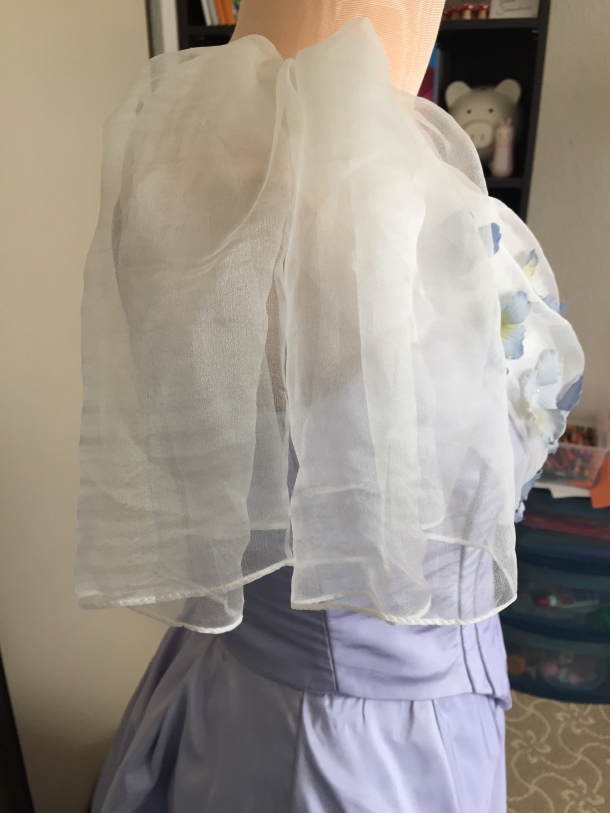
The top was gathered and serged.IMG_2673

The back closes with hooks and eyes.IMG_2729.JPG

I decorated the front with a silk chiffon sash and little flowers that I put faux pearl centers in. IMG_2725

I would have liked to hem the end of the sash and add little pearls to the edge, but I was recovering from a hand injury and couldn’t do any hand-sewing, so it’s just a pouf for now. Thus I had to get creative with ways to avoid it!

Ways to save on hand-sewing:

  • I used a white silk chiffon scarf to trim the bodice, so the edges were already hemmed!
  • I serged or machine-sewed any seam I could.
  • I hemmed the skirt by machine, and then covered the machine stitches by sewing lace over it.
  • Instead of cutting a facing, I used a wide vintage rayon ribbon as a hem facing.
  • I used boning that already came with a casing, so I didn’t have to make the casing. I also had casing that had little “fins” on it so that I could machine-sew the boning onto the seam allowance of the bodice.
  • I used hook and eye tape instead of individually sewing on hooks and eyes.
  • Oh horror: I serged the bottom of the bodice, then flipped it up and held the hem in place by ironing on Stitch Witchery!

Because I flat-lined the fashion fabric to a cotton base, and I couldn’t hand-baste the pieces together there is some puckering. Although it’s not up to my “usual standards” I am still quite proud of what I was able to do with what I could, and I had fun with my friends!IMG_2848
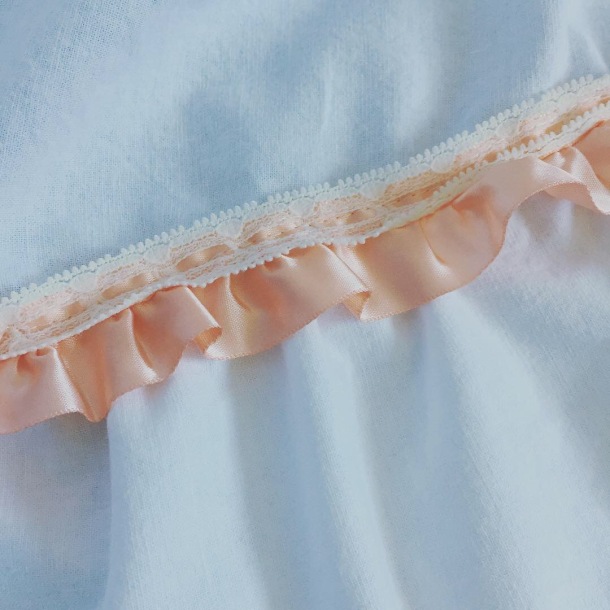
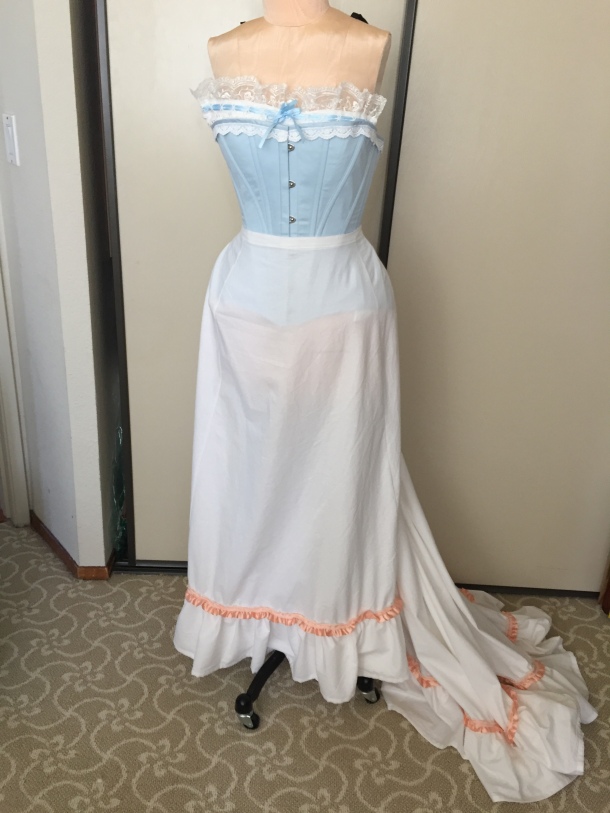
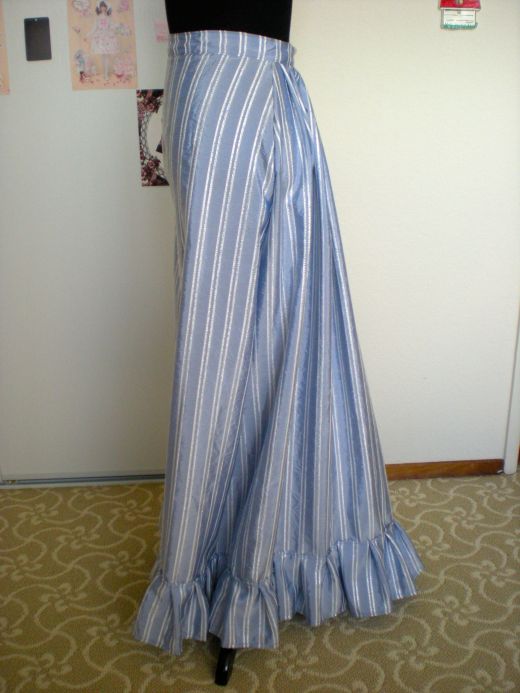
Underneath the skirt I wore a long petticoat based on the Truly Victorian bell skirt pattern, with a big ruffle and trim attached.IMG_2162.JPG
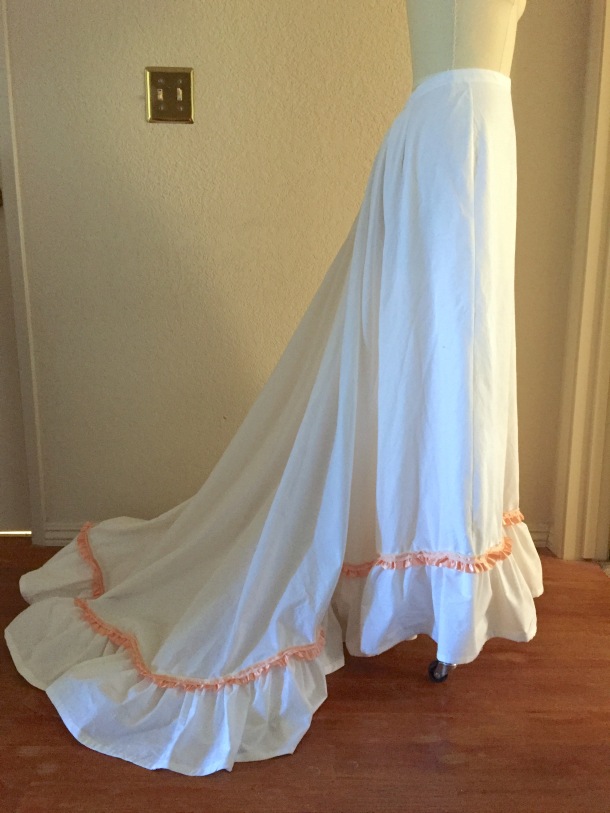
IMG_2175

I wore a custom S-bend corset from Redthreaded, with hip pads, and a bust pad. The padding is necessary to achieve the exaggerated Gibson silhouette. I went from an 8 inch differential in my waist and hips to 13 inches, with only a 1 inch waist reduction!
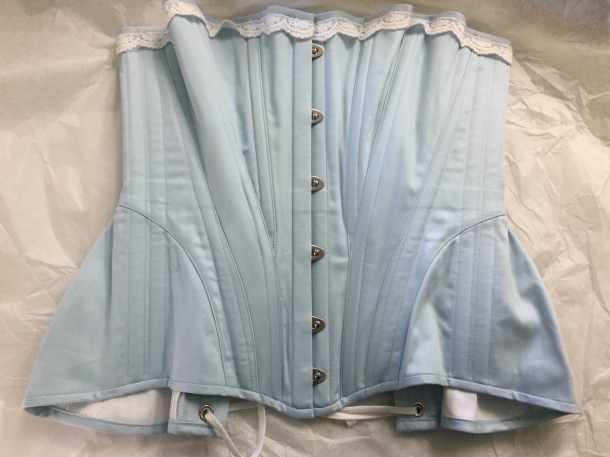
IMG_E2015IMG_2016

I used the “bust improver” pattern from Wearing History, which comes in 2 sizes. I recommend it to give your girls a little extra something!Screen Shot 2018-11-04 at 8.11.32 PM.png
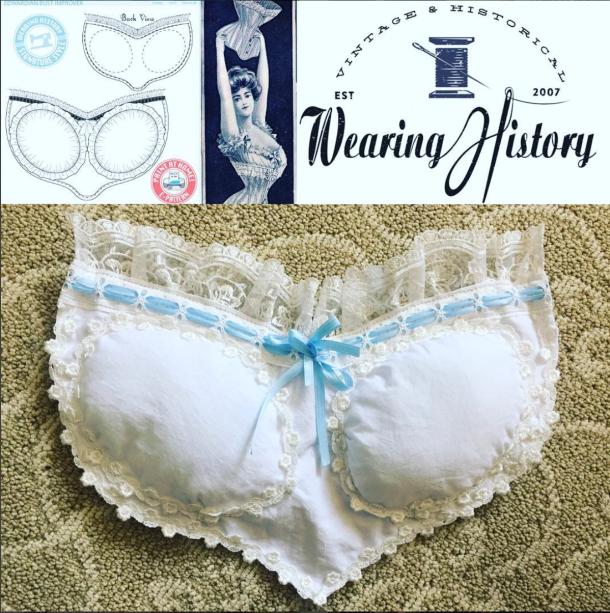
IMG_2708

Project costs:

  • 8 yards silk taffeta: $113.44 including tax from the LA Fabric District (I still have 3 yards left!)
  • 10 yards white veins lace: $34.01 including shipping from Aliexpress
  • 15 pairs grape leaf appliques: $36 including shipping from Aliexpress
  • bodice pattern: $10.75 from Truly Victorian (digital file)
  • skirt pattern: $0 (already used previously)
  • vintage rayon ribbon spool: $3
  • silk chiffon: $0 (gift from friend)
  • 3 yards white cotton for petticoat: $12 from eBay
  • pink trim for petticoat: $3 from garage sale
  • boning, thread, hook and eye tape, flowers, etc. from stash: ~$10

Total cost: $222.20 (plus I have a lot of silk and lace leftover I’ll probably sell to recoup some costs). Normally I don’t tally the costs until the dress is finished, and I still have to add the grape appliqués, but at this point it’s additional labor and not additional materials, so I added everything up. (When I started this blog my goal was to make things for $100 or less, and I’m seeing costs creep up because of nice materials. Hopefully my next project is a lot cheaper!)

All the hair you can see in the picture below is my own, which is currently shoulder-length. I pinned a big hair rat to the top of my head and two smaller ones on the sides, and then all the hair was pulled over the rats and pinned into place. The messy center was hidden by a faux hair bun pinned on top.IMG_2856
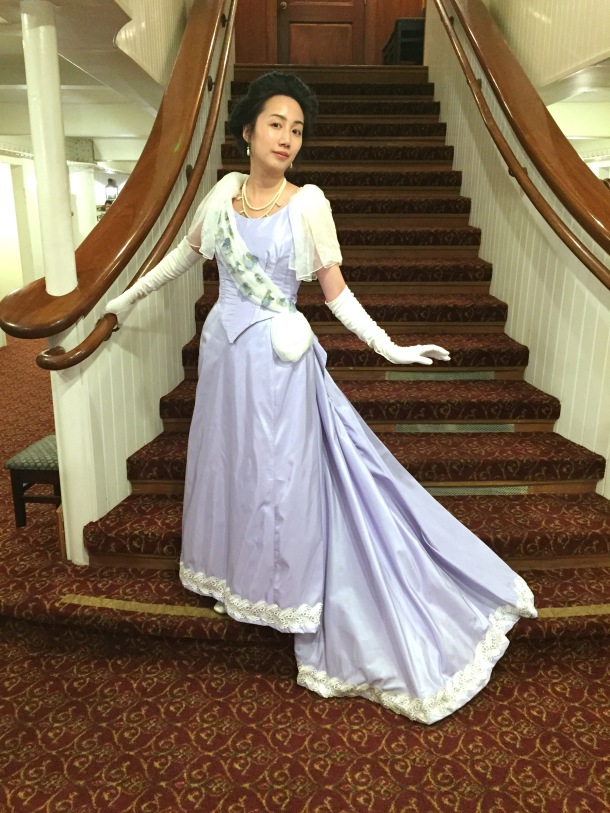
I’m not sure yet, but this might be a nice gala gown for Costume College 2019, when it’s all done!


Gibson Girls at the Gaskell Ball

Posted on

(Oops, I thought this was published May 2, but apparently it was in my draft folder the whole time!)

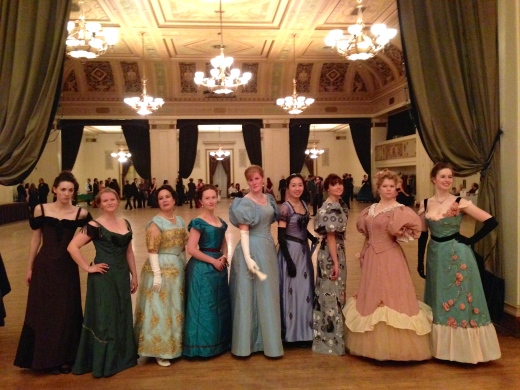
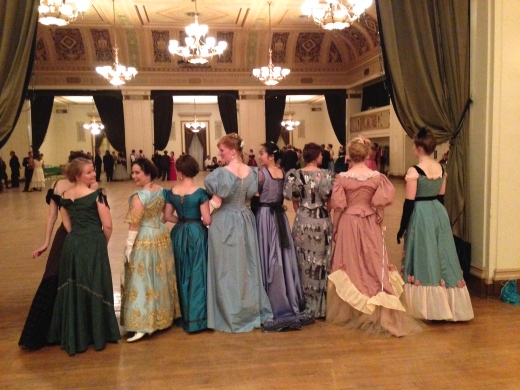
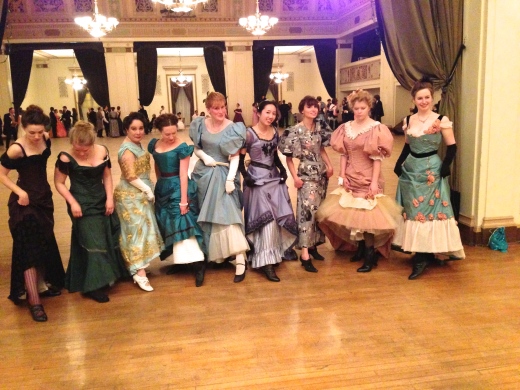
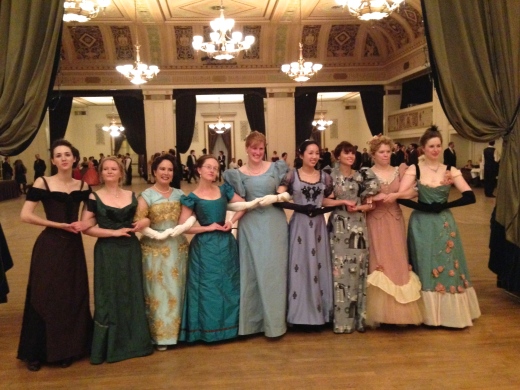
As promised, here are some pictures of me wearing the Gibson Girl dress, and all the gorgeous ladies at the Gaskell Ball who also did a Gibson theme.

I apologize for the lighting in the photos. I took these with my phone because I forgot my camera in my sewing room after taking pictures of the completed gown.

ImageImage

Image

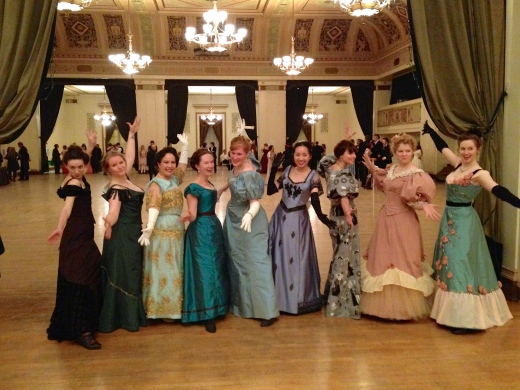
There were a group of 8 of us that did Gibson Girl dresses, with sleeves running the gamut from off-the-shoulder to giant fun poof!

Image

A back view. I loved the variety of colors and textures!

Image

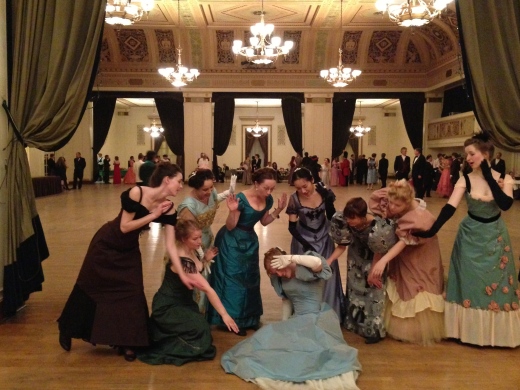
We got a little saucy at one point.

Image

Which caused one of the girls to faint.

Image

But she revived.

Image

And we had a lovely time!

Image

Two things I would like to point out:

1. Half of us were wearing shoes from American Duchess, who makes comfortable, danceable, historical footwear. I am currently waiting to receive a pair of “Gibson” Edwardian shoes I ordered. I highly recommend American Duchess!

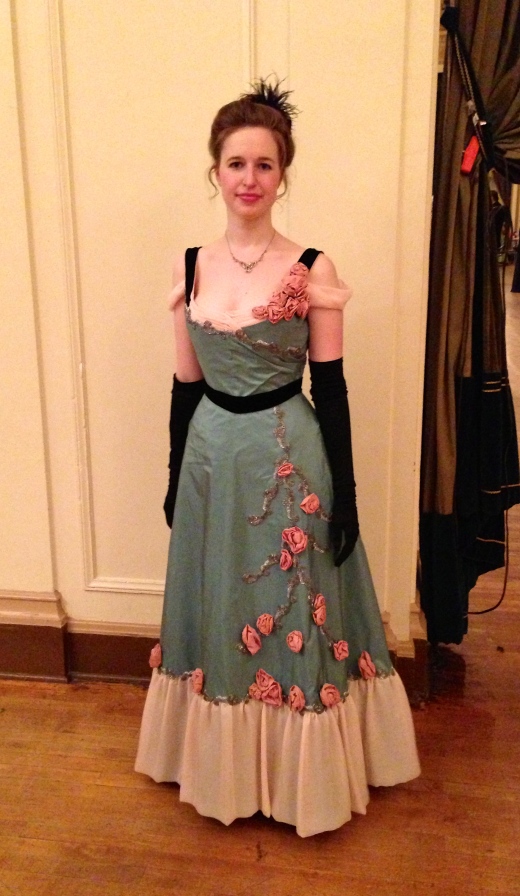
2. The lady in the very lovely dress with the roses is Natalie, and you can read about her gown at Frolicking Frocks. I love how detailed her construction notes are!

ImageThe rest of my photos are on my Flickr account: http://www.flickr.com/photos/vivien_misc/sets/72157633356227565/

Gibson Girl Project (Part 5): Finished Dress

My Gibson Girl dress is finished and I wore it to the Gaskell Ball last night. (The next post will feature pictures of a bunch of Gibson Girls from the ball!)

gibson_final

Read the rest of this entry

Gibson Girl Project (Part 4): Bodice

I have some little tweaks to do but the bodice is nearly complete!

Image

As usual, I underestimated the amount of hand-sewing required. I also have some smoothing to do; I’m not entirely pleased with the little puckers.

Image

For more construction details, peek inside.

Read the rest of this entry

Gibson Girl Project (Part 3) Underwear: Petticoat & Corset

I have been working on the Gibson Girl trained skirt, hand-sewing the hem on the train. Right now I am trying to figure out the lace flounce before I post some progress photos.

However, my undergarments are ready!

I sewed a petticoat out of a striped taffeta I’ve had for years. (You may recognize it as the lining to this coat).

Here is a side view.

Image

Keep reading for more pictures of the petticoat, and details of my beautiful new corset!

Read the rest of this entry

Gibson Girl Project (Part 2) Materials

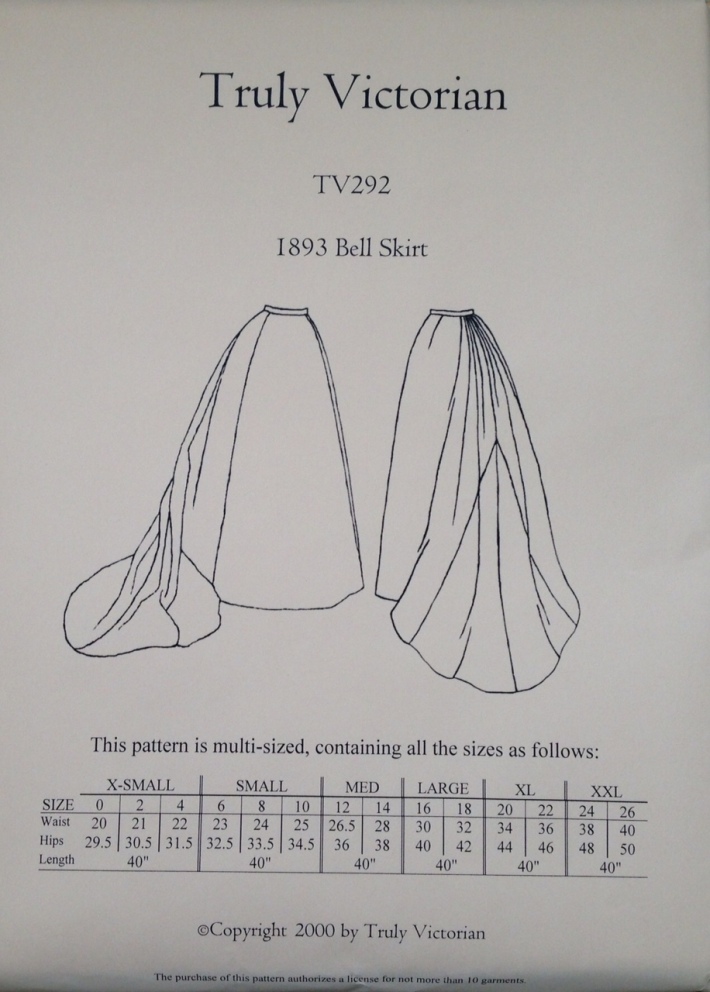
Yesterday I finished gathering my materials for my Gibson Girl dress. I will be using Truly Victorian’s 1893 Bell Skirt pattern (#TV292).

Image

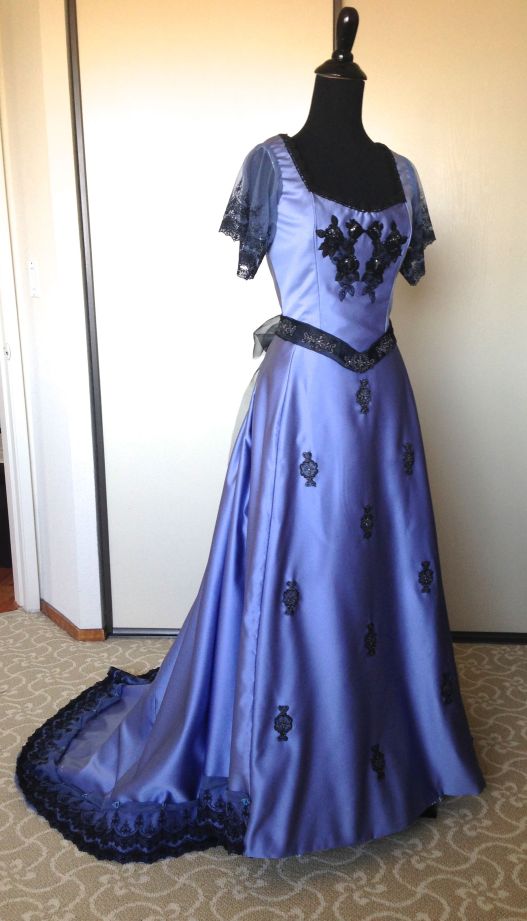
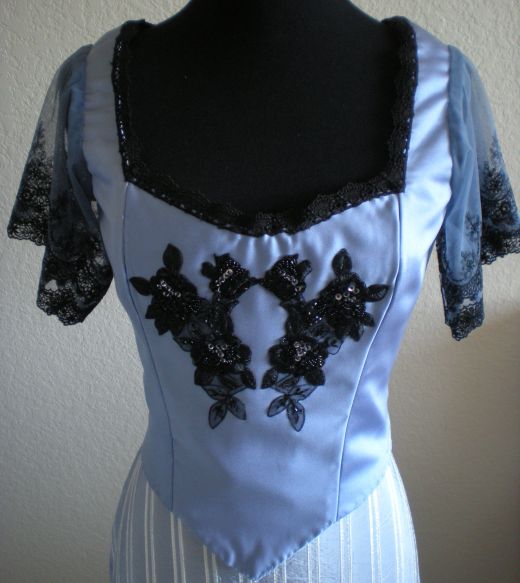
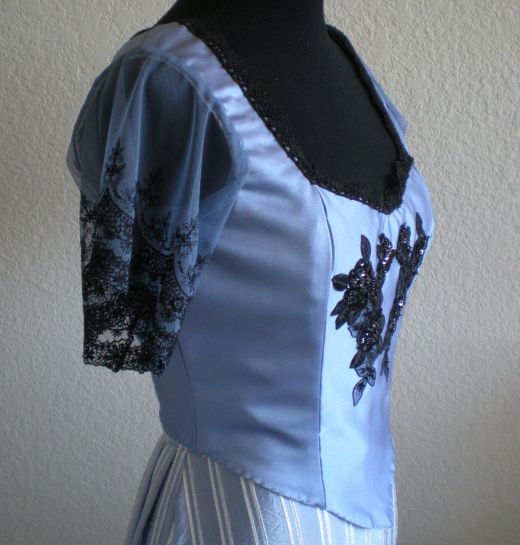
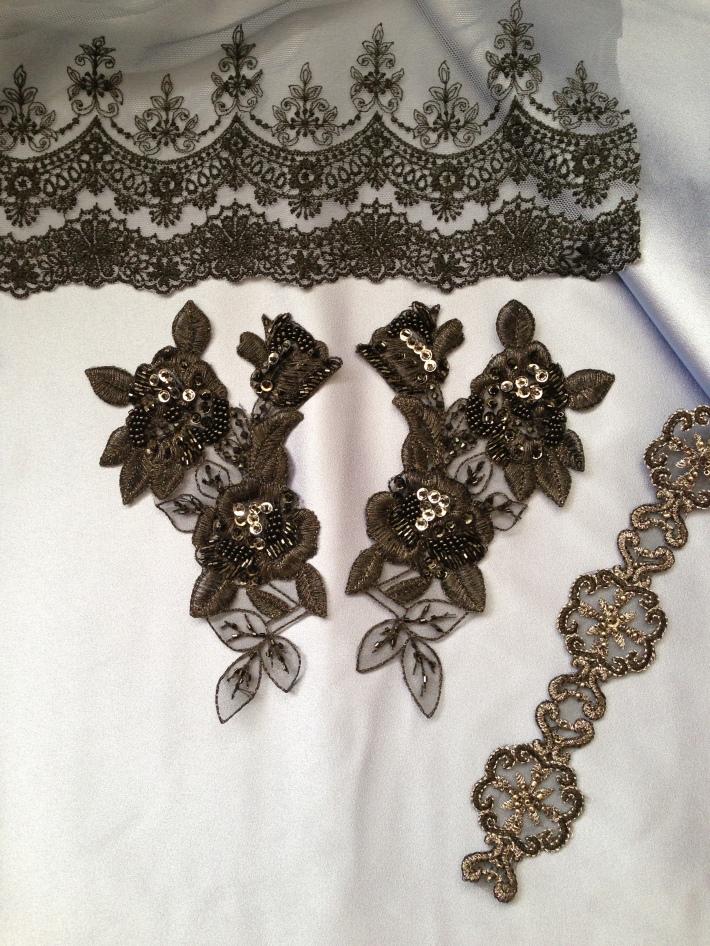
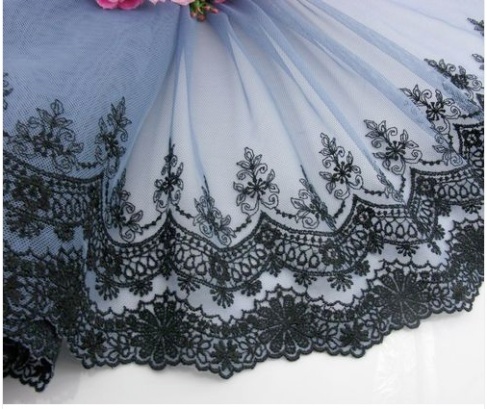
I am using a periwinkle blue satin for the dress. (The fabric is darker than how the photo turned out). The hem will be trimmed with an embroidered black netting lace, and I also bought some lovely appliques from Britex to use on the bodice and skirt front.

Image

Gibson Girl (Part 1)

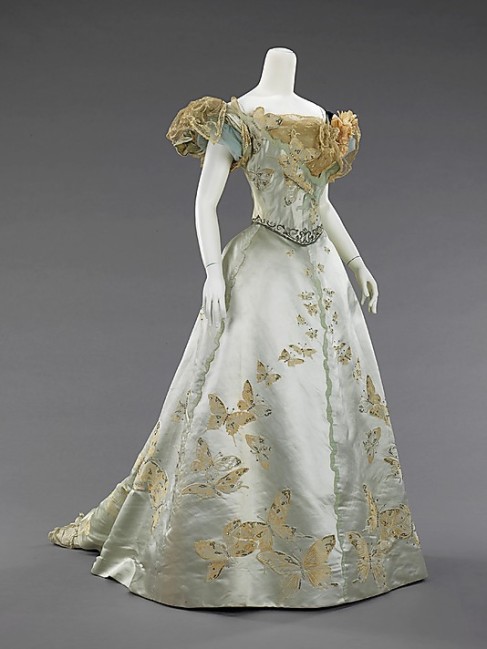
My next major project is to make a Gibson Girl ensemble for an event in April.  I’ve been looking at pictures from the Metropolitan Museum of Art’s website, and I rather like some of the elements in this beautiful butterfly dress.

Image

(Source http://www.metmuseum.org/collections/search-the-collections/80093882?img=4)

In particular, I like the use of appliques, and the embroidery around the bottom of the bodice. If you look carefully there are little rhinestones scattered about.

I am not sure yet about the dress design but I knew I wanted embroidered tulle lace. I decided to buy some great lace and then find a solid-colored fabric to match, instead of the other way around. My color scheme will be baby blue, accented by black. It reminds me of Alice’s dress in Tim Burton’s Alice in Wonderland.

Image

His and Hers Roman Costumes

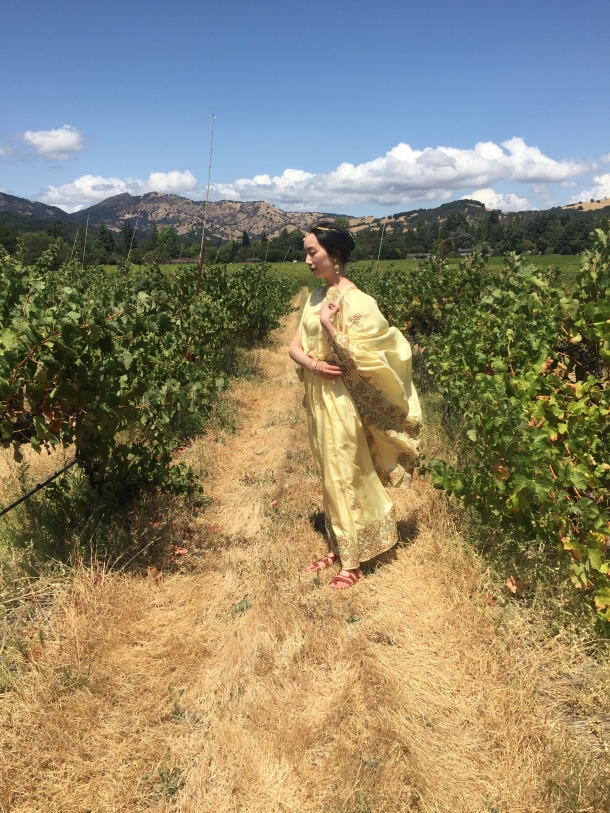
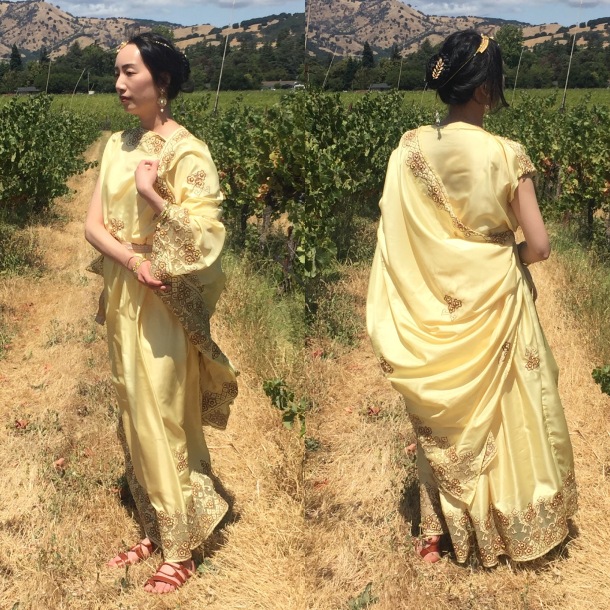
My local costume guild had an event called “Nectar and Nectar and Ambrosia: Day with Dionysus on Mount Olympus” at a winery where Roman and Greek costumes (both fantasy and historically accurate) were encouraged. I challenged myself to make costumes for both myself and my husband in the span of a week, with materials I already had at home. In the end, the outfits really only took a few hours each (with the use of a serger) and a lot of the materials I used were leftovers from other projects or unwanted items people were giving away for free (so this was a budget and eco-friendly endeavor!)IMG_1198.JPG

Please note, these are historically-inspired, but ultimately fantasy costumes. They were good enough for the party I went to, but this is a costume tutorial, not a scholarly article. =) IMG_1236

Roman Women’s Outfit 

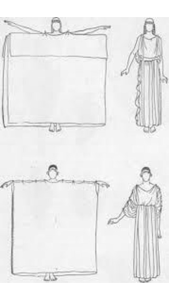
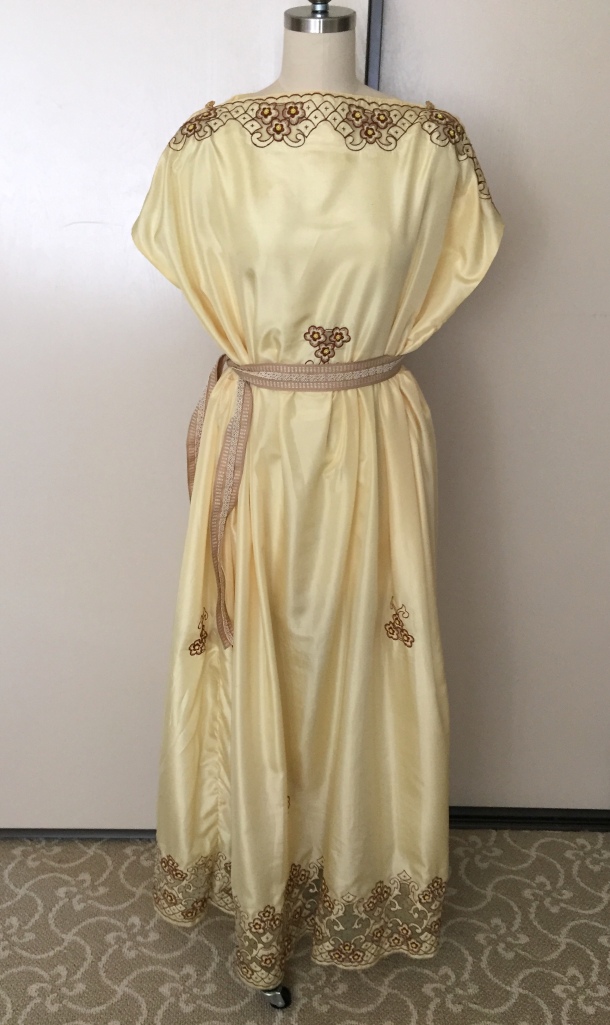
Roman tunics can be rather simple. I got this diagram from a friend and made a short-sleeved version of the bottom figure. As you can see, it is basically a giant tube sewn at the sides. At the top there are areas where you stitch together to make neck and arm openings.IMG_0308

You then add a belt to create the shape at the waist.IMG_1398

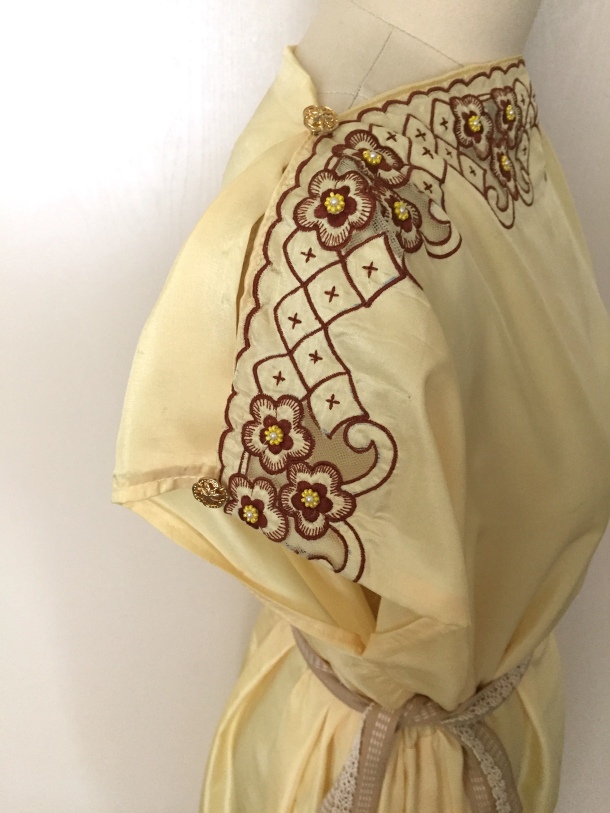
I stitched together parts of the top to allow room for my head, and used some decorative gold buttons I got from a friend. IMG_1400

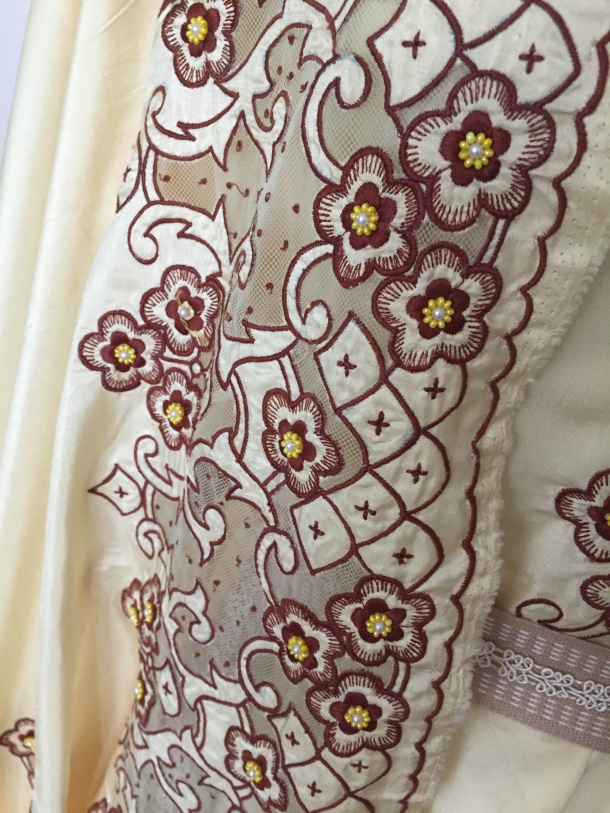
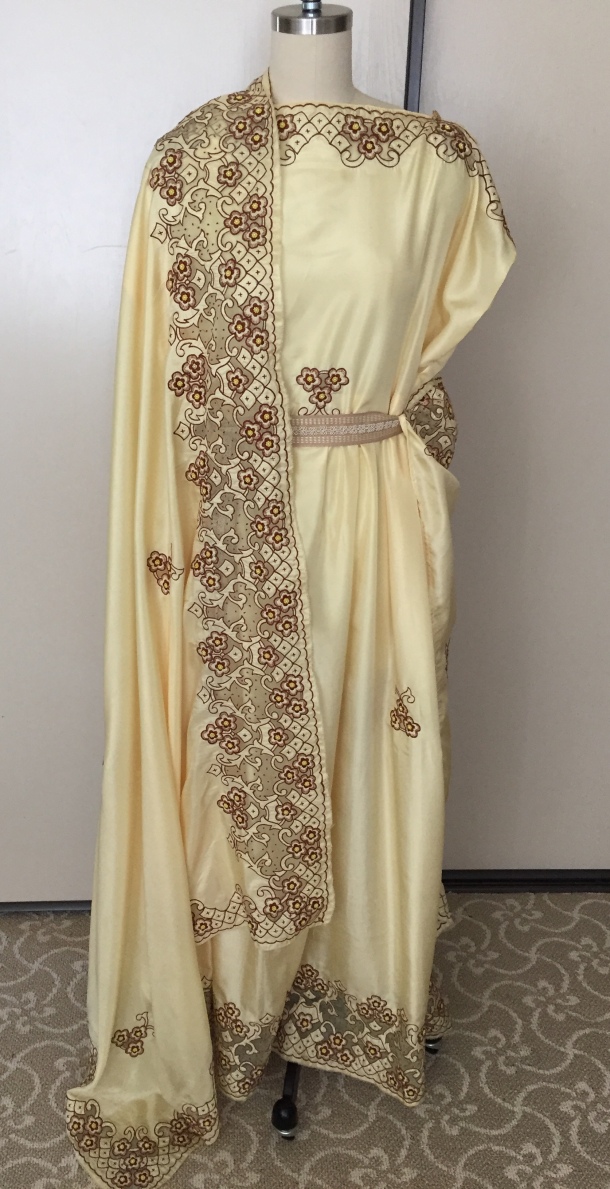
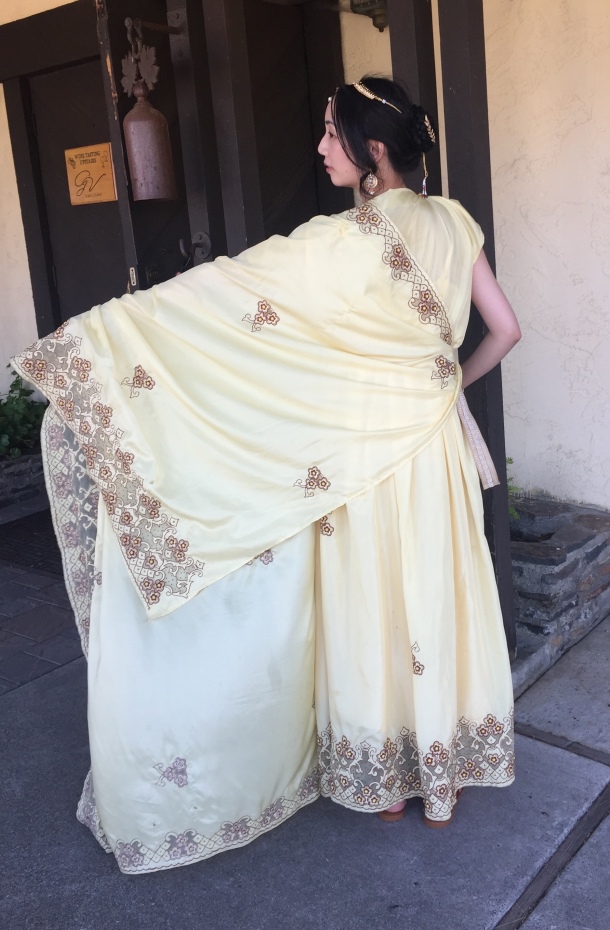
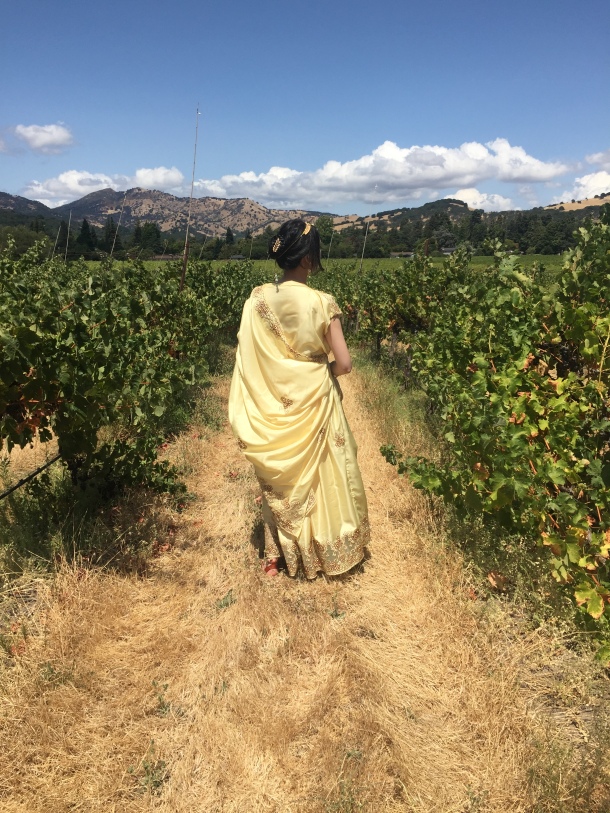
I was gifted a beautiful embroidered silk sari by a friend who was moving and destashing. The sari had a number of snags and holes that I was perfectly fine with for a fantasy party outfit. Maybe it wouldn’t have worked for a ballgown, but hidden in lots of folds it was fine! The sari also had some areas of sheer netting and beaded flowers which are not historically correct for the Roman era, but good enough for me!IMG_1409

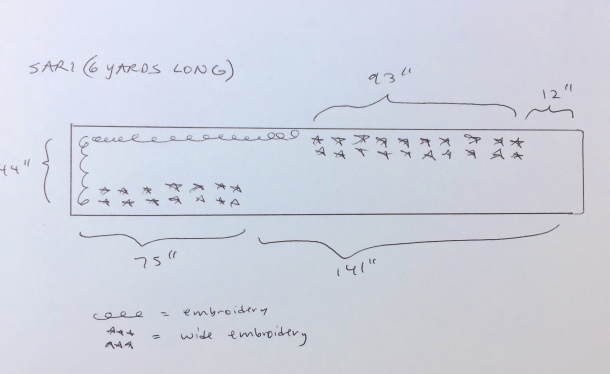
My sari was 6 yards long, but not wide enough to cover the full length of my body. IMG_1422For the simplest sewing, get a very wide fabric (55″ or so) or a solid (so you can use it lengthwise) so you don’t have to have a waist seam or worry about pattern-matching. Since my sari was only 44″ wide and most of the nice embroidery was on the long edge, I had to piece together mine with a waist seam hidden by a belt.IMG_1424
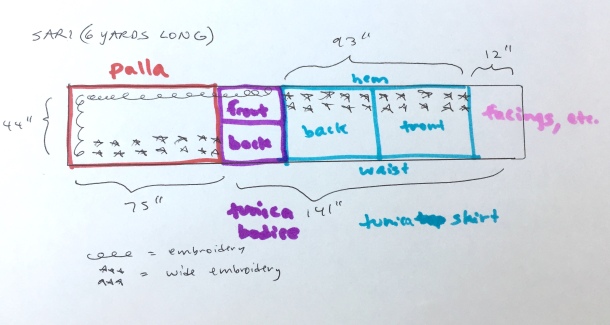
The final width of my top (measured across the embroidery) is 25″ plus seam allowances but of course this will depend on your measurements and how long you want your “sleeves.” (I also have narrow shoulders and limited fabric so I didn’t have a lot of gathering in the front).

So if you have very wide fabric and are not super tall, 1 yard each of fabric for the front and back of your tunic is plenty for many people. Add a few more yards for your palla and you are Roman!IMG_1408IMG_1411.JPG

I didn’t have a lot of left over fabric after cutting the tunica, so my “palla” is too short to be fully wrapped around me properly, so I tucked one corner into my belt, then draped it over my opposite shoulder and arm. For reference, mine ended up 76″ x 44″ but I recommend a longer one if you want a fuller look.IMG_1370.JPG

I think the ripples look quite nice when they hang just right.IMG_1244

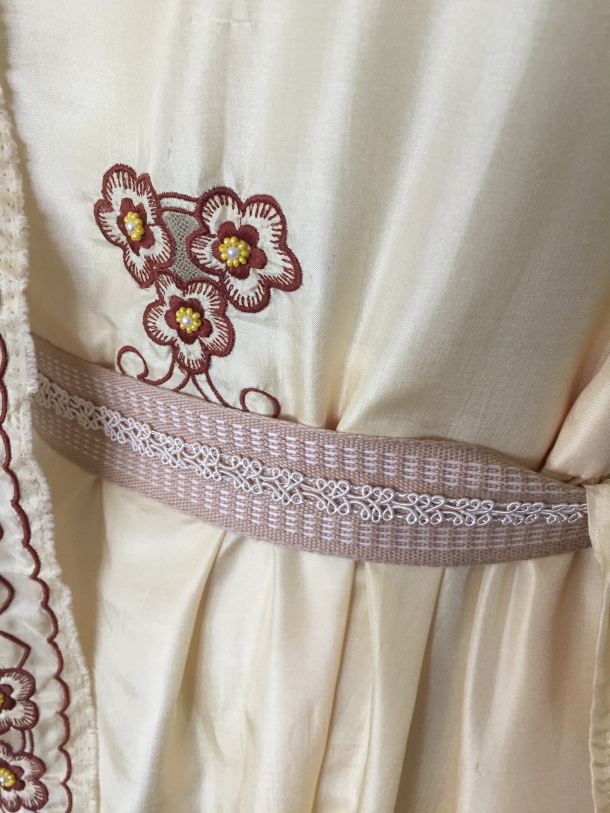
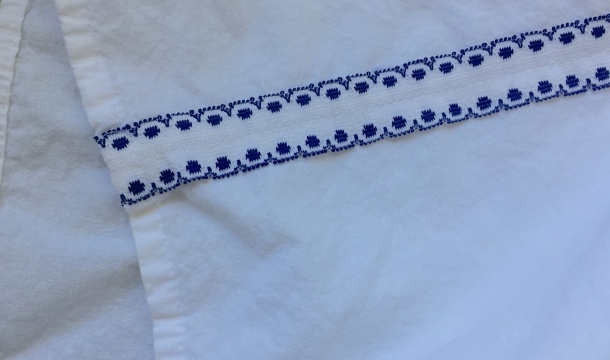
My belt was made from some soft woven ribbon from a gift box. I sewed some gimp braid down the center. The braid was left over from another project. For those of you keeping track, that means so far everything was free!IMG_1410

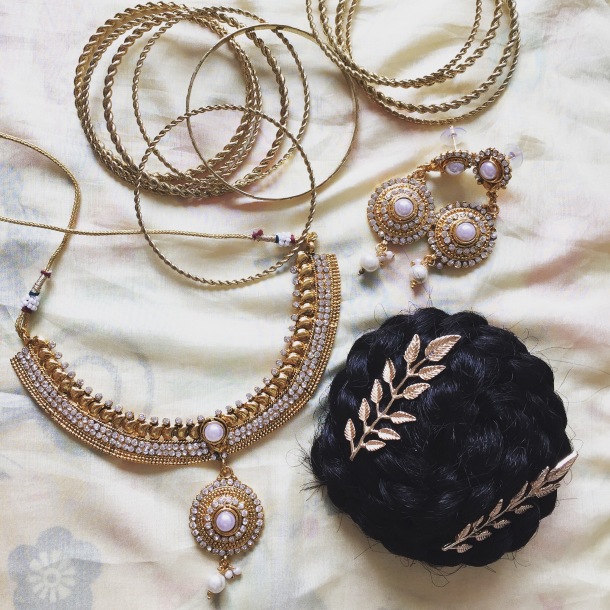
For accessories I wore pieces from an Indian bridal jewelry set I already owned. I wore the necklace on my head with some large earrings and bangles.IMG_1280

I put my hair up and also made a false braided bun with leaf pins that I already owned.TMPR6435.JPG

Underneath the dress I wore a full-length slip (that I actually got from a swap party and mended), plus some Roman-looking sandals from Target.

Roman Men’s Outfit 

IMG_1167.JPG

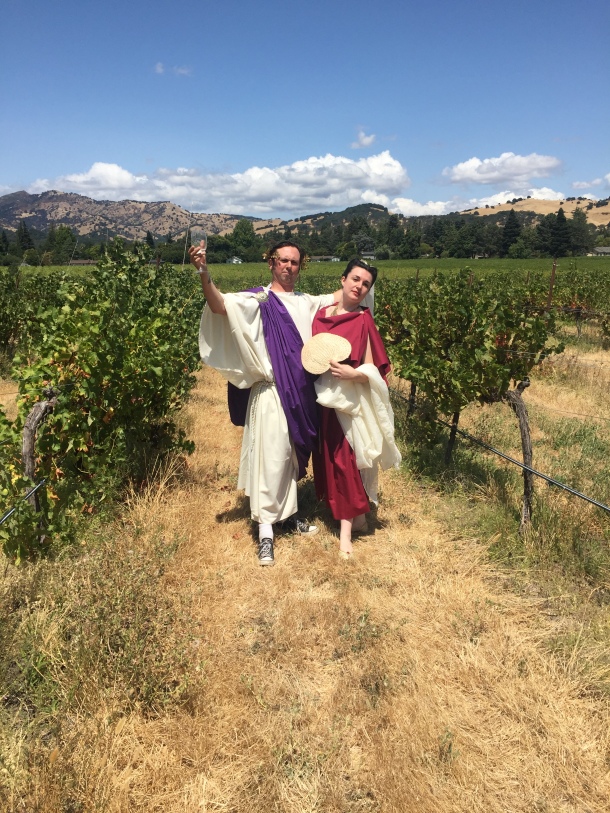
My husband’s tunic is constructed similarly to mine, except it is shorter and has longer sleeves. He also doesn’t have peekaboo shoulders because the sleeve seam is sewn shut, but the neck hole is made the same way. Originally his was 1 yard wide, but he ended up wanting even longer sleeves so I had to add some rectangles of fabric at the top sides like a t-shirt. His is made from white cotton I had leftover from my Gibson Girl petticoat project. I sewed trim across the sleeve  and shoulder seams and neckline before hemming the sleeves. Extra trim was tied around his waist like a belt. IMG_1791.JPG
For the first time my husband’s outfit cost more than mine! (Although still it was only about $10 of materials).

I had originally planned to drape some colored fabric around him with a brooch, but he declined the extra layer of fabric since it was a warm day. He also wore sandals from Target. It took us a while to find the largest pair they had in the women’s section. =)

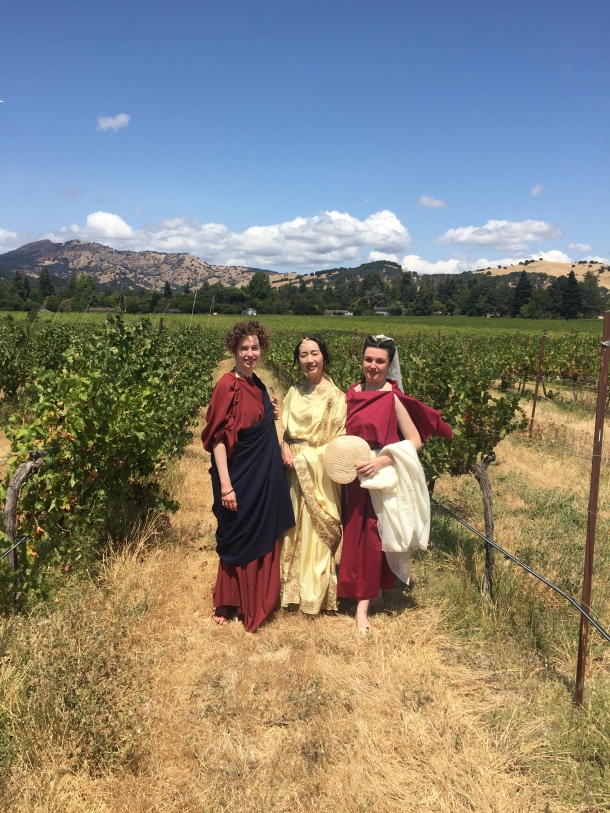
It was a fun event with creative costumes on a beautiful day with friends like Natalie and Kelsey.IMG_1181

Kelsey and Todd as Caesar.IMG_1187

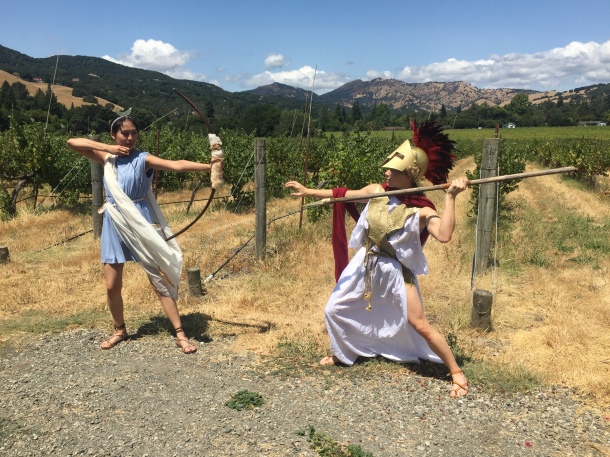
Adrienne and Elizabeth as Artemis and Diana.IMG_1209

I’m tempted to make more Roman outfits now. This was easy and comfortable, and rather flattering for just wrapping fabric!VMOB9427.JPG

2018 Costuming Year in Review

The past year was a rough one health-wise, so it’s a bit of surprise to me writing this post and tallying up my costumes how much I got done! That makes me optimistic for what I can achieve in 2019, even though I’m going to be reasonable in order to keep myself sane and less stressed.

I went to the Legion of Honor museum wearing my 18th century mauve silk dress in February, which I started in January.

28165039_1444739302319997_1270203275298556190_o

Photo by John Carey

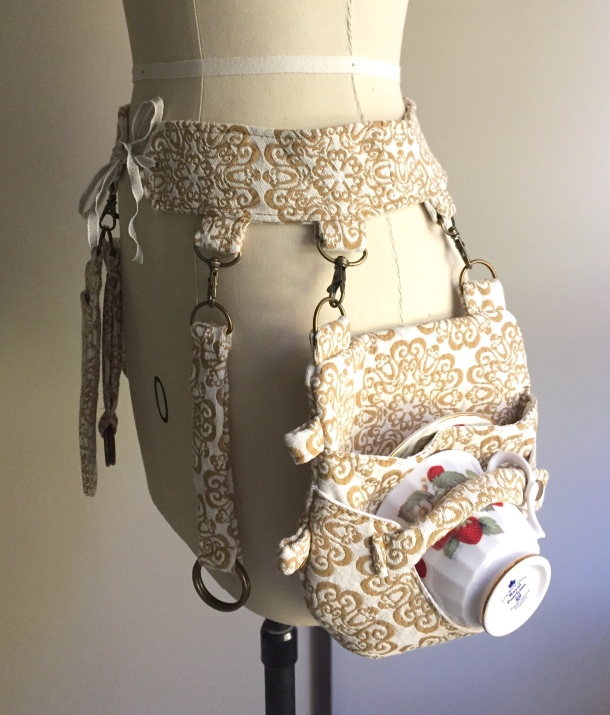
My other January project was to make this steampunk belt and tea holster.IMG_6436

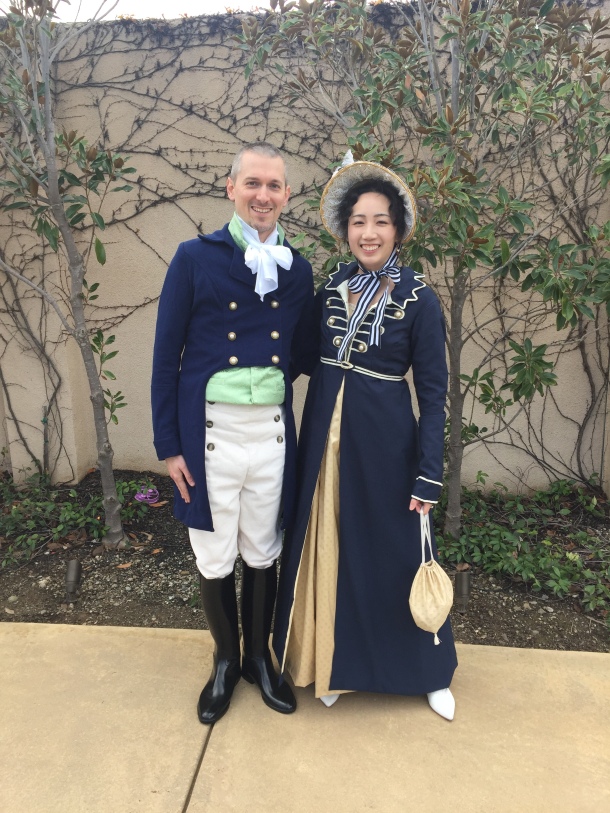
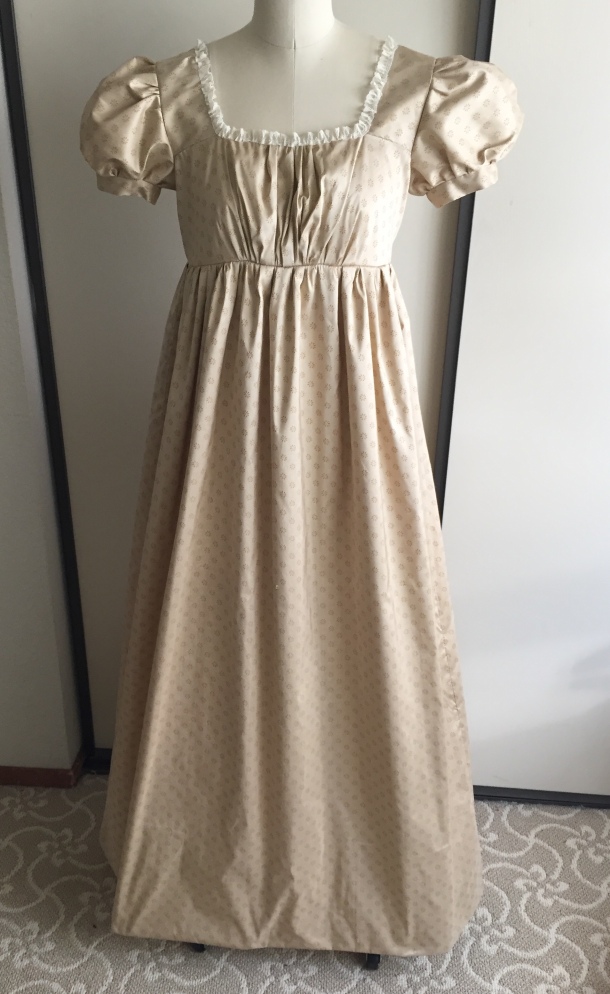
In March I made a Regency outfit for my husband and new dress for myself. (The pelisse and bonnet are not newly made).IMG_7449IMG_7216

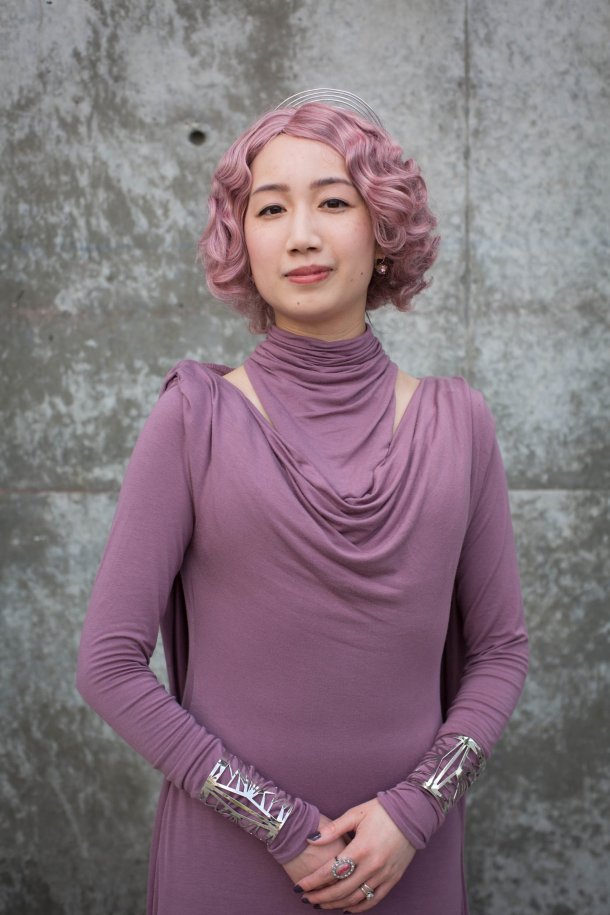
At Silicon Valley Comic Con in April I premiered my Vice Admiral Holdo costume, my proudest achievement of the year! (I also joined the Rebel Legion with it!)

Business Insider Melia Robinson

Photo by Business Insider

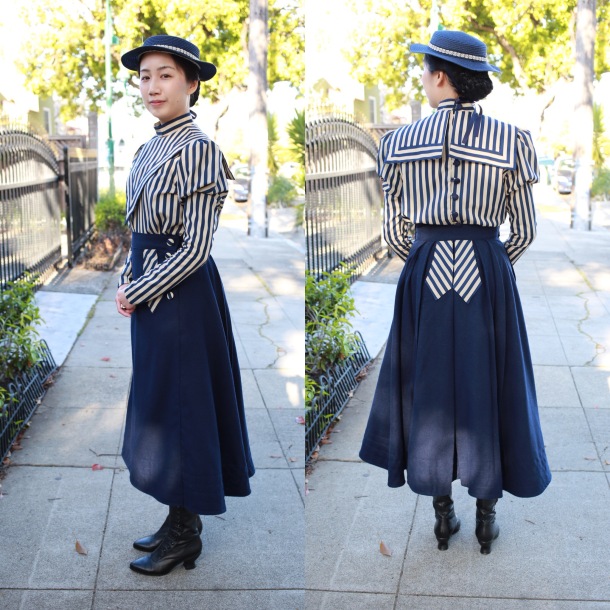
In April I wore a Victorian/Edwardian-inspired bicycling outfit to a train ride and BBQ.

NEBZ9597

Photos by Chris Wiener

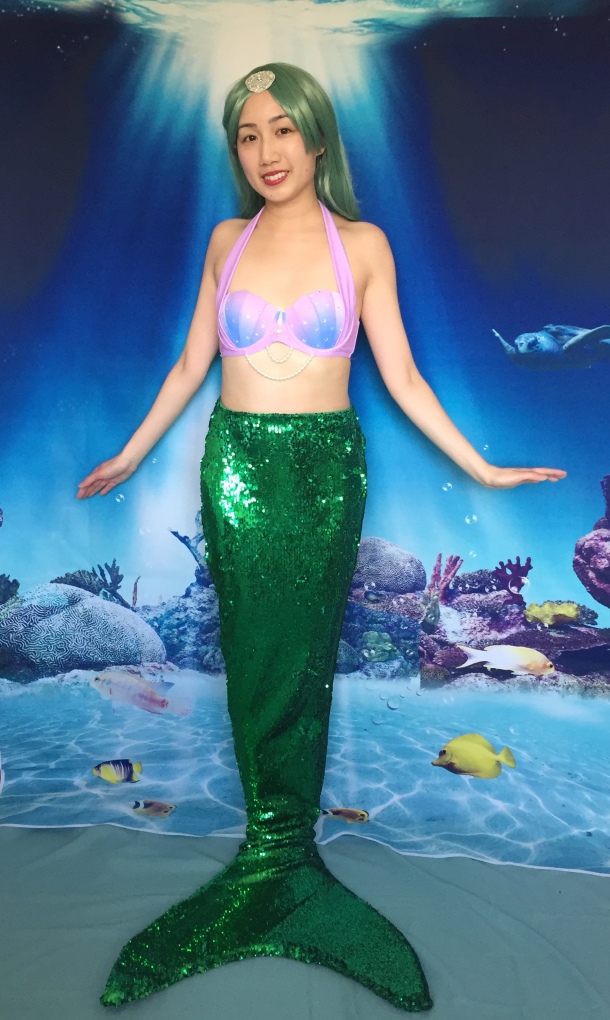
May was a mermaid month, with a tail and shell bra.IMG_9098

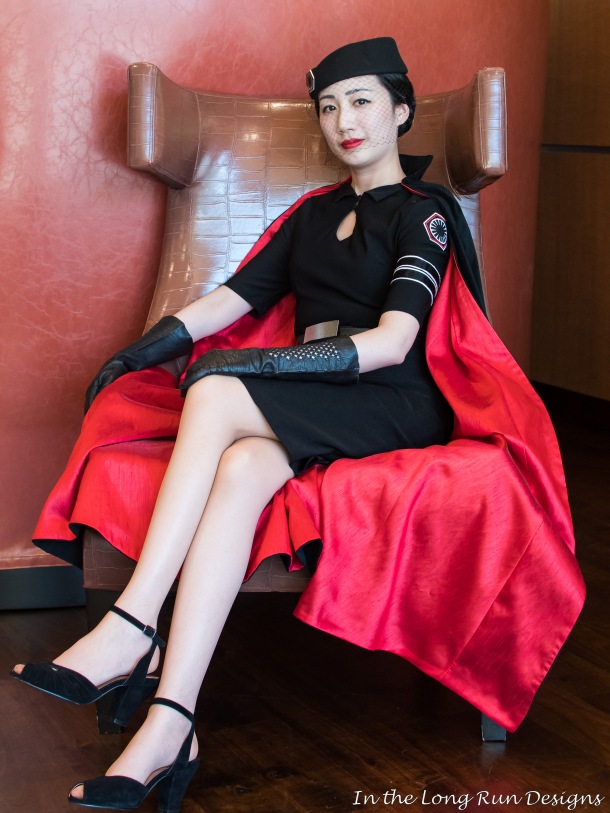
In June I wore a vintage-style First Order Uniform, inspired by Star Wars.

43952806792_d6dd4a1810_o

Photo by Gloria Sheu

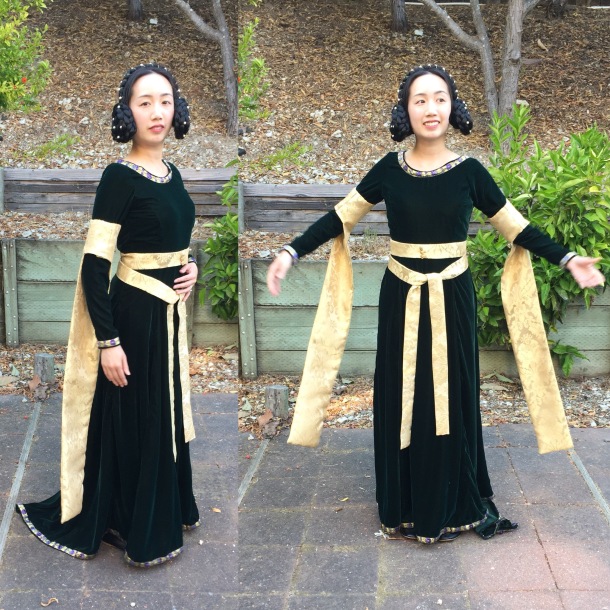
For fun, in June/July I made a medieval fantasy princess dress.EJIY8518

In July I wore Crimson Peak 2.0 (an outfit that I made in 2017 but upgraded to wear to Costume College).

44353198072_e0b45219a7_o

Photo by Gloria Sheu

It included a big lilac petticoat.C18CCFD1-8D0C-4032-9873-C16C3C447BA4

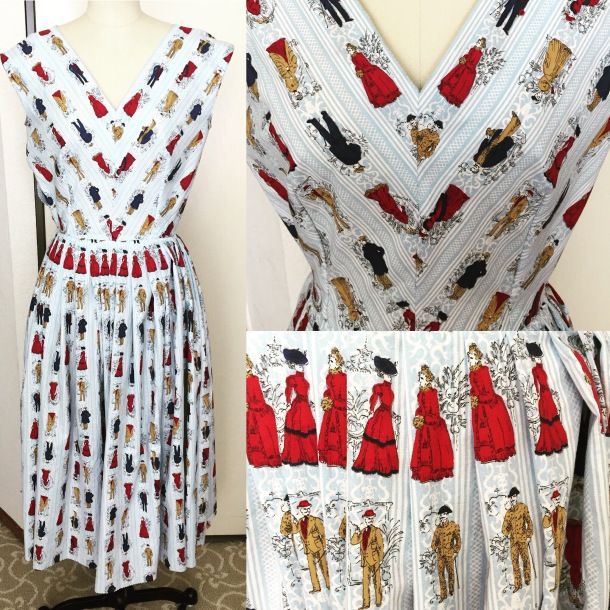
During the summer I also made myself a cotton novelty dress.IMG_0120.JPG

In October I wore this Gibson Girl dress to a GBACG event.IMG_2856

I also made a big trained petticoat for it.IMG_2162

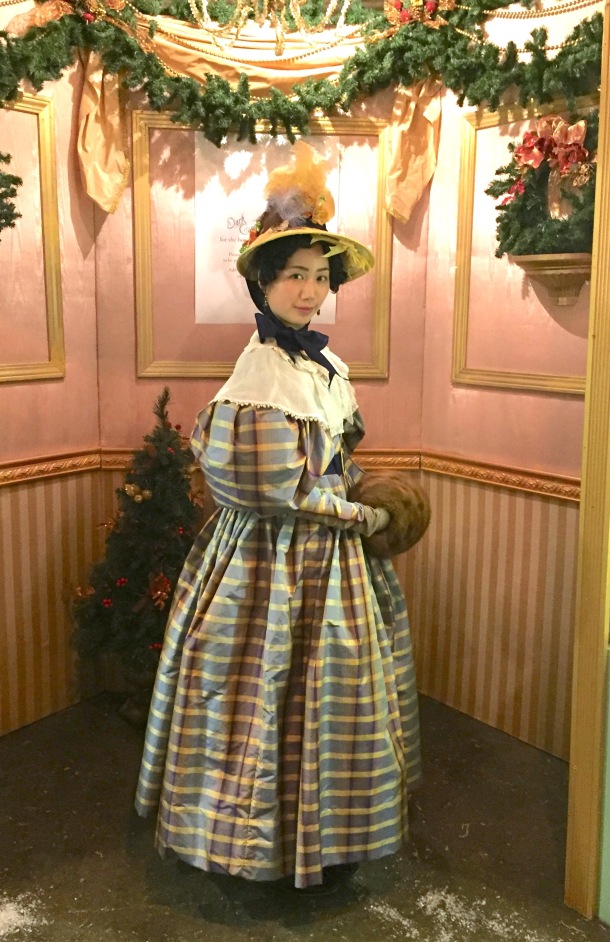
My last big project was this 1830s Romantic day dress, worn to the Dickens Fair in December.IMG_4506

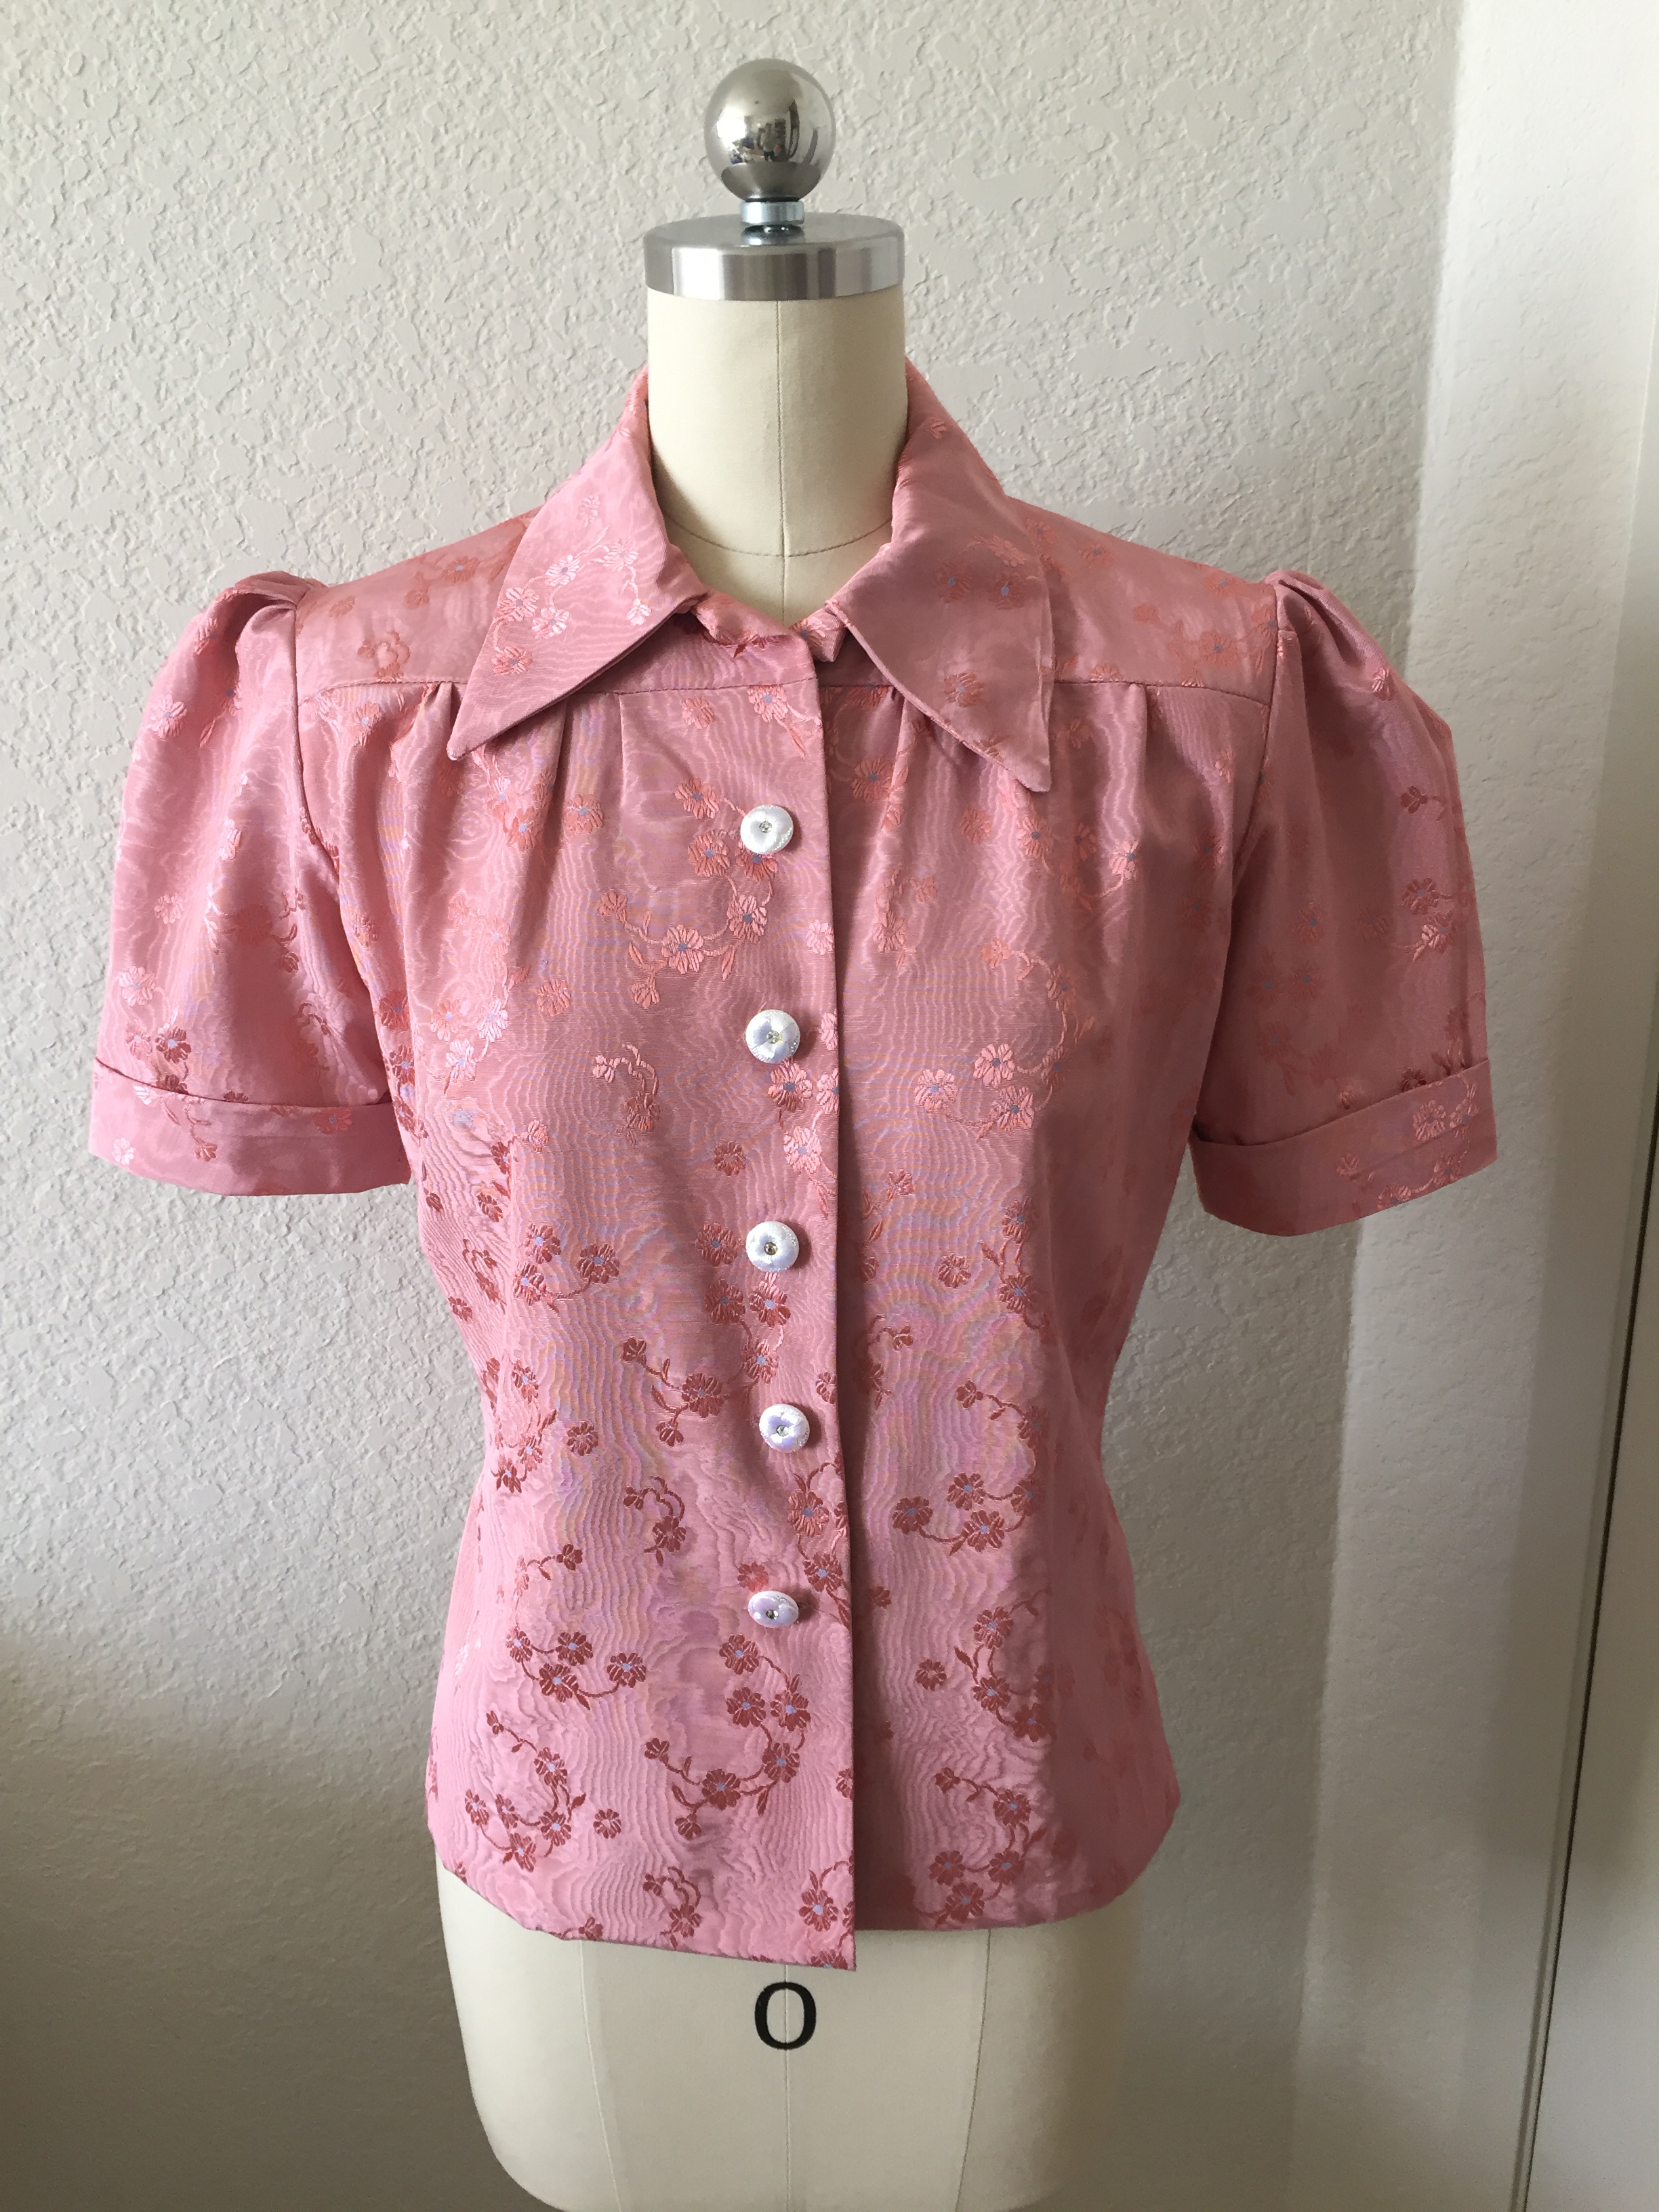
I also made a blouse using a Wearing History pattern.IMG_4738.JPG

I’m surprised at all the projects from this year and look forward to more! On the horizon I’ve got some more Star Wars outfits, an 1890s sweater, an 18th century dress, a 1920s robes de style, and a lot of vintage-style daily wear.

Gatsby Summer Afternoon 2018 Picnic

(Hi everyone! Sorry I’m a bit behind on blogging because I’ve had to limit my computer time due to a hand injury, so posts are written slowly, bit by bit. I haven’t forgotten that I need to give details of my Crimson Peak outfit, and I have posts planned for my Gibson Girl project!)

Last month I went to the annual Gatsby Summer Afternoon at the Dunsmuir House in Oakland, CA. It went by so quickly I didn’t take a lot of pictures this year but I’ll share the ones I have!

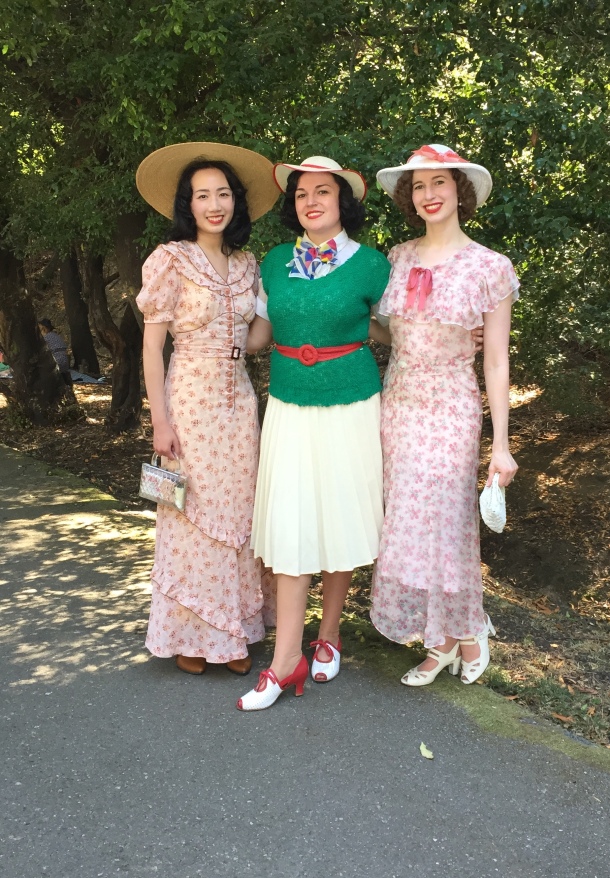
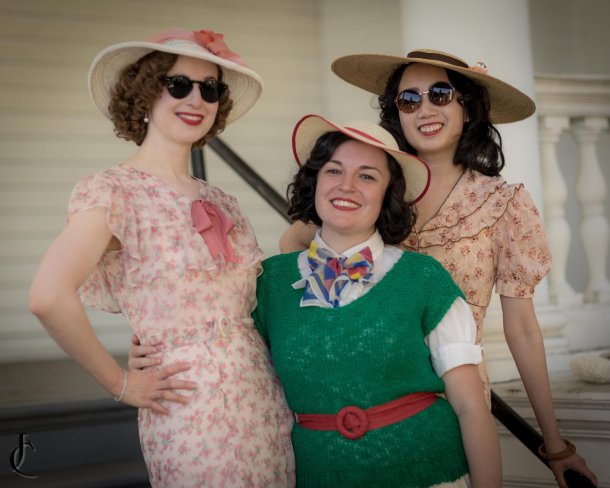
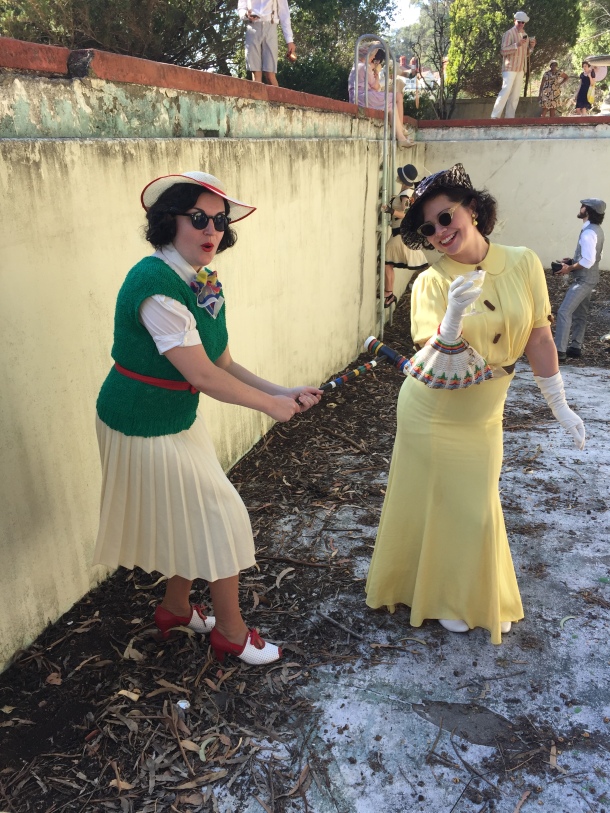
Here I am with Kelsey (in 1930s sportswear) and Natalie (in a self-made dress using vintage fabric).IMG_1943

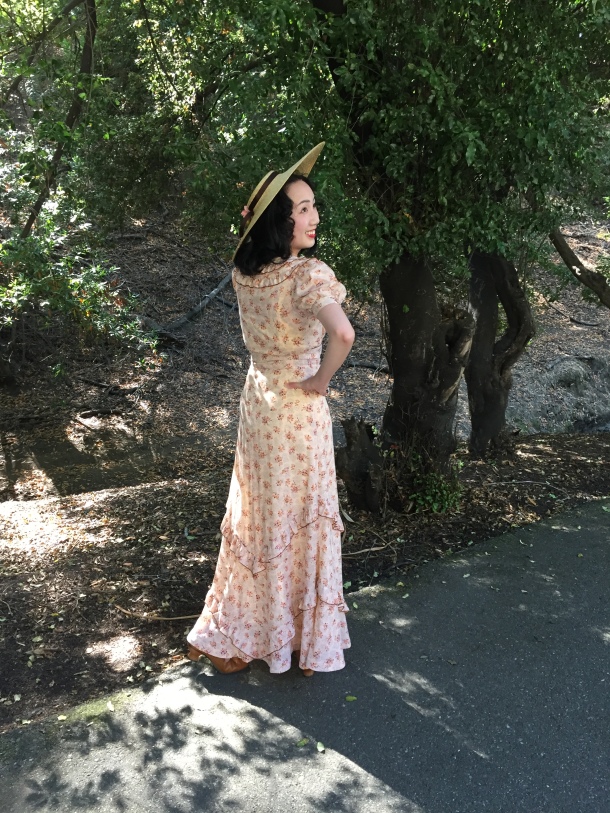
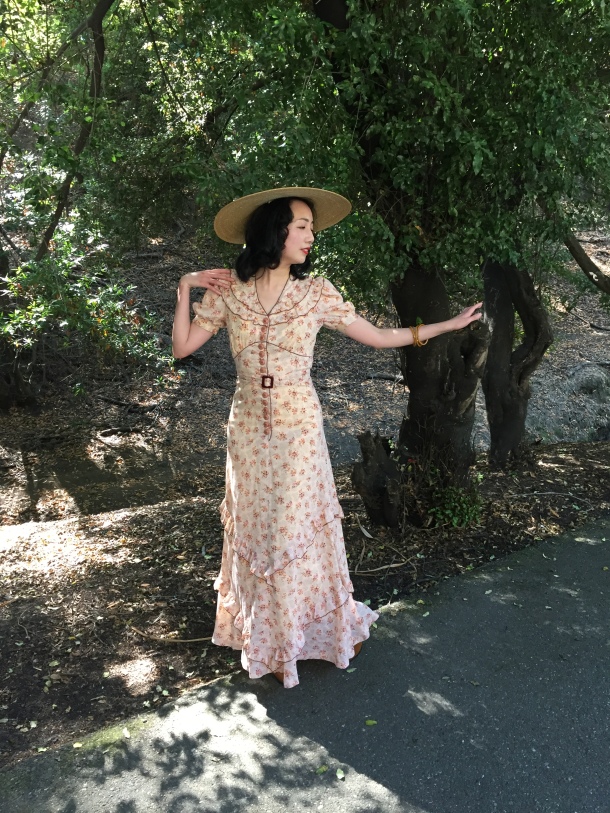
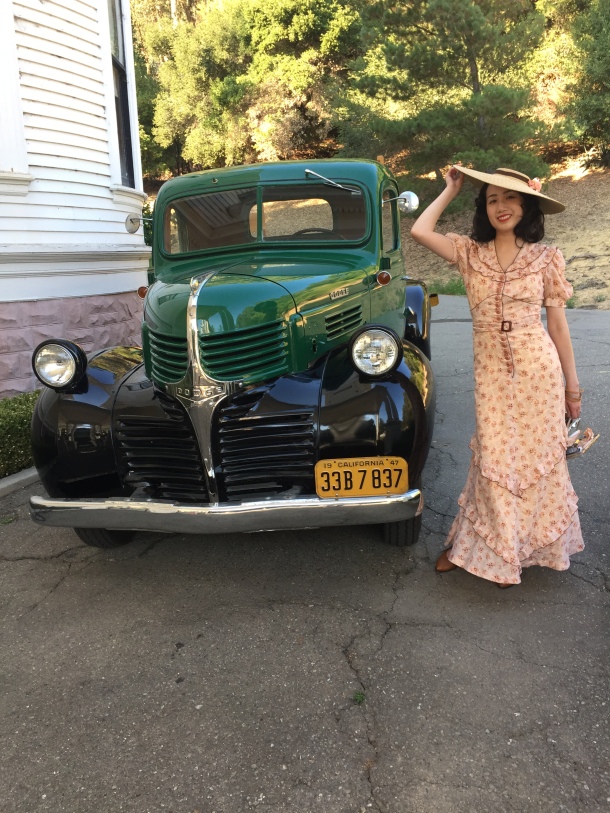
My dress is vintage, but actually 1970s vintage that happens to look like a 1930s dress! (Although the colors, cut, and print are correct for the time period I could tell it wasn’t really 1930s because of the label inside the dress, and because the brown trim is serging instead of piping). It was apparently quite convincing, because I was a finalist in the fashion contest!IMG_1896

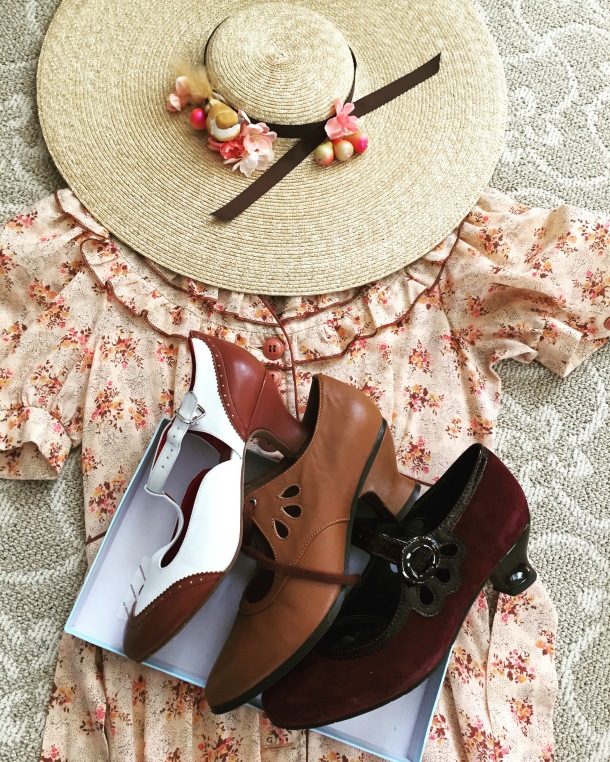
You can barely see them but I am wearing Gibsons from American Duchess, an 18th century straw bergere that I trimmed, and vintage Bakelite and cut steel bangles.IMG_1878

I considered a few other pairs of shoes but ultimately chose the ones in the middle.IMG_1828.JPG

We might have gotten a little rowdy at some point. Kelsey found a croquet mallet that matched her outfit perfectly and decided to menace Mena with it.IMG_1951

As always there were vintage cars!IMG_1971

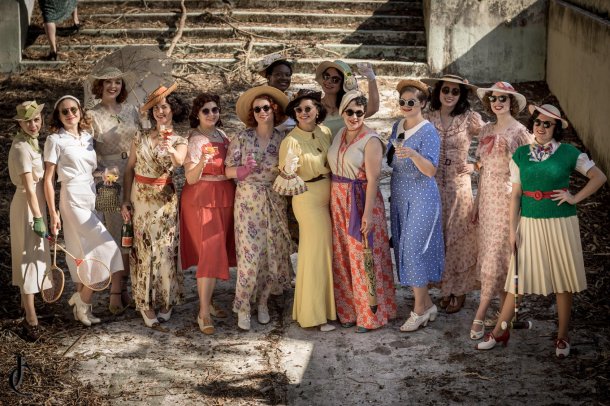
Thank you John Carey of these following photos of me with the other Vintage Style Council gals!41497323_1687158268078098_3411786410644996096_o41572276_1687159128078012_7237750721100120064_o

I had a lovely time as always. See you there next year!