Monthly Archives: January 2013

Robe a la Francaise (18th Century Lolita) Dress Project

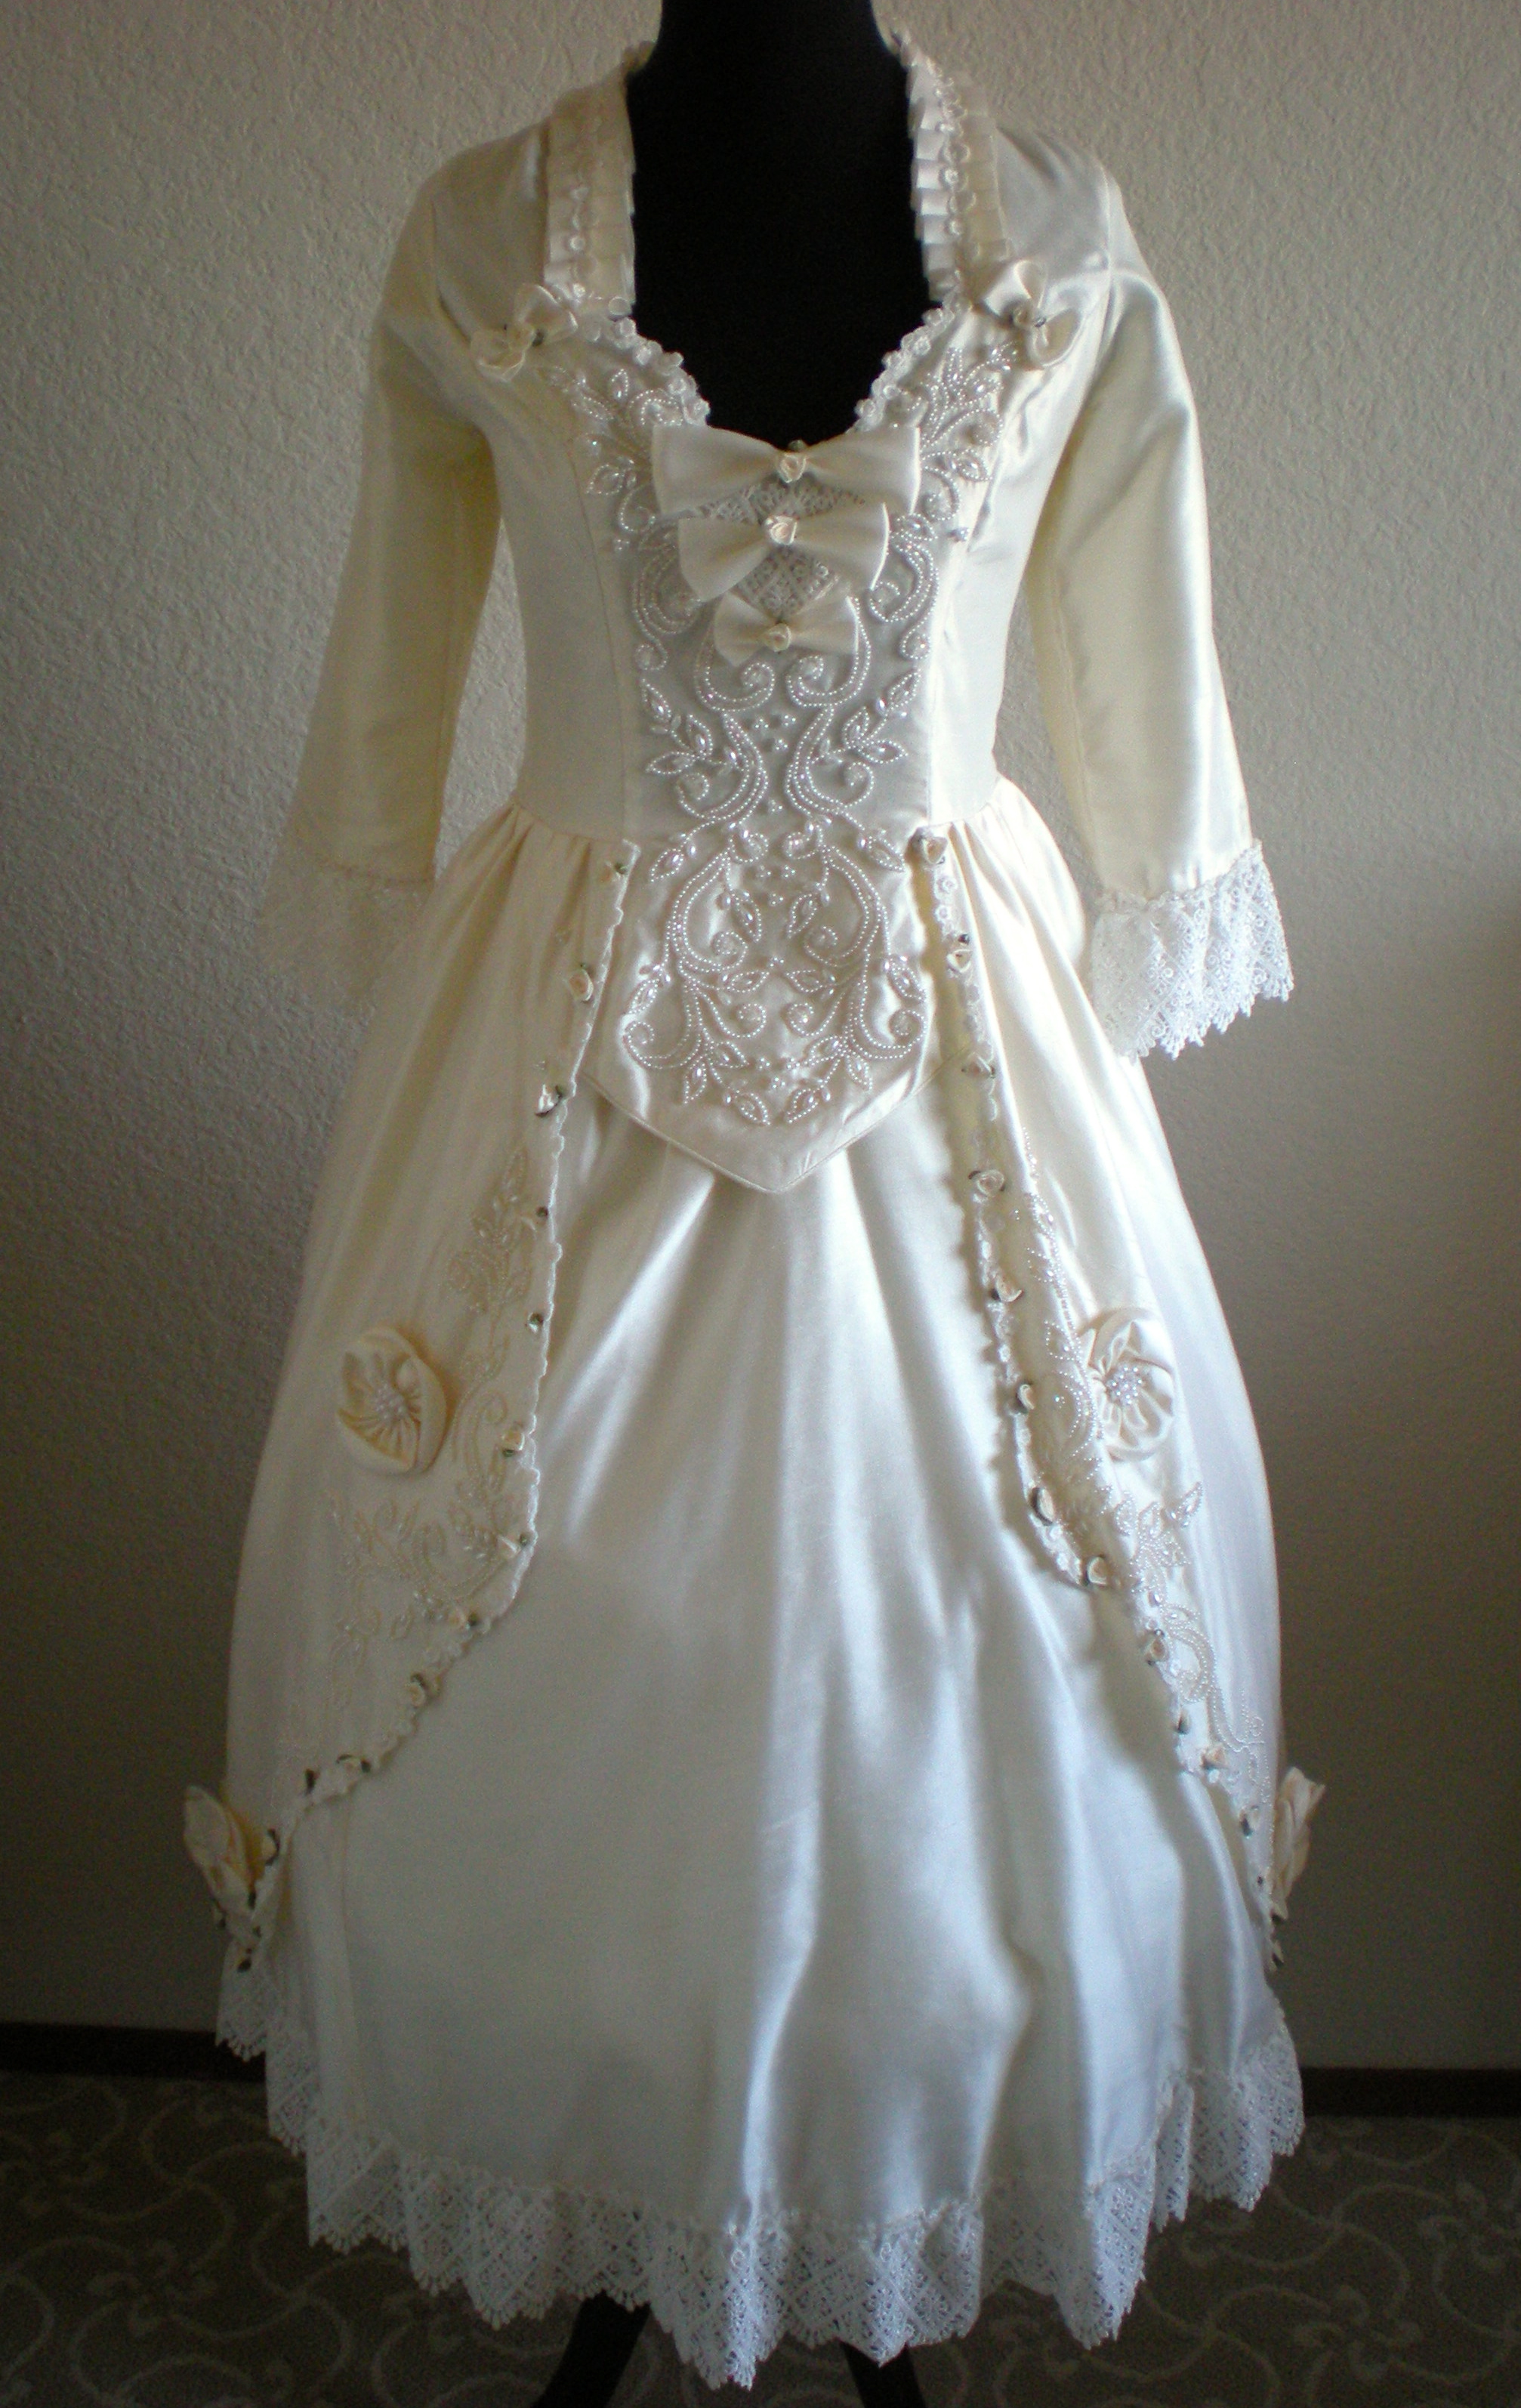
My silk robe a la francaise dress is finished! I don’t have any in progress pictures because I originally made the dress before I had this blog, but recently revamped it for a fashion show. (I added an invisible zipper, Watteau back, ribbon flowers and front bows).

Image

This dress is a combination of 2 inspirations: 18th century French fashion, and Japanese lolita fashion. The dress is too short for the former and a little long for the latter, but my intention was to marry the two into something decadent but wearable.

Image

A side view:

Image

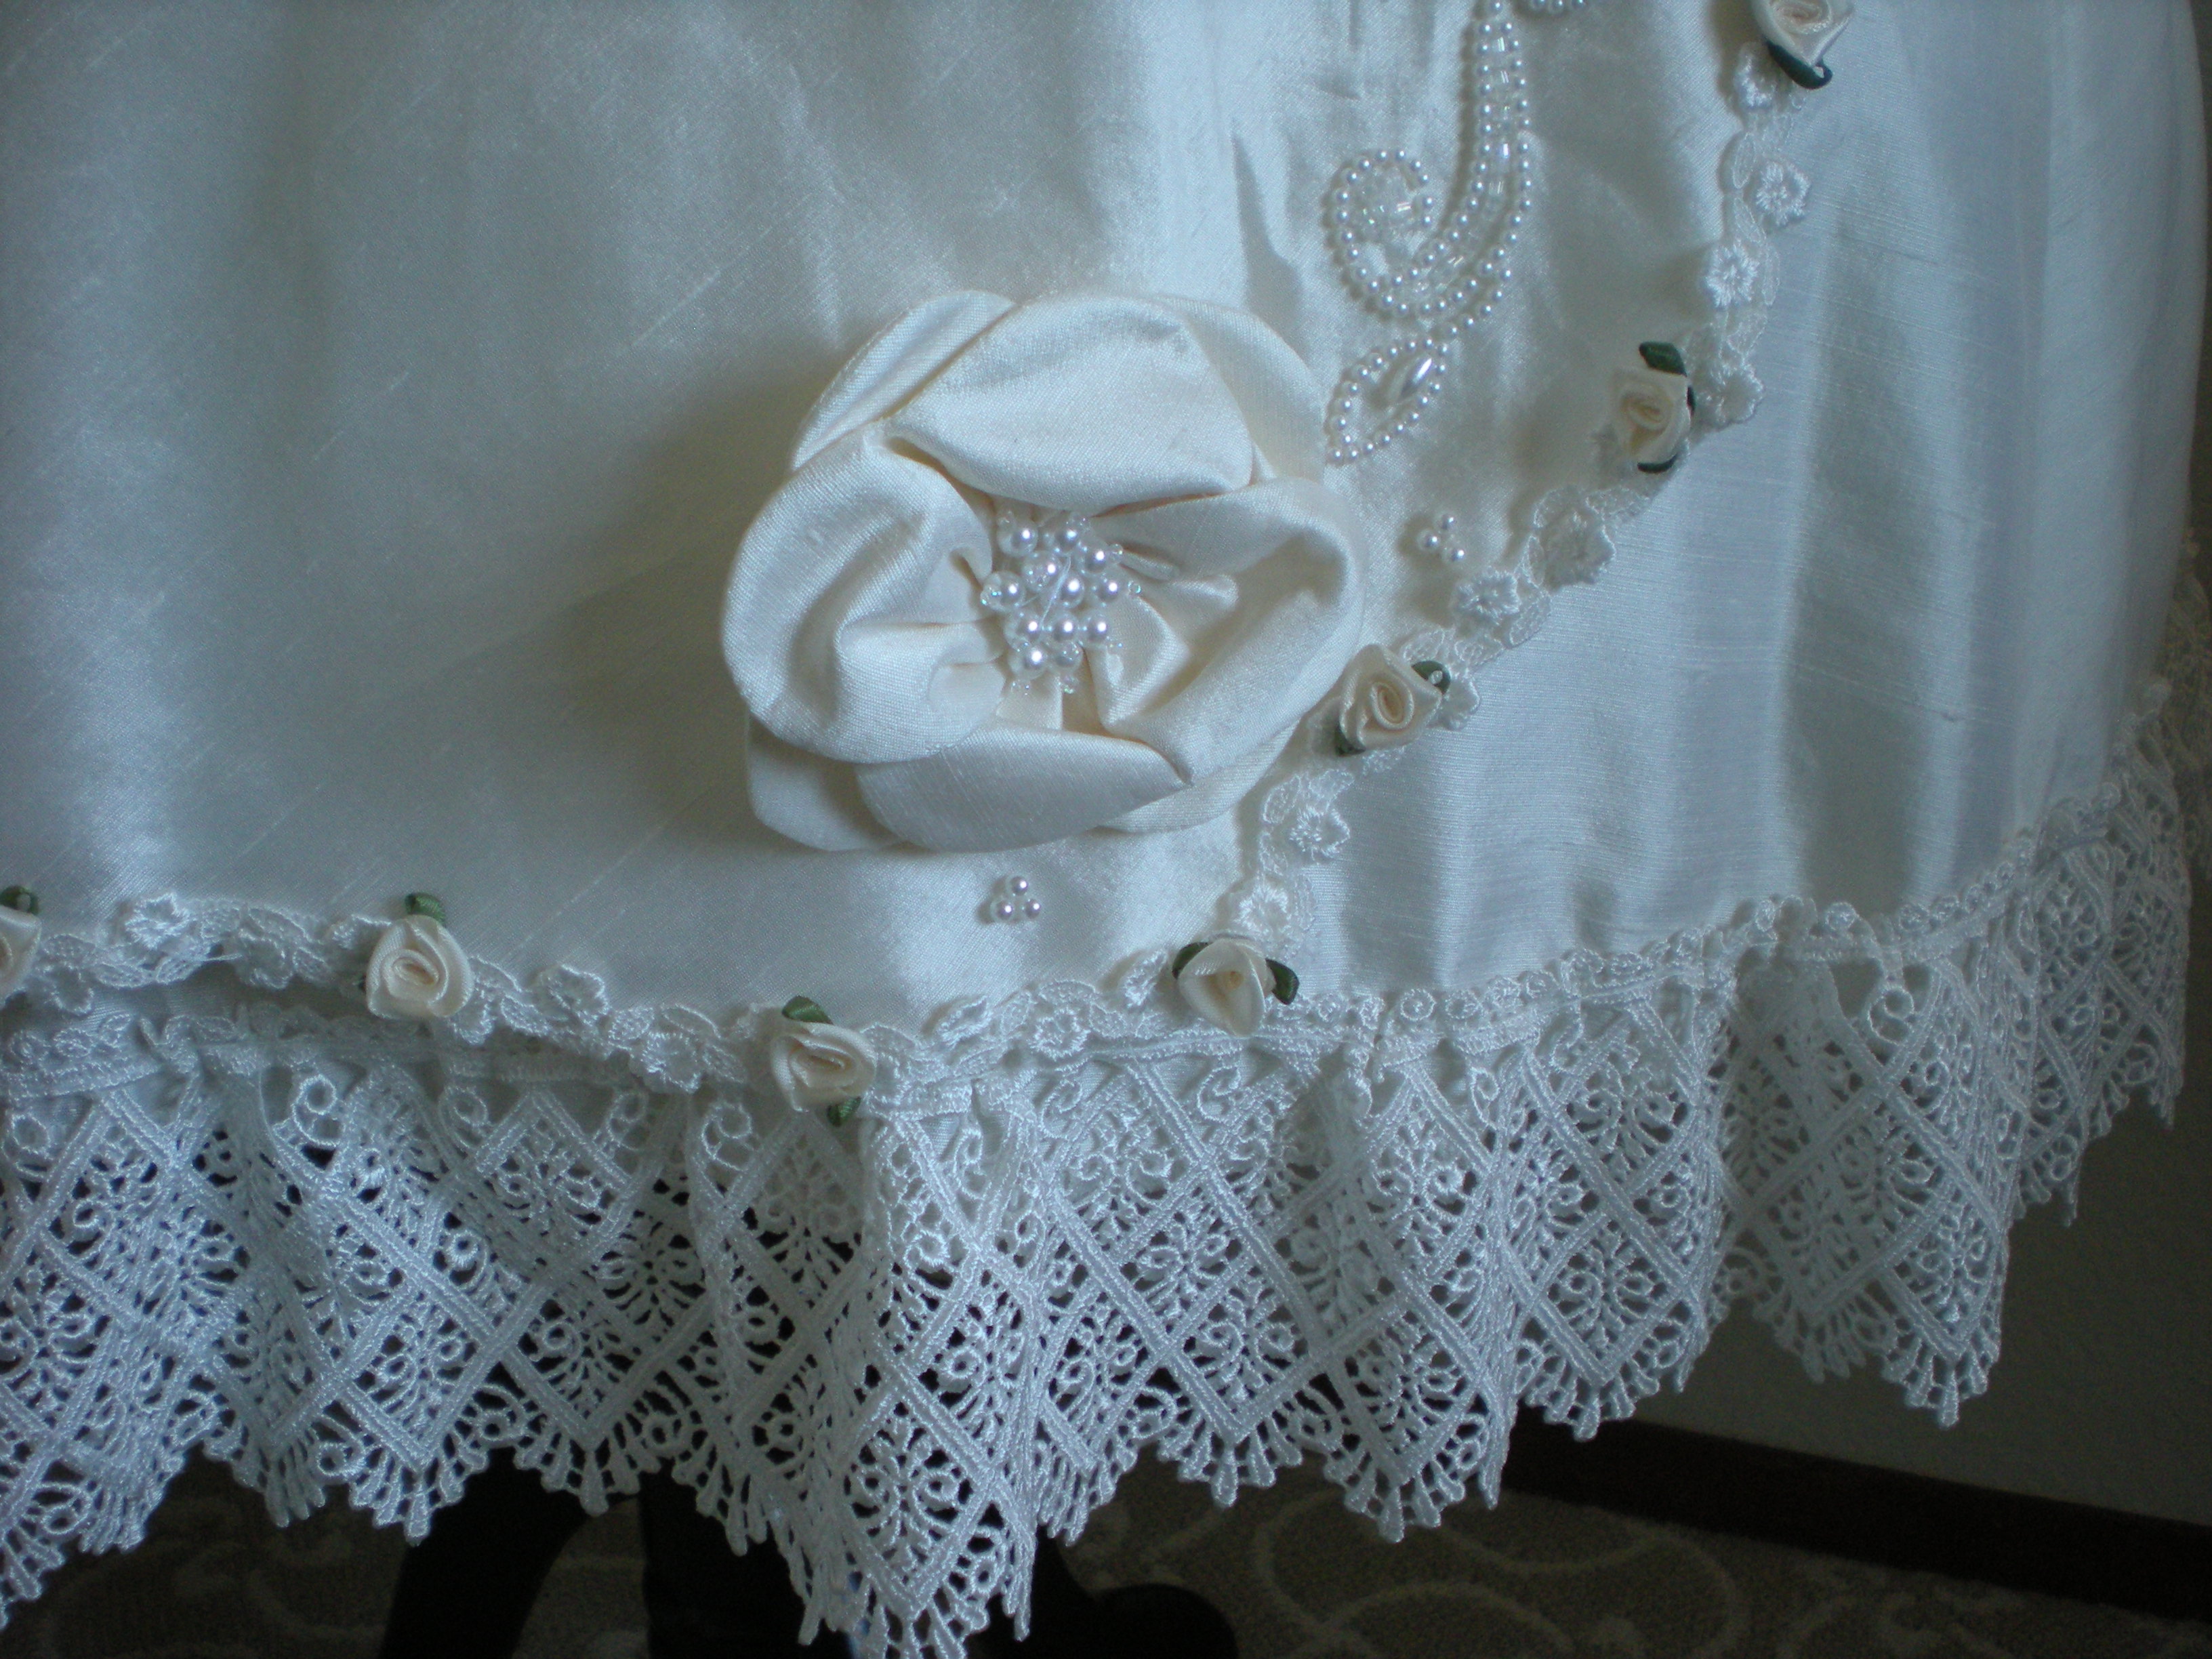
The bodice panel is salvaged from a vintage wedding dress. I love the beading! I added the venise lace, pleated neckline, ribbon roses and bows.

Image

More close-ups:

Image

Image

The back of the dress features Watteau pleats in the robe a la francaise style. Historically, these would be sewn into the back of the dress but I made mine detachable so I could iron it. It reminds me of a super-hero cape!

Image

Here’s the back of the neck:

Image

The dress is two parts (an underskirt and an overdress). The underskirt’s hem has wide venise lace, which is also used for the sleeve cuffs on the overdress.

Image

Image

The overskirt is edged with floral venise lace and little ribbon flowers. (It took a very long time to sew everything on by hand). The big silk flowers were salvaged from the vintage wedding dress.

Image

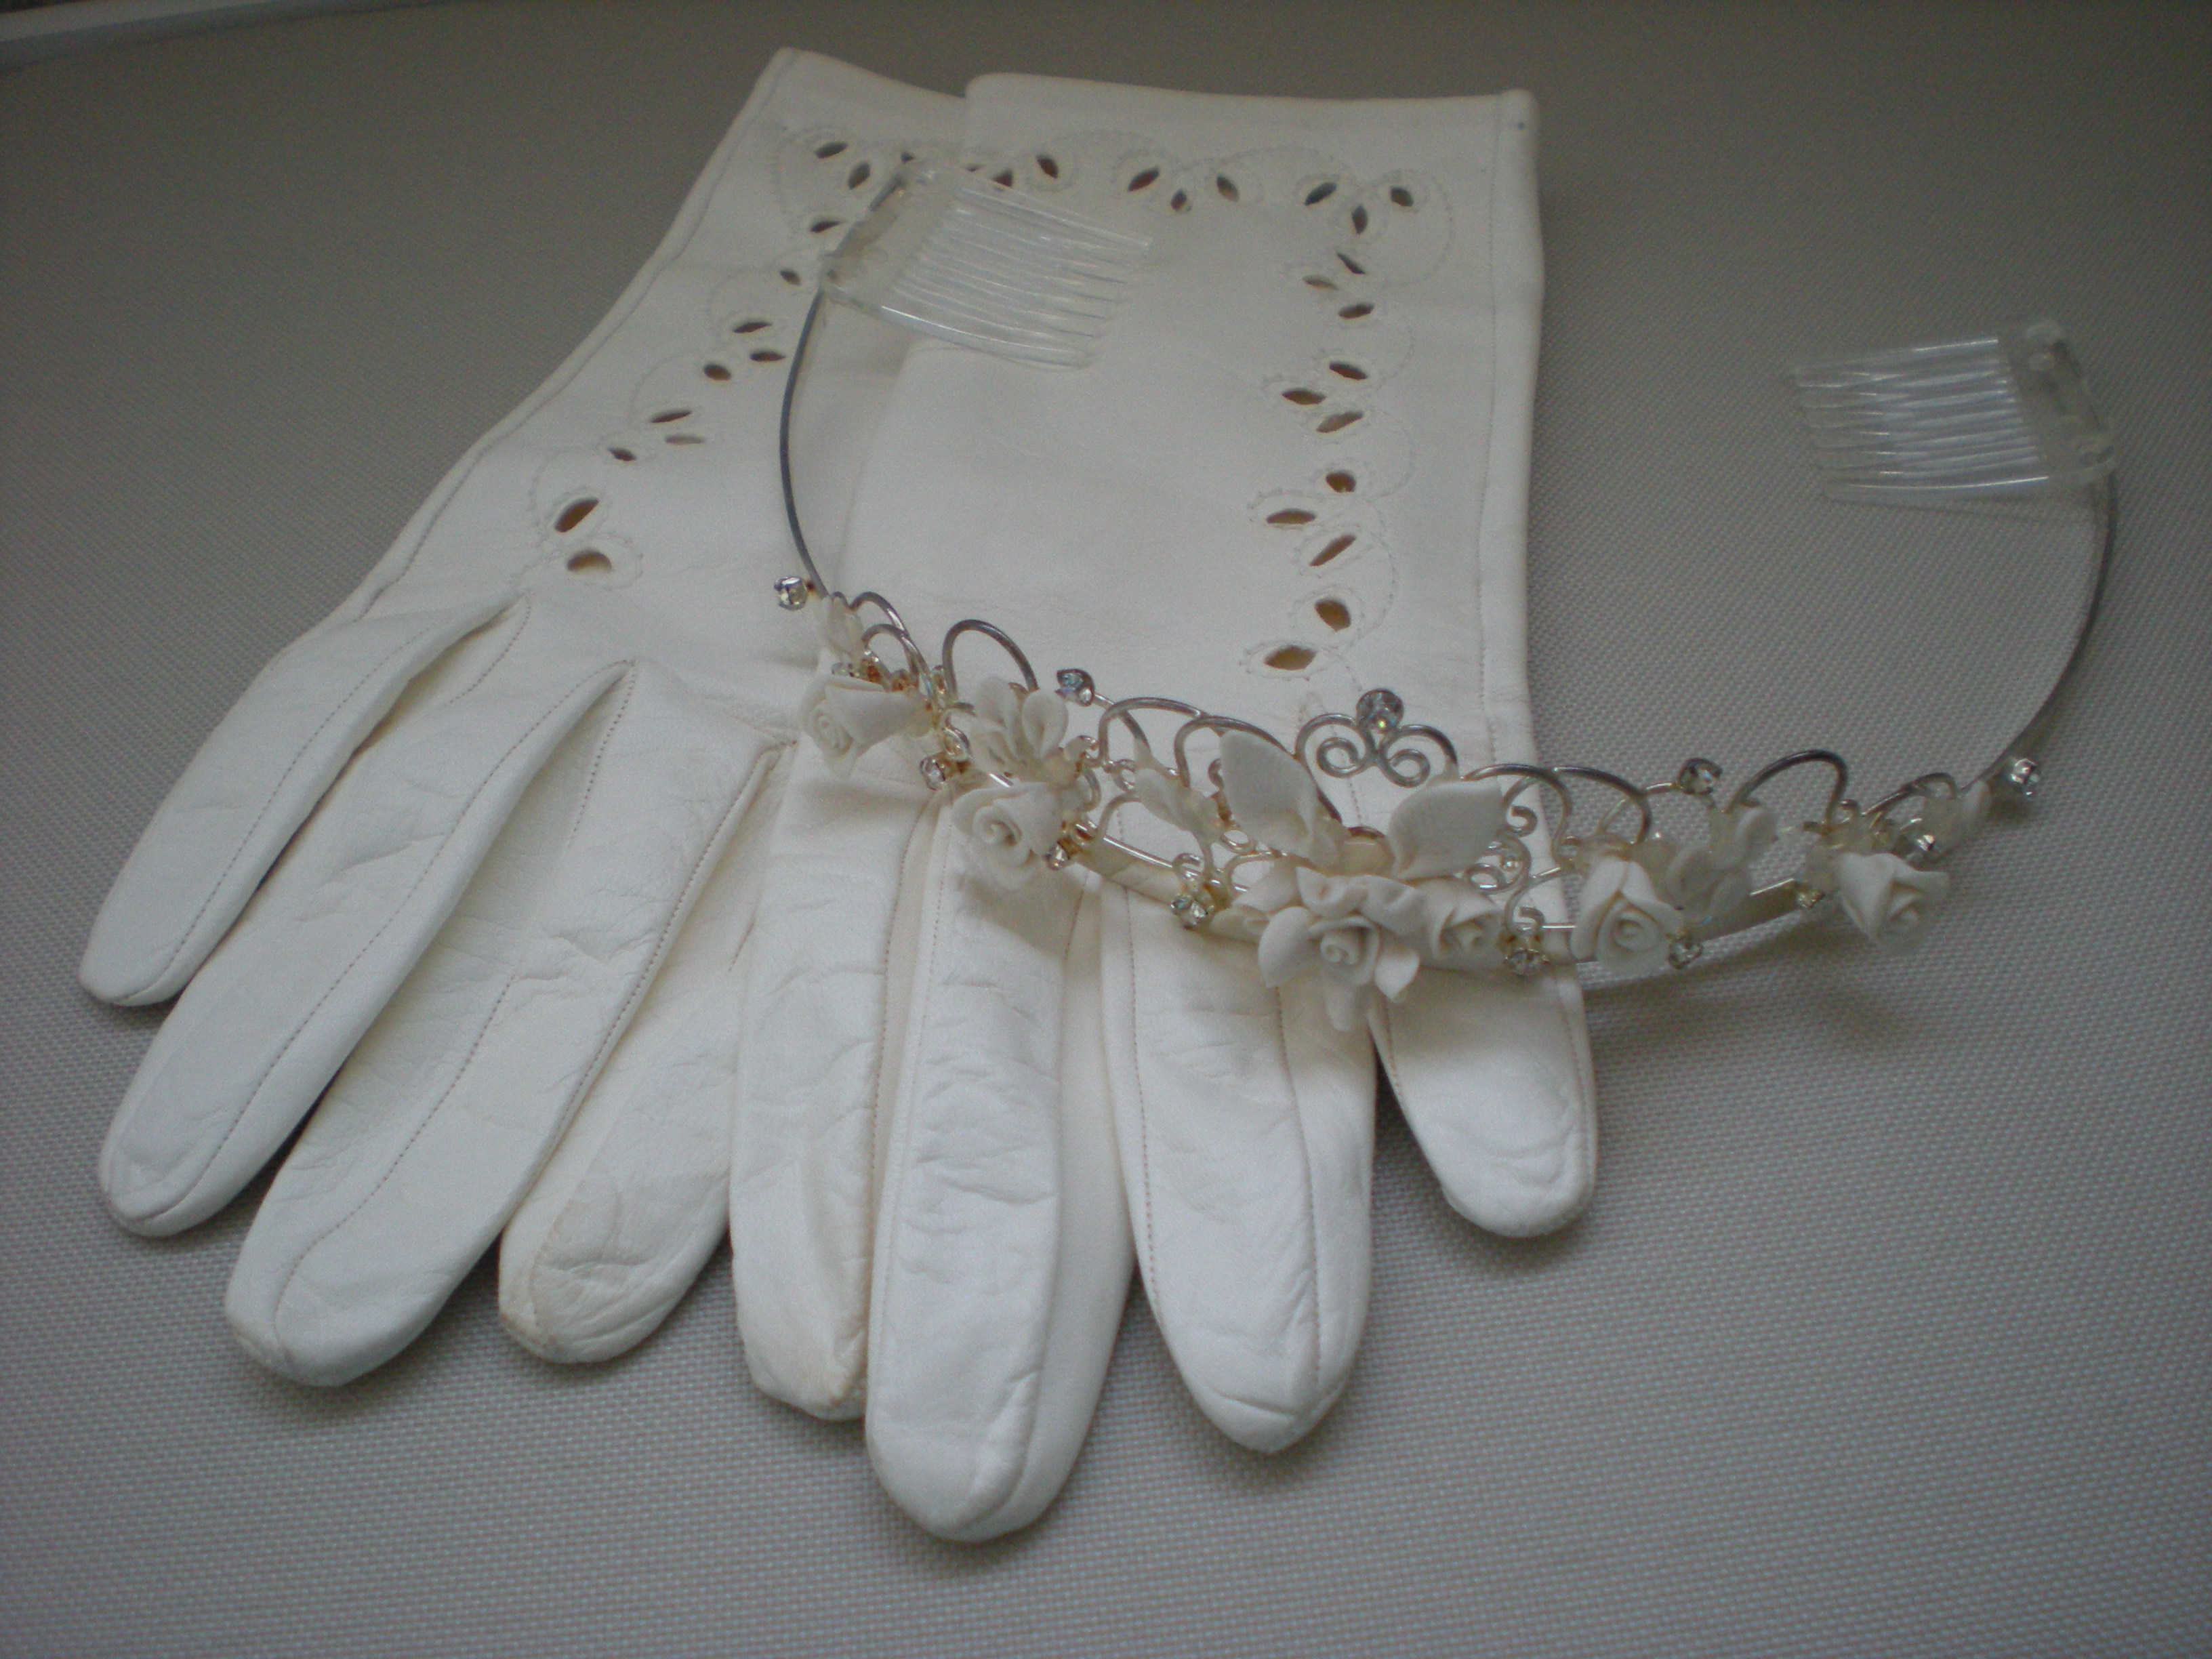
I wore the ensemble at a GBACG fashion show, along with vintage leather gloves with cutouts, and a sculpted clay tiara (that I had worn for my wedding).

Image

All the fabric for this dress was taken from a vintage silk wedding dress I found in a thrift shop. The middle panel with the beading was taken intact but all pieces of fabric in my dress were recut by me. Here’s a picture of it before I took it apart.

Image

It was an early 90s dress with a V back, puffed sleeves and a long waist.Image

Look at all that fabric in the train!

Image

I also used the lining from the dress to line my dress. I already had the venise lace and roses, so this project was very economical compared to buying many yards of new silk. This fabric was also very nice to work with. It is very crisp, ironed well and holds its shape. I would like to work with more silk taffeta in the future if I can find another cheap source of it!

Cute Way to Store Cupcake Wrappers

Cute Way to Store Cupcake Wrappers

I’ve been spending a lot of time on Pinterest. I’ve seen this idea floating around: storing your cupcake liners in a mason jar. It’s neat and tidy, keeps them from being crushed in a drawer, and makes them easy to spot. I added a twist by decorating the lid with one of the cupcake wrappers.

Shoe Closet

As I mentioned in my flooring post, here’s some more details about the extra shelving I built to organize my shoe closet.

closet

(The little gold things on the floor are hinges and a lock for the crawl space).

The top shelf was already in the closet when I moved into the house. It was so handy it inspired me to make a row of shelves for extra storage.

I measured the width of the closet, then went to Home Depot to get boards. Originally I planned to buy plain boards and paint them white, but they already had white composite wood shelves. They were nice enough to cut them to the shorter length I needed, which saved me some sawing at home! (Plus I don’t have an electric saw, which would have made trimming the composite tricky).

The boards are held up with L-shaped shelf brackets. It took a while to measure and drill holes that were level, but not a difficult project overall, and a great way to organize your shoes.

I would have liked to put more shelving on the sides of the closet (for an epic shoe display!) but the stud finder told me that there was electrical wiring on those walls and therefore unsafe to go exploring with a drill bit.

About the shoes: It’s taken me a while to build up this collection. I haven’t changed shoe size for a long time, and I take good care of things, so some of the shoes you see are years old. Since I started doing historical costuming I’ve had reasons to accumulate even more, especially since I discovered all the beautiful things at American Duchess, my current favorite shoe company!

Confession: The closet is never this neat and spacious. I took this photo right after installing the floor, and before I moved all the coats and folding chairs back inside.

Bon Voyage! (Retro Suitcase with Vintage Luggage Stickers)

Shortly before Christmas I got a new suitcase, which came in handy for holiday travel. I decided to jazz it up by making my own “vintage” luggage stickers.

Image

I’ve been wanting a retro suitcase for a long time, but kept running into very expensive reproductions, or antiques in poor condition. I was so happy when I found this particular suitcase on eBay. It has the old-fashioned look I wanted, with the convenient modern wheels and retractable handle. Plus bonus combination locks! Here’s what it looked like before I went to town:

Image

You can buy reproduction luggage stickers but I printed my own. (I have a HP color inkjet printer, so nothing terribly fancy). I found various images online, re-sized them, and them printed them on regular white office paper.

Image

I cut each one out with scissors, then used Mod Podge to glue them onto the suitcase. I also put on another layer of Mod Podge after it dried to seal it in. (If you have printable sticker paper this would speed things up, but I didn’t have any on hand).

Image

I also put stickers on the back.

Image

And a side shot:

Image

I also love the interior of this suitcase! It’s lined with a soft, creamy faux leather that is much nicer than the other suitcases I’ve had.

ImageThe interior pockets and snap straps were perfect for holding my iPad.

ImageNow I want to get a smart tweed suit and pillbox hat, put on some sweet shoes and ladylike gloves, and go flying!