RSS Feed

Monthly Archives: July 2016

Lady Tremaine’s Bodice

Costume College is in 2 days! I finished my bodice a few days ago but today was the first time I tried on all the pieces of my Lady Tremaine outfit: bodice, underskirt, overskirt, chemise, bra, waist cincher, bum pad, stockings, shoes, gloves, hat, veil, earrings, scarf, pin, and bracelet. I hope the AC is turned on at the hotel! I’m busy packing and doing other preparations so after CoCo I will make a full post about the outfit and other details.

So sparkly! (The bodice is hand-sewn because of the sequins).image

The back closes with a separating zipper. I was worried about having hooks and eyes snag on the sequins, so a friend had the genius idea of using a jacket zipper that pulls apart! The waist has some extra room in it because the two velvet waistbands for the skirts are rather thick. (The outer skirt has 2 layers of organza and 2 layers of satin pleated into the waistband, which makes it extra bulky).image

And an in-progress shot:image

See you at Costume College!

Advertisement

Lady Tremaine’s Hat

Today I finished my Lady Tremaine hat!

image

The hat is made of two layers of sinamay with one layer of organza sandwiched inside. My friend Lynne, who made my beautiful 1840s bonnet, helped greatly with the patterning of the brim and loaned me a wooden hat block.

Behold, awkward bathroom selfies!imageimage

The hat brim is bound with bias trim I made from velveteen. The same fabric is used for a band around the bottom of the crown. I upcycled the crown from a wool felt hat I no longer wanted.image

I took some liberties when it came to the exact placement of the flowers and birds, and the type of flowers. The flowers are made from heat-transfer flocking, like the flowers on my skirt.image

The only black birds I could find in the craft store were large Halloween ravens, so I bought smaller birds and spray-painted them black using Krylon Hobby/Craft paint in gloss black.

I don’t have pictures of the process, but the general steps were:

  1. Make a cardboard pattern for the brim.
  2. Cut out 2 layers of sinamay and 1 layer organza according to the brim and pin together.
  3. Sew rayon-covered millinery wire to the edge of the brim.
  4. Bind the edge of the brim with velveteen bias.
  5. Cut and apply floral appliques.
  6. Cut out center head opening and make tabs.
  7. Sew the crown to the tabs.
  8. Add grosgrain hat band to inside crown.
  9. Add velvet band outside crown.
  10. Trim with birds and feathers.

Supply costs (including Amazon affiliate links):

Total: $77.56

It’s not exactly an inexpensive hat, but much nicer than the plain black straw hats I was considering at first, and much cheaper than the $300 Kentucky Derby hats I kept seeing when searching for large sinamay hats!

I look forward to wearing this hat with the rest of my Lady Tremaine ensemble at Costume College this year.

Lady Tremaine’s Bodice (Mockup Process)

This past week I started the mockup process for making Lady Tremaine’s bodice. Since the sequined fabric is very precious and I won’t have time to make another special order for it before Costume College I definitely wanted to take my time with the patterning.

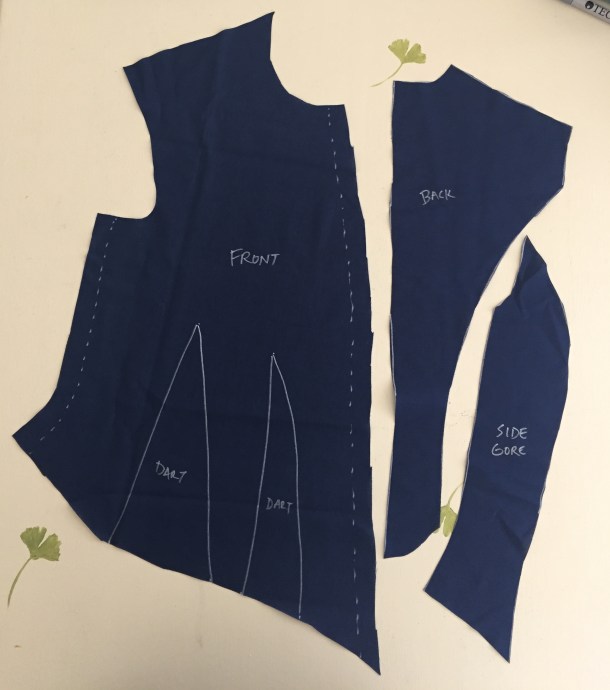
I am using the Vintage Pattern Lending Library Ladies’ Basque pattern. I picked it because it had the shape I wanted, but cutting out the pattern pieces made me realize it had many more seams than I wanted. (Less seams = less trouble when dealing with sequins, and more screen-accurate).

IMG_5749

My goal was to eliminate the center front seam, the two side back seams, and change the four front darts into two. I can do this because I’m not very curvy, I don’t plan to wear this with a corset, and it is a fantasy costume. If this was meant to be a properly fitted historical costume bodice worn over a corset, I would not recommend removing seams.

I started by tracing the paper pattern pieces without modification onto some fabric leftover with another fabric. It was navy blue and I used a silver pen so it ended up looking like architectural plans.

IMG_8347

Mockup #1 was not sewn together; it was placed on the dress form to determine general fit, and I was able to see that there was too much fabric in the front. IMG_8350

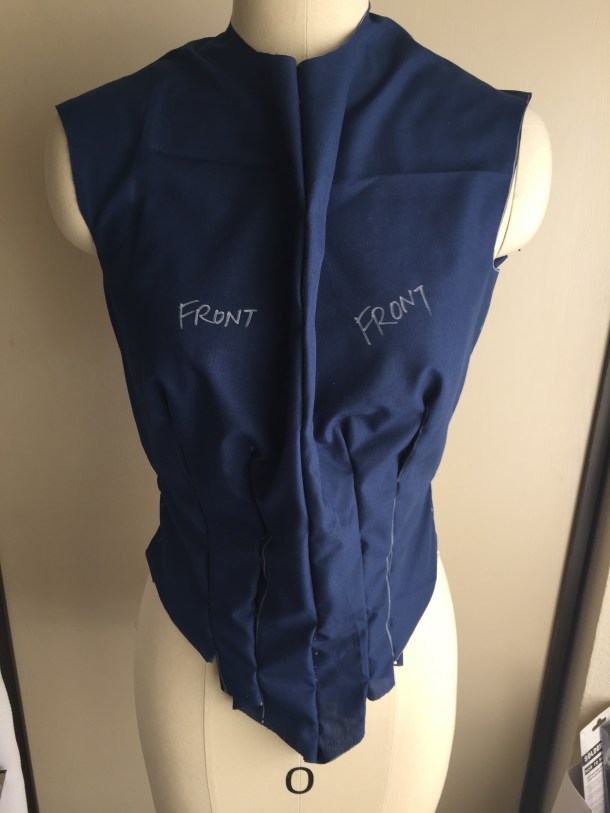
To make adjustments I turned the mockup inside out, and then started pinching out extra fabric and pinning. I also made one giant dart out of the two darts on each side. When satisfied with the general fit I made more notes directly on the fabric with the pen, then disassembled the pieces for my pattern.IMG_8356IMG_8359

The final pattern pieces:IMG_8362

I then made mockup #2, which is wrinkly because I was too lazy to iron the fabric beforehand. =)IMG_8367IMG_8368

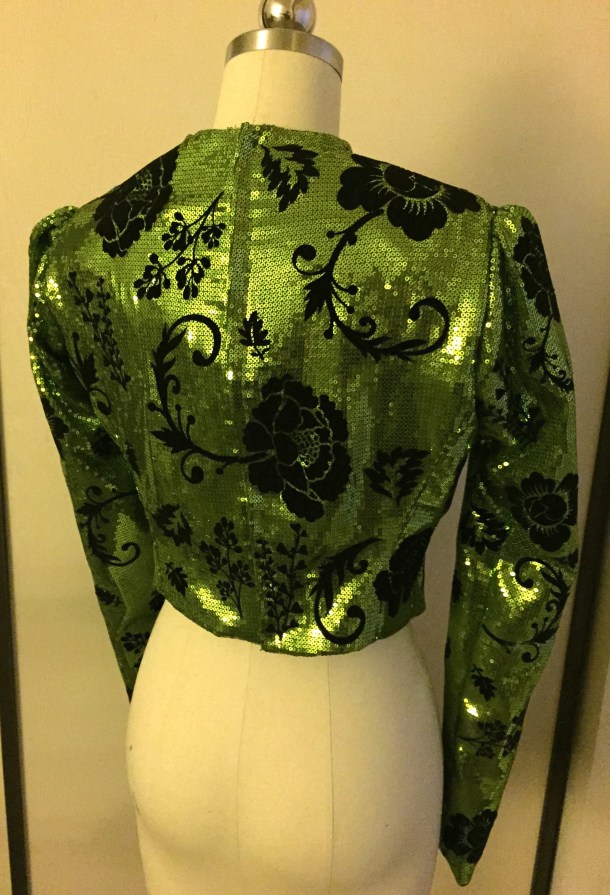
Then finally I cut out my sequined fabric! The sequins are on a sheer georgette, so I had to flat-line it with satin so that any raw seams tucked under would not show. The edges were serged because the satin was fraying and the sequins were falling off.IMG_8383

A note about sequins: The “right” way to sew sequined fabric is to unpick the sequins next to your seam allowance to avoid a bulky seam, or having some of the sequins be punctured or bent by your sewing machine needle. I skipped this step for several reasons: 1) I am working with very small sequins which will hide much better in the seam than large ones. 2) I am hand-sewing the bodice pieces together so that I can feel any resistance in my needle that I wouldn’t be able to tell by machine. 3) I am lazy and short on time to unpick so many tiny sequins and sew them back on.

Here is the current bodice. I still need to add sleeves, trim the neckline and bottom, add closures, and start the scary process of flocking!IMG_8413