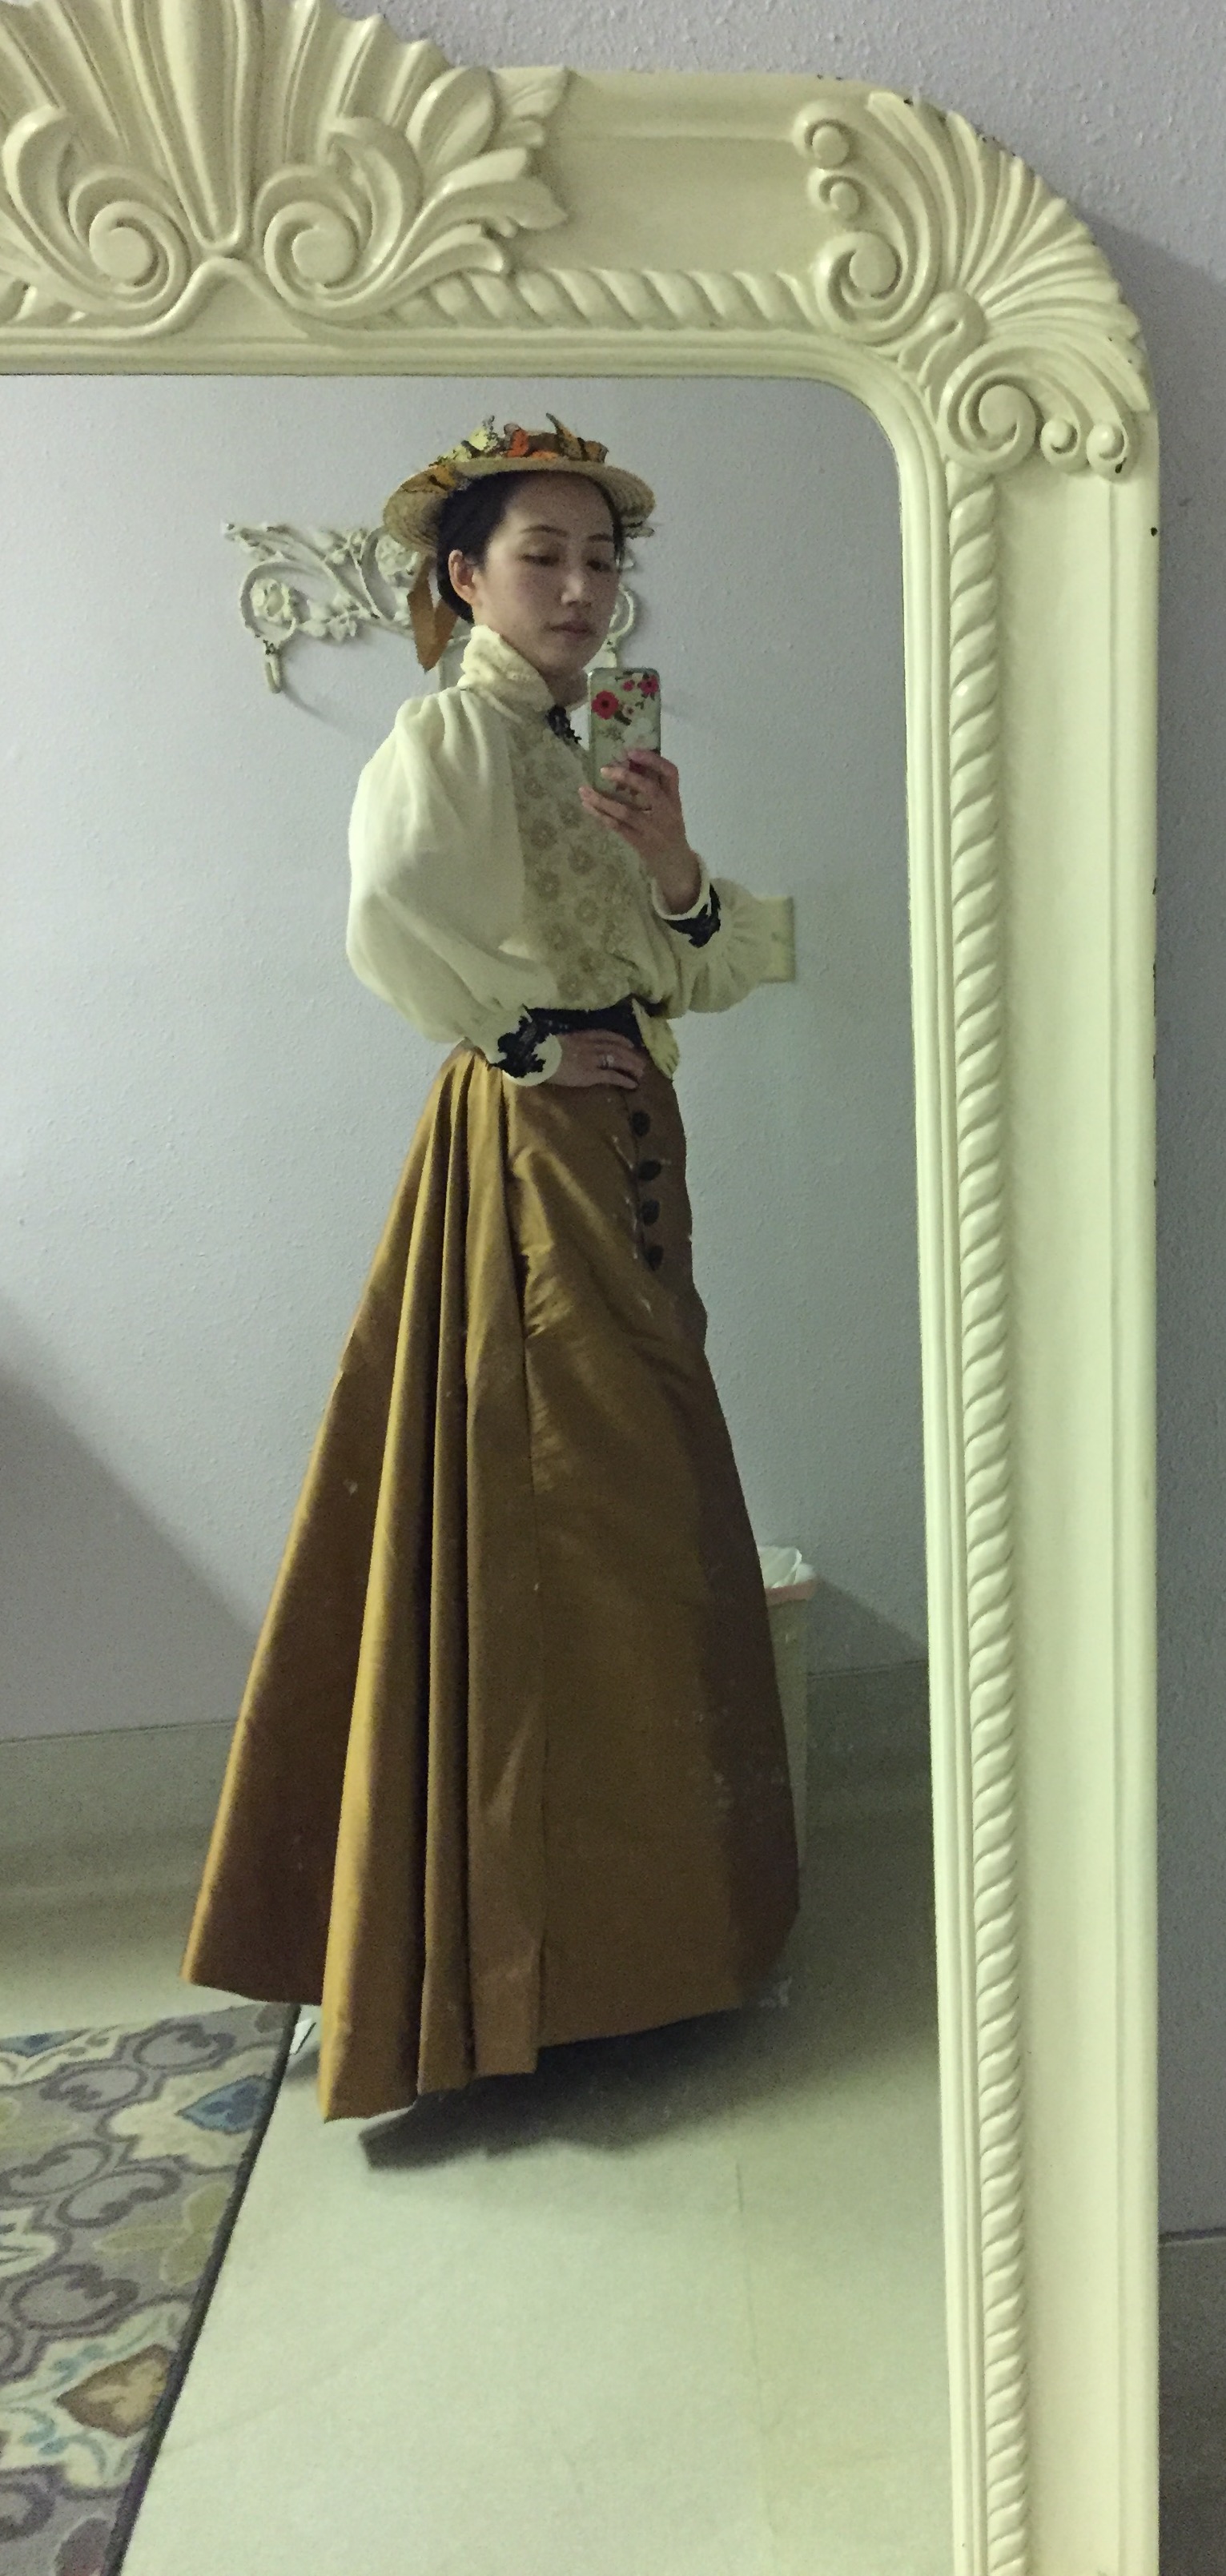
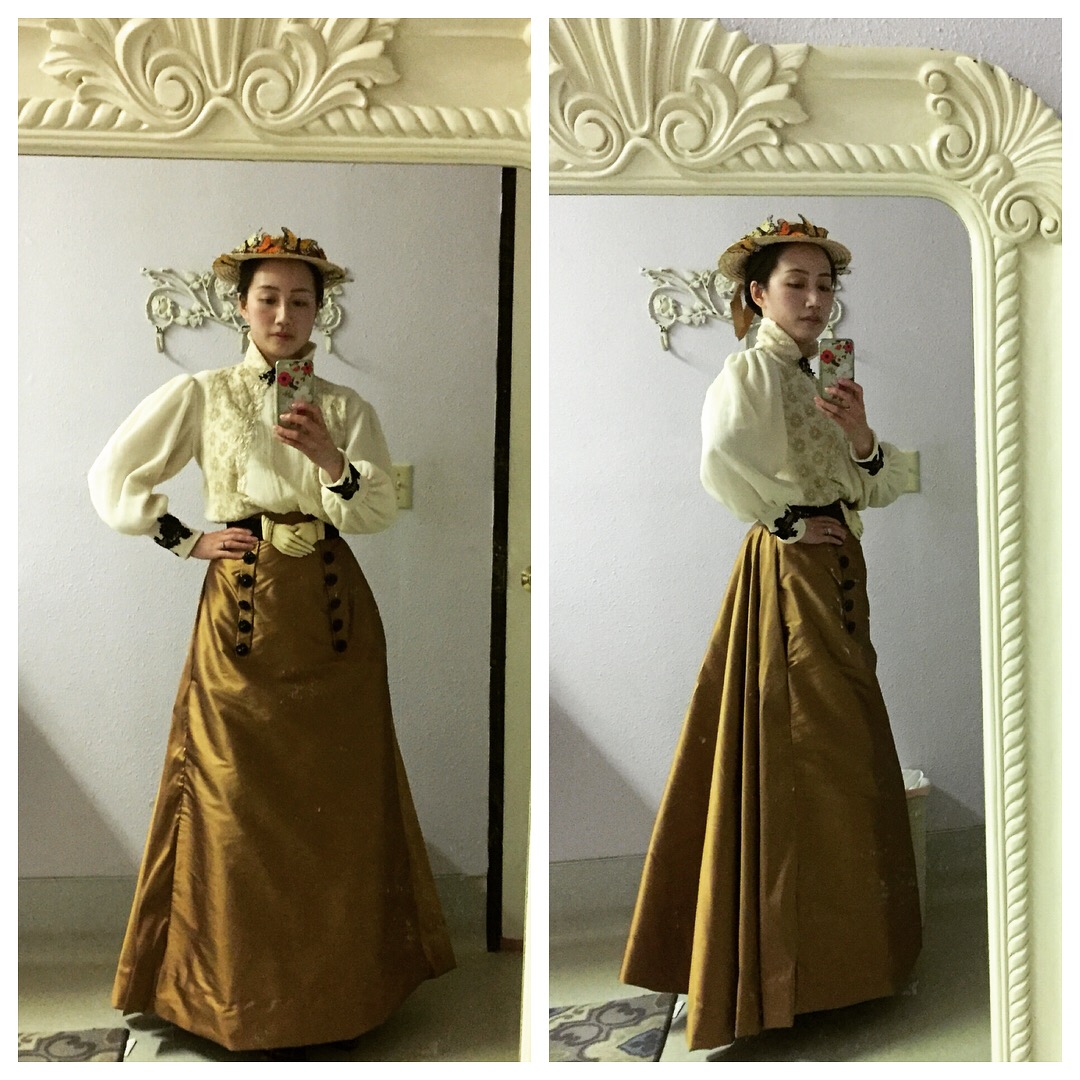
Tag Archives: silk

My Historical Loki Variant Cosplay (Borgias-Inspired Renaissance Dress Costume)

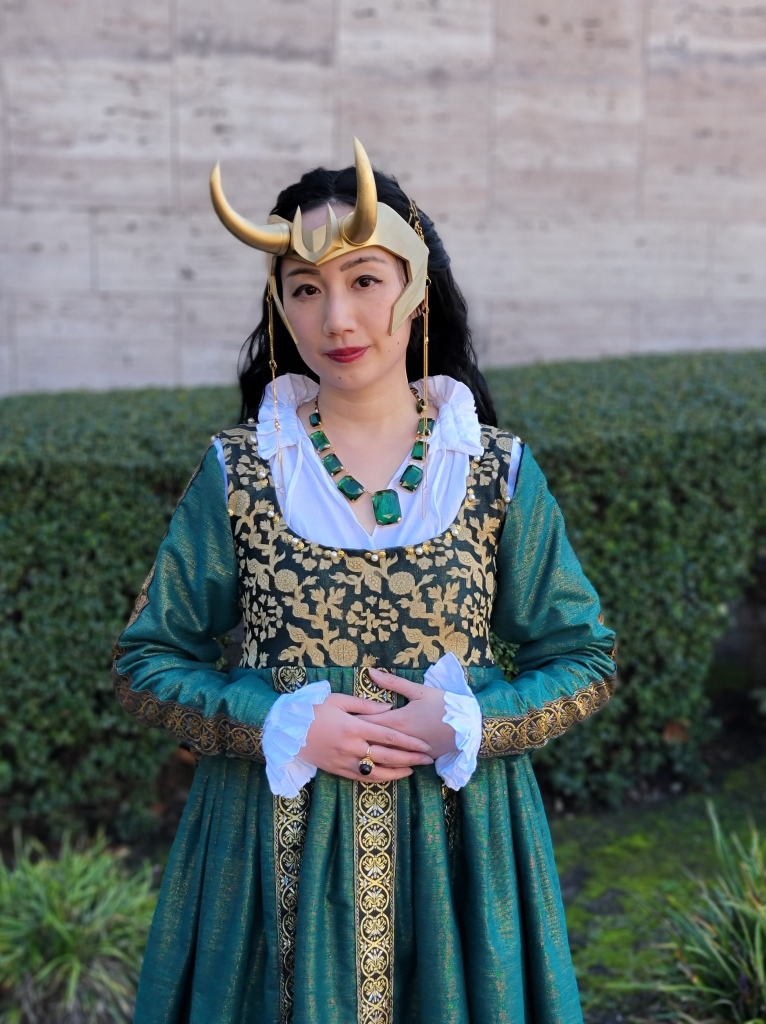
I was making a Borgias-inspired Renaissance dress and decided to lean into to the green gold color scheme and make it a historical Loki variant costume. I wanted a Renaissance gown but being shiny and pretty was more important to me than historical accuracy so this isn’t pegged to a specific decade, but rather a look inspired by both the Borgias HBO show and the character Loki from the Marvel Cinematic Universe.

The dress is made from beautiful green and gold shot raw silk suiting. The bodice uses the same fabric but with a silk/rayon organza burnout overlay, and the lining is a black cotton canvas for structure.

Rather than using a commercial pattern I Frankensteined together math and modified pattern bits from previous costumes I made. The bodice is a shorted version of the kirtle I previously made using help from the Tudor Tailor book (Amazon affiliate link). I widened the shoulder straps and added some more seam allowance but it is otherwise generally the same.

The skirt is made of pleated rectangular panels. Each of the front and back are 1.5 panels wide, with the seam hidden under the metallic jacquard trim.

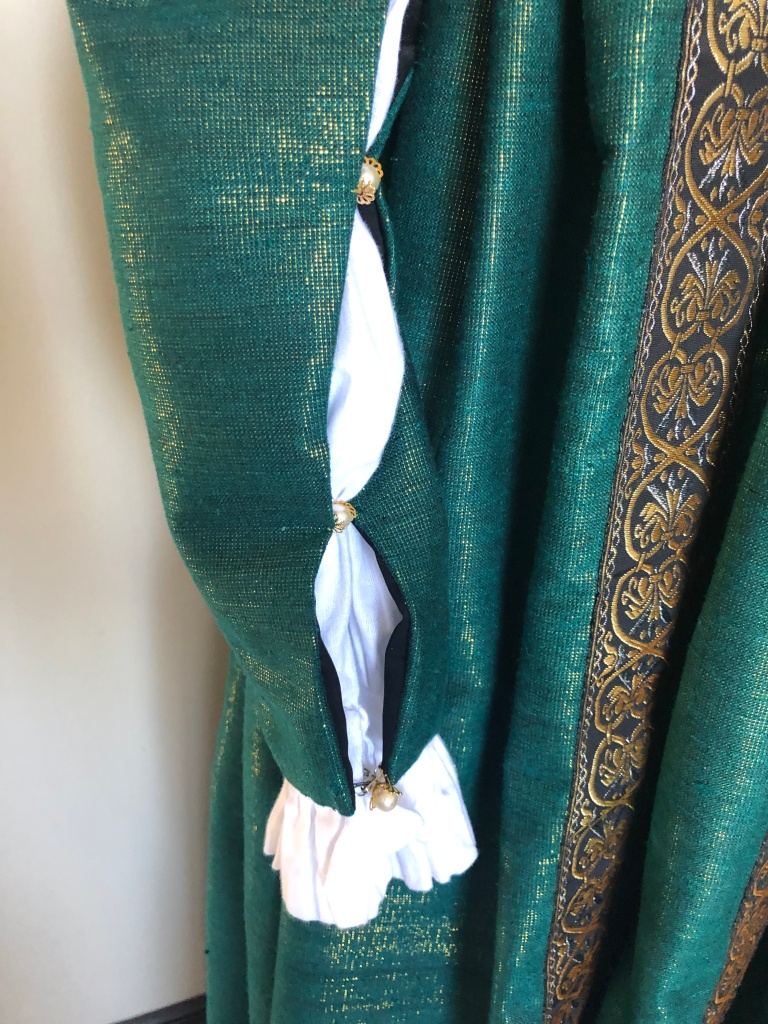
The sleeves are basic sleeve shapes but cut a little loose to allow for the chemise underneath. They are somewhat like tie-on sleeves except instead of ribbons I sewed them at the meeting points with a glass pearl and some gold bead caps.

Underneath the dress I wore a Tudor chemise because that is what I had on hand. (It was also made using a pattern from the Tudor Tailor book). However, at a later point I’d like to make a Renaissance camicia with a different neckline and much fuller sleeves to puff out through the gaps in the green sleeve.

LOKI CROWN

I bought the Loki crown as 3D printed pieces from Parton Prints on Etsy. The horns come as separate pieces for ease of shipping and I glued them on using E6000 glue. After a little sanding, I used a primer that someone recommended to me for 3D printed plastics Tamiya Gray Fine Surface Primer (Amazon affiliate link) I finished up with two coats of Rust-Oleum Metallic Spray Paint in Gold. Originally I used more E6000 to glue on a black elastic strap but decided to cut them off. Instead I used the nubs of those straps as an anchor point to sew on some gold necklace chains both as decorative dangling elements in the front and also as a visible gold band across the back to hold the crown on.

I am wearing a wavy black wig from Amazon (affiliate link) under the crown. I wish my hair was that luxurious! The necklace is a secondhand eBay find.

And here is a video of the dress in action!

I had so much fun pretending to be a villain. Here are a few of the fun TikTok videos I made as Lokizia Borgia:

  1. Transforming into Lokizia Borgia:

2. Asking you to join me in ruling the galaxy:

3. Starting my villain arc:

MATERIALS

  • 5 yards green/gold raw silk suiting from Fabricmartfabrics.com: $52.50 + $9.99 shipping (some left over)
  • 2 yards organza burnout from Fabricmartfabrics.com: $16.10 (shipped with silk suiting, a lot left over)
  • 10 yards metallic jacquard trim from Aliexpress store Lucky Zakka: $9.42
  • Thread, hooks/eyes, glass pearls, lining scraps, paint, glue, etc. from stash/left over from other projects: ~$5
  • Package of 9 mm gold-colored bead caps: $5.90 from Amazon (affiliate link); I have many left out of that 100 pack.
  • Gold chains: $0 (gifted from someone’s destash)
  • 3D printed Loki crown pieces: $32.12 including shipping from Parton Prints on Etsy

Total cost: $131.03 (with about $100 of that in the dress itself).

OTHER RESOURCES MENTIONED IN THE POST (Amazon affiliate links below):

I had a lovely time wearing this to a Sistine Chapel art exhibit with my lovely friend Sara, who took a number of the pictures in this post.

Thank you for reading!

Vintage-Style Purple Silk Satin Pajamas

I was in the mood to make something comfortable, yet luxurious for my last winter 2020 project. March may be a little late to document my last finished project of 2020 but I had a bit of of backlog to get through. My next post will be the 2020 Costuming Year in Review (finally!)

IMG_4678

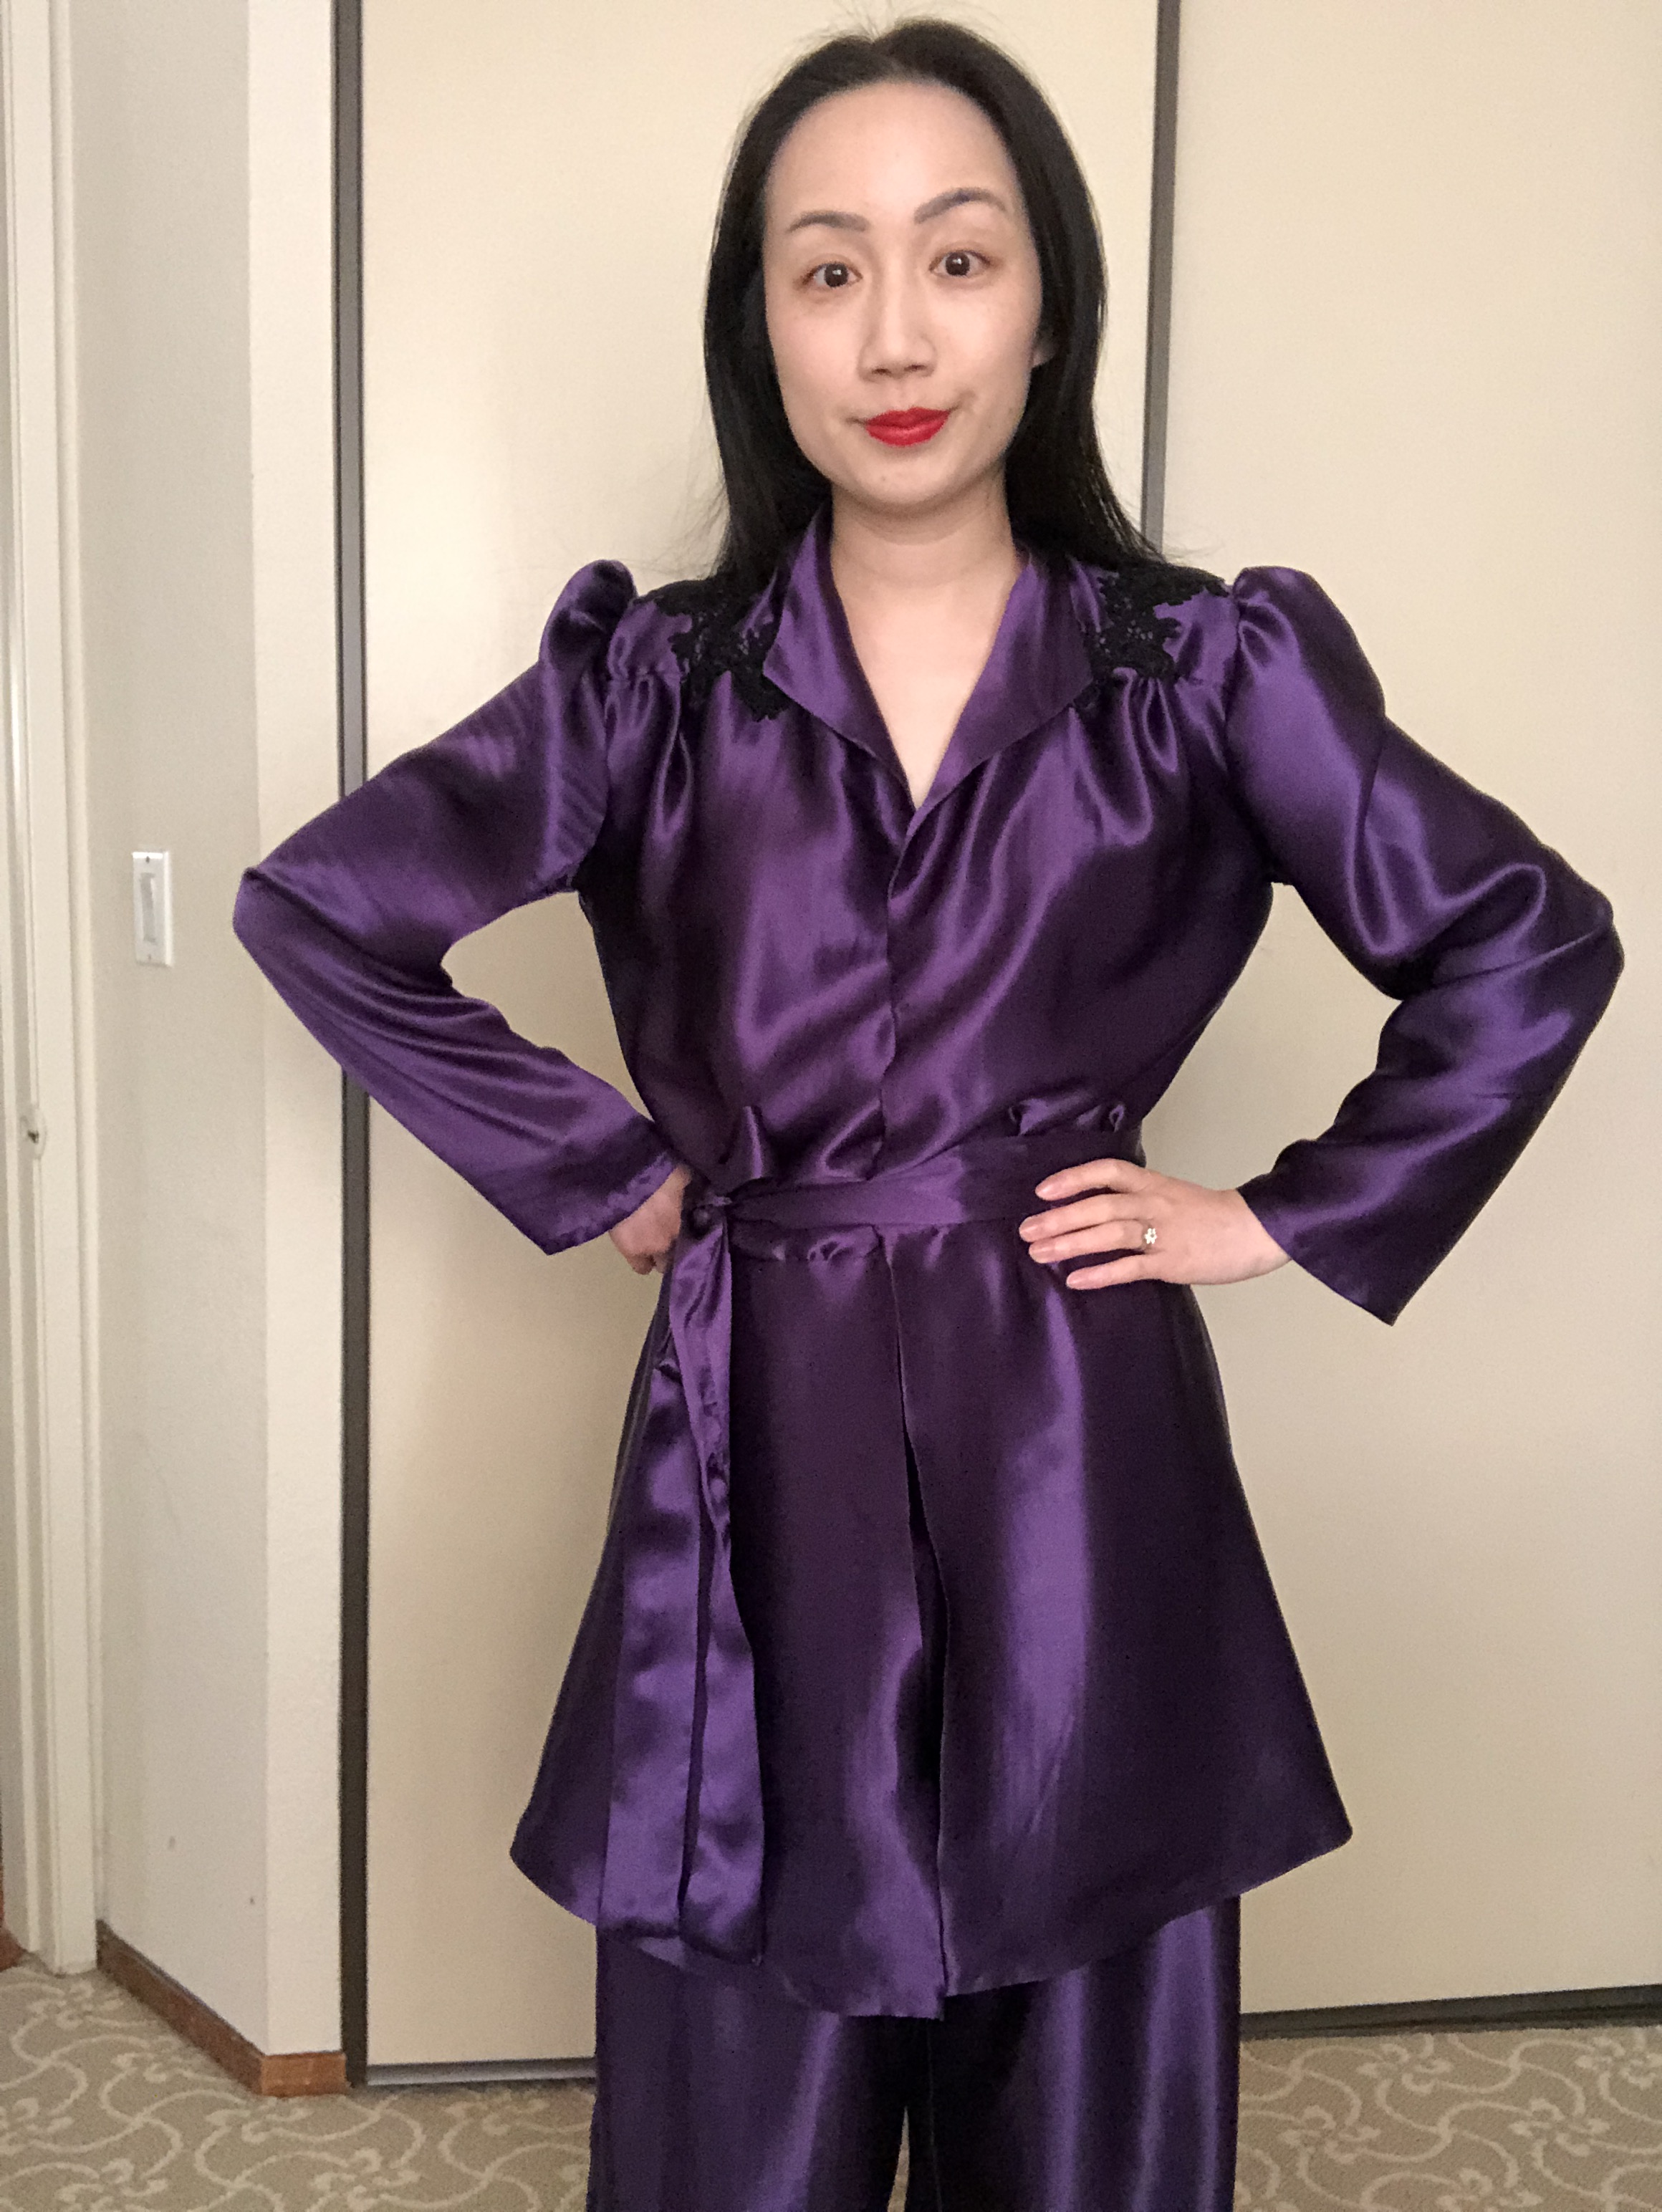
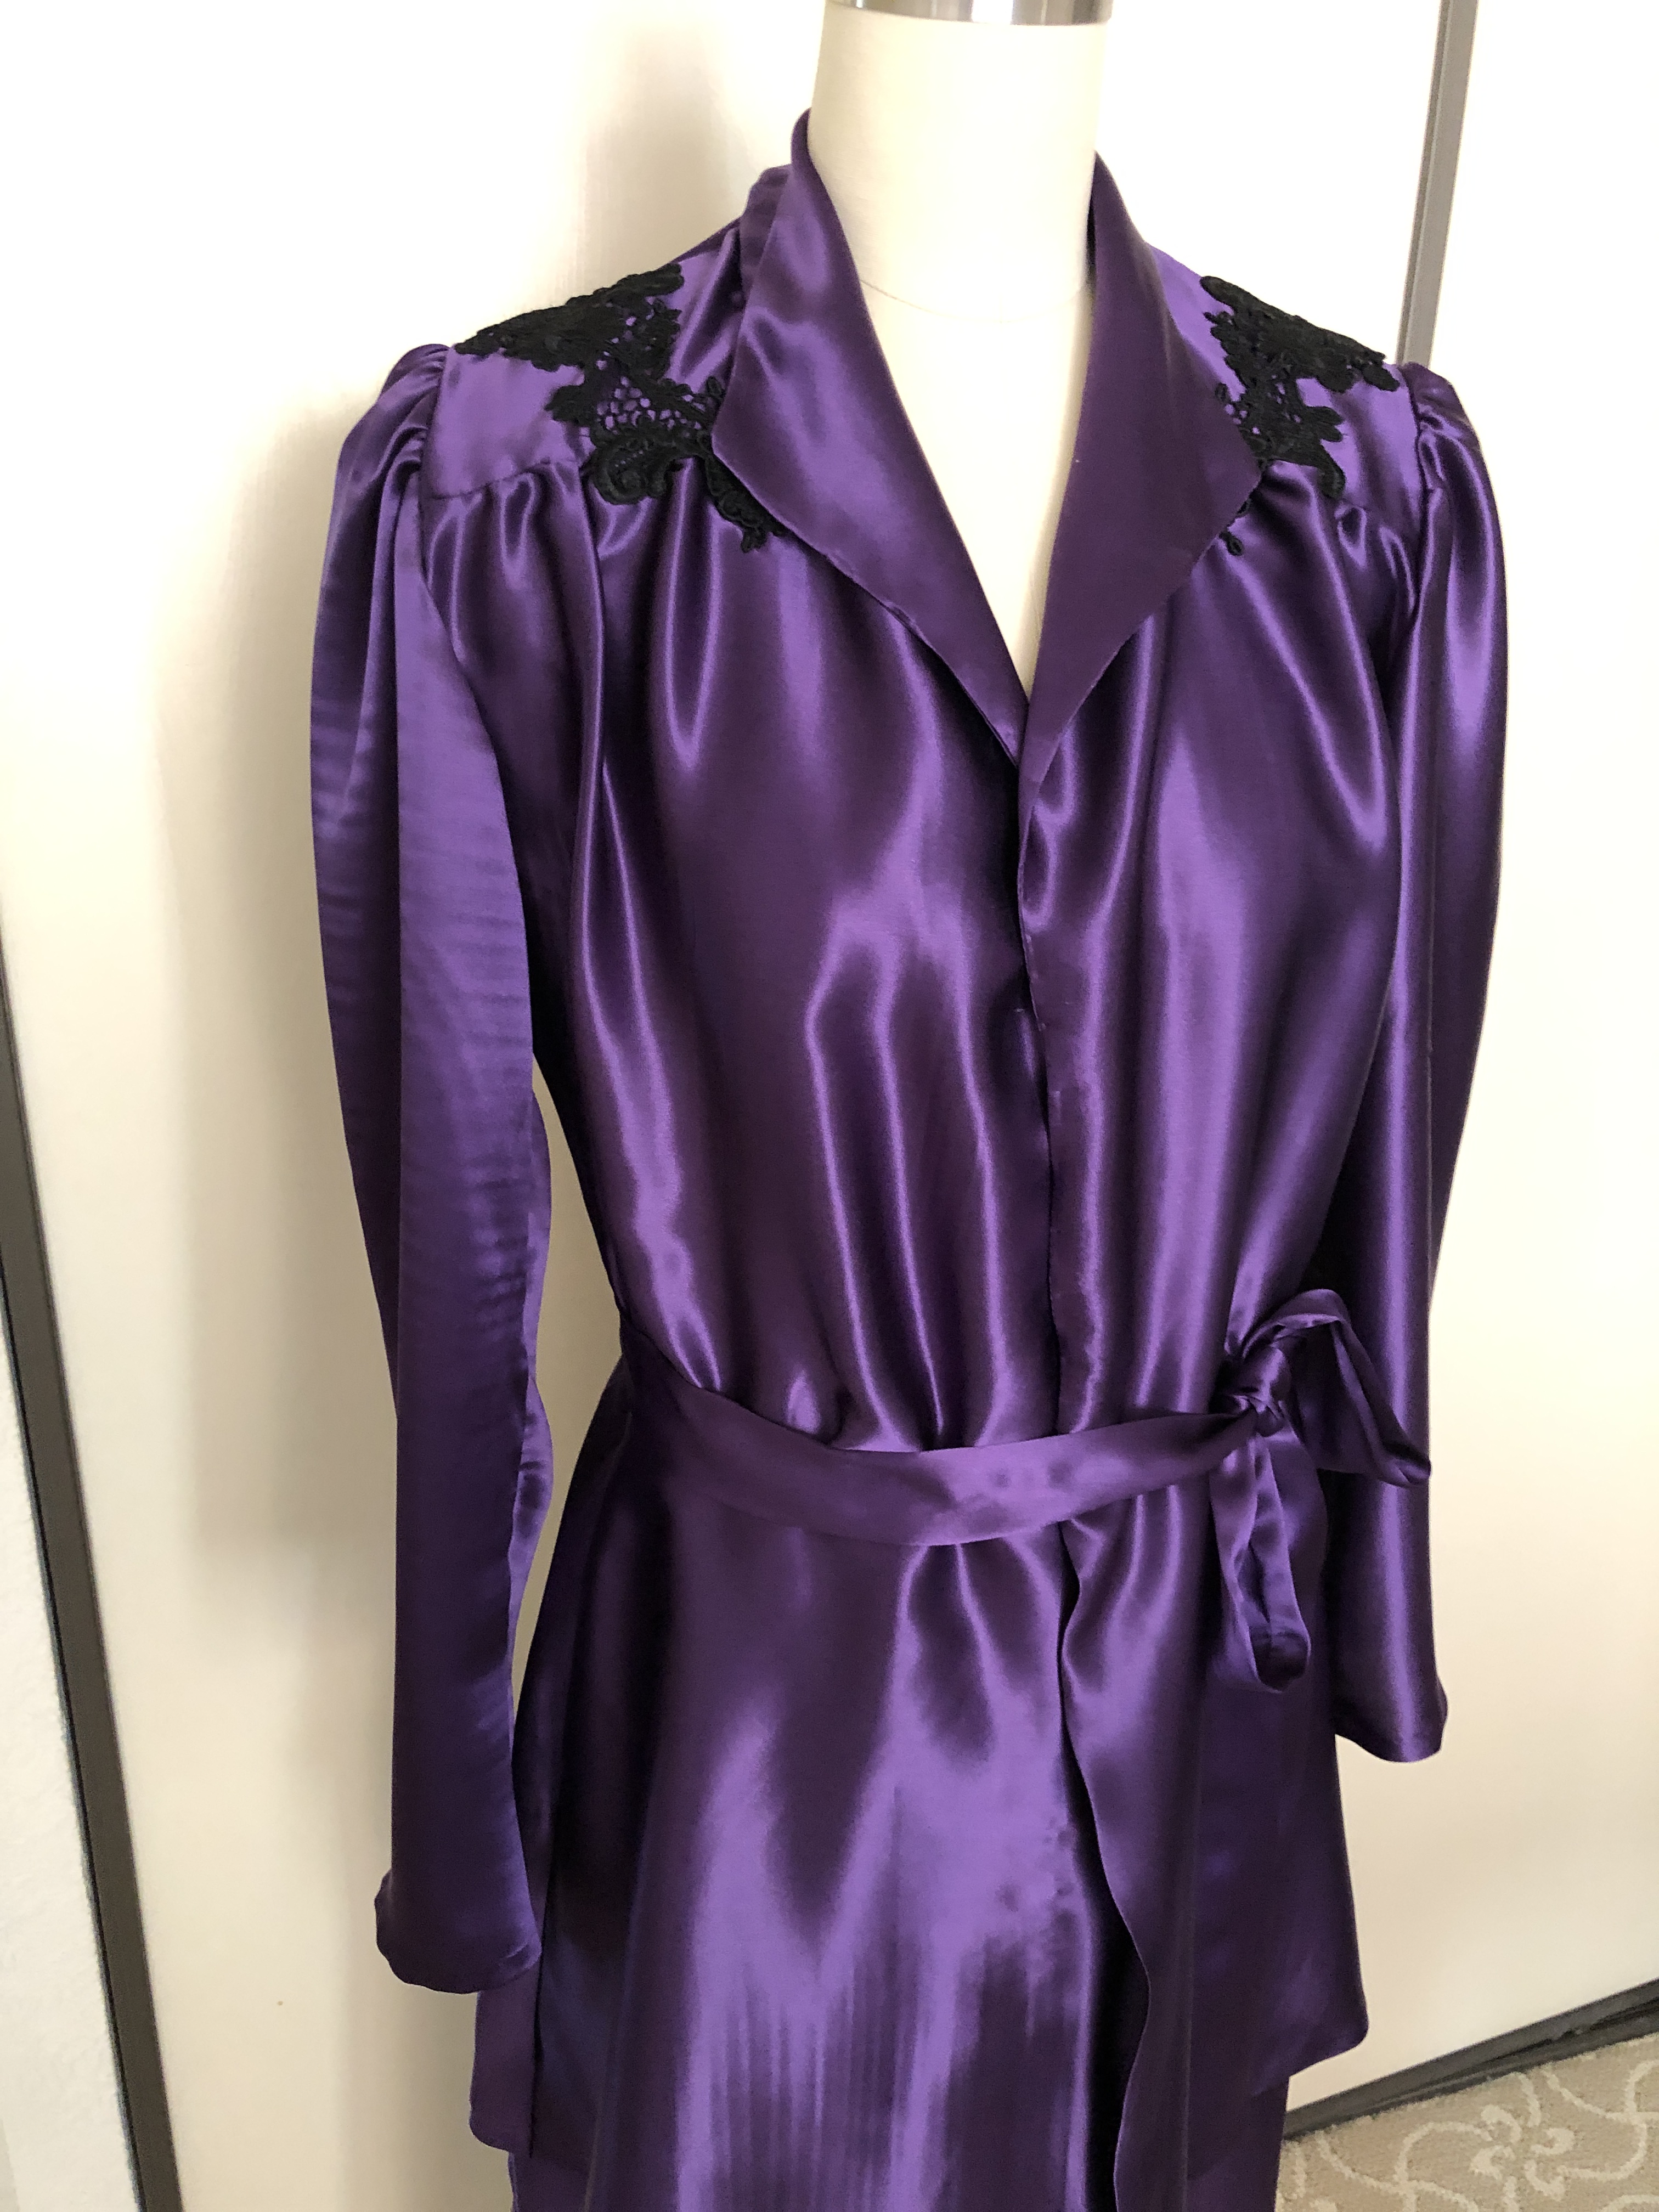
I used the Wearing History 1930s day or evening blouse for the top. (I previously used the short sleeve version of the pattern for the my floral blouse). For the bottoms I used the Gertie Harlow Pajamas pattern.

IMG_4658

To make the Wearing History pattern suitable for PJs you’ll want to cut a larger size so that it is loose. I also cut the bottom of the sleeves a little wider. (In the original you have tapered sleeves and buttons at the cuffs and I didn’t want that for PJs). I didn’t have any buttons that were right so I used snap closures. (In the original pattern the front closes with a placket and hooks and eyes, so you’ll want to add a little extra fabric for the overlap if you use buttons or snaps). I also added some black lace appliqués to the shoulders.

IMG_4589

I purchased 4 yards of 53″ wide purple silk satin and had enough left over to cut out a camisole and still have a large remnant piece. I bought the satin on eBay but the last time I checked the seller seems to not be around anymore.

I wore black bedroom slippers with a big fuzzy pompom for a fun touch. IMG_4695

This was a fun project to round out 2020. It was nice to have something that was both glamorous and comfortable!

An 18th Century Weekend at Wagner House

This past September there was an 18th century themed weekend at Wagner House (Lakewold Gardens) in Lakewood, Washington, hosted by Vanessa of @pinksewing. The weekend consisted of a picnic and a dinner, plus a day of workshops. Jenny of Jennylafleur taught a historical hair class and Denise of Romantic Recollections taught fly fringe. Additionally, photoshoots were provided by Gloria and Mike of In the Long Run Designs and there were trunk shows from Redthreaded and Dames a la Mode.

Here is a photo of the attendees of the picnic, taken by In the Long Run Designs.wagner-house_48828852158_o

And the following are the beautifully attired dinner guests, photo also by In the Long Run Designs.48844032341_9d21e5cf42_o.jpg

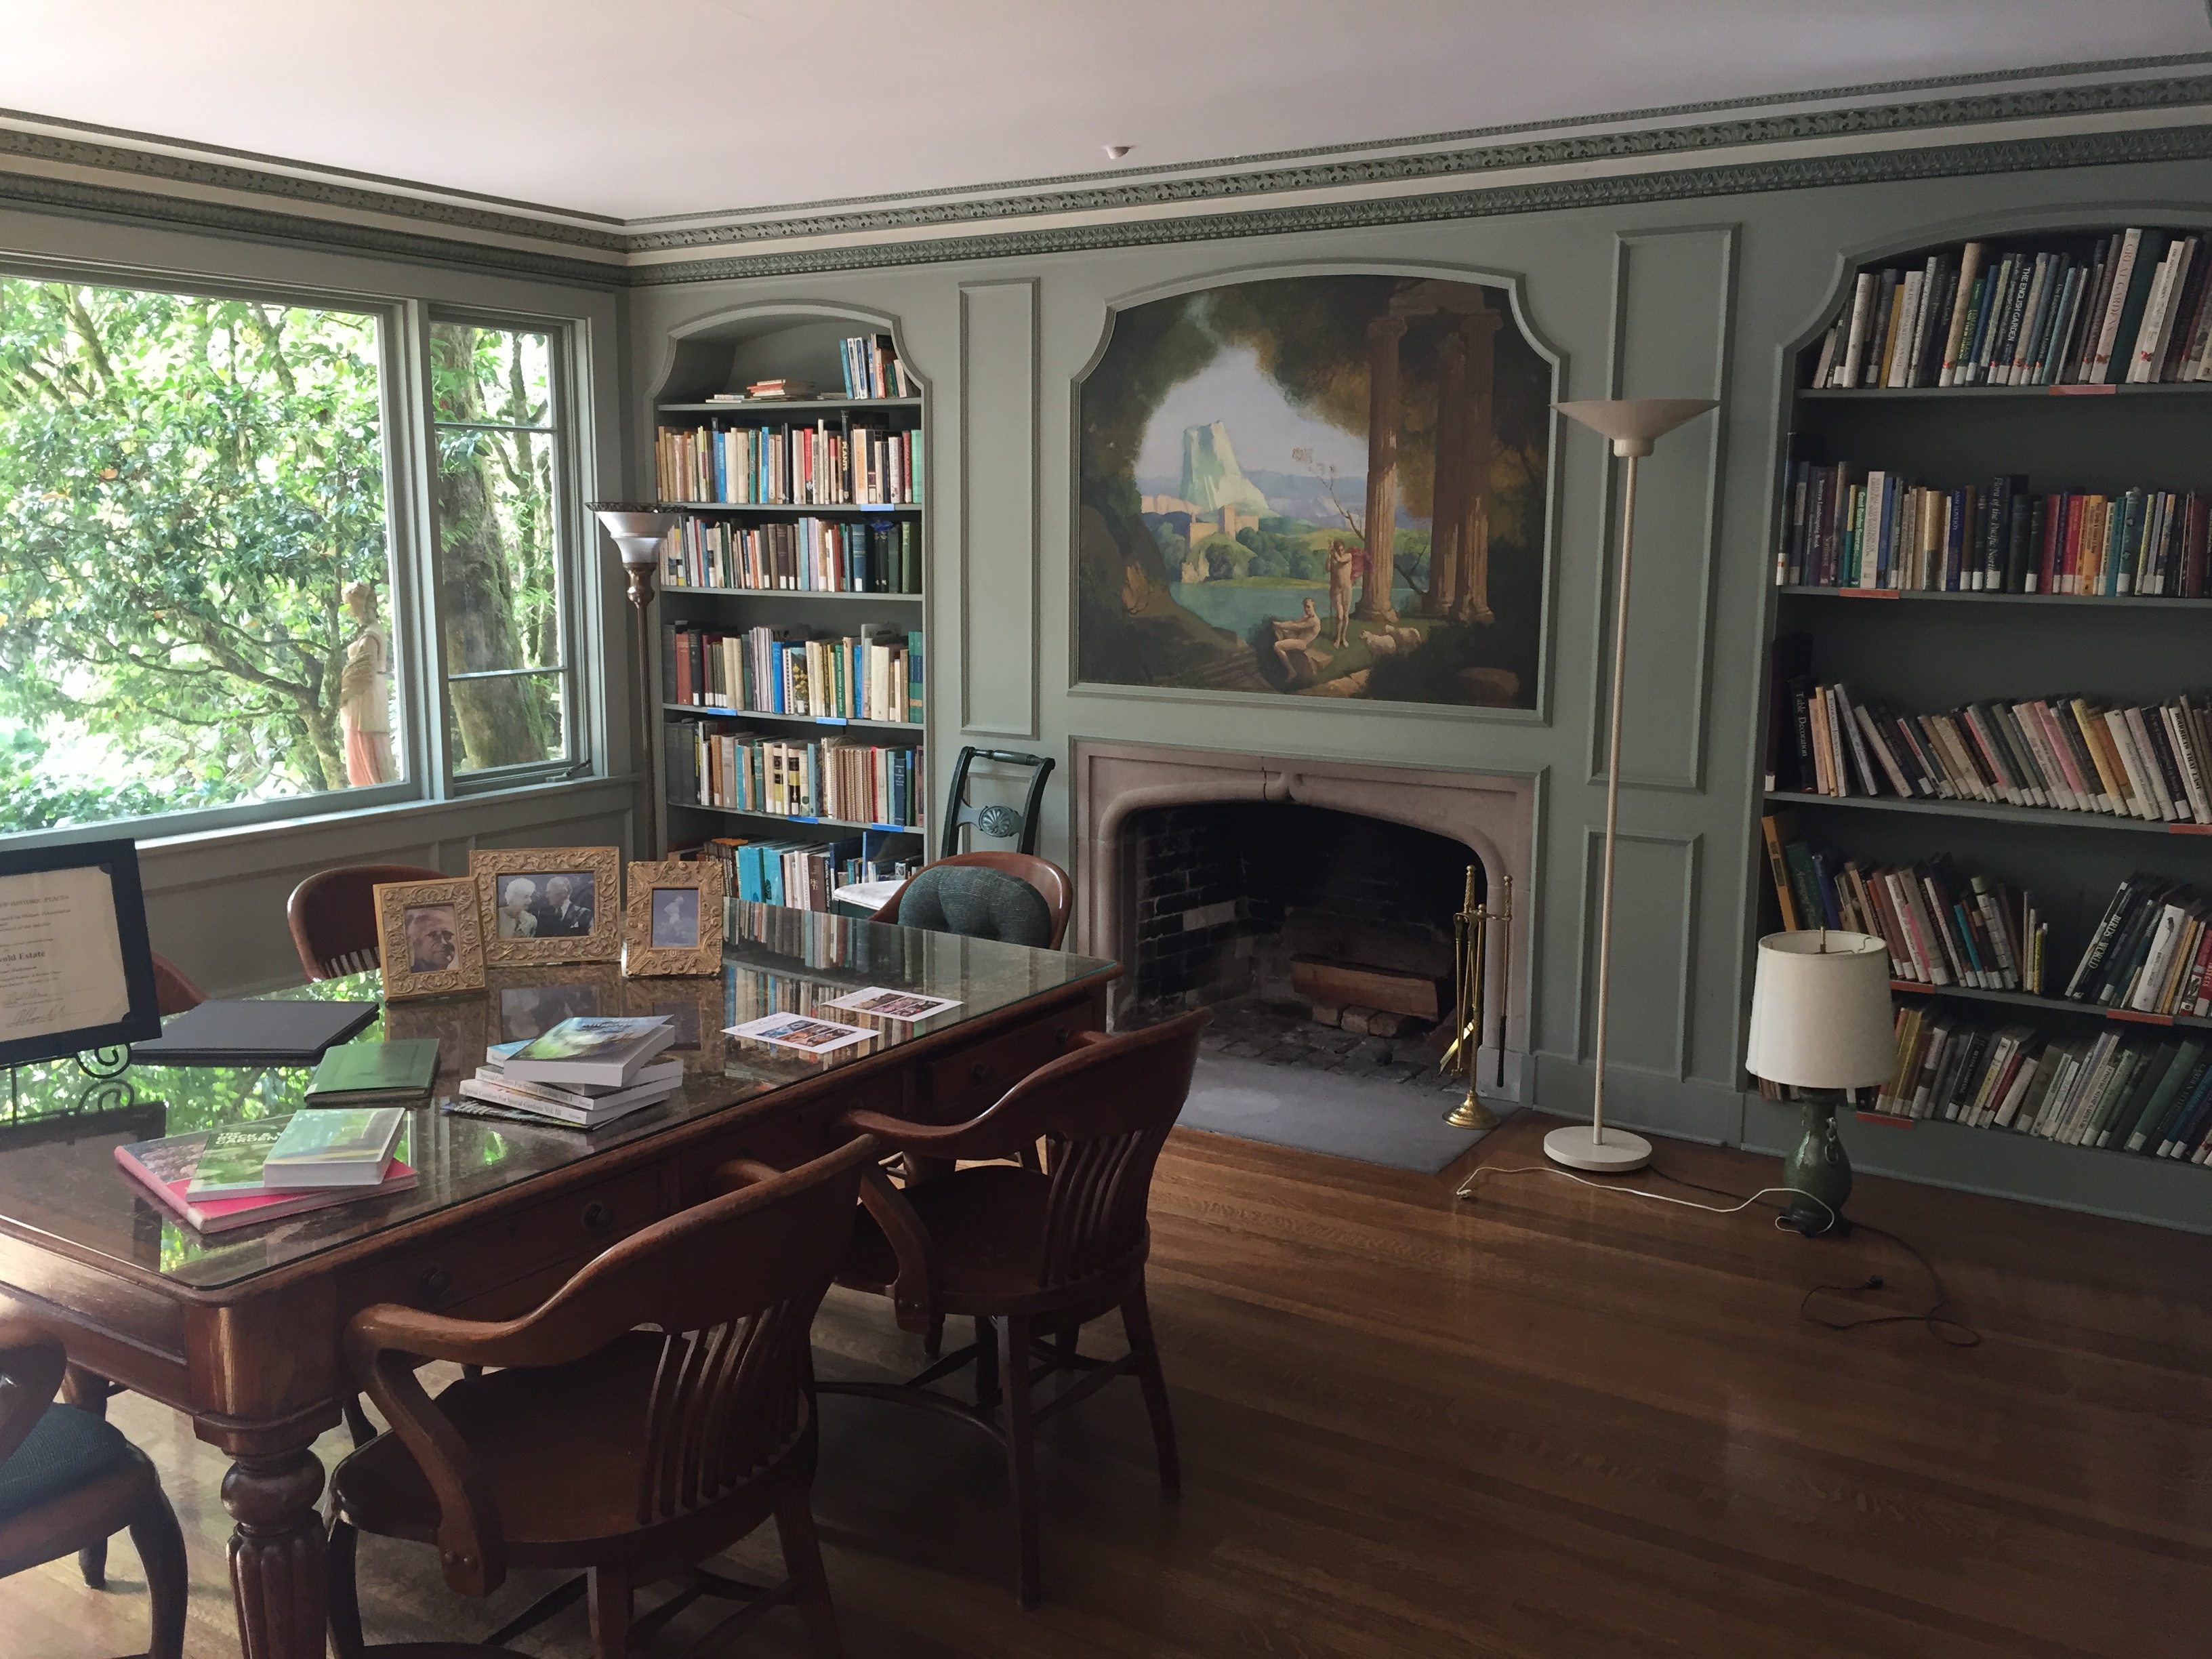
Wagner House is not huge but very elegant. The rooms of the house have been converted to conference/meeting rooms. Downstairs there’s a dining room, solarium, bathroom, marbled foyer, library, and kitchen. We were not allowed upstairs but could take photos at the bottom of the stairs during dinner. In my opinion though, my favorite parts were the gardens and the beautiful woods surrounding the property! IMG_2735IMG_2731IMG_2717

I am in love with this library!IMG_2740IMG_2737IMG_2742IMG_2743

Wagner House is not set up for overnight stays so most of us stayed in a nearby hotel or Airbnb and drove to Lakewold Gardens for the events. Some guests were local to Washington state.

In the first group photo I am wearing my 18th century shepherdess costume, and you can read more about it in my previous post.(Photo by In the Long Run Designs).48867872061_9edf6e25a0_o

In the second group photo I am wearing a mauve silk Italian gown that I previously wore to the Casanova exhibit at the Legion of Honor, but added additional trim to for this event. (Photo by In the Long Run Designs).wagner-house_48829563677_o

I normally wear this dress with a large split bum pad, but it would have taken up half the space in my suitcase, so I opted for a smaller half-moon bum pad and a petticoat. More petticoats would have created a fluffier look, but sometimes we have to make allowances for travel!

IMG_2926IMG_2935

And here are photos of some of the beautiful guests! I enjoyed seeing old friends and making new ones.

Here is Beth in her beautiful candy stripes.IMG_2922

Ginger is so fluffy!IMG_2934

Laina and Cathyn made a striking couple.IMG_2952

The colors that Denise and her husband wore were luminous in person.IMG_2951

Lindsey looked so pretty in pink, and I loved her hair!IMG_2946

Sacque gowns are fantastic from the back!IMG_2944

A shot of Ginger from the picnic.IMG_2904IMG_2801

Taylor and Jenny in stripes during the daytime event.IMG_2796

Guests were milling about before dinner.IMG_2966IMG_2965 2

Dinner was delightful! Vanessa took care of every detail, including limiting the number of seats at each table to fit all our giant dresses. There was also a pianist and bartender! 😉  I’m afraid my camera wasn’t good enough to do the food justice under the lighting conditions, so I’ll just provide the menu here so I can reminisce fondly:

Appetizers:
Bacon Wrapped Chili Chicken Bites
Cranberry Brie Bites
Herbed Mushroom Puffs

Dinner:
Mixed Greens Salad w/Apples, Goat Cheese, w/Balsamic Viniagrette
Tuscan Chicken
Beef Bourguignon
Garlic Parmesan Pasta
Garlic Mashed Potatoes
Roasted Herb Zucchini
Foccacia Bread

Dessert:
Rose & Lemon Macarons
Black Forest Trifles
Vanilla Cream Puffs

As a parting gift we all received an engraved fan as a memento of the weekend, as well as a champagne and macarons enamel pin by Aimee Steinberger.

IMG_2993.JPG

Thank you Vanessa for a magical weekend!48844032341_9d21e5cf42_o

1830s Romantic Era Plaid Silk Day Dress (Plus Tips on How to Put Together Your Own 1830s Outfit)

As promised in my last post about the Gigot Girl Gang visiting the Dickens Fair, here are construction details about my 1830s Romantic Era day dress, made out of a plaid silk taffeta. Undergarments and accessories and the various vendors I used are also detailed in this post. The sections are: materials, pattern, construction, belt, bonnet, pelerine, undergarments, hair, accessories, project costs, and vendor list.IMG_4468.JPGIMG_4506.JPGIMG_4598.JPGIMG_4609.JPG

MATERIALS

My dress is made of a plaid silk taffeta, with the bodice lined in polished cotton, with an interlining of stiff cotton organdy. (In retrospect the organdy was a little too stiff and I’d use something softer next time). The skirt is unlined. The sleeves are lined with polished cotton as well. Because the sleeves are so large and so much material is pleated into the armscye, I think if I were to make this dress again I would not line the sleeves to reduce bulk. The silk from Fabric Mart Fabrics was advertised as “navy and yellow” but ended up being closer to purple and even more gorgeous than I expected. It changed colors depending on the light.IMG_3441.JPG

If silk is not in your budget, many beautiful gowns from this period were made in cotton prints. In my experience, silk shantung in dark colors or busy prints will hide the slubs pretty well if you can’t afford smooth taffeta. (Silk shantung has fewer slubs than dupioni).

PATTERN

I used the Truly Victorian TV455 1830s Romantic Era pattern to make my dress. I previously used this pattern to make an evening version of the 1830s dress.  I find TV patterns fit very well as long as you follow their instructions to pick the right bodice pieces for your measurements. I have found though, that many TV patterns run long in the bodice (even though I am not shortwaisted), so I recommend trimming any excess off the bottom to avoid having the waist of your skirt sit too low and look unflattering. Definitely make a mockup to ensure a good fit. Below is a photo of my final pattern overlaid on the original pattern. As you can see, I had to shorten the bodice quite a lot at the bottom. I also raised the neckline a little (personal preference) and took in the shoulders because mine are narrow.IMG_3427.JPG

One other change I made was that instead of using the included skirt pattern I just used 3 panels of my fabric. That way I could have seams on each side (where I added pockets), and a seam down the back for an opening.

The TV pattern includes sleeve patterns for day and evening looks. (I have not tried it myself, but Black Snail makes an 1830s evening dress pattern as well).

CONSTRUCTION

I’m not going to lie, pattern-matching a non-symmetrical plaid is not easy. But it makes a really beautiful effect in the end. Look at the front and back of the bodice!IMG_4601.JPG

(I should have taken photos before wearing it and getting it all wrinkled!)IMG_4606

I normally hate doing piping, but it was really part of the look for this era, so I piped the front center seam, the neckline, the armscyes, the shoulders, the sleeves, the side seams, and the cuffs.

Do yourself a favor and buy a piping foot. I did not have a piping or zipper foot that fit my antique sewing machine, and it was um, difficult.

The skirt is knife-pleated and sewn directly to the bodice bottom. I hid a pocket in each side seam of the skirt, and the back opening has a placket. I could have done cartridge-pleating for the skirt but decided it was too much hand sewing to handle this time. (If you want to do cartridge pleating, using gingham ribbon across the top makes an easy guide, as described in my post about how I made my 1840s dress). I increased the density of the pleats in the back of the skirt to subtly increase the “poof” in the back.

The hem is folded up, and up again, to make a deep facing for extra structure. Can you see where the tiny stitches are?IMG_4613.JPG

How about now? =)IMG_4616.JPG

The back of the dress closes with hooks and eyes. I use the kind meant for skirts for extra strength, instead of the tiny hooks and eyes.

I’m showing you a photo of the bodice in progress so you don’t repeat a mistake that I made.IMG_3568.JPG

Above is a photo of pattern pieces cut out. I had carefully pattern-matched everything so that the front, side, and back pieces would line up continuously like a barber pole. However, I forgot to take into account seam allowance! The photo below shows the pieces sewn together; whomp whomp. I had already flat-lined, pleated, and piped the front and back so I didn’t want to recut. IMG_3569.JPG

Matching plaids and pleats while taking into account curvature and sandwiching piping made me rethink the life choices that brought me to this point). Everything was done symmetrically so it still looks good enough for me, even though it’s not the way I envisioned.IMG_3570.JPG

I forgot to take a photo of the interior, but my silk is flatlined with my interlining (cotton organdy), and the polished cotton lining is sewn separately and whipstitched in. The boning is sewn to the seams of the lining. (I also used pre-cased plastic boning to save on time).   This is not the most historically accurate method, but made a clean interior and I didn’t have to do much hand-sewing to whip down raw edges.

BELT

The belt consist of a long piece of vintage ribbon, cut to my size and sealed at the ends with Fray Check, and a reproduction metal buckle. Some of the ladies in our group used antique buckles found on eBay, but reproductions are easily available. Mine is a gold oval one with bees purchased from Kansas Mercantile, which is also available from Ensembles of the Past on Etsy. The ribbon I used is a wide and thick rayon ribbon I bought from a vendor at Costume College. It was too wide but I folded one side down to fit.

BONNET

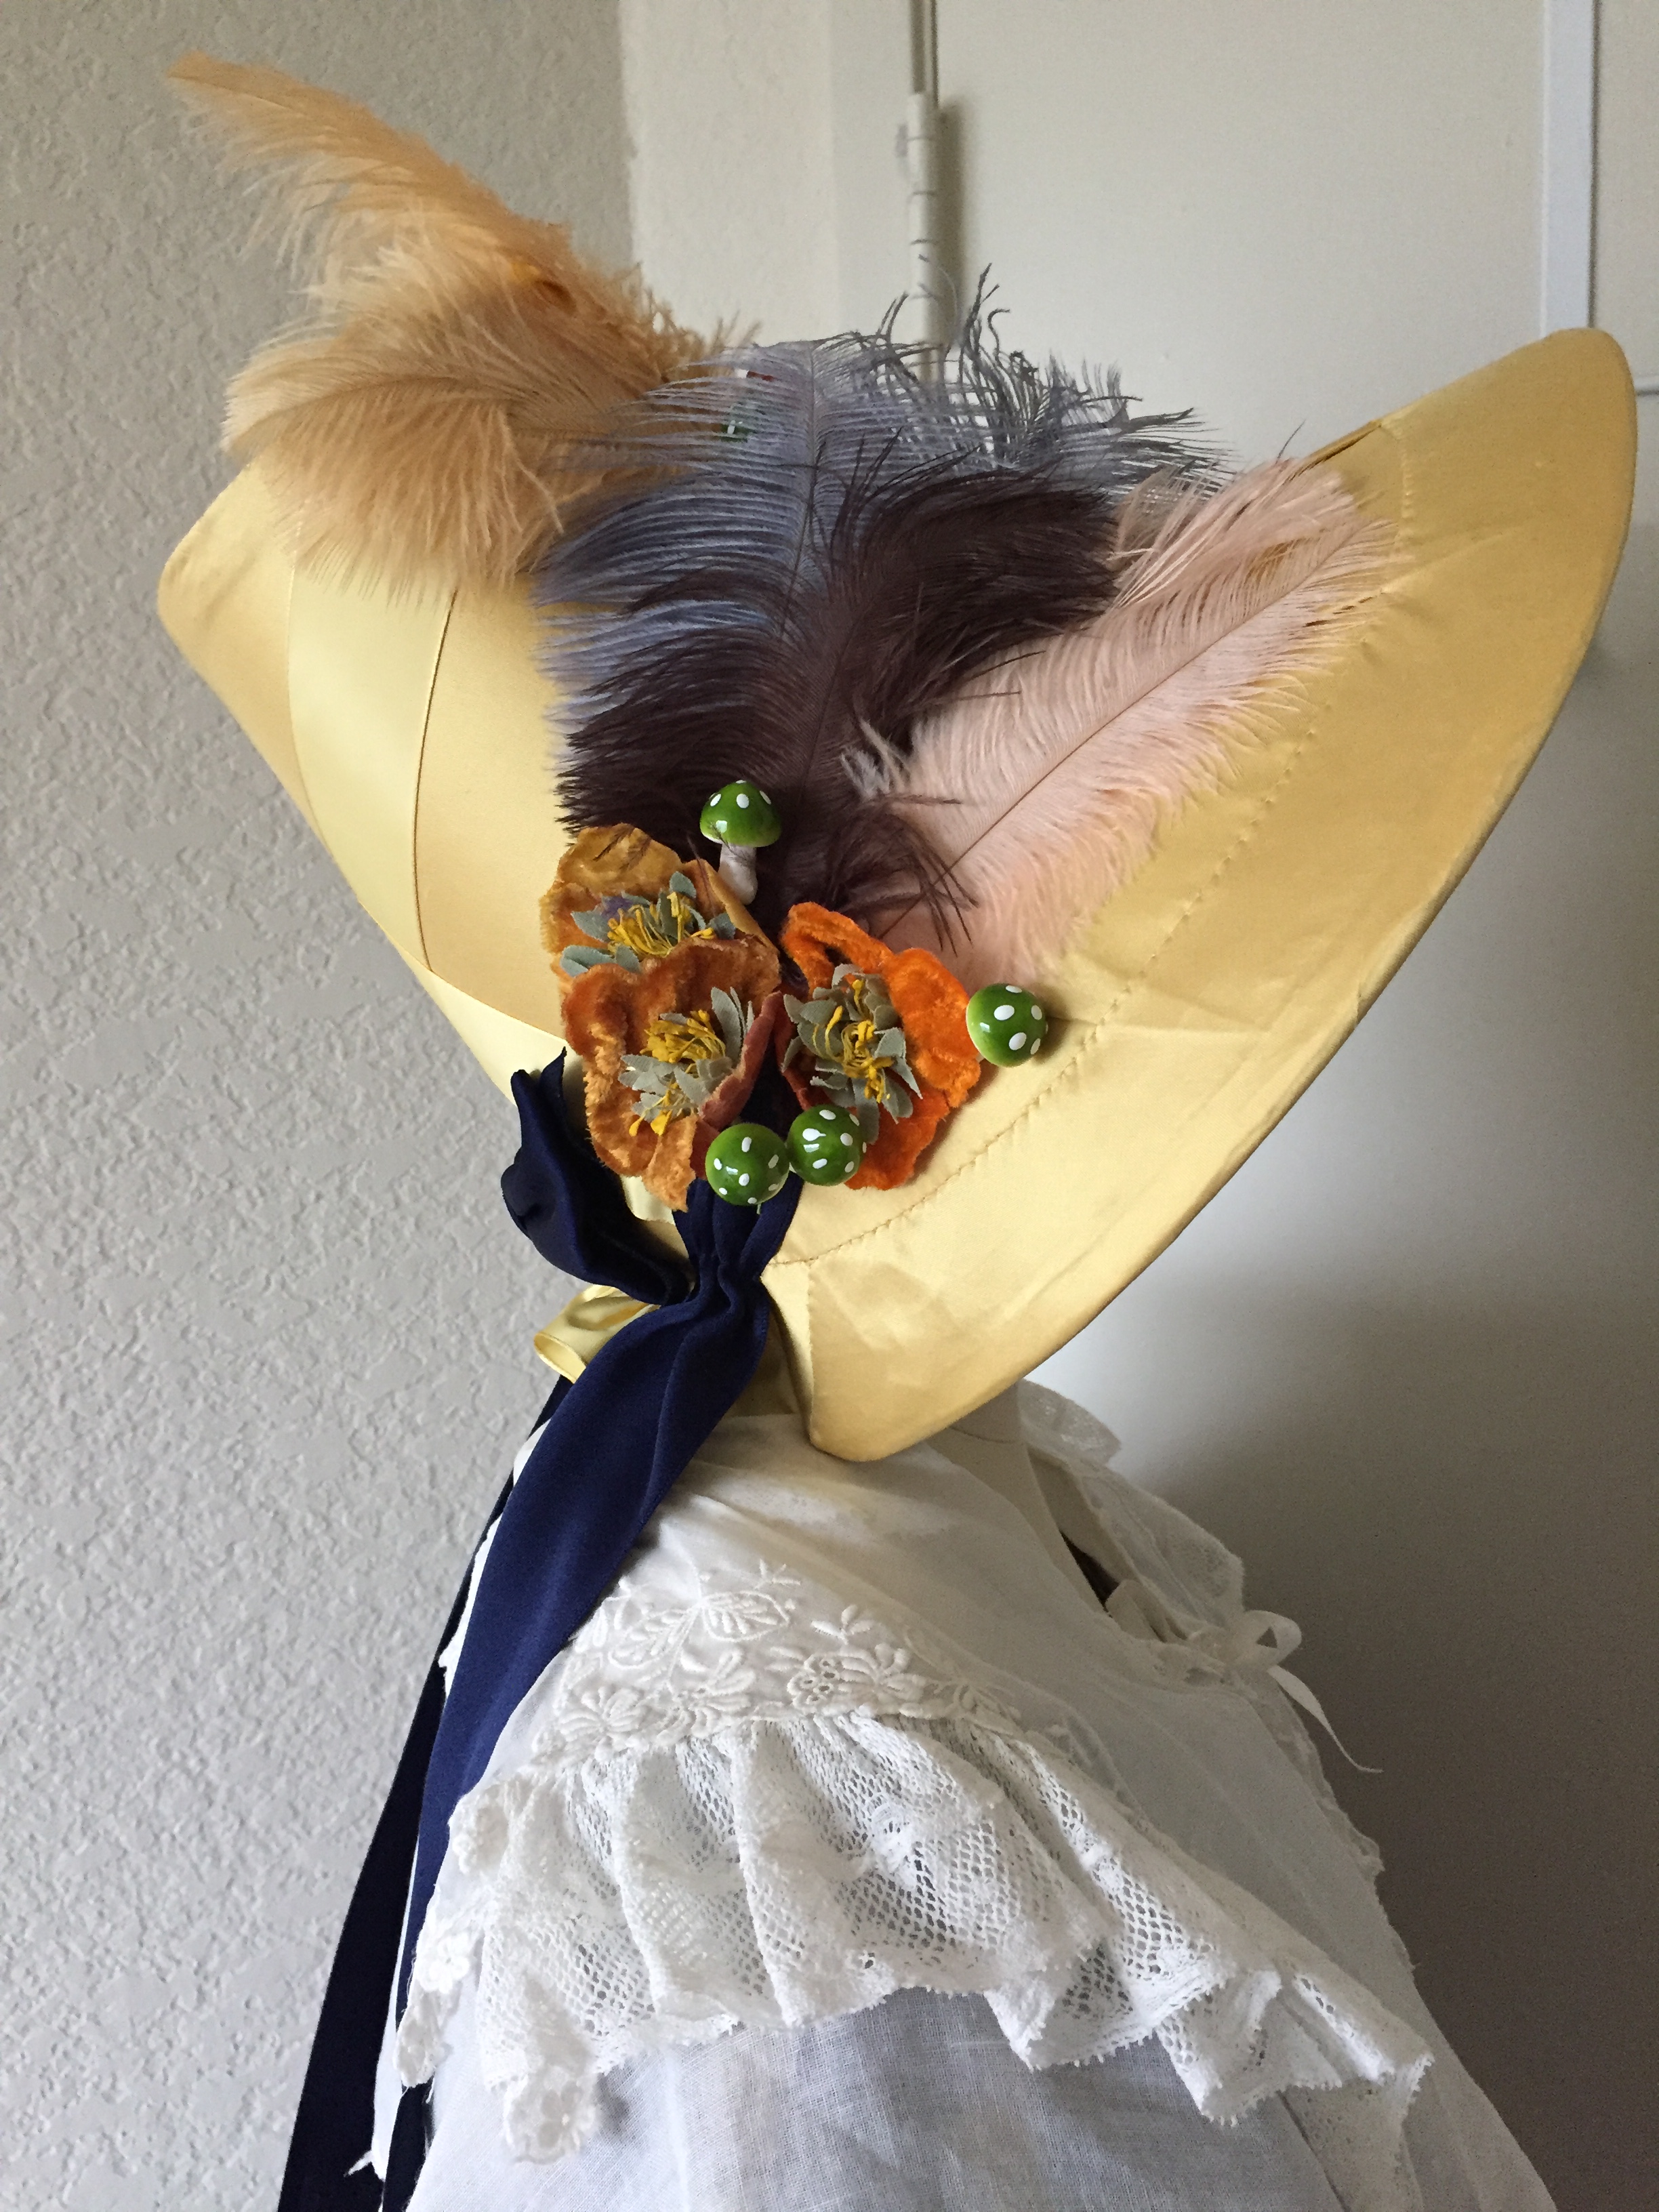
No respectable lady would go outdoors without a head covering, and the 1830s is a great period for putting a lot of outrageous thing onto your hat. Lynn McMasters and Black Snail both make Romantic bonnet patterns if you want to try your hand at millinery. I was recovering from an injury and could not hand-sew a buckram form when I put together my ensemble so I commissioned a bonnet from House of Loli on Etsy. I sent her some yellow and cream silk taffeta for the bonnet, and then added vintage flowers and mushrooms and feathers to to it.IMG_4629IMG_4630IMG_4635IMG_4626
PELERINE

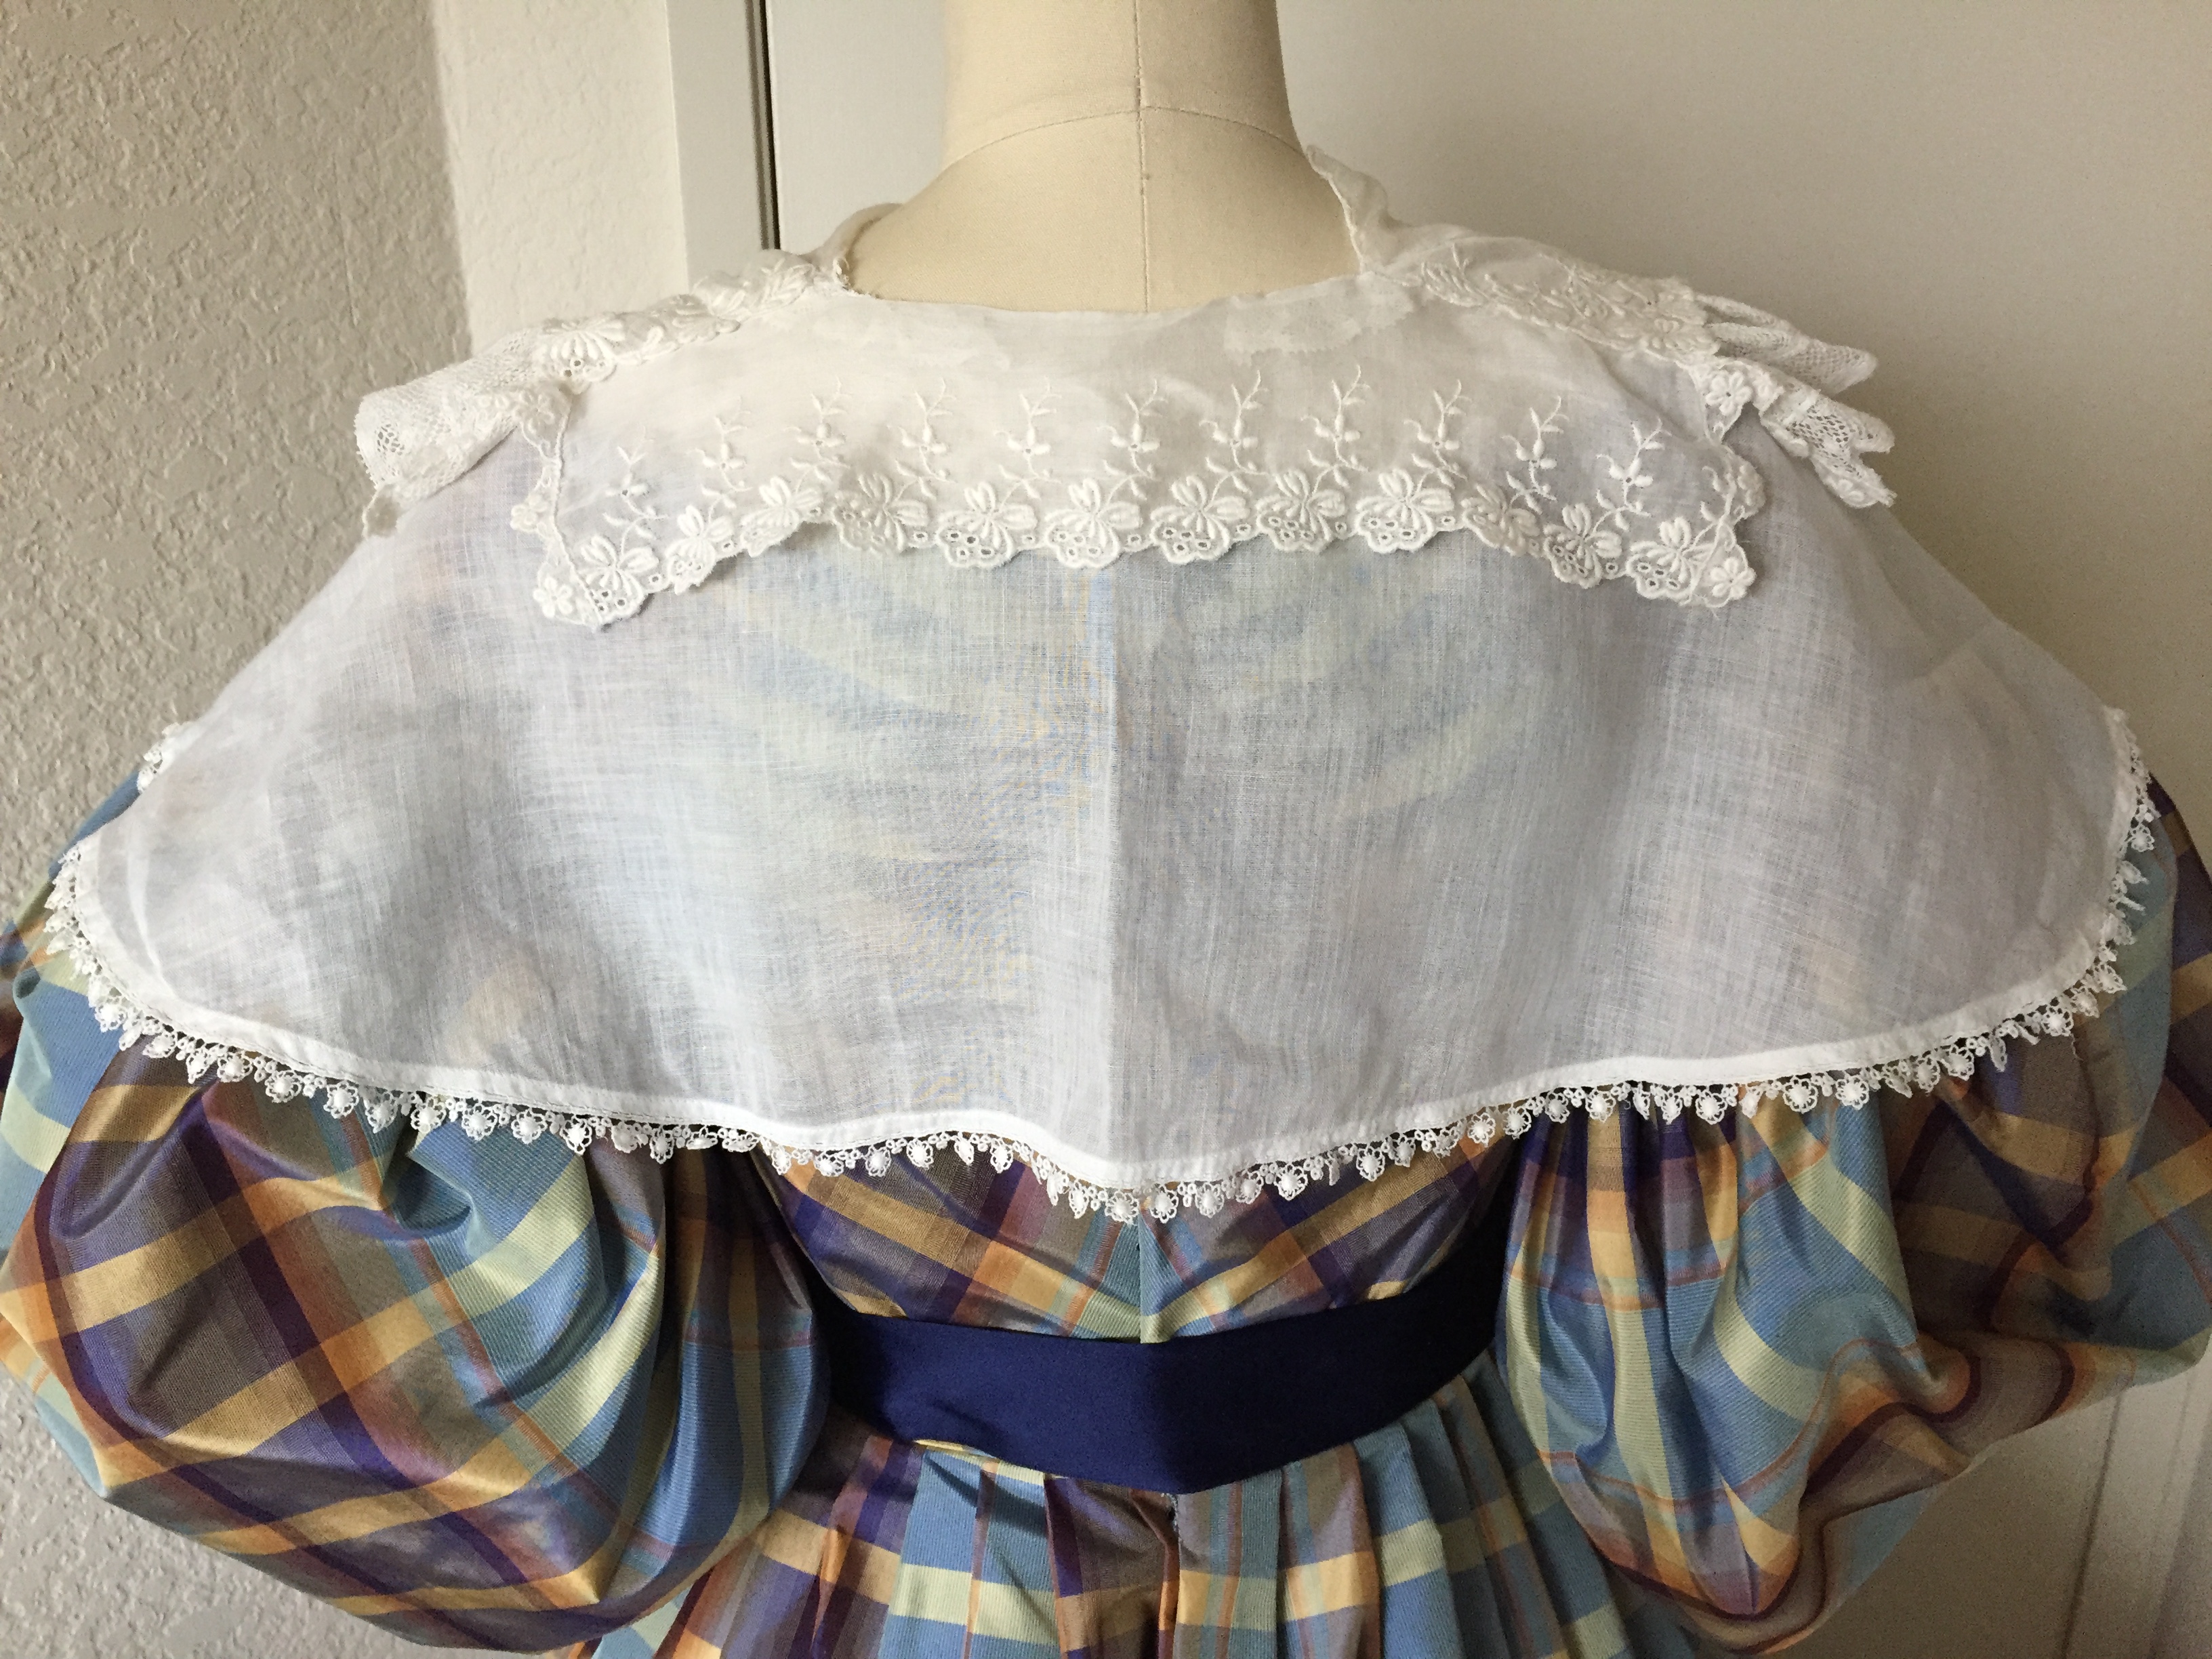
Period ensembles often include a little cape over the dress, either made of the same fabric as the gown, or a fine cotton. I made mine by assembling a few vintage lace collars together to make it look like one pelerine. If you look at my previous post of the Gigot Girl Gang you’ll see that there are lots of options to making one of your own style: small, big, transparent, or opaque. Mine closes with a little bit of silk ribbon. I think for future wearings I will use something heavier to weight it down, like a brooch, because my pelerine kept going askew.IMG_4623IMG_4624

UNDERGARMENTS

The undergarments needed for the whole ensemble are a chemise, stays, corded petticoat, tucked petticoat, and sleeve plumpers. IMG_4303.JPG

I’m too lazy to make a new chemise for each era, so I have a drawstring one that allows me to change the neckline for each gown. I have details on how I made by hacking an 18th century American Duchess pattern in a previous post.

I don’t like making any sort of corsetry, so I purchased the Charlotte stays from Redthreaded. They are very soft and comfortable because they rely on cording and a curved busk instead of boning. If you are on a budget or want more support using steel, Redthreaded also sells ready-made 1830s stays. My stays from the Atelier line are an investment, but they truly are a work of art, and I plan to use them for 1820s and 1840s garments as well.IMG_4444.JPG

Screen Shot 2018-12-23 at 2.06.12 PM

Photo by Redthreaded

If you want to make your own stays, Black Snail has a pattern for the stays (which also includes a pattern for a chemise, corded petticoat, and plumpers).

I purchased my corded petticoat from Hand Stitches in Time during a sale, but even at full price they would be worth it to avoid what is to me a very tedious task of sewing in all those cording channels! Mine is the 60 row corded petticoat. However, if you want to make your own petticoat I have heard great things about the corded petticoat workbook from Historical Sewing.IMG_4299.JPG

Over the corded petticoat I wore a tucked petticoat that I made out of cotton organdy. It is very simple to make. Take 2 long rectangles of fabric and sew into a tube. Hem the bottom. Mark parallel lines around one end of the tube and make as many tucks as you wish until the petticoat is the length you want. Pleat the top into a waistband. To determine how long of a rectangle you should make, determine the length you want your petticoat to be (waist to mid-calf) and add 1 inch for each tuck you want to make.IMG_4301.JPG

You will want to dip both petticoats in starch, let them air-dry, and iron them for maximum poof! You know they’re ready when they can stand up by themselves like petticoat ghosts. I find it handy to let them dry upside-down in the shower using skirt hangers.IMG_4226.JPG

The last bit of undergarments is the sleeve plumpers. The last time I made an 1830s dress I had to figure out the sleeve supports myself, and they ended up being a little odd. Abby of American Duchess has a plumper pattern that is much easier to use, and I highly recommend it. She has a PDF pattern and Youtube video that shows how they are made. I did a little experiment when making mine.IMG_E4230

The one on the left (above) is stuffed with Polyfil. The one on the right is stuffed with shredded memory foam. The one on the right is a bit lumpier, but compresses more easily for stuffing into the armhole in the dress. (A historically correct method would be to use feathers or down). I could have made my plumpers even bigger but I was afraid of not being able to get them through the armhole. IMG_E4245

As described in Abby’s video, there are ties to tie them to the dress so they don’t move around. In some museum photos you’ll see the plumpers tied to the stays (I believe mainly to show them off), but it is much easier to put the plumpers into the dress and then put the dress on, than to try to get the dress over the pumpers while you’re wearing them!

HAIR

My hairstyle consists of mainly false hair. I have a large braided hair bun on top of my head and 2 curled hair clips in the front, based on the style in this 1835 portrait by August Canzi.


The bun is easy to make. Just take false braiding hair (I use the Sassy brand from Sally Beauty Supply), make a thick braid, and wrap it around a hair donut.IMG_4640.JPG

The front clips are made from 2 “side swept bang clips” you can buy on Amazon or eBay. Just make sure you get “side swept” bangs instead of regular ones because they are longer. Wrap the hair in curlers and dip into boiling water for 10 seconds to set the curls. Put on a towel to dry and take the curlers out when they are completely dry.IMG_4378.JPG
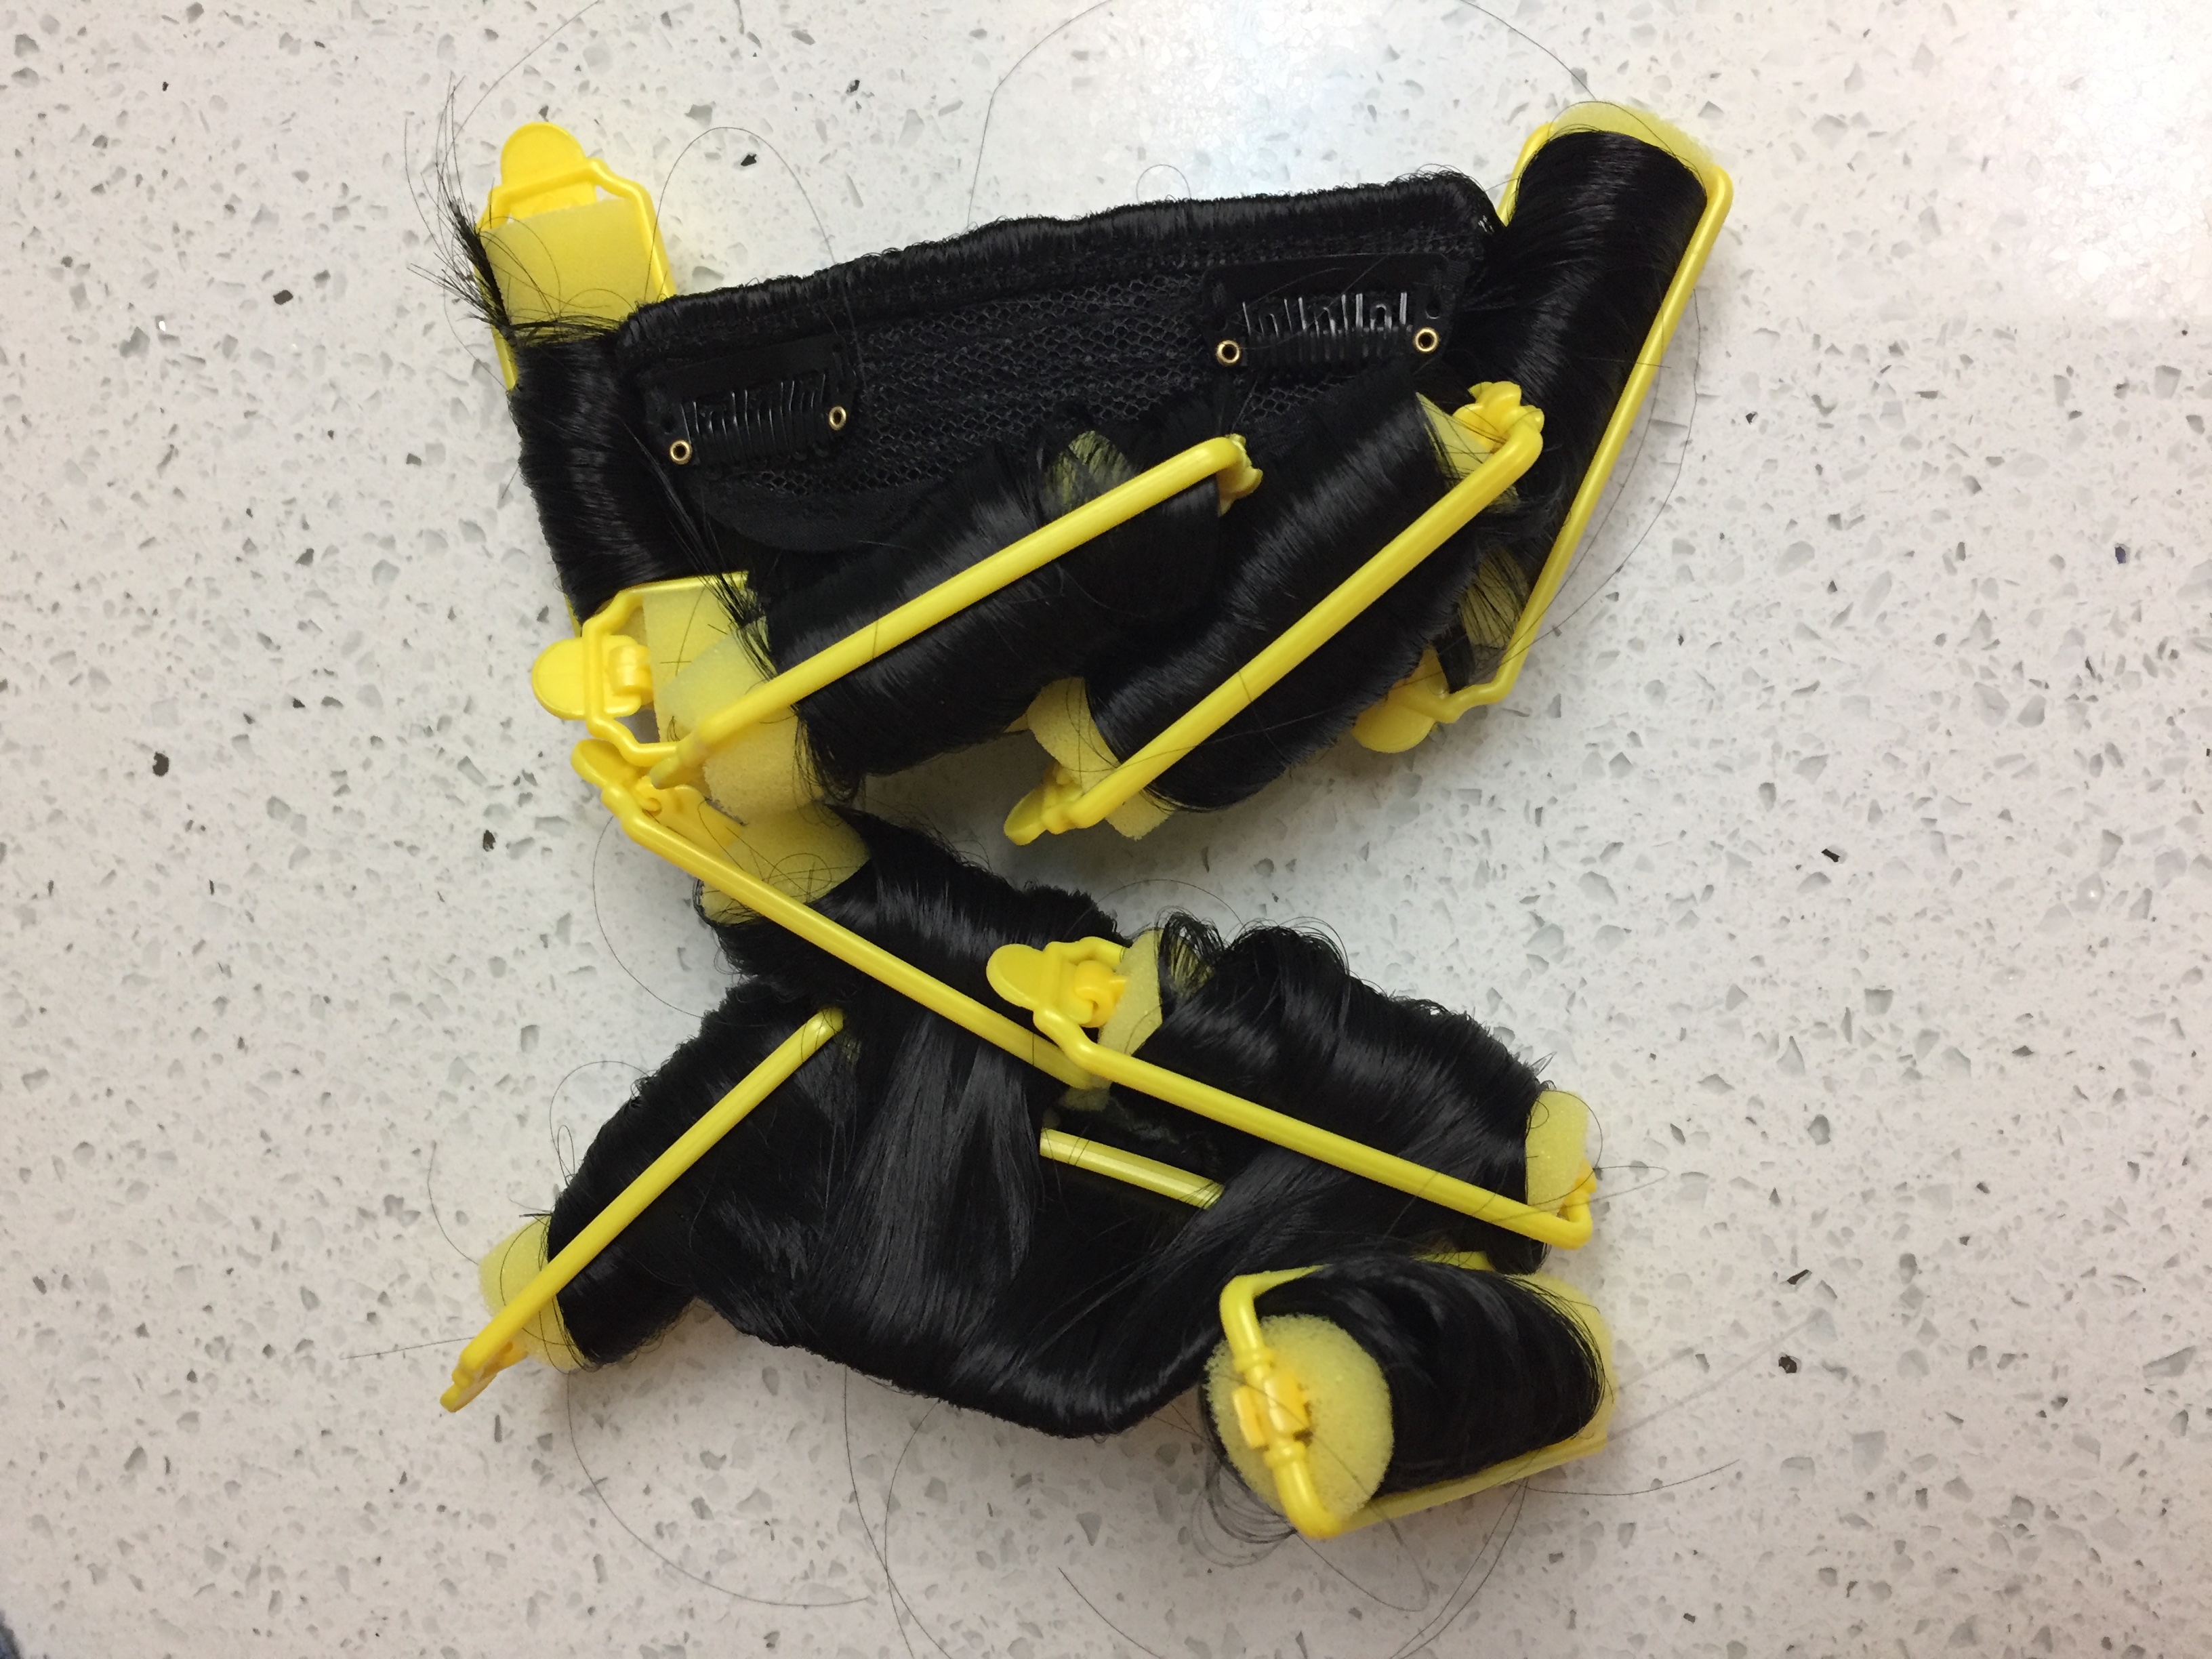
The bun is bobby-pinned onto my head while the bangs have wig clips already pre-attached.

If you have long hair, make 2 braids that cross over the top of your head and pin them down to act as anchors for the bun. I have shorter hair cut into layers that makes braiding difficult, so I made a small bun as an anchor, and pomaded all the shorter hairs into place.

The 1830s is full of elaborate hairstyles involving Apollo knots, fancy loops and braids, flowers, etc. You might have fun exploring those for evening ensembles, but if you want simple and easy the bun and bang clips are the fastest way to get the look.

OTHER ACCESSORIES

Besides the belt and bonnet, my other accessories were a round vintage fur muff, grape cluster earrings by The Lady Detalle, and a brooch from American Duchess, given to members of our Gigot Girl Gang. My shoes were the Gettysburg from American Duchess. (I added insoles and a non-slip adhesive pad to the bottom of the shoes). I also had silk stockings and a pair of silk gloves from the 1930s.


IMG_7106IMG_4344.JPG

PROJECT COSTS

If you are starting from scratch, and especially if you plan to outsource all your undergarments, having a full 1830s garment can be quite the investment. However, you don’t have to have 1830s stays. Some of the other ladies cheat with Victorian corsets from later eras. Long-line Regency stays would work as well. I use a chemise from another time period. You can fake having a corded petticoat by using enough starched petticoats or by putting horsehair crinoline into your skirt. You might be able to retrim a bonnet you already have. Instead of a perlerine maybe you have a nice shawl. You probably have some flat shoes that could pass. (Square-toed modern ballet flats are perfectly acceptable for 1830s; just add some ribbon ties). The muff and jewelry are optional. If this isn’t your first costume rodeo and you already have a lot of similar items, don’t feel like you need a whole new set of undergarments. Since it’s possible to “make do,” I’m giving the cost of just the dress. (I don’t want you to have sticker shock at the entire ensemble that I have been collecting for a while, and be discouraged. Repeat after me: You don’t need all new stuff to have a good time).

  • 8 yards silk taffeta: $84.99 + $7.50 shipping from Fabric Mart Fabrics. (Make sure you get on their mailing list to be notified of their crazy sales. I am able to afford silk dresses because I wait until silk drops to ~$10/yard).
  • TV pattern: $0 (used already for a prior 1830s dress)
  • Navy thread: $1.80 from Fabric Mart Fabrics
  • Belt buckle: $13.59 including shipping from Kansas Mercantile
  • Navy ribbon spool: ~$4 from Costume College vendor (with plenty left over)
  • 3 yards polished cotton for bodice and sleeve lining: ~$5 from garage sale
  • 1 yard cotton organdy for bodice interlining: ~$5
  • Hooks and eyes, other thread, cord, etc. from stash: $5

Total for dress: $126.88 (not awful for a huge silk dress, with leftover silk and ribbon for other projects!)

I made the plumpers from materials left over from other projects, so it was “free.” The organdy for making the tucked petticoat is about $5/yard from Vogue Fabrics. (Depending on your size you will probably use 3-4 yards).

Other items you may already have: stays, chemise, petticoats, bonnet, shoes, stockings, gloves, jewelry. Be creative; I reuse my accessories and undergarments for various outfits and eras all the time!

VENDORS

Happy sewing!QGIN4307

Gigot Girl Gang Invades Dickens Fair!

I go to the San Francisco Dickens Christmas Fair every year, but this year was especially fun because a large contingent of us went in 1830s ensembles. I’m amazed at how many beautiful and talented ladies joined in on the wackiness, and went all out with hair, bonnets, muffs, and other accessories with their big-sleeved gowns.QGIN4307

I took a quick snap in front of my house and later at Fair. My next post is going to discuss construction details, a materials list, show all the undergarments, explain the hair, and how to put together your own ensemble. For now, a few brief notes: my gown is sewn by my out of plaid silk taffeta. I am wearing Gettysburg side-lacing boots from American Duchess, earrings by The Lady Detalle, a bonnet by House of Loli that I trimmed, antique gloves, and a vintage muff. Underneath I have a linen chemise, corded stays by Redthreaded, a corded petticoat by Hand Stitches in Time, a tucked petticoat, sleeve plumpers, and stockings.

Enough chatting, you’re here to see pictures of everyone!

Nicole was beautiful in red and a sheer lace pelerine.IMG_4530

Christina had the most amazing pleated bodice hidden by her pelerine!IMG_4527

Abby was our Swedish head balls lady.

IMG_4533IMG_4538

Abby pretended to have beef with our Dane Elizabeth during the fashion contest, who had the most glorious hat.IMG_4476.JPG

Lauren was also part of the plaid contingent.IMG_4544IMG_4542IMG_4546

The American Duchess ladies made these lovely little ornaments engraved with “Gigot Girl Gang 2018” on the back and some of us wore them on our belts.IMG_4618IMG_4589

Kaila had a lovely tobacco-colored silk gown and pelerine, all hand-sewn. Her bonnet veil was just gorgeous! She won a prize in the fashion contest that we all attended as the “Luddite Fashion Society.” (Most of Dickens Fair is 1850s-1860s).IMG_4494IMG_4498

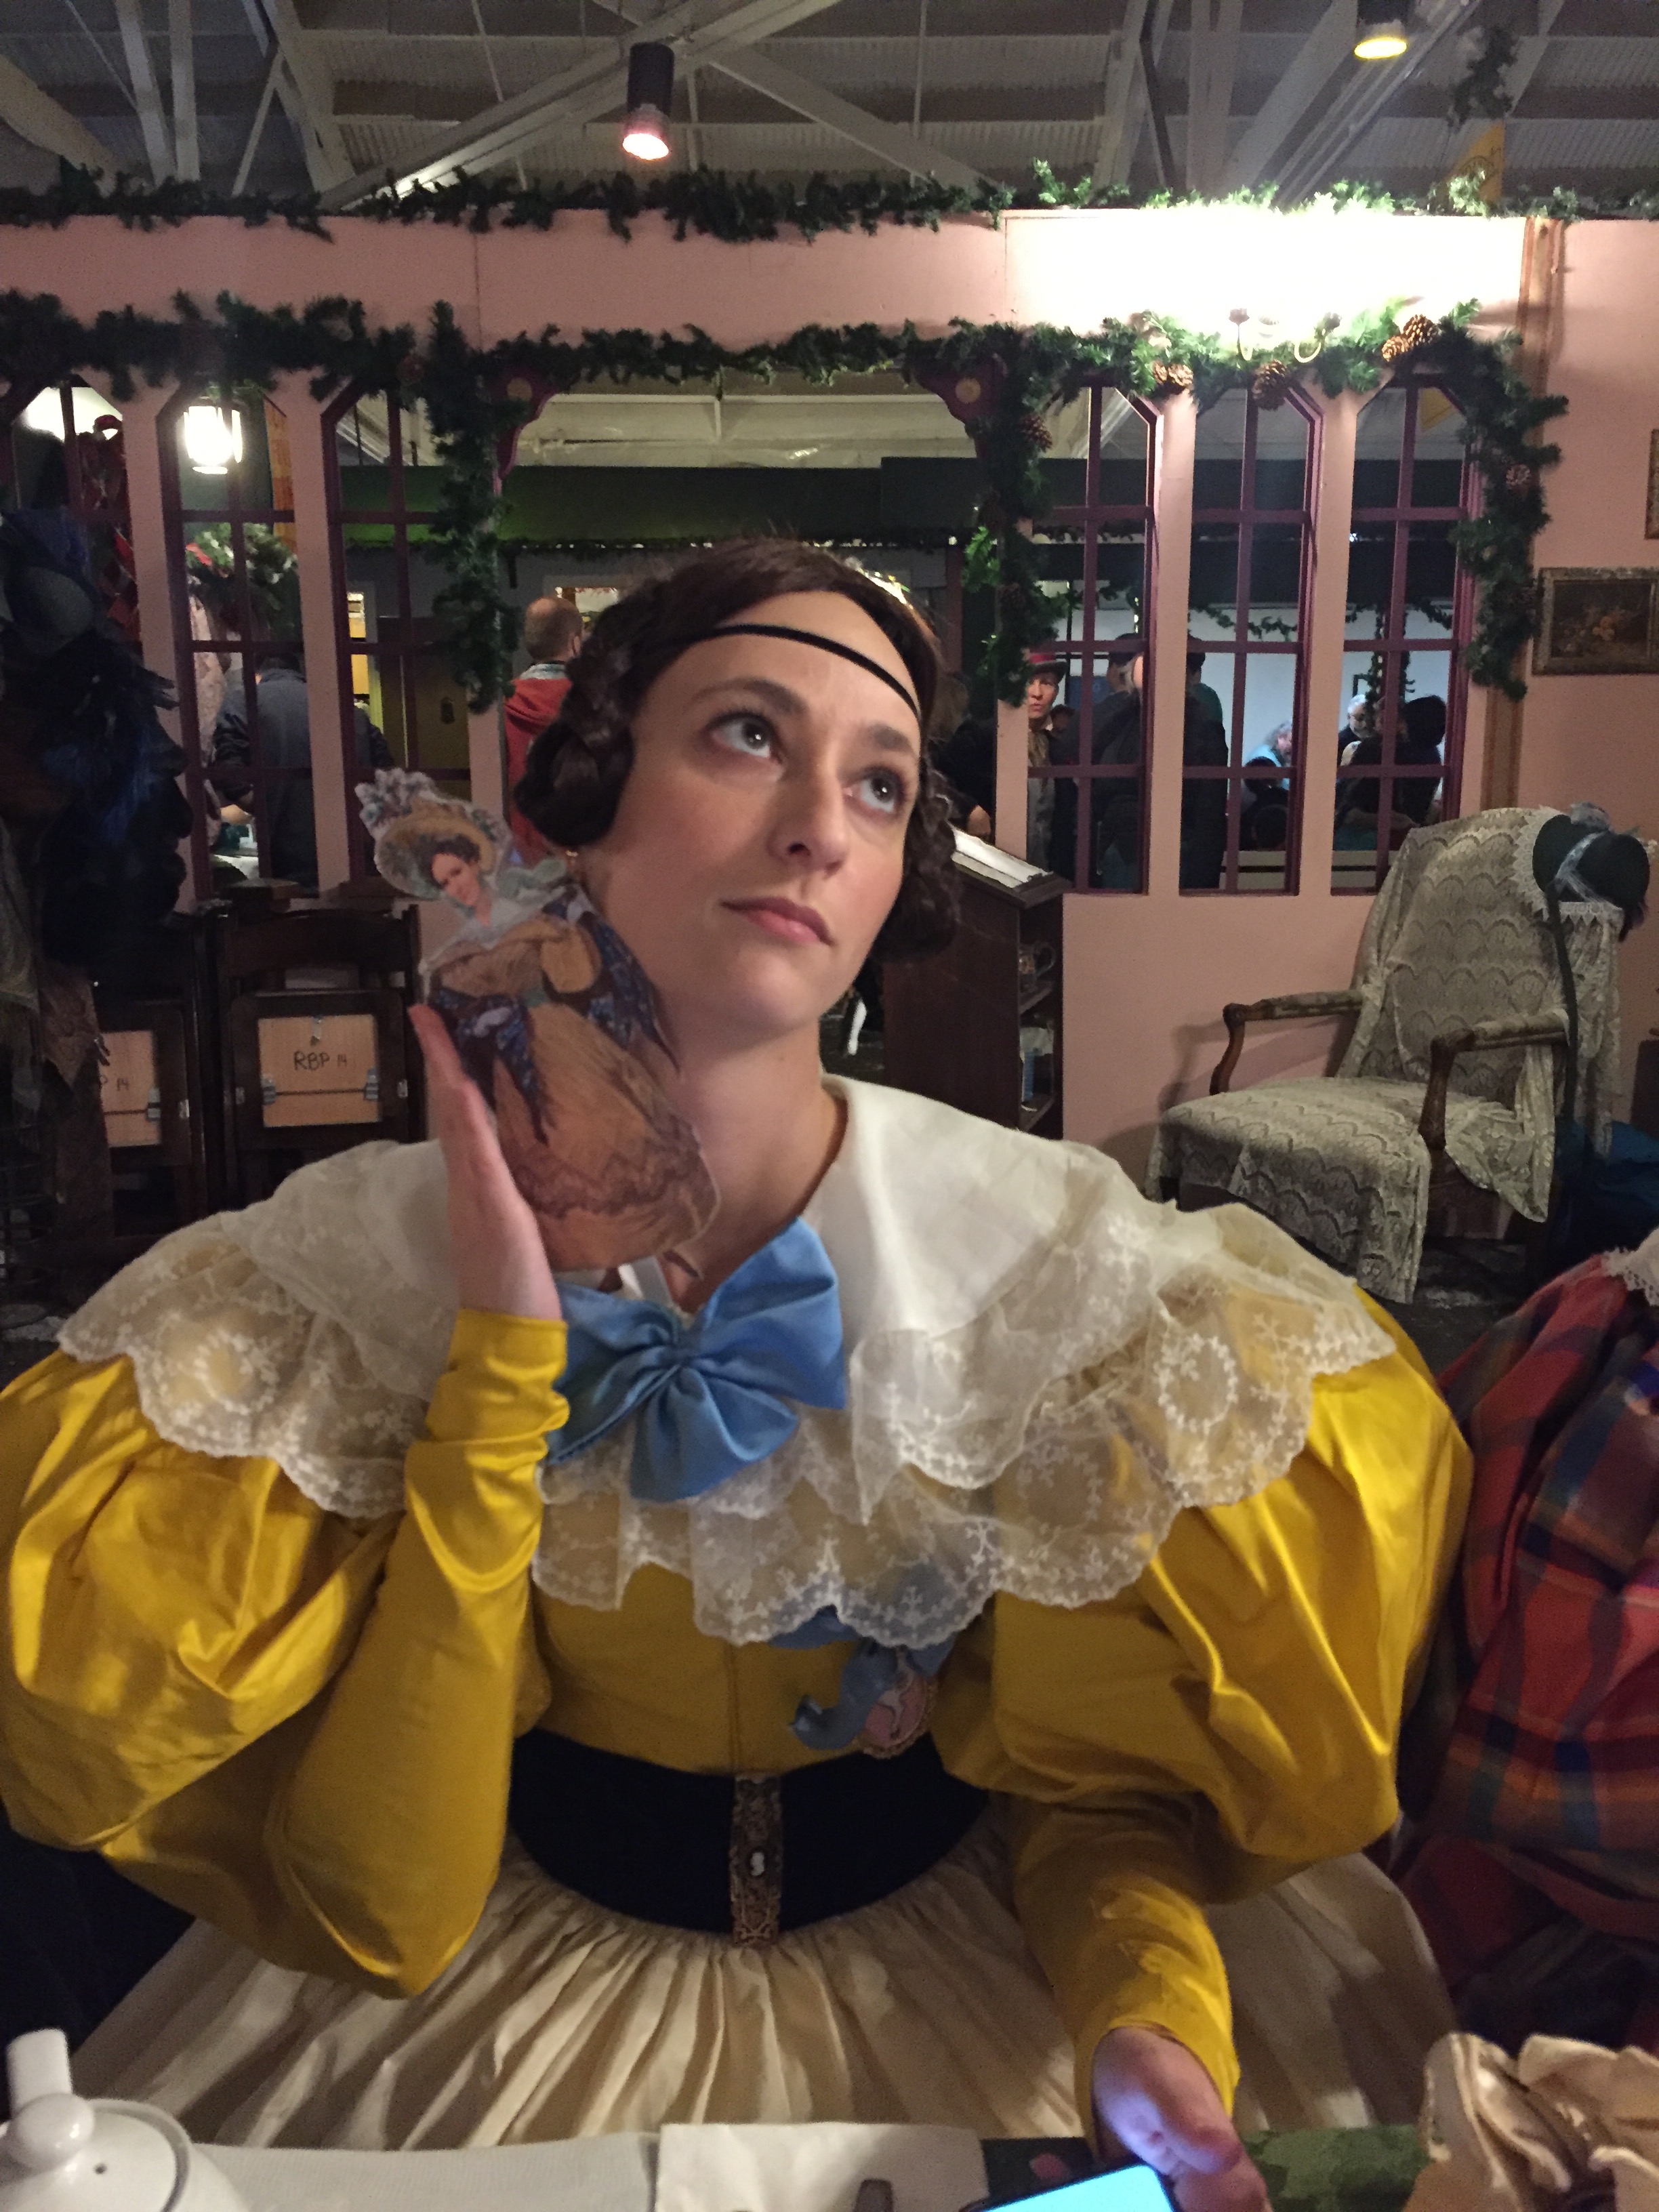
Maggie was a vision in bright yellow, with a little poppet of Cynthia that we passed around.IMG_4570.JPG

We had such a large group and everyone showed up at different times so I couldn’t get shots of everyone. Please forgive the poor lighting at Dickens; I already had to delete so many blurry and dark photos!

We had a grand time at tea.IMG_4564IMG_4557IMG_4556

And we even had an audience with the Queen, played by the beautiful Sarah that day. From left to right: Mena, Kim, Lauren, Sarah, Elizabeth, Sara, and me.IMG_4578

And here we have Sara, Mena, Elizabeth, Sarah, me, Molly, and Kim. I think Kim wins for biggest sleeves!IMG_4574

Many of us plan to wear these gowns again at Costume College in 2019. Please join us if you are interested! I will be making a post explaining how I put together my outfit, and I know American Duchess has some informative blog posts and video planned so come out and play!

More photos are in my Flickr album: https://www.flickr.com/photos/vivien_misc/albums/72157704703672744

Wedgewood Blue Gibson Girl Gown and Undergarments

I attended a dinner party on the Delta King River Boat in Sacramento. The event was hosted by the GBACG and people were encouraged to wear clothing from 1870-1900. I decided to make a Gibson Girl dress out of a Wedgwood blue silk taffeta, trimmed with white lace.IMG_2870IMG_2856

My inspiration was the famous Wedgewood pottery. IMG_1670.JPG

I have some additional appliqués I purchased that I didn’t have time to add for this event, but will for the next wearing to make it even more like pottery. IMG_2096.JPG

The bodice is made with Truly Victorian’s 1892 ball gown bodice and 1893 bell skirt patterns. I found the fit of both to be good, but the bodice is very long and I had to cut a bit from the bottom, even though I am long-waisted.IMG_2796

Some bodice in-progress photos that show the amount that needed to be trimmed:

My jewelry is by In the Long Run. My gloves are vintage and the purse is from a bridal shop. I am wearing Tissots from American Duchess.IMG_2742

I did not use the sleeve pattern that came with the bodice pattern. Instead I gathered up a rectangle of silk chiffon to make flowing sleeves.IMG_2727

The top was gathered and serged.IMG_2673

The back closes with hooks and eyes.IMG_2729.JPG

I decorated the front with a silk chiffon sash and little flowers that I put faux pearl centers in. IMG_2725

I would have liked to hem the end of the sash and add little pearls to the edge, but I was recovering from a hand injury and couldn’t do any hand-sewing, so it’s just a pouf for now. Thus I had to get creative with ways to avoid it!

Ways to save on hand-sewing:

  • I used a white silk chiffon scarf to trim the bodice, so the edges were already hemmed!
  • I serged or machine-sewed any seam I could.
  • I hemmed the skirt by machine, and then covered the machine stitches by sewing lace over it.
  • Instead of cutting a facing, I used a wide vintage rayon ribbon as a hem facing.
  • I used boning that already came with a casing, so I didn’t have to make the casing. I also had casing that had little “fins” on it so that I could machine-sew the boning onto the seam allowance of the bodice.
  • I used hook and eye tape instead of individually sewing on hooks and eyes.
  • Oh horror: I serged the bottom of the bodice, then flipped it up and held the hem in place by ironing on Stitch Witchery!

Because I flat-lined the fashion fabric to a cotton base, and I couldn’t hand-baste the pieces together there is some puckering. Although it’s not up to my “usual standards” I am still quite proud of what I was able to do with what I could, and I had fun with my friends!IMG_2848

Underneath the skirt I wore a long petticoat based on the Truly Victorian bell skirt pattern, with a big ruffle and trim attached.IMG_2162.JPG

IMG_2175

I wore a custom S-bend corset from Redthreaded, with hip pads, and a bust pad. The padding is necessary to achieve the exaggerated Gibson silhouette. I went from an 8 inch differential in my waist and hips to 13 inches, with only a 1 inch waist reduction!

IMG_E2015IMG_2016

I used the “bust improver” pattern from Wearing History, which comes in 2 sizes. I recommend it to give your girls a little extra something!Screen Shot 2018-11-04 at 8.11.32 PM.png

IMG_2708

Project costs:

  • 8 yards silk taffeta: $113.44 including tax from the LA Fabric District (I still have 3 yards left!)
  • 10 yards white veins lace: $34.01 including shipping from Aliexpress
  • 15 pairs grape leaf appliques: $36 including shipping from Aliexpress
  • bodice pattern: $10.75 from Truly Victorian (digital file)
  • skirt pattern: $0 (already used previously)
  • vintage rayon ribbon spool: $3
  • silk chiffon: $0 (gift from friend)
  • 3 yards white cotton for petticoat: $12 from eBay
  • pink trim for petticoat: $3 from garage sale
  • boning, thread, hook and eye tape, flowers, etc. from stash: ~$10

Total cost: $222.20 (plus I have a lot of silk and lace leftover I’ll probably sell to recoup some costs). Normally I don’t tally the costs until the dress is finished, and I still have to add the grape appliqués, but at this point it’s additional labor and not additional materials, so I added everything up. (When I started this blog my goal was to make things for $100 or less, and I’m seeing costs creep up because of nice materials. Hopefully my next project is a lot cheaper!)

All the hair you can see in the picture below is my own, which is currently shoulder-length. I pinned a big hair rat to the top of my head and two smaller ones on the sides, and then all the hair was pulled over the rats and pinned into place. The messy center was hidden by a faux hair bun pinned on top.IMG_2856

I’m not sure yet, but this might be a nice gala gown for Costume College 2019, when it’s all done!


A “Quick” Regency Silk Gown

I’m calling this a quick regency dress because there wasn’t a lot of planning ahead or blogging during steps, fitting was easy because I’ve used the pattern before, and the event I’m wearing it to is next week!IMG_7216

The pattern is Butterick B6074 view B, with minor modifications. The fabric is a printed silk taffeta from my stash.IMG_7222

The bodice is gathered in the front, and the stiffness of the taffeta gives the bust more fullness than I have in real life. 😉IMG_7217

The pattern has drawstring closures at the neckline and waistline, which is period, but I prefer hooks and eyes when the fabric is not a soft cotton.IMG_7220

If you’re curious about how to put in hooks and eyes to minimize gapping, I have the hooks away from the edge, and the eyes sticking over the edge. (Some people also alternate hooks and eyes on each side. I am lazy, and also wanted to use up the last few inches of hook and eye tape that I had).

I serged the armscye and bottom of the bodice to keep them neat. The shoulder straps are sewn in by hand. Here’s an inside look at the dress.IMG_7228

I have a pelisse that I will be wearing over this if the weather is cold, so I admit to be a little sloppy in some of my construction, but eh, I find most people are too distracted by pretty fabric to care. =)

I also made a matching reticule, with my leftover fabric and lining. I made the tassel out of some thick thread.IMG_E7254.JPG

Project costs:

  • 5 yards printed silk taffeta: $38 including shipping from a destash group; I have about 2 yards left over
  • Pattern: $0, already used for another dress
  • Bodice lining: $0, scraps from another project
  • Skirt lining: 2 yards cotton voile: ~$13 with tax and shipping (purchased with other items from Dharma Trading Co.)
  • Thread, lace scrap, and hooks and eyes: ~$5 from stash
  • Silk ribbon: $0, left over from another project

Total: ~$56 (even less if I sell the leftover 2 yards of taffeta to recoup some costs). Not bad for a silk dress!

I plan to wear this dress with my Pemberly slippers from American Duchess, and some beautiful new grape earrings from The Lady Detalle.IMG_7106.JPG

I look forward to wearing this print! Simple, but cute. IMG_7115.JPG

1920s Flapper Dress and Slip Patterns and Tutorial

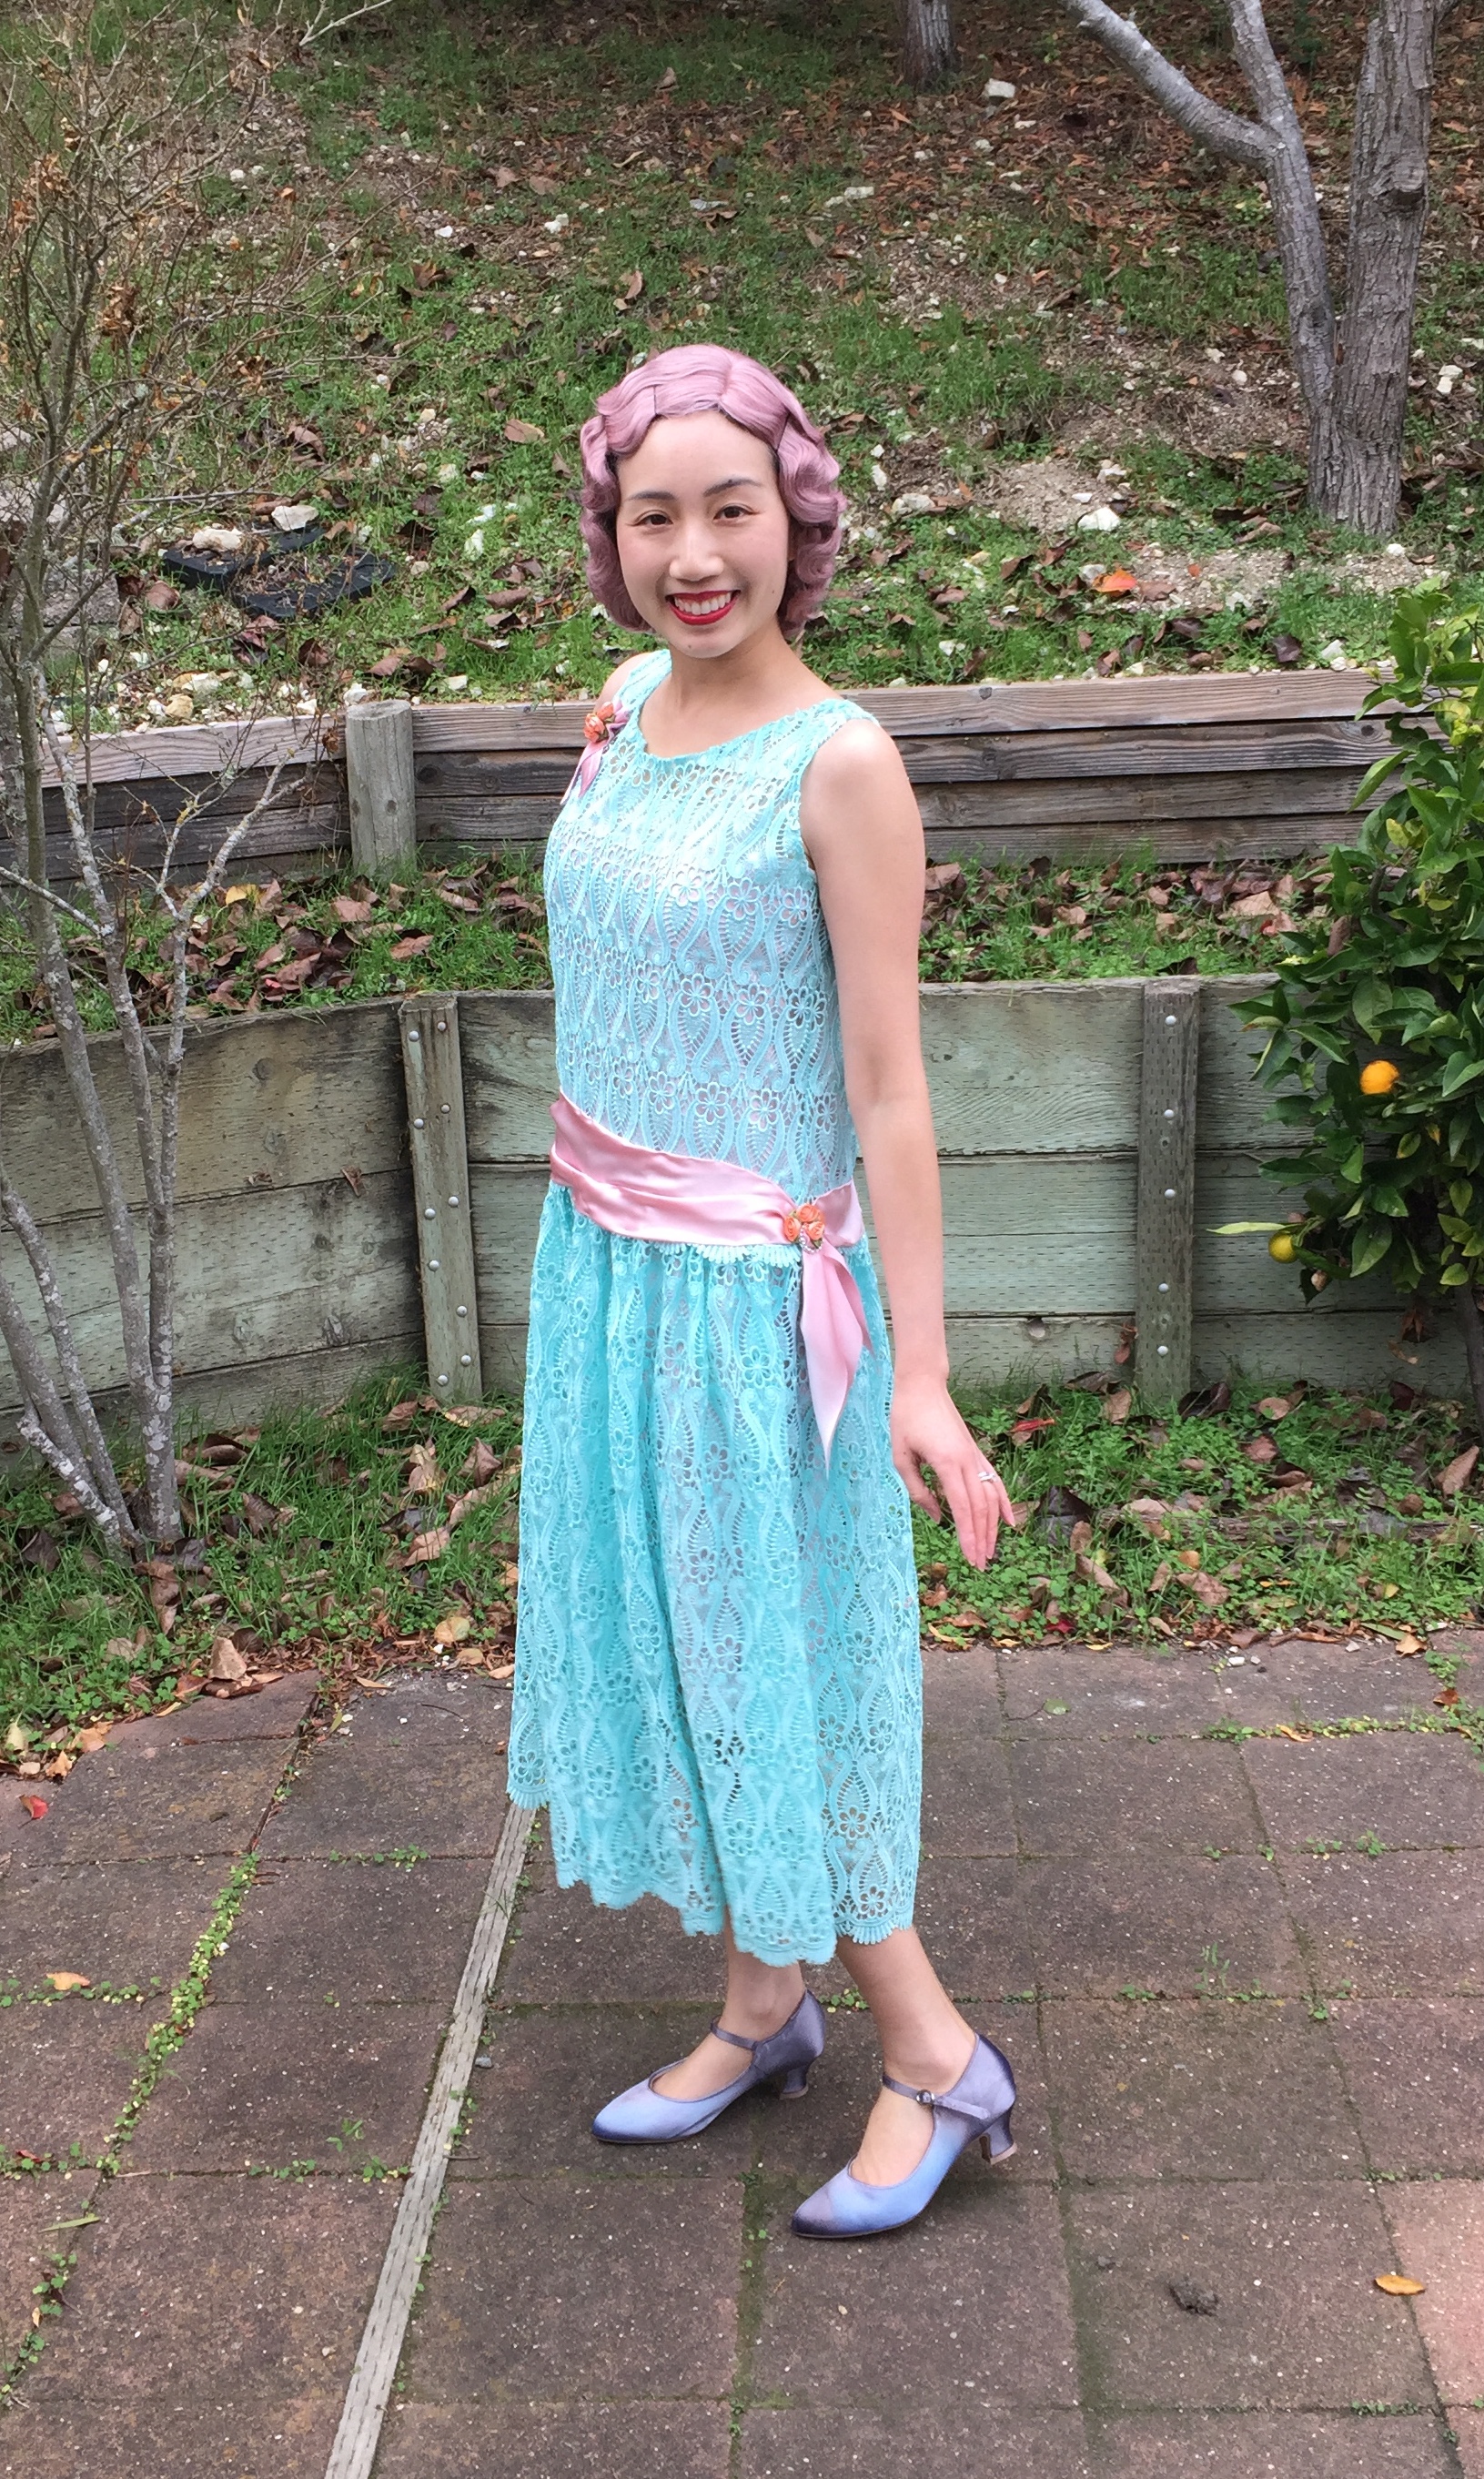
My last projects of 2017 were a 1920s silk slip and a lace dress, made right before New Year’s eve. Neither of them are difficult to make, and I’ve made a pattern and tutorial for both. All the fabric for these two projects were kindly provided to me, free of charge, by Fabric Wholesale Direct.

The main dress is made from their mint iris guipure lace, and the slip and sash are made from their pink silk charmeuse. Thank you Fabric Wholesale Direct for the lovely materials!IMG_5943IMG_5929

1920s Slip

This pattern makes a basic 1920s slip. Choose a slinky fabric like silk charmeuse. You do not want to use anything thick!PIC 7
1) You’ll need the following measurements:
B = your chest circumference, across the top of your bust, plus 4 inches
H = your hip circumference, plus 4 inches
L1 = the length from the top of your bust to your hip, plus 1 inch
L2 = the length from your hip to above your knee, plus 1 inch
(These measurements include ease and 1/2 inch seam allowance).
2) You are going to make a long, slightly trapezoidal shape using the measurements above. The top is B divided by 2, and the total length is going to be L1 + L2. Cut this all as one piece. (The middle line is not a seam; it’s just to make sure it’s wide enough for your hips). You can draw this on paper first, or directly onto the fabric using rulers.
PIC 1
3) Cut two of these trapezoids, place them right sides together, and sew the long edges together.
PIC 2
4) You should now have a long tube. Hem the bottom and top of the tube, and if you like, add lace to decorate the top and bottom edges.
5) Cut two long rectangular straps for the shoulder that are 3 inches x 15 inches. (These are extra long; you will cut off the excess in a later step). Fold each strap lengthwise (inside out) and pin and sew down the long edge, making a skinny tube.
PIC 3
6) Turn the long tubes right side out and iron flat. Add lace to the straps now if you wish.
PIC 4
7) Sew or pin one end of each strap to the BACK of the slip, where your shoulder blades would be.
PIC 5
8) Put the slip on and then pin the other end of the straps to the FRONT of your slip, over the top of your bust, and adjusted to the right length. Cut off the extra length. Sew the straps to the inside of the slip.
PIC 6
Now you are done!

1920s Dress

This tutorial is to make a simple 1920s dress. I used a lace fabric, but you can use anything with a nice drape, such as silk velvet or a thick satin.

1) For the top half of the dress, find a sleeveless tank top style to use as a pattern base. (This should be made of a non-stretchy fabric, and a little loose-fitting, otherwise your dress will be too tight). The ideal length for the tank top is to reach your hips; if it’s too long you can fold the bottom up before tracing.
2) Lay the tank top on your fabric and cut around it, leaving extra space for a seam allowance and extra fit room. Depending on how loose your tank top is, that extra space may be 1-2 inches. Don’t forget the shoulders!
PIC A
3) Use that piece you cut out to trace a second piece, just slightly wider on the sides, to be the front piece of your dress. Sew the side seams and shoulders together.
PIC B
4) Cut a rectangle panel for the skirt that is 2.5 times the circumference of your hips. The width will be the length of your hips to below your knee. (If you want a historically-accurate dress the hem should be below your knee, and if you want a more modern look cut the skirt shorter).
PIC C
5) Sew the short edges of the skirt panel (right side) together, making a big skirt shape. Turn the skirt right side out. The top edge of the skirt will be gathered and sewn to the top part of the dress, and they meet at the hip.
PIC D
6) If you have a fancy edge on your dress top, have your top/skirt seam overlap with the top showing.
PIC E
7) Finish the neck and armholes by folding or rolling the raw edges of the fabric inside the dress and stitching them down.
PIC F
8) Optional: You can cut a sash for the middle that consists of a long rectangle with pointed ends. (You can use the leftover fabric from making your slip). The length and width will depend on personal preference, but the length should be at least double your hips plus extra. (Here the one shown in the photo is 55 inches long and 7 inches wide, with the edges tucked in). Wrap the sash around the hip area of your dress, tucking in the raw edges and sewing them down. For texture and visual interest, you can “wrinkle” the fabric while pinning and sewing it down.
PIC G
9) Optional: Embellish your sash with a shiny buckle and some little ribbon flowers. You can also put more silk charmeuse, ribbons, or flowers on the front of the dress to decorate it.
PIC H
The finished dress should allow for a lot of movement and be fun to dance in.

Thanks again for the materials Fabric Wholesale Direct!

18th Century Costumes at the Legion of Honor

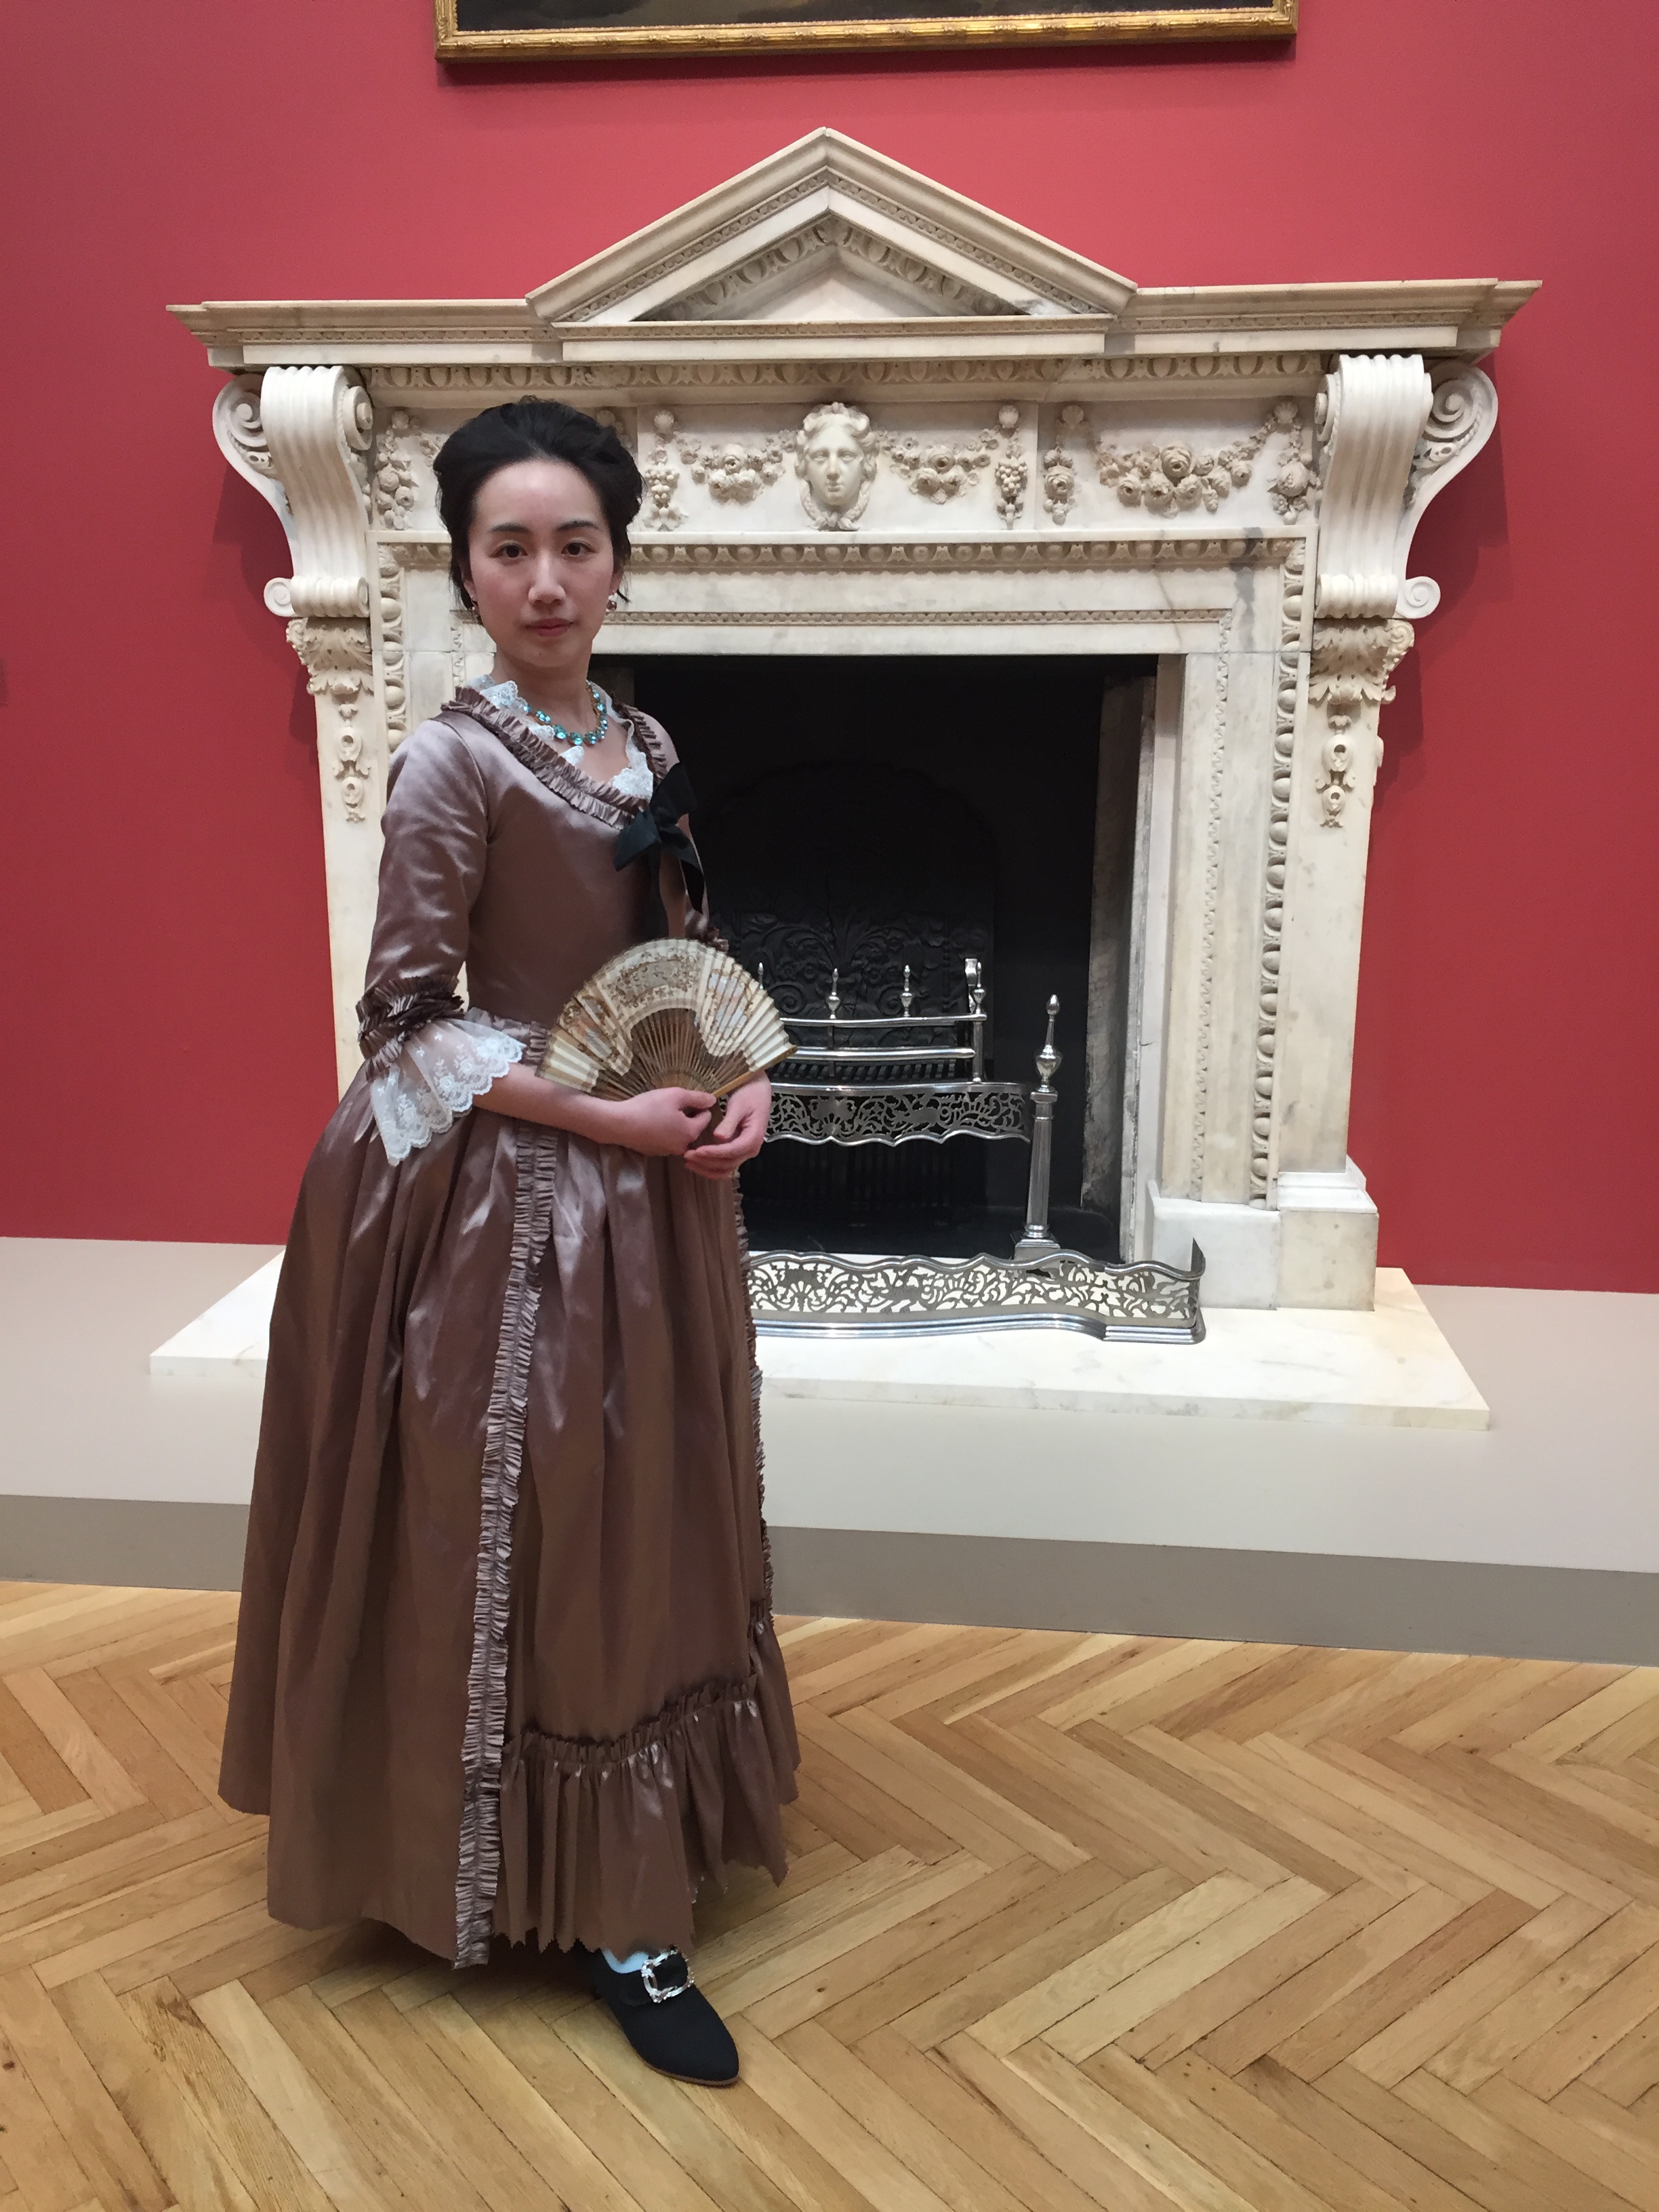
Yesterday I saw the “Casanova, The Seduction of Europe” exhibit with the Greater Bay Area Costumer’s Guild at the Legion of Honor Museum in San Francisco. It was full of incredible artwork, and even antique garments on display. I highly recommend it! I spent the last few weeks working on a new outfit to attend the exhibit instead of blogging about it, but it I will post more about the construction details once I get the last bit of trim on (which did not arrive in time). I wore my new mauve silk Italian gown pinned shut, as is historically correct, but will be changing it to a hook-eye-and opening. (I was paranoid about marking up the silk so I wore it a bit loose).

Many of the photos in this post are used courtesy of John Carey Photographic Imagery. Thanks John!

I love how this photo reminds me of candlelight!

28235509_1444740205653240_7574251756318558416_o

Photo by John Carey

This one is outside the museum.

28070584_1444740978986496_6306691411018361472_o

Photo by John Carey

Here’s a few full-body shots from my phone:IMG_6848IMG_6850

My shoes are 18th century black wool Dunmores from American Duchess (affiliate link) and the earrings and necklace are from In the Long Run Designs. My fan is an antique. IMG_6852

There was much gossip and court intrigue with my fellow Taffeta Sisters, Kelsey and Natalie.IMG_6955

Some of it was of a highly shocking nature!IMG_6868

There were many gorgeous costumes in attendance.

28071272_1444740812319846_2482247944423106324_o

Photo by John Carey

28162085_1444739882319939_3872600878878233833_o

Photo by John Carey

28164556_1444740768986517_9753430740362626_o

Photo by John Carey

28162079_1444741058986488_8766254981545986397_o

Photo by John Carey


There was unavoidable 18th century rump shaking.

Plus other silly shenanigans.


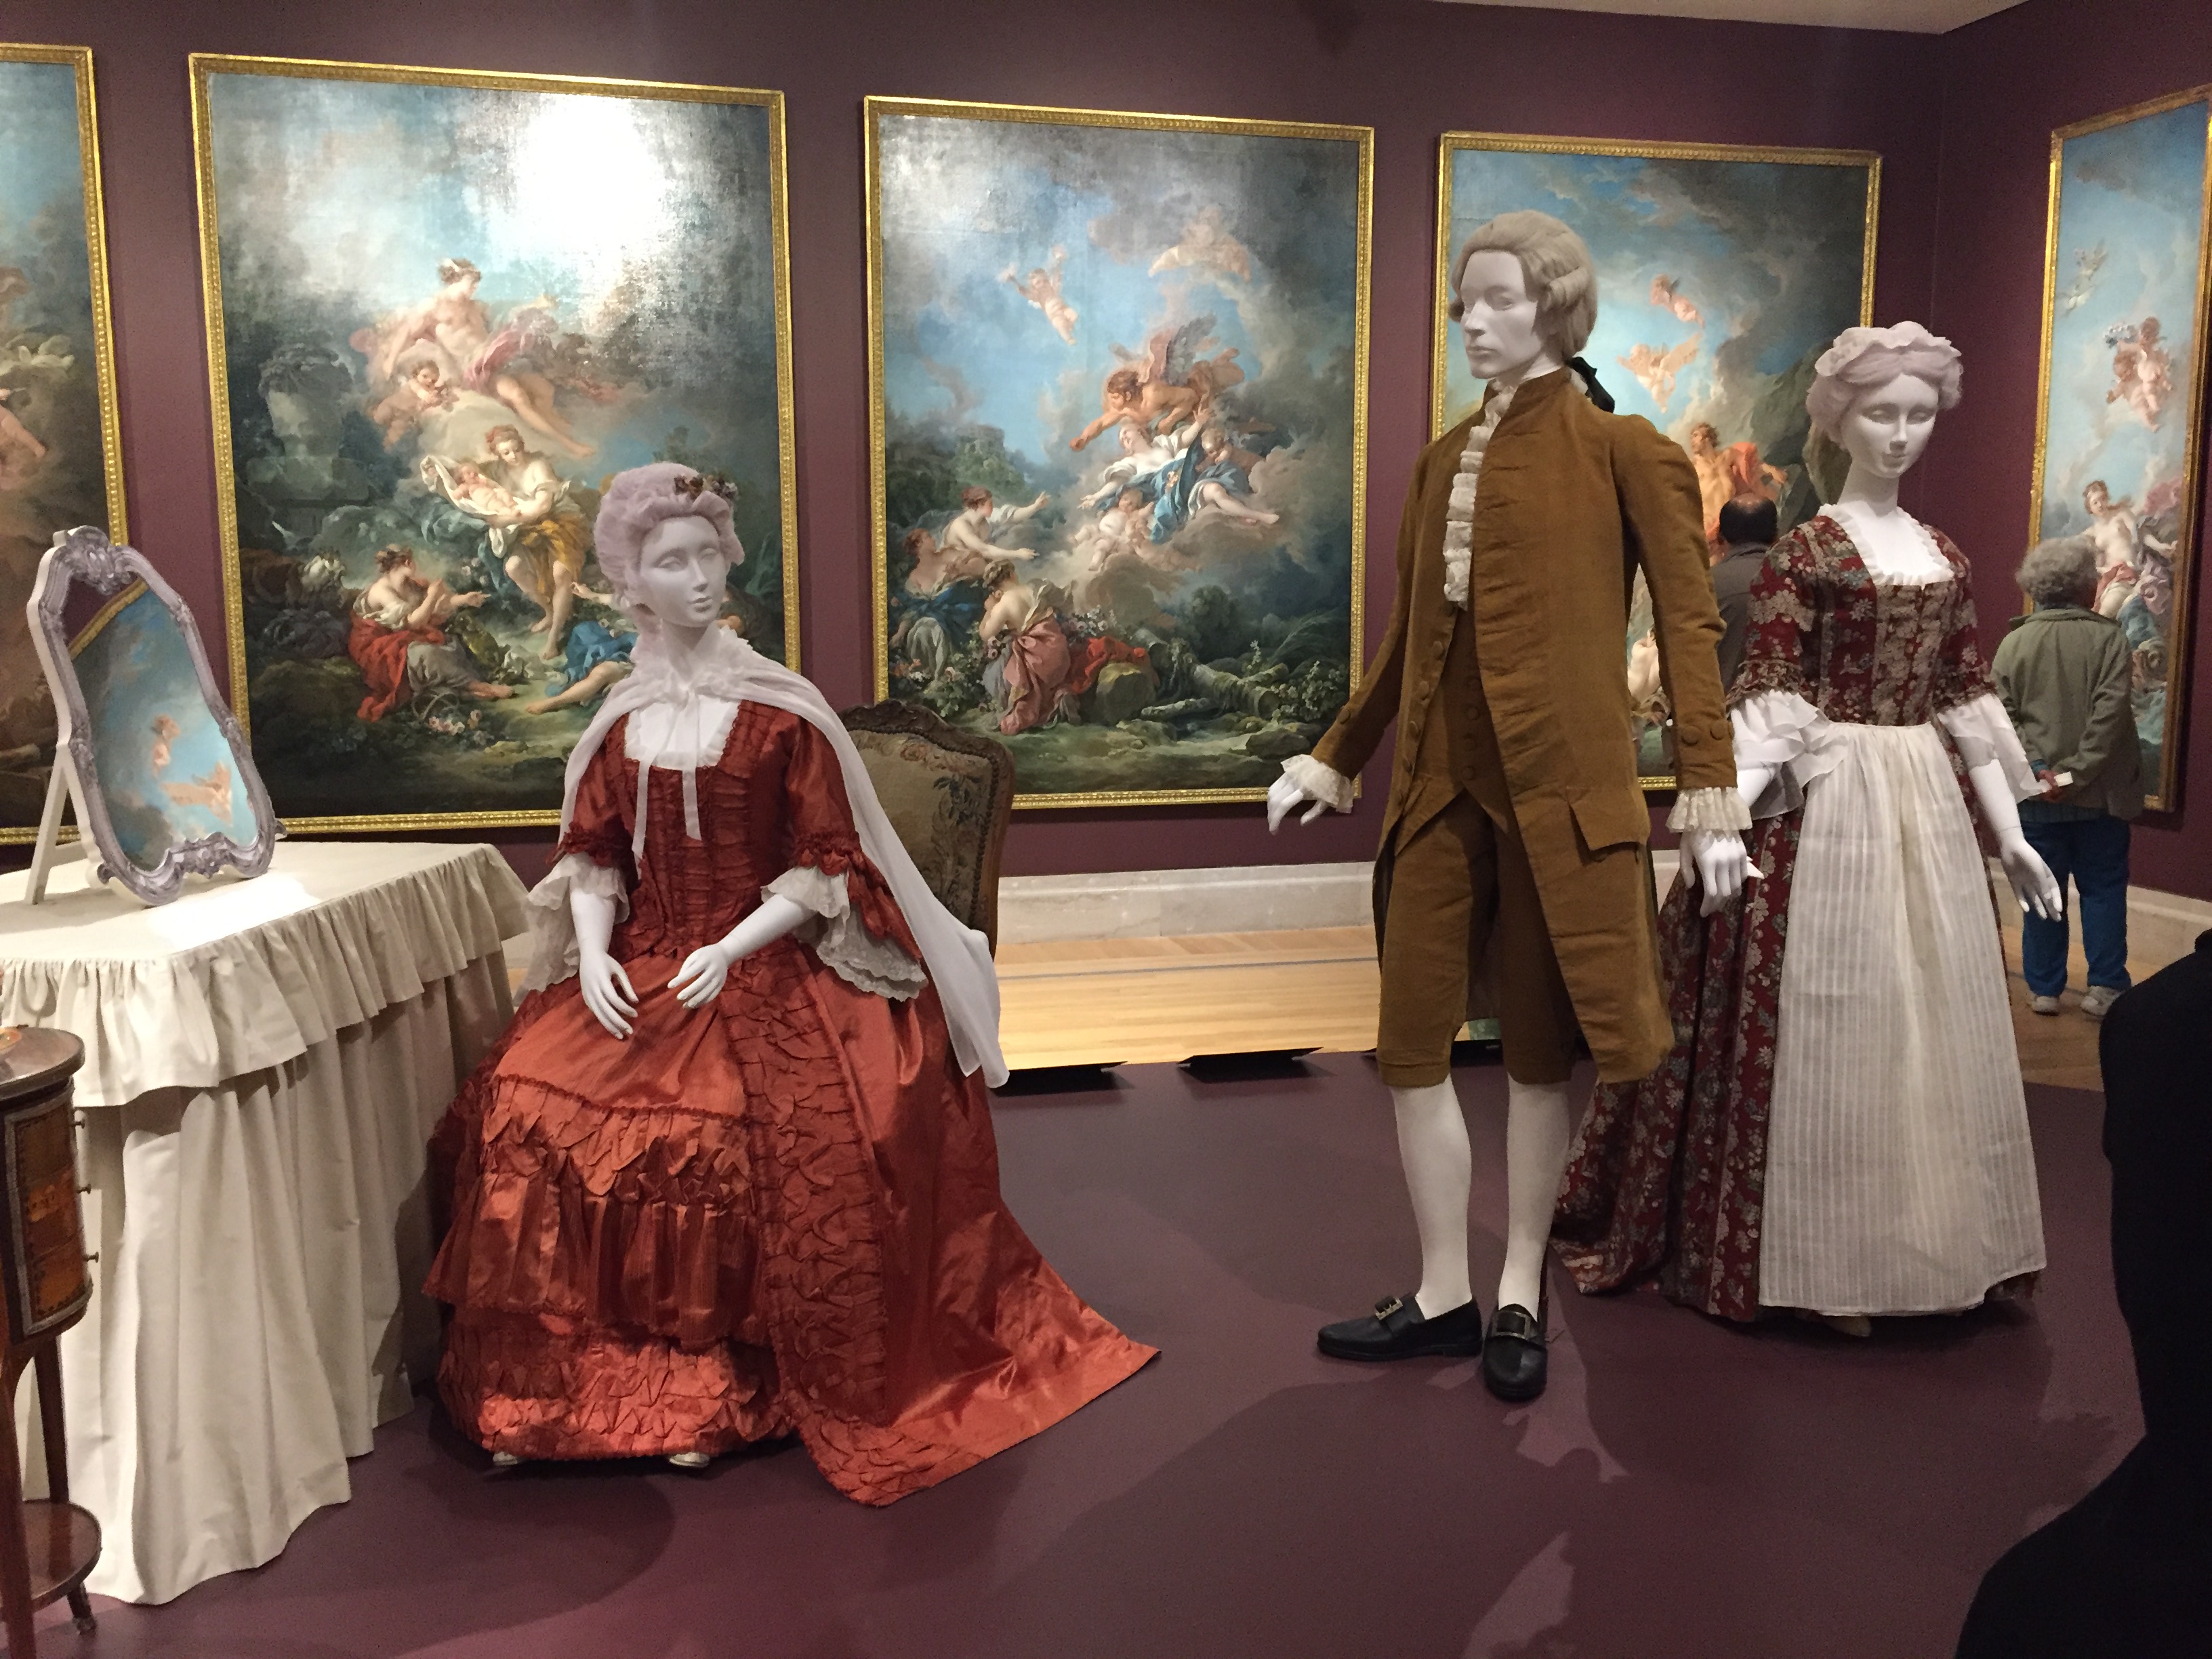
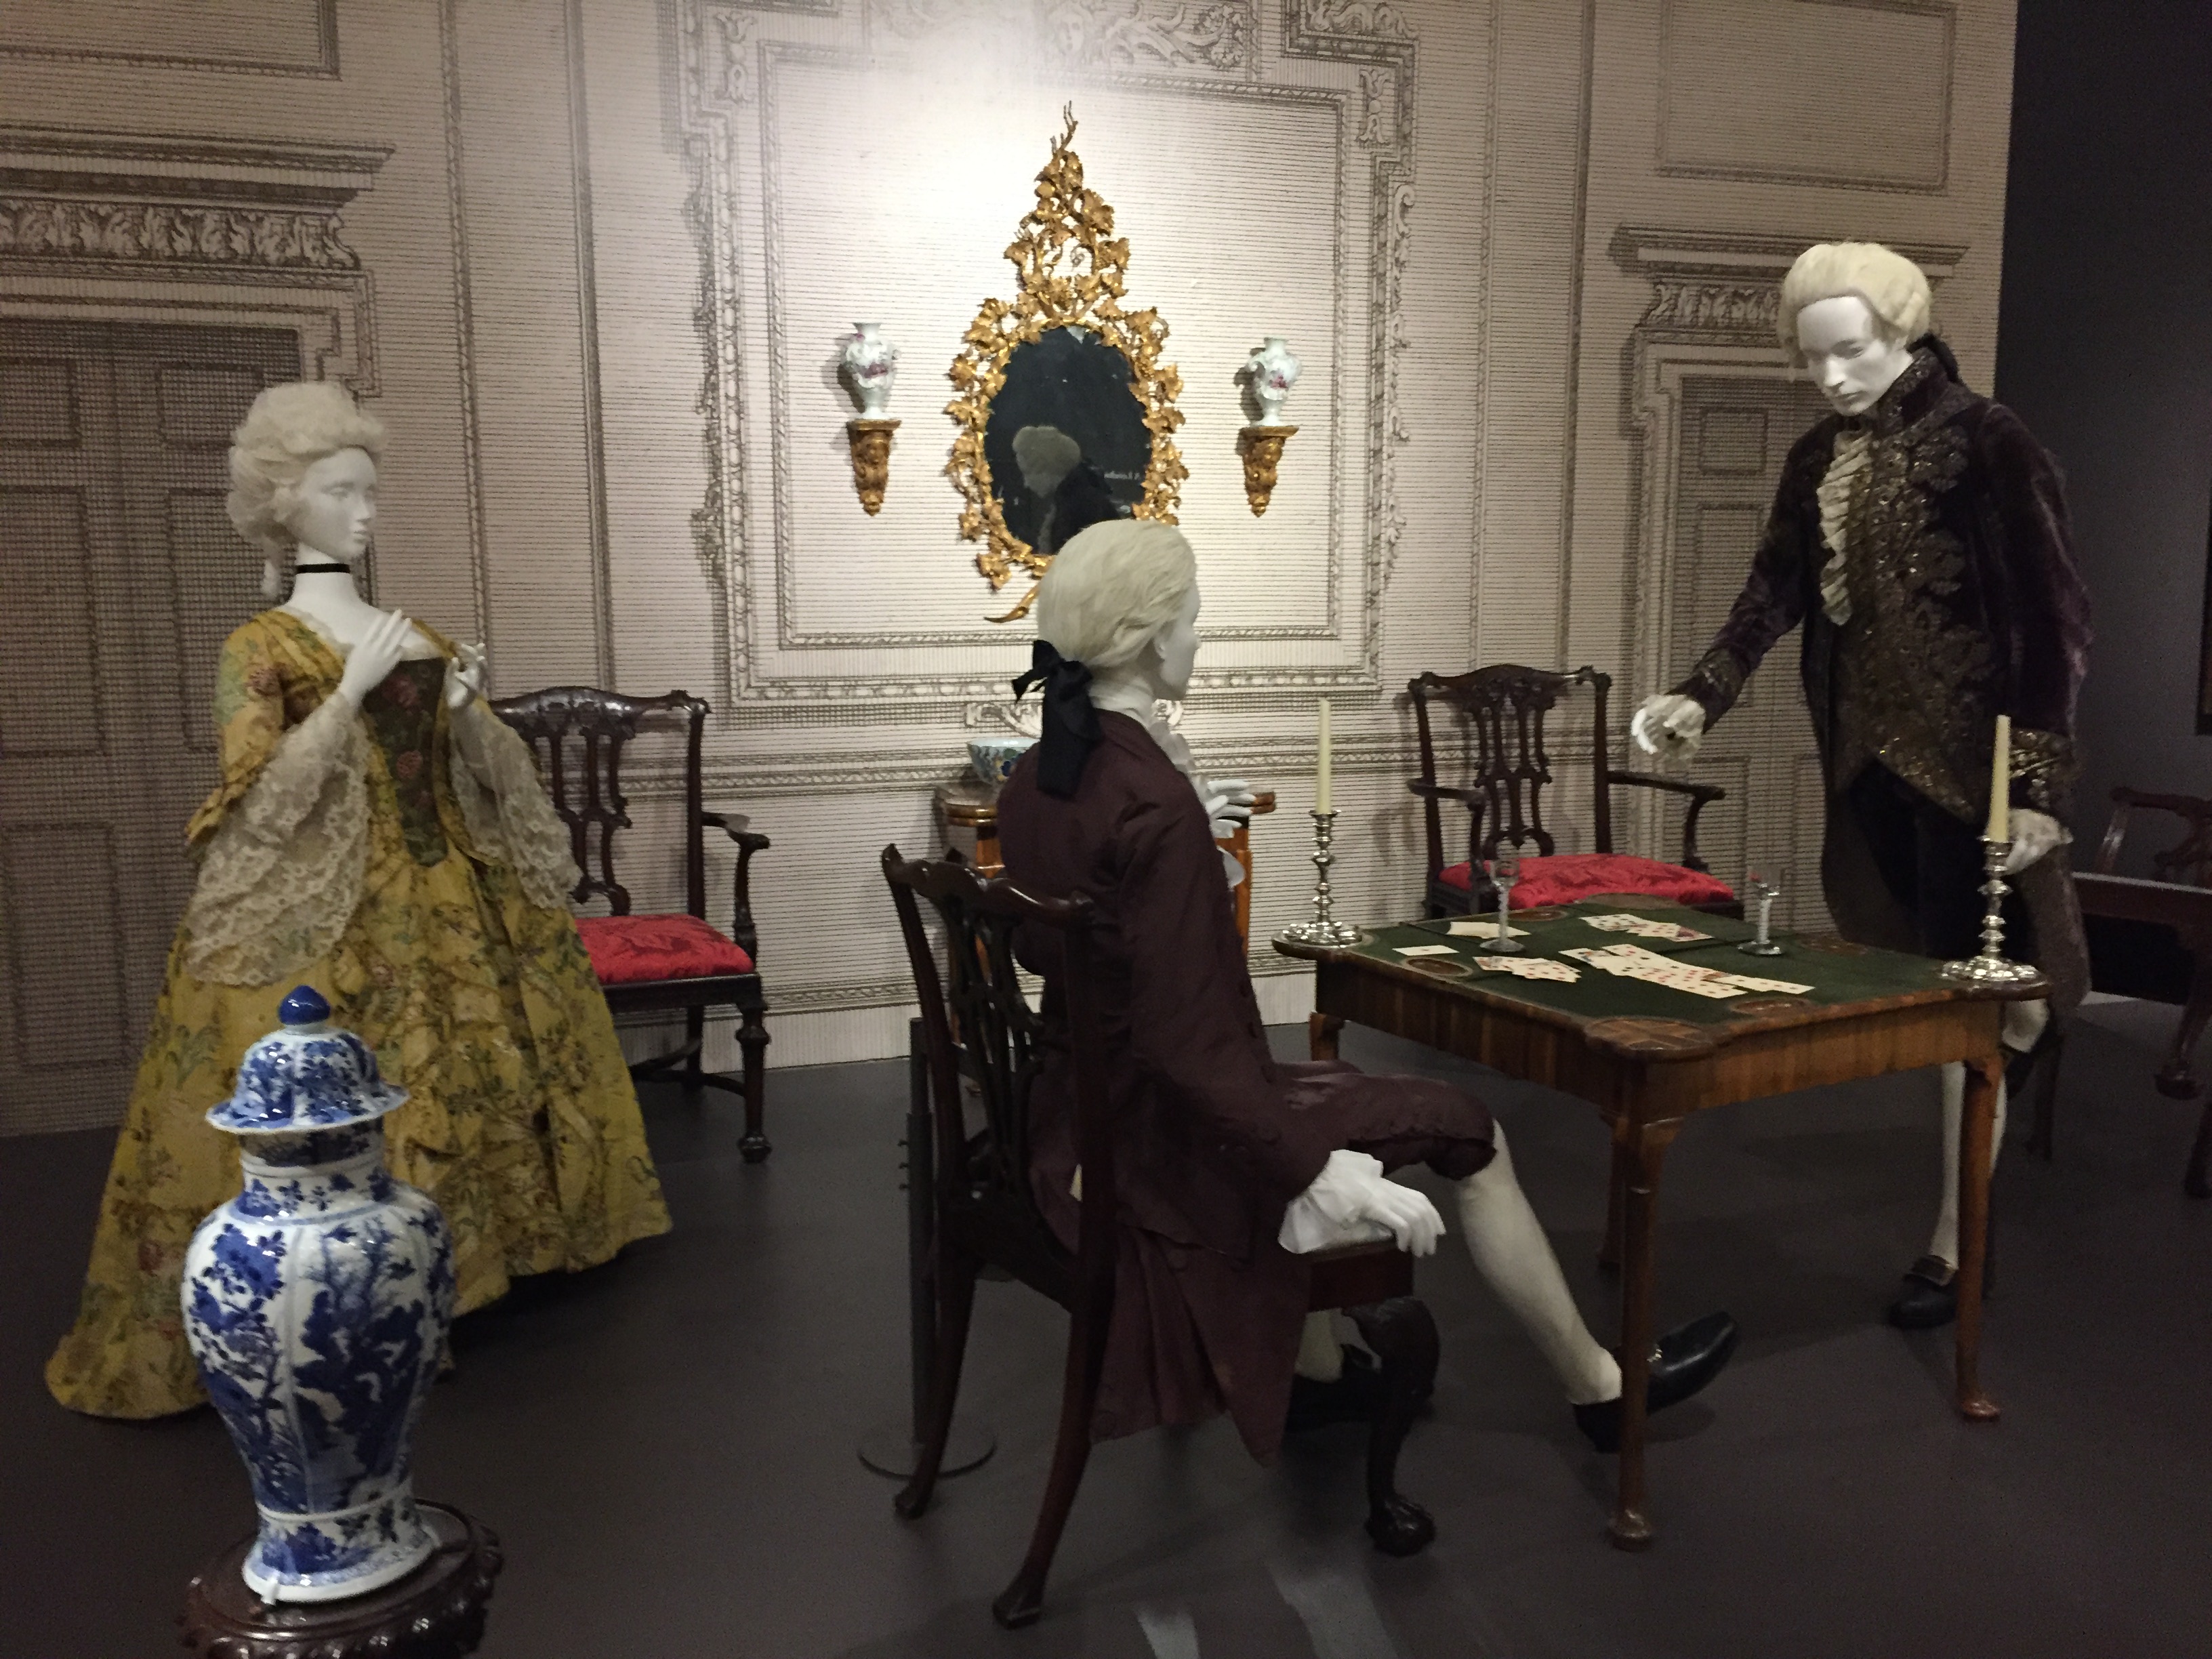
We enjoyed the stunning artwork, costumes, and artifacts on display.IMG_6814.JPGIMG_6829IMG_6805

I felt quite at home with the paintings. =) Many more photos have been uploaded to my Flickr account so please take a look!

28165039_1444739302319997_1270203275298556190_o

Photo by John Carey

Crimson Peak-Inspired Costume at Spooky Victorian Tea Party

I recently attended a “Spooky Victorian Tea Party” hosted by the GBACG, and wore an outfit inspired by Edith Cushing’s picnic outfit in the Crimson Peak movie. When I saw the movie in theaters I immediately fell in love with that creepy hand belt!06a80c2771674a757c37cc5248095268

The belt buckle is meant to mimic carved ivory and the belt is meant to be hair, inspired by mourning jewelry.IMG_8541

I didn’t have time to blog the research and progress, so this post is going to do double-duty. Here is Edith with a beautiful pleated blouse, silk taffeta skirt, a fancy belt, a fugly hat, and a handsome man (Sir Thomas Sharpe).picnic-dress1

My outfit was inspired by, but not a cosplay, for a few reasons. First, I’m using my own hair instead of a blond wig. For reasons of time and cost, I wanted to be able to reuse my ensemble with different accessories for a historical costume like a suffragette outfit. For practical reasons, I could not get the exact same kind of lace on the blouse, and didn’t plan to drive myself crazy looking for it. Finally, I hate the taco hat.

Seriously, it looks like the tostada they give you at Chevy’s on your birthday. Edith even looks embarrassed to be wearing it in this photo.uvkYG7X

In another part of the movie, Edith wears the same skirt with a jacket and a boater. Isn’t that hat so much cuter?IMG_4591

I made my own with a bit of hat surgery, and decorated it with butterflies since those are a theme in the movie.IMG_4627

The costume was on display at FIDM, and a friend went to take photos and report back to me whether the silk taffeta in the skirt was bronze, copper, or pink because the promo photos were inconsistent.

By the way, if you have eagle eyes, or you’re just obsessive like me, you’ll notice a flaw or heavy crease in the silk running between the second-to-last two buttons. This did not happen during transport to the museum. Look again at the pictures I posted above; they are in the movie!IMG_9064

The verdict was bronze. Luckily, another friend was having a garage sale and I got the perfect shade! (In progress photo below).IMG_4495.JPG

I apologize for the poor quality of my photos from the day of the party. The lighting in the tea venue was not the best, and I had just my phone to take pictures, so the colors are darker than they are in real life.IMG_4696

IMG_4697

Both my patterns for the skirt (“Fan-Skirt about 1890”) and blouse (“Edwardian blouse”) came from Black Snail Patterns on Etsy. It was my first time using them and I recommend this company highly!  I made some small modifications, but not many. I love how the back of the skirt falls.IMG_4714

I did not have time to make a new organdy petticoat and had to make do with some petticoats suitable for other silhouettes, so next time the skirt should be fuller.IMG_4715

I used a pleated silk chiffon over a base of cotton gauze for the blouse. I overlaid this with lace, and dyed all three materials with tea.IMG_E4682.JPG

And surprise, my creepy sister-in-law Lucille was at the party! I do hope she was not the one who prepared the tea.IMG_0026

The food (at Tyme for Tea in Niles, CA) was delicious, and the champagne generous!IMG_4742

This costume is still a work in progress. I have the following things planned:

  1. Make the belt. The belt in the movie is made of braided hair. I tried to make my own with a big French braid but it came out very lumpy and thick. It was so unflattering that the morning of the party I decided to just use a plain black belt instead. I will try again with tiny braids sewn to a backing.
  2. Replace the skirt buttons. I used some very thick molded vintage Czech glass buttons. They were lovely, but very heavy and pulled on the front of the skirt and made it collapse. I will have to find some lighter buttons.
  3. Fix the blouse back. Because I have narrow shoulders and a small bust I took in the shoulder seams. I accidentally took too much without accounting for what it would do to the upper closures, so I have a little pulling and gapping between the upper buttons. I’m not sure yet whether to fix this with a modesty panel, more buttons, a little boning along the closures, or a few hooks and eyes.
  4. Replace the lace on the cuffs. I used some black lace appliqués, but I think they are too heavy-looking, and would like to find some delicate black flowers similar to what I have at the collar.

Normally I would do a tally of the costs, but since this outfit is not really done, I will save that for when I truly finish! For now, here is a resource list.

I’m looking forward to wearing this at Costume College with the fixes!

IMG_4782

UPDATE: You can see the improved version here!