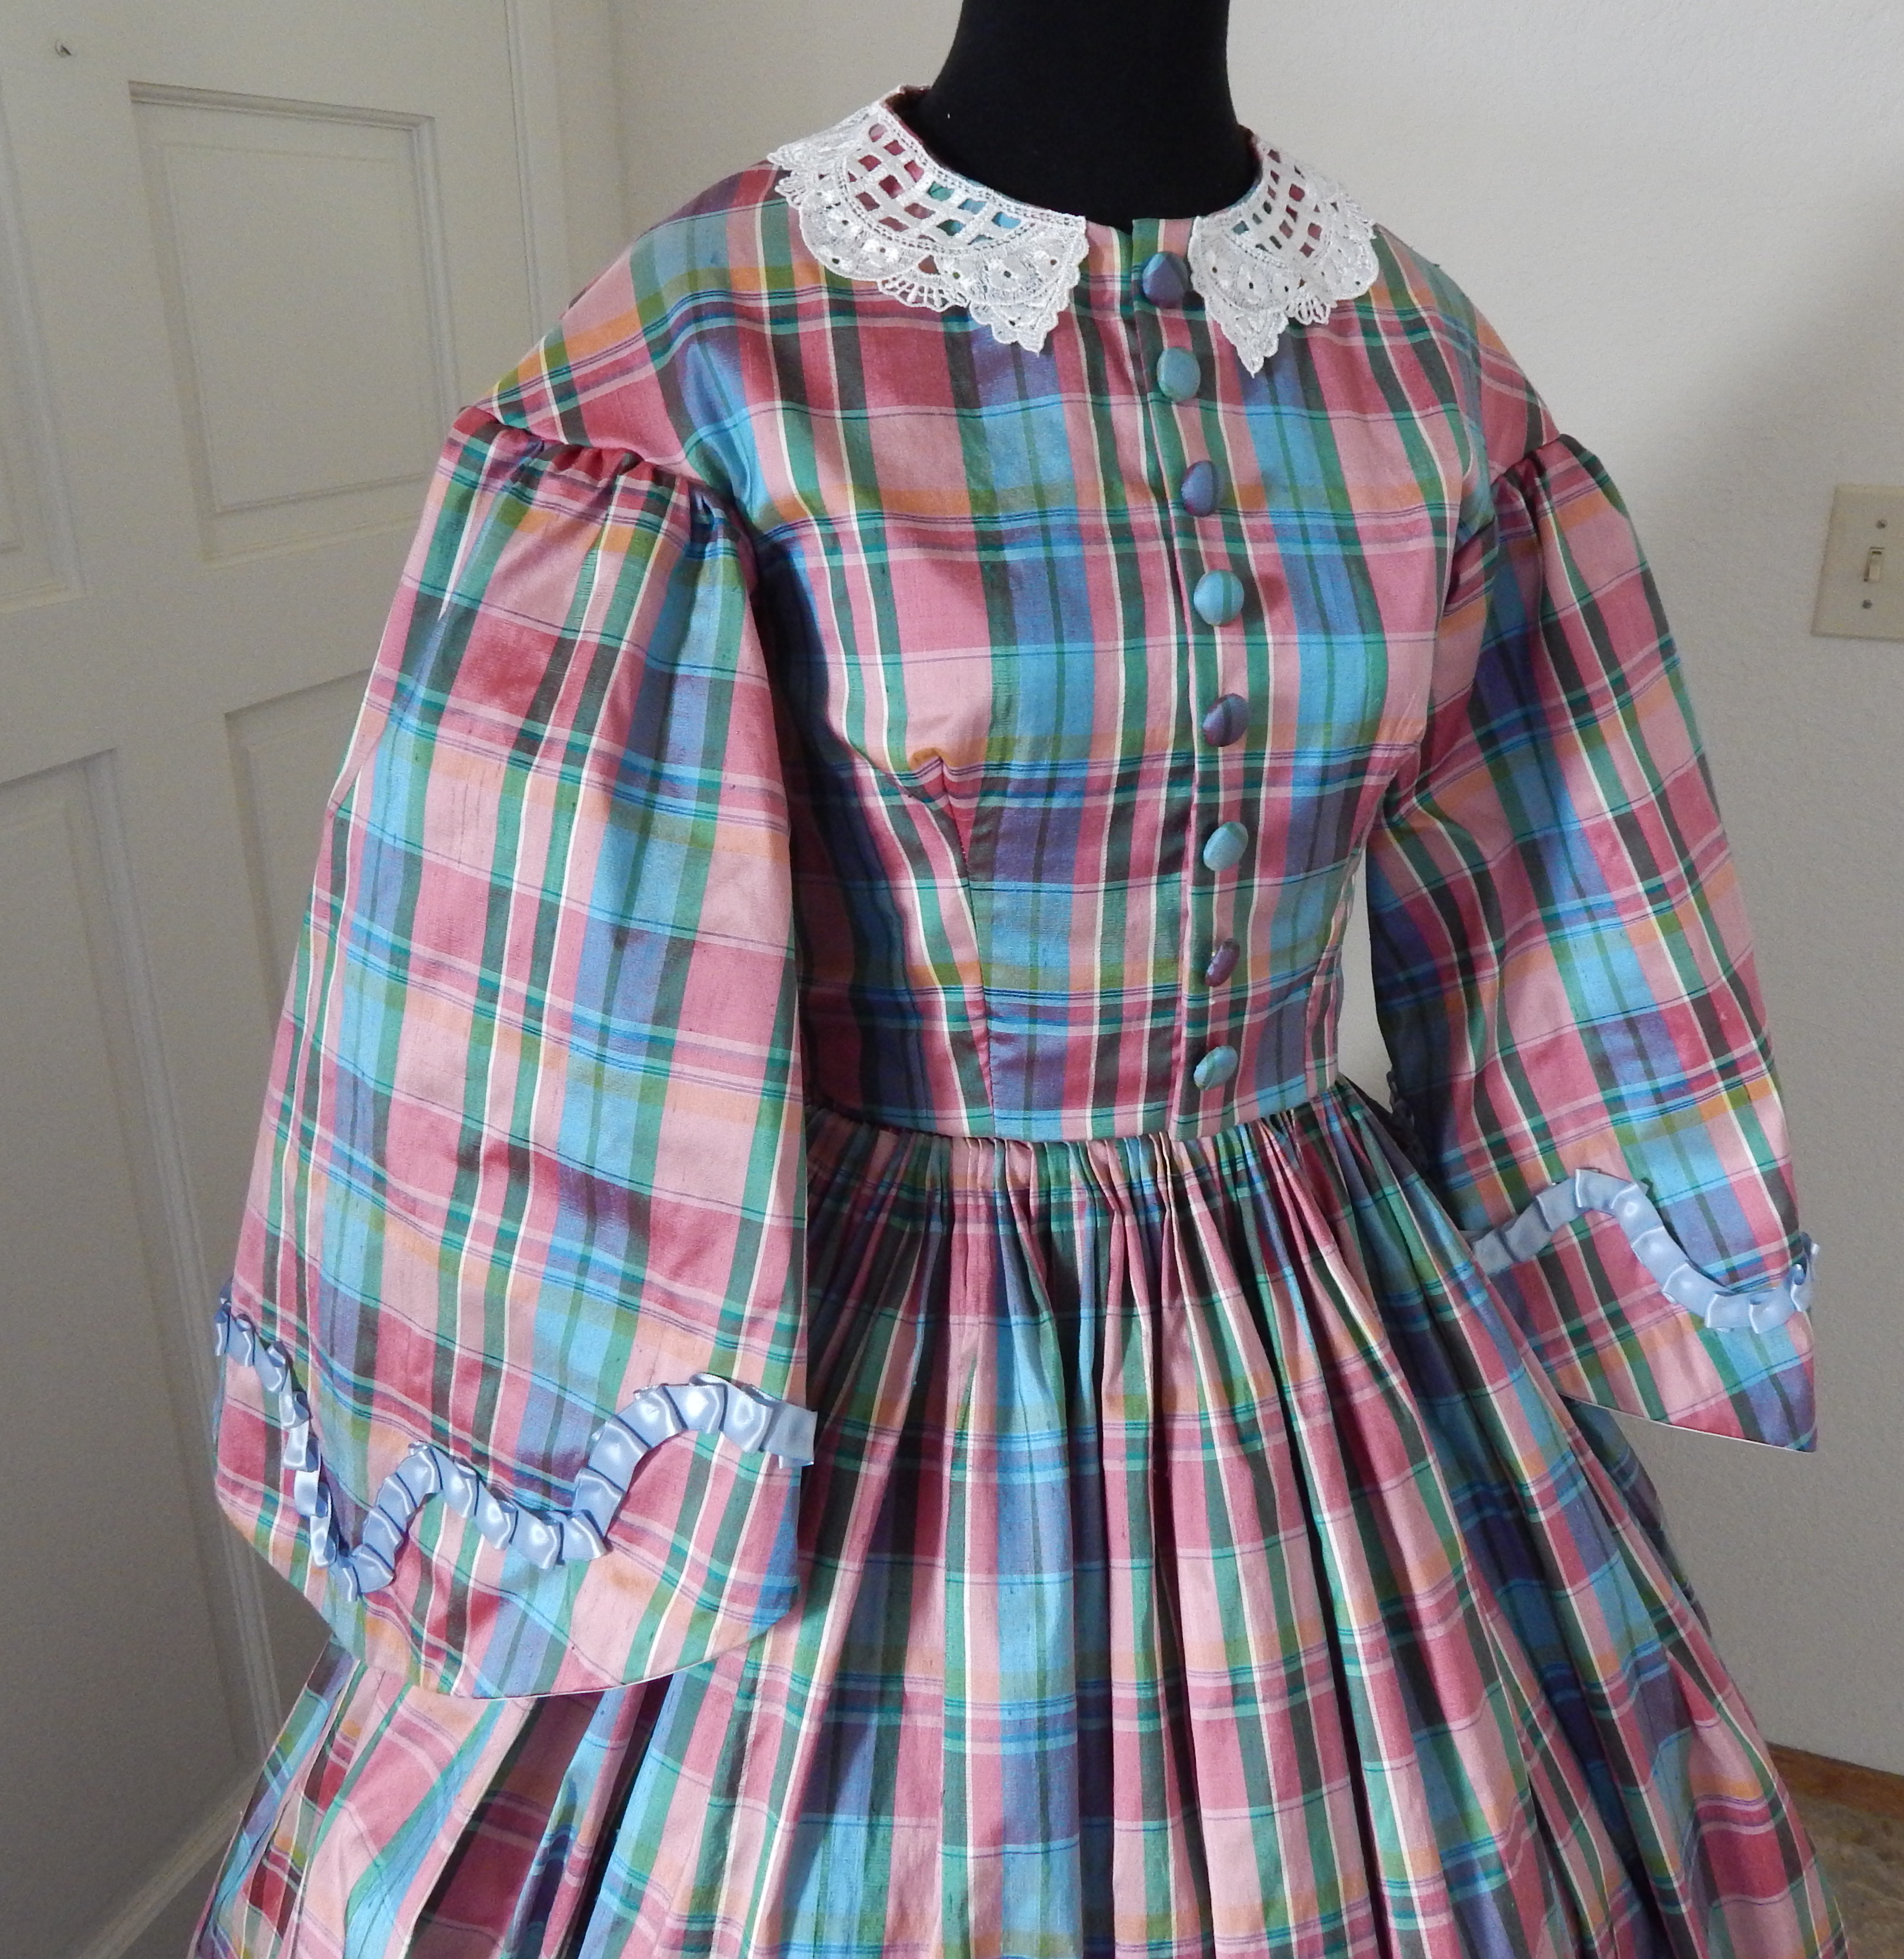
Last Saturday I went to the Dickens Christmas Fair wearing my new 1850s plaid silk dress.

The bonnet is one I trimmed during a previous year, and I am wearing Tavistock button boots from American Duchess. I am standing in front of Cuthbert’s Tea Shop at the Fair.
I would like to make a matching blue belt for the next wearing. I also didn’t have time to make some new silk undersleeves, so I made do with the sleeves of a frilly blouse peeking out. I’m also thinking of trimming the skirt in the same manner as the sleeves, but perhaps I shouldn’t get too carried away.
The dress is made from a plaid silk dupioni. The bodice is flat-lined with a cotton canvas, and closes with hooks and eyes. The covered fabric buttons are decorative only.
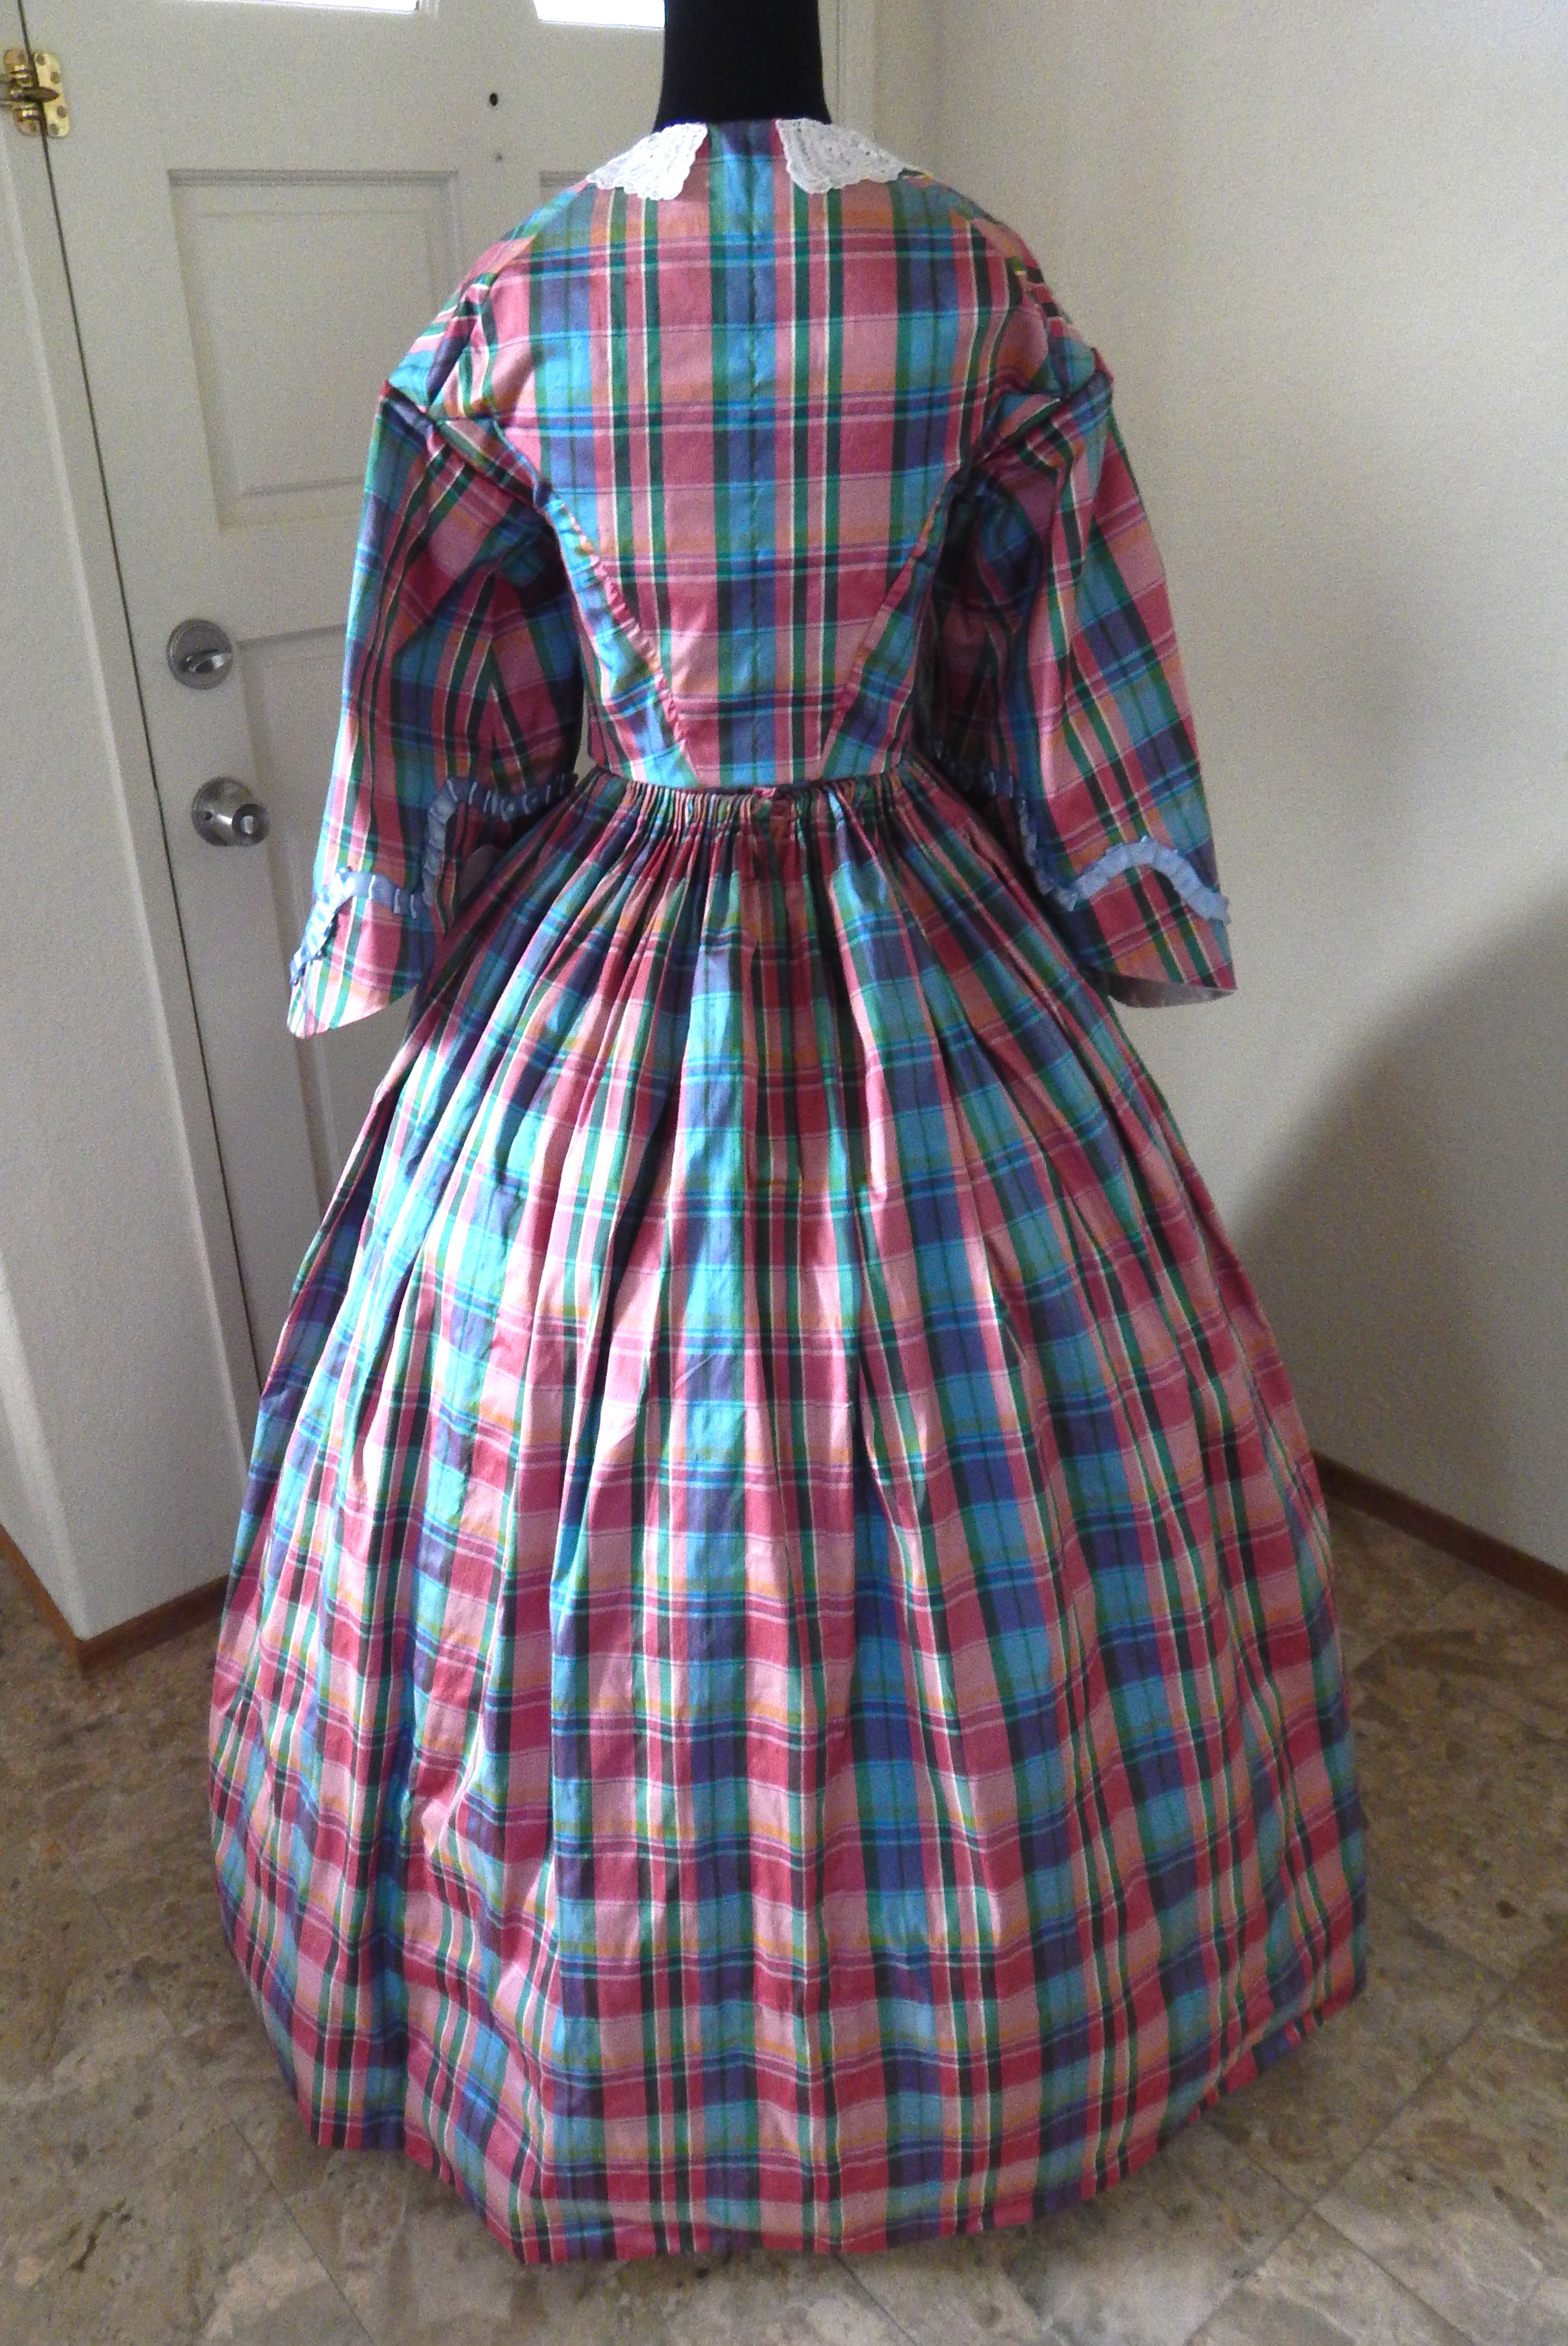
 The skirt hem has a circumference of 136 inches, and the skirt is made up of 3 straight panels. I originally planned a skirt circumference of about 150 inches, but after I cut the panels out I realized the blue stripes were not a uniform width, so changed my plan to have the blue stripes go vertically instead of horizontally.
The collar is lace I found on eBay.
 The sleeves are a pagoda shape, and lined with ivory silk taffeta left over from my 1830s Romantic dress. They are trimmed with ribbon I had to hand-pleat as I sewed, to make them follow the curve I had chalked out on the fabric.
 Originally, I planned to knife-pleat the skirt to save time, but I caught a cold and stayed home from work for 2 days, and cartridge-pleated while watching Netflix. It was my first time doing cartridge pleats, and although time-consuming, I do like the effect, even though I think I should make them a little tighter next time.
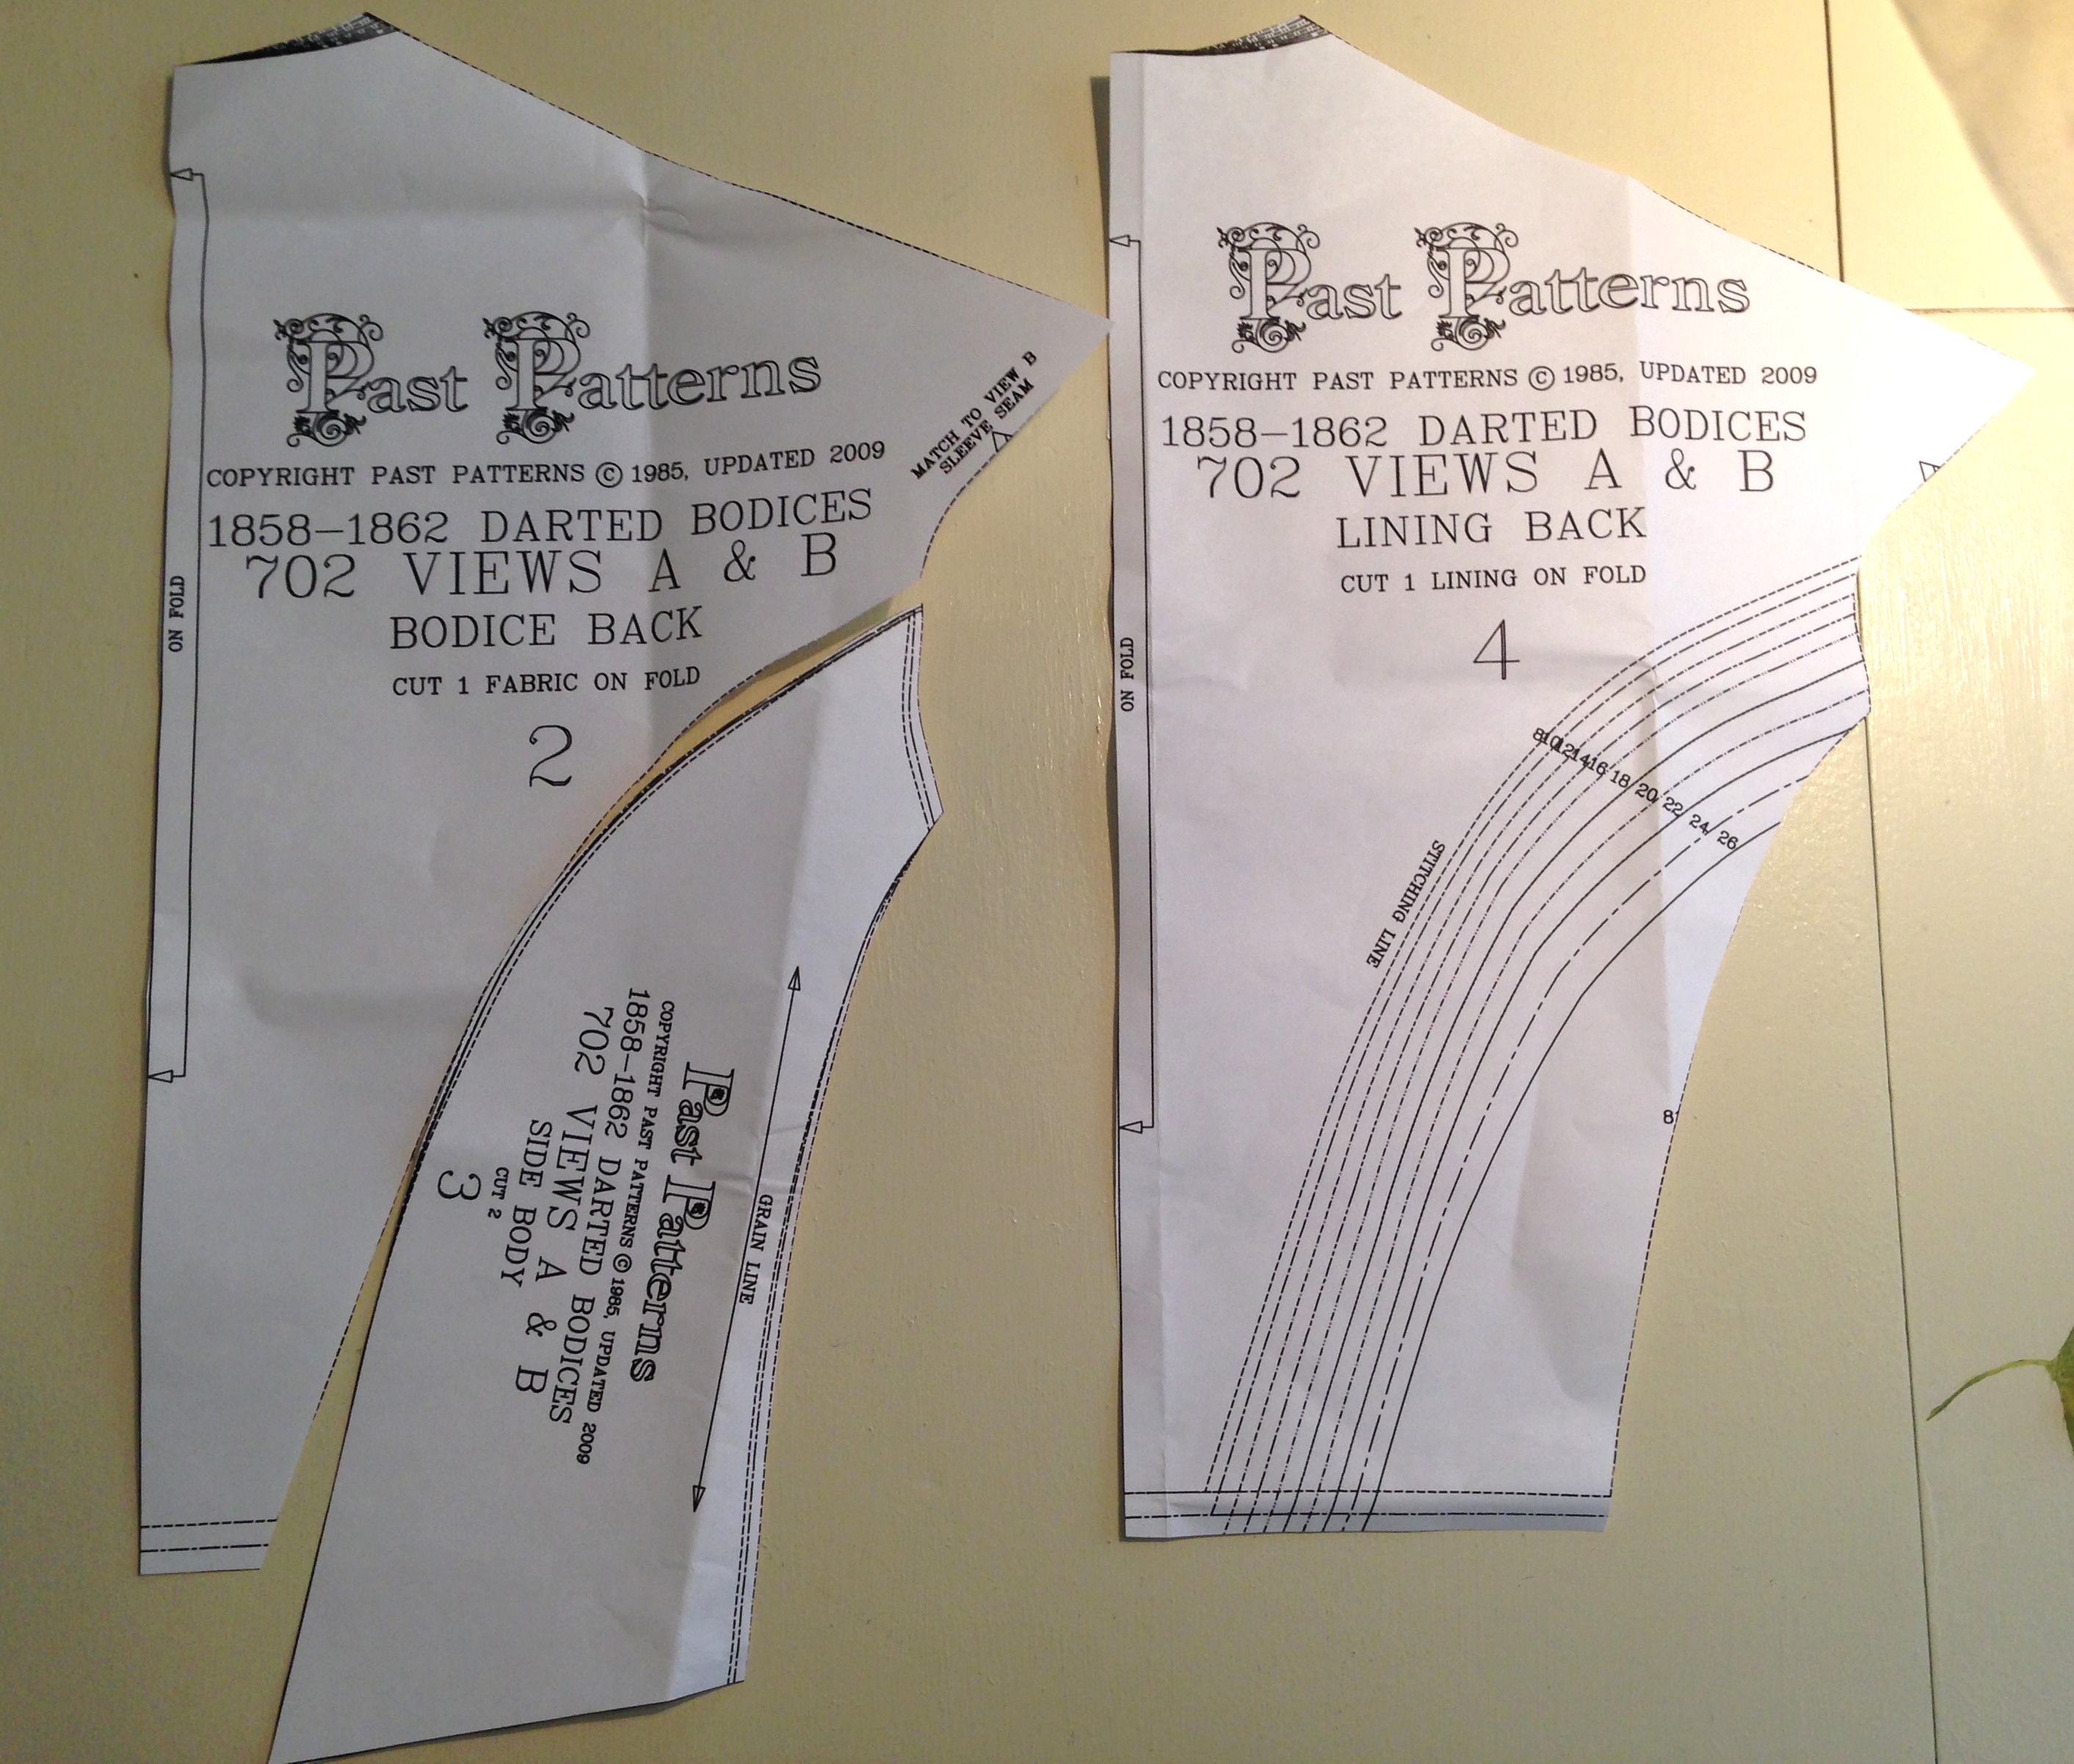
 I received some advice on my last post to cut the side back panels on the bias, since I was having a little trouble with perfectly matching the plaid along the curved seams, so I changed the bodice.
 A few of the things I liked about this dress are things you can’t see, precisely because you can’t see them. The skirt is unlined, except for a self hem-facing of about 10 inches that is hand-sewn. Can you see the horizontal stitch line? (Sorry, I didn’t take photos before wearing at Dickens Fair, and the car ride has rumpled the skirt quite a bit).
 I hid a pocket in each side seam, and I had a lot of trouble finding my pockets throughout the day. Let’s play find the pocket.
 In the past, I’ve added the skirt placket near the end of construction, but this time I followed Jennifer R’s instructions on how to put in the placket before you even sew your skirt panels together, and I think it came out much neater.
Overall I am quite pleased with this outfit! There are a few tweaks I would like to make, and accessories to add (plus add a little more floof on top of my hoop) but it came out better than expected. I used Past Patterns 702 (Dart Fitted Bodices) as a pattern, and I will write a review about the pattern fit and construction in my next post.
Project Costs:
- Fabric: 6 yards 54 inch silk: $59.98 + $13.90 shipping (I still have enough left over for an evening bodice!)
- Pattern: $14 + $3.25 shipping
- Lining: 1 yard cotton canvas: $12.20 + tax
- Sleeve lining: $0 (remnants from a previous project)
- Lace collar: $5.99
- 3 spools ribbon: $11.30 (I still have plenty left to trim the skirt or make a belt)
- Hooks and eyes: $3.65
Total cost: $124.27
If I didn’t pay for shipping or the excess ribbon the cost would have been around $100. Not bad for a silk dress. =)
 She’s got a butt, instead of a mysterious smooth cliff.


 12-14-19")
