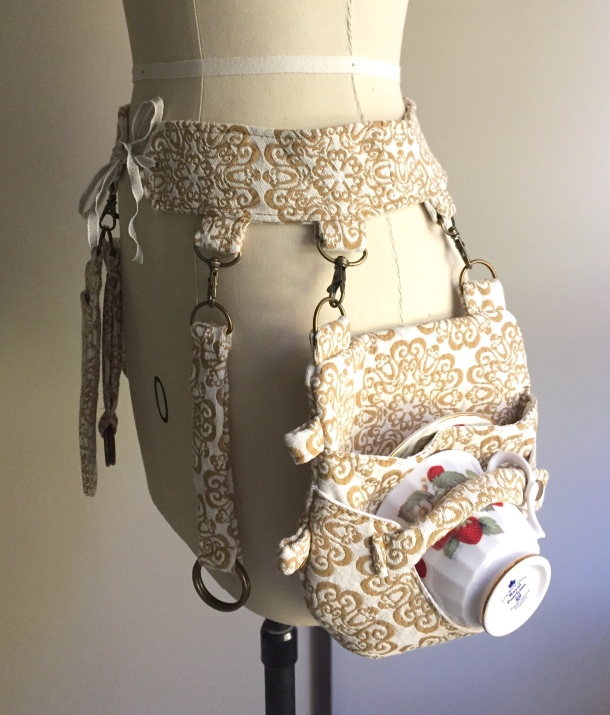
My most recent project is a steampunk utility belt with swivel hooks that accessories can be attached to: a teacup holster, a pouch, a fan pocket, and some skirt lifters/chatelaines. These items were made with two patterns from the Steamtorium Etsy shop: the under corset belt (which includes the pouch, fan pocket, and chatelaines) and the teacup holster.
And here it is without the teacup and fan.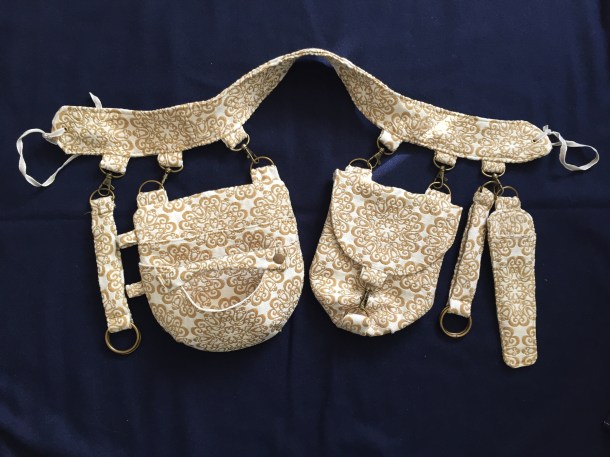
Although this was designed to be a steampunk accessory, which would probably work quite well for a Wild West event I have this year, I think it would make a great sewing utility belt too! I might wear this to a workshop some time. The fan pocket can be used for scissors, various tools can be clipped to the chatelaines, the pouch would hold small items, and I have to stay properly hydrated while sewing, of course. =) My favorite item is the teacup holster!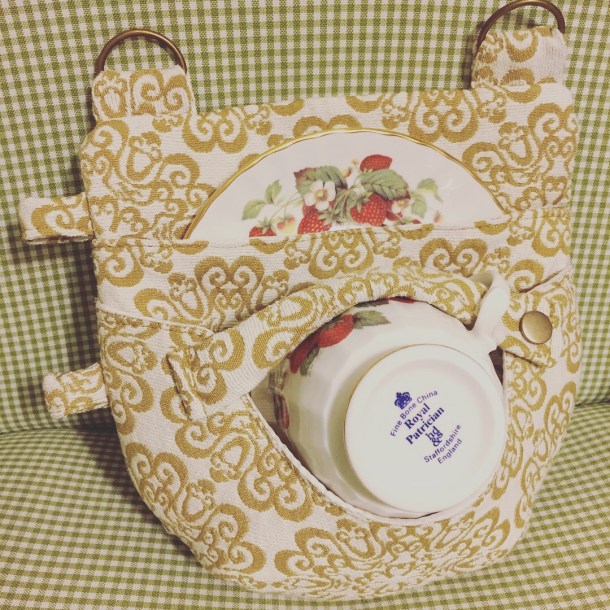
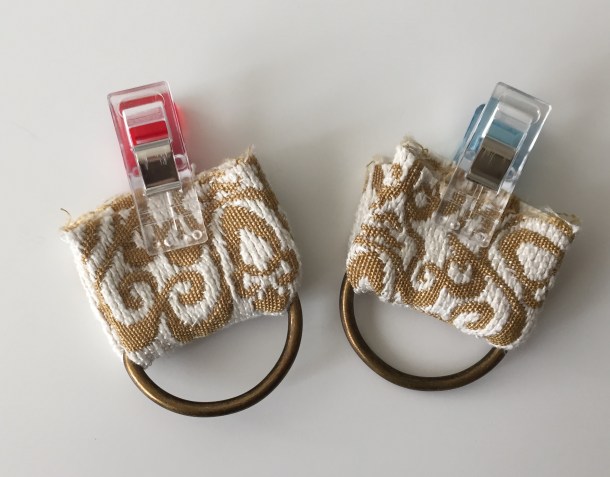
There’s a pocket for your saucer, a pocket with a secure snap strap for your cup, a pocket in the back for teabags, and some loops on the side for your spoon.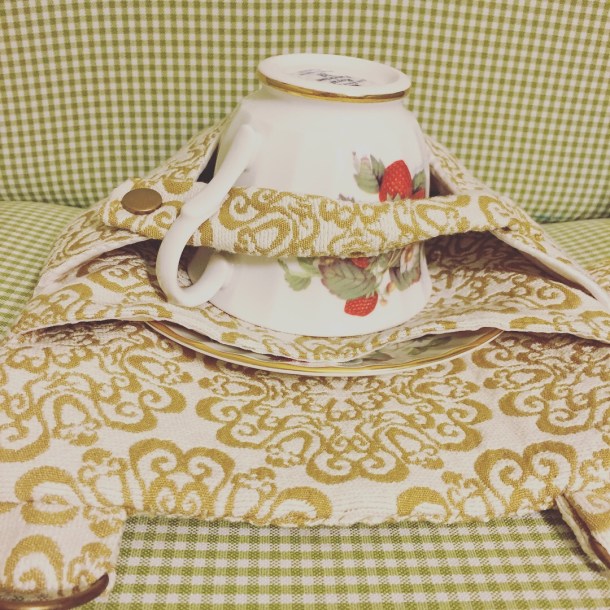
My first thought when I got these PDF patterns was “Wow! Step-by-step instructions clearly illustrated by color photographs!” The pattern is not a difficult one, but has a lot of steps and small parts, so the pictures help a lot, especially if you are a visual learner.
The belt pattern is multi-sized for 27-45″ waists, and the fan pocket comes in 2 sizes, while the rest of the accessories come in one size. Here’s some more examples made by the pattern-maker:


All the accessories are detachable and can be moved around because of a swivel hook and D-ring system.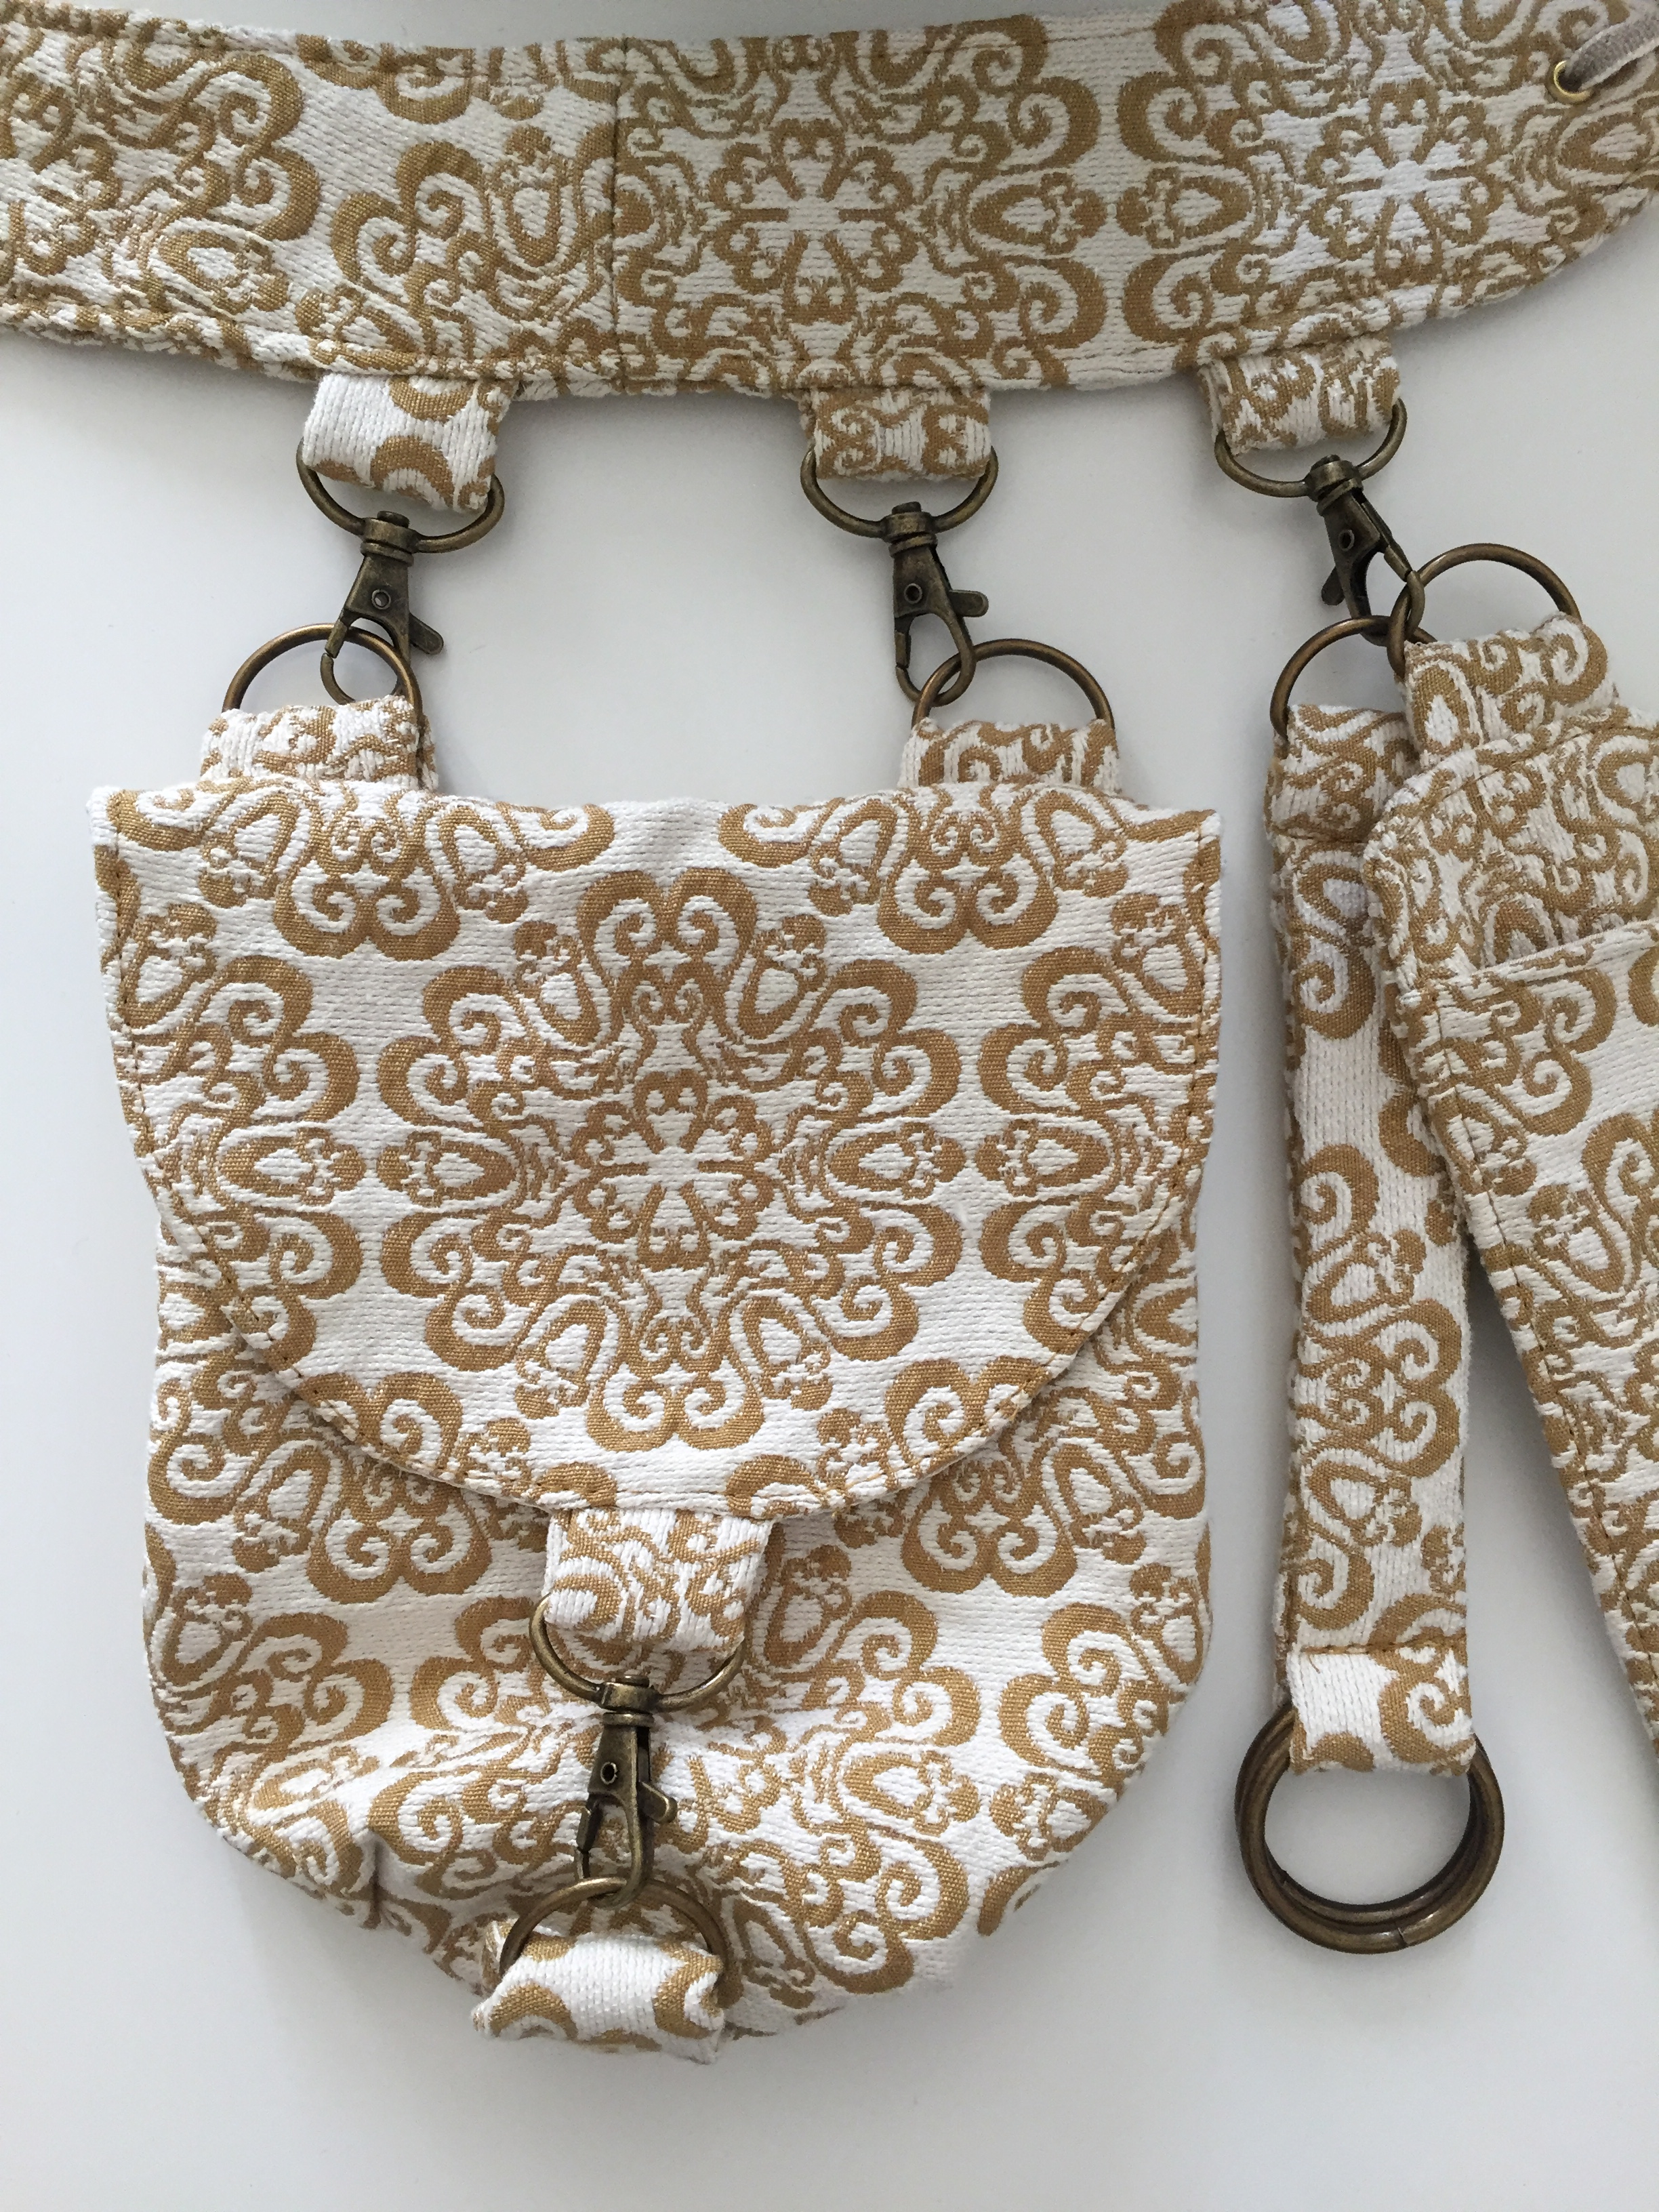
You can wear this at your waist or hips.
Tips for easier sewing:
- Don’t use a fabric that’s too thick! I used a heavy upholstery because I liked the pattern, but some of the straps are narrow and very difficult to turn if your fabric is thick. If I made this again I would use a lighter brocade or twill.
- Read all the instructions carefully first before cutting out the pattern pieces. I ended up cutting some extra pieces that weren’t needed. (For example, if you make the teacup holster to be worn with this belt, and not your own, you will make small D-ring straps, instead of big loops, but both kinds of attachments are provided).
- The pattern instructs you to sew ribbons to each end of the belt to tie it together. If you want to be able to swap the ribbons whenever you like, you can put eyelets or grommets into the ends, like I did. (This is the only change I made to the pattern).
- Get sewing clips. Some parts of the project requiring sandwiching together many layers of fabric, and it’s much easier to clip them together instead of pinning.
Pros and cons:
- Great, detailed instructions!
- There are a lot of pieces. This not a difficult pattern, but it can be time-consuming. Don’t do this the night before a convention! I would recommend pinning the pattern to each fabric piece you cut out so you can keep track of all the small pieces.
- Related to above, there are a lot of materials, and give yourself time to source all of them. In addition to your fabric you will need swivel hooks, D-rings, O-rings, foam batting, fleece batting, interfacing, ribbon, and thread. There’s a detailed materials list in the pattern.
- The belt is made of 6 pieces of fabric (3 on the front and 3 on the back). I suspect this is so that the pattern pieces can fit on an 8 x 11″ paper, and so you can save some fabric yardage. However, if you have thick fabric you will have bulky seams, and it’s hard to match patterns. I think having an option to tape the paper pattern together to make one larger pattern piece to cut the belt out would be nice.
- Very responsive customer service! I found a small typos/omissions on some pattern pieces, but Sherry, the pattern designer, said she would fix them right away. I think by the time you read this review the version in her Etsy shop should have all the updates!
Project cost: I normally provide a tally of the costs, but it’s a little hard in this case because a lot of the items are from my stash, or you use small pieces of it (like the foam interfacing), and some of the hardware is sold in a large pack. (For example, you only need 1 snap, and it comes in a pack of 10). I’d estimate that if you were to buy everything from scratch it may cost $30-40 depending on the fabric and the type of hardware, and you would still have a lot of materials left over.
Final thoughts: This was a fun project to make, the patterns are good with clear instructions, and I recommend them!
Note: I was offered this pattern for free by Sherry Ramaila of Steamtorium, but I wasn’t paid for this post. All opinions are mine, and I used my own fabric. Thank you Sherry for the pattern!


 12-14-19")
