Category Archives: Cosplay

My Historical Loki Variant Cosplay (Borgias-Inspired Renaissance Dress Costume)

I was making a Borgias-inspired Renaissance dress and decided to lean into to the green gold color scheme and make it a historical Loki variant costume. I wanted a Renaissance gown but being shiny and pretty was more important to me than historical accuracy so this isn’t pegged to a specific decade, but rather a look inspired by both the Borgias HBO show and the character Loki from the Marvel Cinematic Universe.

The dress is made from beautiful green and gold shot raw silk suiting. The bodice uses the same fabric but with a silk/rayon organza burnout overlay, and the lining is a black cotton canvas for structure.
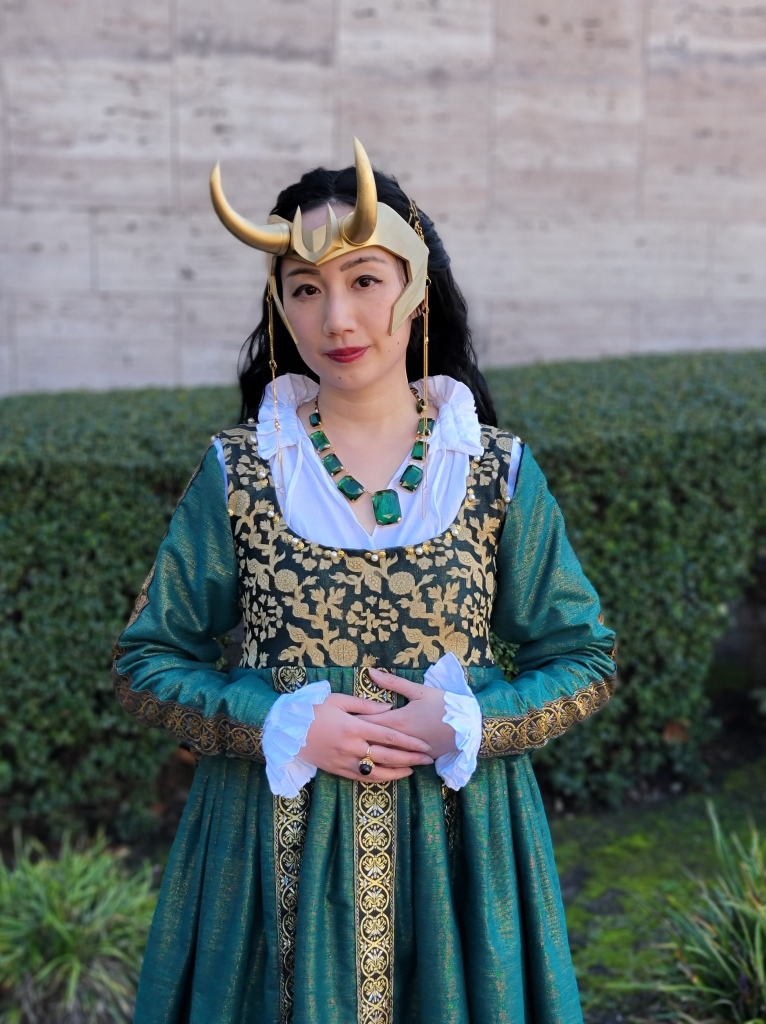
Rather than using a commercial pattern I Frankensteined together math and modified pattern bits from previous costumes I made. The bodice is a shorted version of the kirtle I previously made using help from the Tudor Tailor book (Amazon affiliate link). I widened the shoulder straps and added some more seam allowance but it is otherwise generally the same.

The skirt is made of pleated rectangular panels. Each of the front and back are 1.5 panels wide, with the seam hidden under the metallic jacquard trim.

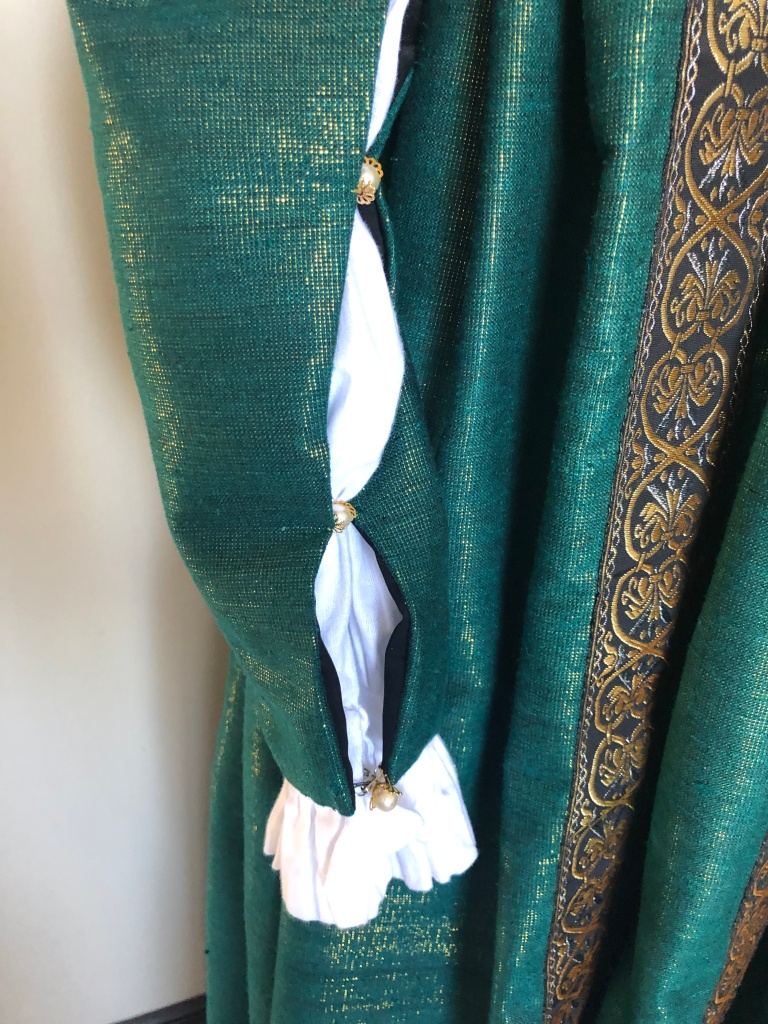
The sleeves are basic sleeve shapes but cut a little loose to allow for the chemise underneath. They are somewhat like tie-on sleeves except instead of ribbons I sewed them at the meeting points with a glass pearl and some gold bead caps.

Underneath the dress I wore a Tudor chemise because that is what I had on hand. (It was also made using a pattern from the Tudor Tailor book). However, at a later point I’d like to make a Renaissance camicia with a different neckline and much fuller sleeves to puff out through the gaps in the green sleeve.

LOKI CROWN

I bought the Loki crown as 3D printed pieces from Parton Prints on Etsy. The horns come as separate pieces for ease of shipping and I glued them on using E6000 glue. After a little sanding, I used a primer that someone recommended to me for 3D printed plastics Tamiya Gray Fine Surface Primer (Amazon affiliate link) I finished up with two coats of Rust-Oleum Metallic Spray Paint in Gold. Originally I used more E6000 to glue on a black elastic strap but decided to cut them off. Instead I used the nubs of those straps as an anchor point to sew on some gold necklace chains both as decorative dangling elements in the front and also as a visible gold band across the back to hold the crown on.

I am wearing a wavy black wig from Amazon (affiliate link) under the crown. I wish my hair was that luxurious! The necklace is a secondhand eBay find.

And here is a video of the dress in action!

I had so much fun pretending to be a villain. Here are a few of the fun TikTok videos I made as Lokizia Borgia:

  1. Transforming into Lokizia Borgia:

2. Asking you to join me in ruling the galaxy:

3. Starting my villain arc:

MATERIALS

  • 5 yards green/gold raw silk suiting from Fabricmartfabrics.com: $52.50 + $9.99 shipping (some left over)
  • 2 yards organza burnout from Fabricmartfabrics.com: $16.10 (shipped with silk suiting, a lot left over)
  • 10 yards metallic jacquard trim from Aliexpress store Lucky Zakka: $9.42
  • Thread, hooks/eyes, glass pearls, lining scraps, paint, glue, etc. from stash/left over from other projects: ~$5
  • Package of 9 mm gold-colored bead caps: $5.90 from Amazon (affiliate link); I have many left out of that 100 pack.
  • Gold chains: $0 (gifted from someone’s destash)
  • 3D printed Loki crown pieces: $32.12 including shipping from Parton Prints on Etsy

Total cost: $131.03 (with about $100 of that in the dress itself).

OTHER RESOURCES MENTIONED IN THE POST (Amazon affiliate links below):

I had a lovely time wearing this to a Sistine Chapel art exhibit with my lovely friend Sara, who took a number of the pictures in this post.

Thank you for reading!
A Hobbit Lady Costume for a Picnic

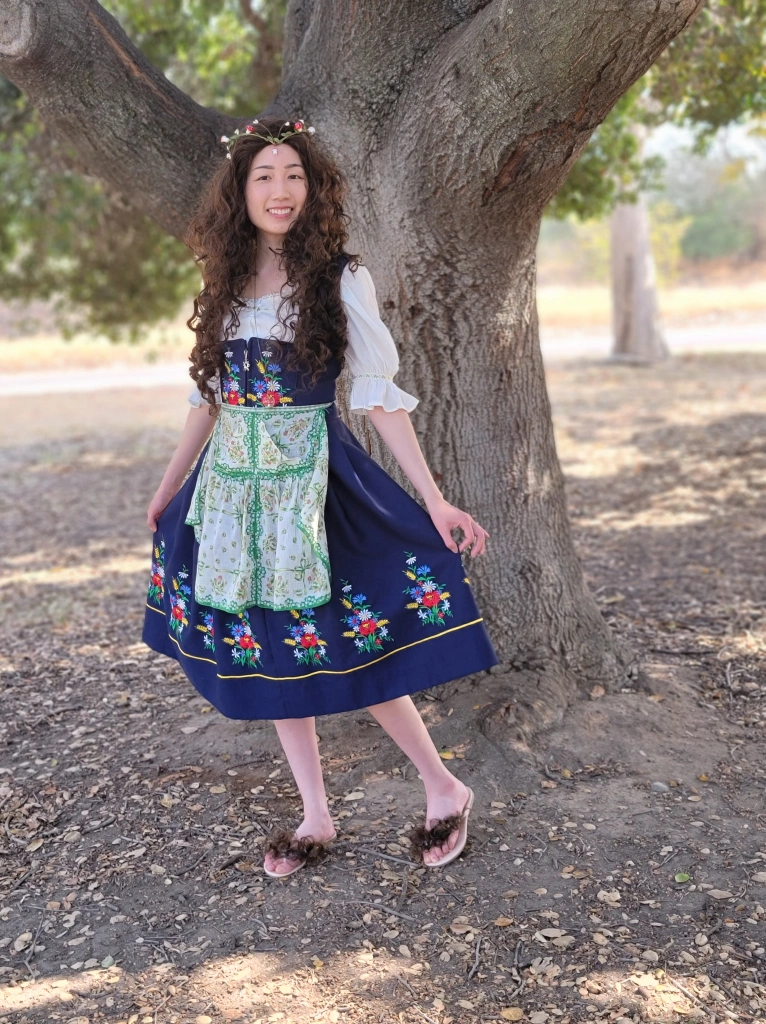
Last weekend I was invited to a hobbit picnic full of food, friends, and hairy hobbit feet! I didn’t have time to make a dress so I put together an outfit using items mostly from my closet. I’ve gotten questions about where I got my items so I will list my sources so you can put together your own hobbit costume!

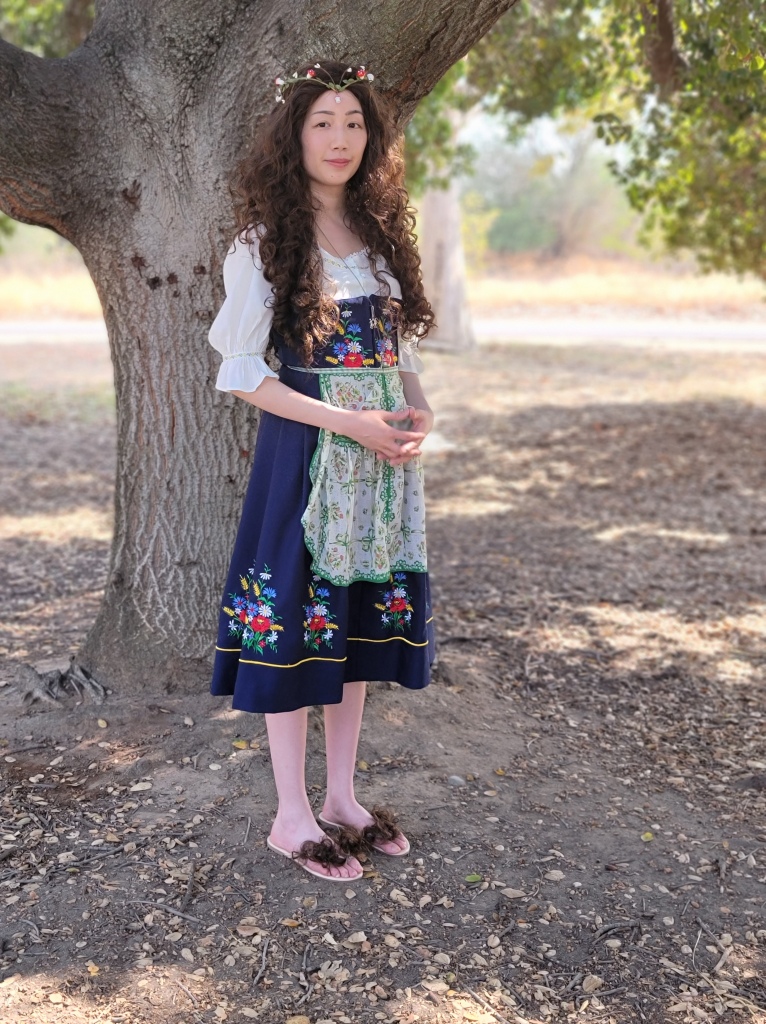
My dress is an embroidered dirndl that I bought secondhand from eBay, but it was originally made by a company called Ernst Licht, an Oktoberfest/Tracht supplier.

My blouse is originally an Amazon one that I modified. It is called the “Floerns Women’s Square Neck Puff Sleeve Button Lace Elegant Top Blouse” (affiliate link). I removed the wide ruffled lace because it was a bit stiff and scratchy, and replaced it with a cheerful floral yellow trim. I used the same trim on the sleeves. (The elastic in the sleeves was a little tight so I removed some and covered it with the trim).

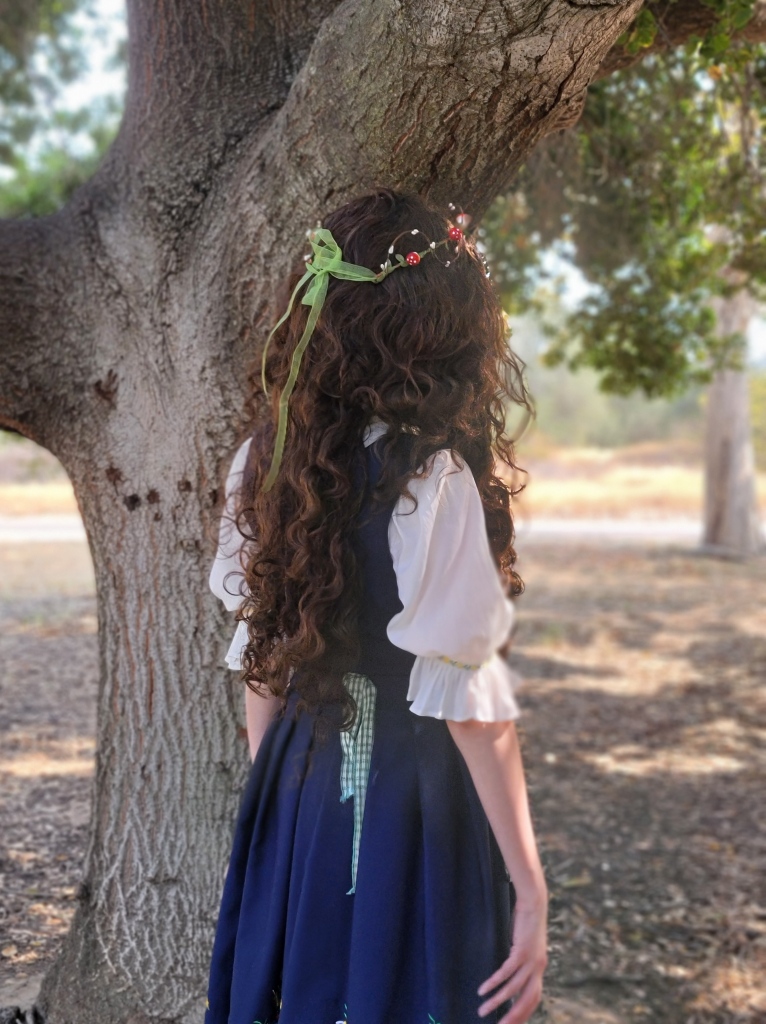
My wig is also from Amazon. It is called the “Karlery Women’s Fluffy Curly Dark Brown wig Halloween Cosplay Wig Anime Costume Party Wig” (affiliate link) and I thought it was very nice for $26.98! It was incredibly full and fluffy and a very natural-looking color and texture.

If you prefer a shorter wig with more defined curls, Arda makes a “Rosie Classic” that works well for hobbit costumes and some of my friends were wearing that wig at the picnic.

The mushroom crown was a birthday present from friends so I’m not sure where it was originally from, but if you search “mushroom tiara” on Etsy you’ll see items with a similar aesthetic.

For the hairy hobbit feet I hot-glued hair to a pair of nude sandals. (My wig was so full I was able to cut some curls from it without making a difference in the way it looked). You can get the same sandals “Shoe Land Falema Women’s Flip Flops Casual Thong flat sandals Comfort Slides” from Amazon (affiliate link) and I found them to true to my usual size.

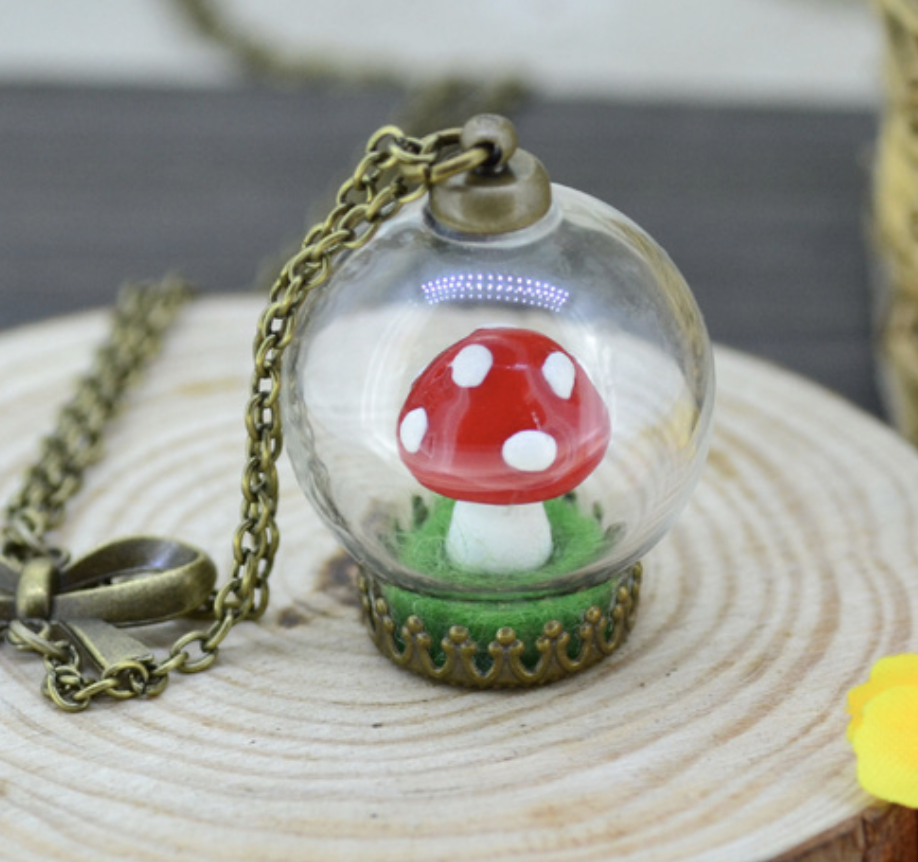
I wore a mushroom in a glass dome necklace I bought on eBay many years ago. It’s no longer available there but I’ve seen some very cute ones if you search for “mushroom terrarium necklace.”

The apron I wore is a vintage one gifted by a friend. It is made from cute printed handkerchiefs! You could make your own by sewing together some handkerchiefs, or make a simple apron by just gathering up a rectangle of colorful fabric and adding waist ties.

I hope this post was helpful to you for putting together your own hobbit costume!

(Thanks La Dauphine Costuming for taking photos of me!)

Historical Belle: My 18th Century-Inspired Beauty and the Beast Costume

I made an 18th-century inspired mashup of Belle’s iconic yellow ballgown and her hooded winter outfit from Disney’s Beauty and the Beast.

The costume has aspects inspired by 18th century fashion but is not a historically accurate reproduction particular to a specific decade. I was heavily inspired by Brunswicks (the hooded traveling outfits) but you can also see elements from robe a la anglaise gowns, caracao jackets, and side-opening petticoats.

The yellow fabric I used is a quilted cotton harvested from a king-sized bedspread! It saved me a lot of time quilting, but the material created some challenges: I had to employ strategic cutting in order to maintain symmetry in the stitch designs in the final costume, and to keep the finished edges in the skirt, peplums, sleeves, and hood. The winter-appropriate thick cotton batting meant to avoid bulky seams I had to carefully pick out excess batting in the seam allowance of each pattern piece while maintaining (or restitching) the lines of quilting stitches. Raw edges were also serged to prevent fraying and loss of batting. Interior excess seam allowance had to be sewn down by hand since ironing was insufficient to keep seams pressed flat. In addition, the pleated areas were too thick to fit into the sewing machine and had to be stitched by hand.

However, I really like how the thickness of the material gave the garment a lot of structure, especially in the jacket peplum.

The scallops were also a feature I liked.

I lined the hood with scraps of white silk dupioni left over from a previous project. It was hand-stitched in so I could keep the scalloping on the hood.

The jacket was decorated with realistic foam roses on wired stems that I trimmed and shaped with pliers to create a base for hand-sewing onto the jacket.  Each rose is accented with red crystals I glued on individually using E6000 Fabri-Fuse glue, which I highly recommend. (This is not the regular E6000 glue. Fabri-Fuse is low-odor, dries quickly, and comes in a squeeze bottle with a sharp tip for detail work).

The yellow and white striped bows are made from vintage French ribbon with picot edging, accented with antique lace. Each sleeve has embroidered tulle lace, large red satin bows, and a rose. 

My necklace and earrings were purchased from In the Long Run Designs on Etsy. The mirror was purchased from Amazon (affiliate link).

Underneath the gown I am wearing 18th century silk and linen stays made by me.

The lace-front wig was styled by me and decorated with the same roses, crystals, and ribbon as the jacket.

The wig base is a long black wavy wig that I purchased from Amazon (affiliate link).

Pattern Info:

The outfit was a combination of self-draping and Frankensteining. The main body of the jacket and sleeves used a heavily modified version of the Period Impressions 1780 Polonaise pattern, which I previously used for my Outlander dinner party dress. However, I took out some back seams and altered the sleeves around the elbow region. The peplum was created by holding and pinning material up to the upper jacket on the dress form until I got the length and fullness I wanted.

The hood and lining are pleated in a fan shape, and the pattern was adapted from the hooded cloak pattern in Linda Baumgarten’s Costume Close-up book (Amazon affiliate link).

The hood doesn’t stand up by itself, so it’s being held up here by a piece of boning to show you the shape:

No pattern was needed for the quilted petticoat, which was constructed in the same manner as your usual 18th century petticoat with side slits. The front and back panels were pleated into twill tape that served as waistbands and ties. Because of the thickness of the material there were less pleats than usual and I left a large section of the front center unpleated to allow for the jacket to sit flat over the stomach.

Materials used:

  • BrylaneHome king-sized quilted bedspread (in “aspen gold” color): $49.90 from Amazon (affiliate link).
  • Two boxes of artificial foam roses: $17.99 each from Amazon (affiliate link)
  • Red crystals (with lots left over!): $7.59 from Amazon (affiliate link)
  • Fabri-Fuse glue: $8.00 from Amazon (affiliate link)
  • Twill tape, thread, hooks/bars, red ribbon, hair clips from stash: ~$5
  • Vintage striped ribbon: $10 (this is a guess because I don’t remember how much I paid for it from a vendor table at an event)
  • Vintage lace: $0 (gift from a friend)
  • Sleeve lace: $8.27 with tax and shipping from Wikilaces on Etsy
  • Hood lining: $0 (scraps from previous project)
  • Lace-front wig: $36.99 from Amazon (affiliate link)

Total: ~$161.73
(I’m not including the shoes or jewelry because those were items I already owned for other costuming purposes. About $40 of the total is a wig I can reuse, plus I had some left over materials, so I’m calling this project a win for my pocketbook!).

I had a lot of fun making and wearing this costume. I even entered it in my first ever cosplay contest and was delighted to be a finalist in the Cosplay with Singer contest this fall! Here’s a video of the costume in action that I made for the contest:

Enjoy this silly video of me trying to fit my large costume through a small space.

Thank you for reading!

Vice Admiral Amilyn Holdo Cosplay at Silicon Valley Comic Con

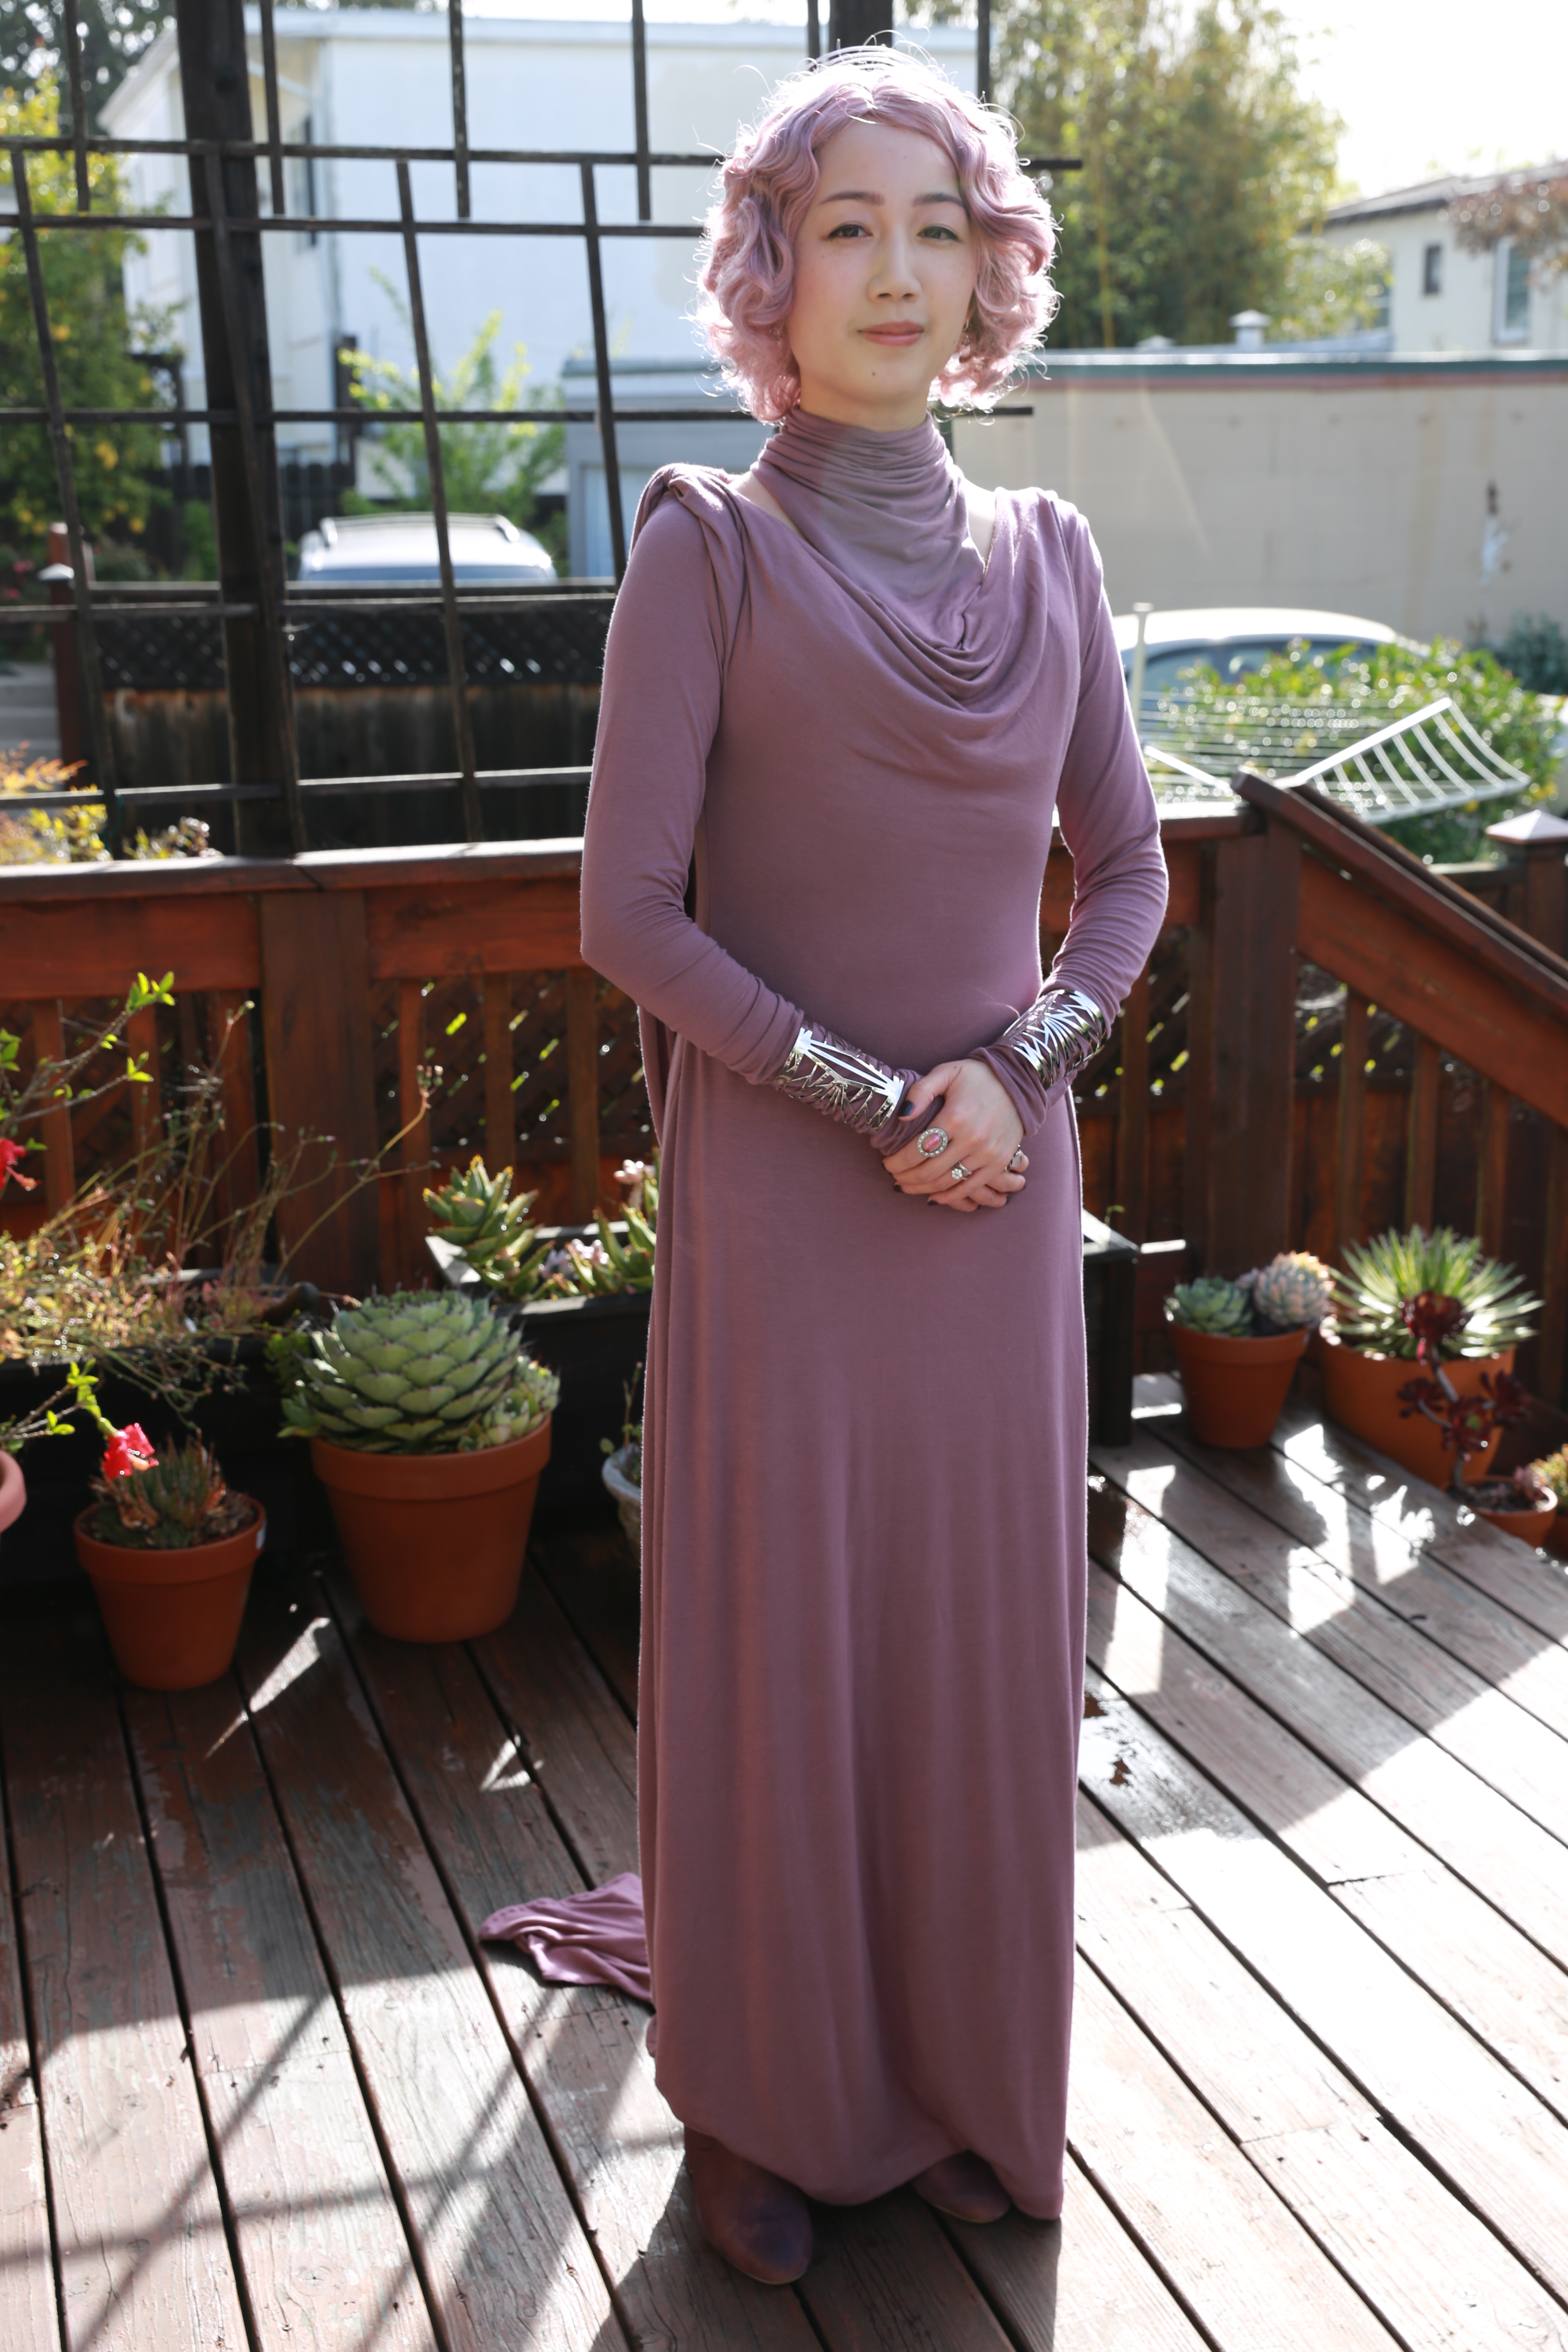
Last weekend at Silicon Valley Comic Con I premiered my Vice Admiral Amilyn Holdo cosplay. I had a great time wearing this costume from Star Wars: The Last Jedi!

Although I’ve been planning this since last year, I only had a few weeks to sew it because I was busy with other events. I will have a follow-up post with more information about the construction, materials, tips and tricks, and a materials list, but for now here are some pictures from the event!

This was taken in the lobby of the convention center, not long after arrival.CMEY9799

However, before SVCC, my friend Chris Weiner took a few photos in his back yard with his superior camera!9N6A3090

The back drape of this dress is what made me fall in love it when I first saw a photo of Lauren Dern as Amilyn Holdo in Vanity Fair Magazine.9N6A3096

There were so many great Star Wars cosplayers at SVCC! I met Praetorian Guards, Stormtroopers, and Darth Vader!IMG_7881IMG_7957IMG_7958

I also met Kylo Ren, who bowed to his Disney overlords.

IMG_7923IMG_7924

I was delighted to meet another Holdo. Double Holdo, double trouble!IMG_7858IMG_7860

I also encountered General Hux, and we had a stare-off.IMG_7930IMG_7931

Lego Obi-Wan was a delight!IMG_7822

I even found and ate a stormtrooper macaron cookie.IMG_7740

And it was an honor to be one of the cosplays featured on Business Insider!Business Insider

Business Insider Melia Robinson

Photo by Melia Robinson of Business Insider

My friend Adrienne took this video of me so you can see how the dress moves as I twirl.

SVCC was a lot of fun; I’ll be sure to be back next year! See my Flickr album for more photos from the event.