Category Archives: 1660s Cavalier

My 17th Century Masquerade Dress (Plus 10 Tips/Tricks for Sewing Costumes)

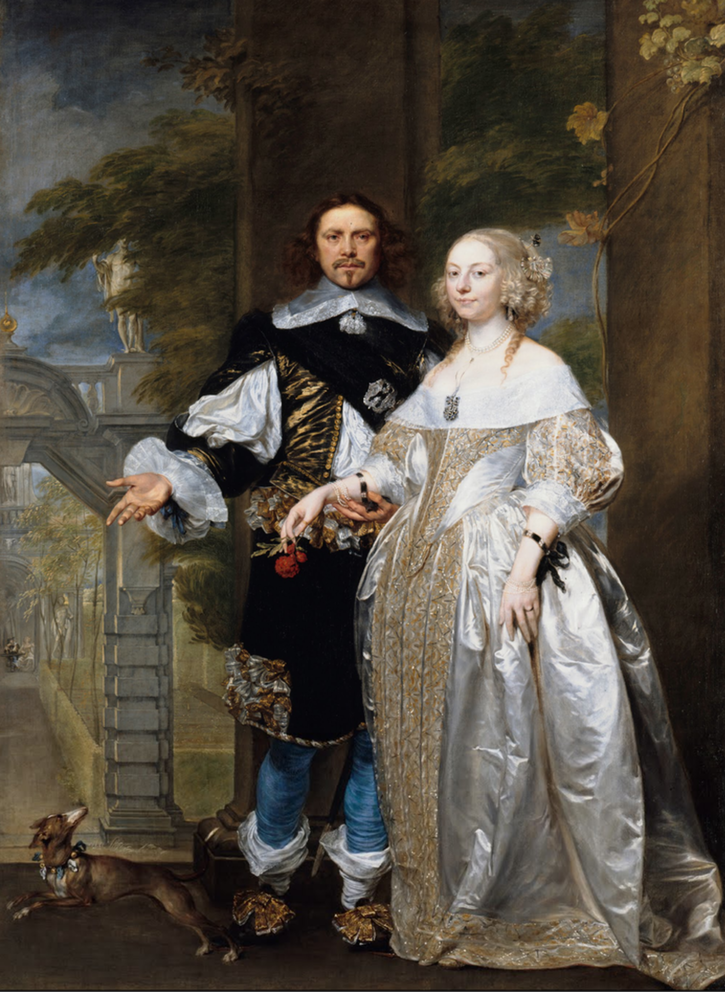
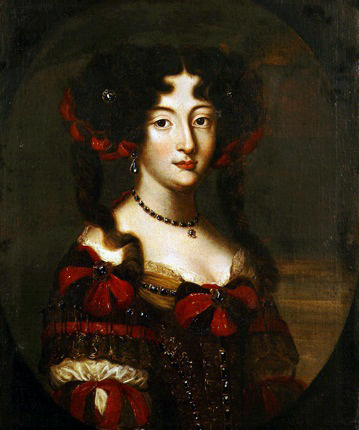
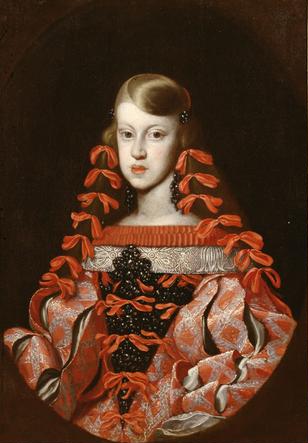
Years ago I made a black 1660s dress but wanted a more colorful one. I finally got my excuse to make one when my local costume guild decided to put on an event called “DuMasquerade,” a dinner event celebrating the works of Alexander Dumas. I made a dress out of purple taffeta and wore a dragon mask perched upon my head.

In this post I’ll show you the dress I wore, plus some tips/tricks to make your sewing faster and/or more polished. I only had a few weeks to make this dress so I definitely took some shortcuts!

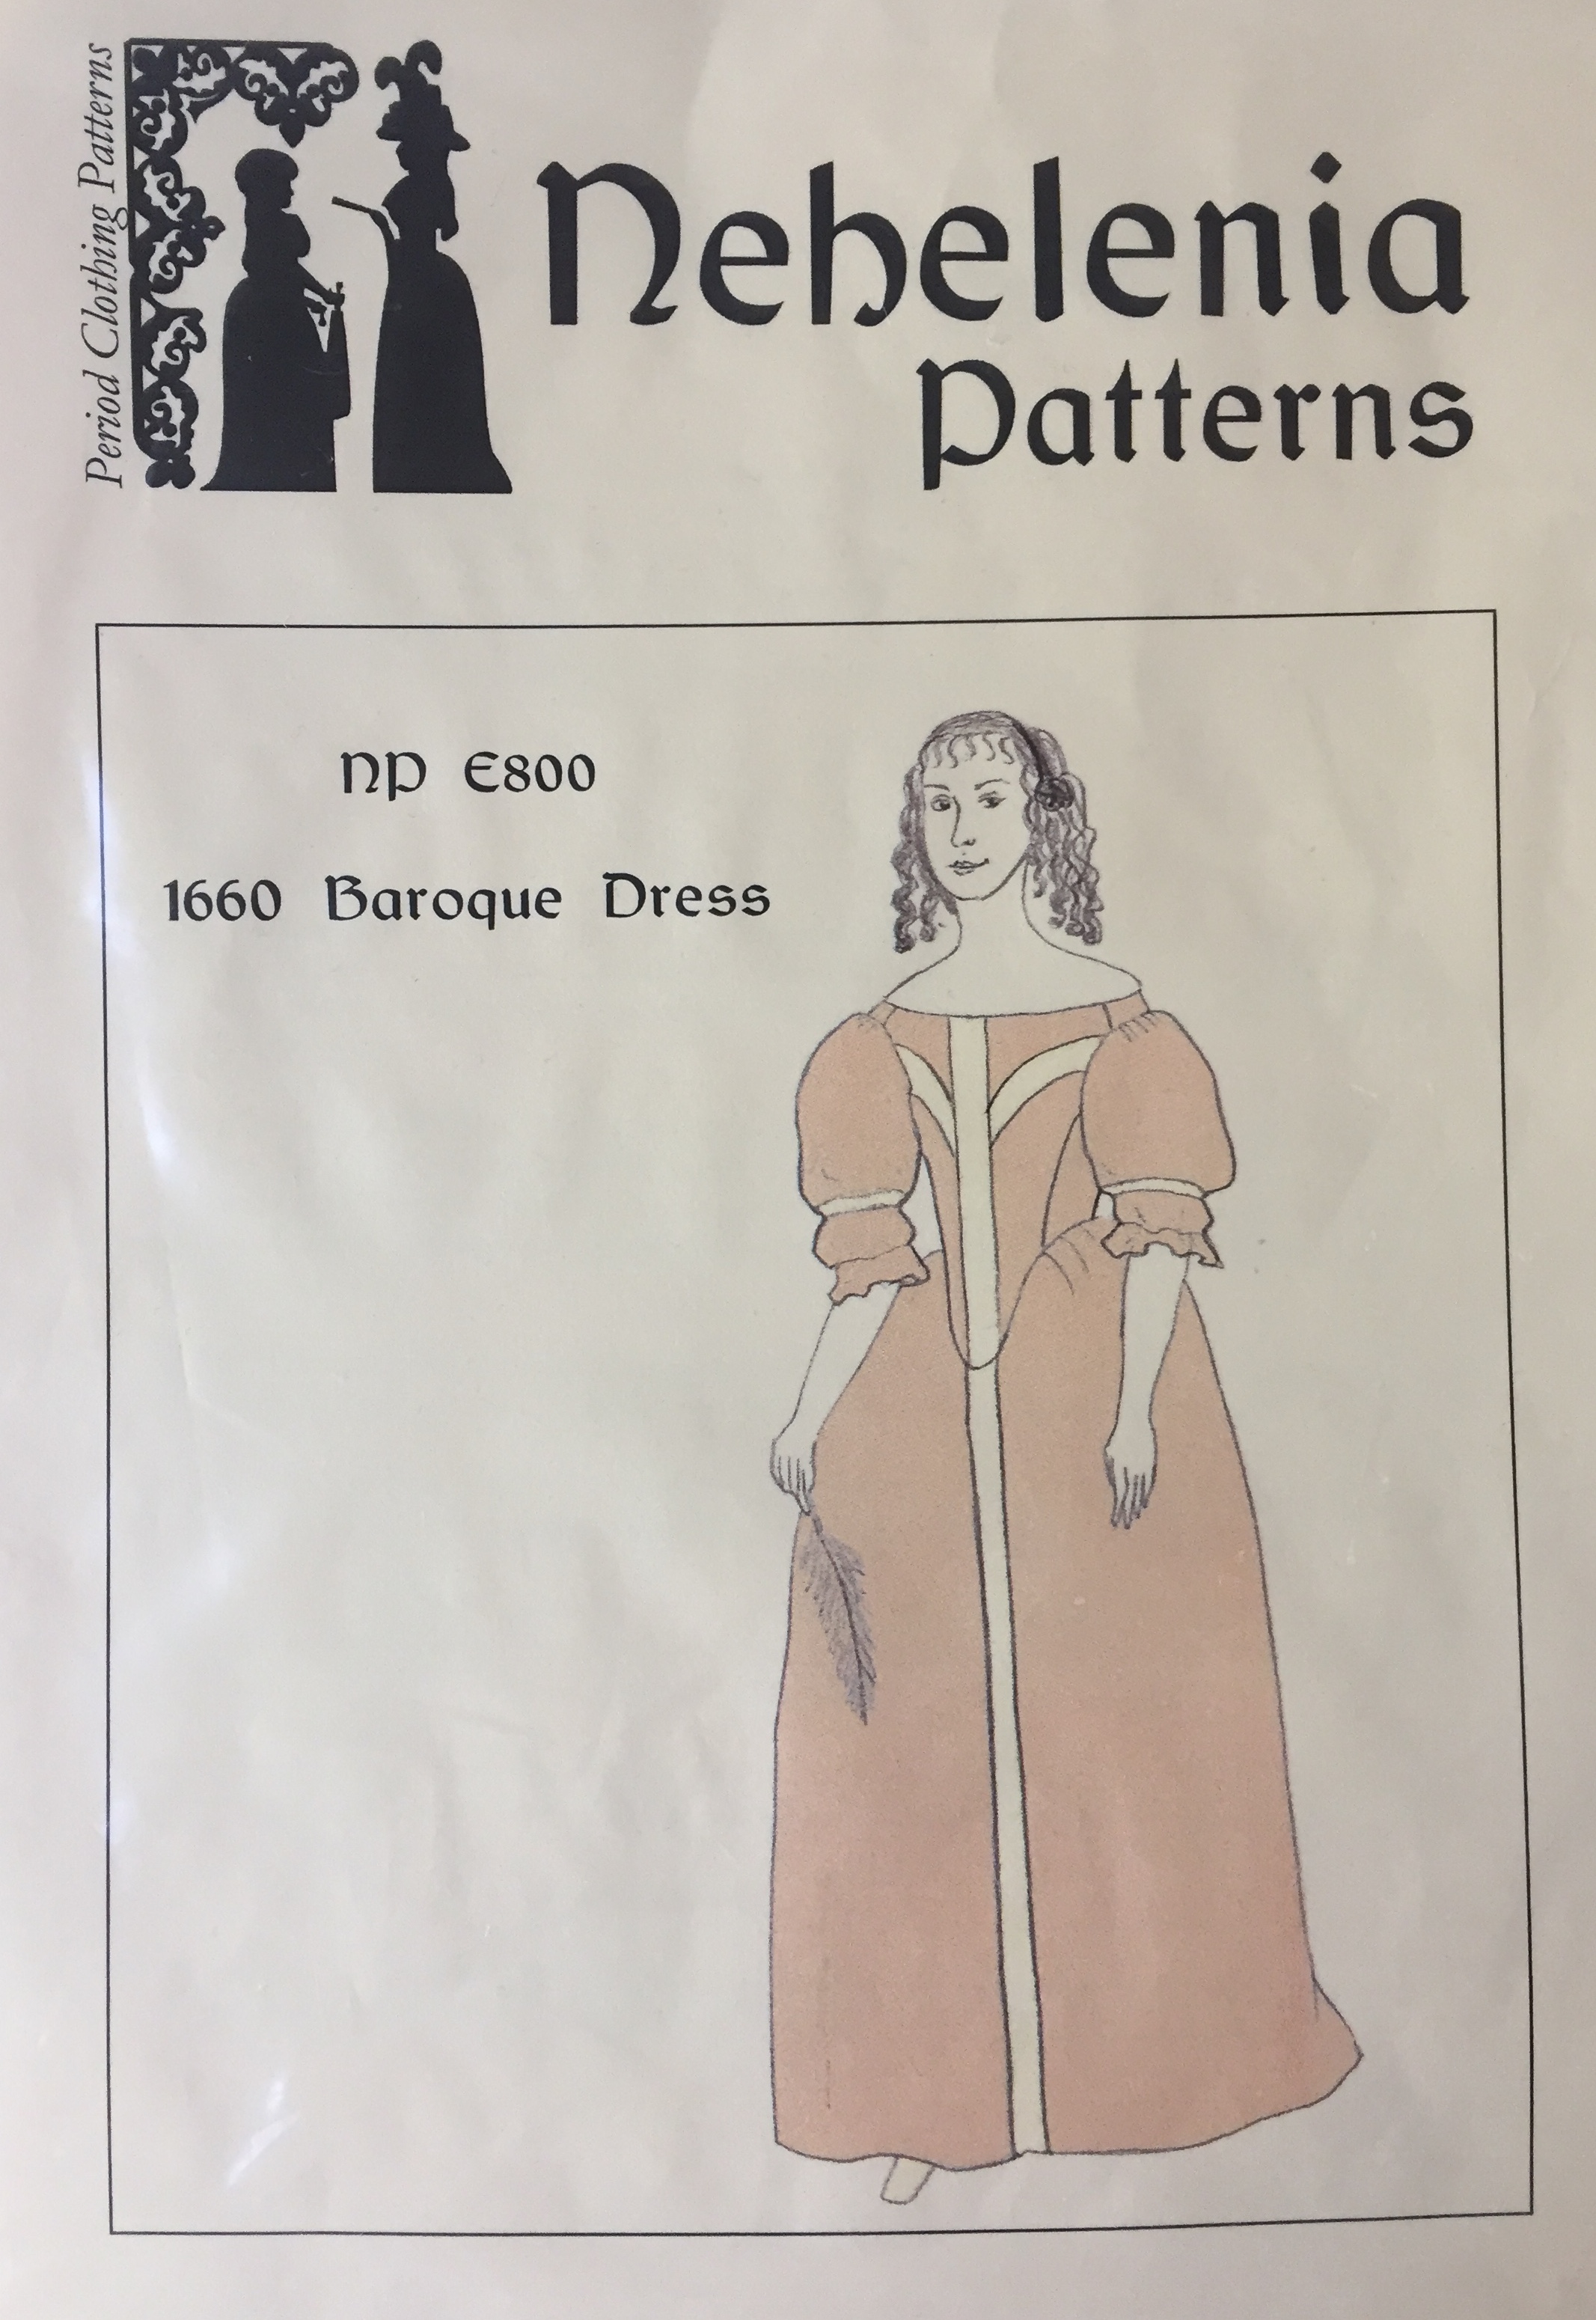
I used the Nehelenia 1660s dress pattern since I was familiar with it, having used it before. This style of dress features a long skirt, a fully boned bodice with a pointed center front, and puffy sleeves, made of a purple taffeta fabric. I am happy to brag that I made this dress for less than $25! A friend found the fabric for $2.50/yard at a local shop, and I got the fancy trim on clearance for $1/yard. The ruffles are made from a cotton organdy curtain I got for free. The lining uses scraps from a previous project and the boning is 4 different colors/lengths of zip ties and boning bits I found around the house or was given to me from someone destashing. The bum roll uses scraps from another finished dress. I already owned the pattern, shoes, wig, and petticoats from previous costumes. I was so under budget for this dress I decided to buy those pearly bodice decorations from an Etsy shop called Recycled Rockstah. The dragon mask is a kid’s Halloween mask that I painted and attached to a headband. Some of my costume projects can get pricey but every so often I like to challenge myself to make something for a low cost, to remind myself of how I started costuming, and to let others know that with a little luck and patience (and keeping a stash!) it’s possible to look fancy for less. Yes, I had the privilege of time and experience, but I firmly believe costuming is for everyone and every budget. You don’t have to have silk to be valid.

TIPS/TRICKS

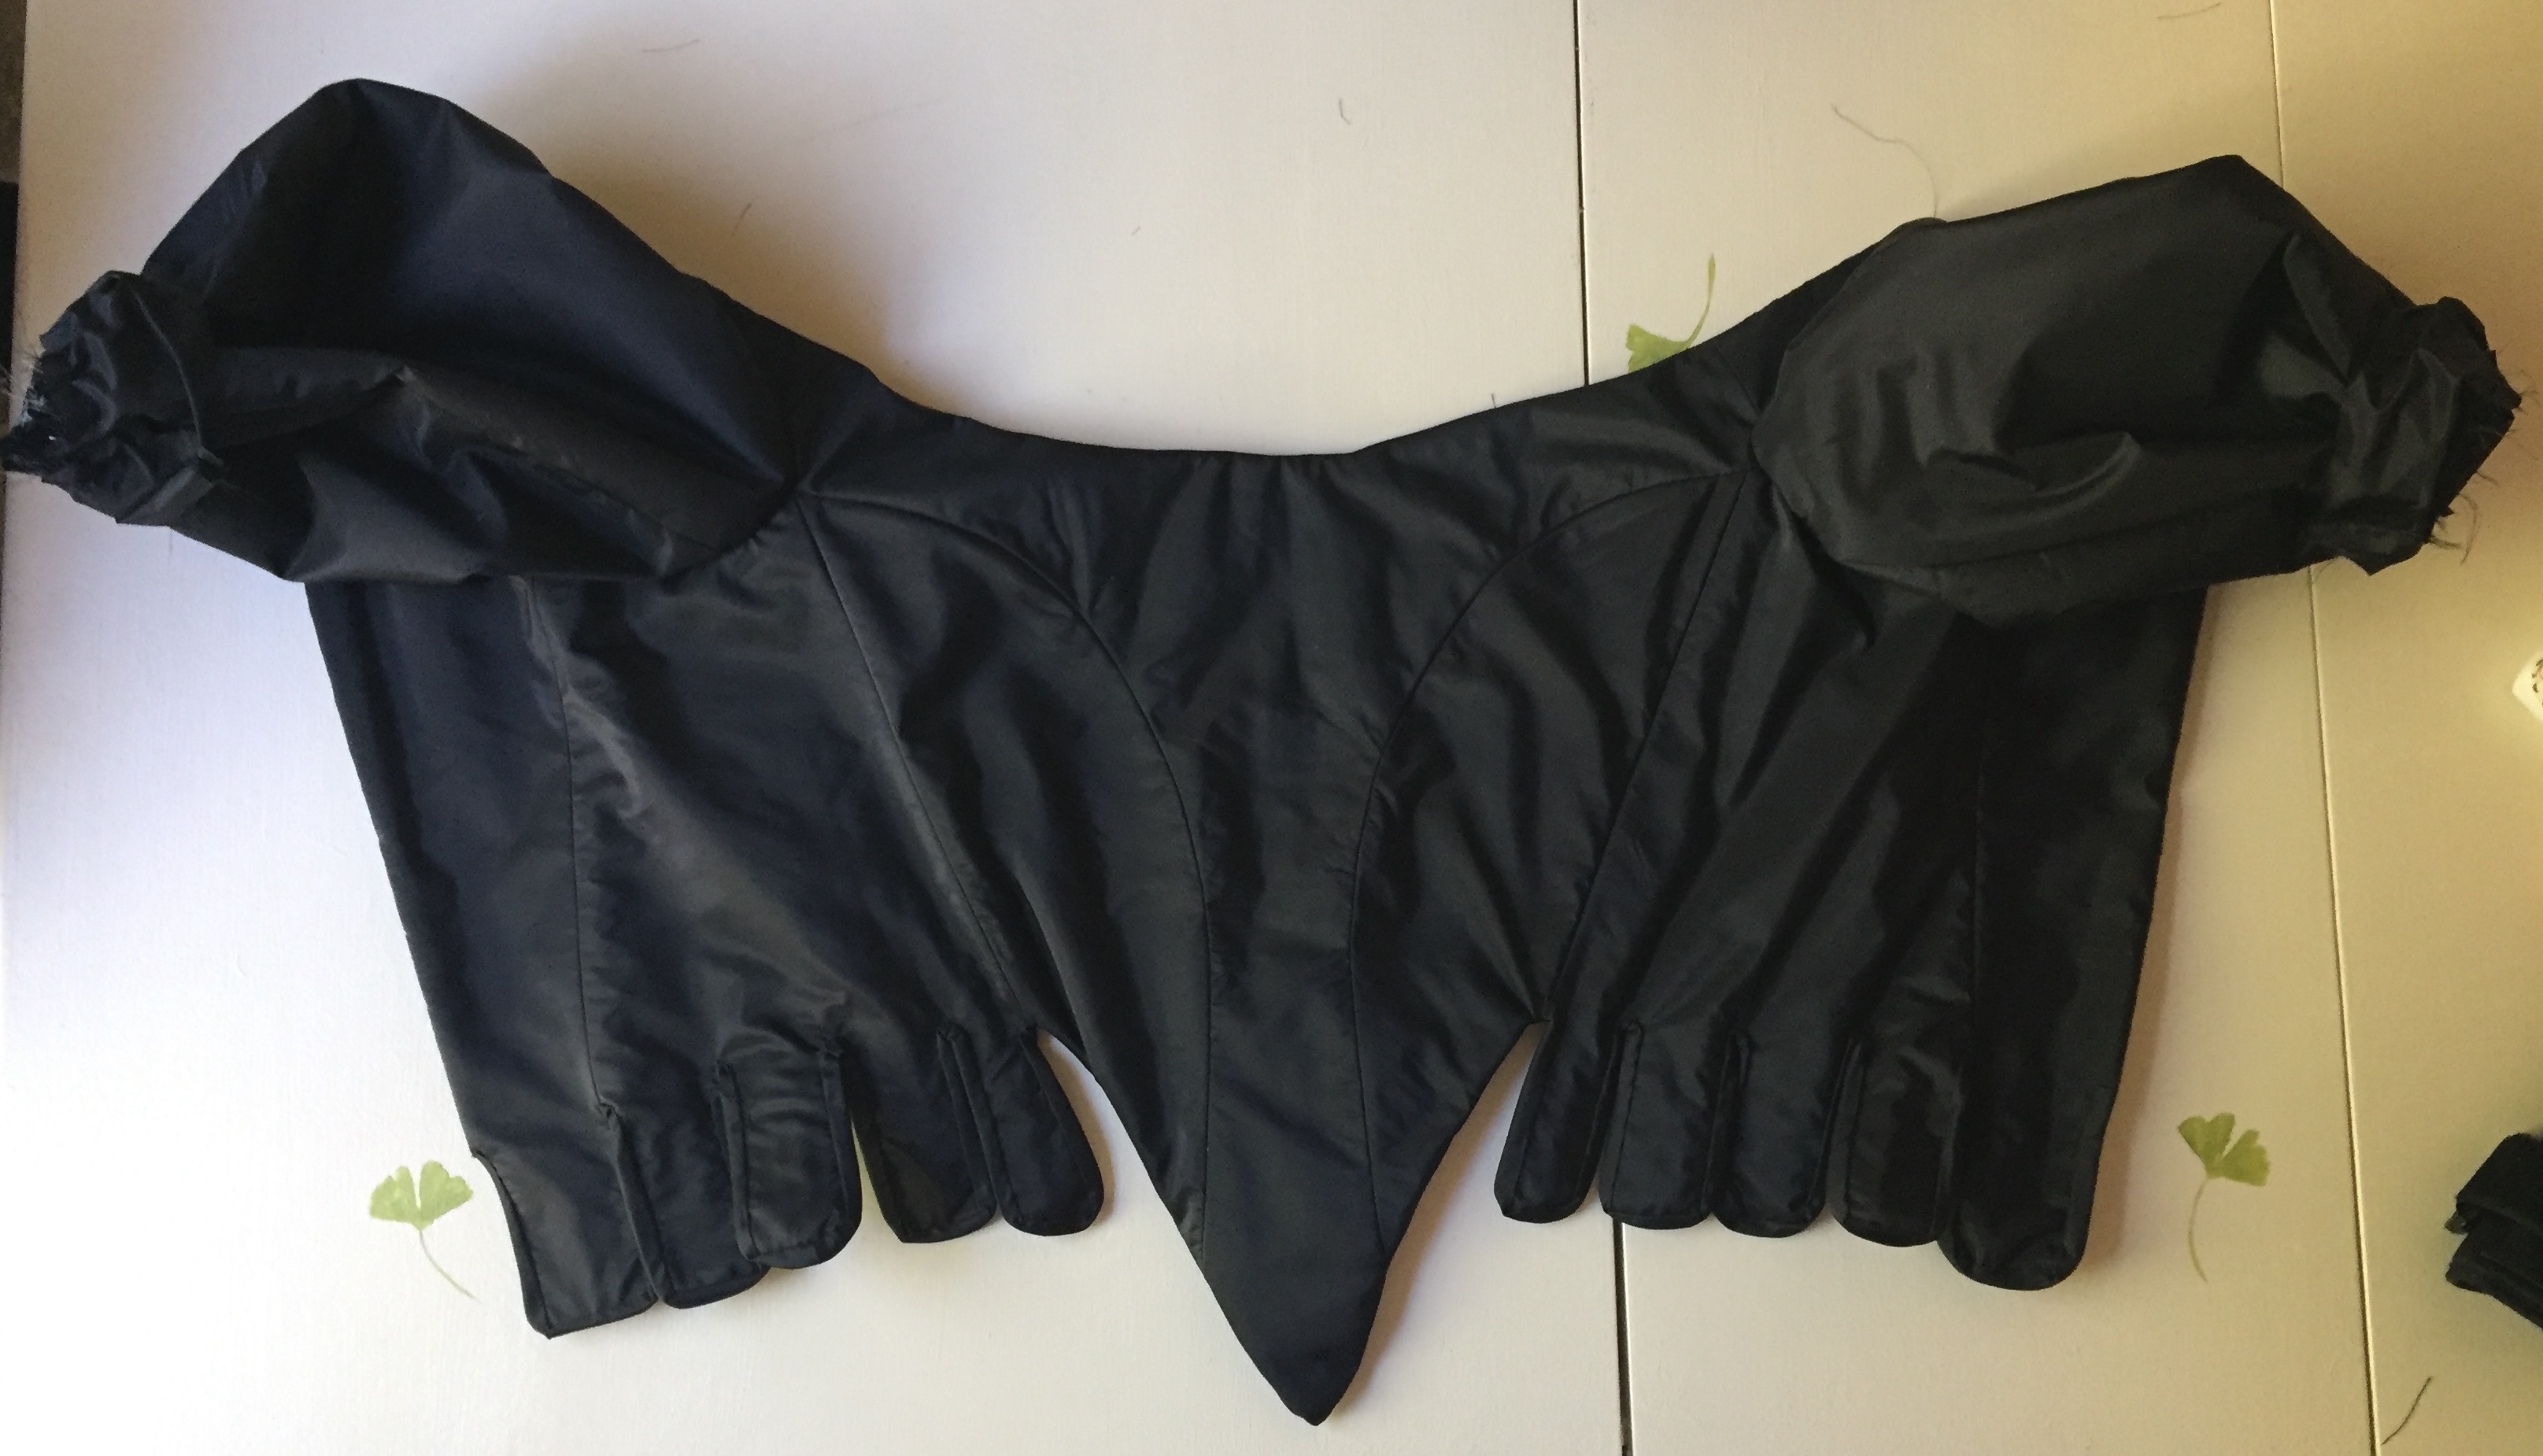
Tip/trick #1: Instead of making a corset as a separate garment, make your bodice fully boned. To do this you will cut out two linings and stitch them together with a series of parallel lines to make channels for your boning! Then you will cover this boned lining layer with your fashion fabric layer.

Tip/trick #2: When you cut out your bodice fashion fabric pattern pieces, extend the sides of the pieces that will make up the neckline, back closure, and bottom edge by about an inch. After you assemble the bodice fashion layer you can serge the raw edges, fold them over, and then whipstitch them to the lining. This way your linings won’t show when worn and you can skip making facings.

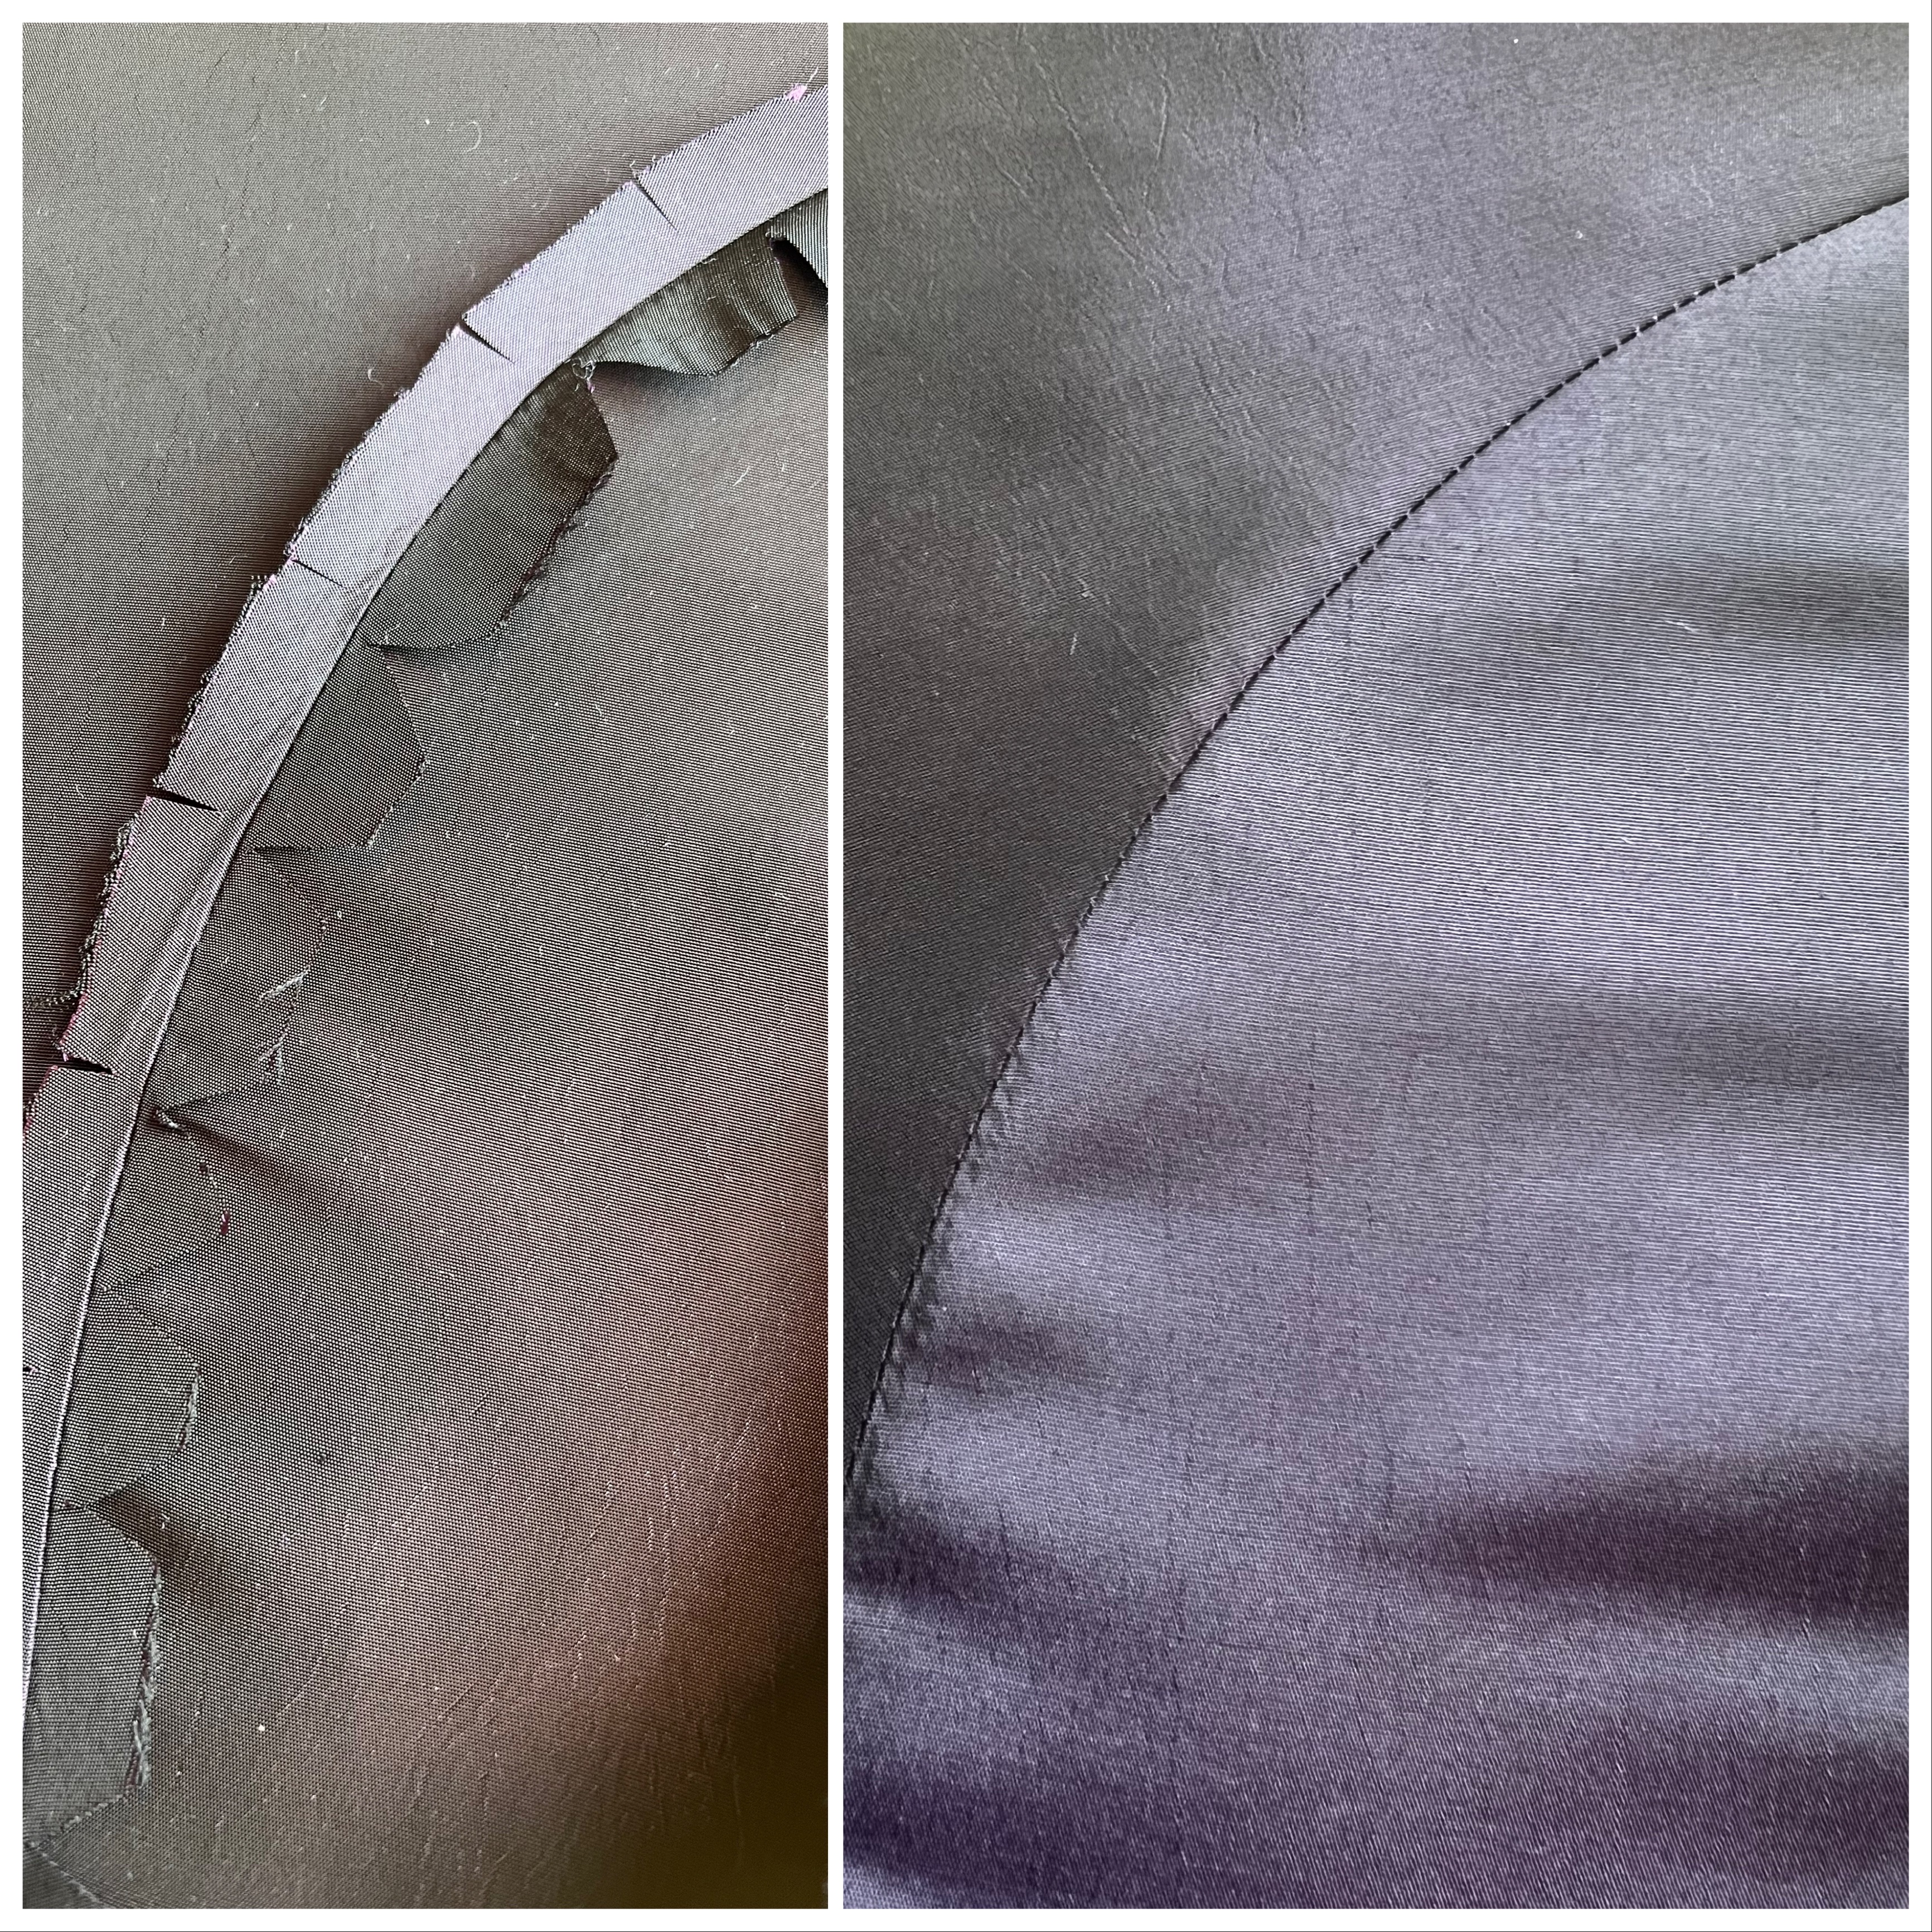
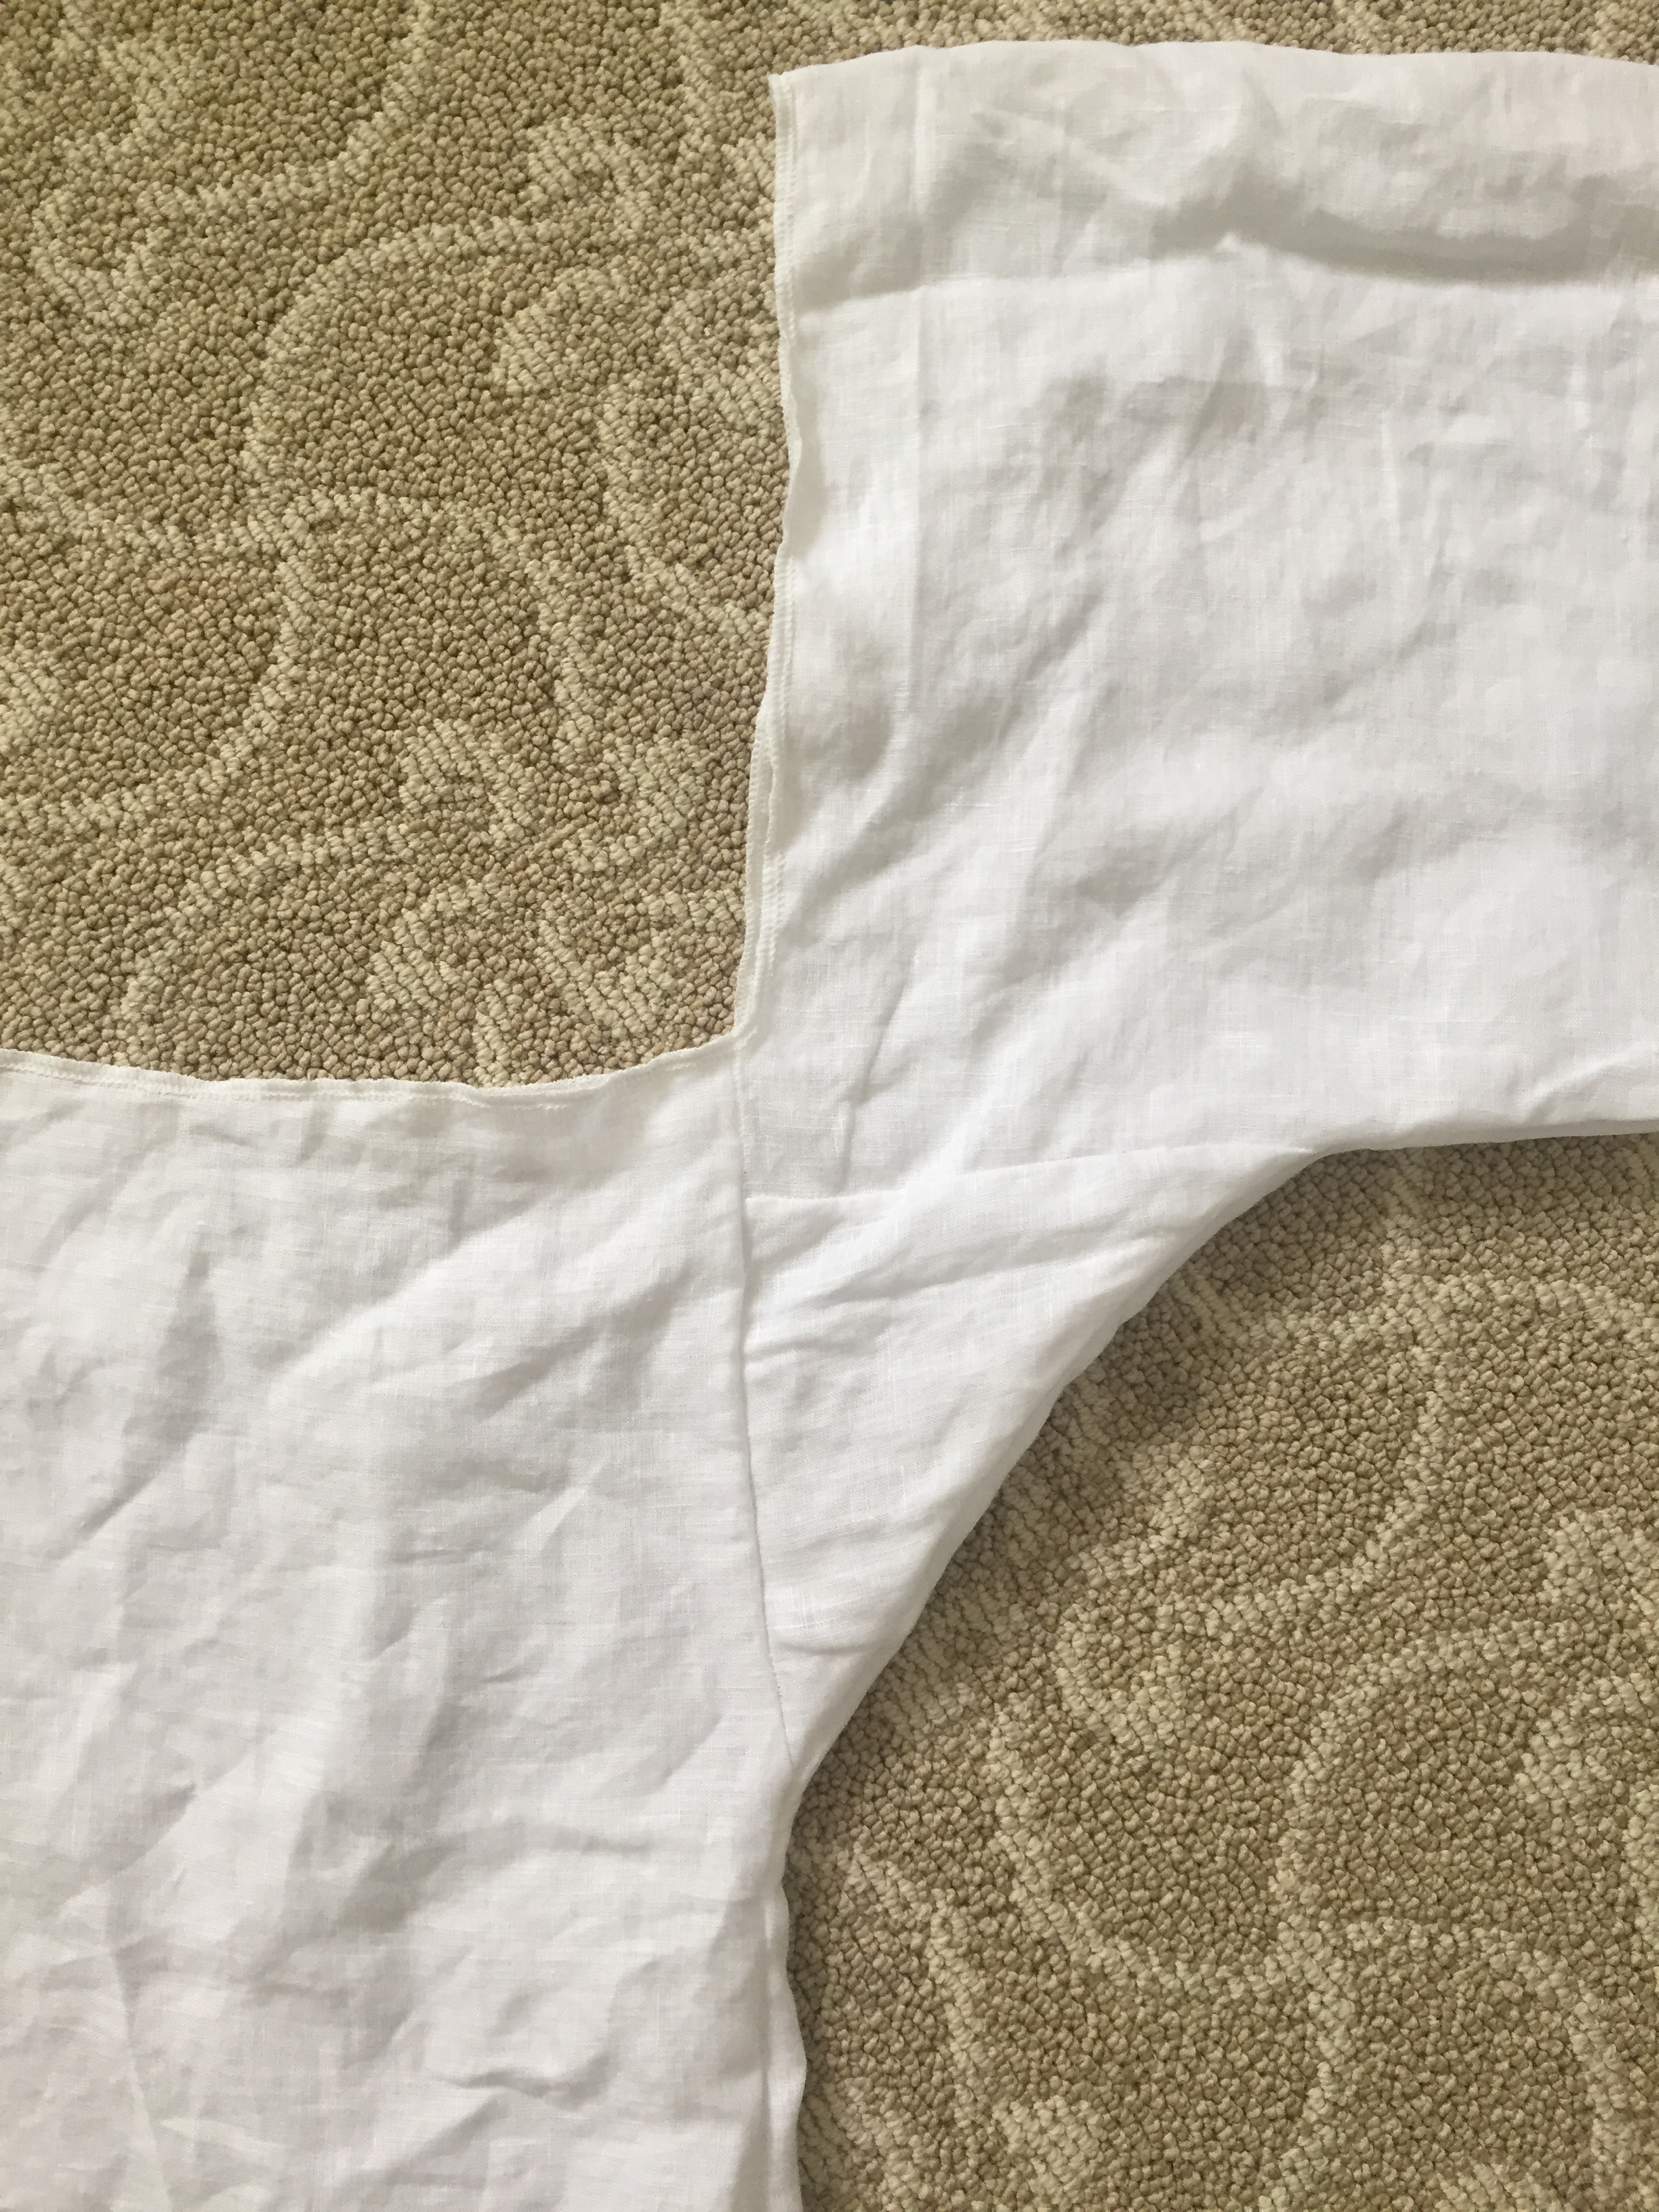
Tip/trick #3: To make your curved seams nice and smooth, you will want to clip after sewing. Iron your seam allowances open. Cut notches in the inner curve of the seam allowance and snip or cut notches in the outer curve of the seam allowance. Iron again on the right side of the fabric to make a very neat seam.

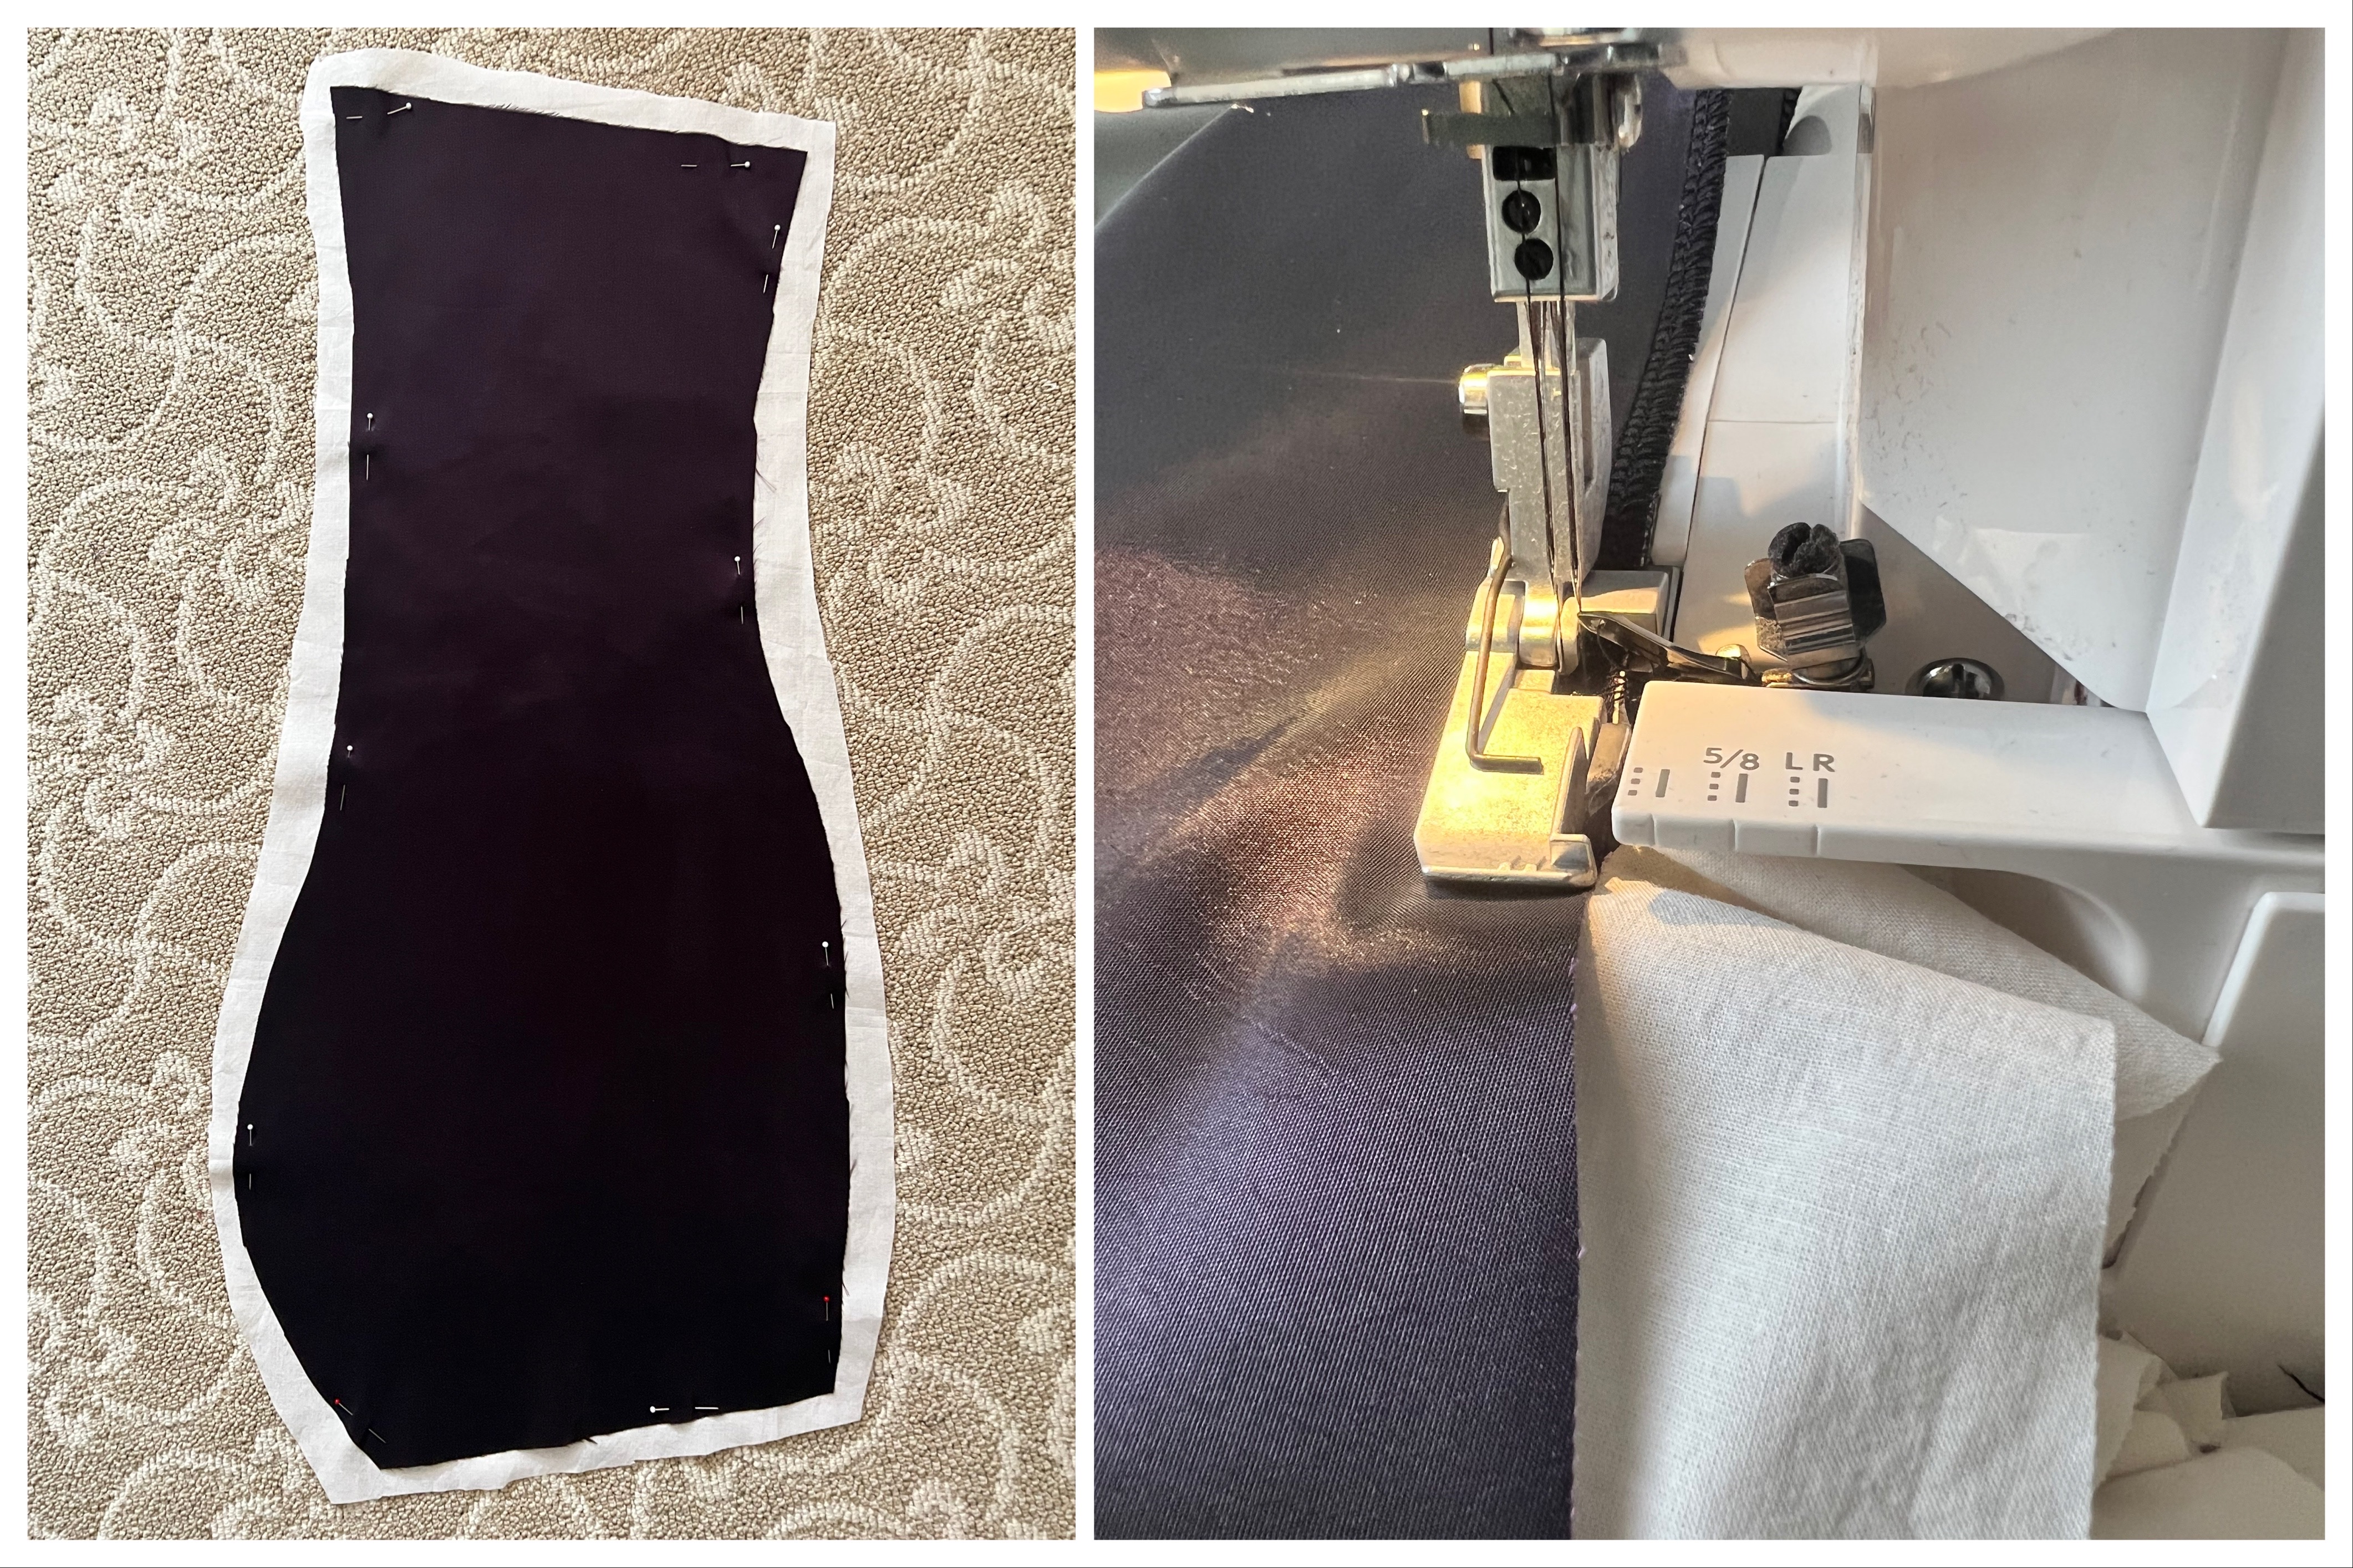
Tip/trick #4: To add extra body to thin fabric, flat-line it by adding an extra layer of fabric. However, to save time on cutting your pattern piece out twice, only cut out one layer and put it on the second. Use your serger to sew the pieces together and trim the excess at the same time!

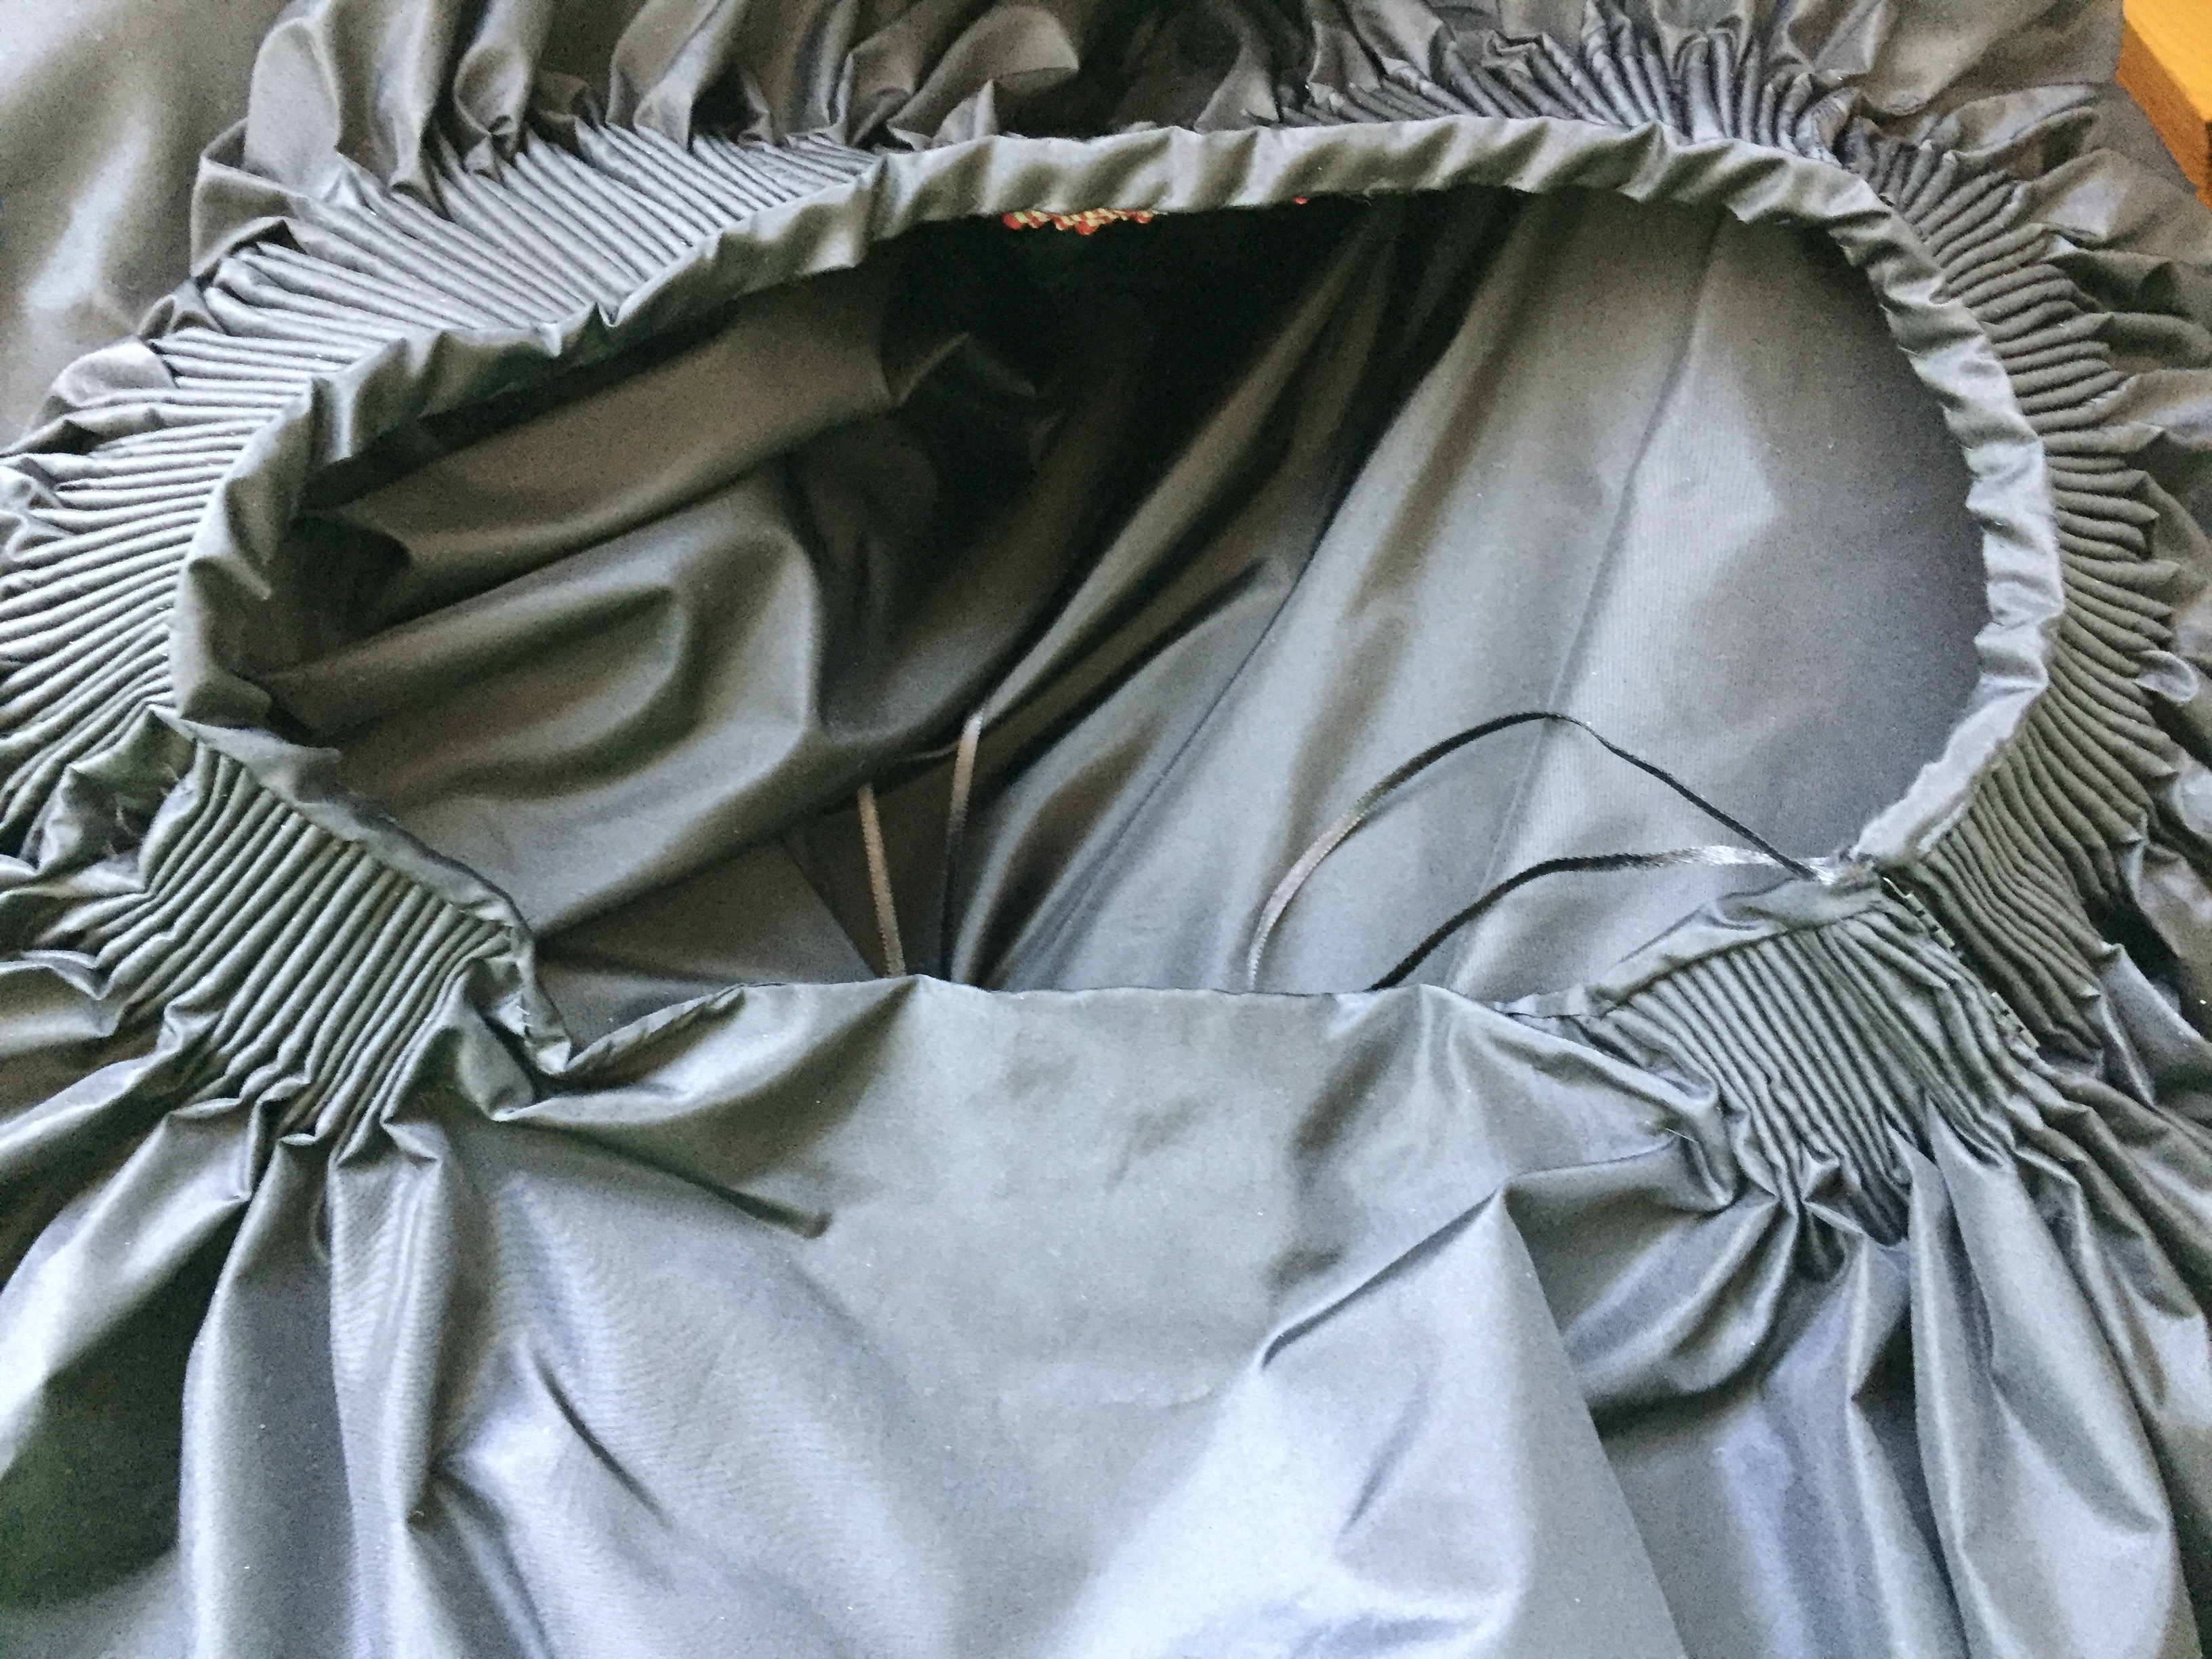
Tip/trick #5: Use knife pleats instead of cartridge pleats. Historically many gowns of this type used cartridge pleating to gather up the skirt. However, this is time-consuming and uses hand-sewing so I prefer knife pleats when I want to make the costume quickly. First serge the raw edges of the top edge of your skirt, then pleat, then stitch down the pleats. 

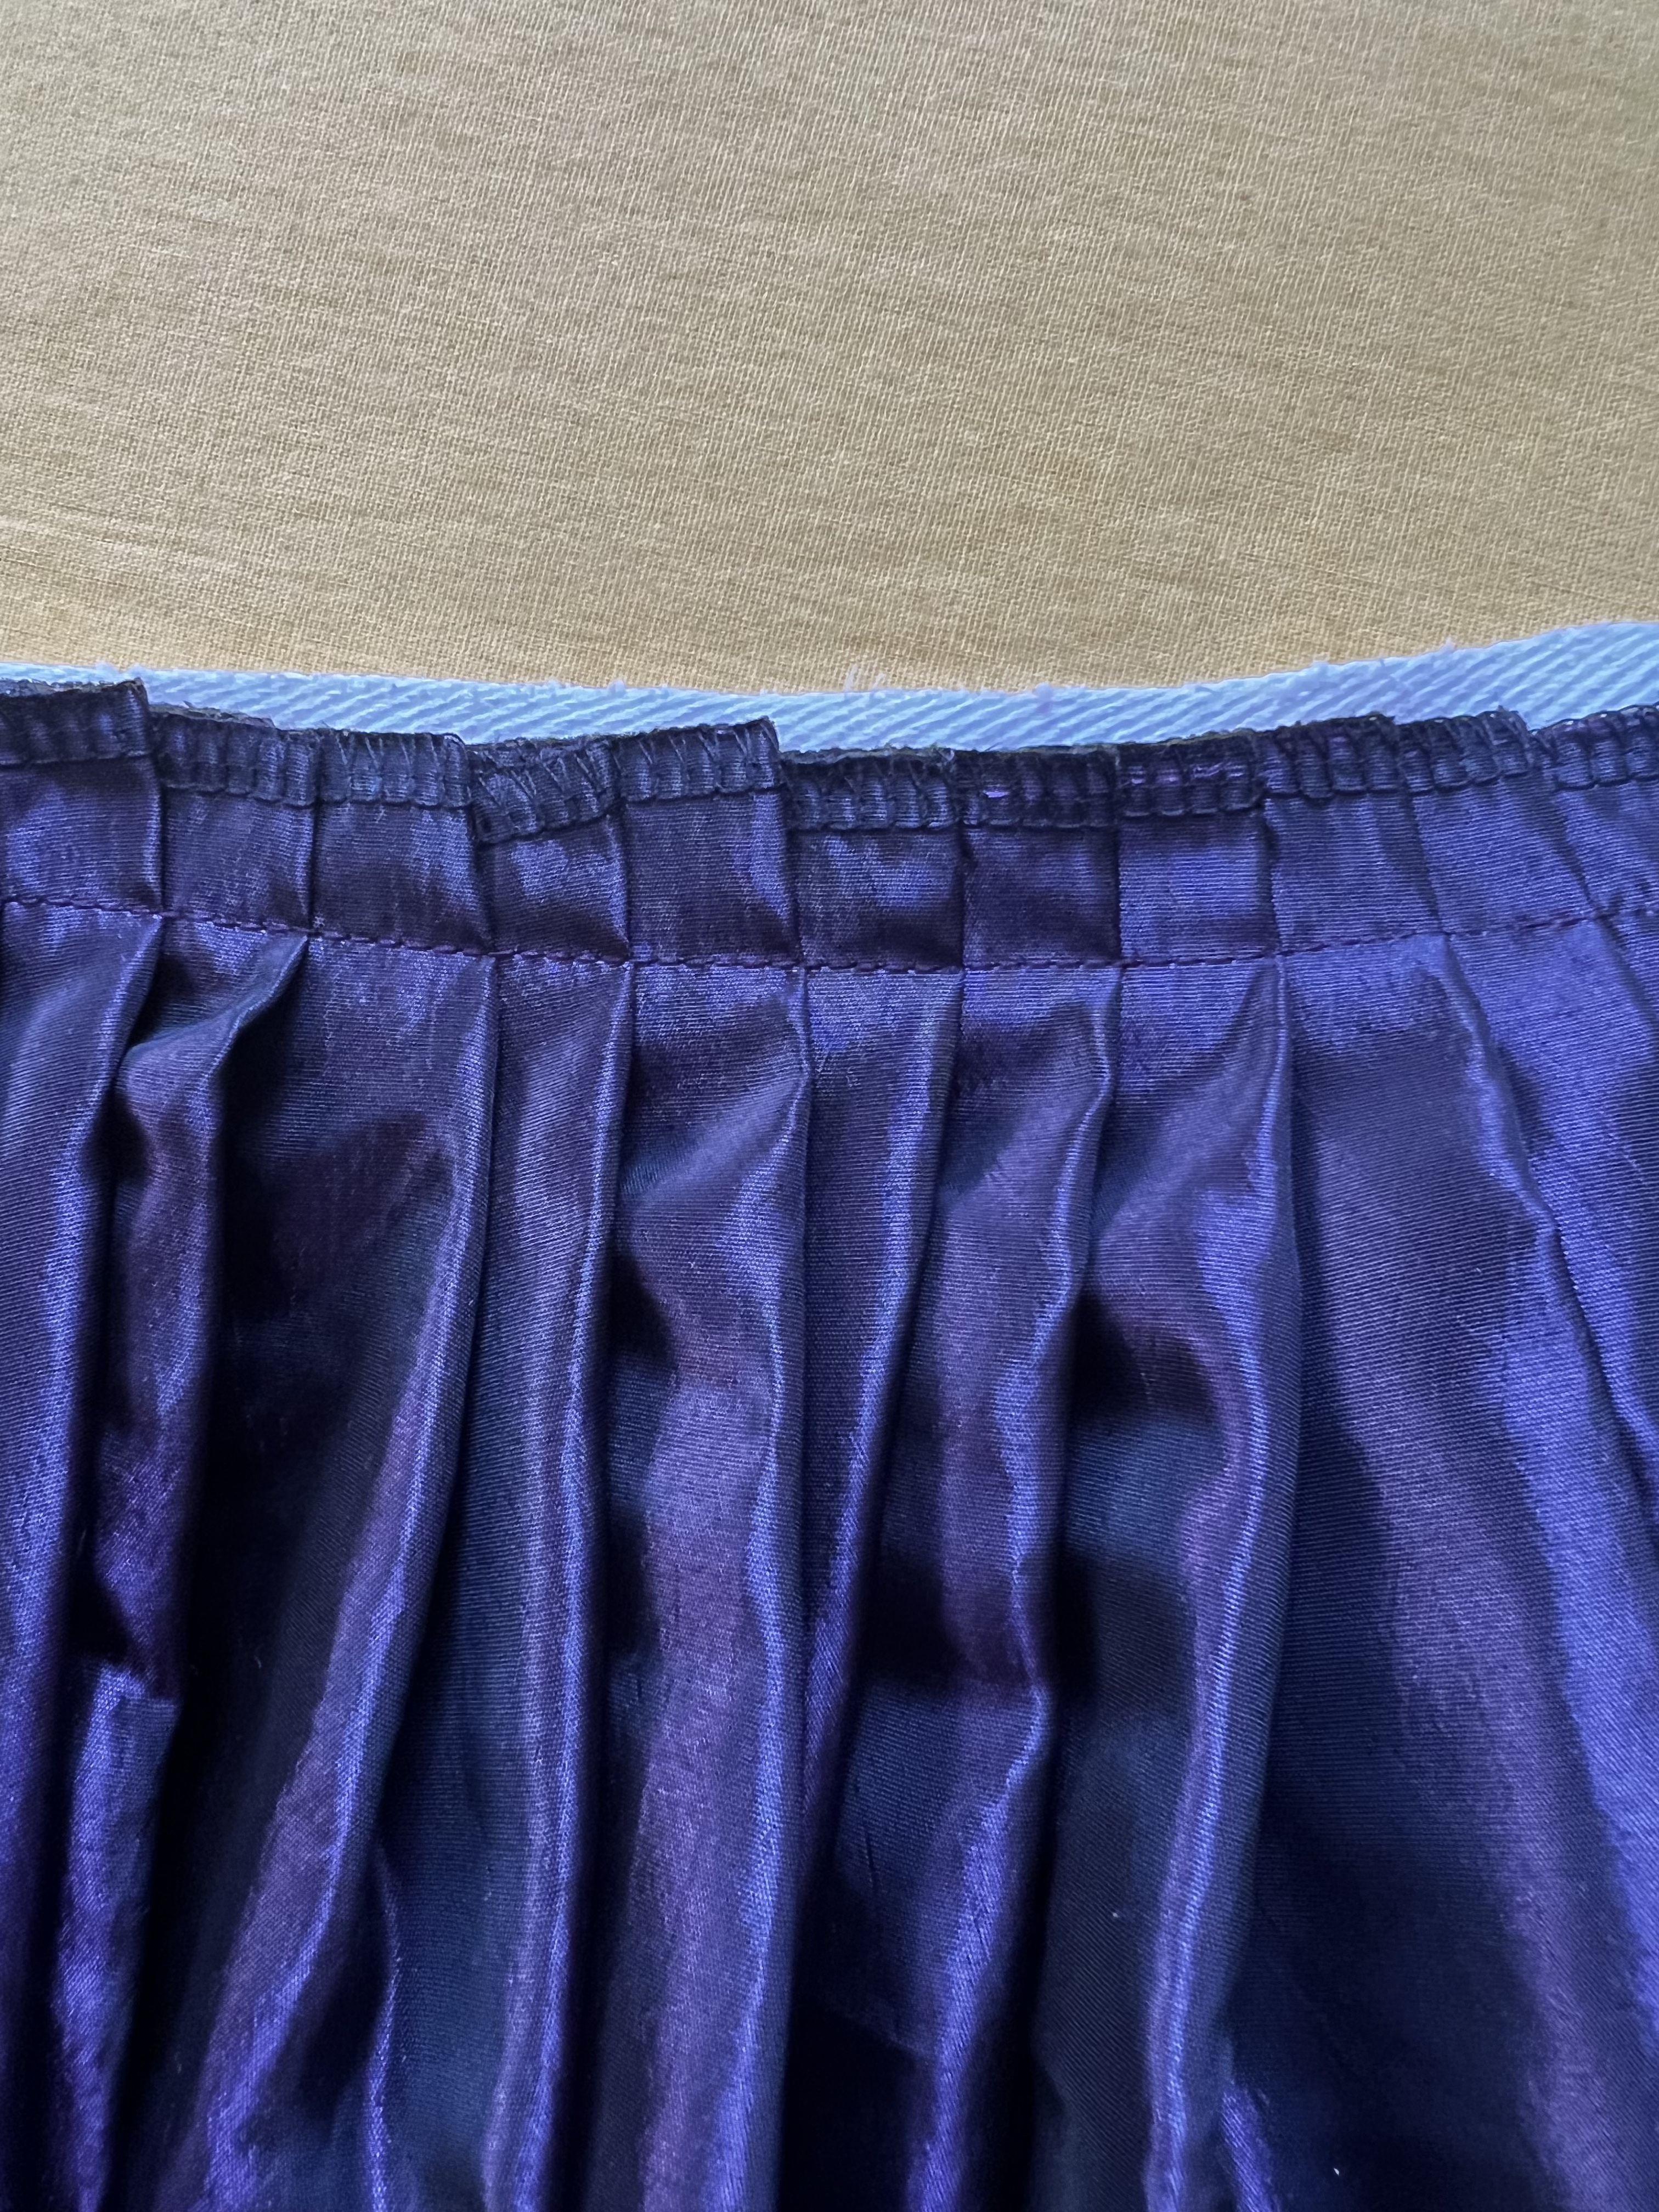
Tip/trick #6: If you want to skip making a waistband for the skirt, and have the convenience of a one-piece dress instead of a separate bodice and skirt, when you stitch down your skirt pleats sew them to a piece of twill tape. Then you will whip-stitch your twill tape to the bodice. 

Tip/trick #7: If you are trying to sew thing tubular like a sleeve or cuff, remember you can remove the flatbed/storage tray of your Janome to turn it into a free arm machine, making it easier to maneuver your sewing project. 

Tip/trick #8: To save time installing metal eyelets or sewing thread eyelets by hand, use the automatic eyelet stitch under your buttonhole menu. After sewing, use an awl to open the holes and put your lacing through. (My dress closes in the back with adjustable lacing).

Tip/trick #9: To save time doing math, use an expandable sewing gauge to mark out where your evenly spaced eyelets should be. This also works for measuring out buttonholes and pleats.

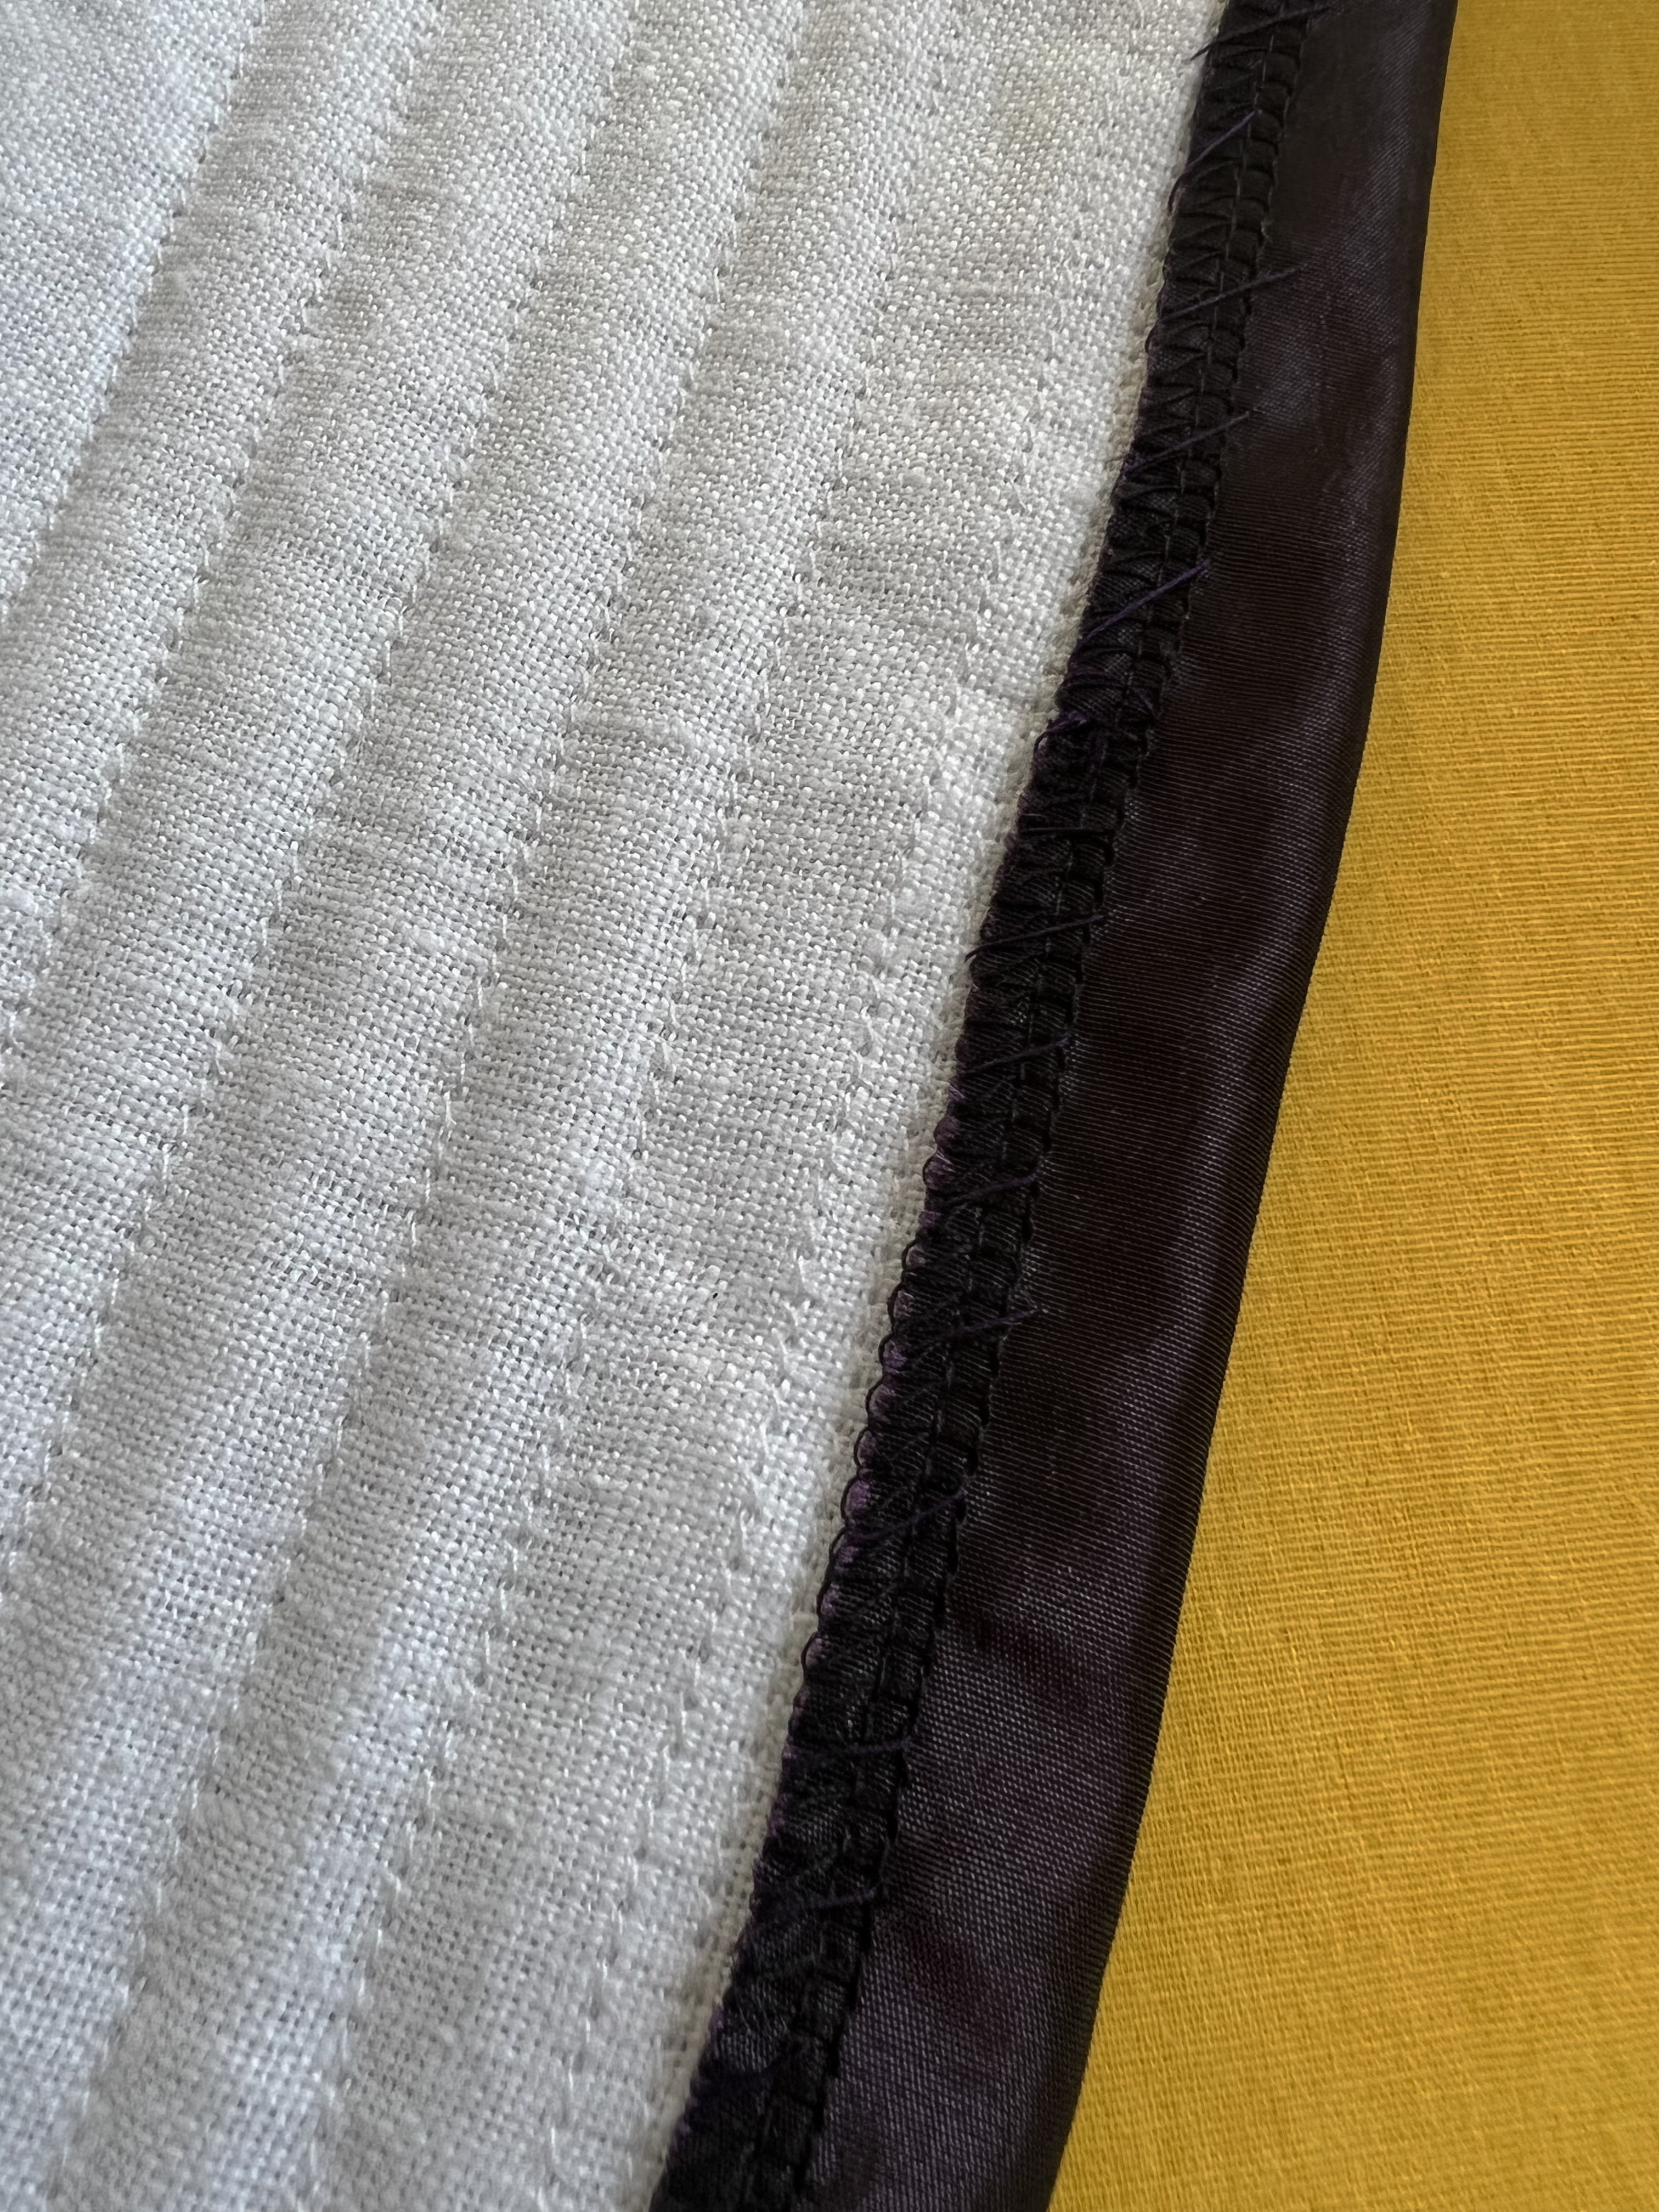
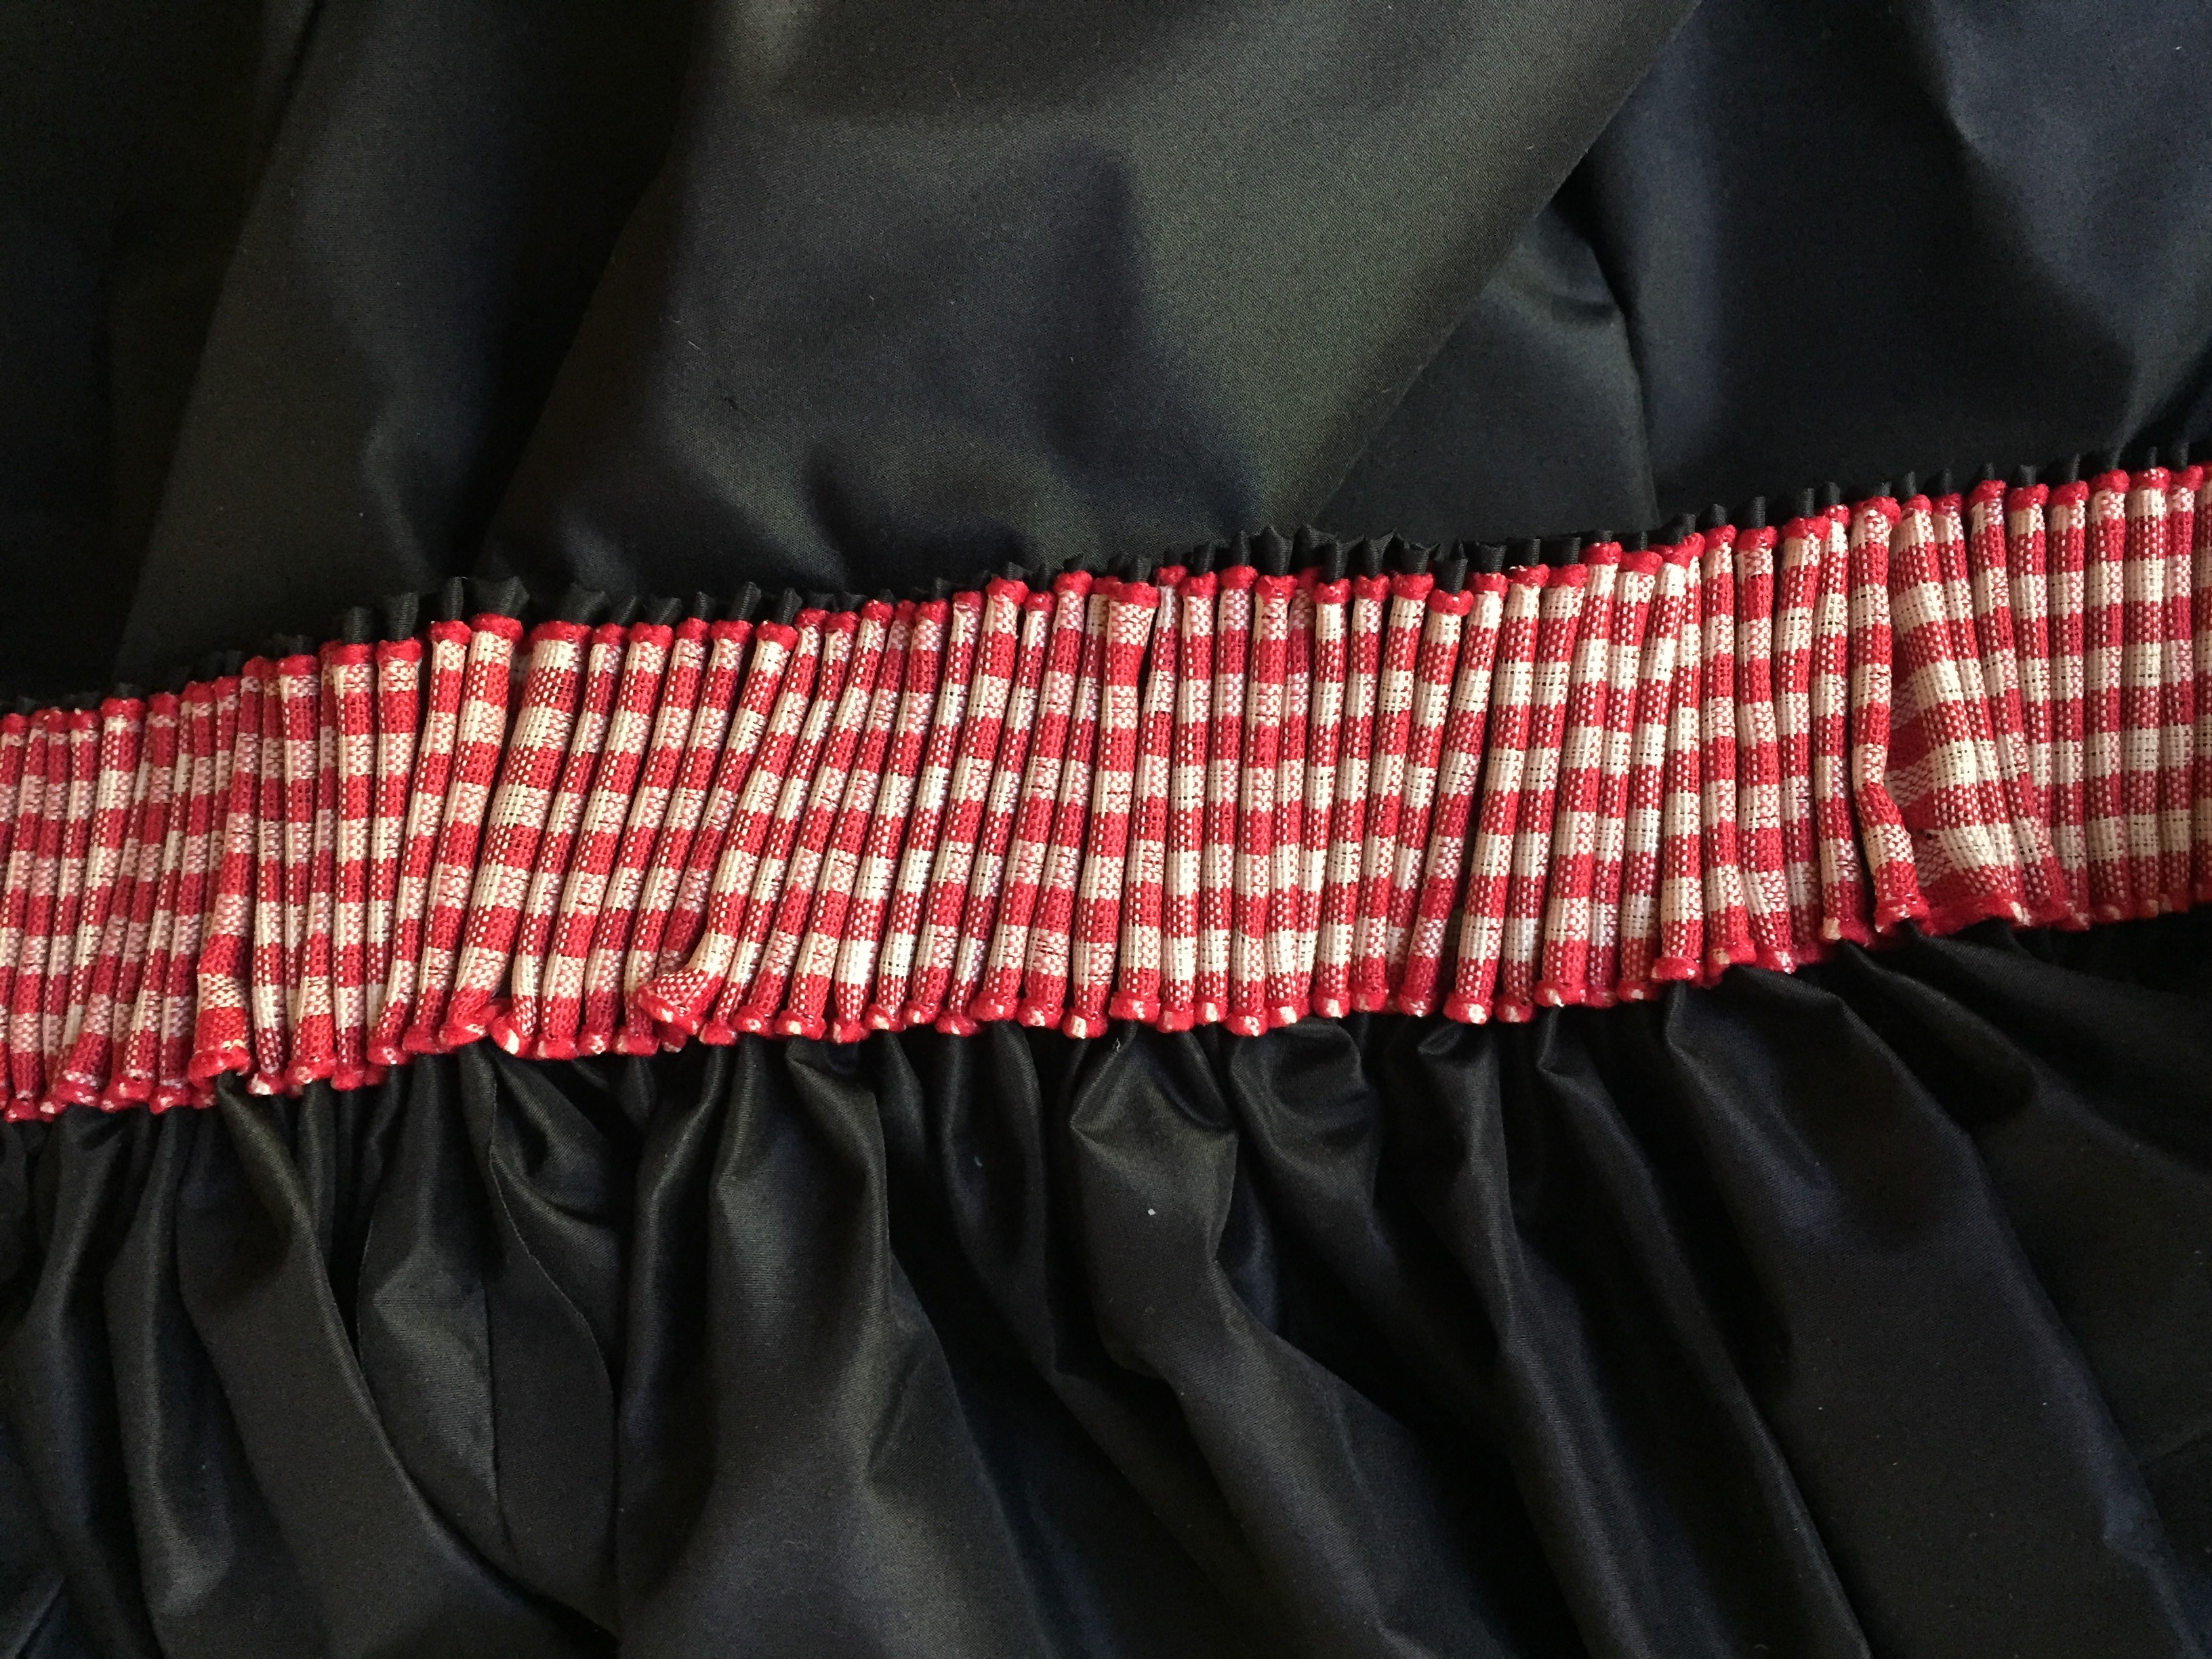
Tip/trick #10: To avoid having an obvious machine-sewn hem, but not have to go through the effort of hemming your skirt by hand, you can cover your machine-sewn hem with a pretty trim. For this hem I serged the raw edge, folded it up inside the skirt, stitched it down, pinned on trim, and then sewed down both edges of the trim using a matching thread.

Thank you for reading and I hope this helps you with your costumes!

Photo by Daisy Rose Coby of Memento Moda. With my friend Sara of La Dauphine Costuming.

1660s Cavalier Dress at Costume College (and Bonus: Hacking the American Duchess 18th Century Undergarments Pattern to Make a 17th Century Chemise)

I now have photos for my 1660s Cavalier dress from official Costume College photographer Andrew Schmidt, as well as a great group photo of the rest of my Cavalier ladies!IMG_4216-(ZF-7662-83598-1-001)

You can see my previous posts about this project under the tag “Cavalier” but if you keep reading I will discuss the things that went wrong with this project, and what I would do differently in the future, so you can learn from my mistakes!IMG_4217-(ZF-7662-83598-1-002)

I am very happy with how our group turned out, with the variety of colors, trimming, and hairstyles. Left to right, back to front: me, Teresa, Cate, Kim, Jessie, and Elizabeth.IMG_4211-(ZF-7662-83598-1-003)

I used the Nehelenia 1660 Baroque dress pattern. This era is completely new to me, and I have no experience with this shape of the bodice, so I followed all the instructions. This included making bound bodice tabs (similar to 18th century stays, seen below) to help distribute the weight of the skirt, and sewing all the bodice pieces of the fashion fabric together before attaching it to the boned interlining.IMG_2904

These steps may be period correct, but created some extra work and issues, so I have some comments about what I would do differently if I made another dress of this style:

  1. No tabs! Anyone who has made stays knows how time-consuming it is to bind them! Since my skirt was a lightweight taffeta, I could have skipped the tabs and pleated the skirt directly to the bodice and saved a lot of time. (I would not recommend this for a heavy skirt like velvet or brocade). Dressing would have been much easier too, since I would have had a one-piece dress to slip over my undergarments. Instead, I had to make sure the front tab was over my skirt, while my back and side tabs were underneath my skirt, while my bum roll was over my bodice back tabs but under my skirt. It took some help getting dressed!
  2. Do not finish the fashion layer before sewing it to the interlining. I had some problems with wrinkling in the bodice. I think it would have helped if I sewed the fashion fabric to the interlining, and then sewed each pattern piece together (the way 18th century stays are made). This would have reduced the wrinkling and wiggling. I talked to someone else at the  Gala who was also wearing a 1660s gown, and hers was so smooth! She said she sewed the bodice the way she would a pair of stays.
  3. Maybe skip the cartridge-pleating. I love tiny cartridge pleats; they look delightful and neat. I am glad I did them for this dress, but for speed in the future I would probably do larger pleats to save time. I ended up spending so much time on them that I was not able to do my eyelet closures before a medical procedure made it impossible for me to sew, and recovery took longer than expected so I had to be sewn into my dress at CoCo! (I can’t remember the last time I showed up at an event without closures, but it’s a humbling reminder that life sometimes intervenes.)

Some of my problems may have been attributable to my use of silk taffeta instead of a thicker silk satin, but I wanted to use what I had in my stash, and the skirt was so light and lovely to wear.

I made the jewelry out of giant acrylic pearls, strung with fishing line. Glass pearls would have been lovely, but very heavy, and since I was going to pin the drape directly to a silk taffeta dress with a silk gauze neckline, I wanted it lighter.

Bonus: Hacking the American Duchess 18th Century Undergarments Pattern to Make a 17th Century Chemise)

I promised a pattern hack in the title, and here it is! This 17th century dress required an off-the-shoulder chemise, which I did not have. I also did not want to draft one from scratch, so I hacked the American Duchess 18th Century Undergarments pattern (Simplicity 8162). This is what the original pattern looks like:8162

Ignoring the ruffles, you have a body panel with a shoulder strap, a sleeve gusset for the underarm, and a square sleeve that is folded to form a tube.IMG_2634.JPG

However, what if you fold down the shoulder strap, shift the sleeve and gusset down, and double the size of the sleeve piece to make it fuller? (Previously you cut a square that became a tube, now you cut a large rectangle that becomes a square).IMG_2639.JPG

This is the shape you get:IMG_2644.JPG

Add a drawstring neckline, and you get an off-the-shoulder chemise!IMG_2648.JPG

Please note, my sleeves are a bit shorter than what you see historically. A proper 17th century chemise would have had much longer and exaggerated sleeves. I made these shorter for several reasons:

  1. I plan to reuse this with other gowns where a billowy chemise sleeve would be inconvenient.
  2. The portrait I am using as inspiration has an exposed chemise sleeve made of finer materials than the linen I used, plus little ribbon ties; thus I made false sleeves that can be attached to my black bodice that will allow for nicer fabric and no need to fuss with tying bows each time I wear it.

So, if you do not have the reasons enumerated above, you should quadruple (not double) the original sleeve pattern into a giant square, not a rectangle.IMG_3853

(Yes, those are green and purple crayons because my child left them next to my computer and I was too lazy to go looking for nicer writing implements).

Final reckoning:  Let’s tally up!

  • 10 yards of 35″ black silk taffeta: $49.90 + $8.75 shipping = $58.65 (Yay for fabulous sales from FabricMart!)
  • Nehelenia pattern: $23.96 including shipping (I ordered with a few other ladies and split the postage from Europe)
  • Lining and boning: $0 (left over from my 18th century stays project)
  • 2 yards linen (for chemise) and 1 yard silk gauze (for bodice neckline): $23.94 including tax and shipping from Dharma Trading (I ordered double that but am setting the rest aside for a different project, so I’m halving the cost)
  • 1 yard silk cotton blend for lower sleeves: $17.99 from Amazon
  • 120 giant pearls: $11.28 from Aliexpress
  • 2 brooches: $5.40 from Aliexpress
  • 2 “small spiral corkscrew” cheerleading/Irish dancing hair clips: $43.11 including shipping from eBay seller american_costumes
  • Ribbon, thread, hooks and eyes, polyfill for the bumroll, etc. from stash ~$5?

Total: $189.33

So the silk was cheap, but all the extras added up! Normally I do not count accessories and hairpieces, but in this case they are very specific to this era and the portrait inspiration, and they’re not very versatile for other eras.

Finally of course, as always, my shoes are American Duchess. They are the Pompadour French Court Shoes in black (affiliate link).

Screen Shot 2017-09-03 at 9.55.04 PM

This was a long post, so thanks for reading!

1660s Cavalier Gown

I’m still recovering from eye surgery so this post will be brief. I’ll post more pictures and construction details when I get back from Costume College.

Here is a quick look at the bodice! I can’t see well enough to make a lot of tiny hand-sewn eyelets in the back, so someone will have to sew me into my dress before the Gala. IMG_2904

I already packed my petticoats and bum roll so I don’t have a mounted picture of the skirt.  I cartridge-pleated it, left the front part that goes under the center bodice tab flat, and hid closures in the pleats. (I have side openings for pocket access).IMG_2911

My hair in its hat box looks like braaaains!IMG_2903.JPG

See you at Costume College!

1660s Cavalier Dress

The Costume College theme this year is “60s” and the Gala theme is “Dinner at Tiffany’s” so I am making a black 1660s dress with large pearls, inspired by this portrait of Grand Duke Ferdinand II of Tuscany and his wife Vittoria Della Rovere by Justus Sustermans at the National Gallery in London.1660s-probably-grand-duke-2

This is a stash-busting project!

A while back I got 10 yards of 36″ black silk taffeta for $5/yard. With this project my goal was to stay as close to $50 as possible, which meant the other materials had to not only be stash, but what I call “legit stash” (leftovers from other projects). As much as we like to pretend it doesn’t count if you buy it and hide it in the closet for a few years, it still cost money up front. Aside from the black silk I wanted to use things that were already accounted for in the costs of other projects. Luckily I had scraps for lining, reed from my stays, and other miscellaneous materials:

This means not all of the materials are ideal. However, my rallying cry is STASH-BUSTING! Stash-busting

I used silk taffeta for the interlining that encases the boning because I didn’t want my bodice to be too thick, since I will have to add more layers afterward (a fashion fabric that has to be flat-lined to prevent the boning from showing).

Please keep in mind that silk can be rather insulating and warm! I used silk interlining anyway because:

  • STASH-BUSTING!
  • I’m going to be wearing this in the evening and indoors, in an air-conditioned hotel.
  • I feel cold all the time. I promise I’m not a vampire.

I am using the Nehelenia 1660 Baroque dress pattern.IMG_2598.JPG

Please note, this pattern is not for beginners. No boning channels are marked, and you have to figure them out by yourself. I recommend having made stays before you tackle this project, because the bodice is essentially stays with fashion fabric on top.

The pattern calls for about 2.5 meters of fabric for the skirt, which is 98 inches. That is not particularly full. I looked at some other bloggers’ recommendations and Kendra of Demode and the Dreamstress both recommend about 150 inches for a modern frame, even though a smaller circumference was historically accurate. I ended up using 4 panels of 36″ fabric.

Here are some quick progress shots of the inside and outside of the bodice. (The sleeves are still a mess and I have to add eyelet closures down the back and some silk gauze to the neckline).IMG_2601IMG_2603

I have cartridge-pleated about 3/4 of the skirt. My trick to save time marking and measuring is to sewing gingham to the inside and keep it there as a way to make the pleats fuller.IMG_2605IMG_2606

For a “simple” black dress this is proving to be a lot of work (much of it hidden). There is. boning, binding of tabs, cartridge-pleating of the skirt and sleeves, etc. I am having surgery later today so I will have to take a bit of break from sewing and the computer. I hope I can still finish before Costume College!

Portraits of 17th Century Fashion

While I’m finishing up accessories for my Napoleonic project, let’s talk about the 17th century!

ca-1664-margaret-brooke_med

ca. 1664 Margaret Brooke, Lady Denham by Sir Peter Lely (Sheffield Museums)

I’m interested in 1660s and 1670s baroque fashion, which broadly speaking consists of a fully-boned bodice with a pointed front, wide neckline, full sleeves, and double-chins. (Yes, “soft features” were considered fashionable).

tumblr_nhwmm09TH71t658edo1_1280

1667 Portrait of a Woman by Joannes Buns

There are many solid-colored gowns in portraiture, but the elaborate lace trim down the front of the gown was also very common.

1662-married-couple-in-the_med.png

1662 Married Couple in the Park attributed to Gonzales Coques (Staatliche Museen zu Berlin)

The 17th century is full of crazy hair. A lot of the hairstyles remind me of a cocker spaniel, full and curly at top.

4c0c55515df13ad2569720f0fa0bac27

 Portrait of Maria Mancini by a Follower of Jacob Ferdinand Voet, sold by Bonhams Auctions

Maria_Kazimiera_d'Arquien queen poland voet

c. 1670s Maria Kazimiera (Casimira) d’Arquien, Queen of Poland by Voet

1670ca-principessa-laura_med

ca. 1670 Principessa Laura Caterina Altieri by Jacob Ferdinand Voet (Museo del Settecento Veneziano, Venizia)

CN-102-Casper-Netscher-Portrait-of-Susanna-Doublet-Huygens-Vrouwe-van-Sint-Annaland.jpg

1669. Portrait of Suzanna Doublet Huygens by Caspar Netscher from The Leiden Collection

If you like bows upon bows check out the Infanta Margarita Teresa.

Margarita_Teresa_of_Spain

  (c. 1662-1664) Infanta Margarita Teresa, by anonymous at the Kunsthistoriches Museum, Vienna

My dress for the Costume College Gala will be inspired by this portrait of Grand Duke Ferdinand II of Tuscany and his wife Vittoria Della Rovere. Although there are many flamboyantly-colored gowns from the time period, the little goth inside my heart wants a black gown.

1660s-probably-grand-duke-2

Grand Duke Ferdinand II of Tuscany and his wife Vittoria Della Rovere by Justus Sustermans  at the National Gallery in London

My gown won’t be an exact reproduction but I plan to make a similar jewelry set. Look at those giant pearls! They look like they would be deadly if swung in the wrong direction.

2017 Costuming Plans

I have three large projects planned for 2017, although I’m sure little projects will pop up in between if I get invited to events or get distracted by shiny things. I’m happy to report that I already have most of the materials on hand for my three projects, much of it acquired through some lucky bargains!

Regency court dress

I am not planning to reproduce this exact outfit, but this picture is to give you an idea of what I have in mind. I will be making a beaded Regency evening dress, for which I already have the materials (courtesy of Fabric Wholesale Direct). I’ve started on the dress so that will be the focus of my next series of posts. The color and type of fabric I will be using for the train has not been decided and will depend on what I can get for a reasonable price.

1660s Cavalier gown

I’ve never made a 1660s outfit before, so this is an era that is new to me. Although I think satin might be a little more appropriate, I will be making this out of black silk taffeta because I happen to have it in my stash (from the wonderful $5/yard sale from Fabric Mart!) Although I had already picked out this dress to make for the gala at Costume College this year before the theme was announced, it ended up being the perfect choice. The theme will be “Dinner at Tiffany’s” so a black dress with pearls is quite appropriate!

Crimson Peak picnic outfit

06a80c2771674a757c37cc5248095268

I already have the right color silk for the skirt due to a serendipitous find from a friend’s garage sale! I won’t be able to find the exact lace for the blouse but I have something with a similar feel. The biggest challenge will be sculpting the hand belt. This outfit is being planned for a spooky Victorian tea in October.

I hope your sewing adventures in 2017 are fun and fabulous!