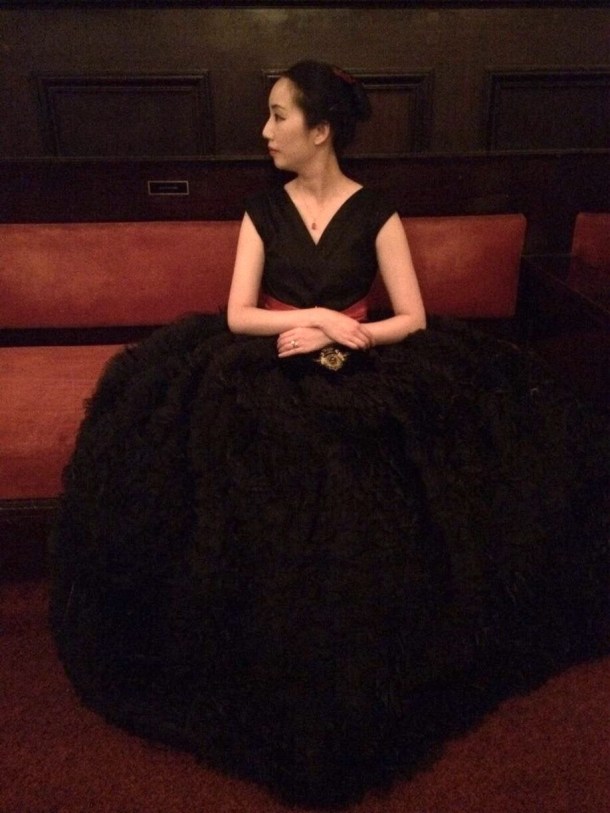
I now have photos for my 1660s Cavalier dress from official Costume College photographer Andrew Schmidt, as well as a great group photo of the rest of my Cavalier ladies!
You can see my previous posts about this project under the tag “Cavalier” but if you keep reading I will discuss the things that went wrong with this project, and what I would do differently in the future, so you can learn from my mistakes!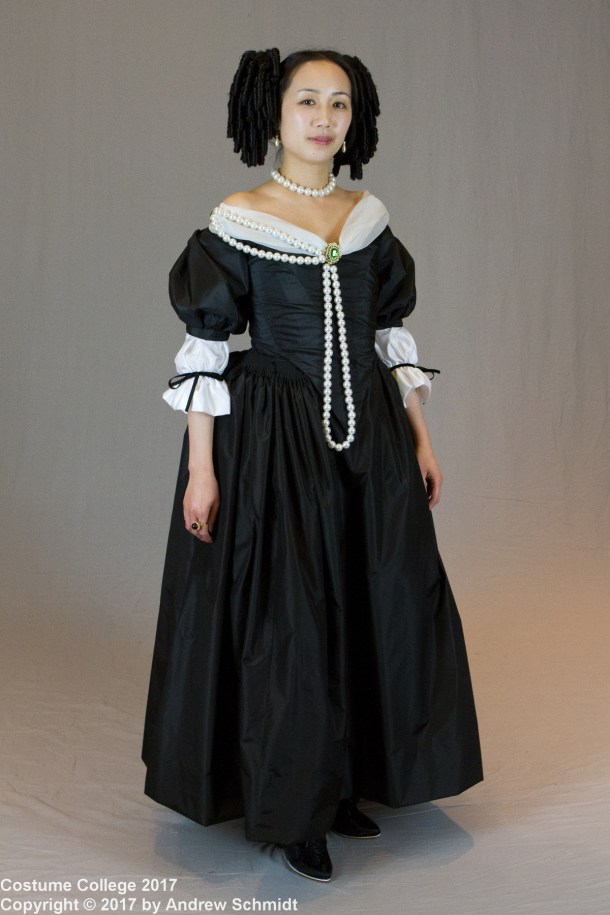
I am very happy with how our group turned out, with the variety of colors, trimming, and hairstyles. Left to right, back to front: me, Teresa, Cate, Kim, Jessie, and Elizabeth.
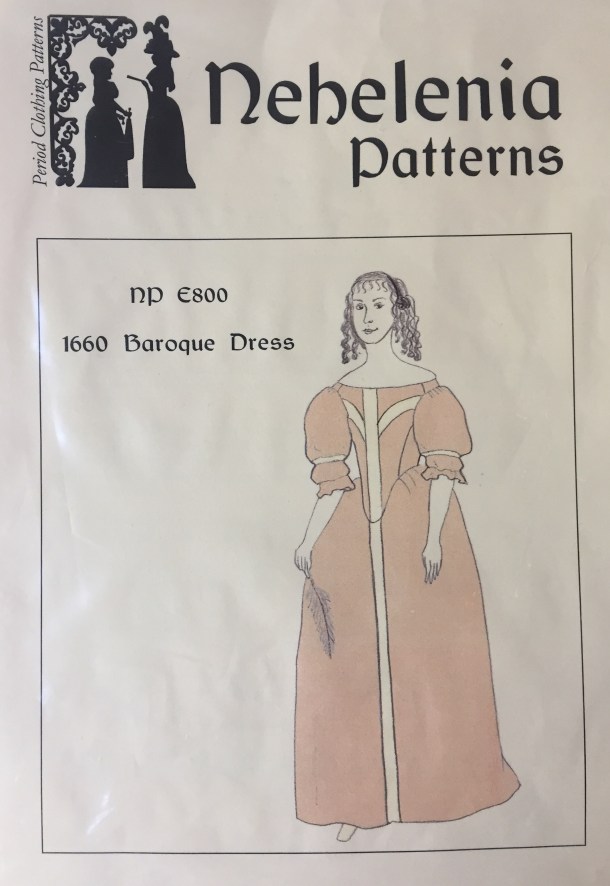
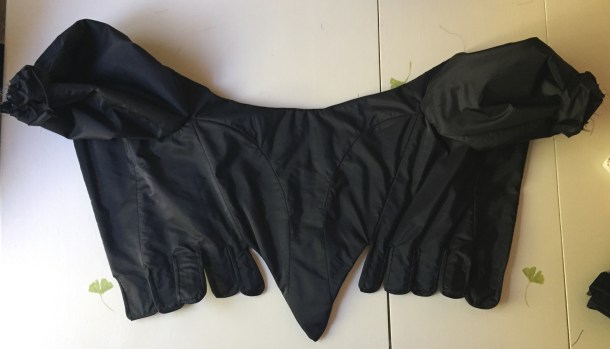
I used the Nehelenia 1660 Baroque dress pattern. This era is completely new to me, and I have no experience with this shape of the bodice, so I followed all the instructions. This included making bound bodice tabs (similar to 18th century stays, seen below) to help distribute the weight of the skirt, and sewing all the bodice pieces of the fashion fabric together before attaching it to the boned interlining.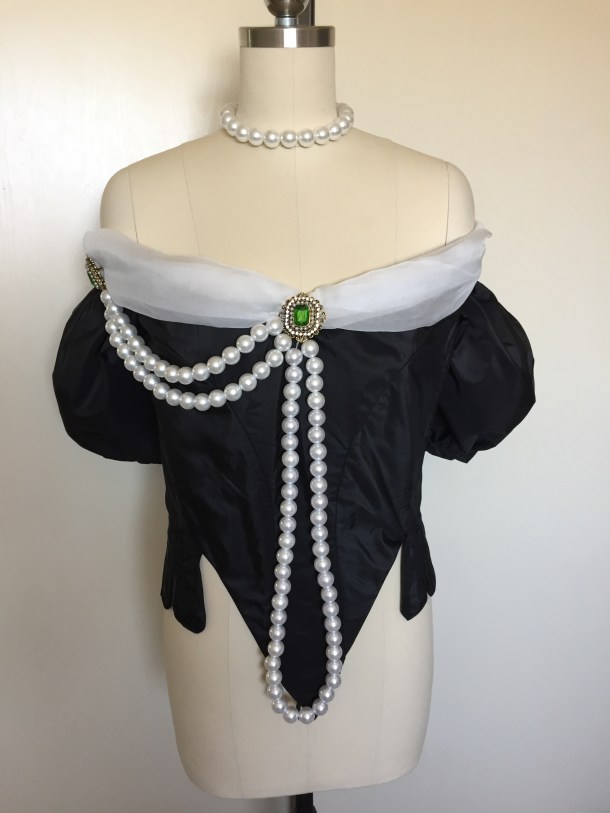
These steps may be period correct, but created some extra work and issues, so I have some comments about what I would do differently if I made another dress of this style:
- No tabs! Anyone who has made stays knows how time-consuming it is to bind them! Since my skirt was a lightweight taffeta, I could have skipped the tabs and pleated the skirt directly to the bodice and saved a lot of time. (I would not recommend this for a heavy skirt like velvet or brocade). Dressing would have been much easier too, since I would have had a one-piece dress to slip over my undergarments. Instead, I had to make sure the front tab was over my skirt, while my back and side tabs were underneath my skirt, while my bum roll was over my bodice back tabs but under my skirt. It took some help getting dressed!
- Do not finish the fashion layer before sewing it to the interlining. I had some problems with wrinkling in the bodice. I think it would have helped if I sewed the fashion fabric to the interlining, and then sewed each pattern piece together (the way 18th century stays are made). This would have reduced the wrinkling and wiggling. I talked to someone else at the Gala who was also wearing a 1660s gown, and hers was so smooth! She said she sewed the bodice the way she would a pair of stays.
- Maybe skip the cartridge-pleating. I love tiny cartridge pleats; they look delightful and neat. I am glad I did them for this dress, but for speed in the future I would probably do larger pleats to save time. I ended up spending so much time on them that I was not able to do my eyelet closures before a medical procedure made it impossible for me to sew, and recovery took longer than expected so I had to be sewn into my dress at CoCo! (I can’t remember the last time I showed up at an event without closures, but it’s a humbling reminder that life sometimes intervenes.)
Some of my problems may have been attributable to my use of silk taffeta instead of a thicker silk satin, but I wanted to use what I had in my stash, and the skirt was so light and lovely to wear.
I made the jewelry out of giant acrylic pearls, strung with fishing line. Glass pearls would have been lovely, but very heavy, and since I was going to pin the drape directly to a silk taffeta dress with a silk gauze neckline, I wanted it lighter.
Bonus: Hacking the American Duchess 18th Century Undergarments Pattern to Make a 17th Century Chemise)
I promised a pattern hack in the title, and here it is! This 17th century dress required an off-the-shoulder chemise, which I did not have. I also did not want to draft one from scratch, so I hacked the American Duchess 18th Century Undergarments pattern (Simplicity 8162). This is what the original pattern looks like: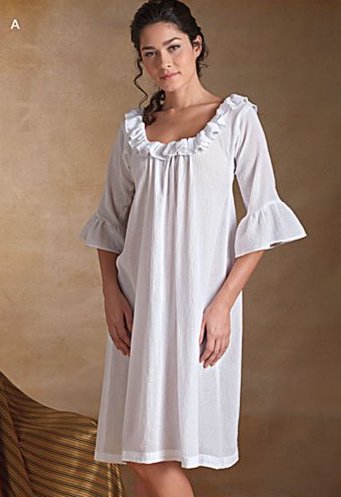
Ignoring the ruffles, you have a body panel with a shoulder strap, a sleeve gusset for the underarm, and a square sleeve that is folded to form a tube.
However, what if you fold down the shoulder strap, shift the sleeve and gusset down, and double the size of the sleeve piece to make it fuller? (Previously you cut a square that became a tube, now you cut a large rectangle that becomes a square).
This is the shape you get: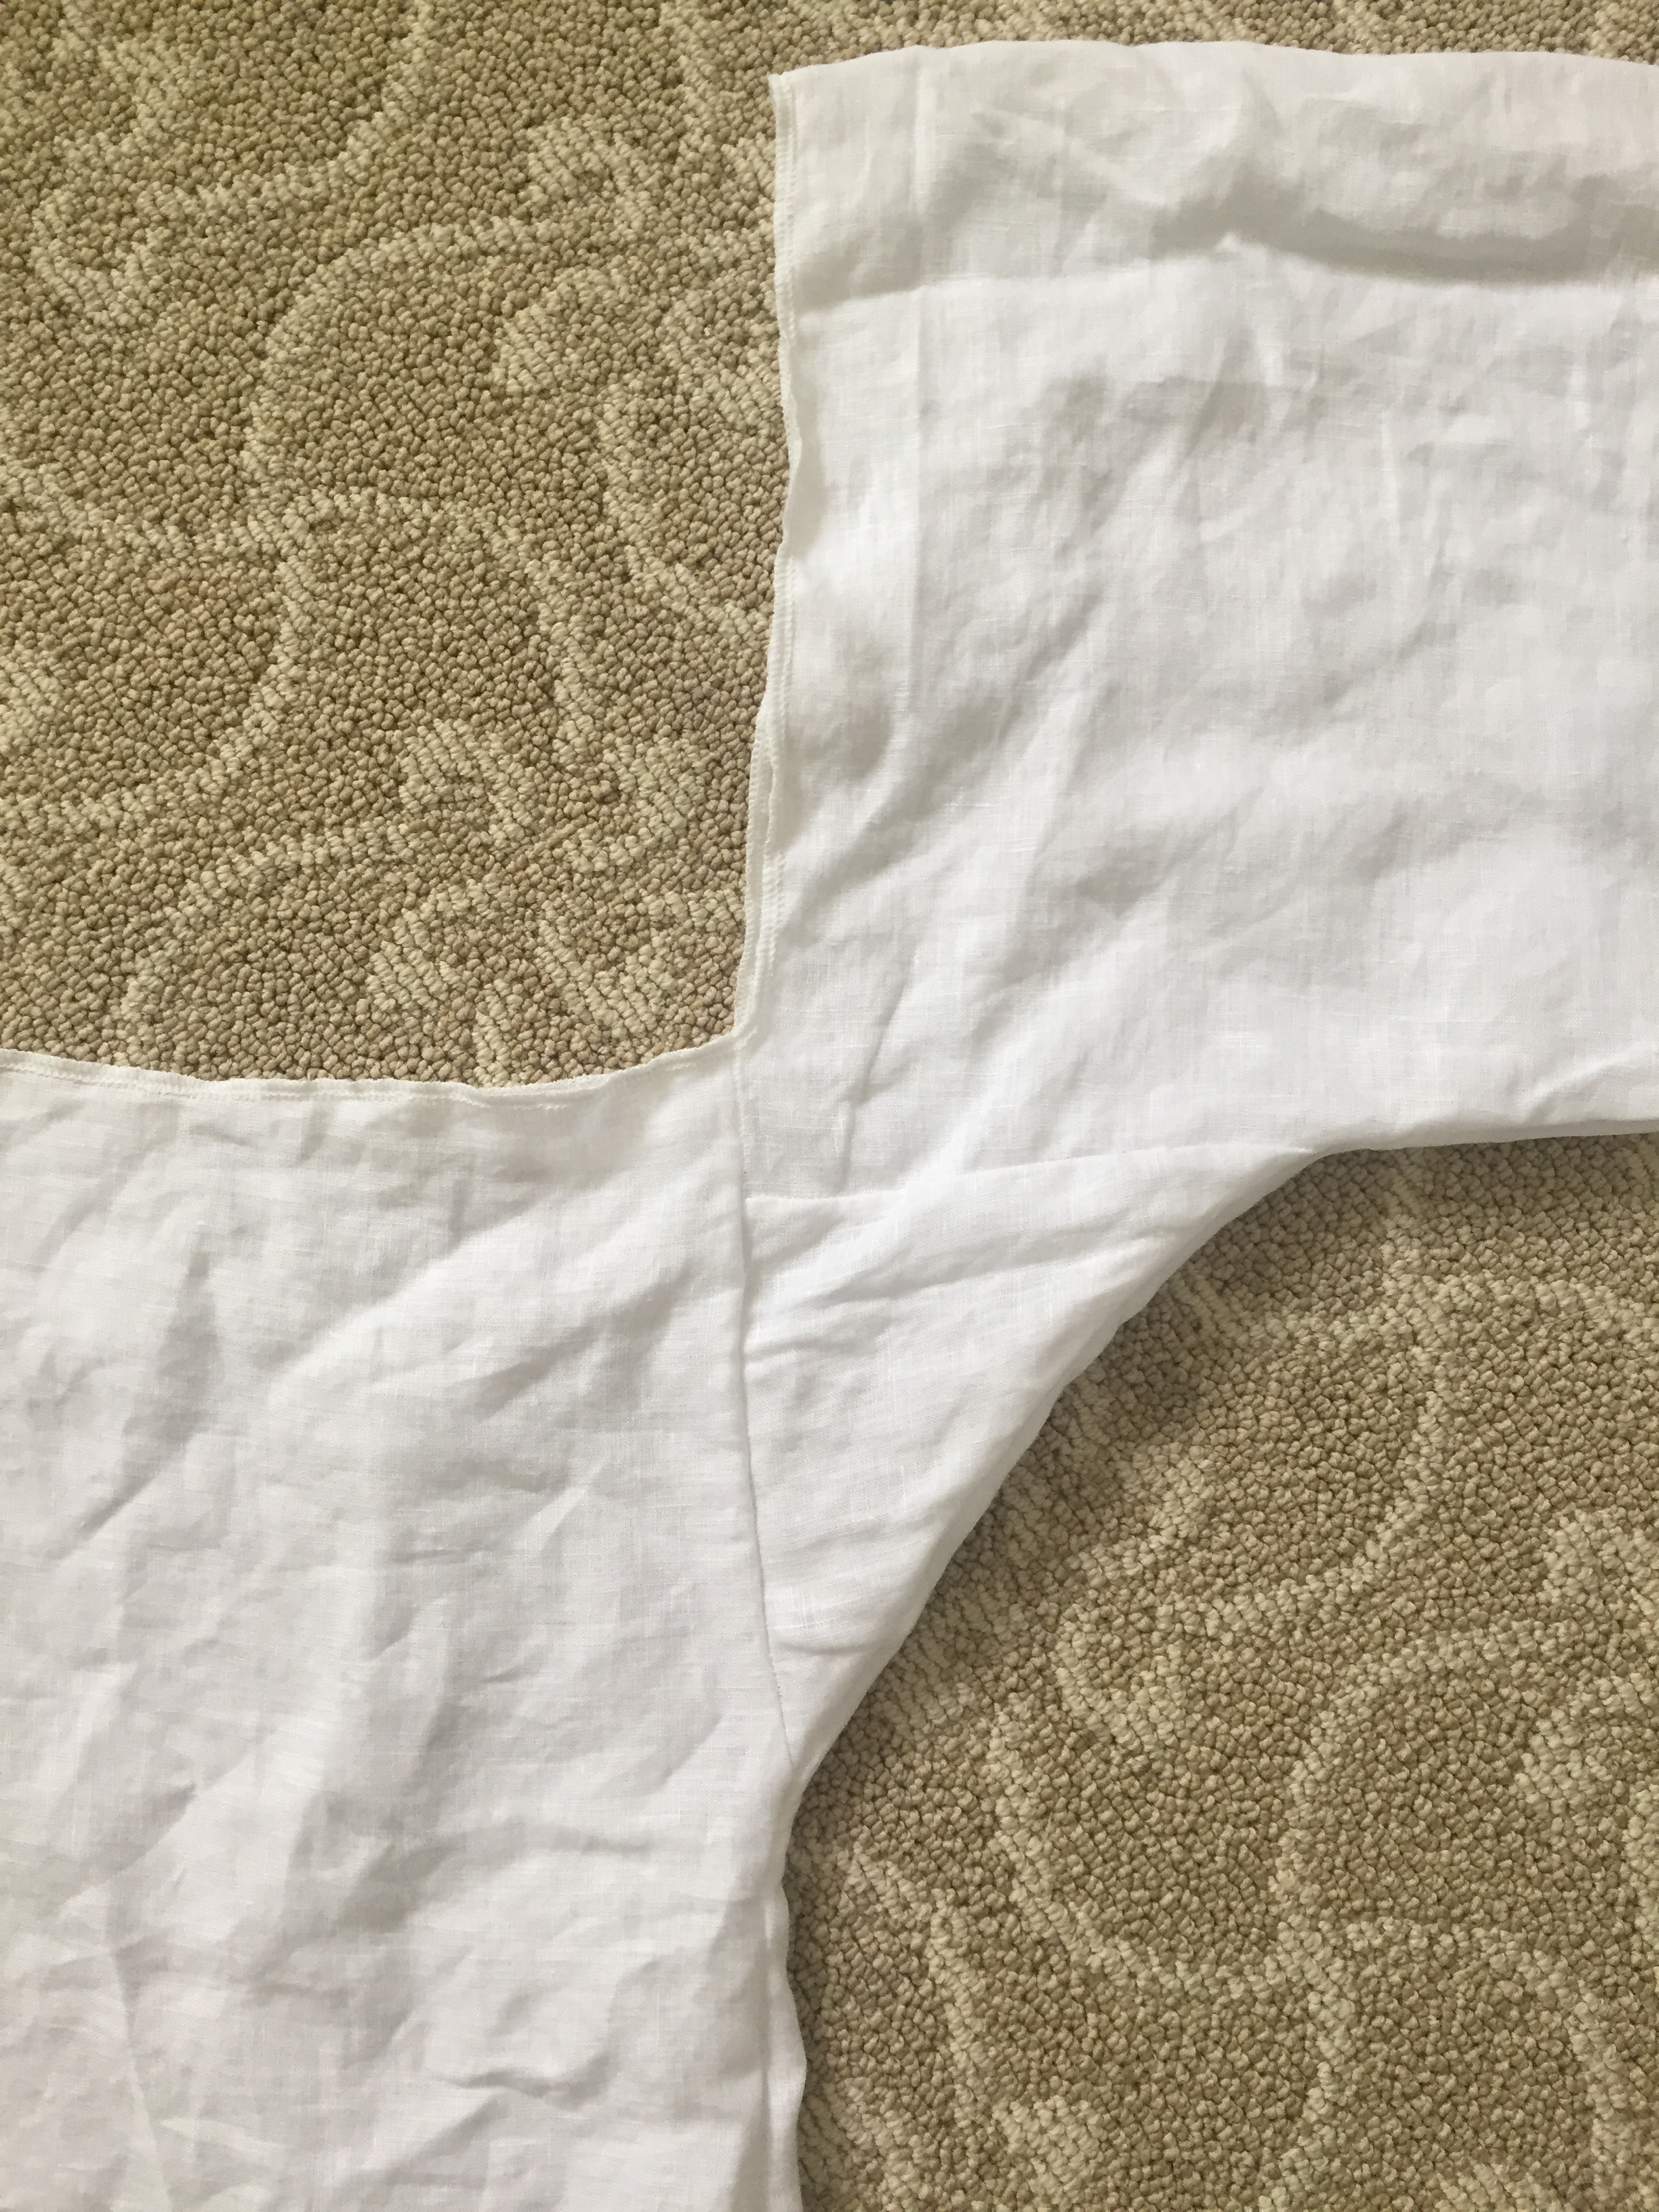
Add a drawstring neckline, and you get an off-the-shoulder chemise!
Please note, my sleeves are a bit shorter than what you see historically. A proper 17th century chemise would have had much longer and exaggerated sleeves. I made these shorter for several reasons:
- I plan to reuse this with other gowns where a billowy chemise sleeve would be inconvenient.
- The portrait I am using as inspiration has an exposed chemise sleeve made of finer materials than the linen I used, plus little ribbon ties; thus I made false sleeves that can be attached to my black bodice that will allow for nicer fabric and no need to fuss with tying bows each time I wear it.
So, if you do not have the reasons enumerated above, you should quadruple (not double) the original sleeve pattern into a giant square, not a rectangle.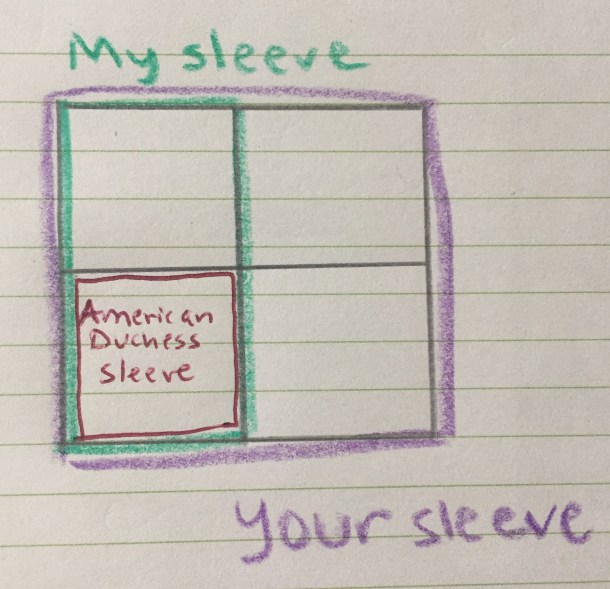
(Yes, those are green and purple crayons because my child left them next to my computer and I was too lazy to go looking for nicer writing implements).
Final reckoning: Let’s tally up!
- 10 yards of 35″ black silk taffeta: $49.90 + $8.75 shipping = $58.65 (Yay for fabulous sales from FabricMart!)
- Nehelenia pattern: $23.96 including shipping (I ordered with a few other ladies and split the postage from Europe)
- Lining and boning: $0 (left over from my 18th century stays project)
- 2 yards linen (for chemise) and 1 yard silk gauze (for bodice neckline): $23.94 including tax and shipping from Dharma Trading (I ordered double that but am setting the rest aside for a different project, so I’m halving the cost)
- 1 yard silk cotton blend for lower sleeves: $17.99 from Amazon
- 120 giant pearls: $11.28 from Aliexpress
- 2 brooches: $5.40 from Aliexpress
- 2 “small spiral corkscrew” cheerleading/Irish dancing hair clips: $43.11 including shipping from eBay seller american_costumes
- Ribbon, thread, hooks and eyes, polyfill for the bumroll, etc. from stash ~$5?
Total: $189.33
So the silk was cheap, but all the extras added up! Normally I do not count accessories and hairpieces, but in this case they are very specific to this era and the portrait inspiration, and they’re not very versatile for other eras.
Finally of course, as always, my shoes are American Duchess. They are the Pompadour French Court Shoes in black (affiliate link).

This was a long post, so thanks for reading!
")


 12-14-19")
