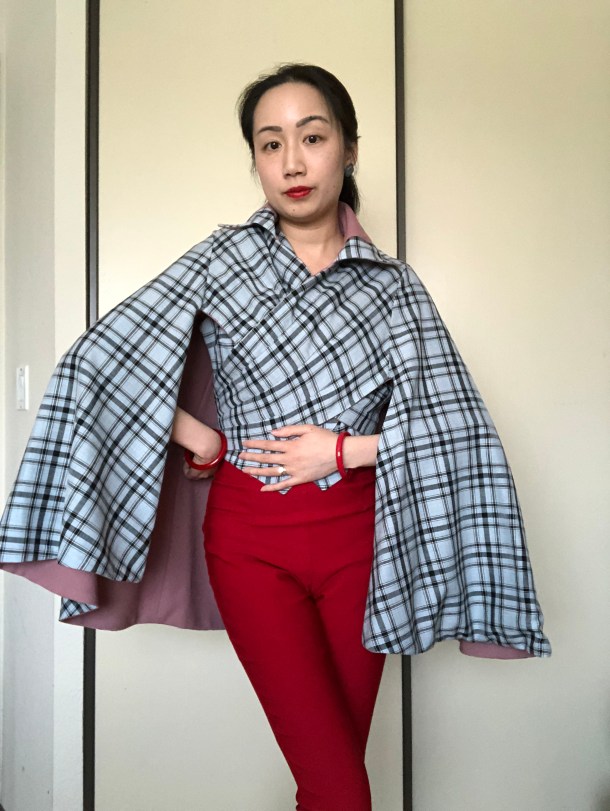
I lined the cape with a blue and black plaid fabric I got from a friend but constructed my cape in a way to make it reversible.
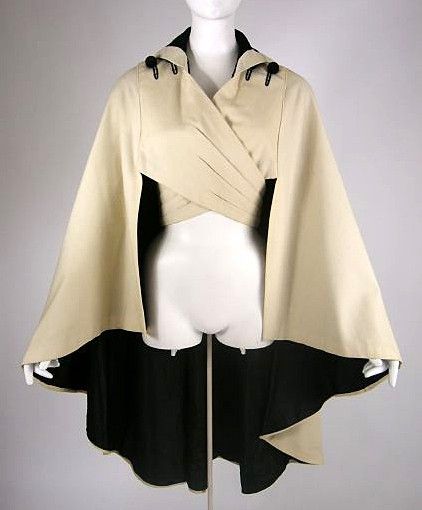
The cape is inspired by an antique cream and black one.
I made mine using a light-weight wool for spring/fall usage.
One of the cute details this cape has is the contrast on the collar, which I repeated on the lining to make it fully reversible.
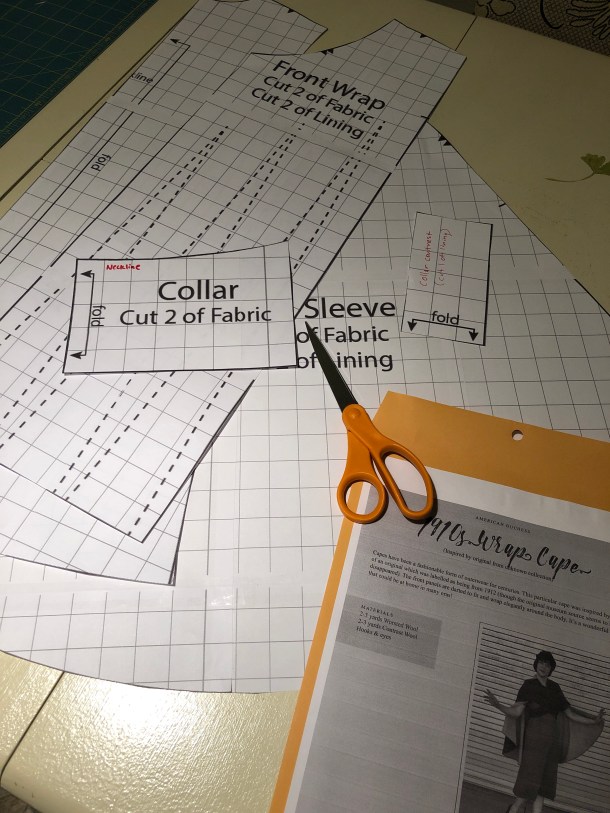
This cape pattern is available in PDF format but is a gridded pattern you have to scale up. To save time I just printed the pattern extra large and taped the pieces together.
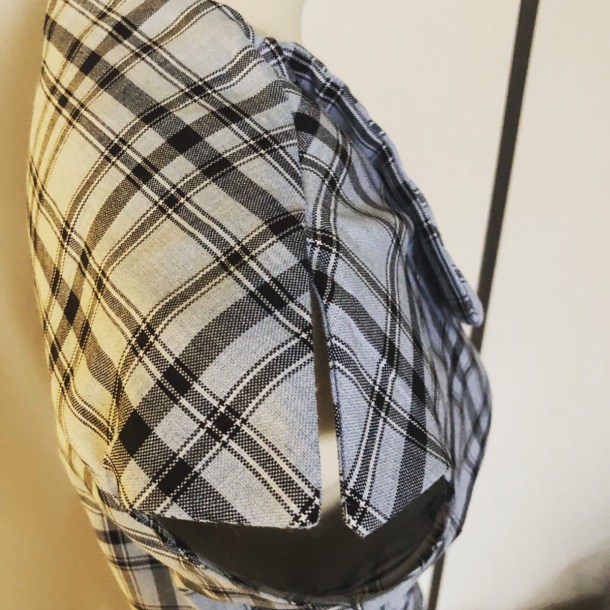
The closures are hidden under the back of the cape. The front pieces wrap around and you can finish them either by with hooks and bars or a ribbon bow. I had to trim a little bit off the ends because of my body shape. If you are large-busted you may need to change the size of the darts on the front wraps.
Overall, it’s an easy, good-looking cape and I plan to use this pattern again for a witchy wardrobe!
Like all the other Wearing History blouse patterns I made, I am quite happy with how this turned out. It is not a complicated pattern because there are not many pieces. There’s some leeway to adjust the fit by moving the buttons and buttonholes a bit.
The shoulders have a split which make for a cute detail. Plus there’s a belt in the back with a buckle.
I loved the way this blouse looked with the red cigarette pants, but I had enough fabric left over I decided it would be also fun to make matching shorts. This way I would have the look of a romper but the convenience of a 2-piece outfit.
I made my costume according to the Rebel Legion Jedi Librarian/ Archivist/ Historian Costume Standards but please note, I am not a RL judge and this post reflects my own experience making my costume and is not an official guide of any sort. This blog post will take you through the layers of my costume (with a dressing video at the end).
I used heavier fabrics like wool and cotton twill because I intend to use this for winter events; you’ll want to stick to cotton and linen if you plan to use it in warmer climates.
UNDER TUNIC AND SKIRT
I made the under tunic out of a poplin fabric with slight stretch. You actually don’t need a full shirt; a dickey just showing the collar is sufficient. However, for warmth and laundering reasons I wanted a full shirt.
Any mandarin-collared shirt pattern will do but I used a modified Simplicity 8768 (affiliate link), simply because I already owned the pattern. It is the top half of View A. Instead of a zipper I put snap openings down the center front. (The pattern runs large so I had room for the overlap closure).
The CRL guide requires either pants or a floor length skirt. I opted for a navy cotton twill skirt with a very full sweep. The skirt is self-drafted, but if you have basic sewing skills you can make one. Mine is made from gored panels to reduce bulk at the waist, but if your fabric is not thick you can do a simple gathered skirt. Please note that if you are planning to wear this for Saber Guild or any activity that requires stuntwork, I recommend a full circle skirt for mobility reasons. You can’t do a high kick with a narrow skirt!
I’ve also seen that some people do sew the the inner tunic and skirt together, so you don’t have to fuss with waistbands if you prefer.
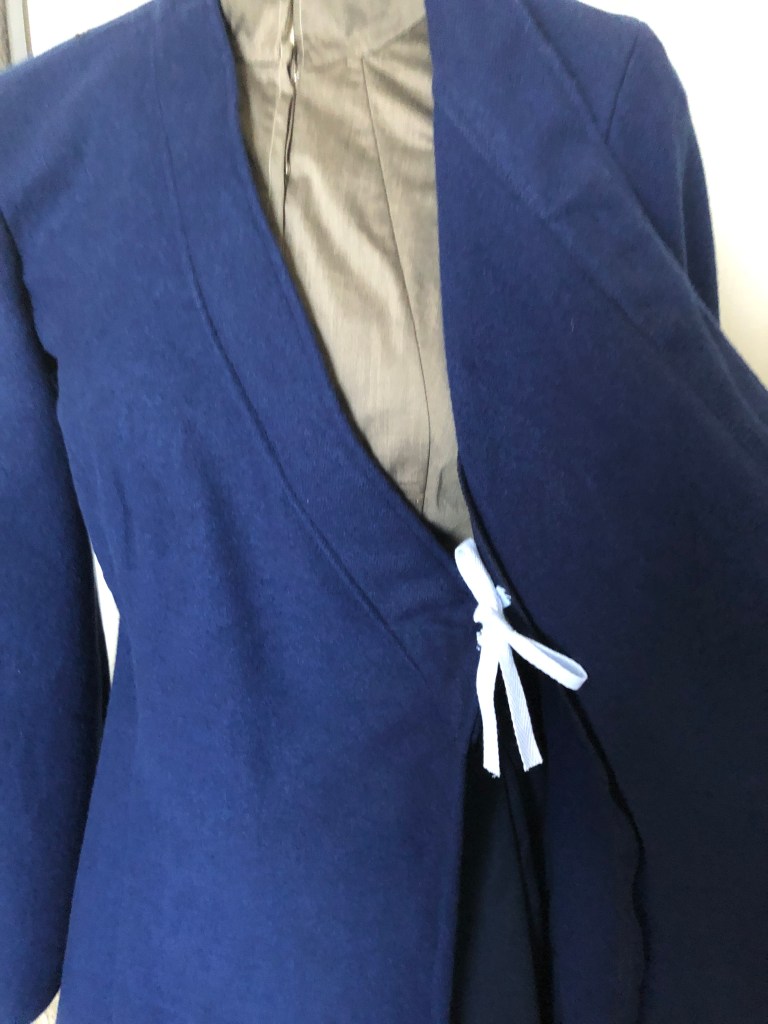
As before, I have a hidden tie closure inside the tunic, plus hook and bar closures on the outside.
The use of a coat weight wool for my tunic means it hangs beautifully like a real coat, and will be cozy for the winter!
BELT AND TOOLS
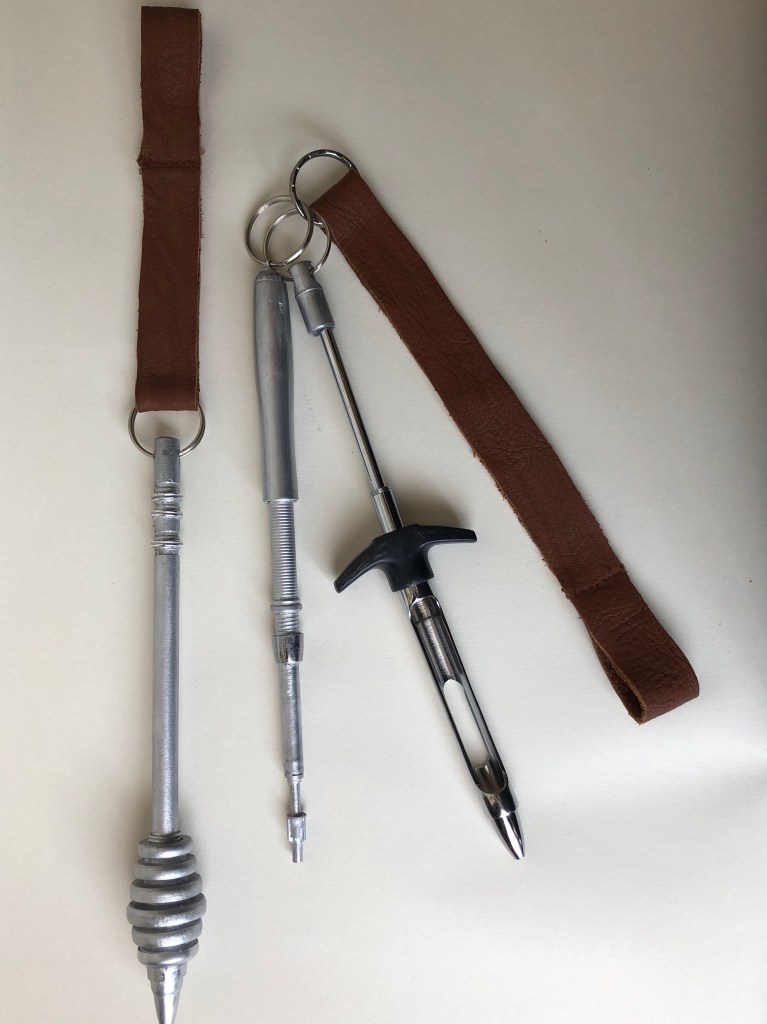
The belt is hidden under the obi, and is only used to hold up the tools. I’ve heard that these “tools” may be keys of some sort. They are actually optional items, not required for RL approval, but I think they add something interesting to the costume and are fun to make! Since the belt is not seen, I just used a modern belt.
My tools are based on the ones that Jocasta Nu wore in the Star Wars prequels.
Since I do not own a 3D printer I made the tools using items like broken pens and other items I had around the house.
The bulby thing used a wooden honey dipper (Amazon affiliate link). I drilled a hole in the top of the honey dipper, added a button cover and 2 pen parts on bottom, then added pairs of metal jump rings to the handle and top of bulb.
The stylus thing consists of 5 pieces from various pens reassembled plus half a jewelry clasp at the top.
Everything was glued together with E6000 and painted with Rub ‘n Buff. Key rings were added at the end and then I cut leather straps to hold them to the belt.
POUCH
The CRL specifies the pouch must be suede with a drawstring closure. I found a suede pouch on eBay and then modified it. I punched extra holes and moved the cord so that the pouch would be gathered in the center front similar to Jocasta’s. I also cut a leather strip (slightly wider than the ones I used for the tools) and sewed it to the back of the pouch to give it a hanging loop. I swapped the wooden bead with a different closure I had in my stash.
If you want to make your own pouch from scratch, it’s a simple U shape. This is what it originally looked like before modifications:
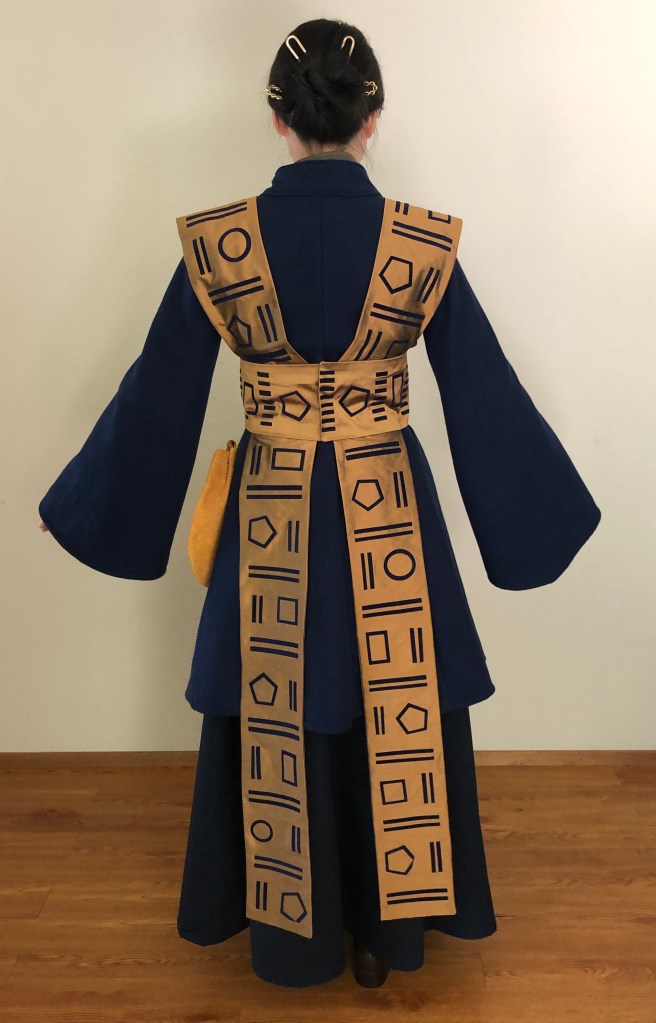
OBI AND TABARDS
I would say that the defining feature of the Jedi librarian are the long tabards with the geometric designs. The original ones that Jocasta had were embroidered, but I’ve also seen people use upholstery fabric that’s woven with designs, or draw them on themselves with fabric pens or paint. I opted to make my own custom fabric using navy heat transfer vinyl flocking on to of bronze silk shantung. (At the time I made my costume I had not seen anyone else in the Rebel Legion use this technique for librarians, but I was approved and the CRL is vague about how to achieve the geometric designs).
I used a Silhouette machine (like a Cricut) to cut the designs after drawing them in the software. For those of you not familiar with these machines, they look like printers but with a thin blade instead of an ink jet. After cutting you peel away the excess material, apply it to your fabric with a hot iron, then remove the clear plastic backing. I used flocked HTV so the navy blue material had a velvety texture against the bronze silk. Here’s a test piece showing you what it looks like up close.
My obi closes in the back with hidden hook and bars. To keep the tabards level I have them sewn to the obi.
As for more explanation about the pattern shape for the tabards/obi and what shapes are acceptable under RL guidelines please refer to my Generic Jedi post. A few important points:
There are no shoulder seams. The top portion of the tabards curve from the front to the back.
The tabards are angled like a Y. They will not sit right if you just try to have 2 very long rectangles. You can save fabric by hiding the seam behind the obi.
The exact dimensions depend on your height and size, but for me I started with a lot of 6″ x 36″ rectangles and cut off extra as needed. You will need 14 rectangles (2 top tabards, 4 bottom tabards, 1 obi, then double everything for a lining). This includes seam allowance.
The tabards and obi have 2 layers: sew them right sides together on the long edges and one short edge, flip right side out to sandwich the raw seams, then hem the remaining short edge to your desired length. The hemmed end hides under the obi.
I used silk shantung which is lightweight by itself, but got heavy enough with the addition of the appliqués. I recommend using interfacing if you use thin fabric because you will want the tabards to have a decent weight to not flap around when you walk.
To help prevent the tabards from slipping off my shoulders I have a hidden snap on each shoulder.
BOOTS
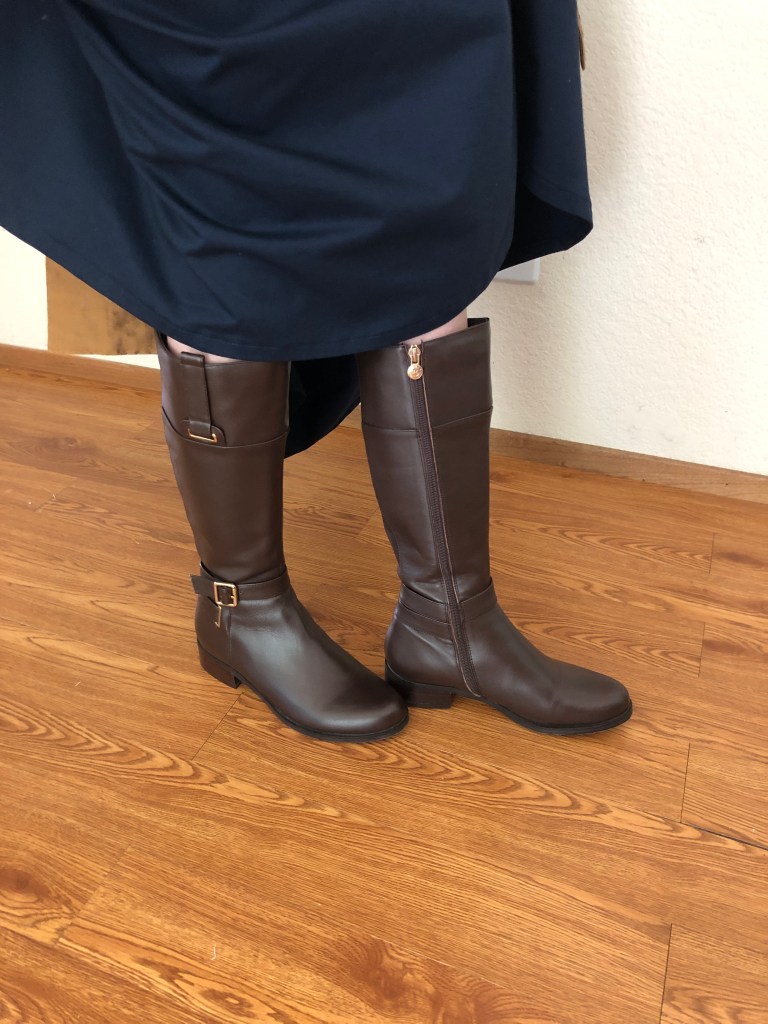
My boots are the same ones used in my Generic Jedi costume: “Gabi” boots purchased from Slimcalfboot.com during a sale. The CRL calls for “low-heeled and closed-toe shoes” for skirts and calf-high brown or black boots if you’re wearing pants. Zippers must be on the inside of the leg if present.
GETTING DRESSED
Finally, here is a quick video of me putting on all the layers! The 3D printed Jedi holocron is from 3D Pro Designs on Etsy. I put my hair up in a bun and have 4 vintage U-shaped hair pins sticking out.
Your cost will vary a lot depending on what materials you use. I used a lot of wool, silk, leather, and flocked HTV, which raised my costs, but I got my fabrics on sale and reused my boots, which lowered my costs. If you’re on a budget I recommend looking at upholstery or drapery fabric for materials that already come with geometric designs, and sticking to cottons for your tunics. I also got really lucky on a crazy deal for my wool, which should have been the bulk of my cost. I’m also a bargain hunter when it comes to cosplays and go looking for deals on eBay or other places instead of buying everything “new.”
Materials list:
Inner tunic: 2 yards of 45″ cotton poly poplin shirting ($5.36 from Fabricmartfabrics.com)
Outer tunic: 3 yards of 55″ wool ($16.75 from a “garage sale”)
Skirt: 3 yards of 62″ navy twill ($21.58 from eBay)
Tabards/obi: 3 yards bronze silk shantung ($41 from Fabricmart)


 12-14-19")
