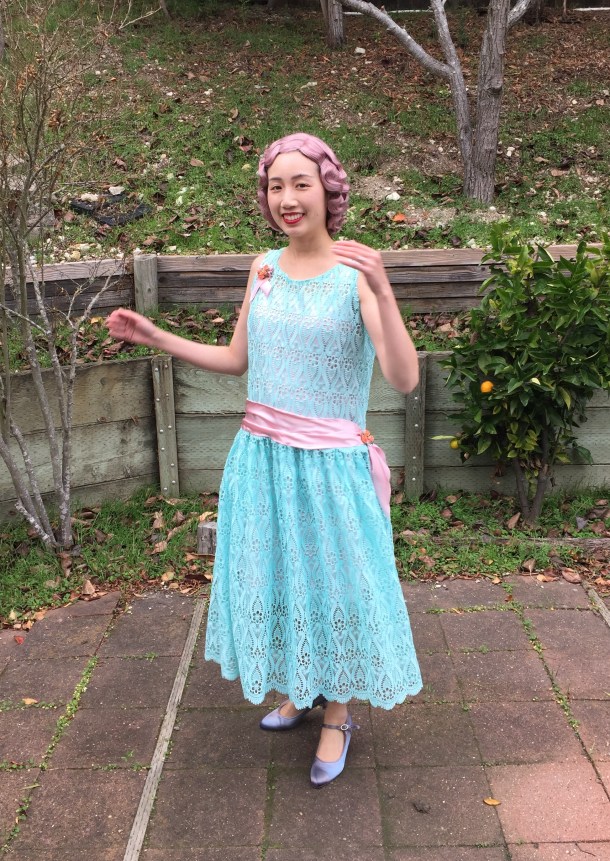
My last projects of 2017 were a 1920s silk slip and a lace dress, made right before New Year’s eve. Neither of them are difficult to make, and I’ve made a pattern and tutorial for both. All the fabric for these two projects were kindly provided to me, free of charge, by Fabric Wholesale Direct.
The main dress is made from their mint iris guipure lace, and the slip and sash are made from their pink silk charmeuse. Thank you Fabric Wholesale Direct for the lovely materials!
1920s Slip
This pattern makes a basic 1920s slip. Choose a slinky fabric like silk charmeuse. You do not want to use anything thick!
1) You’ll need the following measurements:
B = your chest circumference, across the top of your bust, plus 4 inches
H = your hip circumference, plus 4 inches
L1 = the length from the top of your bust to your hip, plus 1 inch
L2 = the length from your hip to above your knee, plus 1 inch
(These measurements include ease and 1/2 inch seam allowance).
2) You are going to make a long, slightly trapezoidal shape using the measurements above. The top is B divided by 2, and the total length is going to be L1 + L2. Cut this all as one piece. (The middle line is not a seam; it’s just to make sure it’s wide enough for your hips). You can draw this on paper first, or directly onto the fabric using rulers.

3) Cut two of these trapezoids, place them right sides together, and sew the long edges together.

4) You should now have a long tube. Hem the bottom and top of the tube, and if you like, add lace to decorate the top and bottom edges.
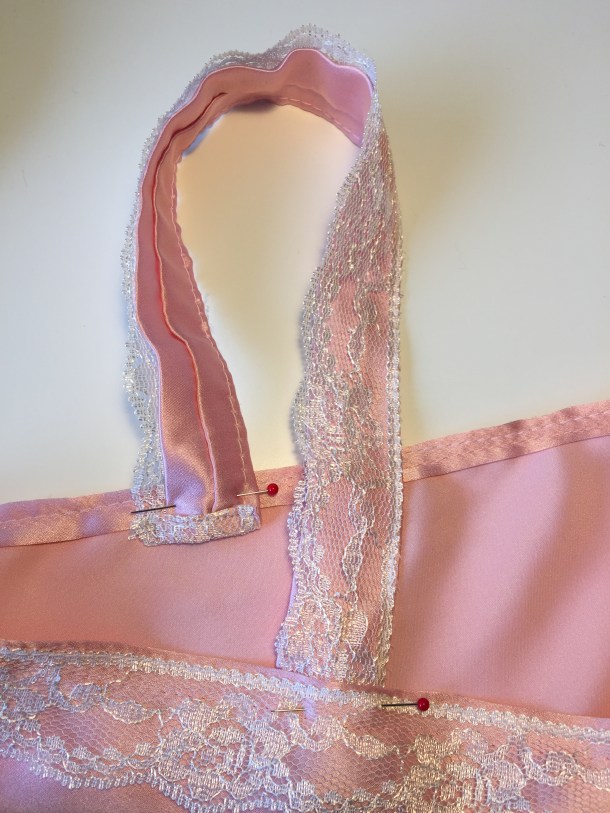
5) Cut two long rectangular straps for the shoulder that are 3 inches x 15 inches. (These are extra long; you will cut off the excess in a later step). Fold each strap lengthwise (inside out) and pin and sew down the long edge, making a skinny tube.

6) Turn the long tubes right side out and iron flat. Add lace to the straps now if you wish.

7) Sew or pin one end of each strap to the BACK of the slip, where your shoulder blades would be.

8) Put the slip on and then pin the other end of the straps to the FRONT of your slip, over the top of your bust, and adjusted to the right length. Cut off the extra length. Sew the straps to the inside of the slip.
Now you are done!


1920s Dress
This tutorial is to make a simple 1920s dress. I used a lace fabric, but you can use anything with a nice drape, such as silk velvet or a thick satin.
1) For the top half of the dress, find a sleeveless tank top style to use as a pattern base. (This should be made of a non-stretchy fabric, and a little loose-fitting, otherwise your dress will be too tight). The ideal length for the tank top is to reach your hips; if it’s too long you can fold the bottom up before tracing.
2) Lay the tank top on your fabric and cut around it, leaving extra space for a seam allowance and extra fit room. Depending on how loose your tank top is, that extra space may be 1-2 inches. Don’t forget the shoulders!
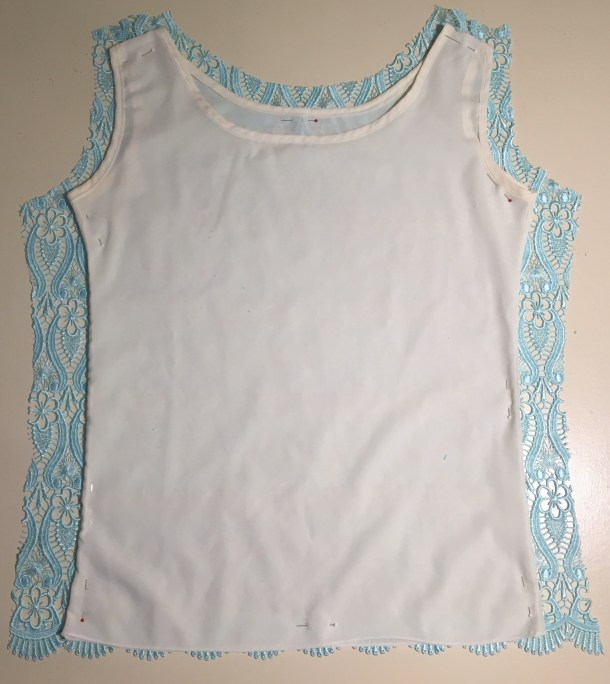
3) Use that piece you cut out to trace a second piece, just slightly wider on the sides, to be the front piece of your dress. Sew the side seams and shoulders together.

4) Cut a rectangle panel for the skirt that is 2.5 times the circumference of your hips. The width will be the length of your hips to below your knee. (If you want a historically-accurate dress the hem should be below your knee, and if you want a more modern look cut the skirt shorter).

5) Sew the short edges of the skirt panel (right side) together, making a big skirt shape. Turn the skirt right side out. The top edge of the skirt will be gathered and sewn to the top part of the dress, and they meet at the hip.

6) If you have a fancy edge on your dress top, have your top/skirt seam overlap with the top showing.

7) Finish the neck and armholes by folding or rolling the raw edges of the fabric inside the dress and stitching them down.

8) Optional: You can cut a sash for the middle that consists of a long rectangle with pointed ends. (You can use the leftover fabric from making your slip). The length and width will depend on personal preference, but the length should be at least double your hips plus extra. (Here the one shown in the photo is 55 inches long and 7 inches wide, with the edges tucked in). Wrap the sash around the hip area of your dress, tucking in the raw edges and sewing them down. For texture and visual interest, you can “wrinkle” the fabric while pinning and sewing it down.

9) Optional: Embellish your sash with a shiny buckle and some little ribbon flowers. You can also put more silk charmeuse, ribbons, or flowers on the front of the dress to decorate it.

The finished dress should allow for a lot of movement and be fun to dance in.


Thanks again for the materials Fabric Wholesale Direct!


 12-14-19")
