Category Archives: 1830s Romantic

1830s Dresses at the Romantics Picnic

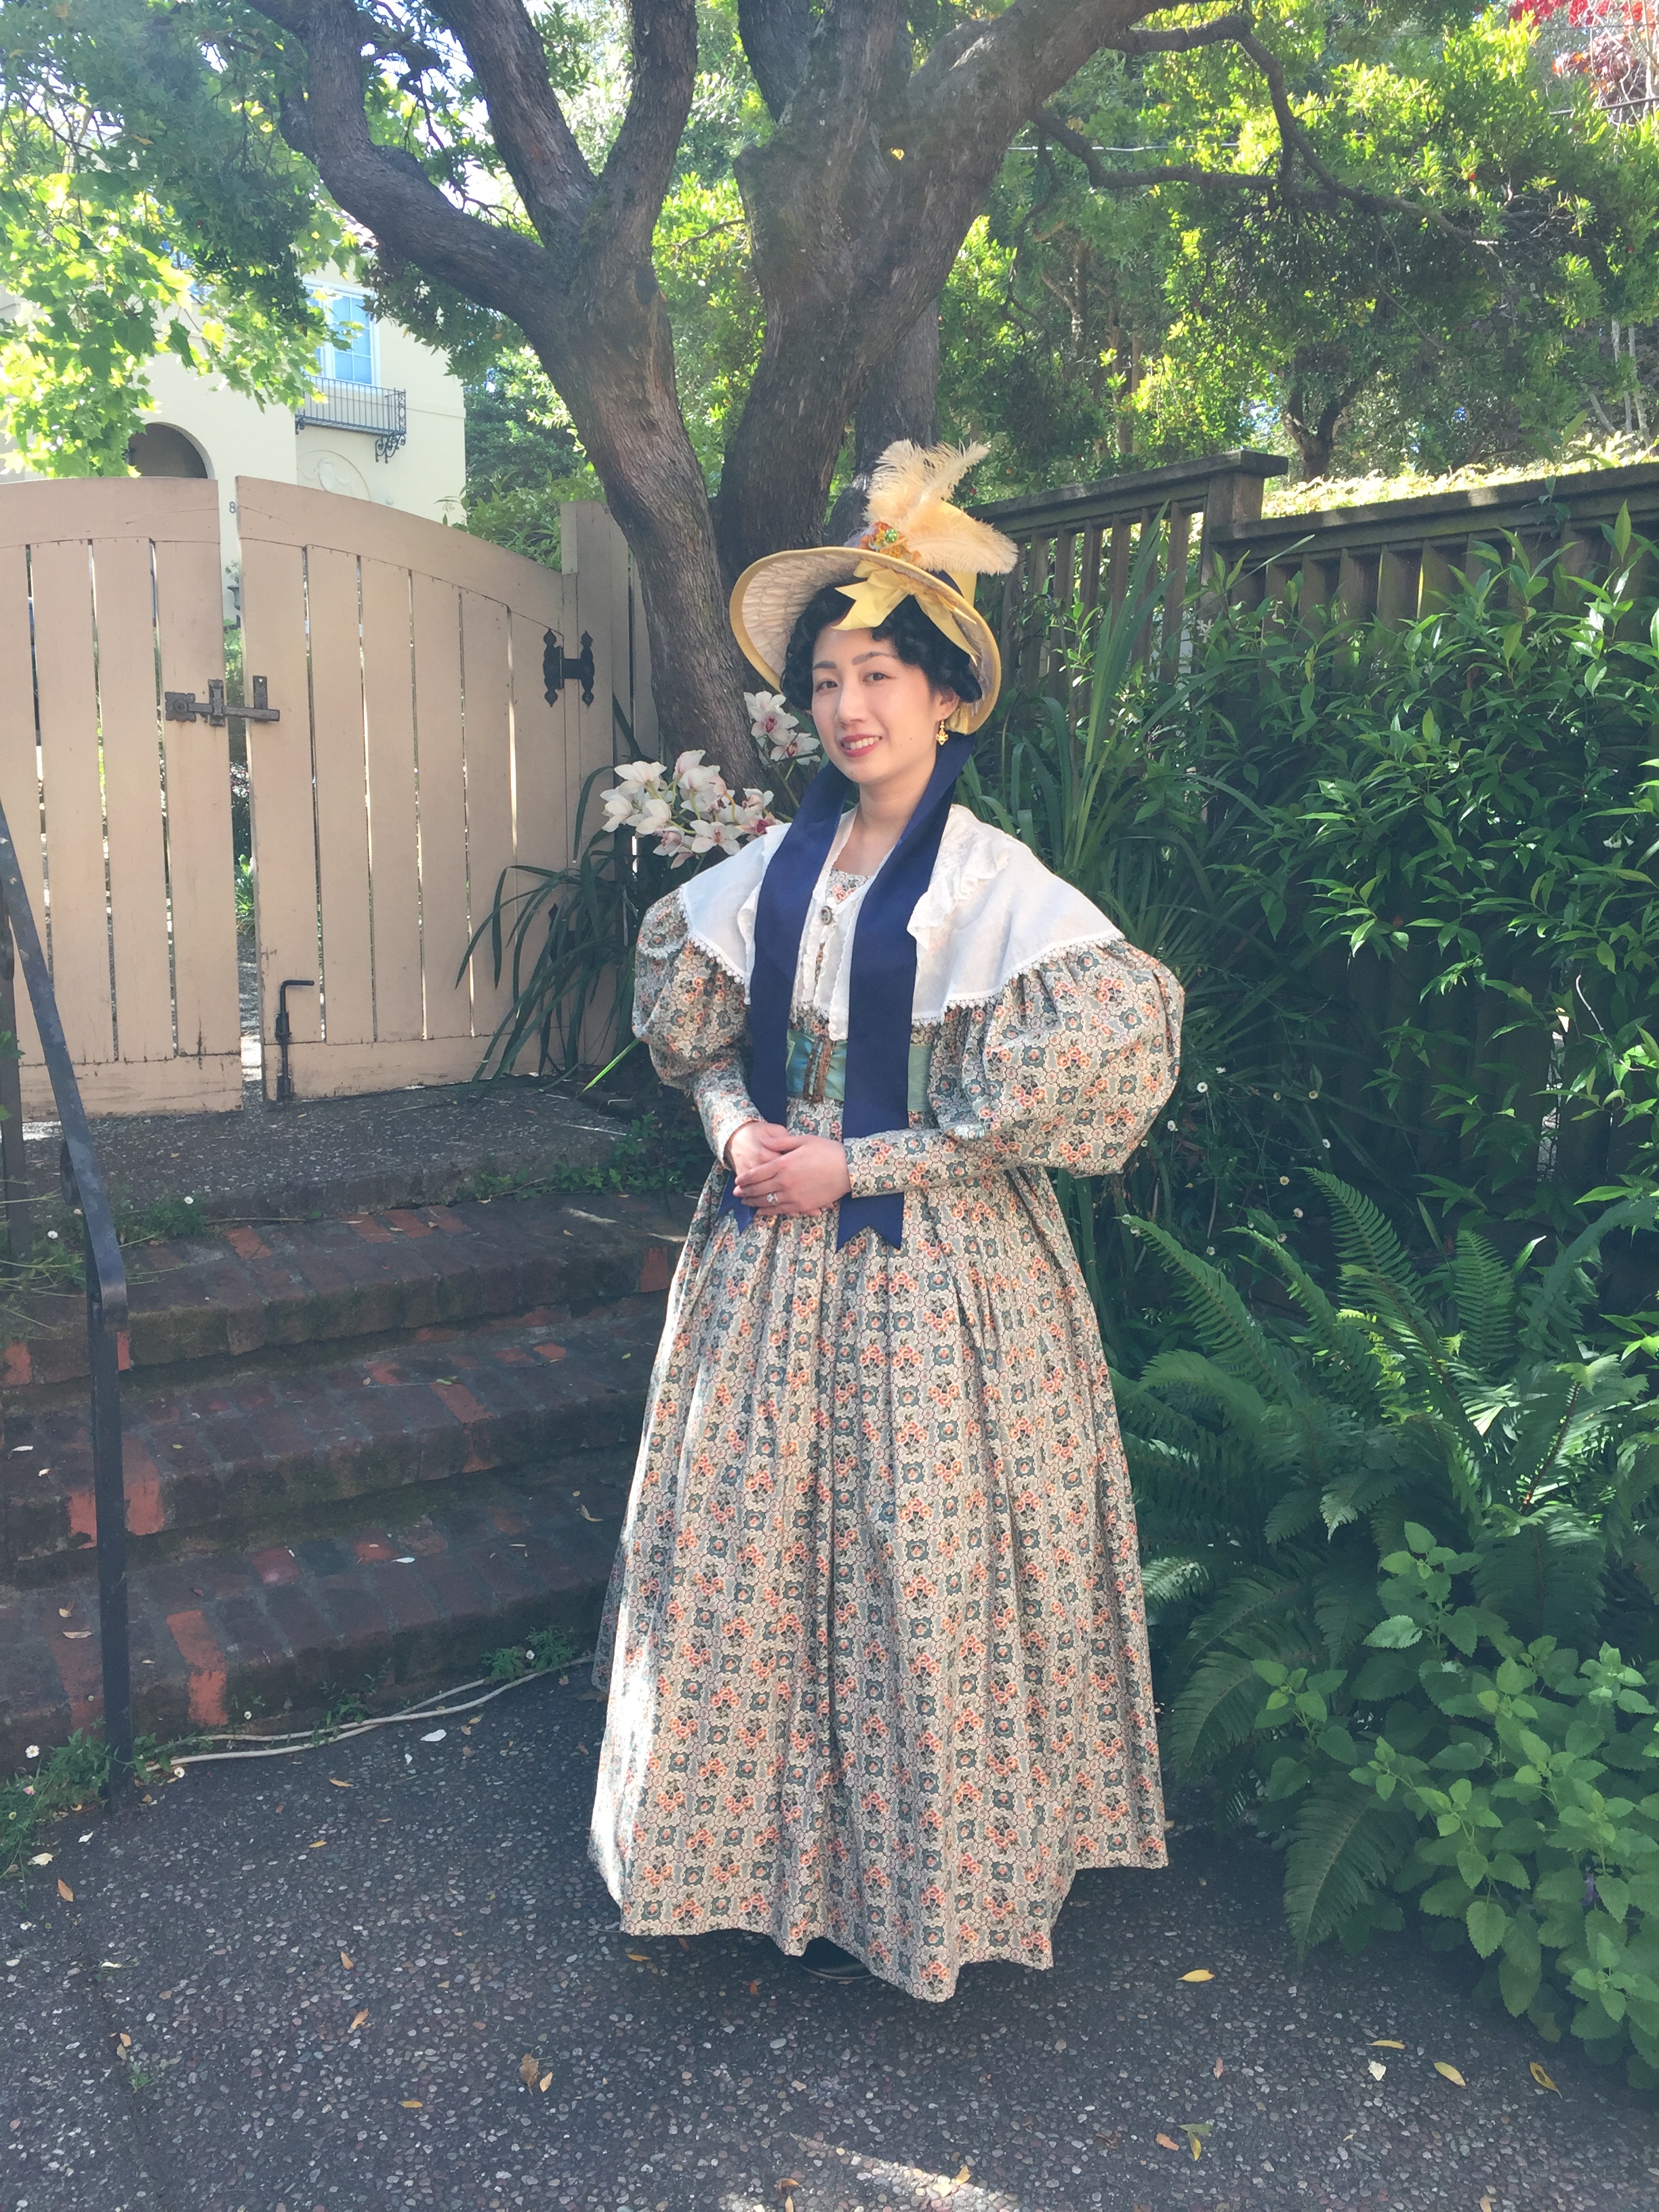
This past weekend the Greater Bay Area Costumer’s Guild held an 1830s-themed picnic, and I finally got to wear the 1830s cotton day dress I made a few months ago. Before the picnic I got dressed and took a few photos at a friend’s house.IMG_8621

I reused some accessories (like the bonnet and pelerine) from my 1830s silk dress ensemble, paired with a new moire ribbon belt and carved shell buckle. IMG_8618.JPG

Thank you to my friend Kaila who helped me get dressed, and wore a lovely silk gown that day.IMG_8609.JPG

Also joining us was Mena who had the most epic frilled cap!IMG_8622.JPG

The picnic was at Ardenwood Farms and it was a lovely day with a good turnout of wonderful costumes! I was impressed by how many people embraced the silly hair and giant sleeves of the 1830s. (The following group photos are all by Lori Clayton, used with permission). IMG_8431jkl

There were lots of charming ensembles in a variety of colors.IMG_8449IMG_8442IMG_8437

There were also a few gentleman in attendance (not all pictured).IMG_8399

And some of us got sassy showing off our corded petticoats.IMG_8441

The picnic spread was delicious.IMG_8634.JPG

Overall I had a lovely day out with friends! (Photo below by Sara of La Dauphine).from Sara McKee.jpg

The rest of my photos can be found on my Flickr album. IMG_8627

1830s Cotton Day Dress

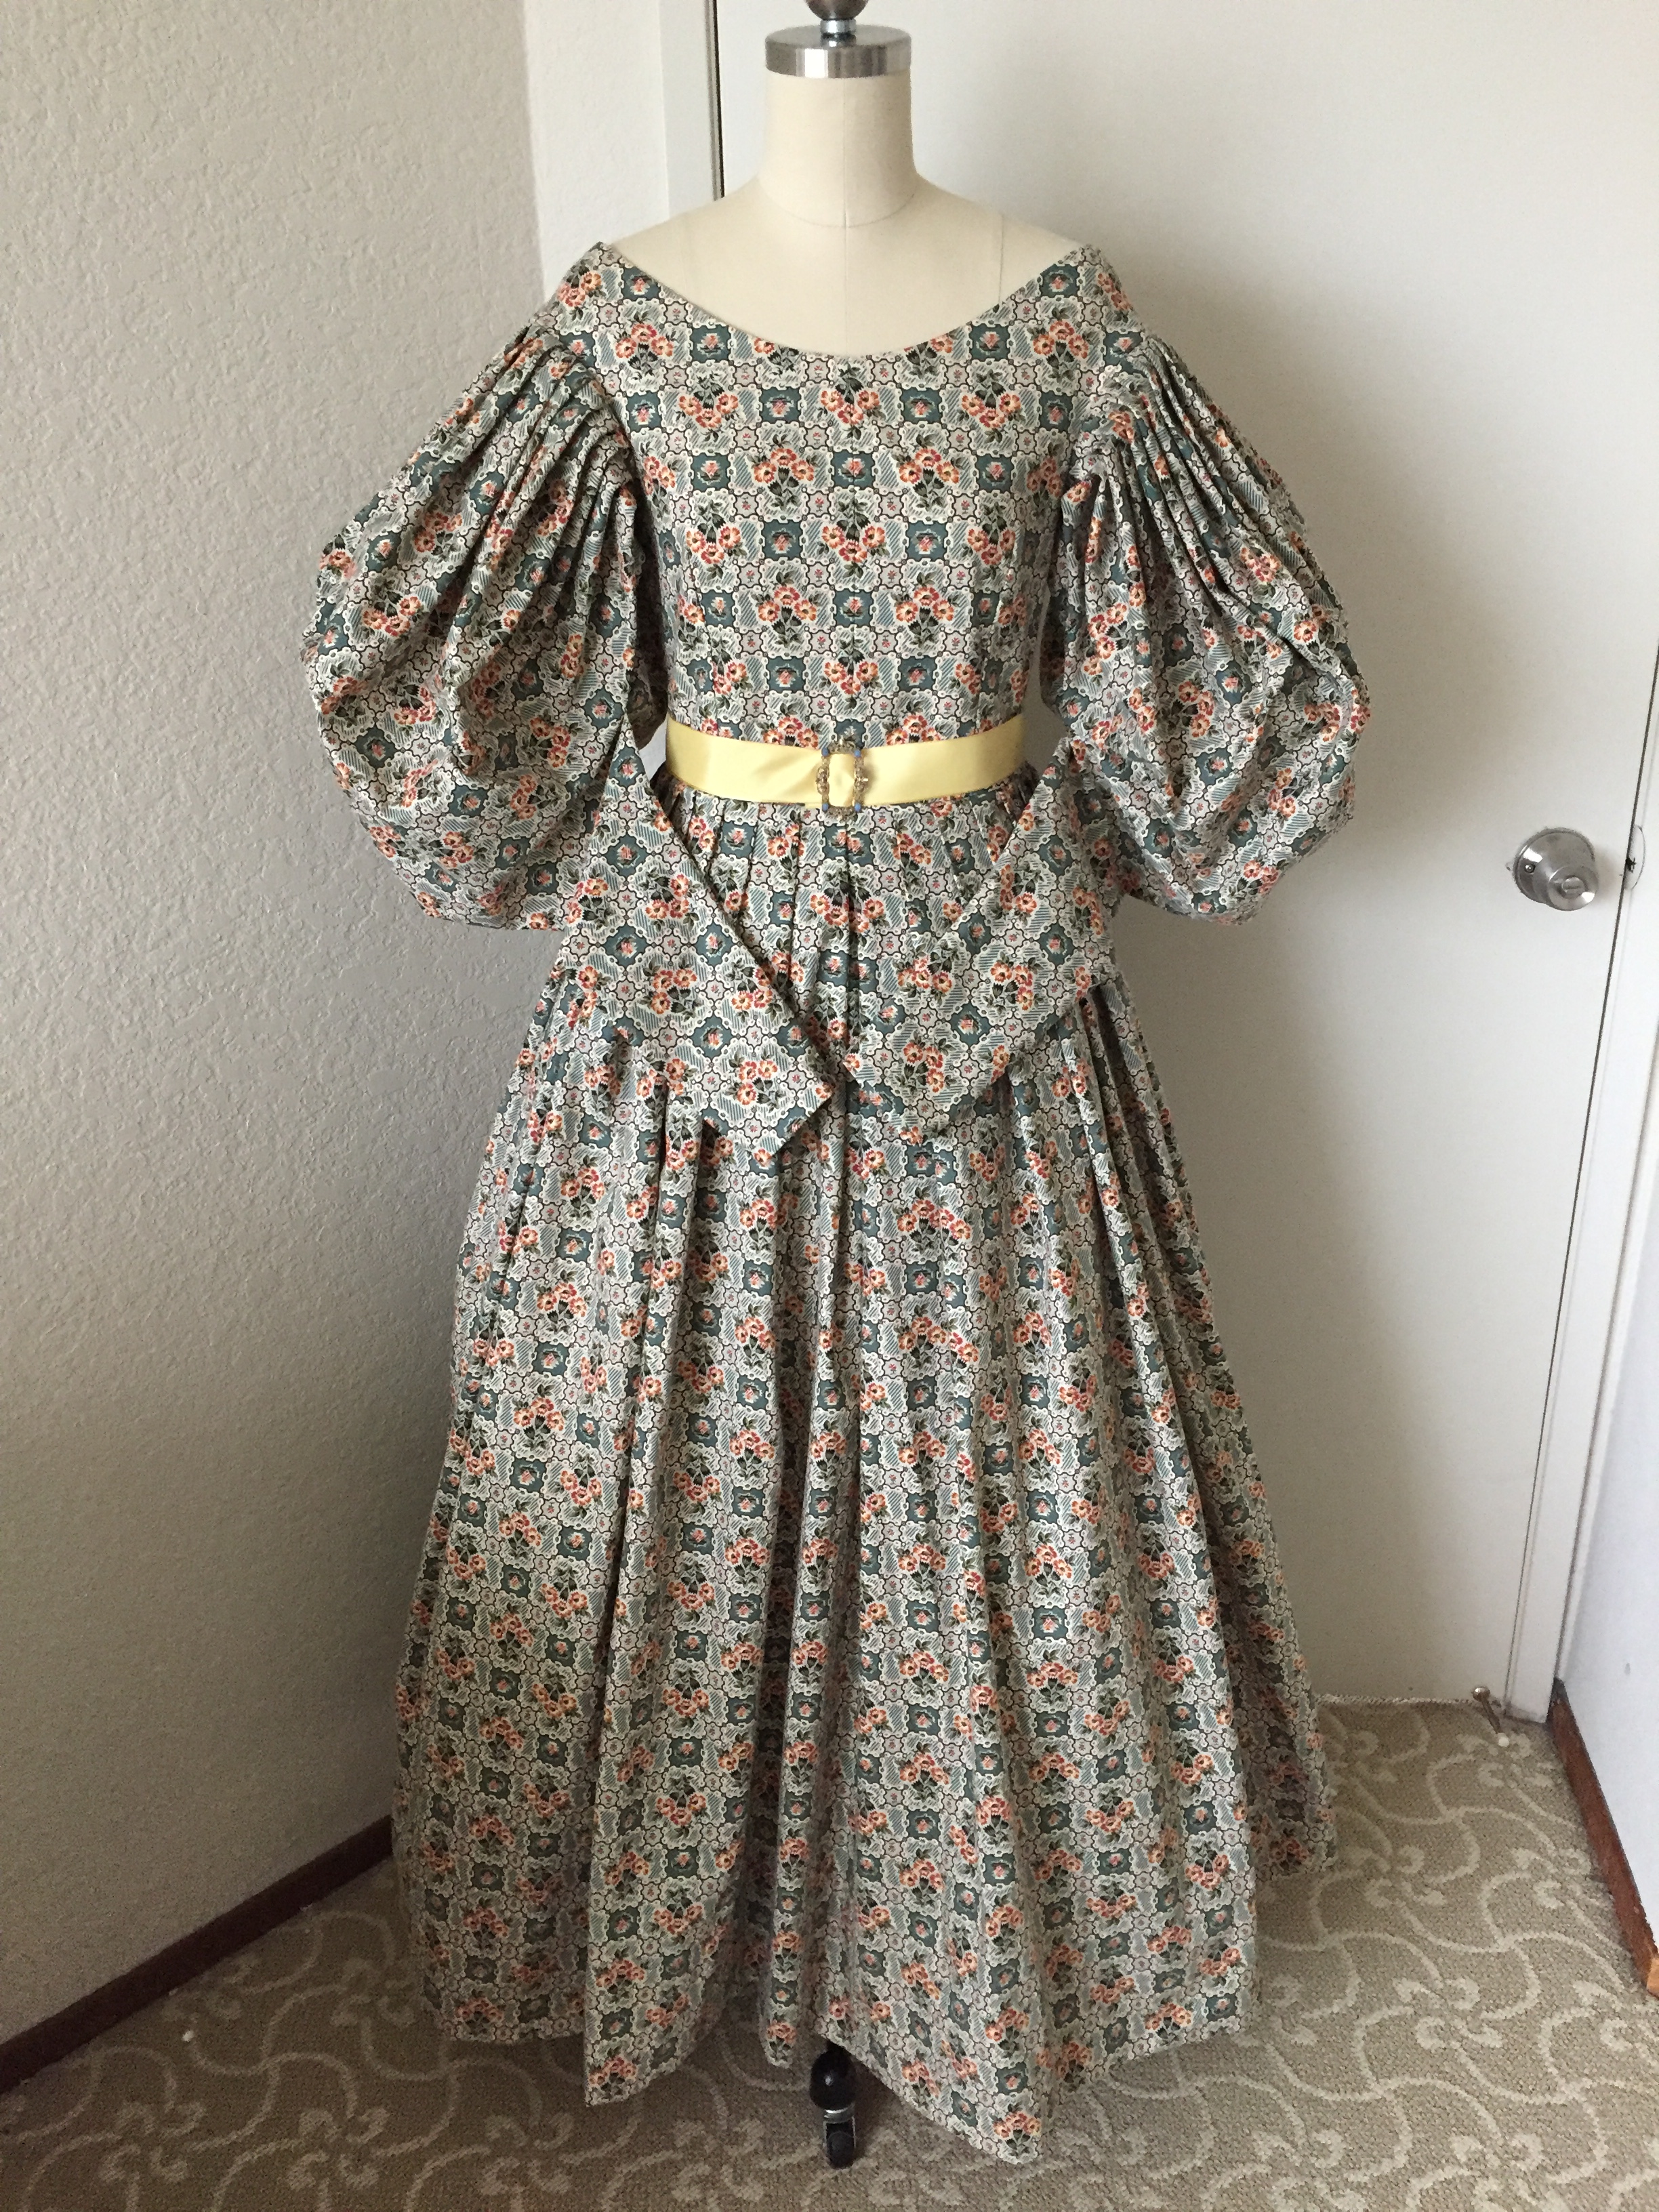
I have an 1830s-themed picnic later this year, so I made another Romantic era gown! Although I already have the plaid silk dress that I wore to the Dickens Fair, the thought of wearing silk to an outdoor summer picnic did not sound very comfortable. Instead, I decided to have a washable cotton dress in a busy print that could hide stains.IMG_6177.JPGIMG_6179.JPG

The dress is shown above without the sleeve plumpers or the petticoats properly starched, so there will be a lot more poof when I wear it! The fabric is a quilting cotton by Andover Fabrics from their Maling Road collection, shown below with one of the hidden pockets I put in the side seams.IMG_5788.JPG

Although the cotton I bought was not advertised as a reproduction print, I thought the general checkered feel of it was similar to this antique wool gown at the Victoria and Albert Museum.Dress-With-Lace-Pelerine

The cotton pleats up beautifully, as seen in my sleeves. (Since the sleeves have about a yard of fabric, deep pleats are needed to get all that fabric into the armscye. Gathering will be too bulky).IMG_6182.JPG

I have lots of details about construction, undergarments, and accessories in my post about my plaid silk gown, so I’ll just go over the things I did differently in this gown.

As before, I used the Truly Victorian TV455 1830s Romantic Era pattern to make my dress, but this time I redrafted the sleeve pattern to have a more defined difference between the upper and lower sleeve, using the Workwoman’s Guide as a reference (drawing not to scale):IMG_6428.JPG

Other changes I made to the construction (mostly to speed things up):

  • I skipped the piping because the print was so busy, and I wanted this project to be fast!
  • I used the variation of the pattern that omits the pleating at the top of the bodice because I will be outdoors and wearing a pelerine that covers the pleating anyway.
  • I did not line the sleeves this time; this reduced the bulk when pleating.
  • Rather than having an opening in the lower sleeve that closes with hooks and eyes, I just sewed the sleeve seam shut. This means that the wrist area of the sleeve is not very tightly fitted, but still looks slim enough since I have slender hands I can carefully slide in. Having the seam fully shut made construction much easier since I had no lining, and is one less thing to fuss with when dressing.
  • Last time I flat-lined my silk with an organdy interlining, then made a separate polished cotton lining. This time I skipped the lining and flat-lined my cotton print with a plain cotton interlining. Here’s a time-saving tip I posted to my Instagram stories:IMG_5757.JPG

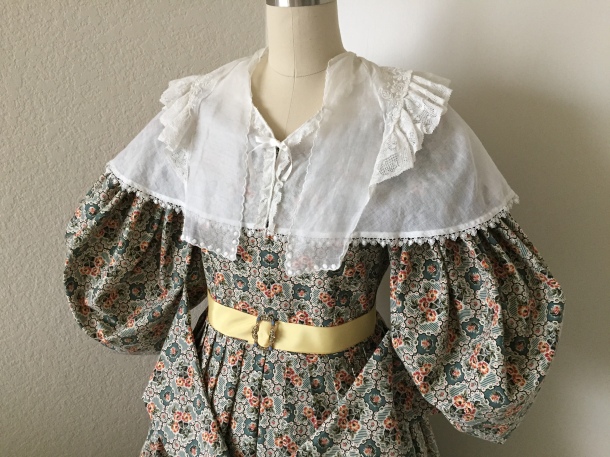
I will be reusing the delicate cotton pelerine I made for my silk gown.IMG_6187.JPG

The yellow ribbon belt is just a placeholder; I am considering a teal or coral velvet ribbon for the sash. I also purchased a lovely carved antique abalone shell belt buckle to use with this dress. It is probably Edwardian instead of Victorian, but it has the right size and proportions.IMG_6221.JPG

I put bust pads inside the gown, which are just cotton pouches stuffed with Poly-fil. They are not really meant to make your bust bigger, but fill out the hollow near the front of your underarm. The size, shape, and placement will depend on your body.
IMG_6401

As you can see, the neckline is just flipped down and hand-stitched into place.

Materials:

  • 8 yards of 44″ wide quilting cotton: $66.75 including shipping from eBay
  • Pattern: $0, previously used twice!
  • Bodice lining: $0 (leftover scraps from other projects)
  • Thread, hooks and eyes, Poly-fil. ~$3 (already in stash and purchased in bulk)
  • Ribbon: TBA

Not including accessories that means the dress will be around $70-75, since I already have all the undergarments, bonnet, shoes, and pelerine!

Here’s a storage tip: I now have three 1830s gowns and I don’t want to have the sleeves crushed in my packet closet. I also didn’t want to make multiple sets of sleeve plumpers. I put a plastic bag inside each sleeve and then put Poly-fil inside the bag. That meant the enormous sleeves of my 1830s dresses could muscle my other dresses in the closet out of the way.IMG_6403

IMG_6404

My event is still more than 3 months away, so I won’t be posting final worn photos for a little while, but I am glad to be done! (I don’t normally finish things this far in advance, but I wanted to make this gown while my previous 1830s dress was still fresh in my mind).IMG_6189.JPG

1830s Romantic Era Plaid Silk Day Dress (Plus Tips on How to Put Together Your Own 1830s Outfit)

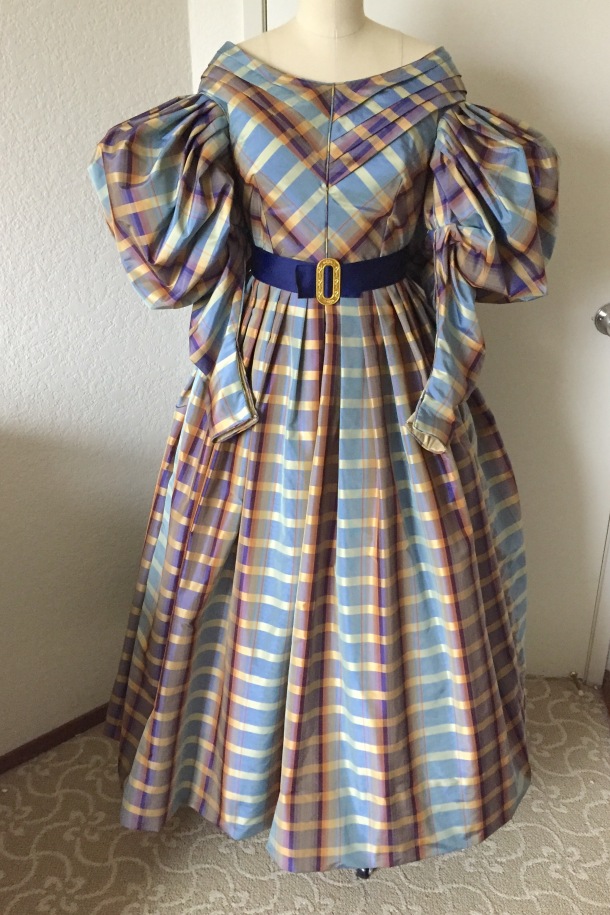
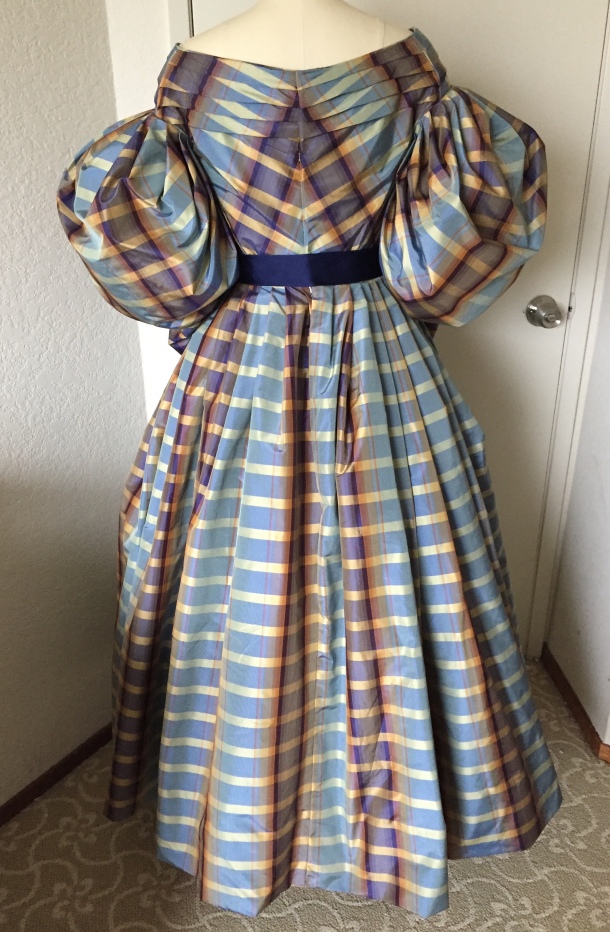
As promised in my last post about the Gigot Girl Gang visiting the Dickens Fair, here are construction details about my 1830s Romantic Era day dress, made out of a plaid silk taffeta. Undergarments and accessories and the various vendors I used are also detailed in this post. The sections are: materials, pattern, construction, belt, bonnet, pelerine, undergarments, hair, accessories, project costs, and vendor list.IMG_4468.JPGIMG_4506.JPGIMG_4598.JPGIMG_4609.JPG
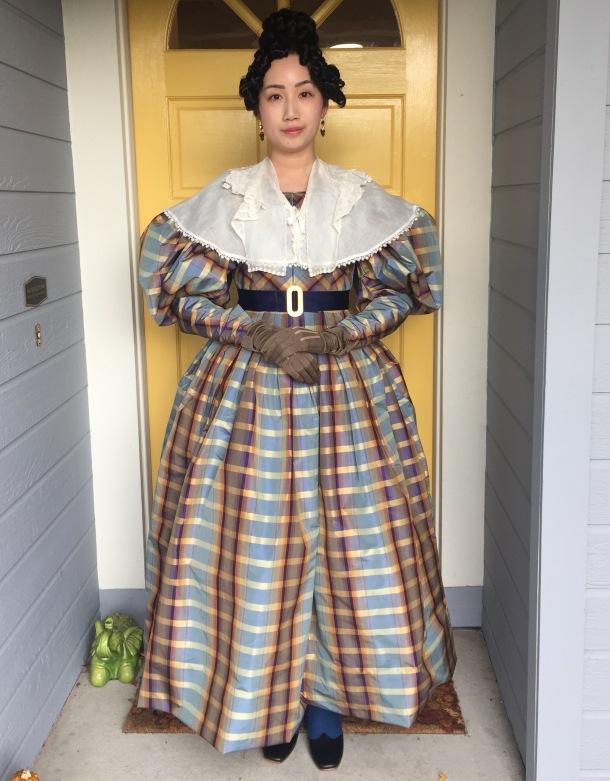
MATERIALS

My dress is made of a plaid silk taffeta, with the bodice lined in polished cotton, with an interlining of stiff cotton organdy. (In retrospect the organdy was a little too stiff and I’d use something softer next time). The skirt is unlined. The sleeves are lined with polished cotton as well. Because the sleeves are so large and so much material is pleated into the armscye, I think if I were to make this dress again I would not line the sleeves to reduce bulk. The silk from Fabric Mart Fabrics was advertised as “navy and yellow” but ended up being closer to purple and even more gorgeous than I expected. It changed colors depending on the light.IMG_3441.JPG

If silk is not in your budget, many beautiful gowns from this period were made in cotton prints. In my experience, silk shantung in dark colors or busy prints will hide the slubs pretty well if you can’t afford smooth taffeta. (Silk shantung has fewer slubs than dupioni).

PATTERN

I used the Truly Victorian TV455 1830s Romantic Era pattern to make my dress. I previously used this pattern to make an evening version of the 1830s dress.  I find TV patterns fit very well as long as you follow their instructions to pick the right bodice pieces for your measurements. I have found though, that many TV patterns run long in the bodice (even though I am not shortwaisted), so I recommend trimming any excess off the bottom to avoid having the waist of your skirt sit too low and look unflattering. Definitely make a mockup to ensure a good fit. Below is a photo of my final pattern overlaid on the original pattern. As you can see, I had to shorten the bodice quite a lot at the bottom. I also raised the neckline a little (personal preference) and took in the shoulders because mine are narrow.IMG_3427.JPG
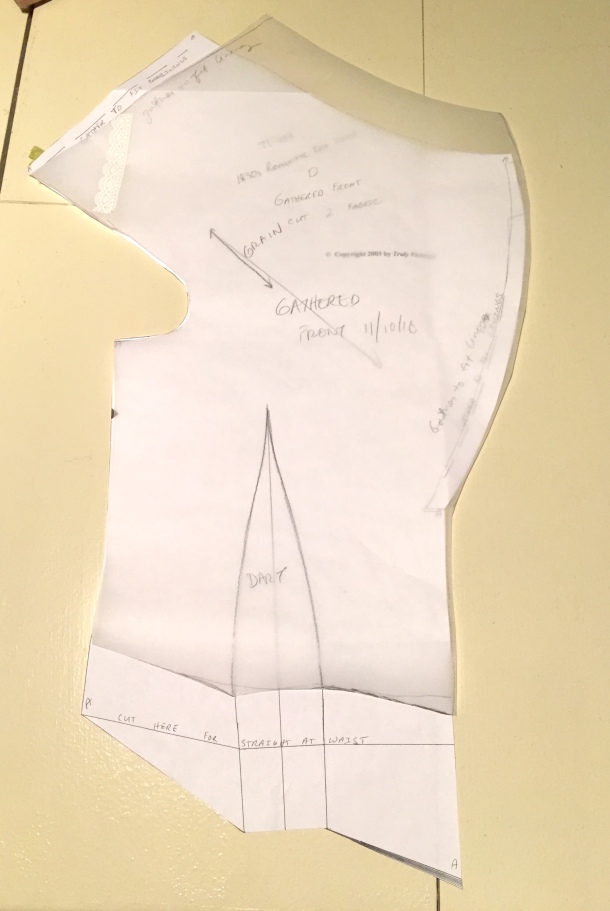
One other change I made was that instead of using the included skirt pattern I just used 3 panels of my fabric. That way I could have seams on each side (where I added pockets), and a seam down the back for an opening.

The TV pattern includes sleeve patterns for day and evening looks. (I have not tried it myself, but Black Snail makes an 1830s evening dress pattern as well).

CONSTRUCTION

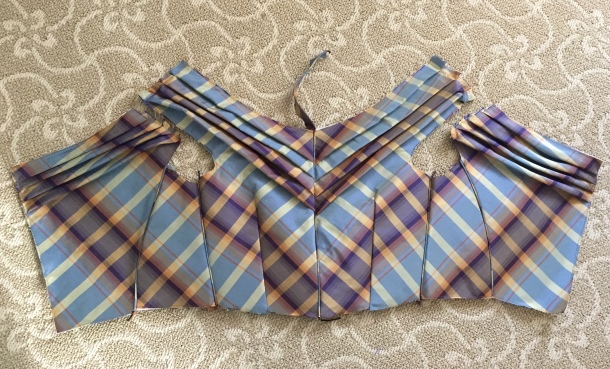
I’m not going to lie, pattern-matching a non-symmetrical plaid is not easy. But it makes a really beautiful effect in the end. Look at the front and back of the bodice!IMG_4601.JPG
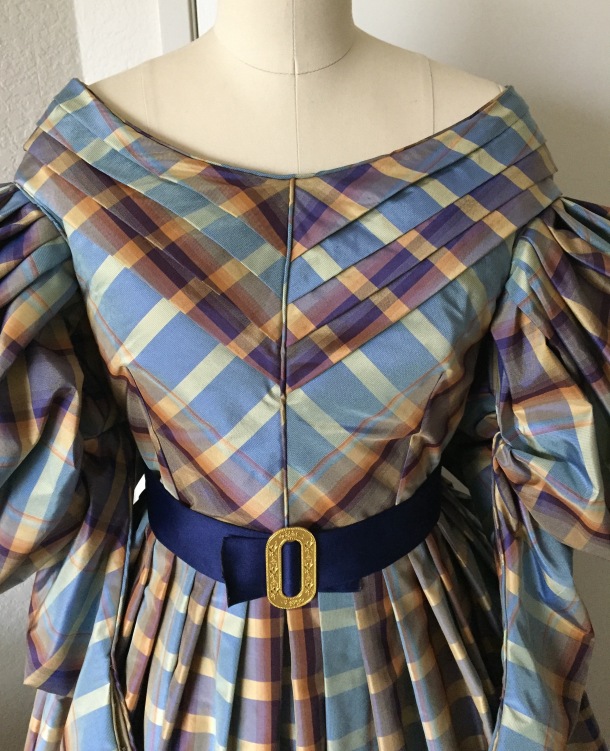
(I should have taken photos before wearing it and getting it all wrinkled!)IMG_4606
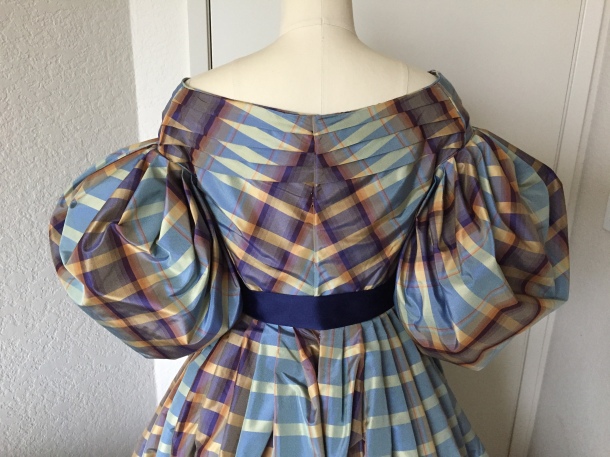
I normally hate doing piping, but it was really part of the look for this era, so I piped the front center seam, the neckline, the armscyes, the shoulders, the sleeves, the side seams, and the cuffs.

Do yourself a favor and buy a piping foot. I did not have a piping or zipper foot that fit my antique sewing machine, and it was um, difficult.

The skirt is knife-pleated and sewn directly to the bodice bottom. I hid a pocket in each side seam of the skirt, and the back opening has a placket. I could have done cartridge-pleating for the skirt but decided it was too much hand sewing to handle this time. (If you want to do cartridge pleating, using gingham ribbon across the top makes an easy guide, as described in my post about how I made my 1840s dress). I increased the density of the pleats in the back of the skirt to subtly increase the “poof” in the back.

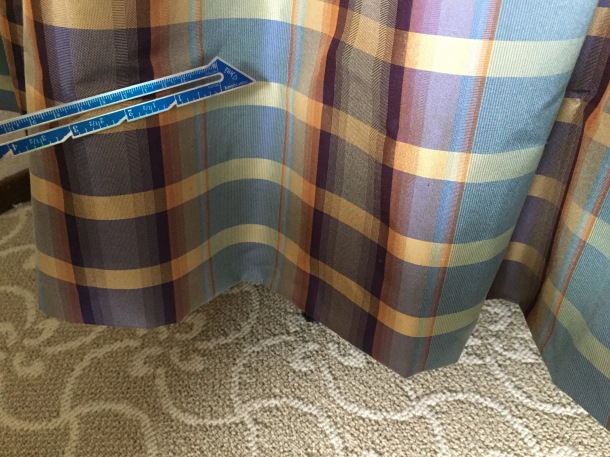
The hem is folded up, and up again, to make a deep facing for extra structure. Can you see where the tiny stitches are?IMG_4613.JPG
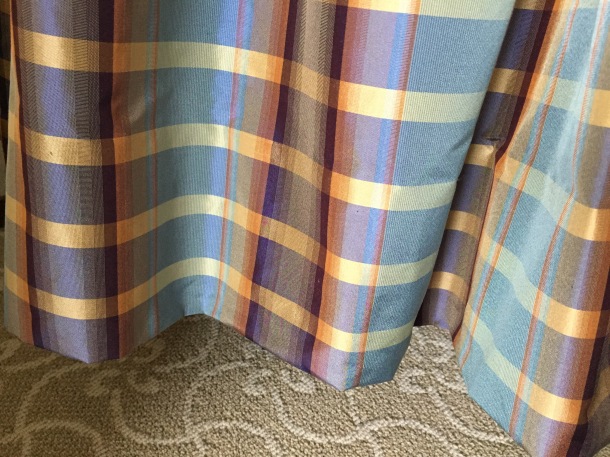
How about now? =)IMG_4616.JPG

The back of the dress closes with hooks and eyes. I use the kind meant for skirts for extra strength, instead of the tiny hooks and eyes.

I’m showing you a photo of the bodice in progress so you don’t repeat a mistake that I made.IMG_3568.JPG
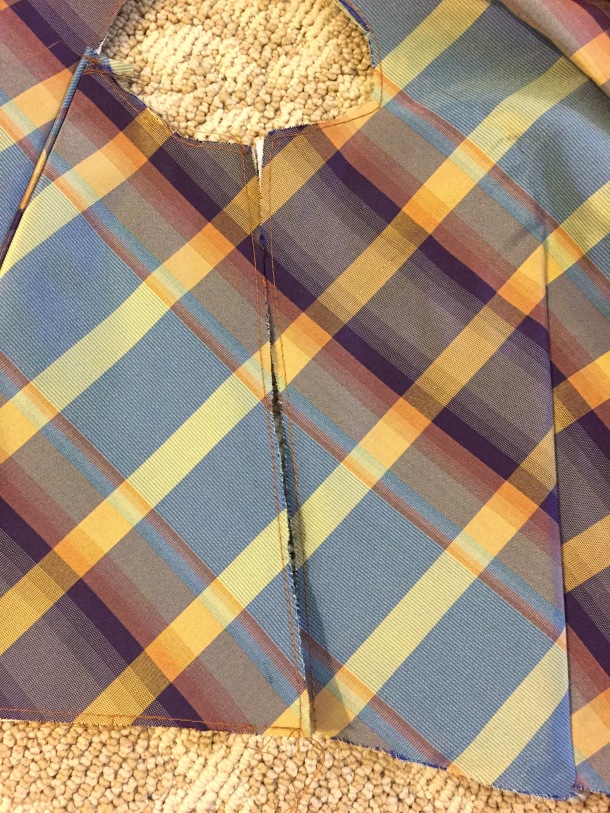
Above is a photo of pattern pieces cut out. I had carefully pattern-matched everything so that the front, side, and back pieces would line up continuously like a barber pole. However, I forgot to take into account seam allowance! The photo below shows the pieces sewn together; whomp whomp. I had already flat-lined, pleated, and piped the front and back so I didn’t want to recut. IMG_3569.JPG
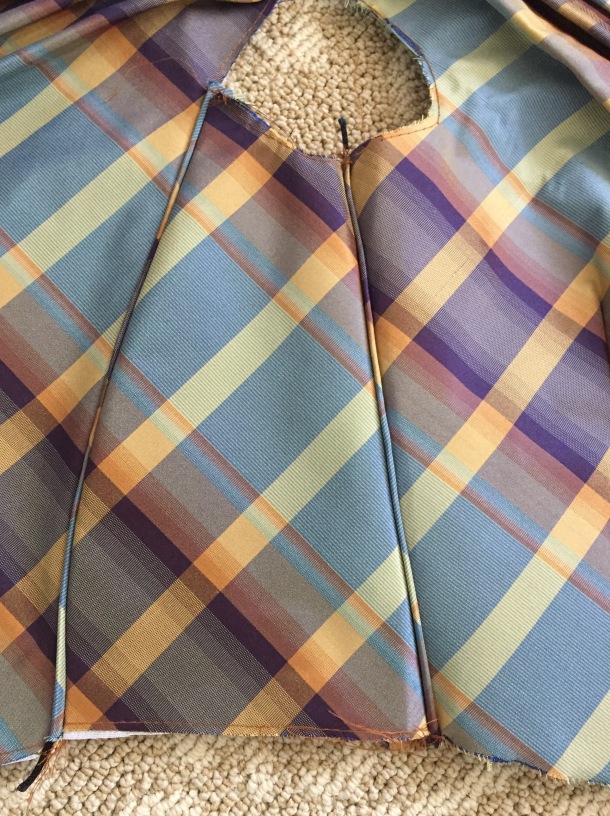
Matching plaids and pleats while taking into account curvature and sandwiching piping made me rethink the life choices that brought me to this point). Everything was done symmetrically so it still looks good enough for me, even though it’s not the way I envisioned.IMG_3570.JPG
I forgot to take a photo of the interior, but my silk is flatlined with my interlining (cotton organdy), and the polished cotton lining is sewn separately and whipstitched in. The boning is sewn to the seams of the lining. (I also used pre-cased plastic boning to save on time).   This is not the most historically accurate method, but made a clean interior and I didn’t have to do much hand-sewing to whip down raw edges.

BELT

The belt consist of a long piece of vintage ribbon, cut to my size and sealed at the ends with Fray Check, and a reproduction metal buckle. Some of the ladies in our group used antique buckles found on eBay, but reproductions are easily available. Mine is a gold oval one with bees purchased from Kansas Mercantile, which is also available from Ensembles of the Past on Etsy. The ribbon I used is a wide and thick rayon ribbon I bought from a vendor at Costume College. It was too wide but I folded one side down to fit.

BONNET

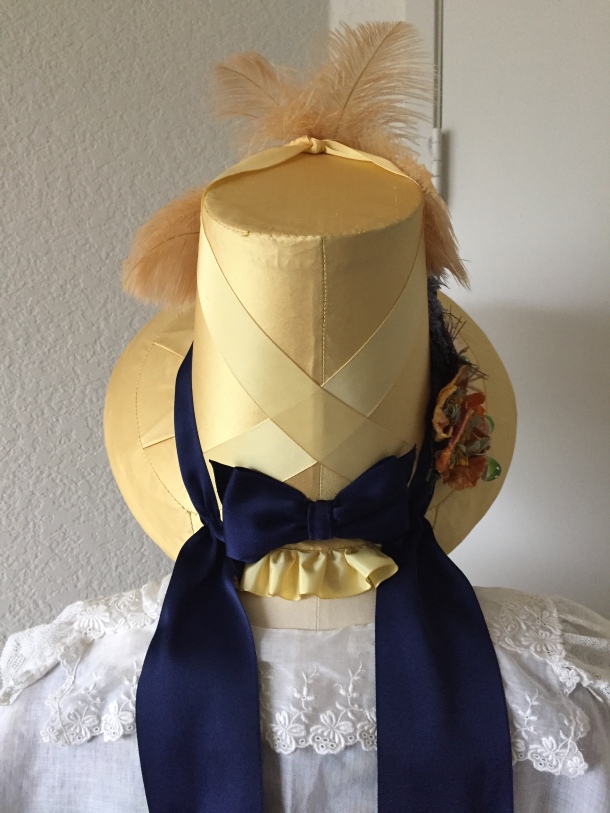
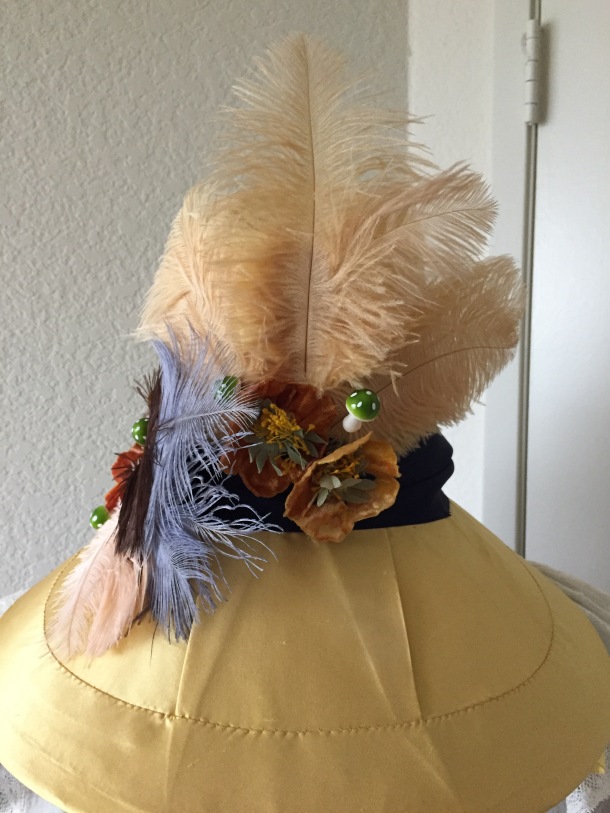
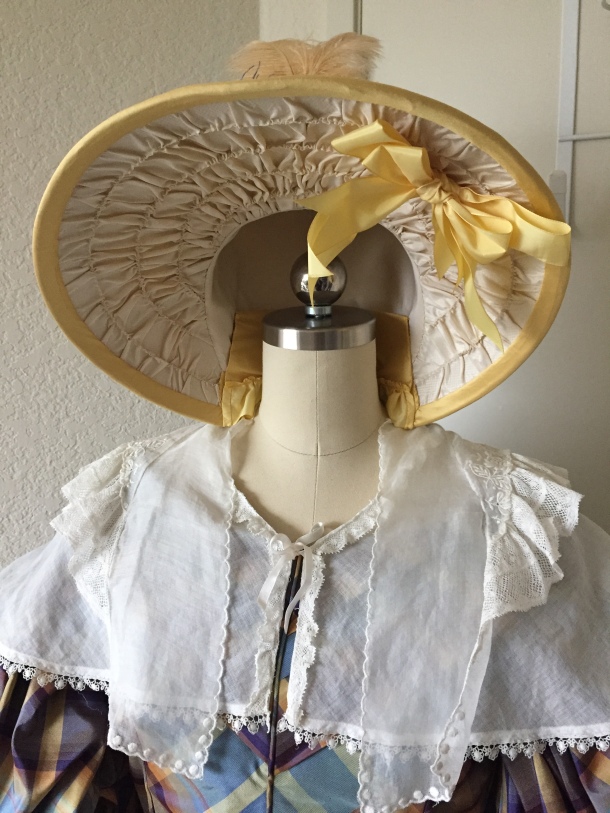
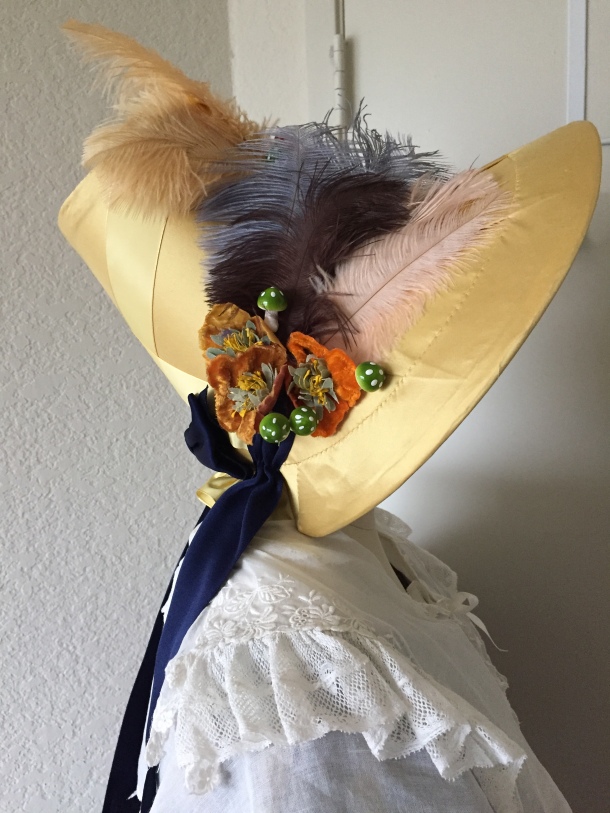
No respectable lady would go outdoors without a head covering, and the 1830s is a great period for putting a lot of outrageous thing onto your hat. Lynn McMasters and Black Snail both make Romantic bonnet patterns if you want to try your hand at millinery. I was recovering from an injury and could not hand-sew a buckram form when I put together my ensemble so I commissioned a bonnet from House of Loli on Etsy. I sent her some yellow and cream silk taffeta for the bonnet, and then added vintage flowers and mushrooms and feathers to to it.IMG_4629IMG_4630IMG_4635IMG_4626
PELERINE

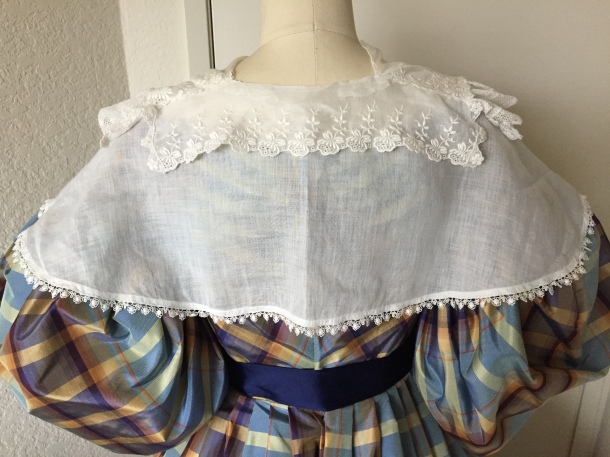
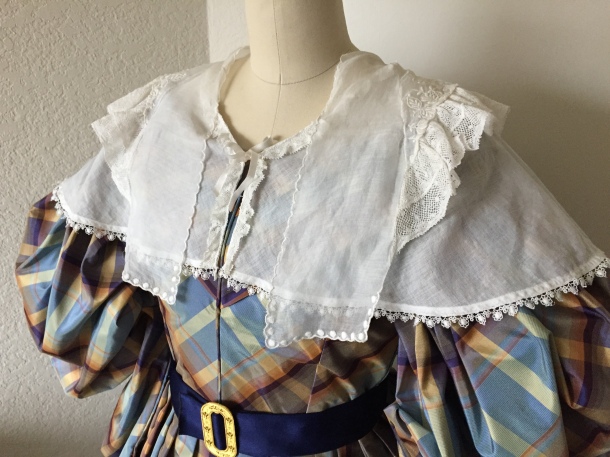
Period ensembles often include a little cape over the dress, either made of the same fabric as the gown, or a fine cotton. I made mine by assembling a few vintage lace collars together to make it look like one pelerine. If you look at my previous post of the Gigot Girl Gang you’ll see that there are lots of options to making one of your own style: small, big, transparent, or opaque. Mine closes with a little bit of silk ribbon. I think for future wearings I will use something heavier to weight it down, like a brooch, because my pelerine kept going askew.IMG_4623IMG_4624
UNDERGARMENTS

The undergarments needed for the whole ensemble are a chemise, stays, corded petticoat, tucked petticoat, and sleeve plumpers. IMG_4303.JPG
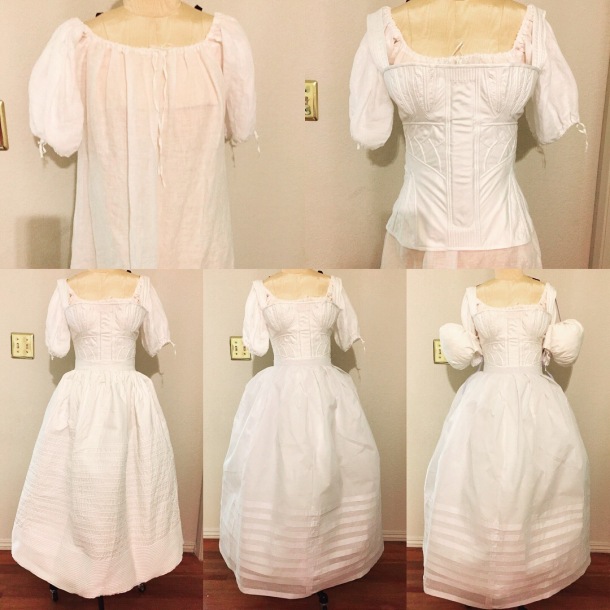
I’m too lazy to make a new chemise for each era, so I have a drawstring one that allows me to change the neckline for each gown. I have details on how I made by hacking an 18th century American Duchess pattern in a previous post.

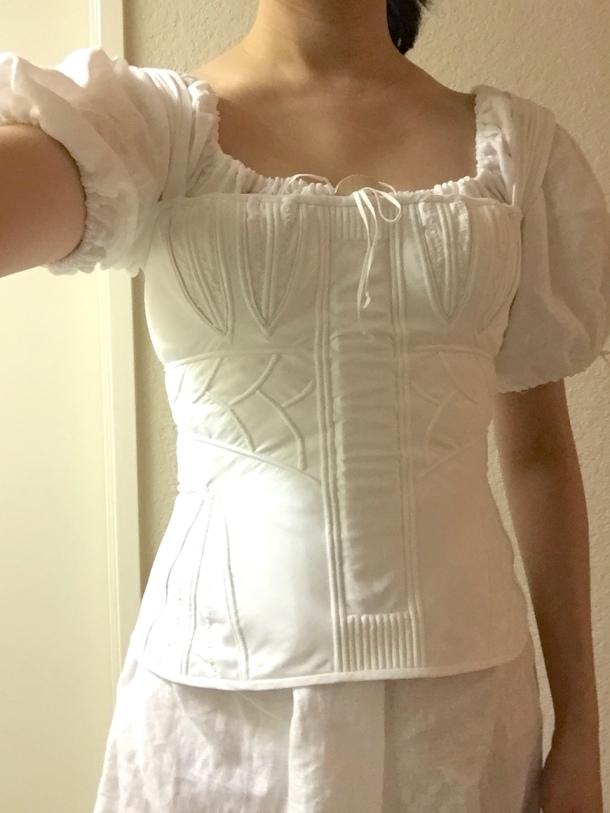
I don’t like making any sort of corsetry, so I purchased the Charlotte stays from Redthreaded. They are very soft and comfortable because they rely on cording and a curved busk instead of boning. If you are on a budget or want more support using steel, Redthreaded also sells ready-made 1830s stays. My stays from the Atelier line are an investment, but they truly are a work of art, and I plan to use them for 1820s and 1840s garments as well.IMG_4444.JPG
Screen Shot 2018-12-23 at 2.06.12 PM

Photo by Redthreaded

If you want to make your own stays, Black Snail has a pattern for the stays (which also includes a pattern for a chemise, corded petticoat, and plumpers).

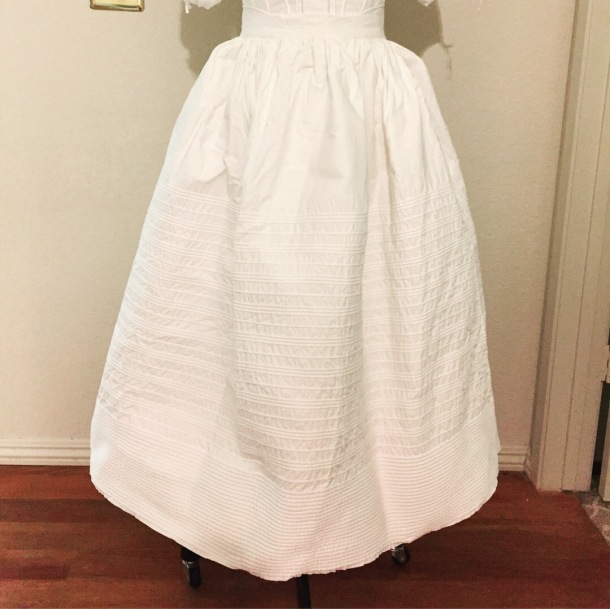
I purchased my corded petticoat from Hand Stitches in Time during a sale, but even at full price they would be worth it to avoid what is to me a very tedious task of sewing in all those cording channels! Mine is the 60 row corded petticoat. However, if you want to make your own petticoat I have heard great things about the corded petticoat workbook from Historical Sewing.IMG_4299.JPG
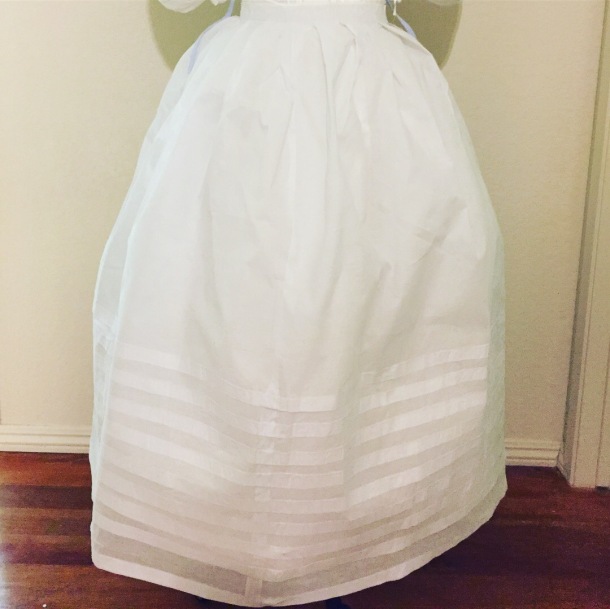
Over the corded petticoat I wore a tucked petticoat that I made out of cotton organdy. It is very simple to make. Take 2 long rectangles of fabric and sew into a tube. Hem the bottom. Mark parallel lines around one end of the tube and make as many tucks as you wish until the petticoat is the length you want. Pleat the top into a waistband. To determine how long of a rectangle you should make, determine the length you want your petticoat to be (waist to mid-calf) and add 1 inch for each tuck you want to make.IMG_4301.JPG
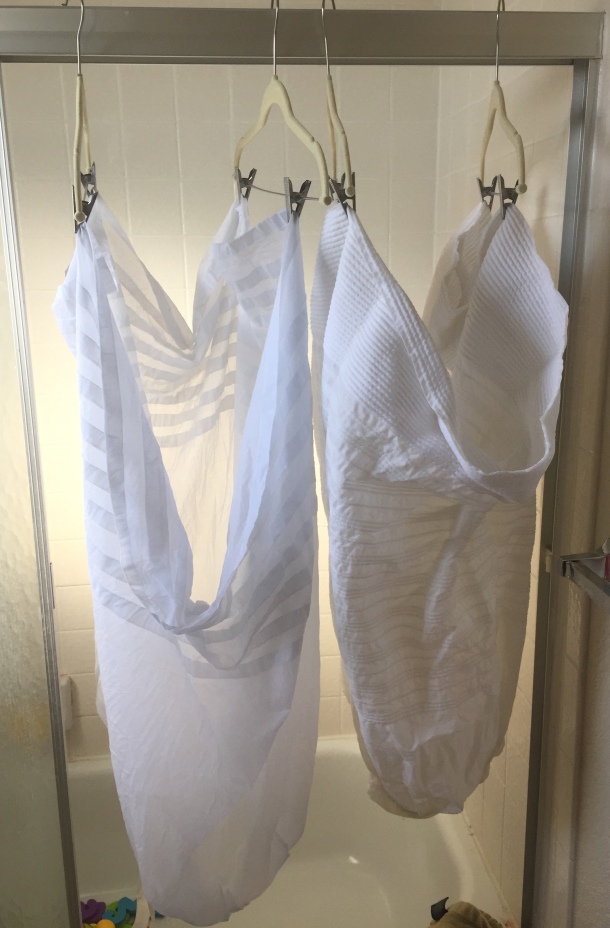
You will want to dip both petticoats in starch, let them air-dry, and iron them for maximum poof! You know they’re ready when they can stand up by themselves like petticoat ghosts. I find it handy to let them dry upside-down in the shower using skirt hangers.IMG_4226.JPG
The last bit of undergarments is the sleeve plumpers. The last time I made an 1830s dress I had to figure out the sleeve supports myself, and they ended up being a little odd. Abby of American Duchess has a plumper pattern that is much easier to use, and I highly recommend it. She has a PDF pattern and Youtube video that shows how they are made. I did a little experiment when making mine.IMG_E4230
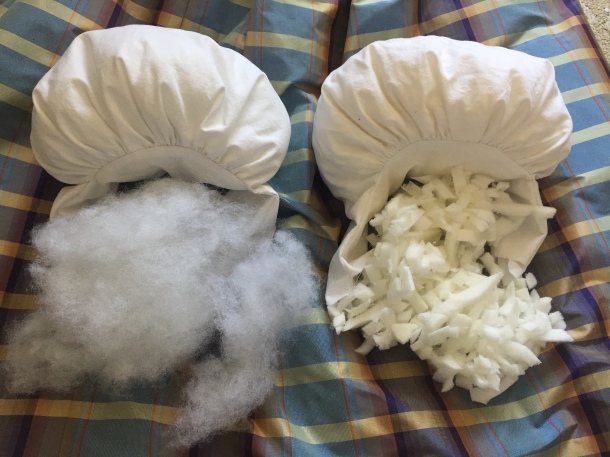
The one on the left (above) is stuffed with Polyfil. The one on the right is stuffed with shredded memory foam. The one on the right is a bit lumpier, but compresses more easily for stuffing into the armhole in the dress. (A historically correct method would be to use feathers or down). I could have made my plumpers even bigger but I was afraid of not being able to get them through the armhole. IMG_E4245
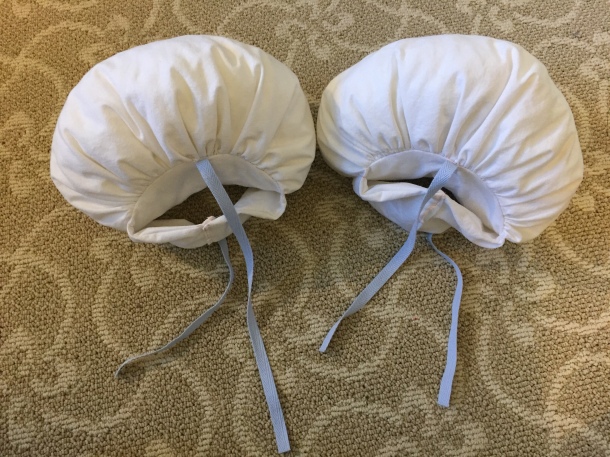
As described in Abby’s video, there are ties to tie them to the dress so they don’t move around. In some museum photos you’ll see the plumpers tied to the stays (I believe mainly to show them off), but it is much easier to put the plumpers into the dress and then put the dress on, than to try to get the dress over the pumpers while you’re wearing them!

HAIR

My hairstyle consists of mainly false hair. I have a large braided hair bun on top of my head and 2 curled hair clips in the front, based on the style in this 1835 portrait by August Canzi.


The bun is easy to make. Just take false braiding hair (I use the Sassy brand from Sally Beauty Supply), make a thick braid, and wrap it around a hair donut.IMG_4640.JPG
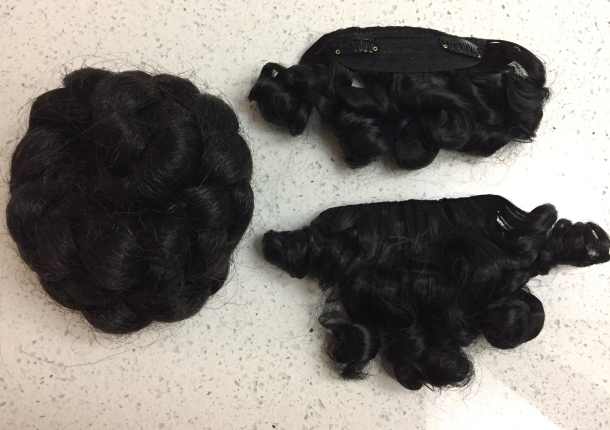
The front clips are made from 2 “side swept bang clips” you can buy on Amazon or eBay. Just make sure you get “side swept” bangs instead of regular ones because they are longer. Wrap the hair in curlers and dip into boiling water for 10 seconds to set the curls. Put on a towel to dry and take the curlers out when they are completely dry.IMG_4378.JPG
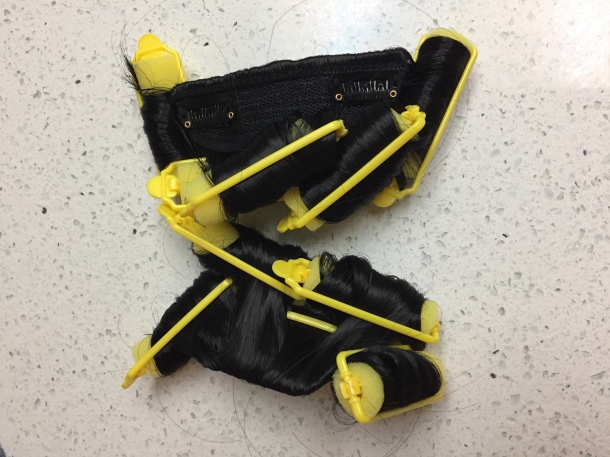
The bun is bobby-pinned onto my head while the bangs have wig clips already pre-attached.

If you have long hair, make 2 braids that cross over the top of your head and pin them down to act as anchors for the bun. I have shorter hair cut into layers that makes braiding difficult, so I made a small bun as an anchor, and pomaded all the shorter hairs into place.

The 1830s is full of elaborate hairstyles involving Apollo knots, fancy loops and braids, flowers, etc. You might have fun exploring those for evening ensembles, but if you want simple and easy the bun and bang clips are the fastest way to get the look.

OTHER ACCESSORIES

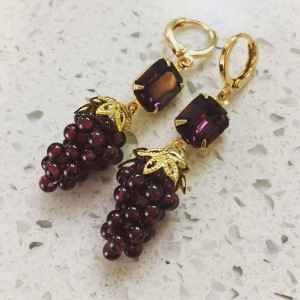
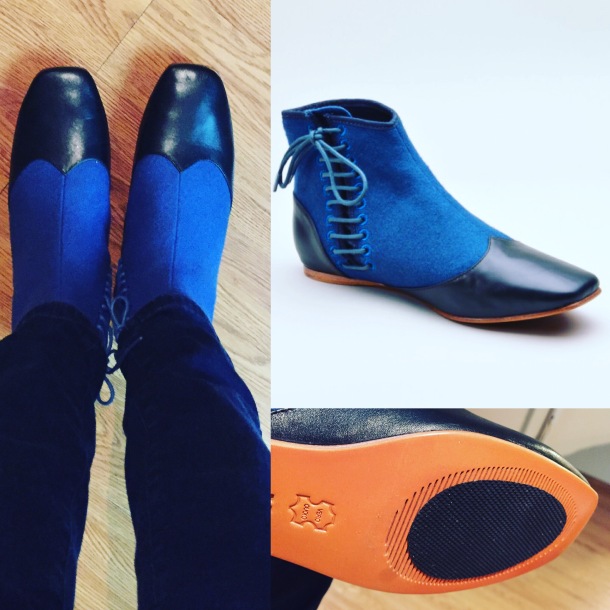
Besides the belt and bonnet, my other accessories were a round vintage fur muff, grape cluster earrings by The Lady Detalle, and a brooch from American Duchess, given to members of our Gigot Girl Gang. My shoes were the Gettysburg from American Duchess. (I added insoles and a non-slip adhesive pad to the bottom of the shoes). I also had silk stockings and a pair of silk gloves from the 1930s.


IMG_7106IMG_4344.JPG

PROJECT COSTS

If you are starting from scratch, and especially if you plan to outsource all your undergarments, having a full 1830s garment can be quite the investment. However, you don’t have to have 1830s stays. Some of the other ladies cheat with Victorian corsets from later eras. Long-line Regency stays would work as well. I use a chemise from another time period. You can fake having a corded petticoat by using enough starched petticoats or by putting horsehair crinoline into your skirt. You might be able to retrim a bonnet you already have. Instead of a perlerine maybe you have a nice shawl. You probably have some flat shoes that could pass. (Square-toed modern ballet flats are perfectly acceptable for 1830s; just add some ribbon ties). The muff and jewelry are optional. If this isn’t your first costume rodeo and you already have a lot of similar items, don’t feel like you need a whole new set of undergarments. Since it’s possible to “make do,” I’m giving the cost of just the dress. (I don’t want you to have sticker shock at the entire ensemble that I have been collecting for a while, and be discouraged. Repeat after me: You don’t need all new stuff to have a good time).

  • 8 yards silk taffeta: $84.99 + $7.50 shipping from Fabric Mart Fabrics. (Make sure you get on their mailing list to be notified of their crazy sales. I am able to afford silk dresses because I wait until silk drops to ~$10/yard).
  • TV pattern: $0 (used already for a prior 1830s dress)
  • Navy thread: $1.80 from Fabric Mart Fabrics
  • Belt buckle: $13.59 including shipping from Kansas Mercantile
  • Navy ribbon spool: ~$4 from Costume College vendor (with plenty left over)
  • 3 yards polished cotton for bodice and sleeve lining: ~$5 from garage sale
  • 1 yard cotton organdy for bodice interlining: ~$5
  • Hooks and eyes, other thread, cord, etc. from stash: $5

Total for dress: $126.88 (not awful for a huge silk dress, with leftover silk and ribbon for other projects!)

I made the plumpers from materials left over from other projects, so it was “free.” The organdy for making the tucked petticoat is about $5/yard from Vogue Fabrics. (Depending on your size you will probably use 3-4 yards).

Other items you may already have: stays, chemise, petticoats, bonnet, shoes, stockings, gloves, jewelry. Be creative; I reuse my accessories and undergarments for various outfits and eras all the time!

VENDORS

Happy sewing!QGIN4307
Gigot Girl Gang Invades Dickens Fair!

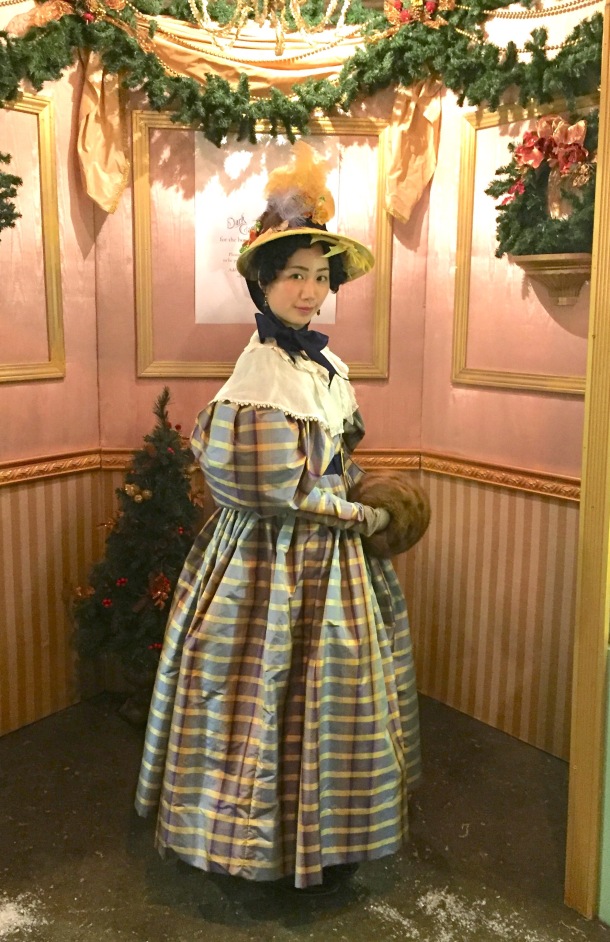
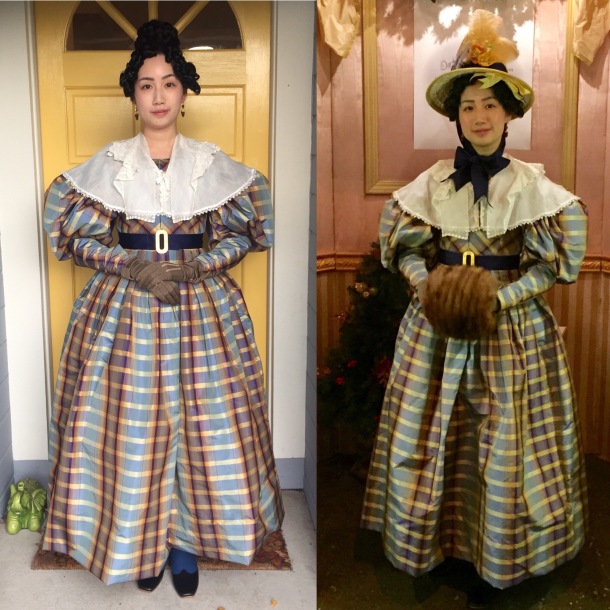
I go to the San Francisco Dickens Christmas Fair every year, but this year was especially fun because a large contingent of us went in 1830s ensembles. I’m amazed at how many beautiful and talented ladies joined in on the wackiness, and went all out with hair, bonnets, muffs, and other accessories with their big-sleeved gowns.QGIN4307

I took a quick snap in front of my house and later at Fair. My next post is going to discuss construction details, a materials list, show all the undergarments, explain the hair, and how to put together your own ensemble. For now, a few brief notes: my gown is sewn by my out of plaid silk taffeta. I am wearing Gettysburg side-lacing boots from American Duchess, earrings by The Lady Detalle, a bonnet by House of Loli that I trimmed, antique gloves, and a vintage muff. Underneath I have a linen chemise, corded stays by Redthreaded, a corded petticoat by Hand Stitches in Time, a tucked petticoat, sleeve plumpers, and stockings.

Enough chatting, you’re here to see pictures of everyone!

Nicole was beautiful in red and a sheer lace pelerine.IMG_4530

Christina had the most amazing pleated bodice hidden by her pelerine!IMG_4527

Abby was our Swedish head balls lady.

IMG_4533IMG_4538

Abby pretended to have beef with our Dane Elizabeth during the fashion contest, who had the most glorious hat.IMG_4476.JPG

Lauren was also part of the plaid contingent.IMG_4544IMG_4542IMG_4546

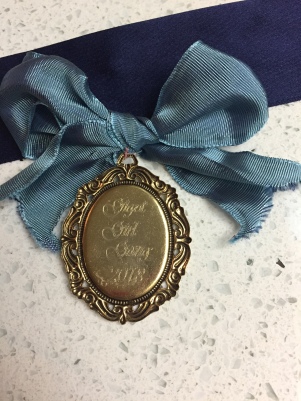
The American Duchess ladies made these lovely little ornaments engraved with “Gigot Girl Gang 2018” on the back and some of us wore them on our belts.IMG_4618IMG_4589

Kaila had a lovely tobacco-colored silk gown and pelerine, all hand-sewn. Her bonnet veil was just gorgeous! She won a prize in the fashion contest that we all attended as the “Luddite Fashion Society.” (Most of Dickens Fair is 1850s-1860s).IMG_4494IMG_4498

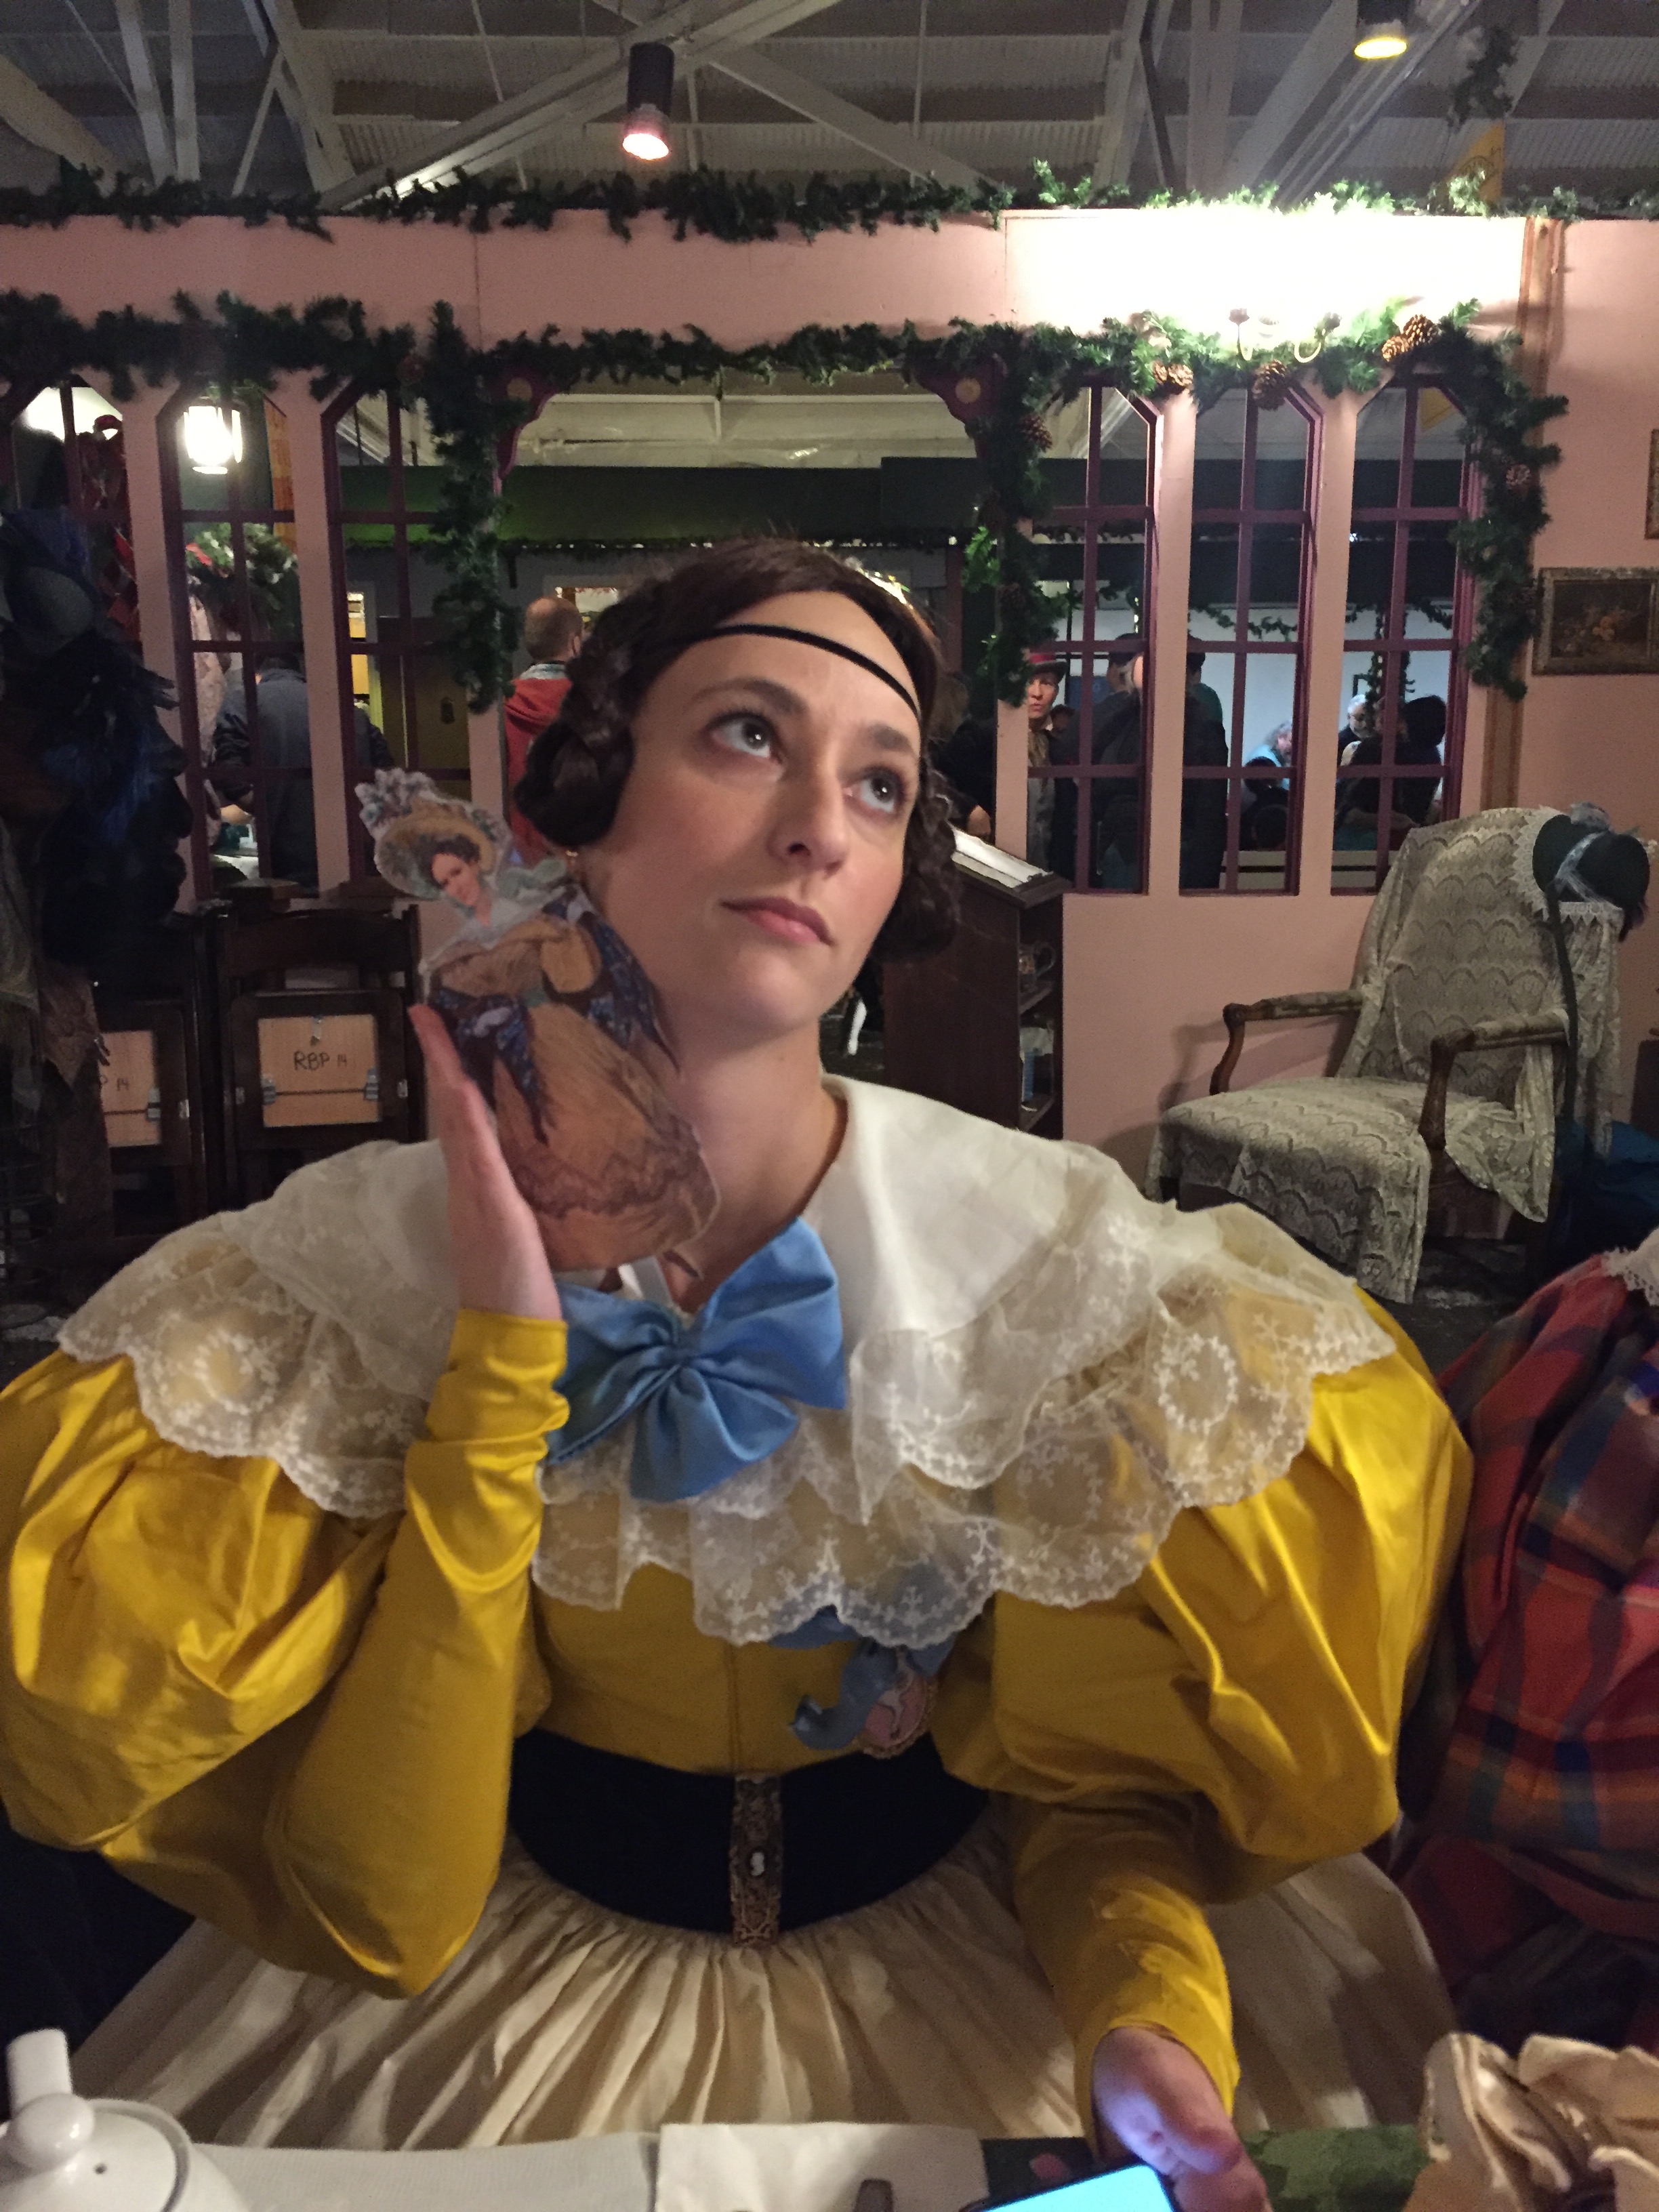
Maggie was a vision in bright yellow, with a little poppet of Cynthia that we passed around.IMG_4570.JPG

We had such a large group and everyone showed up at different times so I couldn’t get shots of everyone. Please forgive the poor lighting at Dickens; I already had to delete so many blurry and dark photos!

We had a grand time at tea.IMG_4564IMG_4557IMG_4556

And we even had an audience with the Queen, played by the beautiful Sarah that day. From left to right: Mena, Kim, Lauren, Sarah, Elizabeth, Sara, and me.IMG_4578

And here we have Sara, Mena, Elizabeth, Sarah, me, Molly, and Kim. I think Kim wins for biggest sleeves!IMG_4574

Many of us plan to wear these gowns again at Costume College in 2019. Please join us if you are interested! I will be making a post explaining how I put together my outfit, and I know American Duchess has some informative blog posts and video planned so come out and play!

More photos are in my Flickr album: https://www.flickr.com/photos/vivien_misc/albums/72157704703672744

1830s Romantics at the PEERS Victorian Gothic Ball

This weekend I went to the PEERS Victorian Gothic Ball. We were invited to wear 1830s or 1840s clothing and dance the night away, along with actors portraying characters from Jane Eyre and readings by Mr. Edgar Allen Poe and other poets. There is a mini-reunion of our Hopeless Romantics group, along with a few new ladies in 1830s clothing.IMG_9359

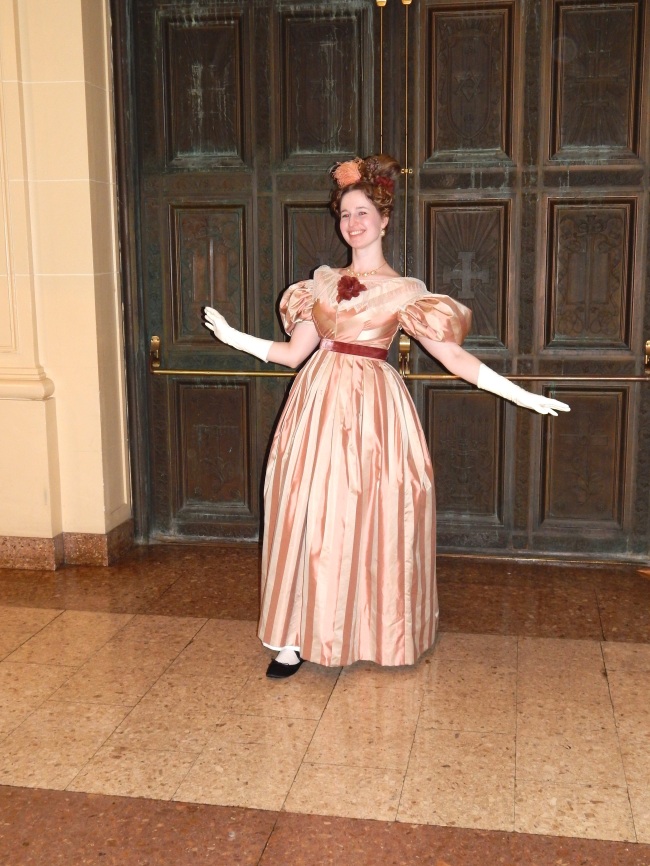
I wasn’t quite sure until a few hours before the ball that I would be wearing that particular dress because I had a back injury and could not wear a corset or spend a lot of time with my arms above my head doing elaborate hair. Luckily I already had an easy hairpiece from a previous outing (with a tutorial here) and managed to squeeze myself into the dress sans corset by shifting my petticoats down a bit. The silhouette is not perfect, but I made it to the ball!IMG_9365I am wearing jewelry from Dames a la Mode and Pemberly slippers from American Duchess.

I tried to pose like a serious portrait.IMG_9308

A close-up of the hair and jewelry.IMG_9307

And I shall end with the delightfully silly menu from the bar that evening.IMG_9301

Easy 1830s Hair! (Plus Instructions)

Last week I went to a PEERS ball set in the 1830s/1840s: the Dances of Mystery and Imagination, hosted by Edgar Allen Poe.

The Hopeless Romantics had a mini-reunion there. Last time I wore my 1830s gown I had a full wig, which looked nice, but was very warm.

This time, I decided to make a new hairpiece and incorporate a raven, in honor of Mr. Poe. I built everything on a headband, so it was very easy to put on and take off. (I also got a lot of amused cackling when I took my hair off at the ball to show everyone what looked like fancy earmuffs!)  The headband made it much easier to get dressed, and to get in and out of a car.

IMG_3883As you can see, the raven has the stylish 1830s Apollo knots!

IMG_3885IMG_3880IMG_3879 I did not take any photos of the construction process, but I hope it’s easy to visualize.

1. I wrapped a headband with black velvet ribbon, and sewed the ends in place.

2. I wired the feet of a dollar store Halloween decoration raven to the middle of the headband.

3. I made 2 fake hair buns. Each one consisted of a long braid that was coiled into a cinnamon bun shape, sewn into place, then covered with a chignon hairnet for security. (I used “Sassy Collection” brand fake braid hair from Sally Beauty Supply because it is cheap and decently realistic for the price).

4. I hotglued (yes glued) the buns onto each side of the hairband.

5. I hotglued some flowers to cover the rest of the hairband.

6. I did some more squiggles of hot glue on the inside of the hairband and buns. Once dry, the rubbery texture provides a little more grip.

7. I gave the raven a little hairstyle by pinning 2 loops of velvet ribbon and a fake flower into his foam head.

Fast, easy, and pretty.

I think Mr. Poe approves, sort of.

IMG_3835

Plus it’s shareable hair! Here is Sam, from Overattired.com, looking like a pretty pretty princess.
IMG_3847

The Hopeless Romantics Invade Gaskell Ball, 1830s Style!

There were so many beautifully made gowns at Gaskell Ball. Most of us used the same pattern, but I loved all the variations in fabric choice and trimming.

We made a lovely rainbow!

Image

And had a ton of fun!

Image

Here I am with the other pale-colored ladies.

Image

Kim had such a cute doll-like shorter dress.

Image

Natalie of Frolicking Frocks looked just like a fashion plate.

Image

Breana of Mothball Fleet had such a daring and darling color combination, with perfect piping.

Image

Elizabeth had a bodice with impressive detailing, and a padded hem.

Image

Amanda’s dress looked great in motion.

Image

Samantha had such a cute bow sash.

Image

Jean-Anne went for a bold print that worked out great.

Image

Jenny looked elegant in white.

Image

Christina of The Laced Angel used an old sari, to great effect.

Image

Kathy of Stuff I Sew had an impressively smocked dress. Read the details here!

Image

Monica had charming little fans and tucks on her dress.

Image

Kaila had really lovely piping and pleats.

Image

Cassandra’s dress reminded me of a Disney princess.

Image

You’ve seen mine, so here’s a silly photo.

Image

I am looking forward to next year’s theme!

1830s Romantic Dress (Part 6): Finished Dress and Hair

Last night I had a fantastic time dressing up with a large group of other ladies wearing Romantic Era gowns (and crazy 1830s hair) at the Gaskell Ball in Oakland, CA. (I will be posting photos of everyone in my next entry!) I finished my dress with a few days to spare, but did not have time to work on the hair until the last day.

Image

(I didn’t have time to make a new petticoat, and the old one is a little longer and less poofy than I would like, but that is a project for next time).

Image

I was very pleased with the way the sheer sleeves came out. I was fretting before about how to pattern them, then went for the easiest approach. I took a yard of fabric, sliced it down the middle, French seamed the pieces to make 2 tubes, and gathered the ends into the armhole or wrist openings.

Image

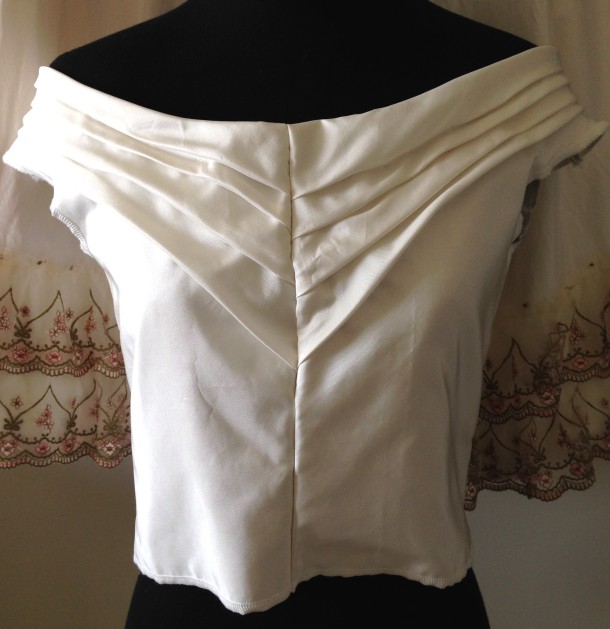
The bodice is pleated and embellished with pink and green embroidered lace and little pink ribbon flowers with pearls in the centers. The back of the neckline is also pleated.

1830s bodice

The cuffs are made with the same embroidered lace I have on the bodice neckline. The waist is trimmed with a green scrap of fabric (leftover from a Titanic, and then Gatsby project). The pearl and rhinestone buckle was purchased from Britex.

Image

The hem is trimmed with embroidered tulle lace, as you previously saw.

IMG_1801

I struggled with the hair, and it is a little sloppier than I wanted, but I think it’s a decent first try. A  number of people asked me if it was my real hair!

Image

I forgot to buy a foam head, so I used a stuffed toy monkey. I bought a long black wig, and split it into 3 sections. I made 2 fat braids and pinned them into Princess Leia-style cinnamon buns.

DSCN0467

The middle section was braided and left for the moment.

I then used another large piece of fake hair that I split into 2 braids (with wire braided in). I formed pretzel loops and sewed that to the wig, and then used the little braid from the main wig to wrap around the base. I pinned a fake peony in the back, and put some little roses and butterflies into the buns.

DSCN0470

I decorated the front with a little fake bird, a birdcage and some feathers.

DSCN0474

I had a lot of fun with this project!

Final cost rundown (not including fake hair):

Silk taffeta, linen lining, hook-and-eye tape, bird, feathers, flowers, cage: from the stash

Tulle lace: $27.96

Floral lace $11.91

Organza: $3.10

Pearl buckle $9.73

Total $52.70*

*well, I did spend about $200 on silk a few years back, but we’re talking new expenses here. =)

1830s Romantic Dress (Part 5): Bodice

I haven’t done a lot of sewing in the past few weeks because I started work again and have had some long hours. However, here is a sneak peek at the bodice in progress.

bodice

I put on the puff sleeves and started the sheer ones. The neckline has lace. I still need to fuss with the fitting (since the heavy sleeves are pulling things down), the gathers and the cuffs on the sheer sleeves.  The front will be embellished with some little pink flowers.

1830s Romantic Dress (Part 4): Waistlines and Hemlines

I have hemmed the skirt from floor-length to ankle-length to make it more like the fashion plates of the day. Plus, it will be easier to walk and dance in! I also ruffled 2 rows of the embroidered tulle lace and sewed it around the bottom, using 12 out of the 20 yards I purchased.  Here is a sneak peek at the hem.

IMG_1801I tried on my overbust corset, and although it fits just fine, the pressure on my chest is rather uncomfortable since I’m still nursing. Currently I’m trying to decide between wearing an underbust corset as a foundation, or just making the dress to be worn sans corset to be extra comfortable.

However, I am sure that the waistline of the bodice needs to be raised considerably. The TV455 pattern is very long-waisted, even if you did not want the high-waisted look of the late 1820s or early 1830s. This is a picture of the bodice in progress, after I already cut off several inches of fabric all along the bottom. I still need to shorten it more. The bodice looks rather baggy because it is still missing darts, and is also larger than my dress form.

IMG_1804

I am using hook-and-eye tape for the back closure, reinforced by some plastic boning.