Tag Archives: wool

Shawl with Surprise Hood Pattern and Tutorial

Winter is here and I wanted a cute and cozy accessory that was a nice shawl, but also a surprise hood and scarf! I made this out of a wool knit jersey but other soft fabrics with a bit of drape would work as well. I added some pompom trim for whimsy but that is optional; this surprise hood would work well untrimmed, or finished with decorative stitching or other touches. This was inspired by Victorian mantelets with front lappets, knit sontags, chic old Hollywood head scarves, and modern cozy.

Note: I am a member of the Janome Maker program and this project was sewn on a Janome Skyline S9. (This post is sponsored by Janome but all content and opinions are mine).

WHAT YOU WILL NEED

  • Soft fabric with drape (wool jersey, lightweight cable knit, rayon challis, lightweight wool suiting, etc.)
  • The yardage depends on how wide your fabric is. (I used 1.5 yards of a 58″ wide fabric by alternating the wide and narrow ends of the pattern pieces while cutting).
  • Thread, scissors, chalk, pins.
  • Optional: 5 yards pompom/ball fringe trim, lace, rickrack, etc.

DRAFTING THE PATTERN

Don’t worry if you don’t have any pattern drafting experience! I’ve broken it down into squares/rectangles/triangles so if you have a ruler you can draw these shapes. Start with these basic geometric shapes; I find it is easiest to draw the square first, then the rectangle, then the triangle on a large piece of paper. (It doesn’t have to be fancy or special drafting paper; a roll of gift wrap works great).

Next, draw the curves indicated in red on the diagram. Then, discard the shaded areas.

Now you have your pattern that you can cut out of paper and use to trace onto your fabric! (This includes 1/2 inch seam allowance. You can add more when cutting out your fabric if you want your shawl a little wider or are skipping any trim).

CONSTRUCTION

Cut out 4 identical pieces of fabric. 2 will be the fashion layer and 2 will be the lining. (If you want, you can use a different fabric for the lining but then the hood will be a different fabric when flipped up).

Sew the center back seam of the 2 fashion pieces together. Repeat for the lining layer. Press the seams flat.

Put the fashion and lining layers right sides together. If you plan to use pompom trim or lace, this is the time to sandwich your trim in between the two layers as shown, with the edges flush. (This is so that the pompom balls are “inside” when sewing the edges but will be on the “outside” when the shawl is flipped right side out). You will have trim everywhere except the neckline. (If you are using rickrack, instead of sandwiching it in the layers you should sew it to the fashion layer before it is attached to the lining).

Sew all along the outer edges of the shawl, except for the neckline, as shown in the earlier image.

Turn the right sides out through the opening in the neckline, exposing the pompom trim. Fold in the raw edges of the neckline and topstitch closed.

Right now you will have a long flat piece as shown below. (The ends are folded in so I could fit everything in the photo).

Pleat the neckline area (up to where the pompoms start) to fit the curve of your neck. The finished curved area should cover the back half of your neck. (If you have a dress form handy, an easy way to determine how to do the pleats is to pin the center back seam to the center back of the form, pin where the pompom trim starts to the shoulder point on the form, then pleat using the neck of the form as a guide). To keep the pleats in place, stitch down the pleats over the previous topstitch line either by machine or by hand.

Optional: Use one of the embroidery stitches to add some extra decorative details to your shawl. Some ideas include using a continuous stitch along the edges of the shawl, or putting a monogram on the tails. You can also do a decorative stitch along the edge after the shawl is sewn, rather than using pompom trim. (These examples are under the Decorative stitch menu on my Janome Skyline S9).

HOW TO WEAR

This can be worn multiple ways!

  1. Wear the draped back and front tails down as a shawl.
  2. Pull up the draped back over your head as a hood (with the tails in front or pushed behind your shoulders).
  3. Wrap one or two front tails around your neck like a scarf.
  4. Combine 2 and 3 for a chic hooded scarf look.

Which one is your favorite?

Thank you for reading! Be sure to follow me on Instagram @freshfrippery for the first peek at any new projects!

I am happy to provide all patterns and tutorials for for free on my blog. It is absolutely optional, but if you would like to donate towards my domain registration and the data costs of hosting the many photos on my site, consider buying me a “coffee”: https://ko-fi.com/freshfrippery.  Thank you!

1910s Edwardian Wool Suit

I love the Edwardian era and the Wearing History 1910s WWI suit pattern seemed smart and cozy. 

3D873E11-B0BE-4567-AD90-AA14344025C7
1E9D50E6-EE1B-4C26-B1EF-3EBDA0731651

I liked the big lapels, sailor collar, and tulip-shaped pockets and cuffs.

AB119FB6-9259-4C3C-A8CD-B5D731A2A21B

I used a gray and black houndstooth wool for the skirt and accents and a yellow wool for the jacket. The black buttons are vintage Czech glass buttons and the the yellow ones are vintage handmade.

6399A312-27A4-4D95-AEC8-FFFC483EB605
27D58852-097A-4F2B-97CE-982EFFDBE036

There are different options for collars and pockets in this pattern.

The skirt is made according to the construction methods of the era where there’s an internal waistband that actually holds the skirt up. The waistband you see on the outside is attached at the top but not at the bottom, allowing for the gathers in the back of the skirt to hang loosely. 

7EE1FE73-F2EA-49AC-998A-3D72E50EB371
7A811B00-2301-487E-BB56-C343998D18E2

I made myself a matching hat which was pretty easy! The base of the hat used the same pattern as the jacket belt. I wrapped it around my head at a jaunty angle and pinned it to fit. The center of the hat is just a giant pleated rosette with a pompom hiding the center hole.

D9926C7F-17BA-48C9-A37A-97DACFEAC92E

I’m afraid I took my photos while it was getting dark quickly during winter, so they are a bit grainy.

B91953ED-CBAB-4AE0-B041-3C5017CC1D8A

Some sizing notes: This is based on an antique pattern from the period.

  • The original skirt is quite long (great for tall people) but WH includes a cutting line if you want a shorter version of the skirt. I am 5’6″ and cut the shorter version.
  • The shoulders of the jacket are rather broad. I had to take in the shoulders a little bit to reduce the width.
  • The jacket is very full and loose but this is intentional. Shaping is done by the belt. You do not need to cut a smaller size; it is supposed to be a bit tent-like. (For security I have some hidden snaps in the jacket and hooks and bars in the belt).

Materials:

  • 3 yards gray/black houndstooth wool: $31.50 plus tax and shipping from Fabricmartfabrics
  • Pattern from Wearing History: $28 plus tax and shipping
  • 4 yards yellow wool: $65 including tax and shipping from a FB destash group
  • Vintage yellow buttons: $6 + tax from a marketplace
  • Vintage Czech glass buttons: from eBay; I’ve had them for years and don’t remember how much I paid
  • Thread, snaps, etc. from stash

I’m not quite sure of the total cost because items 1 and 2 had shipping bundled with other items; I don’t have receipts for everything, and I have leftover wool in both colors, but I hope this gives you an approximate idea of what it will cost you to make your own. Thank you for reading!

02D0951B-1787-49DA-9B8B-52A9E6D51C30

Plaid Galore (Using American Duchess Cape and Wearing History Blouse Patterns)

Earlier this year I made a mauve wool 1910s wrap cape using the free pattern from American Duchess.   I’m happy to see so many other people making it! The cape even has its own Instagram hashtag #ADcapecult. SXFB6622

I lined the cape with a blue and black plaid fabric I got from a friend but constructed my cape in a way to make it reversible. LEYY6663

The cape is inspired by an antique cream and black one.IMG_7297

I made mine using a light-weight wool for spring/fall usage.IMG_7486

One of the cute details this cape has is the contrast on the collar, which I repeated on the lining to make it fully reversible. QLWZ6538

This cape pattern is available in PDF format but is a gridded pattern you have to scale up. To save time I just printed the pattern extra large and taped the pieces together. IMG_7402

The closures are hidden under the back of the cape. The front pieces wrap around and you can finish them either by with hooks and bars or a ribbon bow. I had to trim a little bit off the ends because of my body shape. If you are large-busted you may need to change the size of the darts on the front wraps.

Overall, it’s an easy, good-looking cape and I plan to use this pattern again for a witchy wardrobe!IMG_0007

I had plenty of the plaid fabric left over and used it to make this cute 1930s double-breasted blouse pattern from Wearing History. IMG_6938JERR7630RRXR6541

I’ve coordinated the house in the outfit above with the Daphne retro wedge sandals from American Duchess.

Like all the other Wearing History blouse patterns I made, I am quite happy with how this turned out. It is not a complicated pattern because there are not many pieces. There’s some leeway to adjust the fit by moving the buttons and buttonholes a bit.IMG_6927

The shoulders have a split which make for a cute detail. Plus there’s a belt in the back with a buckle.SLWP7455

I loved the way this blouse looked with the red cigarette pants, but I had enough fabric left over I decided it would be also fun to make matching shorts. This way I would have the look of a romper but the convenience of a 2-piece outfit. IMG_0098

To make the shorts I hacked an existing pattern I already had: the Decades of Style 1930s Last Resort Beach PJs. I used the upper portion of the pants because I wanted the high-waisted look. You can see the beach PJs I made in an earlier post.

I had fun making my little mini capsule wardrobe!

FMDS8136

Vintage-Style Cowgirl Split Riding Pants / Skirt for a Western Train Ride Event

Last month I made myself a cowgirl ensemble with a pair of split riding pants (with a button on panel to turn it into a skirt) using some cheerful blue wool and the 1919-1920 riding pants pattern by Wearing History.IMG_6640

The leftover wool was used for a self-drafted matching vest, lined with the same floral cotton as my blouse. GXWCE5351

I wore the ensemble during a ride on the Sacramento River Train with my local costume guild. IMG_6583

At the event I wore the pants without the extra skirt panel, but for a future wearing I plan to use this versatile garment with the skirt panel buttoned in (which makes them surprise pants!) IMG_E6491

I used 20 silver-colored metal shank buttons that have been in my stash for years. I think I paid 25 cents a button a long time ago and have been saving them for a project that needed 20 buttons! I got the wool for a great bargain too ($20!)IMG_E6486

The blouse was up-cycled from a second-hand cotton dress! I removed the skirt and used the extra fabric to make new sleeves and cuffs (replacing the 3/4 sleeves), extend the hem of the blouse, and also line my vest.  (It would have been even less work to just cut the skirt off a few inches below the waist seam, but it had a lot of gathered material that would have created bulk below the split riding pants).ABUU0472IMG_6478

For my other accessories I wore American Duchess Tavistock boots, vintage fringed sueded gloves with studs, a wool hat with a silver emblem I got from Poshmark, and a pleather pouch from Amazon.IMG_6693IMG_6691IMG_6830

The pouch (Amazon affiliate link) had slits in the back for threading the belt through to wear as a hip pouch, plus internal loops to wear as a purse. It’s “old-time” enough that I think it’ll end up in other costume ensembles!IMG_6831

Some notes about the Wearing History pattern: It comes with a short and long version of the skirt. Since I had limited fabric I cut the shorter version and was able to get a vest out of the scraps. (I used 3 yards of 54″ wool). The pants are unlined.Screen Shot 2020-03-24 at 5.23.22 PMThe skirt panel is faced with self-fabric and contains all the buttonholes while the buttons are sewn onto the pants. There are two options to attach the skirt panel. You can have one side sewn into the seam of the pants (which means you won’t lose the panel and you can make half as many buttonholes) or you can have the panel completely removable. If you have the panel attached you fold it over to one side and button it down.  I opted to have the panel completely removable because my self-faced fabric folded over would have meant 4 layers of medium-weight wool and more bulk than I wanted. (If you use a lightweight wool or other fabric you don’t have to be concerned about that).IMG_6485

The back of the skirt has an inverted box pleat that you can stitch down the center back seam. I did not do the stitching, in order to make the back more skirt-like. IMG_6501

The pants are very full so even if the skirt is buttoned in place in the front there should be plenty of range of motion due to the extra fabric in the sides and back.IMG_6595

Pattern difficulty is “advanced” according to Wearing History. This is because this is a reproduction of an antique pattern from 1919-1920 and assumes certain basic knowledge. Wearing History has added some really helpful notes, but this is not the kind of modern pattern that has step-by-step illustrations.  You should know how to make and attach a placket for the opening and the facings on the bottom hem. (These are rectangular pieces you make yourself from scraps, and are not included in the pattern).IMG_8727

I am an experienced costumer maker and have made pants before, so I did not find this pattern particularly difficult, but it is not a beginner pattern for sure. I highly recommend this pattern if you are experienced or an ambitious intermediate seamstress. It was definitely fun to wear with the rest of my guild!IMG_8713

The last 3 photos are by Lauren Moyer, one of our wonderful GBACG board members.IMG_8724

Giddyap!

DIY Generic Jedi Costume for Rebel Legion (A Head to Toe Guide)

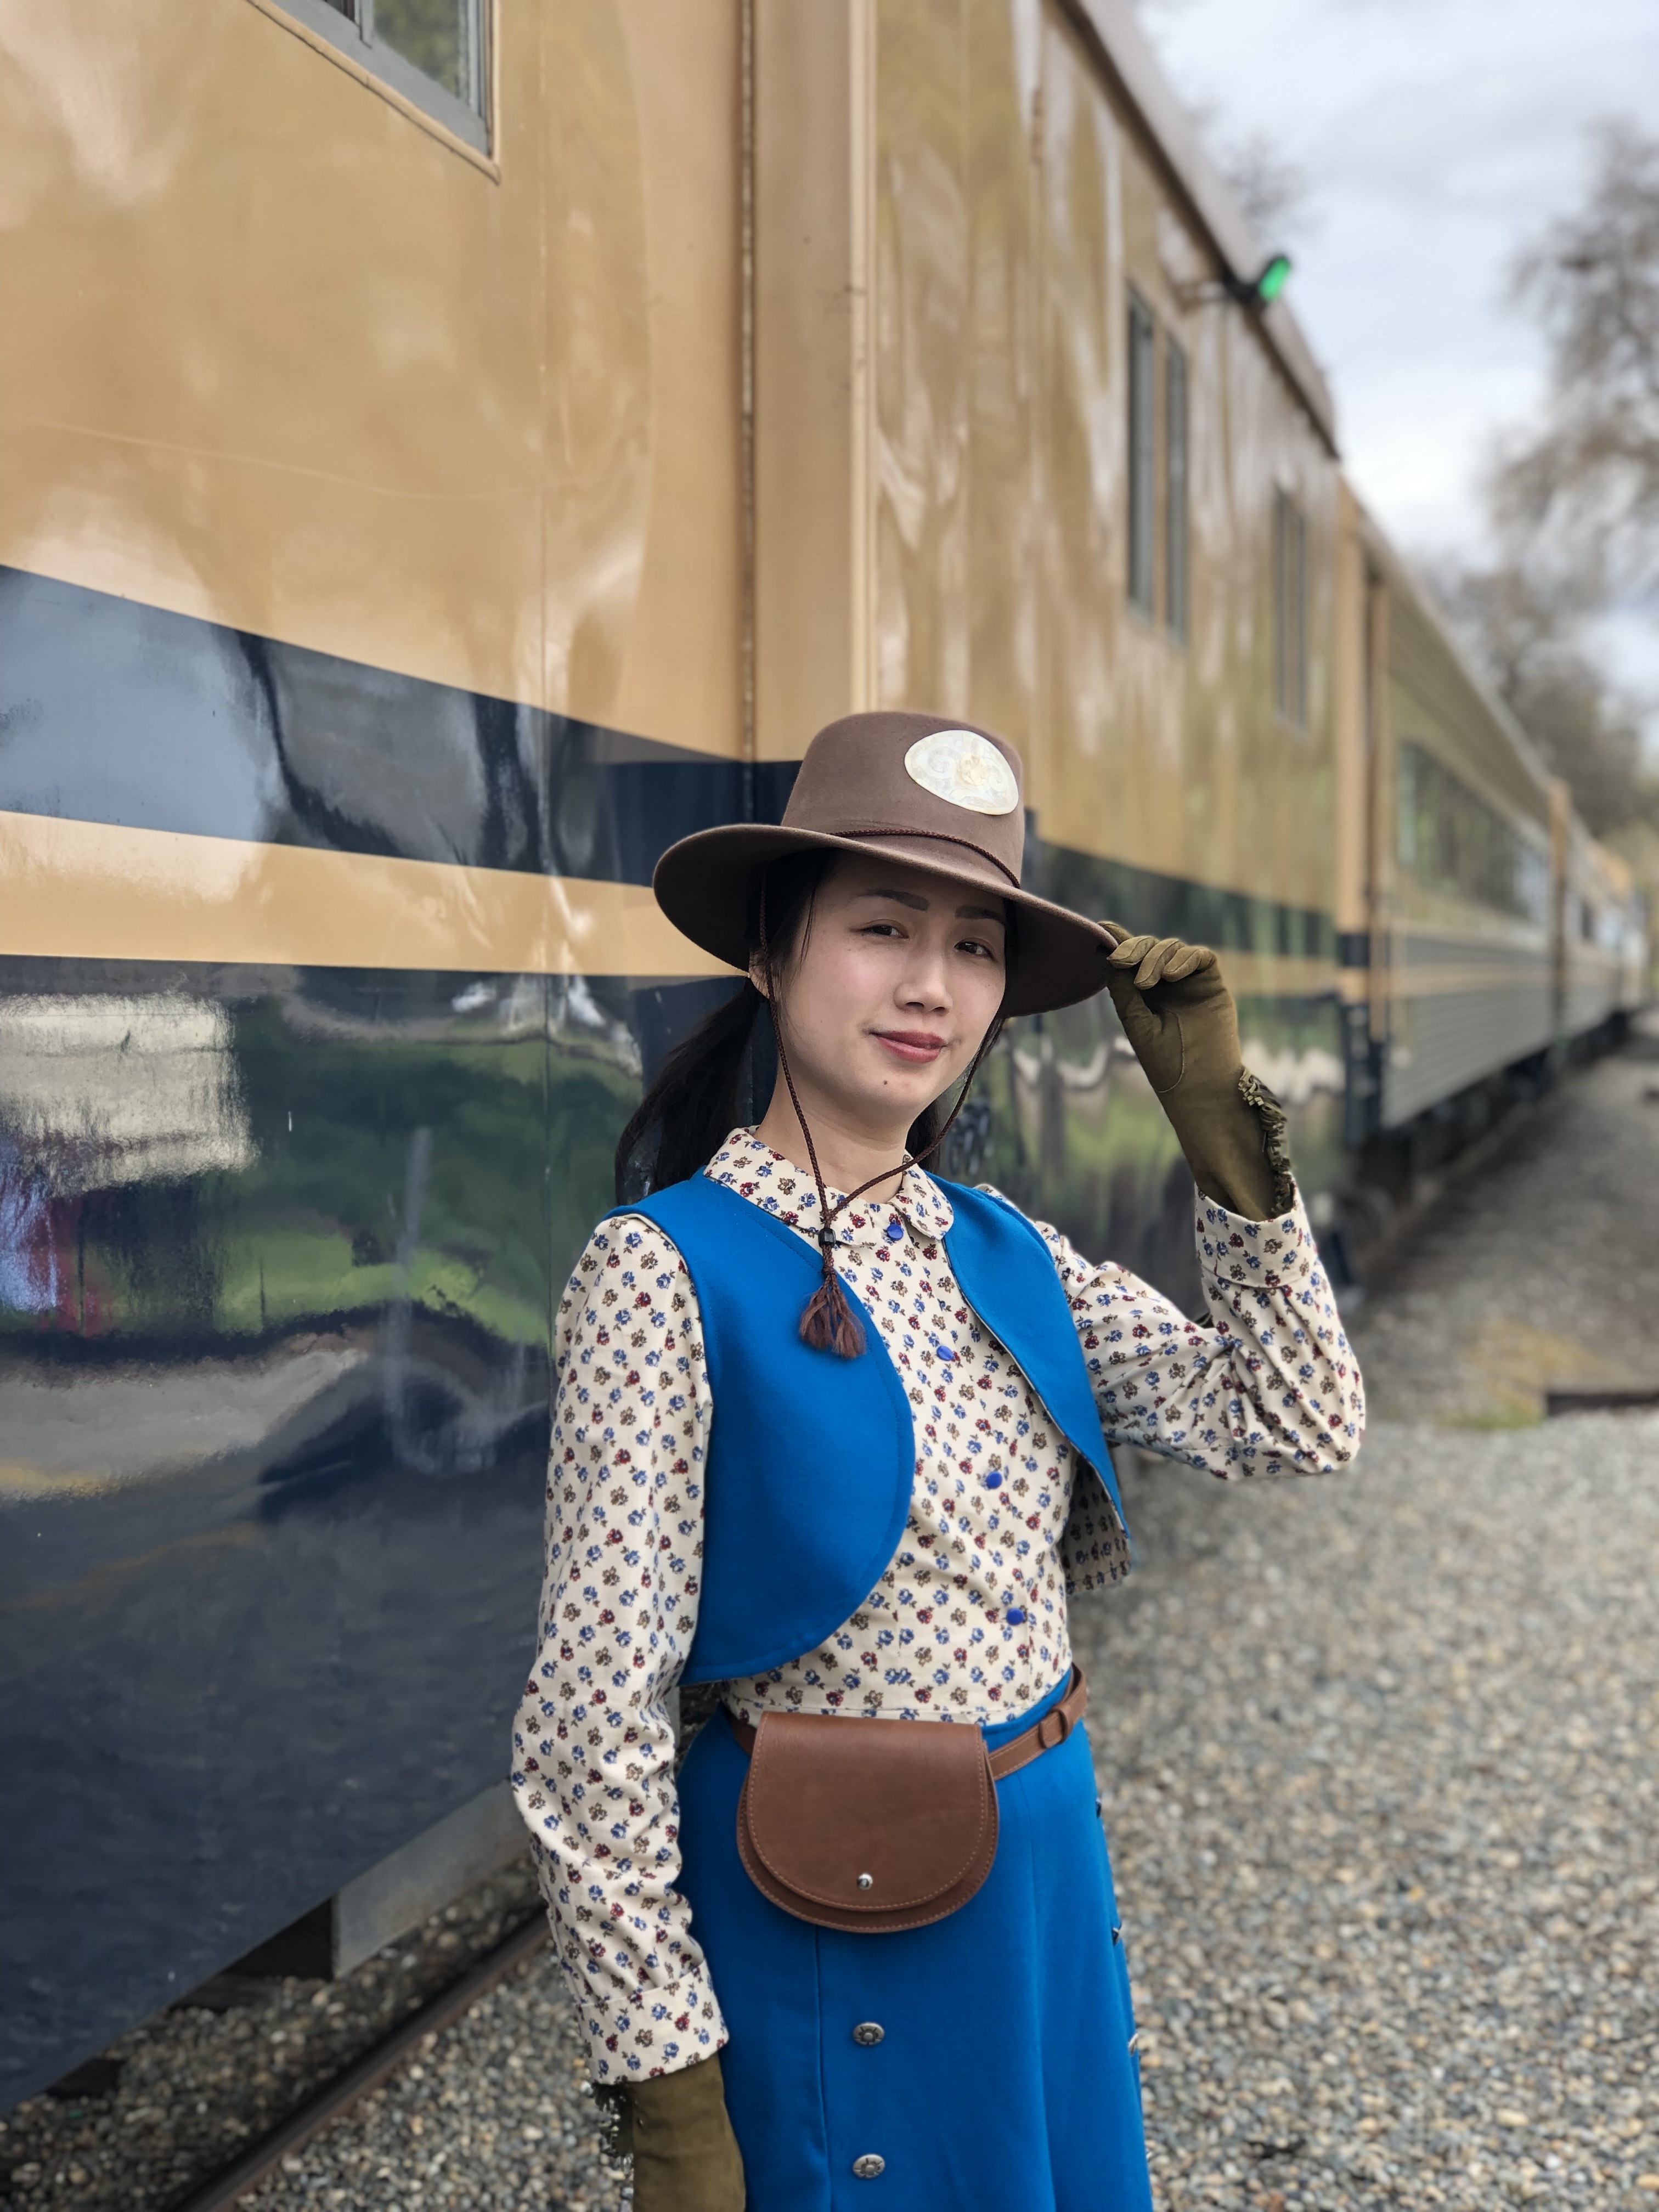
I’ve had some questions about how I put together my Jedi costume, which is not of any particular character that appeared in the Star Wars universe, but follows the guideline of what a Jedi would have worn in the Old Republic. This kind of costume is called a “generic Jedi” in the Rebel Legion organization, of which I am a member. I made my costume according to the Rebel Legion Jedi Costume Standards, which is a useful reference even if you want a costume for fun and not for RL approval. (Please note, I am not a RL judge and this post reflects my own experience making my costume and is not an official guide of any sort).

Miss Vivien_s Con-Ex-4

Photo by Ribidib

Miss Vivien_s Con-Ex-1

Photo by Ribidib

The fun thing about doing a generic Jedi is you get to put a lot of your personality into it. You can choose your own colors and there are different kinds of shapes that are allowed. I’ll discuss some of the options available to you in each section.

The basic parts you need for a Jedi costume are:

  • Outer tunic (the beige part of my outfit)
  • Tabards (the blue parts that go over my shoulders and down the front)
  • Obi (the blue sash around my waist)
  • Pants or skirt
  • Belt
  • Boots
  • Lightsaber
  • Lightsaber clip on belt

For RL approval you need at least 3 out of these 4 items:

  • Inner tunic (the white part of my outfit)
  • Two or more (leather or resin) pouches
  • Food capsules (the colored things on my belt)
  • Hooded robe

I didn’t want to hang too many things on my belt so I opted to have only one pouch and fulfilled my requirements by having the other items. (If you are petite you may have trouble fitting two pouches and eight food capsules onto the sides of the belt and have to opt for one pouch and four food capsules).hoodfront.JPG

My inner and outer tunics, pants, and robe are made of linen. The obi and tabards are wool. These materials were personal preferences due to breathability and durability but natural materials are not required if you are on a budget.

The RL Costume Guide linked above has suggested colors; Jedi tend to be earth-tones so you’ll see a lot of brown, black, gray, beige, etc. but other colors are approvable. My blue ensemble is not particularly common but still allowed.

OUTER TUNIC:

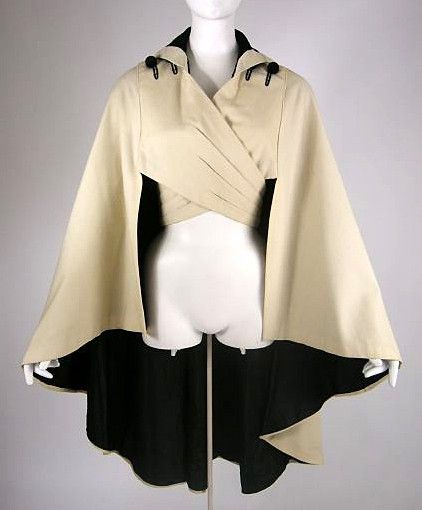
The outer tunic is similar to a kimono in concept in that one side folds over the other side and there are big sleeves. IMG_0407

IMG_0410

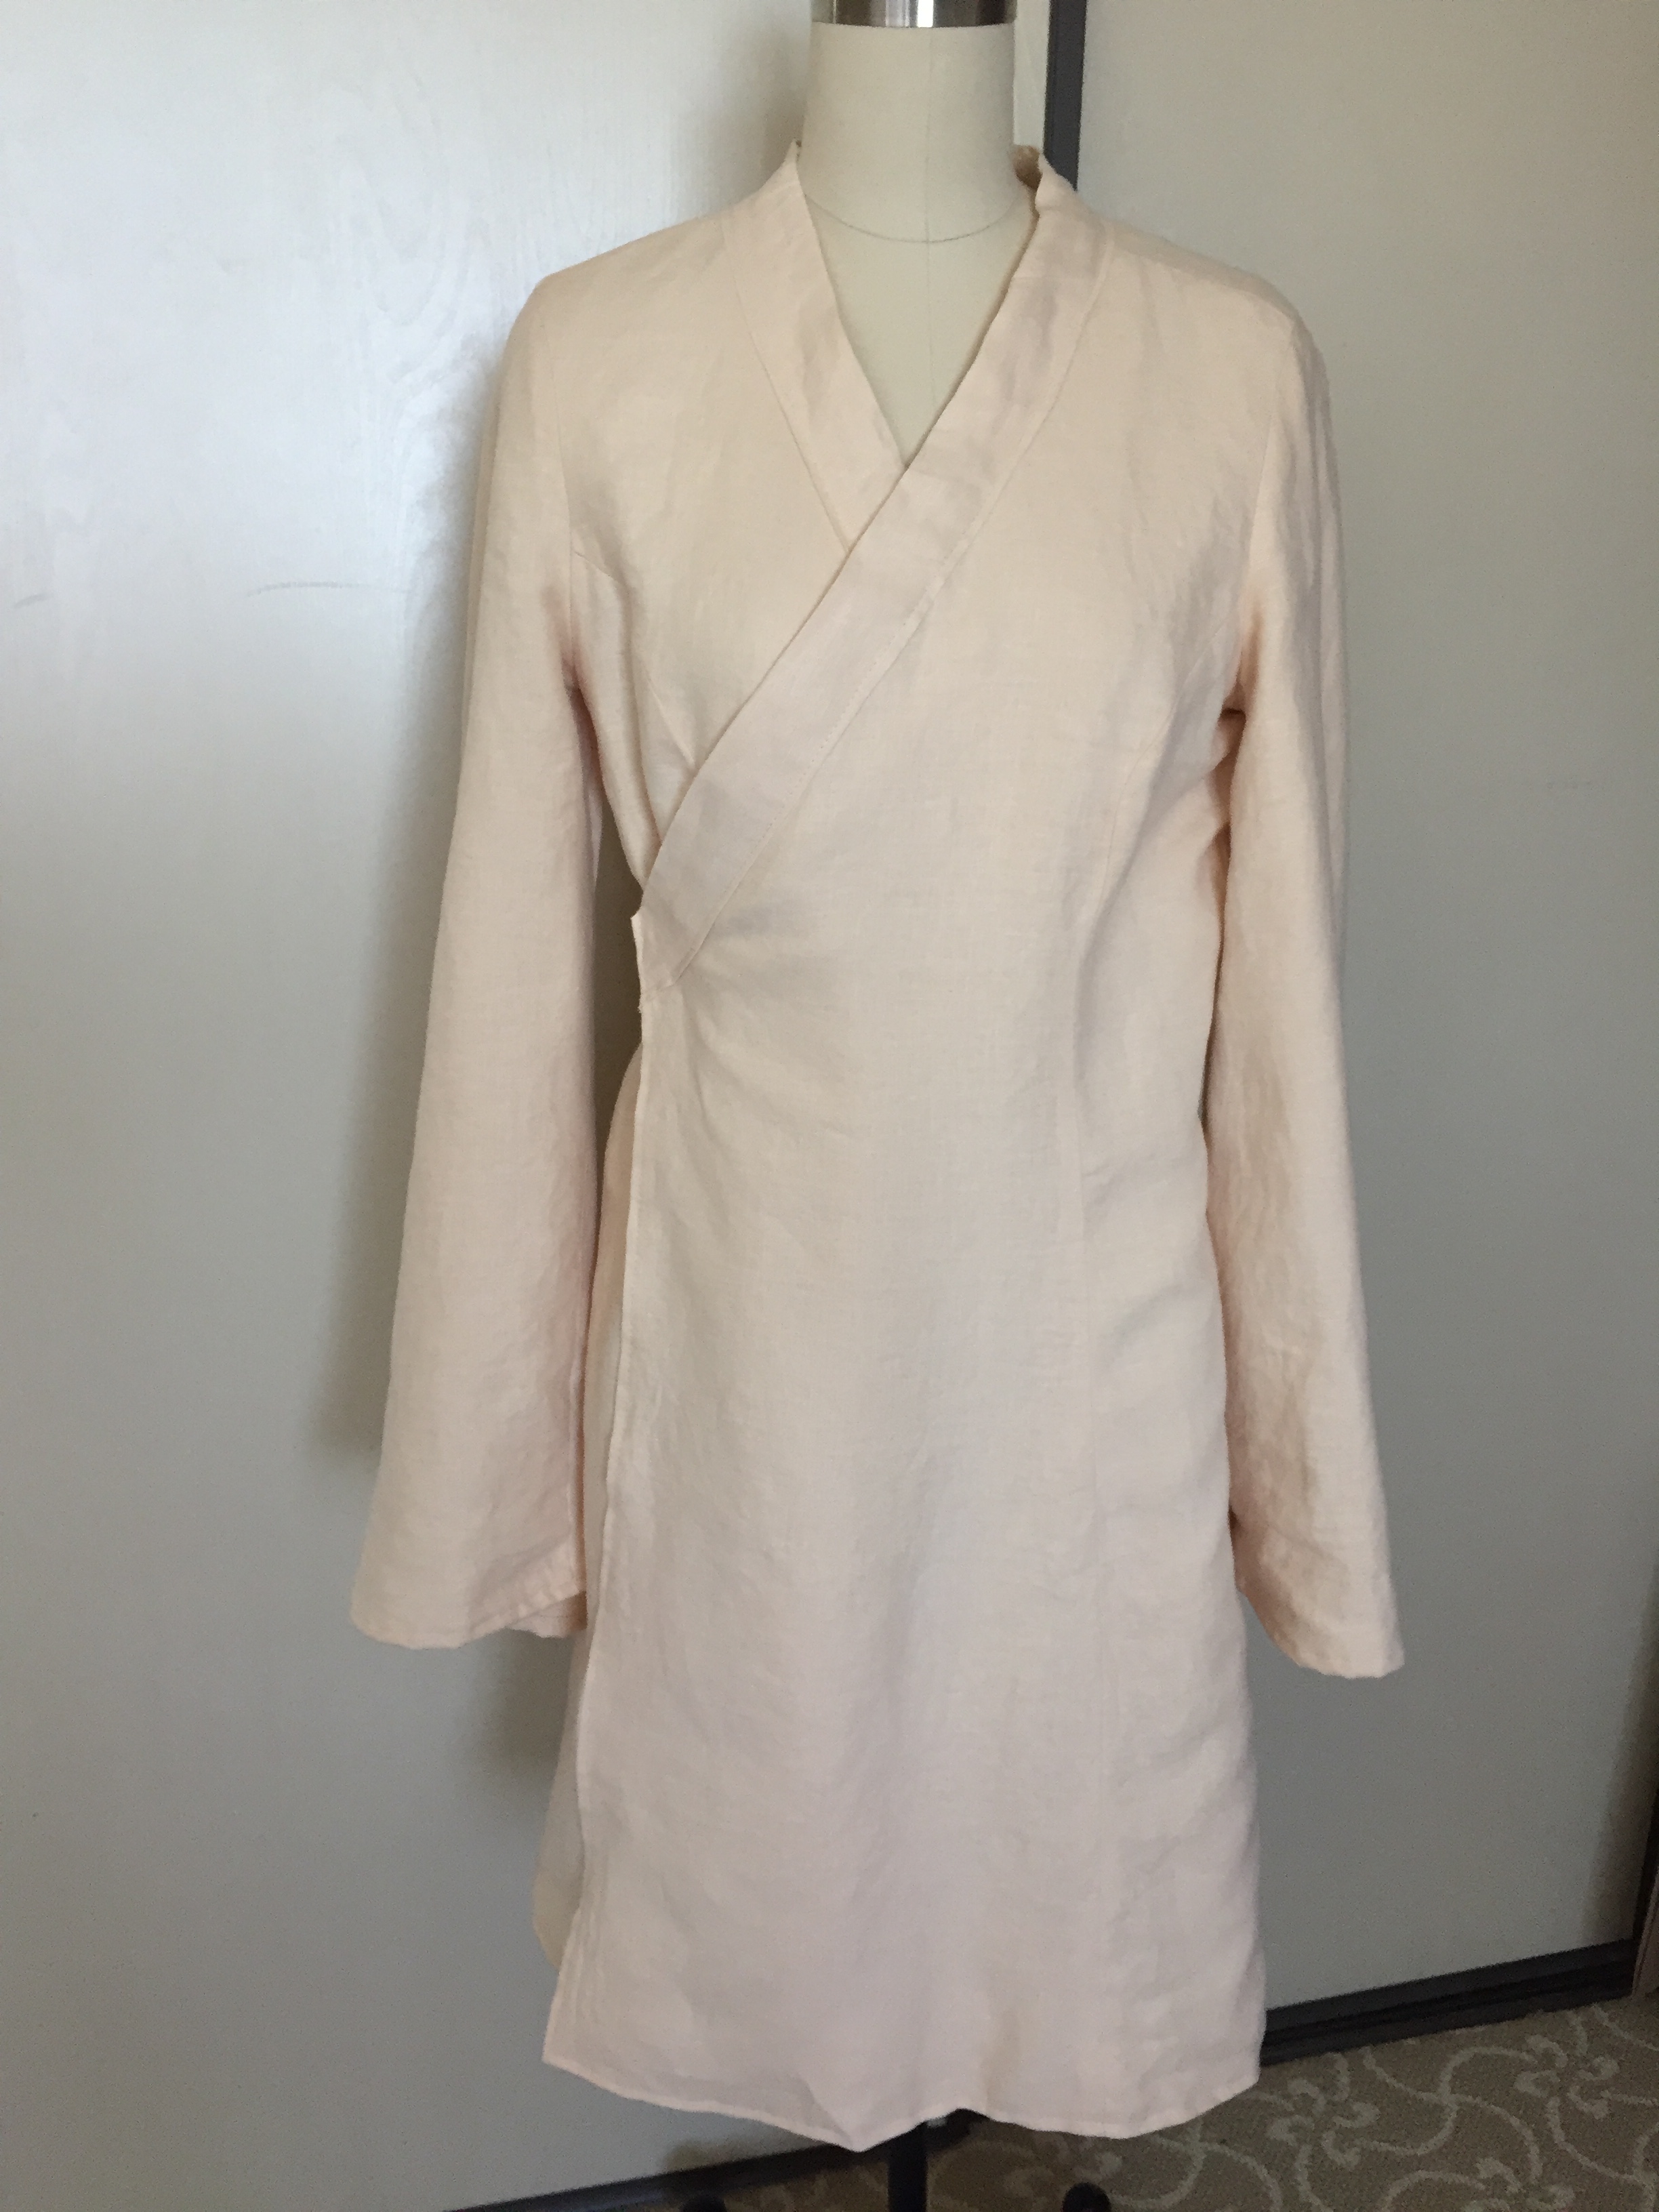
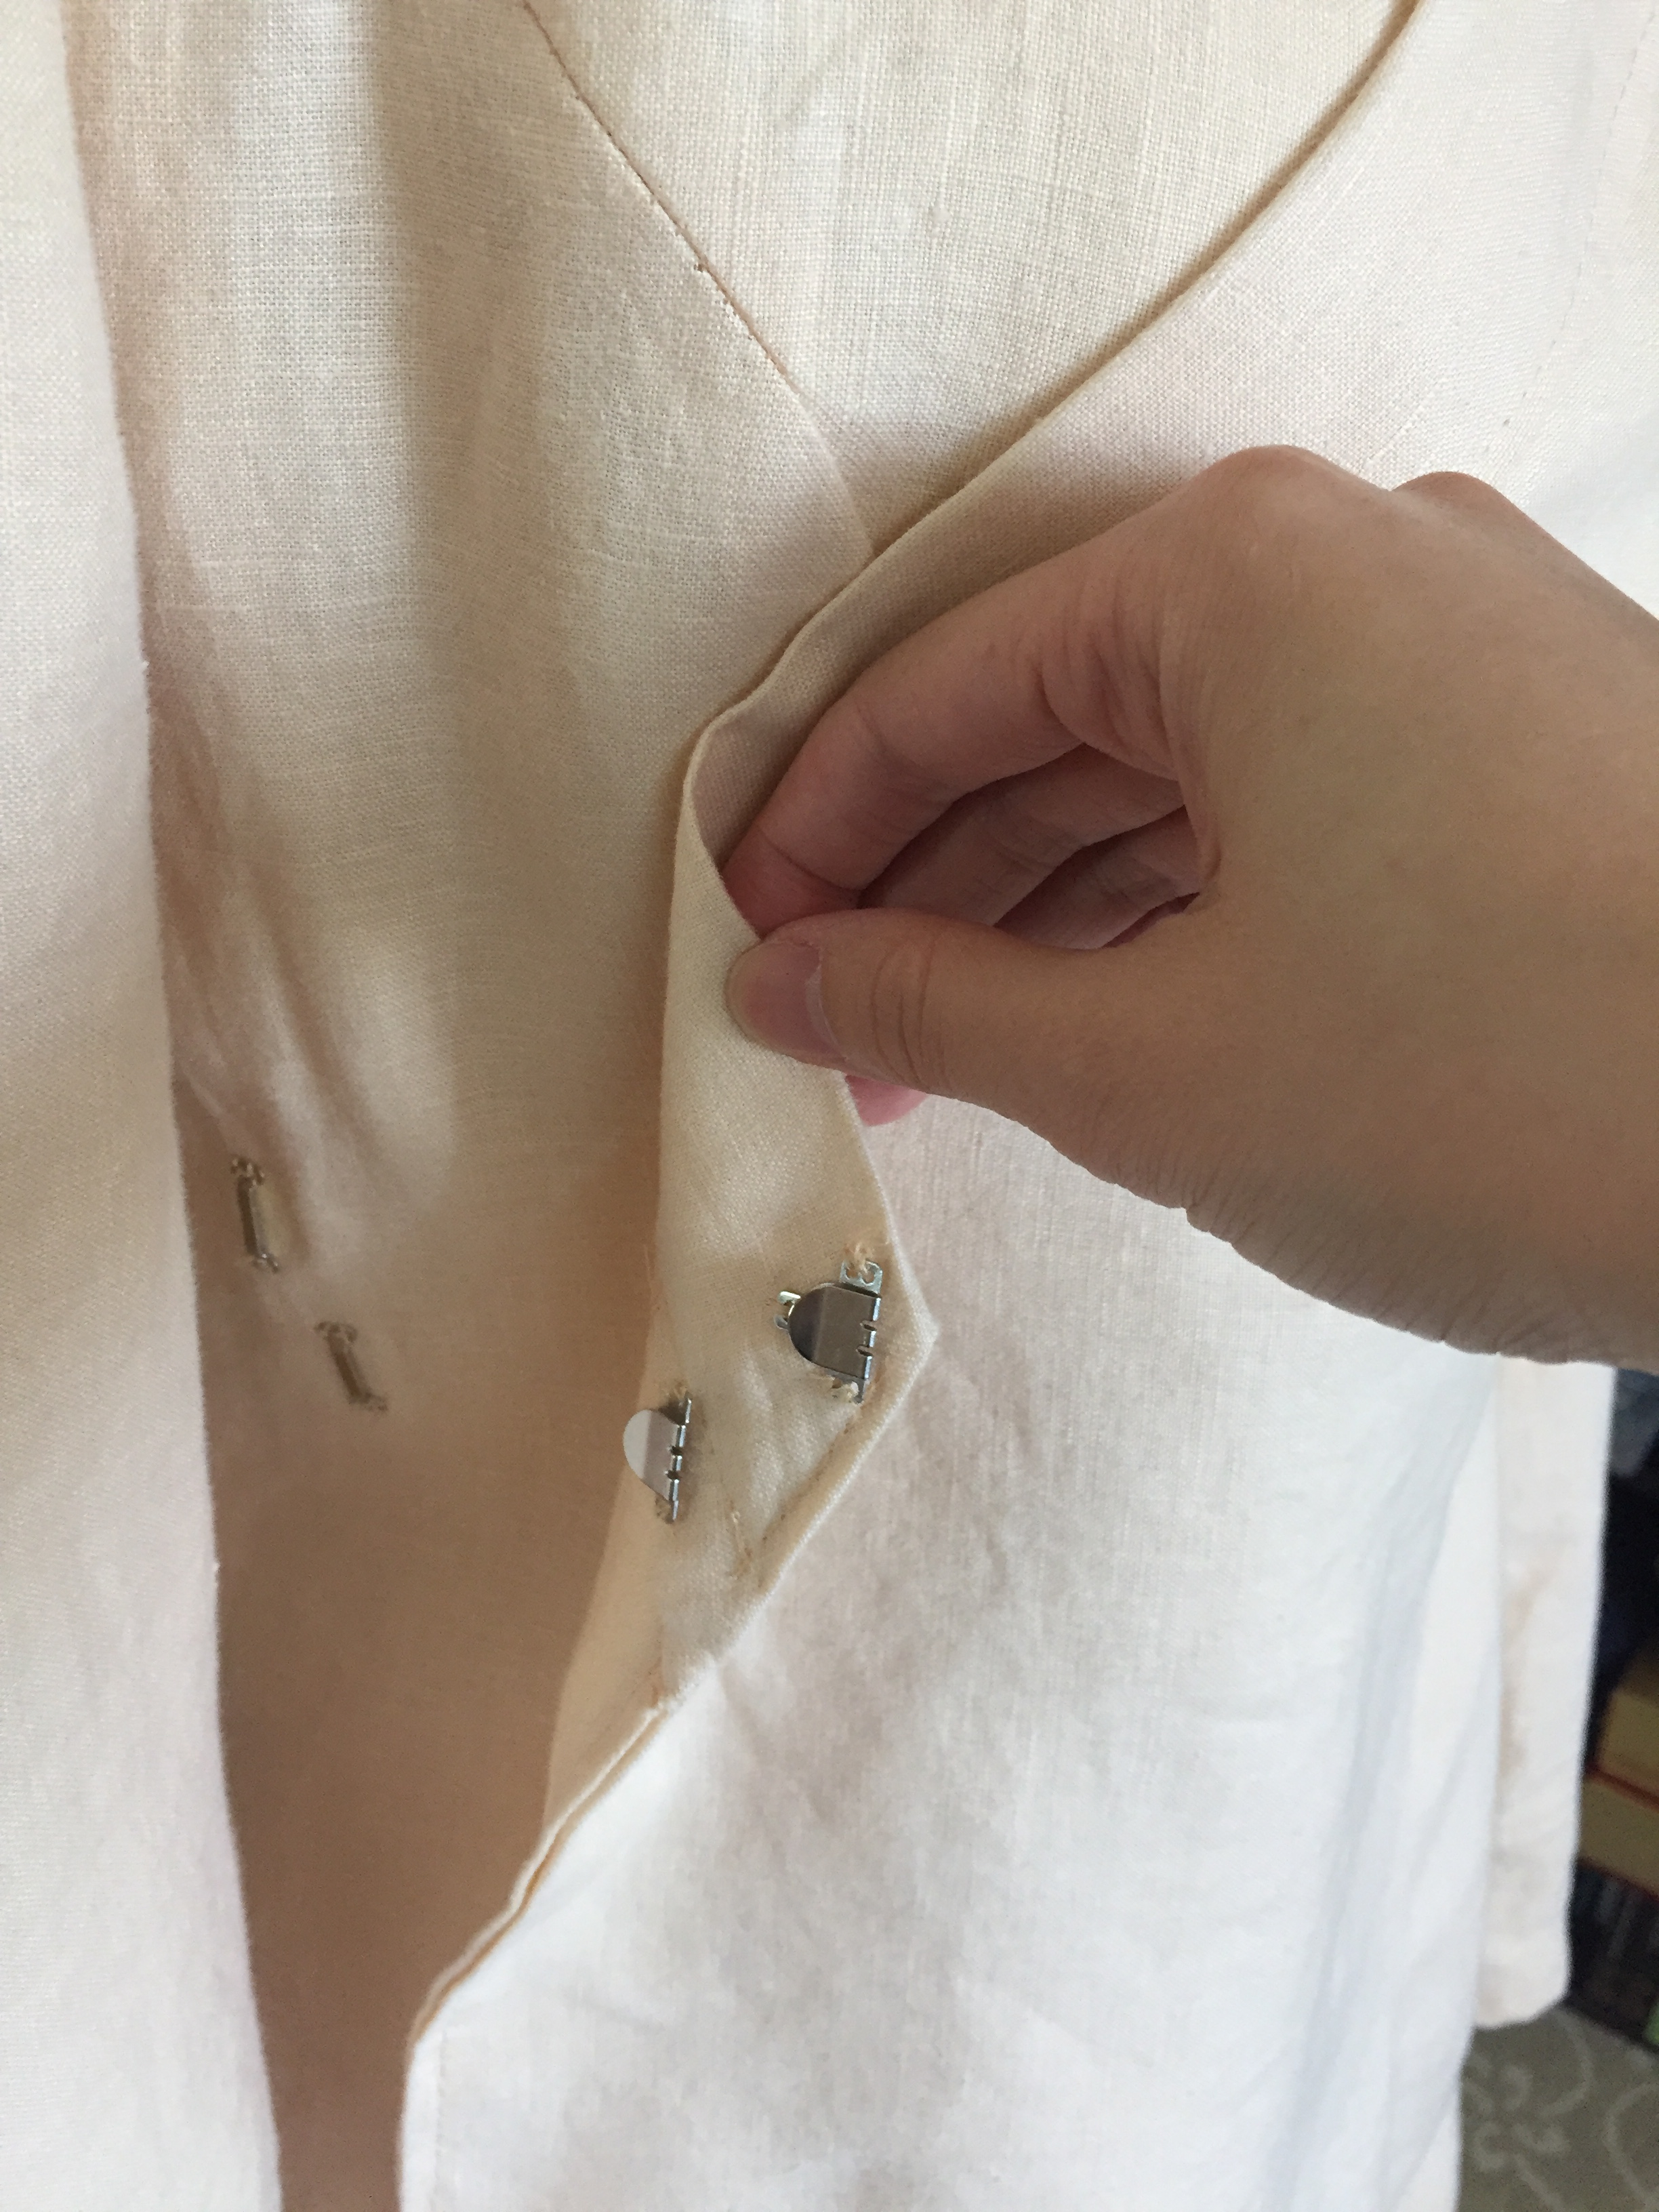
You can see the opening on the right side here.IMG_0408

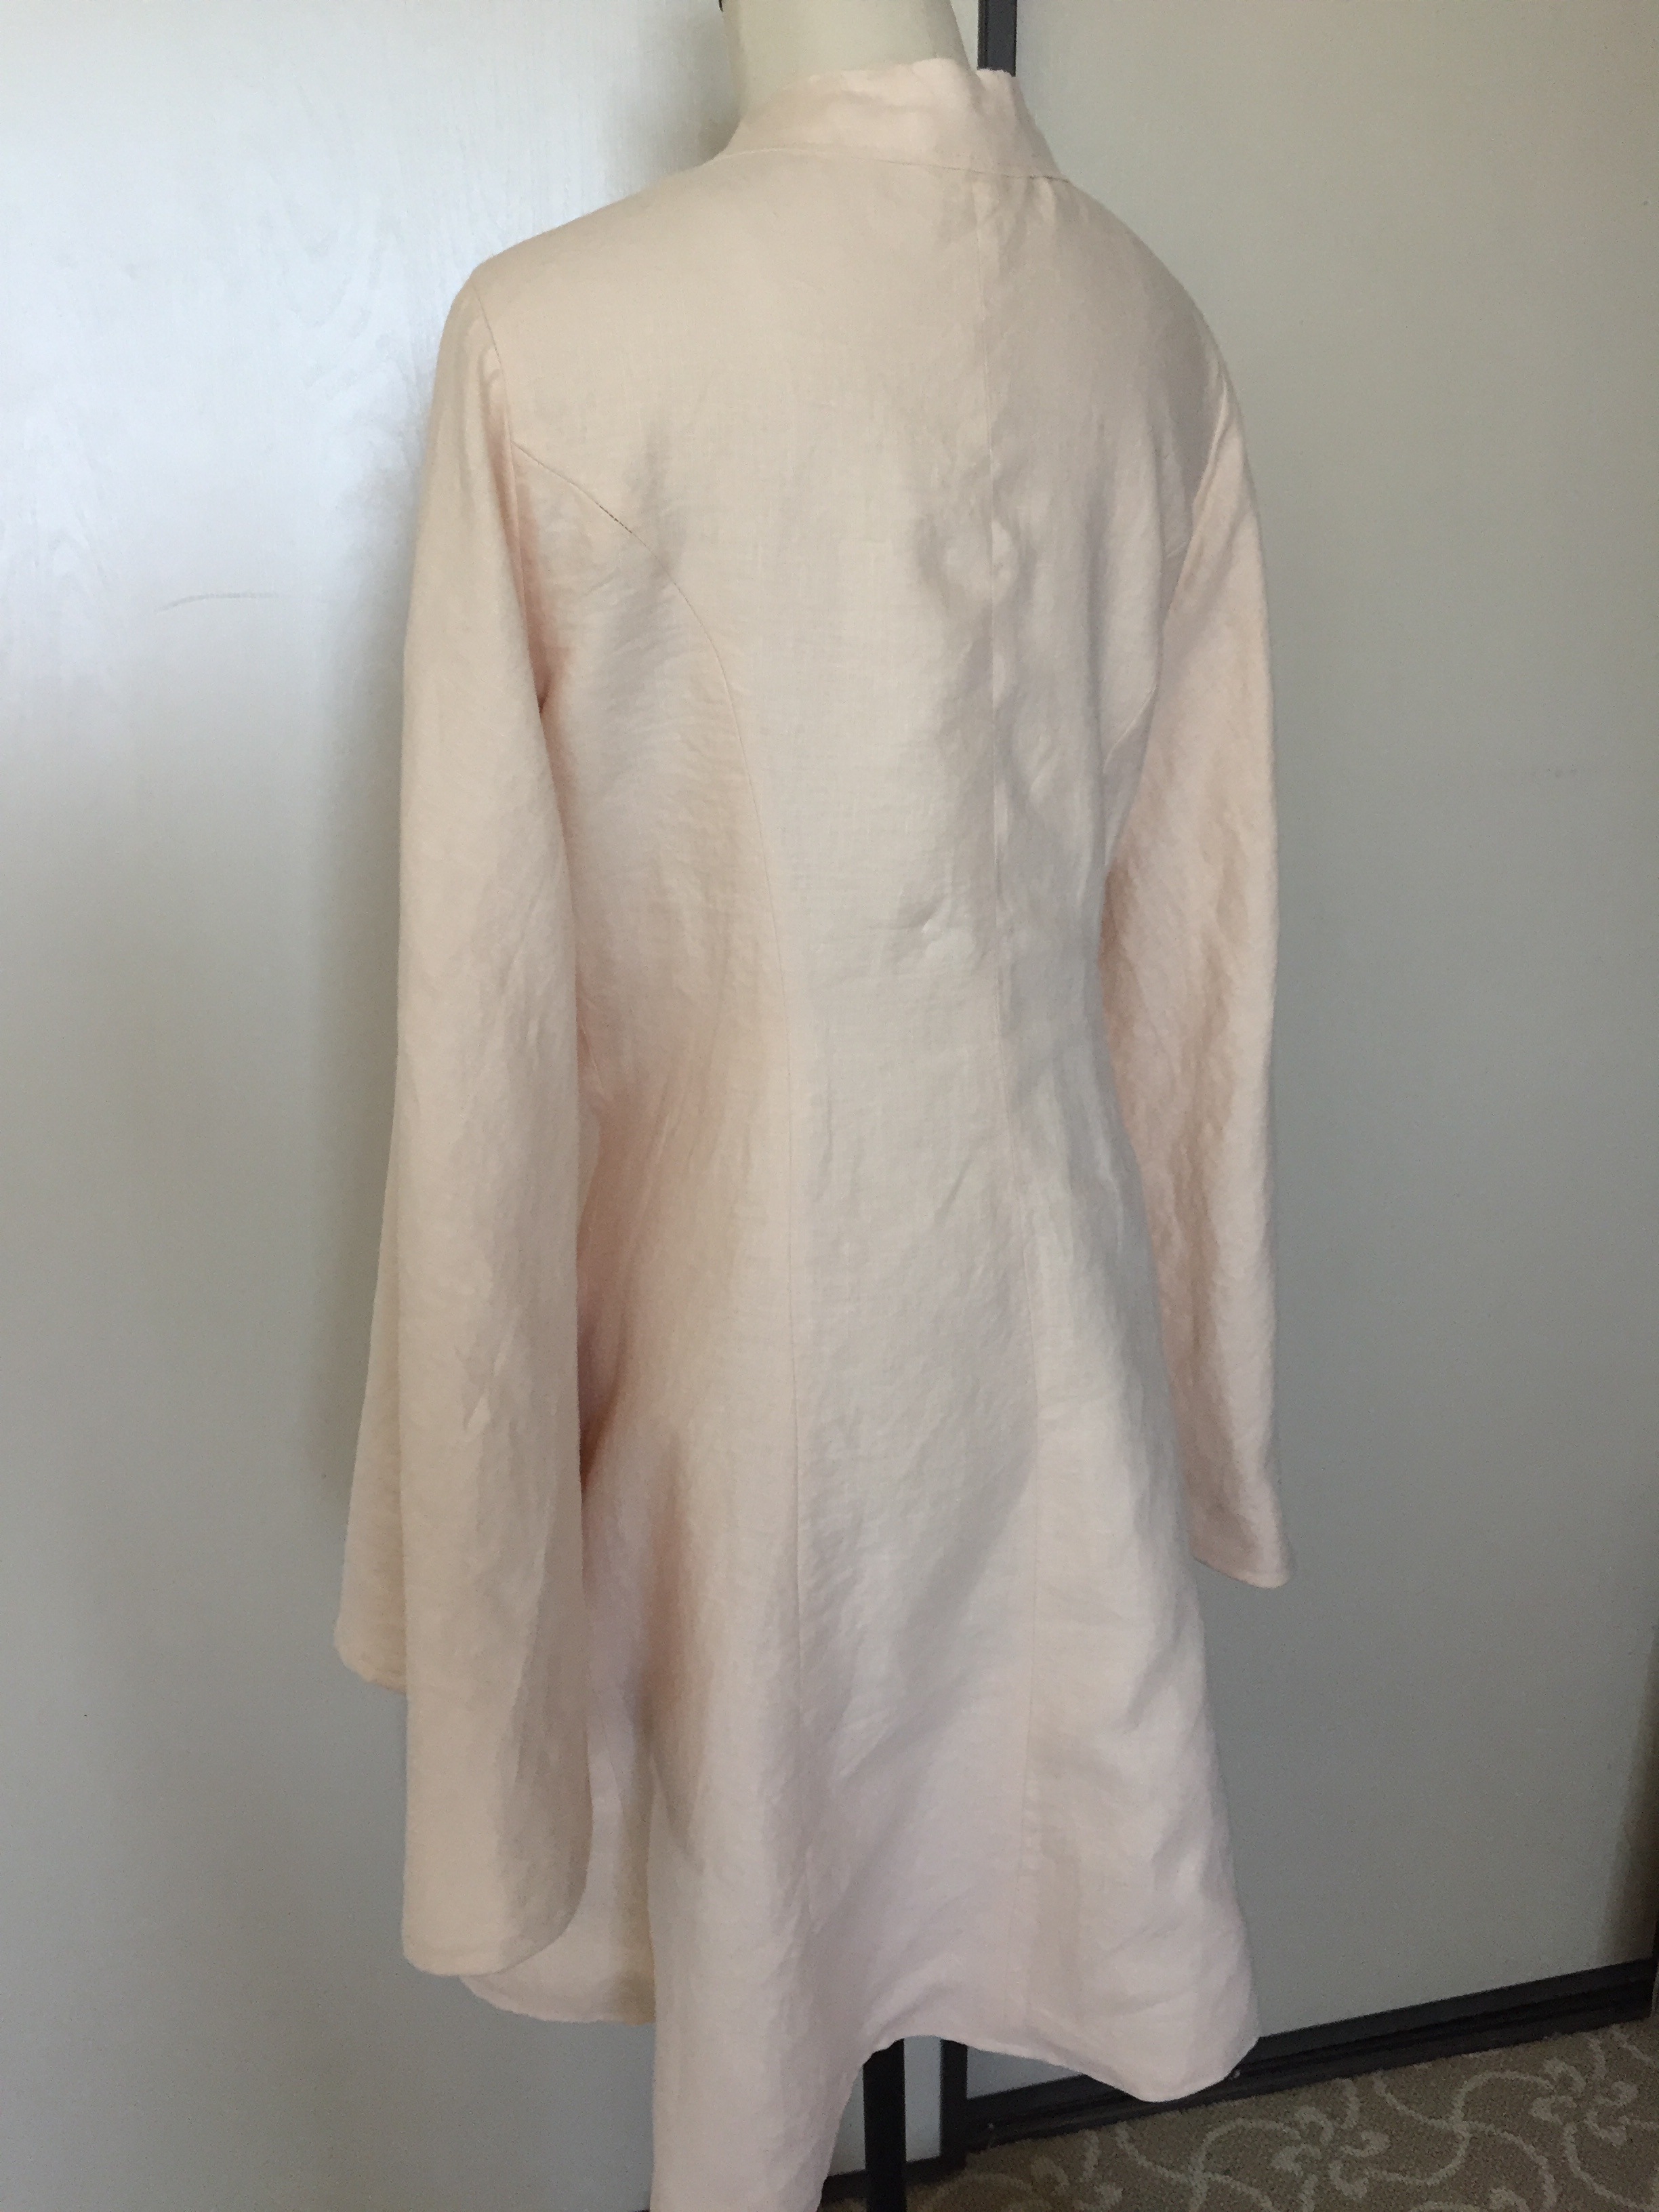
There are lots of tutorials and free patterns online for Jedi robes and tunics, so I will not reproduce them here. However, most of those are meant for male or unisex figures. They assume you have a boxy tunic that will be fitted to you with the belt, but creates some extra bulk at the waist. I opted to have a tunic with curved princess seams in the front and back to be more figure flattering. If you are not female-bodied or you want to save time by not worrying about extra seams, the free online Jedi tunic patterns are great. Otherwise, I would modify a wrap dress pattern for your Jedi.

I already had this McCalls M6940 Game of Thrones pattern (affiliate link) for a cosplay project so I modified it:68385897_722415068187496_2174166372844568576_n

  • Start with View A (the picture on the right).
  • Tape the skirt hip gore (yellow part with the lion) pattern piece to the skirt hip (red part above it) pattern piece so that you can use it as one big pattern piece. You should not have that extra horizontal seam at your hip on your Jedi tunic.
  • Shorten the skirt. My preference is above knee-level but you can make yours shorter or longer. (For RL approval it will need to cover your butt at least). You can also have a “hi-lo” tunic where the back is longer than the front.
  • Make a wide band (about 2 inches wide) for your collar instead of the narrower one in the pattern.
  • Use different sleeves. The Jedi sleeves are big cone shapes like wizard robes. I already had Simplicity 8723 Harry Potter robe pattern (affiliate link) so I borrowed the sleeves from that pattern, but made them longer. (For RL approval your sleeve should be knuckle-length).68369096_2548470338771719_1778429370386350080_n.jpg
  • Closures: instead of visible ties as shown on the McCall’s pattern, you want to have hidden closures on your Jedi tunic. I put hooks and bars on the right side of my tunic, and then a hidden ribbon tie on the inside left for extra security.IMG_0405IMG_0404

Unless your fabric is thick I recommend lining your tunic to give it better drape. A thin, flimsy tunic is going to look a little off if you want to look like an Old Republic Jedi or get RL approval. (If you are doing this as a casual Halloween costume then by all means do what’s quick and easy if you prefer!) I used two layers of “blanched almond” 100% linen from Fabricmart for mine. I have not used it myself but I have heard that Joann Fabrics has a “linen look” linen-rayon blend that is pretty good if you don’t have the budget for full linen. Crinkle cotton gauze is also a popular choice. You may be able to find a good polyester/cotton blend but it may be hot to wear.

INNER TUNIC: 

Although not required I highly recommend having one. It’s a layer that you can launder without having to wash your whole costume each time. You can either make a full shirt or just a dickey (false shirt with just a collar and a bit of a front and back). The important part is that the collar shows.  Mine is a full wrap shirt with a band collar about 2 inches wide. IMG_0402

As you can see it is a very simple shape, with just a snap closure, because you won’t be seeing most of it while the costume is worn. My pattern is self-drafted but you can modify any basic shirt pattern. The easiest thing would be finding a wrap blouse pattern  with a V neck to start with, but if you have some basic sewing skills you can extend one “flap” of the shirt pattern over and cut out the neckline to be a V shape.IMG_0403

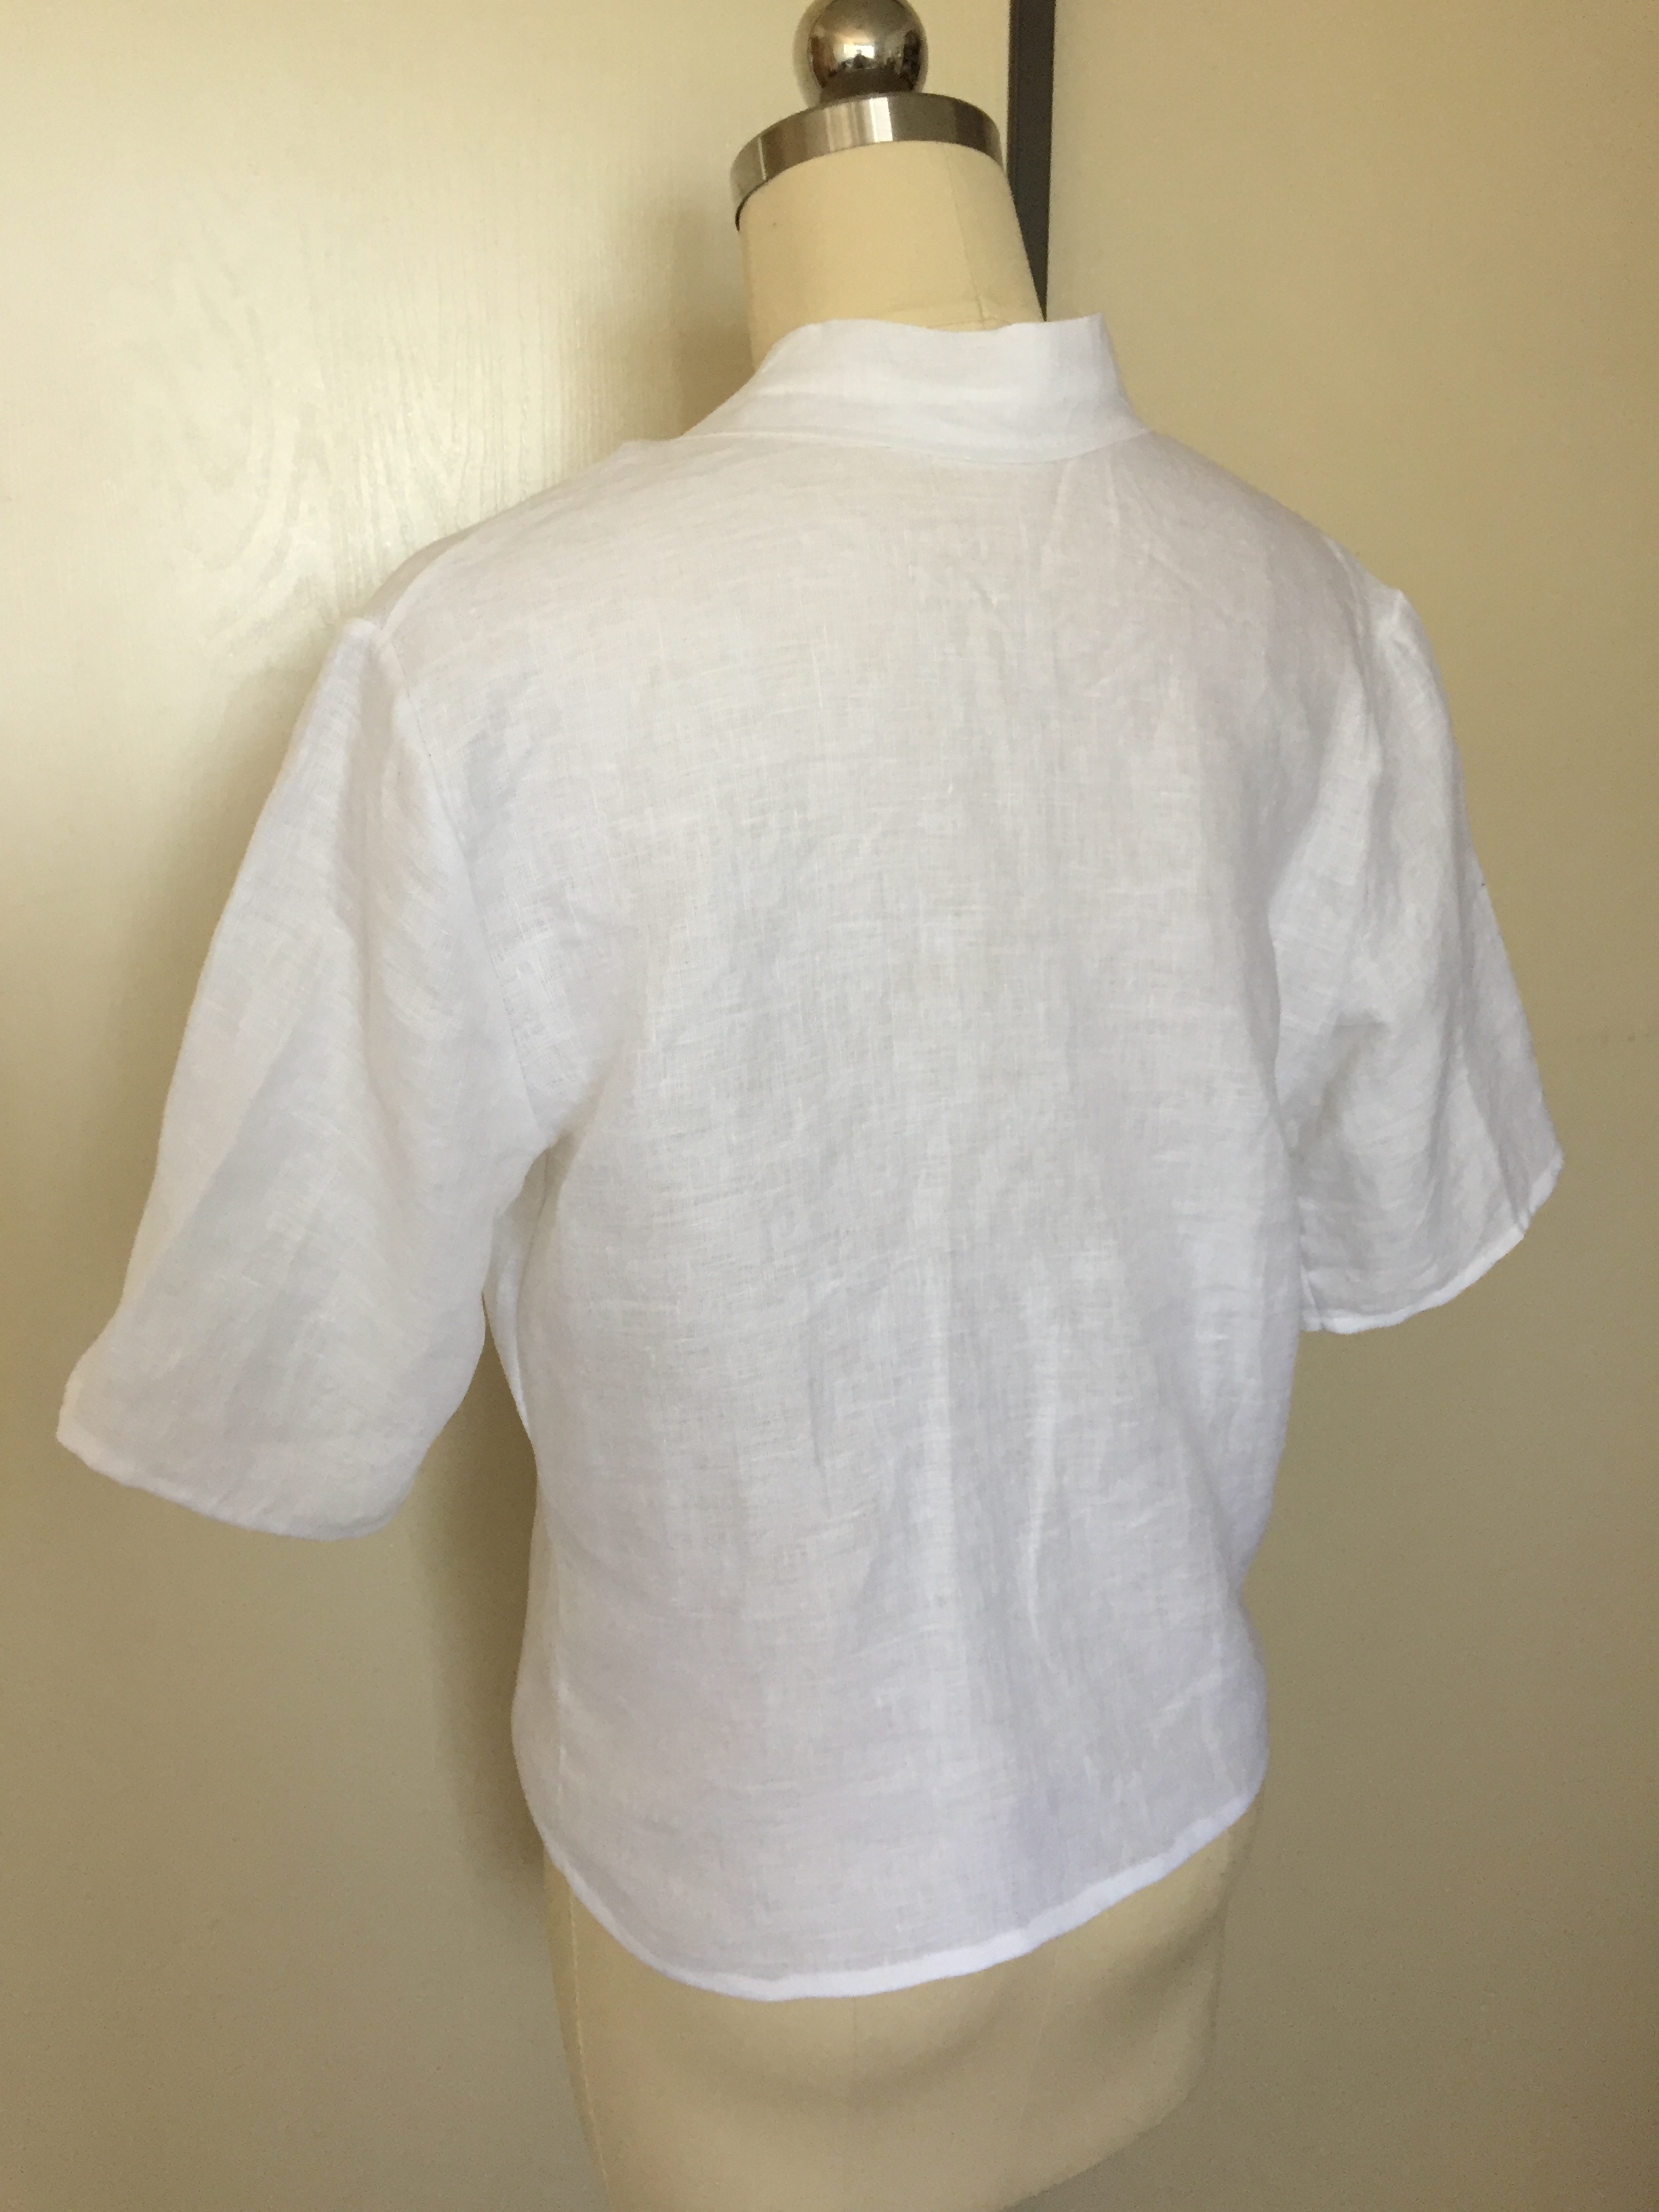
Mine is made out of linen because it wicks moisture. Wearing lots of Jedi layers can get warm!

TABARDS:

When worn, tabards look like two pieces that go over your shoulders and down the front and back of your outer tunic.  They are NOT straight rectangles because they need to be angled to sit right. You can cut them out as Y-shapes but I preferred to have pieces where the seam was hidden by the obi because it saved fabric. Here is an in progress shot to show you what I mean.  The top pieces need to be long enough to cover the front and back; there is NO shoulder seam for Jedi tabards.IMG_8962.JPG

The exact dimensions are going to depend on your height and how broad your shoulders are. They should be wide enough to extend past your shoulders slightly. Mine are 5″ wide  but I am not a very large person. For the upper pieces cutting out rectangles about 6″ x 36″ wide was a good starting point for me. I am 5’6″ tall and that was enough fabric to have 0.5″ seam allowances and a lot extra to trim off when angling the ends. (The tabards are double thickness so cut 4 identical rectangles out).

The bottom half of the tabard is where you have a lot of chances to show off your personal preferences.

  • The ends can be squared off, pointed, or rounded. Mine are pointed and curved on one side.
  • The length can vary but must be at least as long as your outer tunic (for RL approval).
  • You can have the tabards meet and become one piece hanging in the front.
  • The back tabards can cross or not.
  • They can be fabric or leather.
  • You can put decorative symbols on them with paint or embroidery.IMG_8928.JPG

For the lower tabards I started with 4 rectangles that were 6″ x 28″, which like the upper tabards were enough for seam allowance and extra for trimming. My curve starts about 6 inches from the end.

I constructed the tabards by sewing the right sides together, turning them right side out, and top-stitching. They are the same on the front and back.

OBI:

The obi is the wide sash around your waist. The RL standards say that the obi should be the same width as your tabards or about the 3 times the width of your belt. I did the first option so my obi is 5″ wide, but yours should be proportional to your height and shoulder width. The length will depend on your waist measurement. You’ll want to have add at least several inches for overlap in the back, plus more for seam allowance.

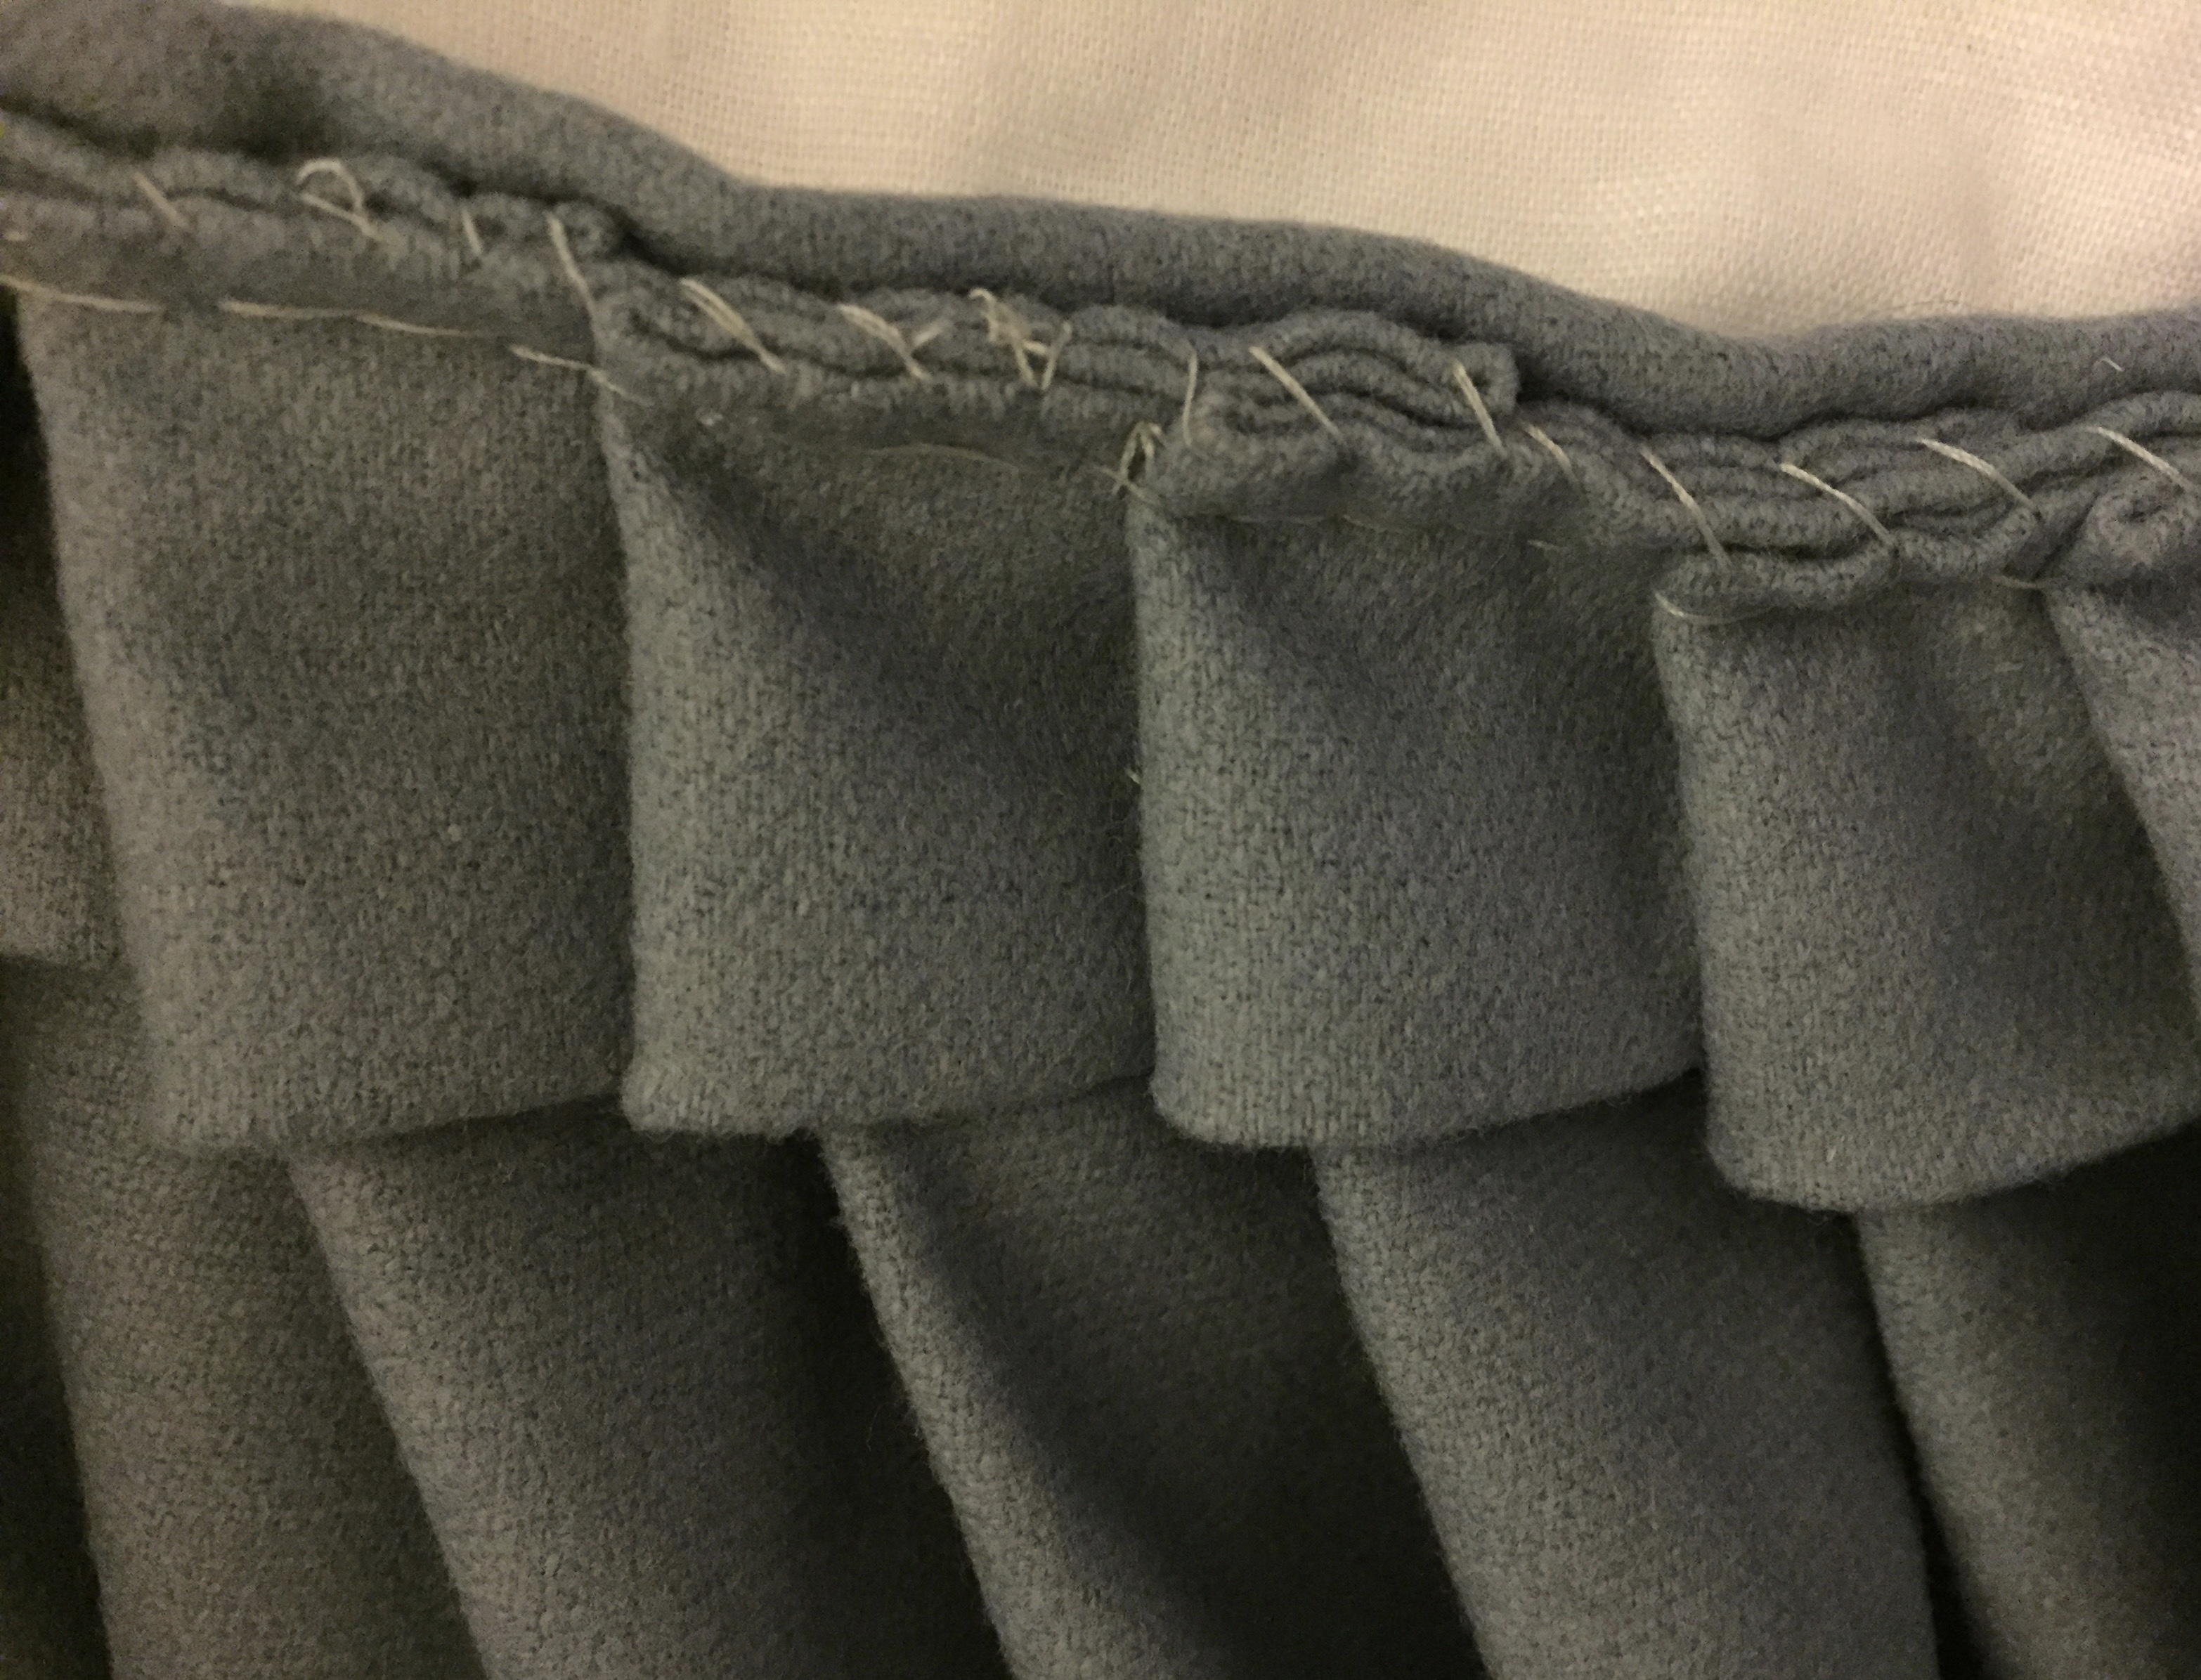
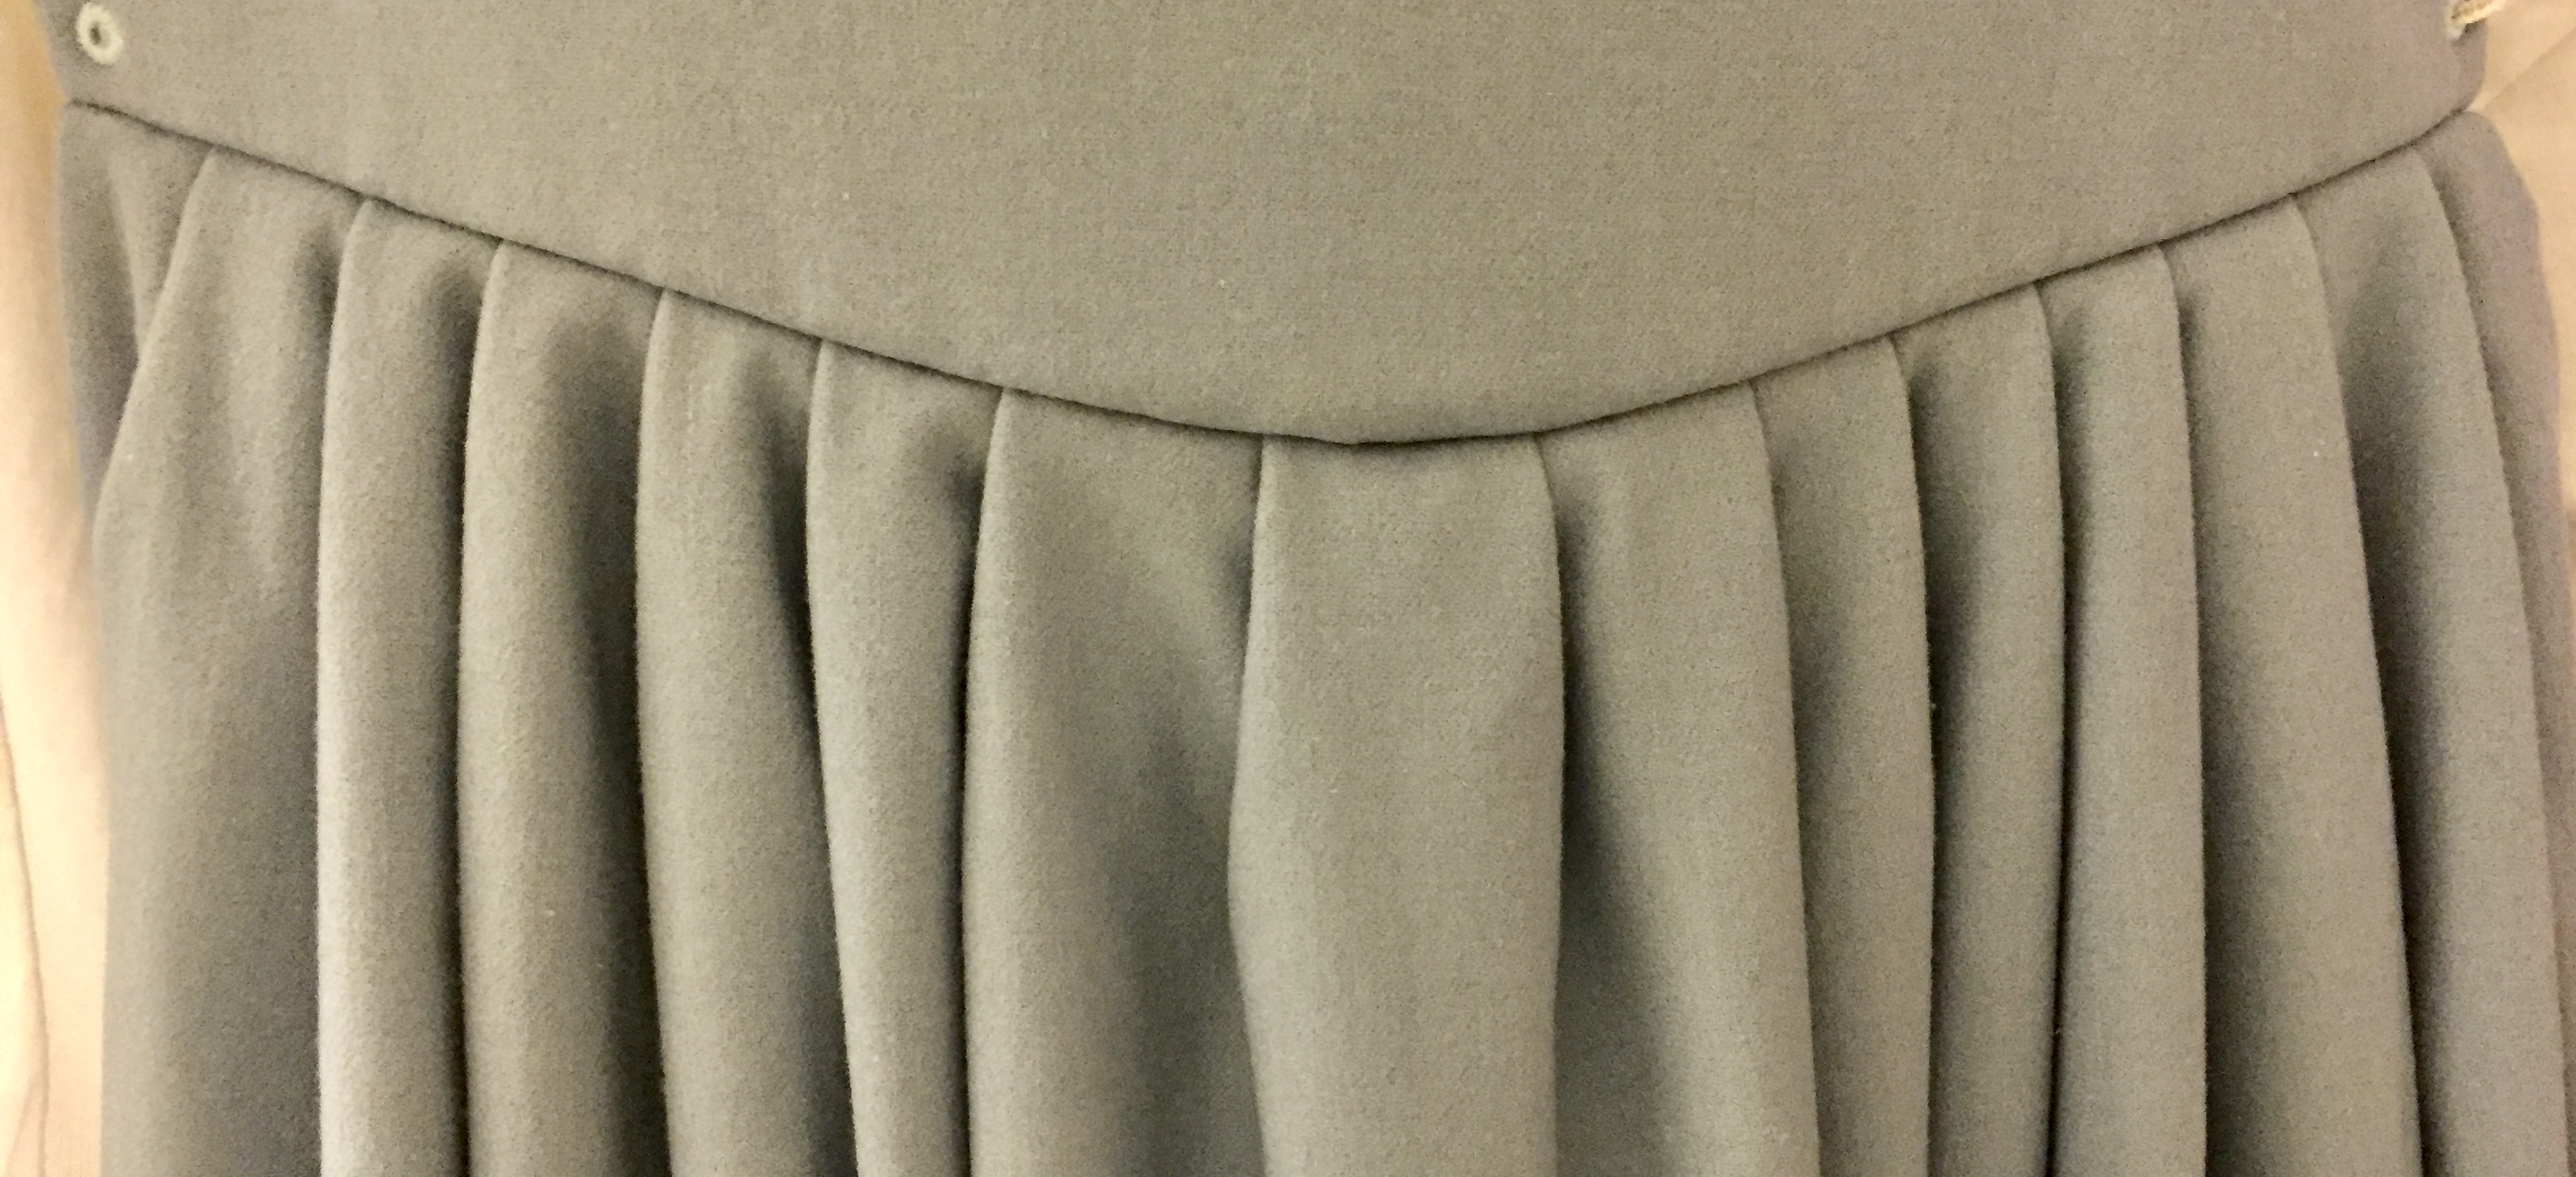
The easiest obi is just a long rectangle, but a lot of people like to add texture and visual interest. Mostly this means pleating or scrunching up the top layer horizontally. I put in a series of diagonal tucks. I have not seen anyone else do this so I want to note that even though I got approved, if you are going for RL submission your judge’s opinion may vary. IMG_8956.JPG

The obi cannot have any visible closures. You can use velcro, hooks and eyes, or snaps but they must be hidden in the back overlap. (I used 2 large snaps). Some people also do not add closures and rely on the belt to keep the obi closed, but that makes it a little harder to get dressed.

I recommend sewing your tabards to your obi. (Then you put it on like a backwards vest, with the obi closure in the back).  This will keep them from shifting while you are wearing them and they will hang symmetrically without having to adjust  them each time. If you are clever about it, when you sew the tabards to the obi you will form small pockets between the tabards and obi for your credit cards and cash, or stickers and trading cards to pass out to kids.

BELT:

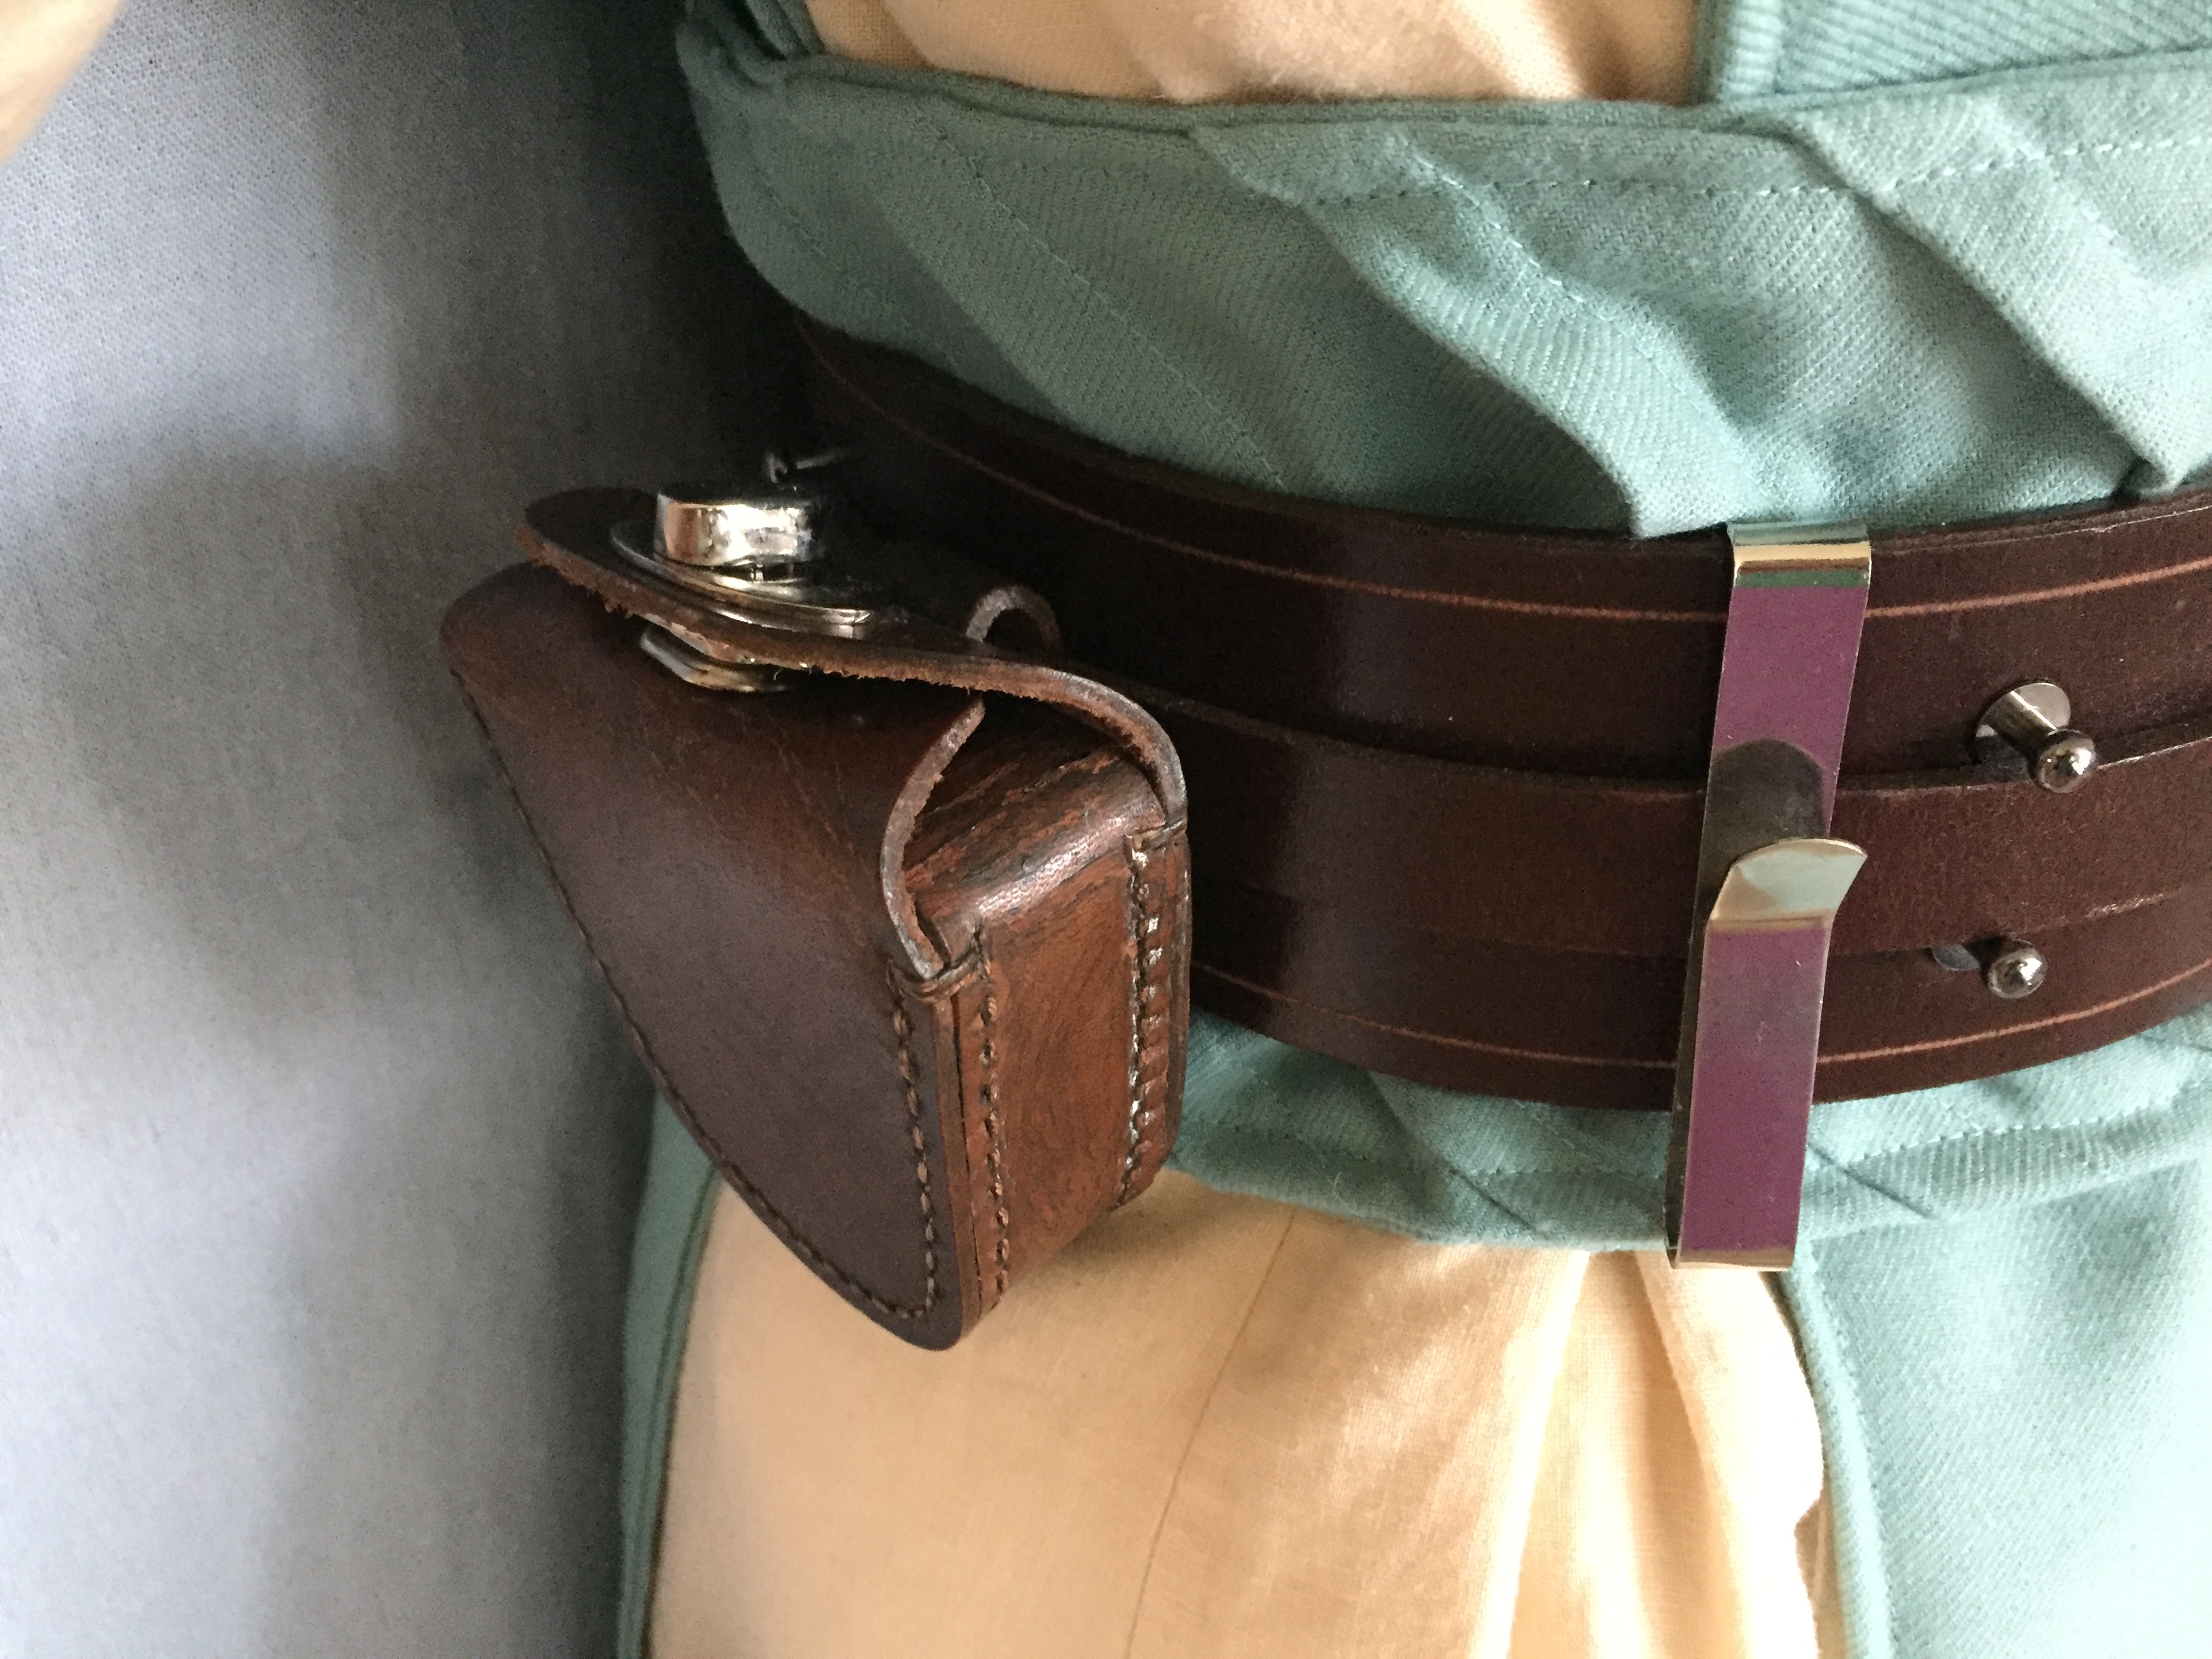
Leather and pleather belts are both approvable, but I chose a leather belt for durability since I plan to wear this costume a lot. My belt was custom-made for me by Mag Mel Creations on Etsy.  David does really great work and has wonderful customer service; I highly recommend his shop.

The classic Jedi belt consists of a wide belt with a skinny belt down the middle, with a buckle and studs holding the skinny belt in place.  My belt is dark brown leather and 2.5 inches wide but the width can vary depending on your height. There are different buckle types you can get but mine is the “Obi-wan” style. The buckle in front is not actually the main closure for the belt. Jedi belts overlap in the back and closes with studs (mine), Velcro, or snaps that are then hidden by a loop of leather that slides over the opening. IMG_8522.JPG

Your belt can be brown or black but should match your boots.

BOOTS:

Like the belt, your boots can be brown or black but need to coordinate with the belt. If you are following RL standards:

  • They should be tall but not extend over the knee.
  • Boots should be low-heeled.
  • Laces are not allowed.
  • Zippers are ok but need to be facing the inside of your leg.
  • Decorative buckles are ok but not if they are overly numerous.
  • I have an elastic gusset down the back of my boots, which are considered ok if they are discreet and blend in.

Like the belt, boots can be leather or pleather, but if you are going to be trooping a lot or marching in parades get some good quality leather boots to be kind to your feet!

I have very narrow calves so my options are limited, but I was able to get “Gabi” boots from Slimcalfboot.com during a sale. They also have a sister company called Wideshaftboot.com.
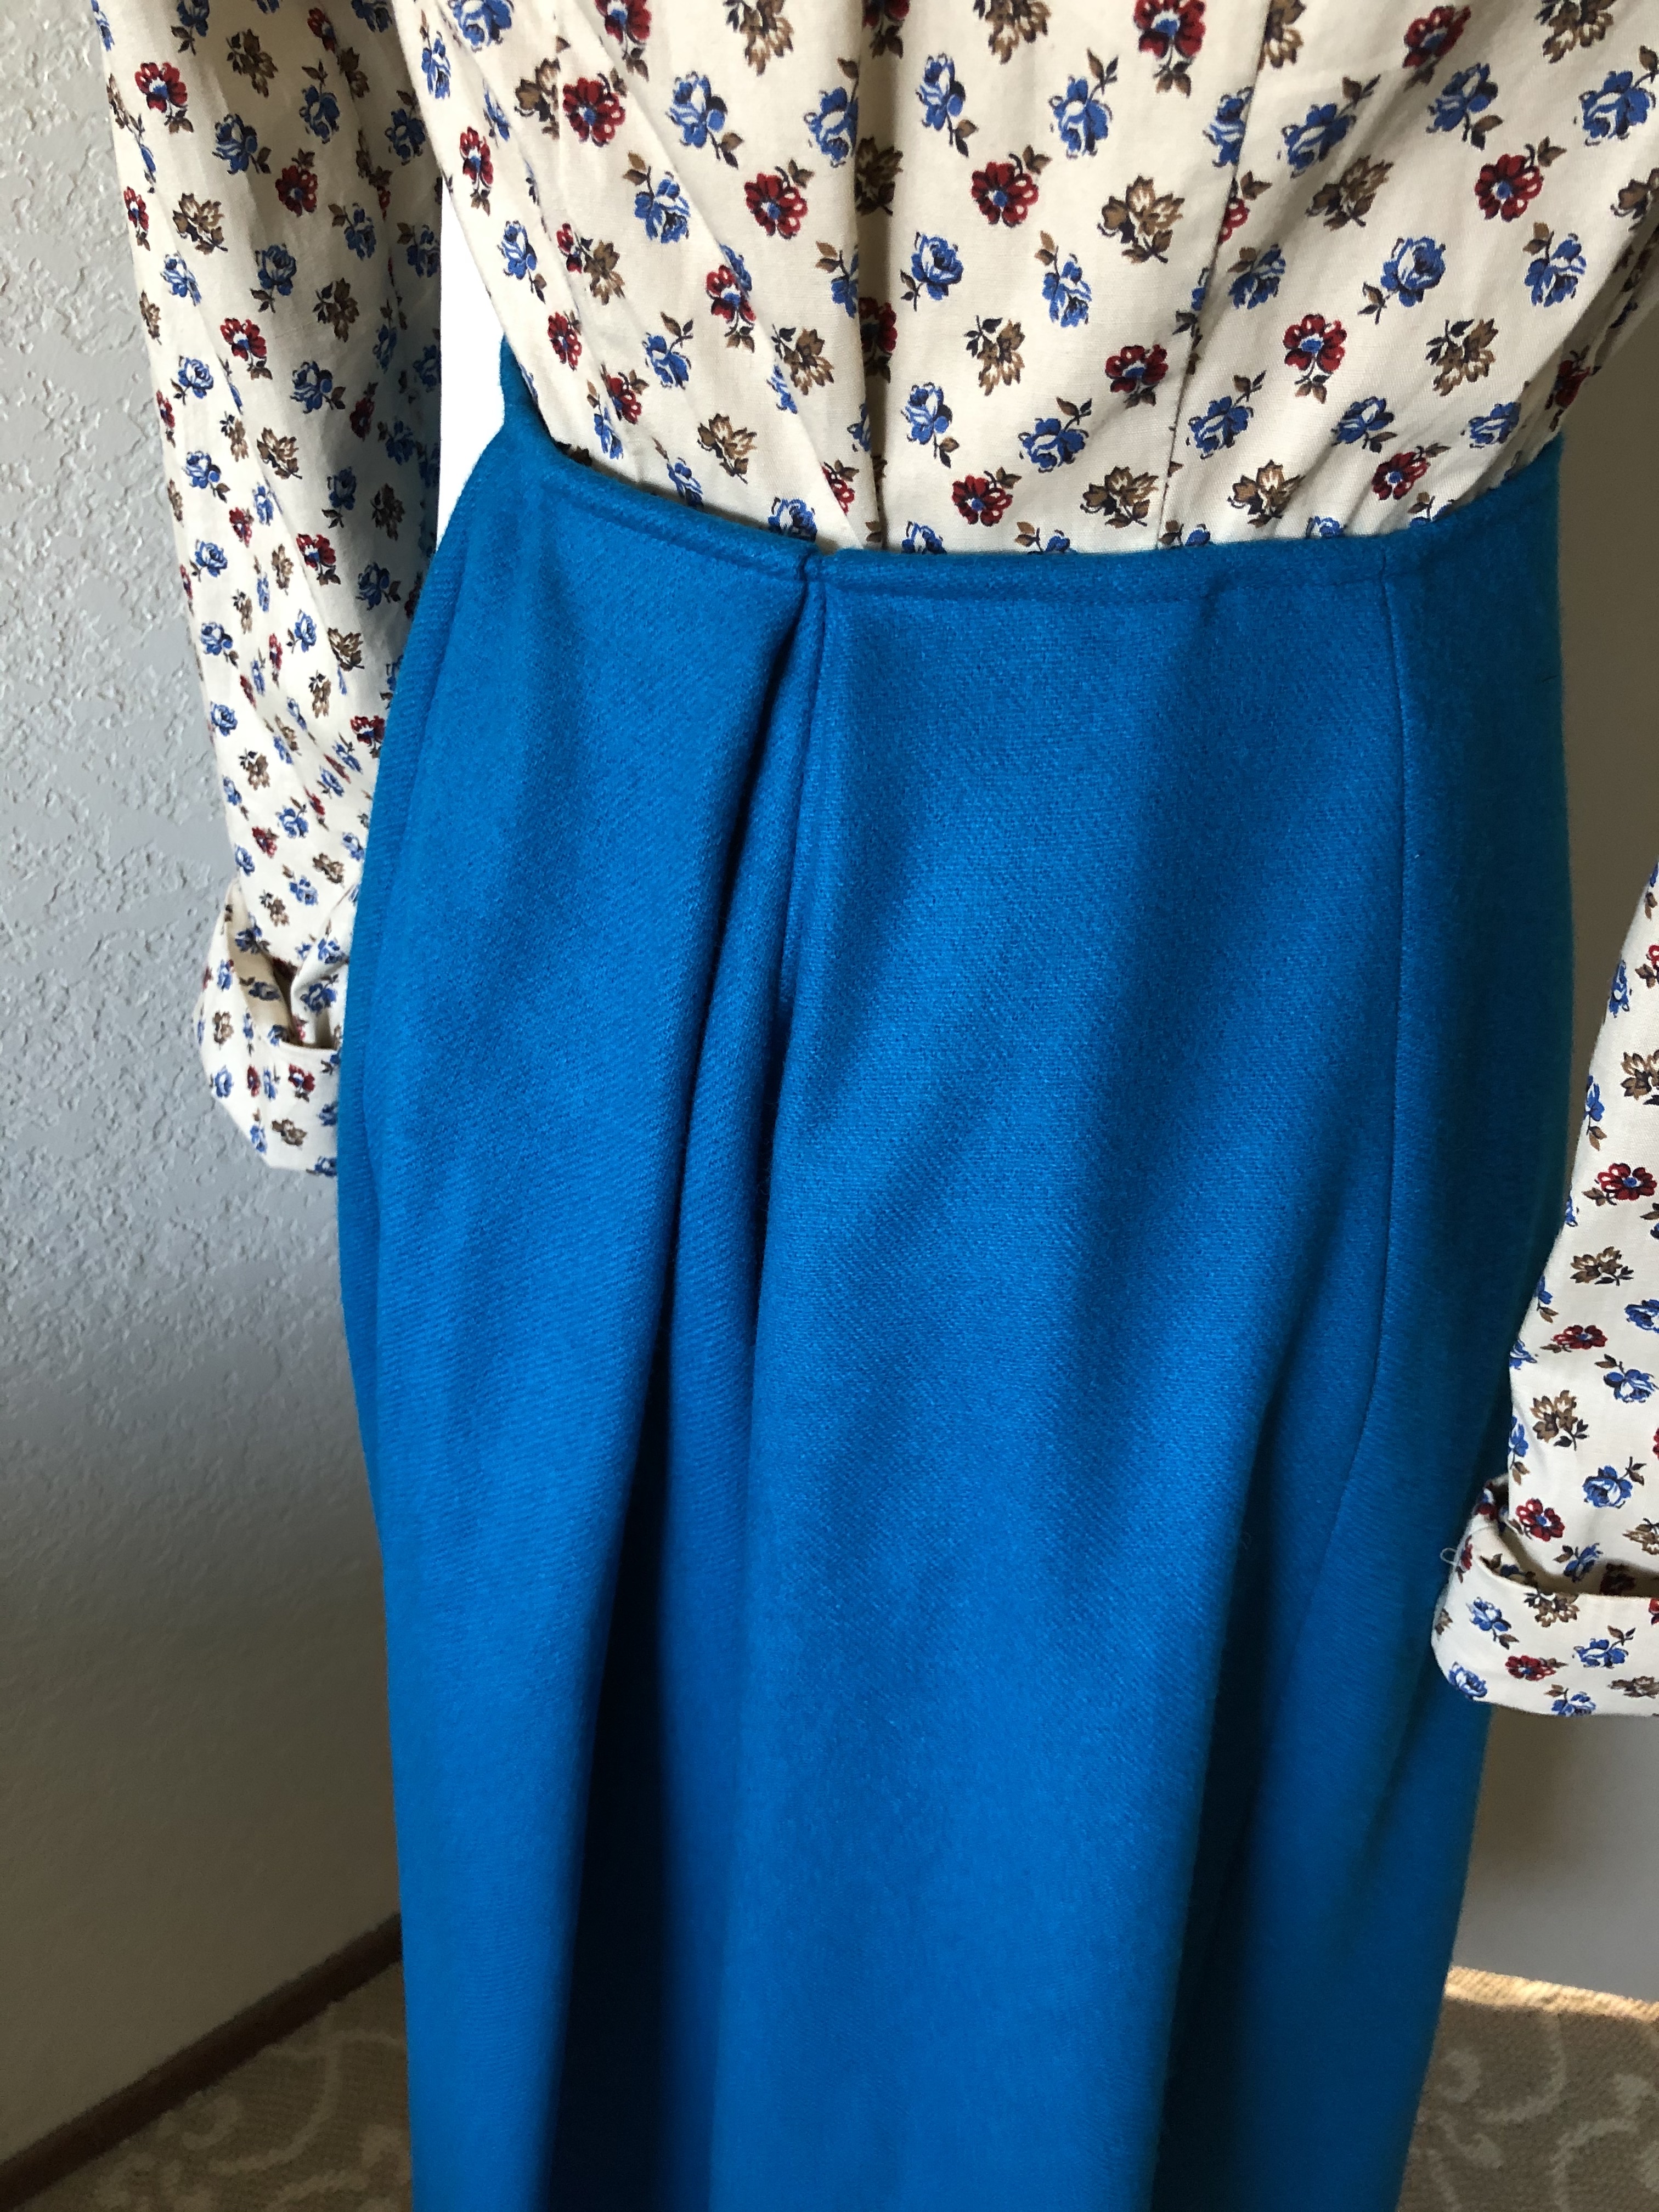
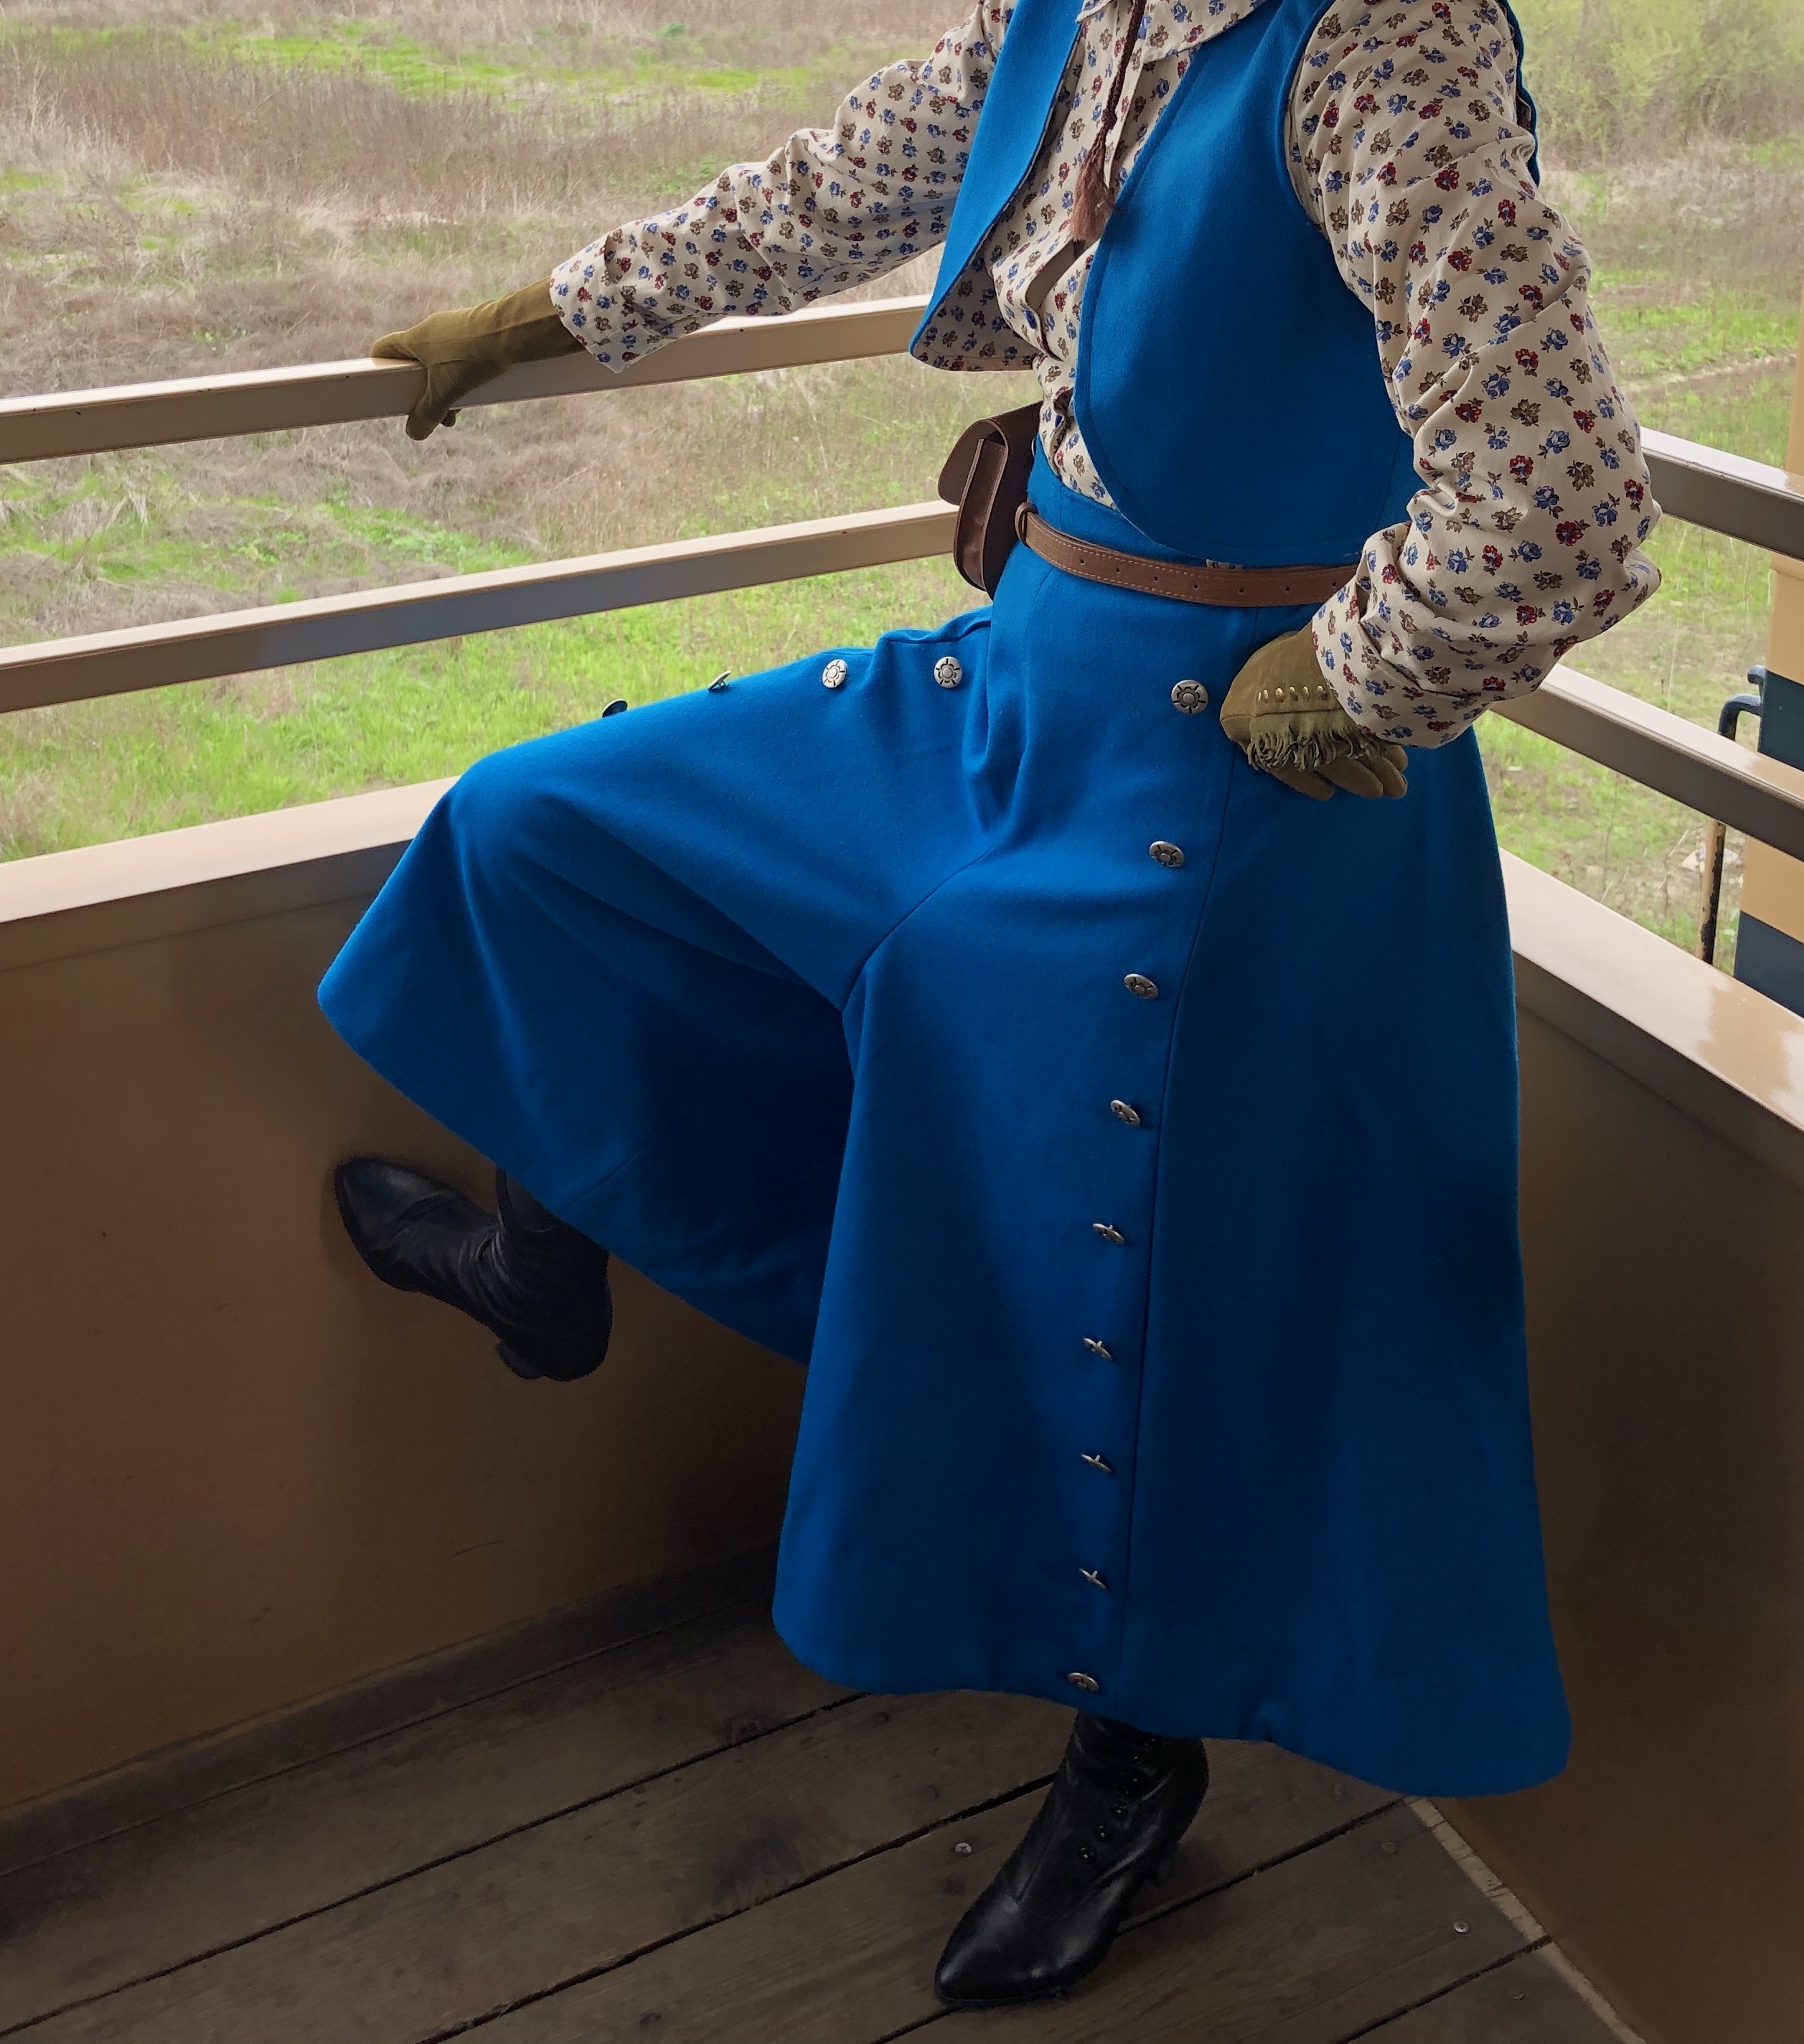
Screen Shot 2019-05-24 at 1.39.46 PM

PANTS:

Getting pants are the easiest part of the ensemble! Only a little bit between the bottom of your tunic and top of your boots show, so there’s a lot of leeway to choose pants. You may even already have some in your closet that work.

  • Pants should be plain and in a solid color.
  • If there are pockets they should be hidden by your tunic. (No cargo pants with pockets down the side of your leg).
  • Whether they close with elastic, drawstrings, or buttons doesn’t matter because it won’t show. (Your outer tunic is supposed to be long enough to cover your butt).
  • Skirts are also allowed by RL instead of pants but they are supposed to be long enough to not expose any skin.

I made my own pants to match my robe, but many people buy nursing scrubs or use khakis. My pattern is self-drafted but you can use a pajama pants pattern and then taper the legs a bit.IMG_0398.JPG

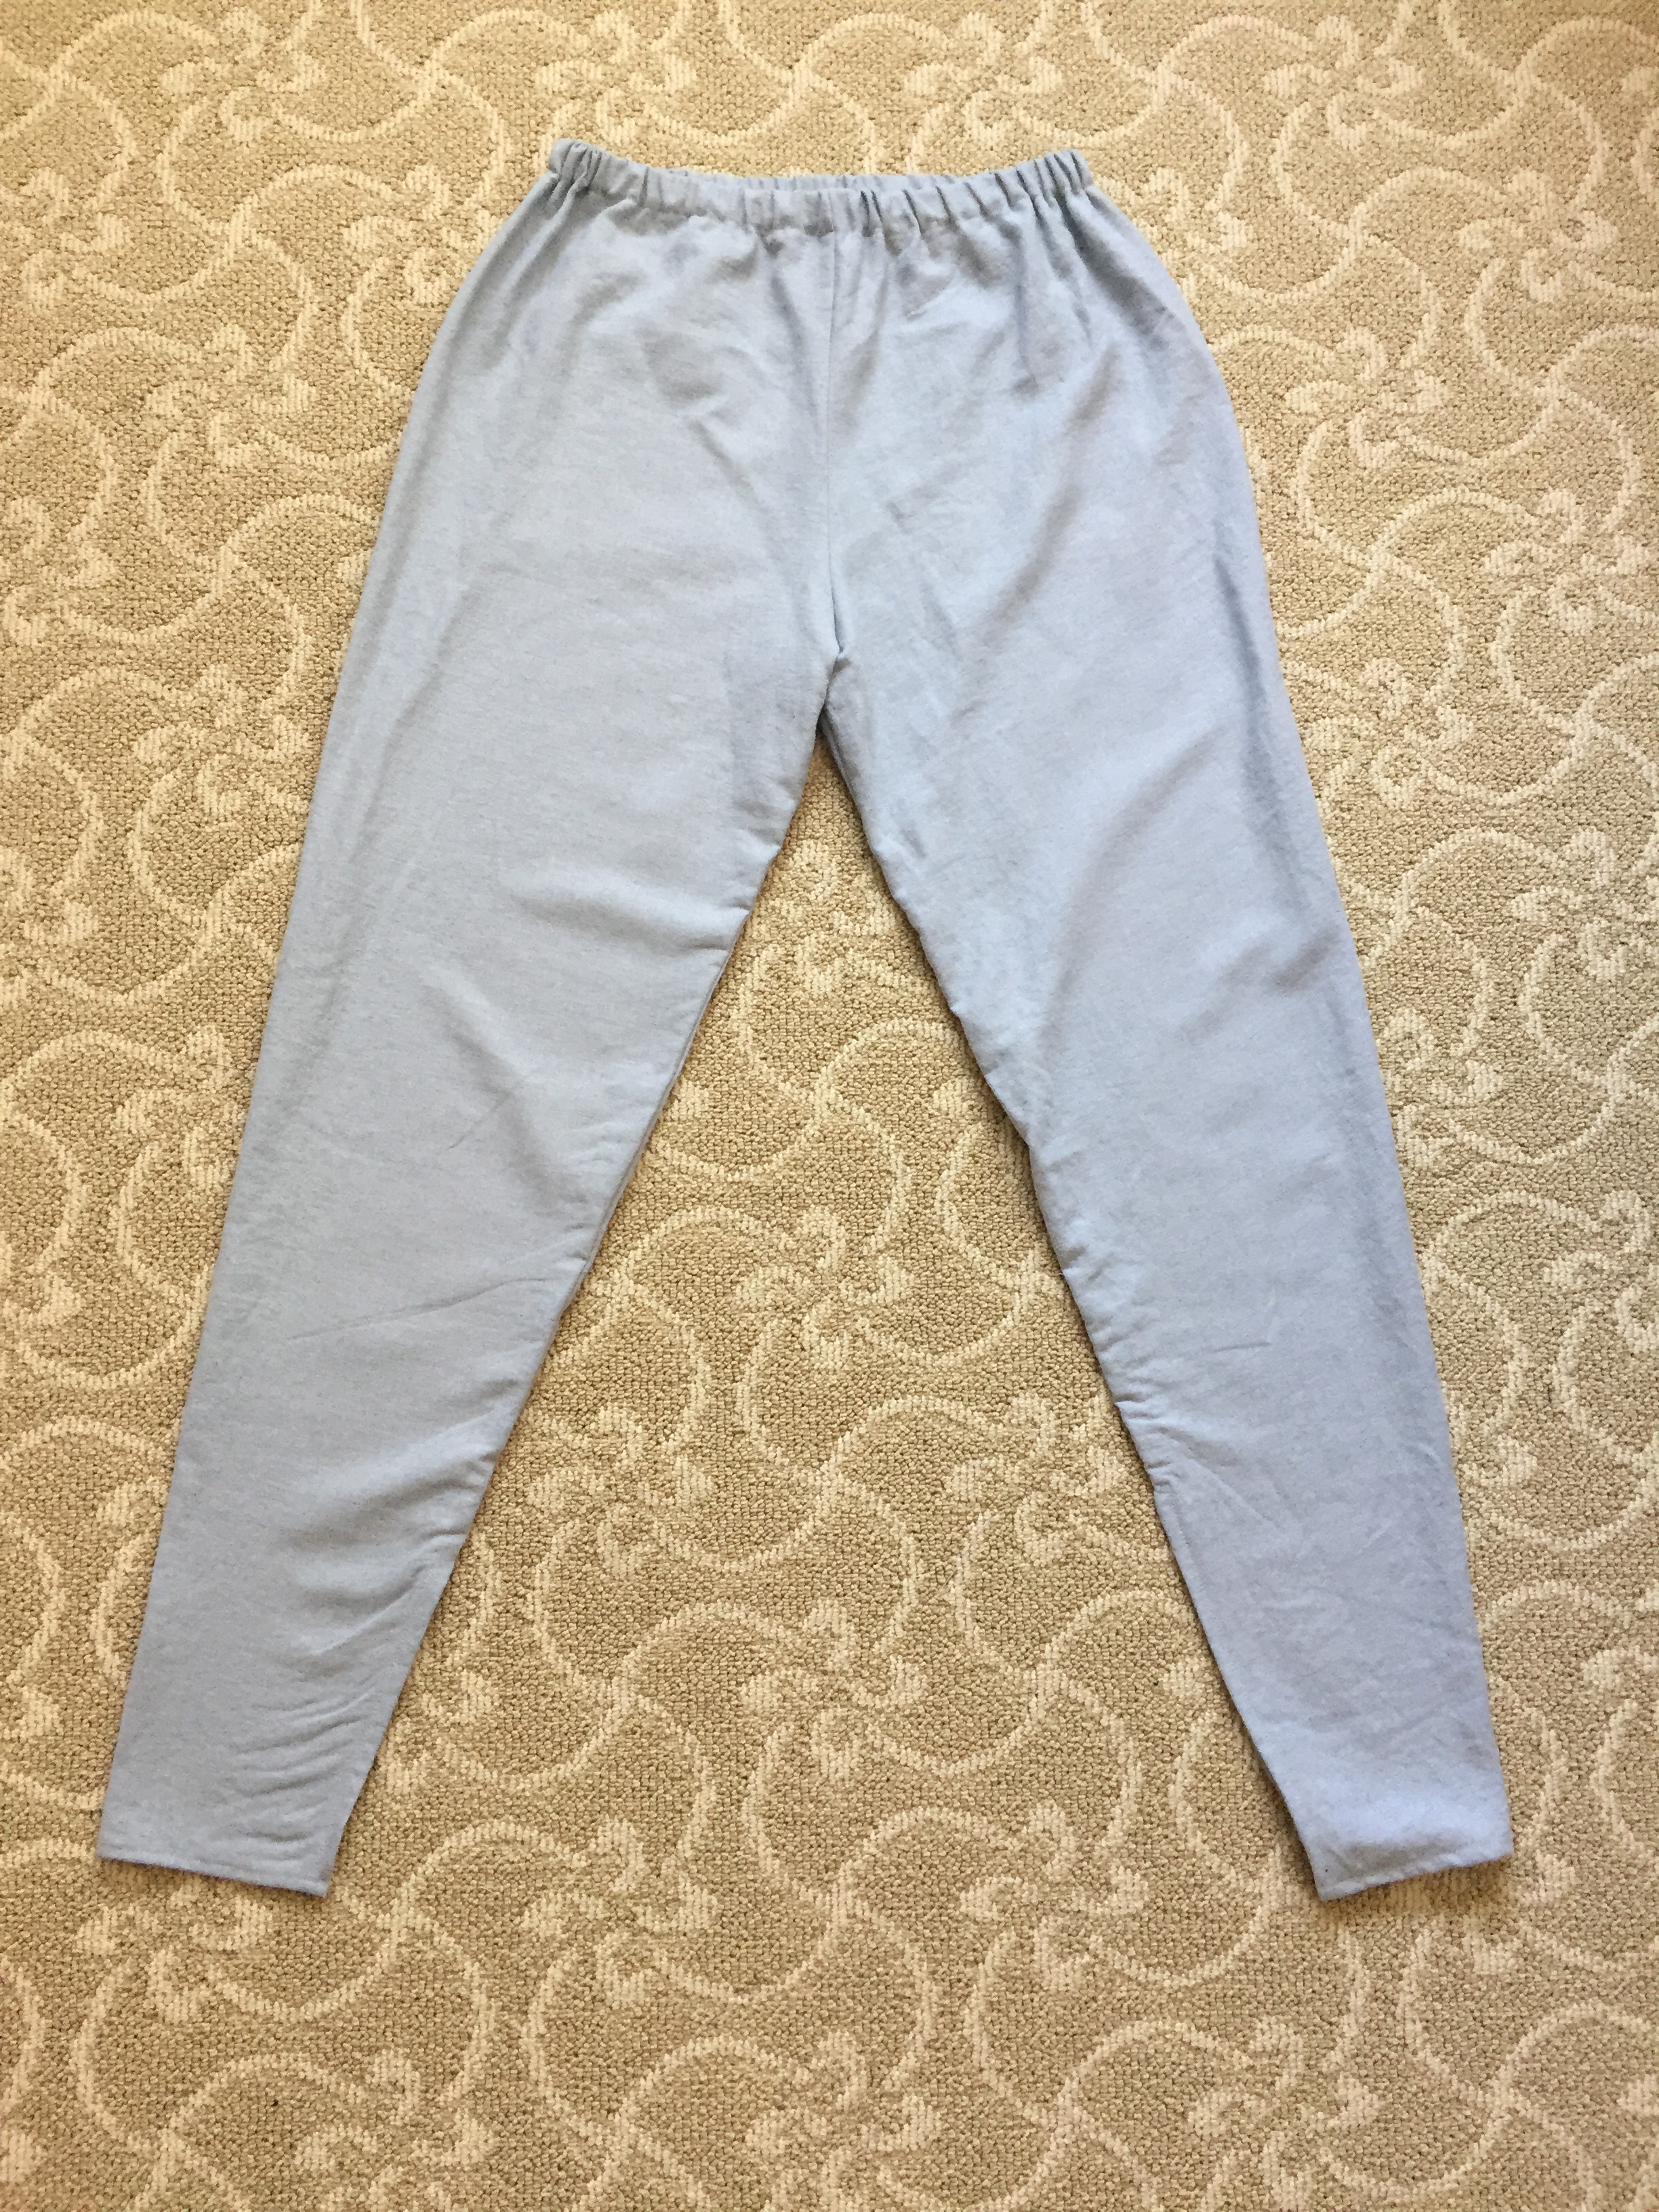
I added 2 pockets to the back big enough for a phone and a wallet. My waistband is elastic because that’s a lot faster than putting in a zipper and placket.
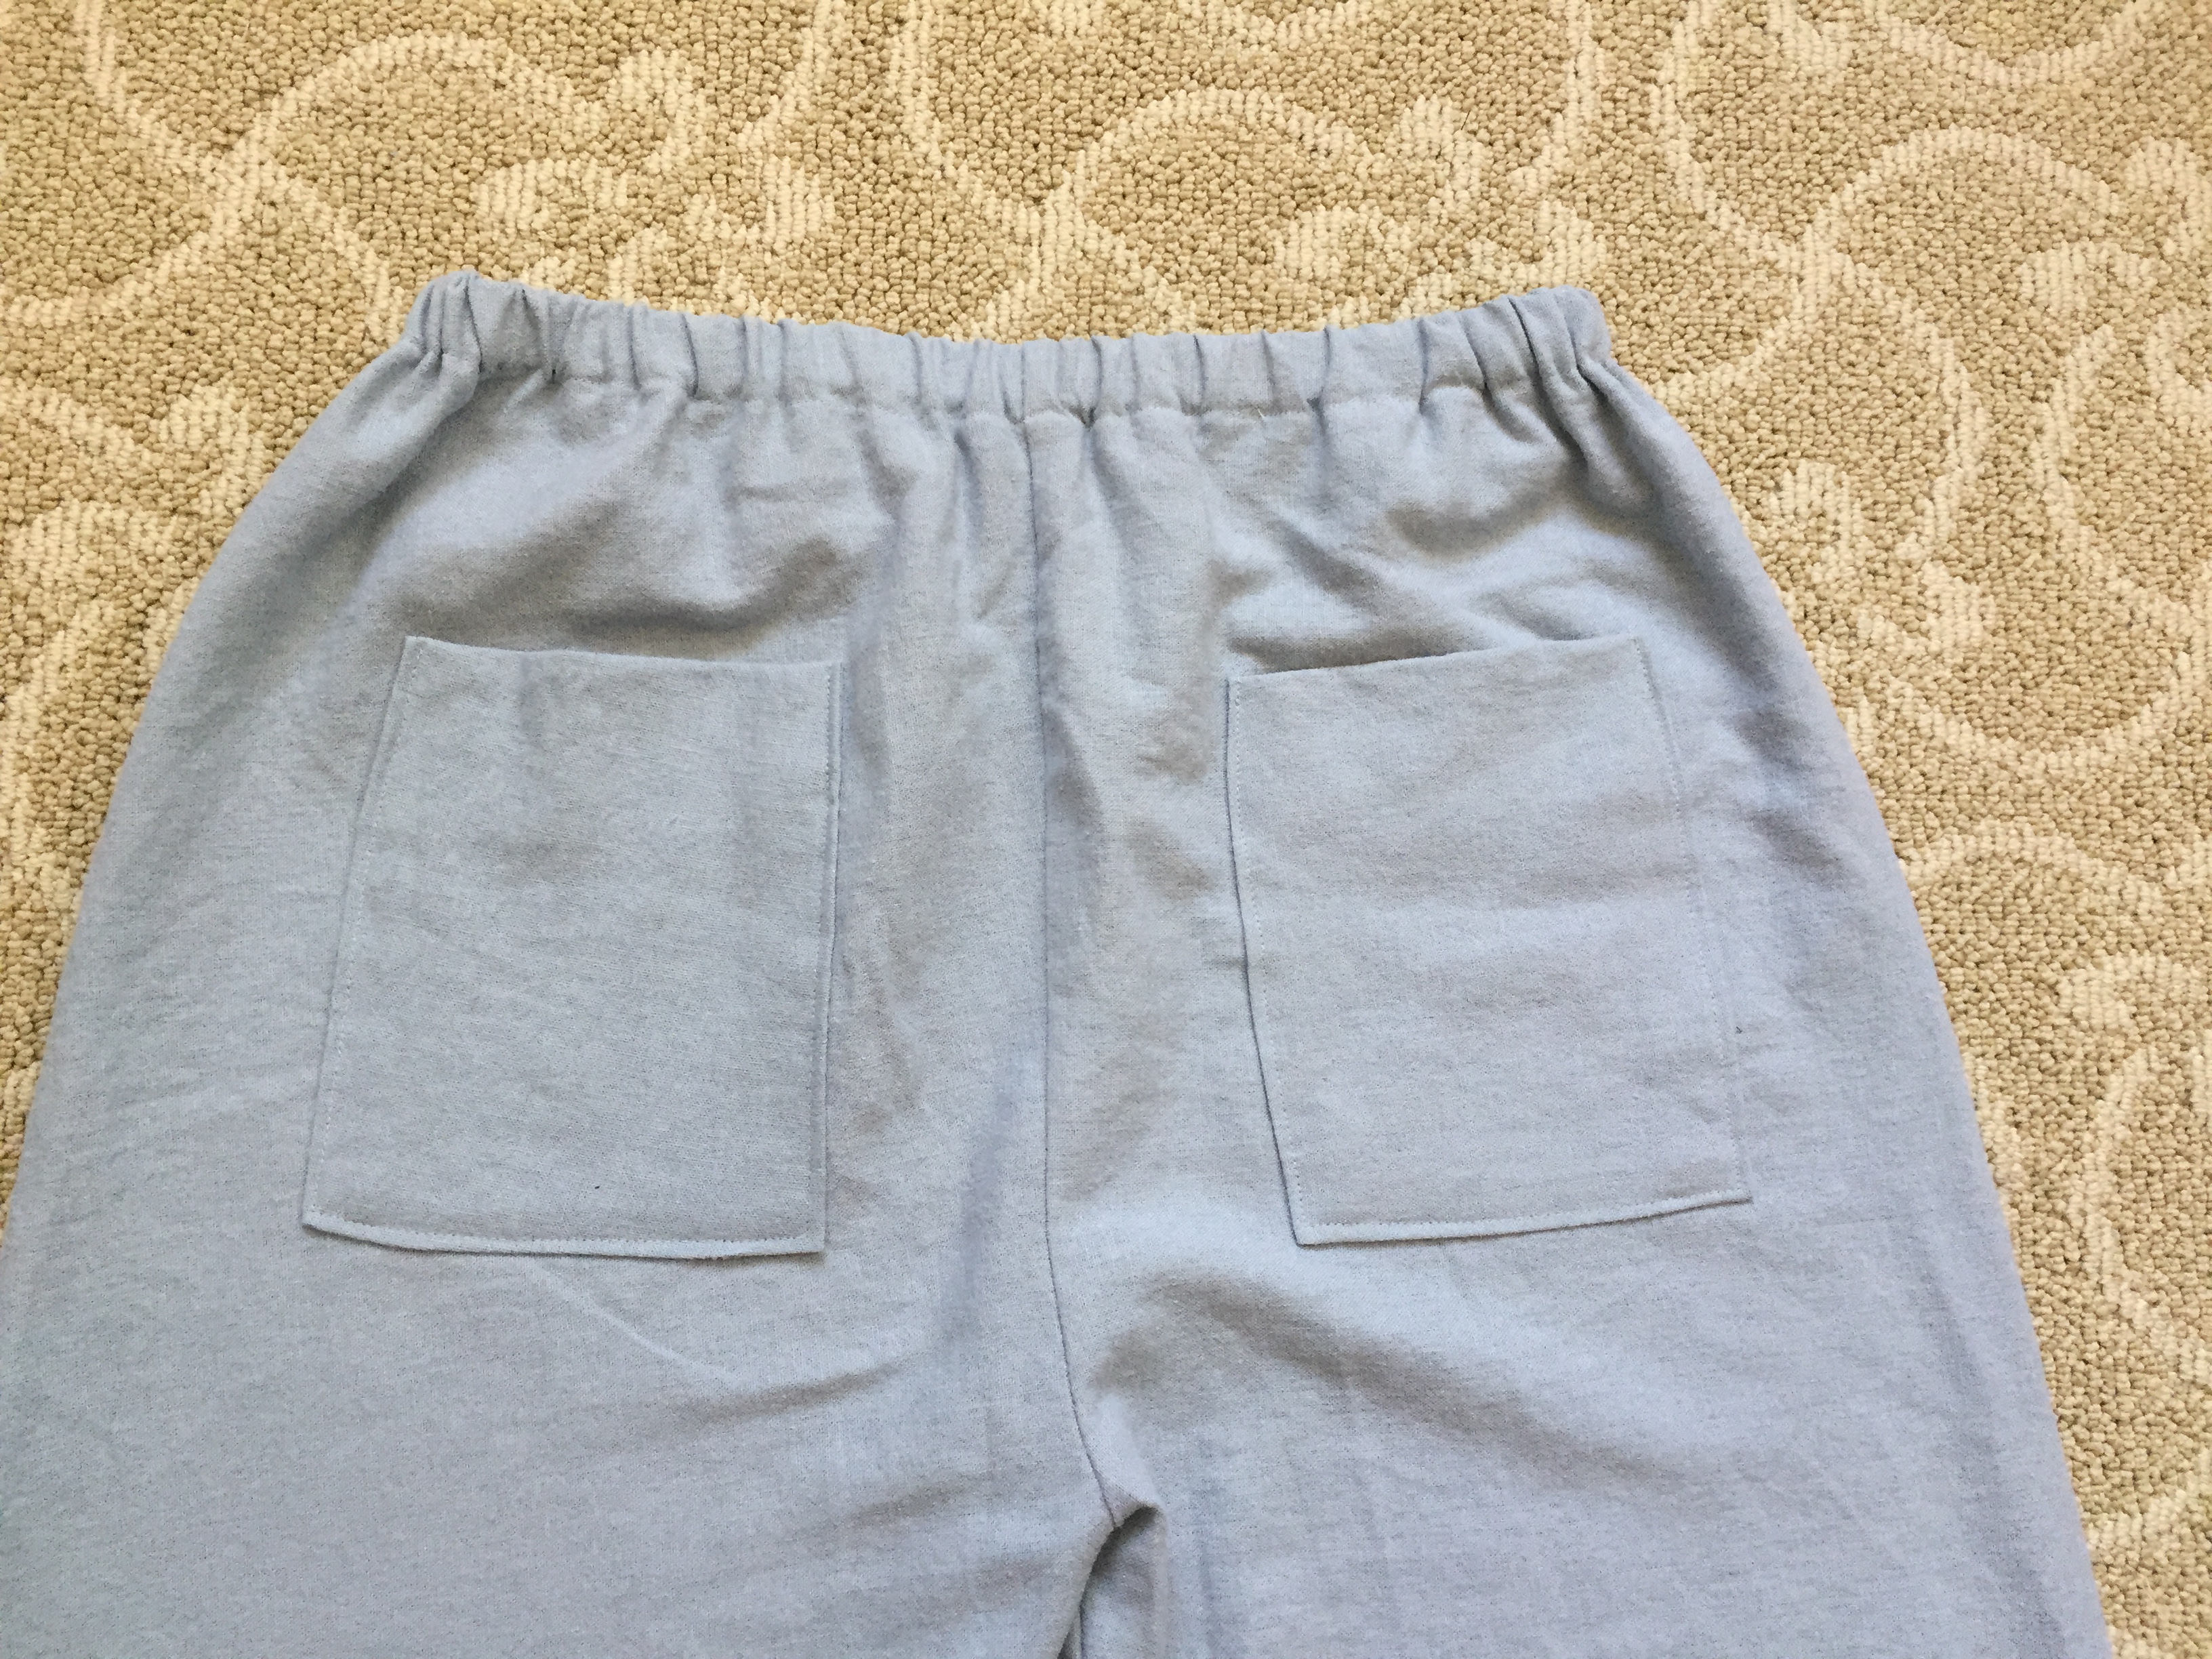
 IMG_0400.JPG

ROBE:

The robe is an optional item but fun! Jedi robes are very oversized with really large hoods and sleeves. I used the aforementioned Simplicity 8723 Harry Potter robe pattern (affiliate link) but made a few adjustments:

  • Wizard hoods are pointed. Jedi hoods are rounded. You’ll want to cut off the pointy tip and round out the back of your hood pattern piece.
  • You’ll need to cut your hood bigger by extending the pattern pieces in all directions. Jedi hoods are HUGE. Did I emphasize they are SUPER BIG? They are so large that when you wear them the sides of the hood cover your shoulders. hoodfront
  • When the hood is down, the back of it almost touches your butt. To get all that fabric into your neckline you’ll need to do big pleats. (Your hood does not need to be lined, but I did because I wanted all the seams and edges to be very neatly finished. I’ve seen Jedi with serged one-layered hoods get approved so it’s not necessary).robeback.JPG
  • The sleeves are humongous and long enough to cover your hands. If you are using the Harry Potter robe pattern you’ll need to extend the length of the sleeves.
  • The robe should be close to floor-length.  (The RL standard is no more than 2 inches off the floor). The HP robe pattern only goes to about knee length so you’ll want to lengthen the robe. Please note, if you plan to run, drop the robe!68369096_2548470338771719_1778429370386350080_n

POUCHES:

Jedi have leather pouches attached to their belts. (If you want to use it as a RL minimum extra you’ll need 2). The pouches are allowed to be pleather or resin. There is a lot of leeway to the pouches as long as they match the look of your belt. A lot of people use military surplus ammo pouches because they are easy to find and inexpensive. You may prefer to find a pouch large enough to hold a phone or wallet. I opted for a small pouch due to my proportions, and because I already put pockets in my pants.

My pouch is a military surplus leather slingshot pellet holder (affiliate link) that I darkened with a few layers of shoe polish and wax.

IMG_0016.JPG

Some Jedi belt makers will also make you a custom matching pouch if you ask.

LIGHTSABER:

Lightsabers are a very personal item with lots of possibilities. As a generic Jedi and not a specific character you can pick a design that appeals to you instead of looking for screen accuracy.  If you want a fun costume you can pick up a plastic lightsaber at a toy shop. If you want a nicer one with a metal hilt the cost varies wildly depending on design, if it has a sound board, if it can do multiple sound effects, if it can change colors, if you had a saber smith do custom engraving, etc. I’ve seen lightsabers cost anywhere between $50-$1000 or more. There are a number of companies out there making lightsabers so make Google your friend. IMG_9995

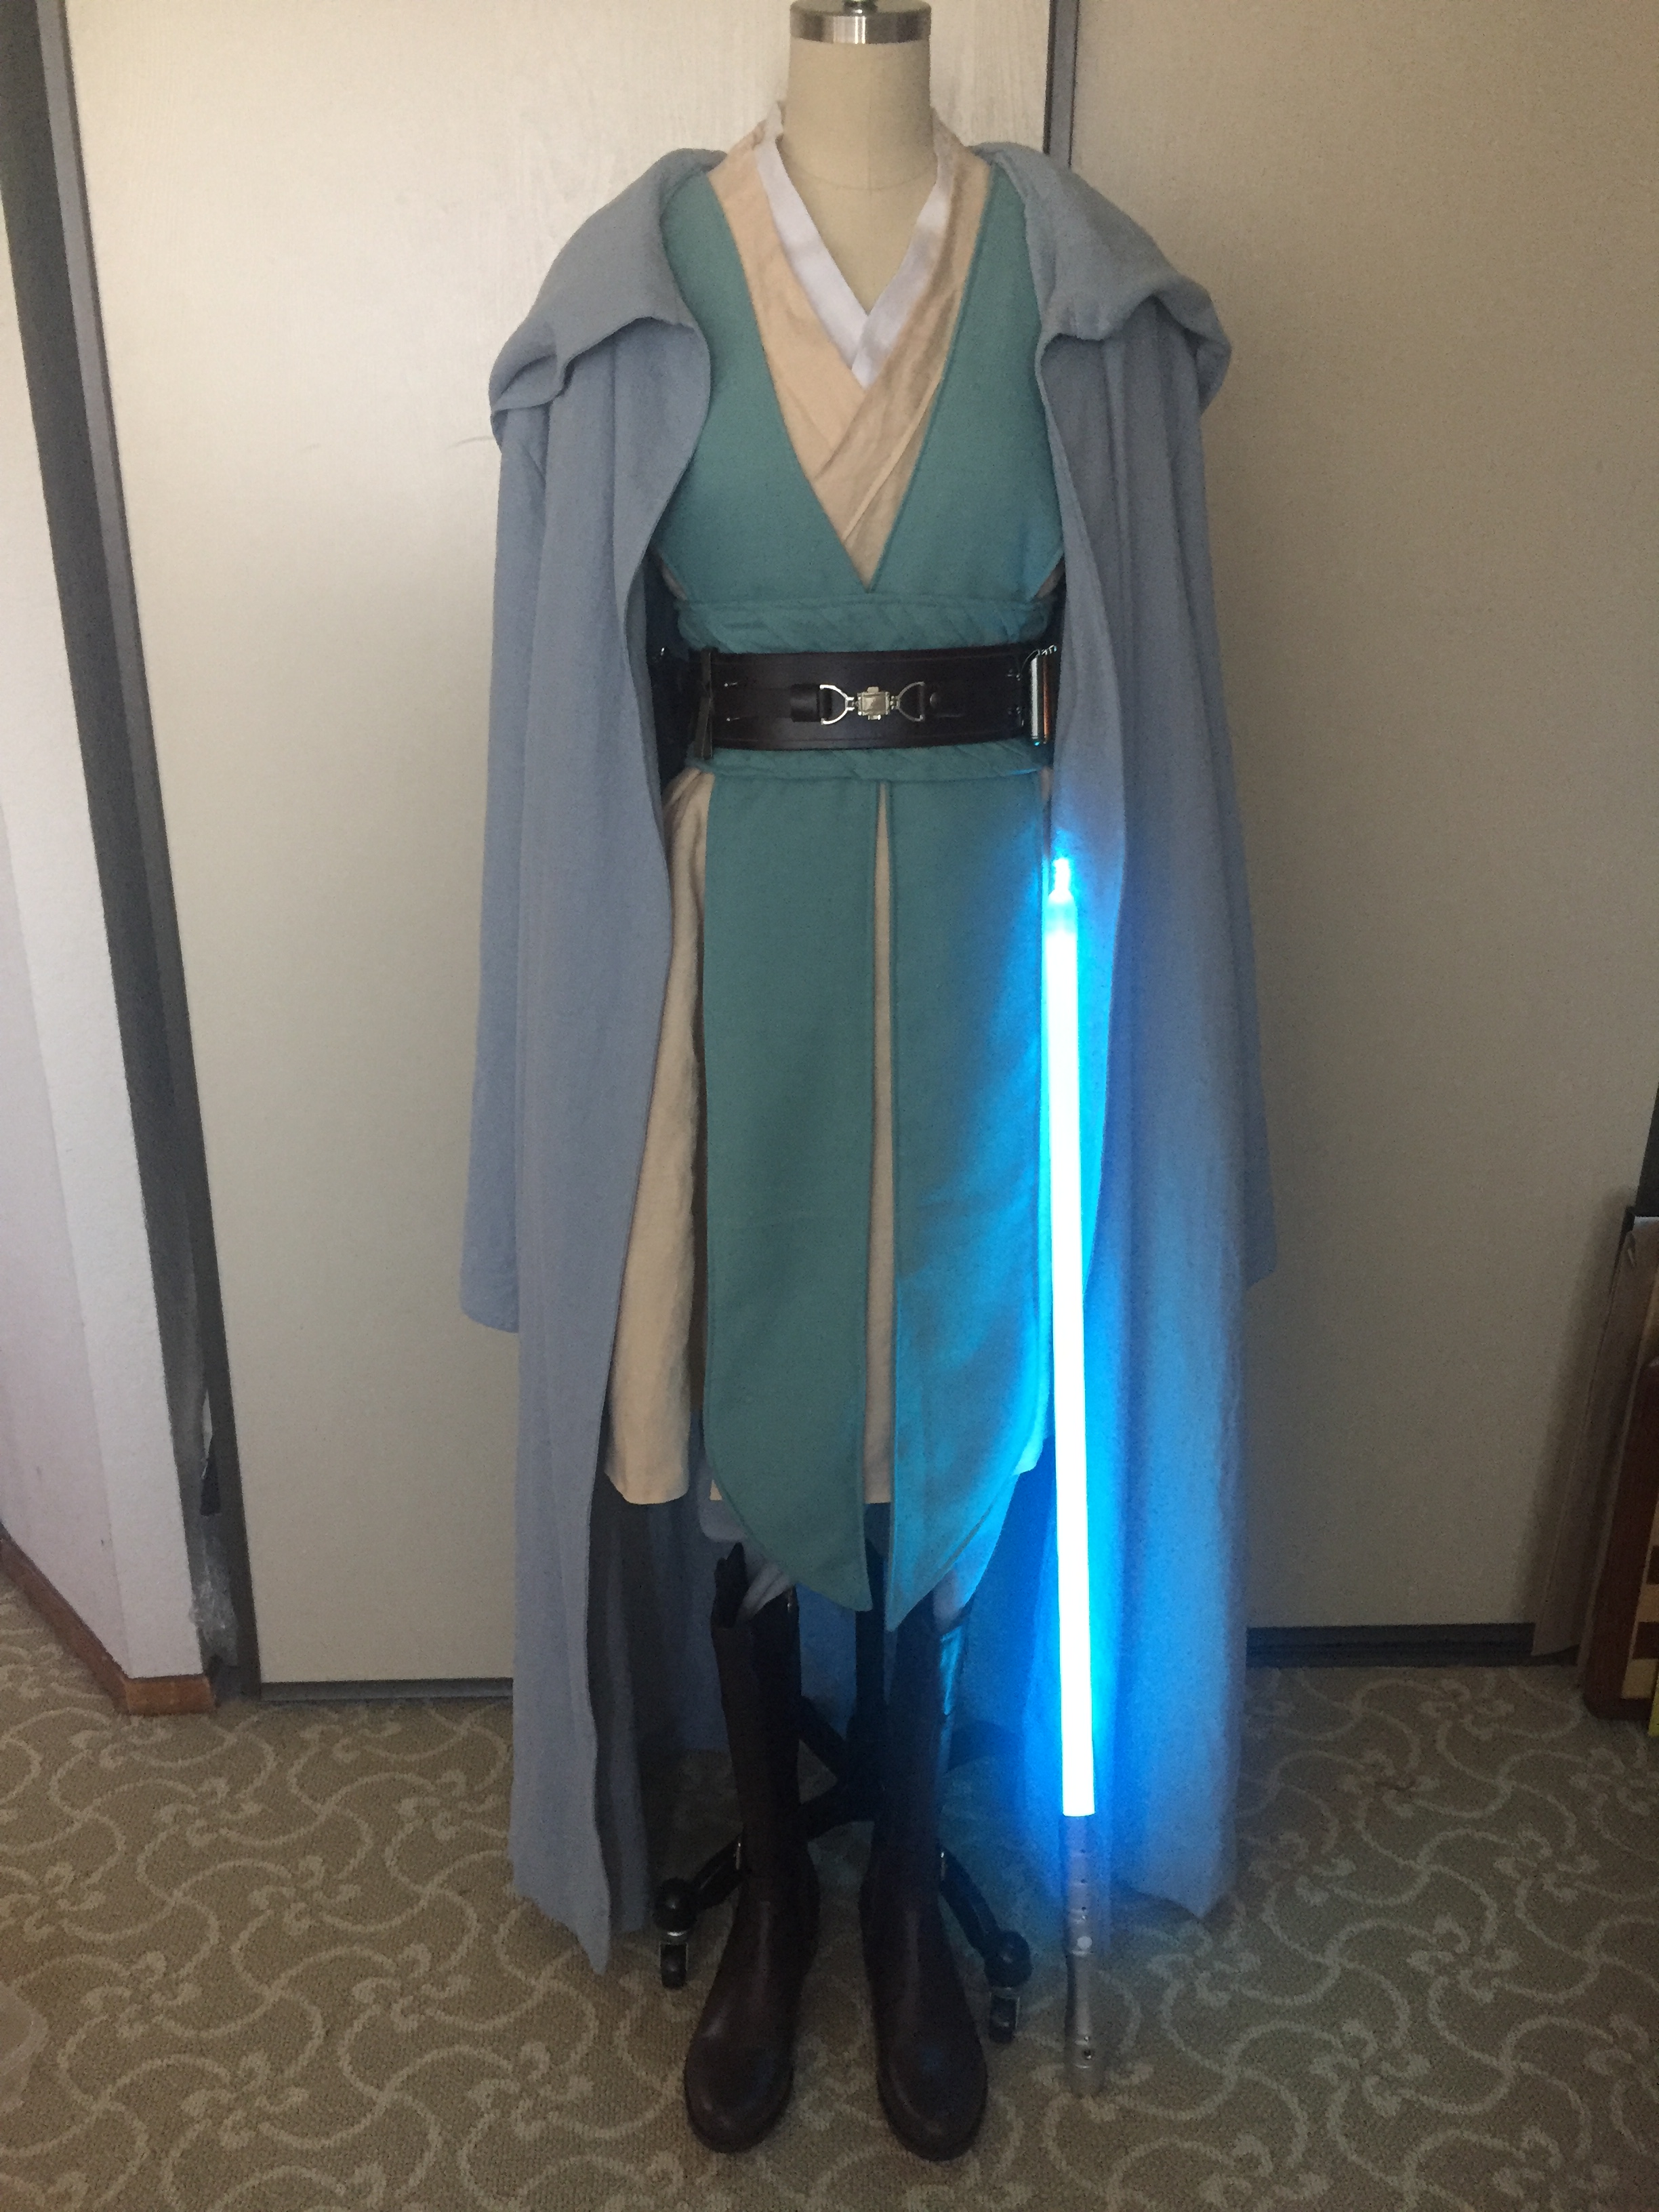
However, if you are interested in mine, it is a YDD from Amazon (affiliate link), which was recommended to me as being good for small hands. At about $80 with sound effects it is a great deal. I like the smooth look because it’s comfortable to hold. As far as I can tell it is the same as the Kyojin Tiny Giant from Pach Store, but I have not purchased from that company myself.Screen Shot 2020-01-15 at 9.06.25 PM

LIGHTSABER CLIP:

There are two main ways to attach your lightsaber hilt to your belt depending on your lightsaber. If your hilt has a D ring then you will need a “hook” type of attachment and if your hilt has a Covertec wheel then you will need a Covertec-style belt clip (affiliate link).

I have a hook attachment for my belt. You can buy “Jedi lightsaber clips” but a really cost-effective way to get the look and function is to buy an archery quiver clip (which is used to hold the quiver of arrows to your belt) from a sporting goods store. Mine is a “Neet chrome belt clip” (affiliate link). One end hooks onto your belt and the other end is a hook for your D ring.

IMG_0016

FOOD CAPSULES:

Clipped to the belt are also little metallic pieces called “food capsules.” If you are going for RL approval you will need at least a set of 4; some people have 8. I bought my Jedi food capsules on Amazon (affiliate link), and they come in a set of 8 but I only use 4 of them.IMG_0017.JPG

HOW MUCH FABRIC DO I NEED?

The amount of fabric you use will depend on your size of course, but to give you a rough idea this is how much I used (as a 5’6″ tall slender person):

All fabric was wide widths (about 54″).

HOW MUCH WILL THIS COST?

The cost of your Jedi costume will vary widely depending on what sort of materials you use, how fancy your lightsaber is, and whether your goal is to be Rebel Legion approvable or have a quick Halloween costume. I plan to wear this costume multiple times a year for many years and need to be comfortable during long hours so I invested in nice fabrics (all linen and wool) and high quality genuine leather boots and belt. Including my lightsaber (which was on the low end of the price range) I spent about $500. DON’T PANIC.  If you use cotton or polyester fabric and pleather boots and belt I think you could put together a Jedi for $200, or even maybe $100 if you get creative at the thrift store. If you are on a budget I’d recommend going to a thrift store and looking for used boots there, and seeing what curtains and sheets you could use to make your garments instead of buying new fabric. If you have a bit of skill you can try your hand at making your own belt as well. (If you are not looking for RL approval you have a lot more flexibility in terms of faking the look with a store-bought belt). If you skip the robe, which takes up a lot of fabric, that will bring your costs down as well.

I wrote this guide with Rebel Legion approval in mind, but if you are not interested in that you can simplify or skip items. Also please keep in mind that your goals are your goals. Don’t let anyone make you feel embarrassed if you have a low budget, like unusual color combinations, or want a costume for fun and not for official approval.

Good luck and May the Force Be With You!Miss Vivien_s Con-Ex-1

EndorBaseCards_2.3x3.5_plusBleed_VivienLeeJedi_Front

My Rebel Legion trading card, graphics by Colin Adams (OddViking)

HEY WHAT’S UP WITH ALL THESE “AFFILIATE LINKS”?

I am required to disclose that if you buy something through the Amazon link I get a small percentage of the sale that goes towards my domain registration fees and other costs associated with hosting the many photos on this website. (I don’t generate a profit on this blog; I just hope to break even). If you feel extra generous you can buy me a “coffee.” Thank you for reading!
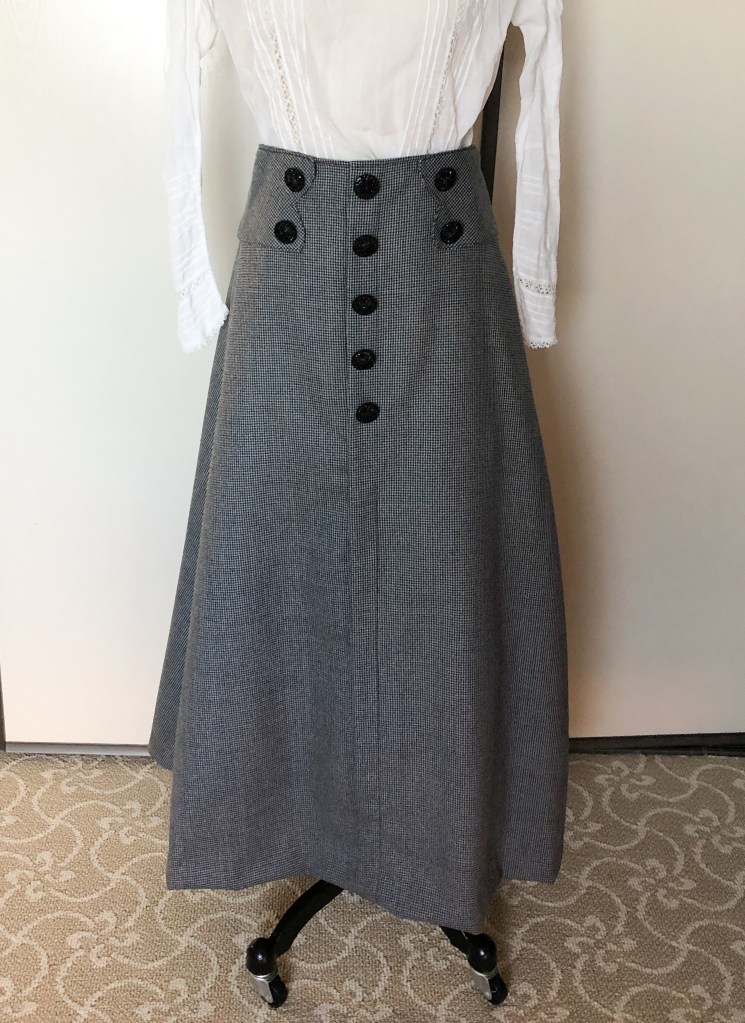
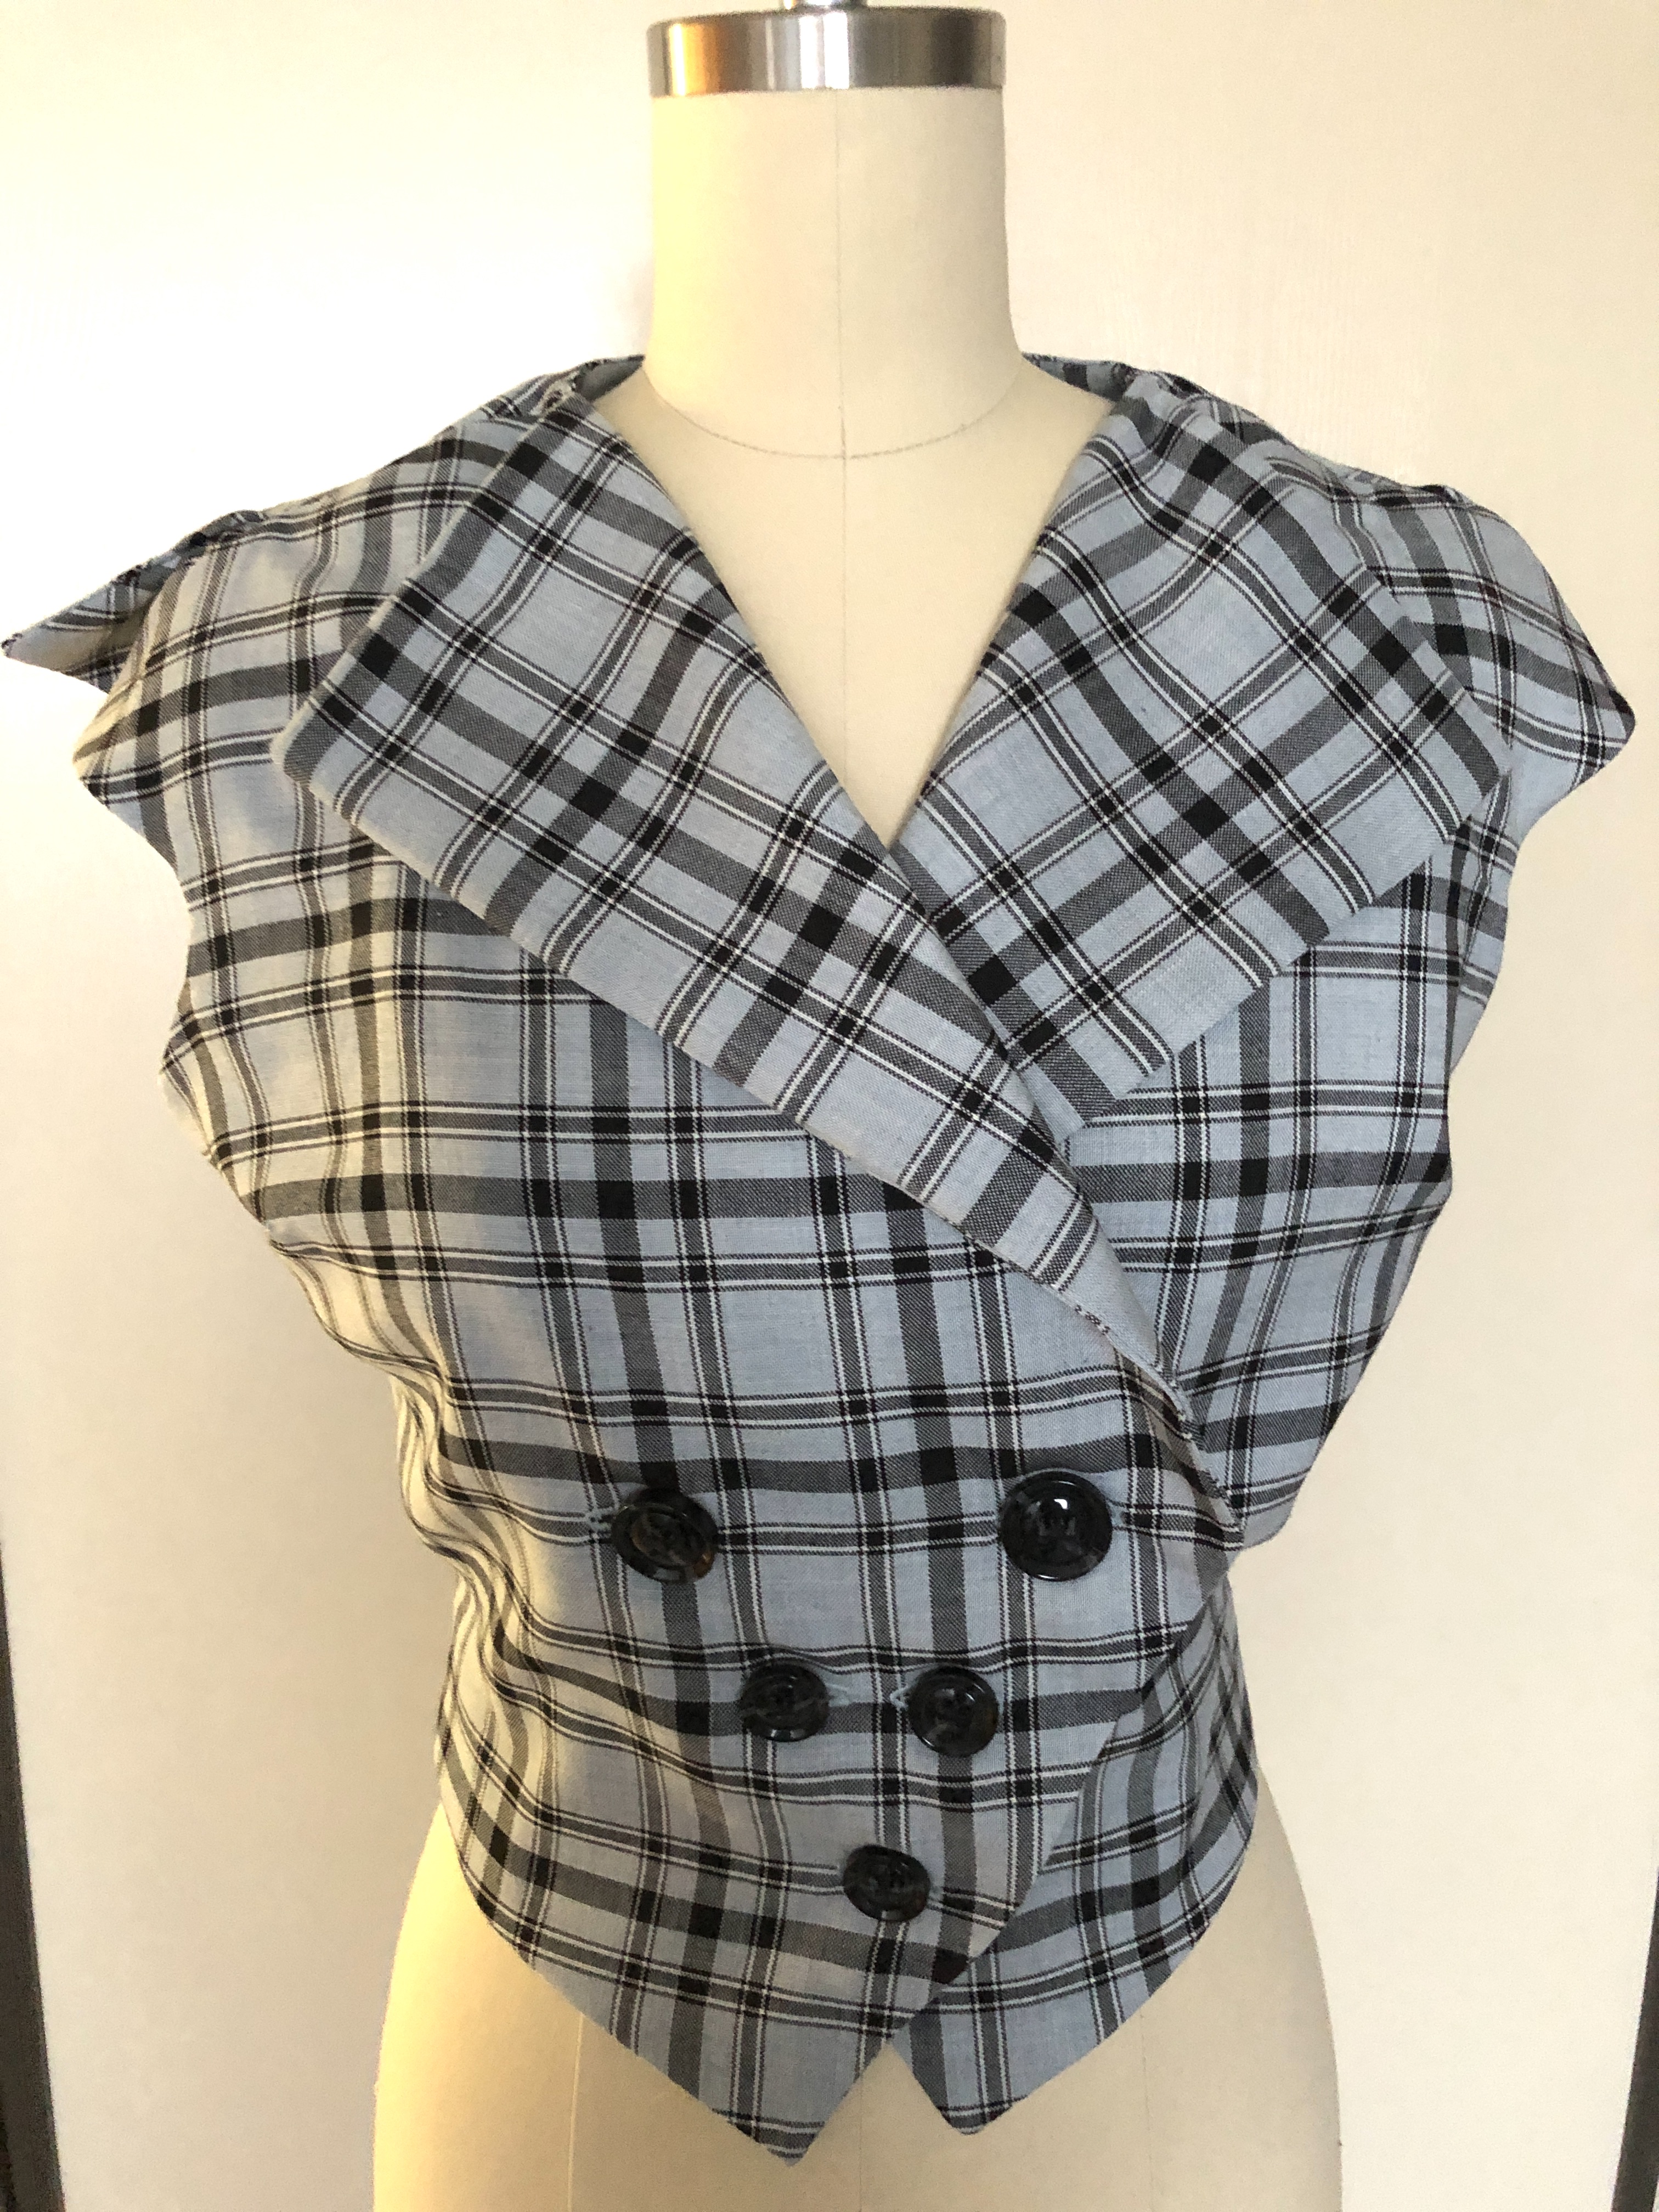
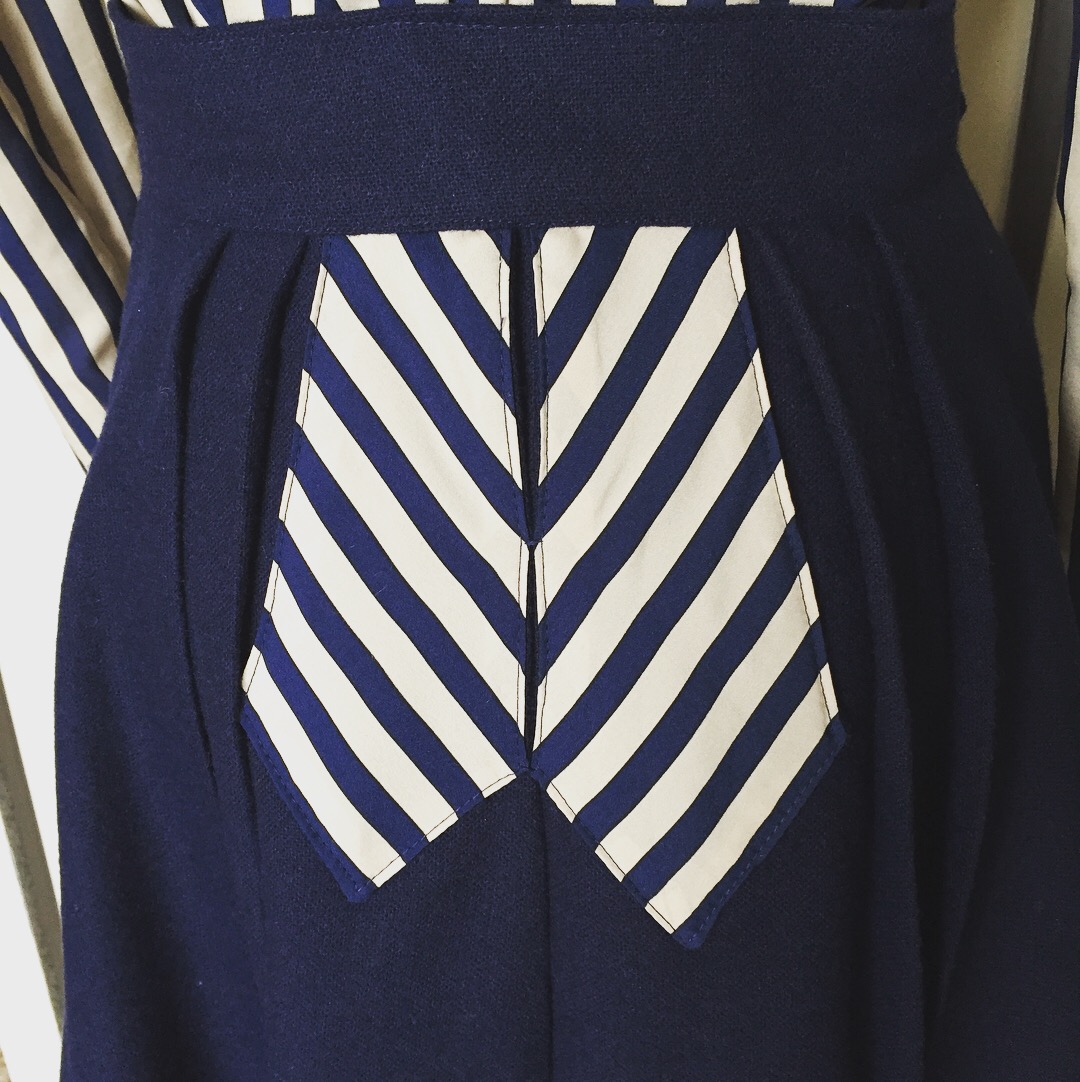
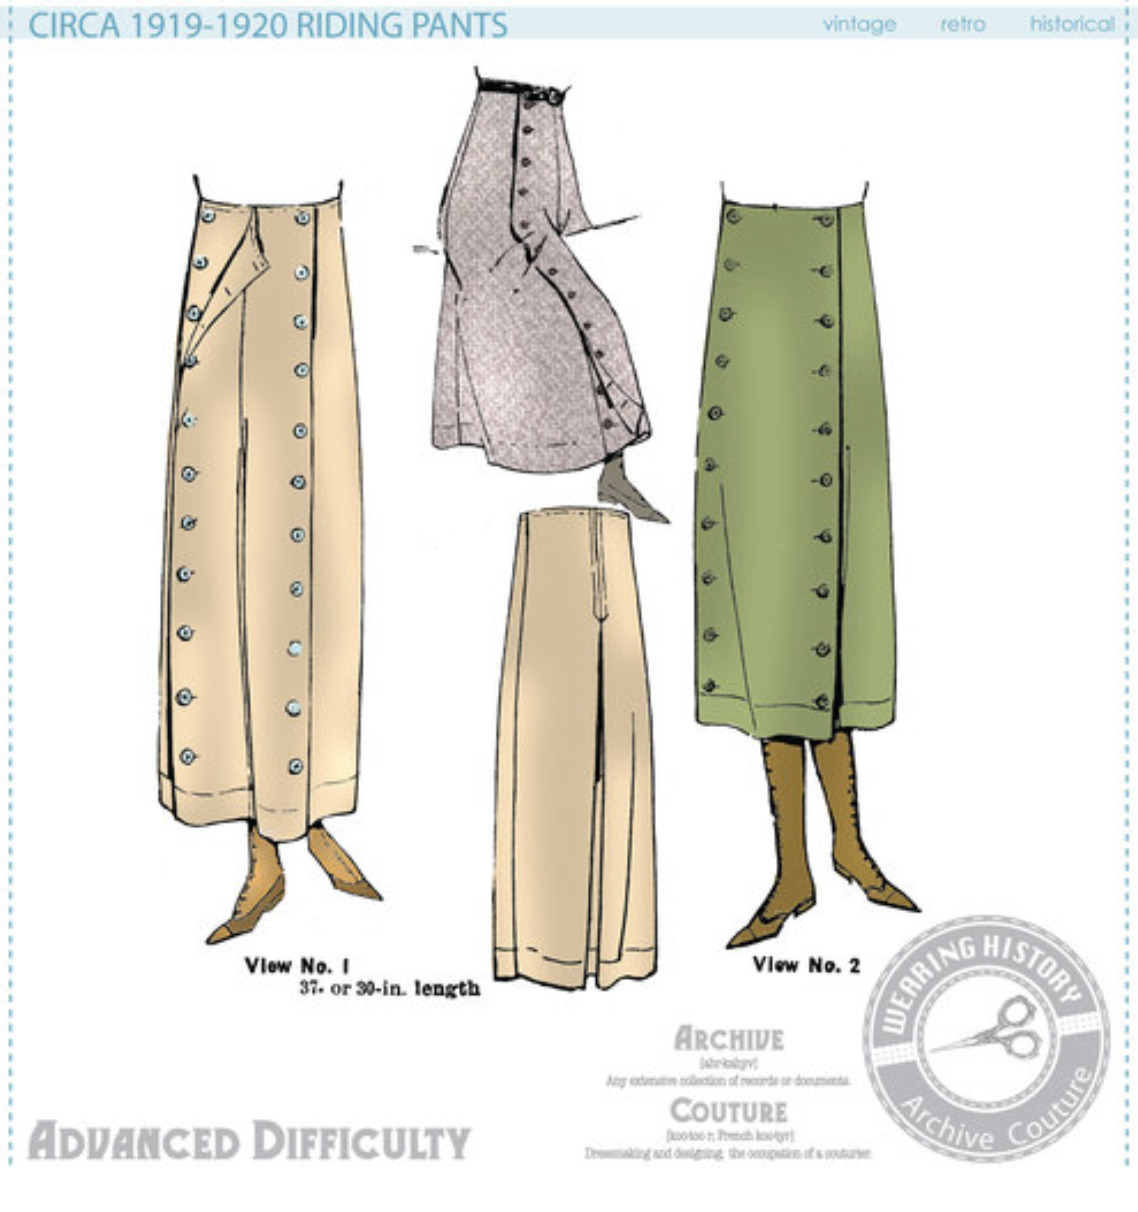
Professor McGonagall-inspired Deerstalker Witch Hat Pattern and Instructions

Professor McGonagall is my favorite character in the Harry Potter books/movies, and I love her tartan hat with the little ear flaps. I recently made my own and got some requests to share the pattern so here you go!IMG_3350

The hat has flaps on the ears that you can wear down or tied up. My hat is made from wool left over from a matching skirt that I made. The nice thing about this project is that it doesn’t require a lot of fabric and can be made from scraps.

IMG_3361

This hat sits on top of the head (and the pieces are sized for my 22″ head). If you want the hat crown big enough to cover your head you’ll need to resize the pieces a bit.

IMG_3359

This is the movie hat for reference.

cd4900d583933744699700073d474bd7.png

PATTERN PIECES AND MATERIALS

The hat uses several simple shapes and in the sections below I’ll describe how to draft and assemble them. I apologize in advance that I have a lot of pictures of the pattern pieces and finished item, but not the construction process since I made this at night right before a trip. However, construction is pretty straightforward! The pattern pieces include a 3/8″ seam allowance.

Materials:

  • Tartan/plaid print fabric (wool or cotton flannel)
  • Fusible foam interfacing
  • Regular fabric interfacing or stiff cotton organdy
  • Lining fabric
  • Ribbon or twill tape for ties and inner binding
  • Small comb
  • Thread, etc.IMG_3438

THE CROWN

The pattern:

The shape is a big cone. The center of the cone (which will be the front of the hat) is a little longer than the edges (which will be the back of the hat) since the crown tilts backwards a bit. To draft this shape you can draw a giant circle with a 19″ diameter, and then cut out about 1/3 of it as a starter shape, then use the measurements in the diagram below to help you get close to the final shape. The other option is to draw a triangle with 8.5″x8.5″x16″ triangle and then add the rounded part on the bottom. IMG_3439

Assembly:

Cut 1 fashion fabric, 1 lining, and 1 interfacing. For the lining I used a scrap of nylon (but any thin fabric is fine). For the interfacing I used single sided foam stabilizer which gives your crown some stiffness and structure. I use Bosal brand (Amazon affiliate link) In-R-Form, which is designed for purses but makes nice hats.IMG_3046

Iron lining to foam interfacing first; I’ll refer to it as “lining” from now on because it’s become one piece. Sew the back seams of the lining together (right sides together) to make a cone shape and trim excess bulk from the seam area. Sew fabric into cone shape the same way and flip right side out. Put fabric cone over lining cone and stitch bottom edges together to create your crown.

THE BRIM

The pattern:

The shape is a modified circle with a hole in the middle. To draft it draw a 12″ wide circle (or trace a large plate). In the center draw a 5.25″ wide circle (or trace a bowl). Cut out and discard the inner circle. Draw a curve on the sides like a butternut squash; this is to allow you to pull up your earflaps later. (Fold the pattern in half and cut both sides at the same time to keep it symmetrical).IMG_3442

Assembly:

Cut out 2 brims from fashion fabric and 1 brim from interfacing. You’ll want the brim to be thin and a little floppy so do not use the foam you used for the crown. I used some stiff cotton organdy because I had that available, but you can use other kinds of fabric interfacing.

The goal is to end up with a donut with the interfacing inside, so layer your pieces in this order: fabric, fabric, interfacing (with fabric right sides together).

Stitch the outer edge of all the pieces together, then flip inside out from the center hole in order to have the fabric facing out and the interfacing sandwiched in. Then topstitch the outer edges (for neat finished look) and topstitch the inner edges (to keep the layers together for the next step).

Sew the bottom edge of the crown to the inner edge of the brim, making sure the raw edges of both pieces face into the hat. Trim extra bulk from the foam if needed.

THE EAR FLAPS

The pattern:

The ear flap is a tongue shape. You can draft this piece by making a 4.5″ x 5.75″ rectangle and curving one end. (Fold the rectangle in half length-wise and cut off a rounded corner to make sure it’s symmetrical). The straight edge is the side that will be sewn to the hat.IMG_3443

Assembly:

For each flap cut 2 fabric and 1 interfacing (4 fabric and 2 interfacing total). The ear flaps should be soft so use a very thin and light interfacing, such as the lining to your hat. The assembly for each flap is just like the brim. Summary: put the fabric right sides together with the interfacing on top, sew together on the outer edges, flip right side out, topstitch all edges.

Stitch one flap to each side of the hat underneath the brim. This should be along the area where the brim curves in. I recommend pinning the pieces to the hat and trying it on to make sure the flaps cover your ears before sewing down. Sorry I forgot to take a picture before I sewed in the binding.IMG_3447

To cover up the raw edges inside the hat, hand-stitch in a ribbon, twill tape, or bias tape. I used a 1-inch wide music print twill tape because it was cute, but actually this is too wide and will cause ripples like my hat. If you want a smoother appearance a 1/2 inch ribbon is preferred.

Since this hat sits on top of your head, for security I sewed a small comb in the front.IMG_3448

THE HATBAND AND TIES

The pattern:

The hatband is just a long finished strip. Cut a long rectangle 22 inches long x 2 inches wide.IMG_3449

Assembly:

Sew down the long edges, right sides together, making a tube. Turn right side out and topstitch both long edges. Sew the small ends together to make a big circle. Put the band on the base of the crown and tack down in several places next to the brim to keep it from falling off.

Here’s a top view to show that the top of the band is not stitched down, just the bottom.IMG_3446

For the ties cut 2 pieces of ribbon or twill tape and stitch to the ends of each earflap. I plan to mostly wear my flaps up so the the tape is stitched to the side of the flap that will not show. For an extra neat appearance you can sandwich the ties into the flaps during construction, but if they are sewn to the outside you can switch them later.

My ties are 18 inches long each so that they can also be tied under the chin. If you don’t plan to have the extra versatility you can make them shorter. I used a linen twill tape I had in the stash because it matched my wool, but a wide ribbon would look cute too!

IMG_3351
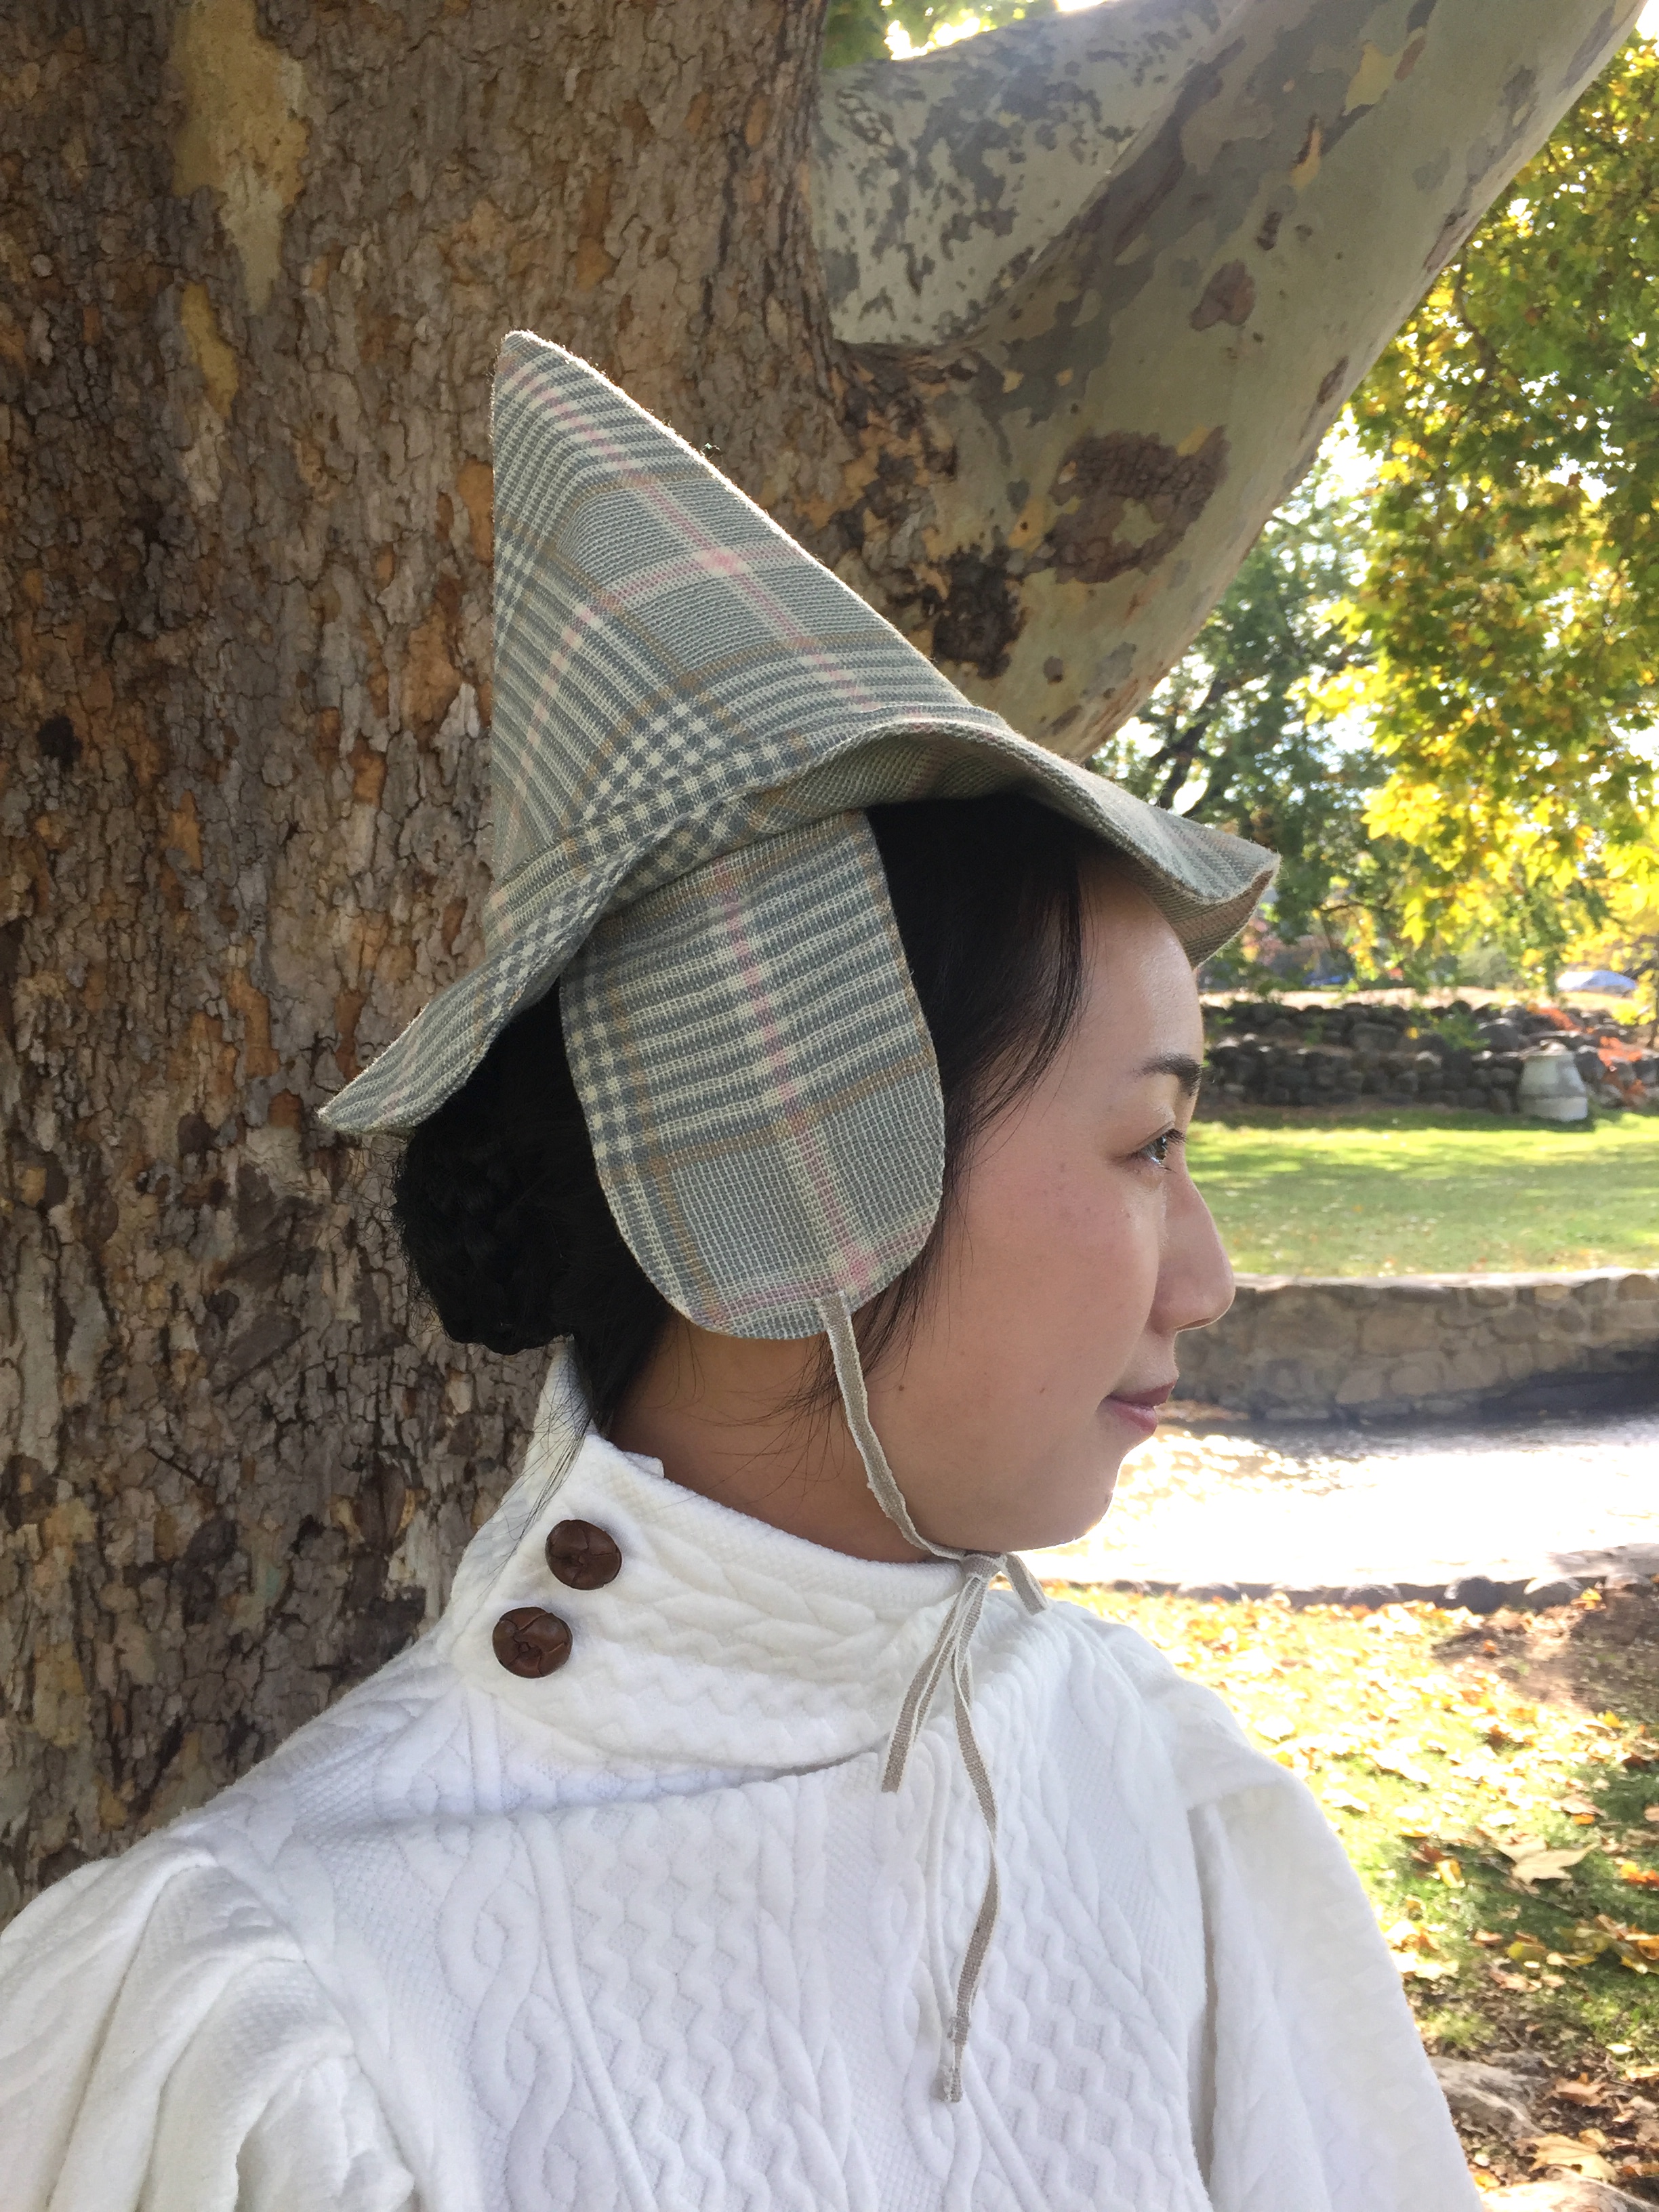
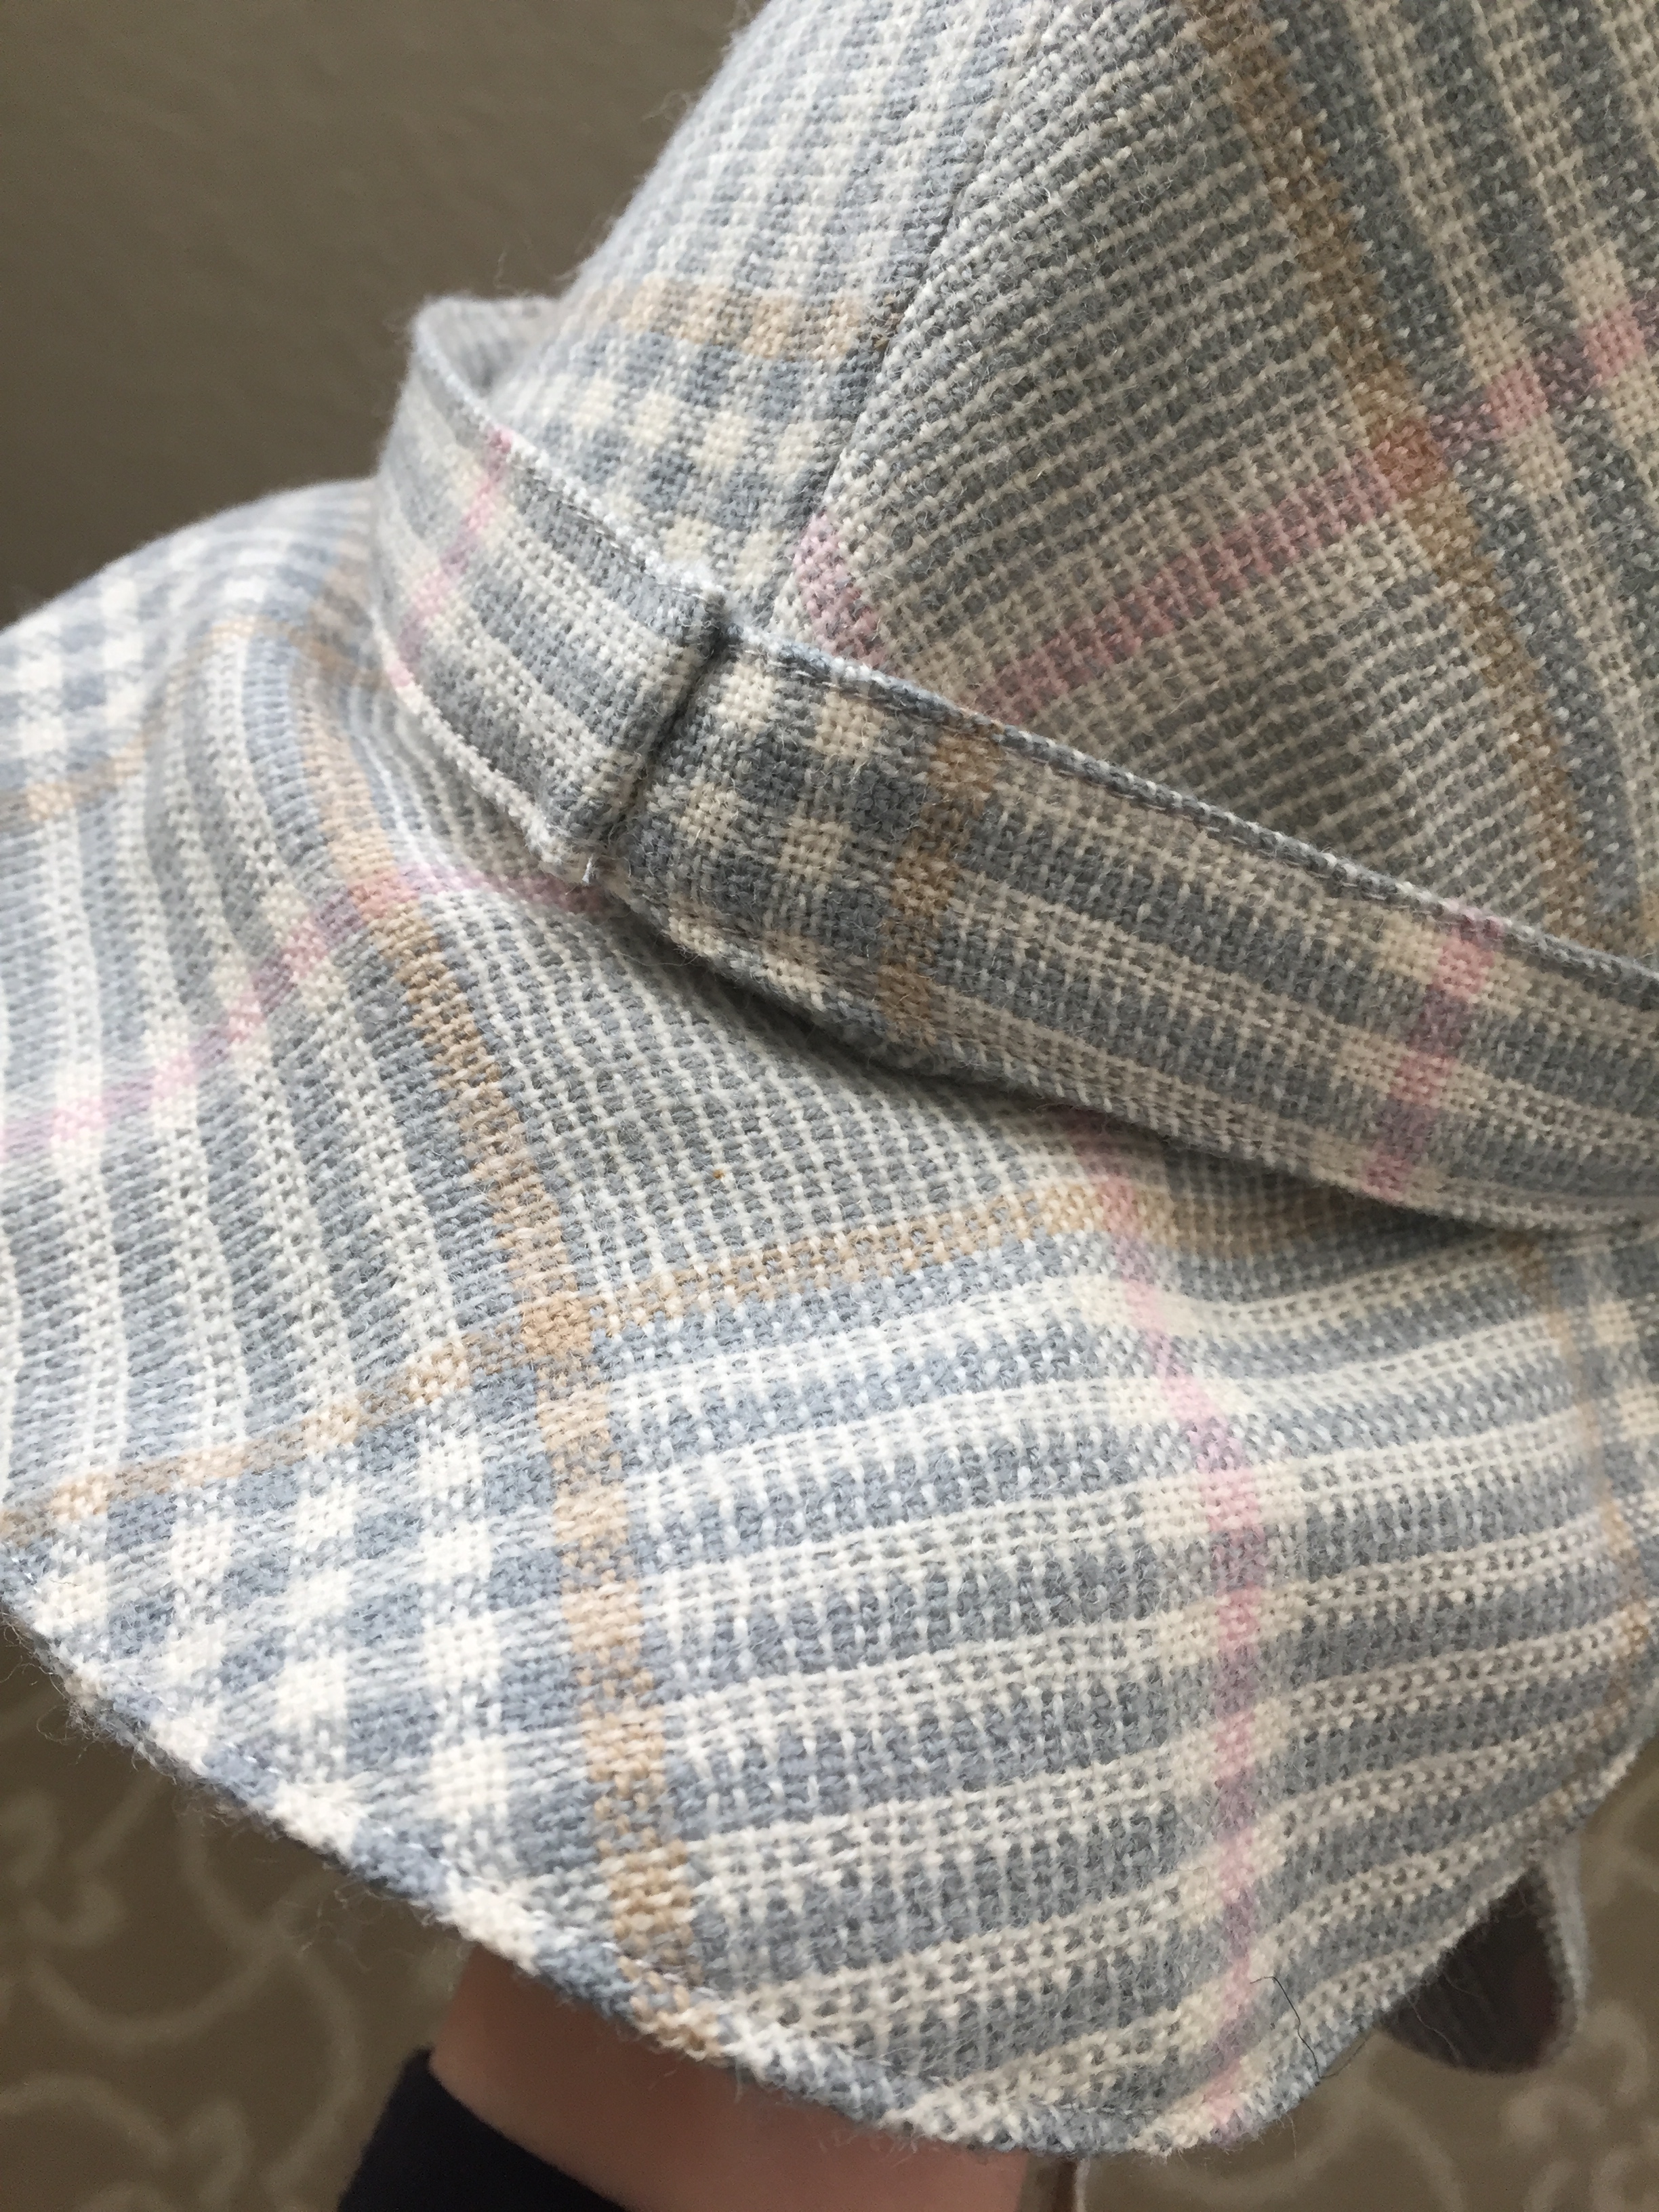
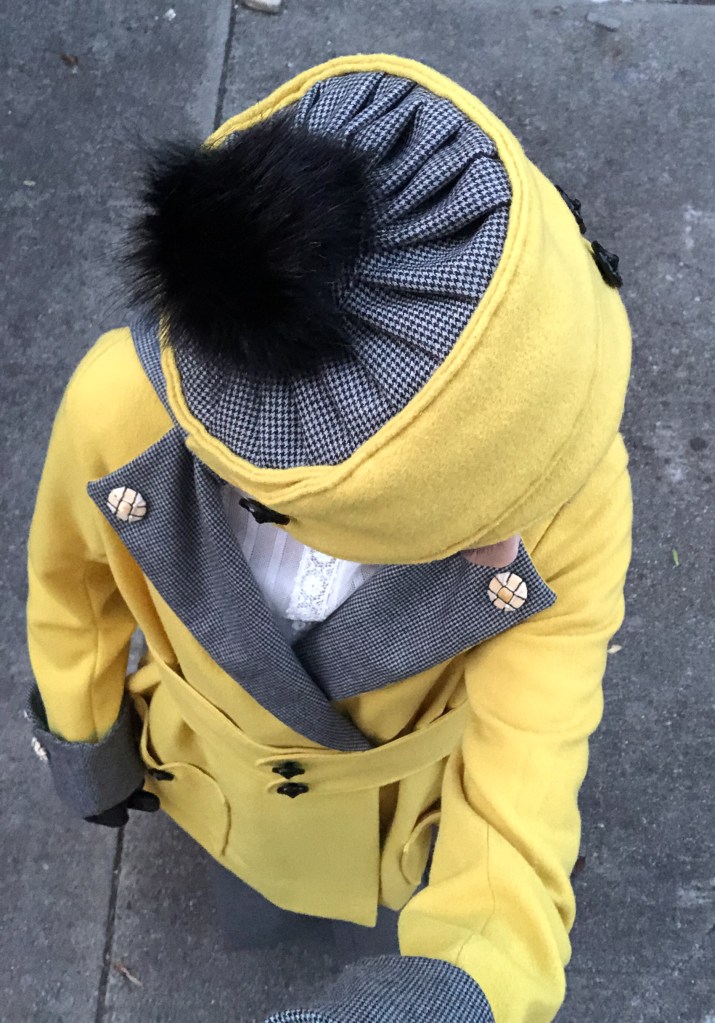
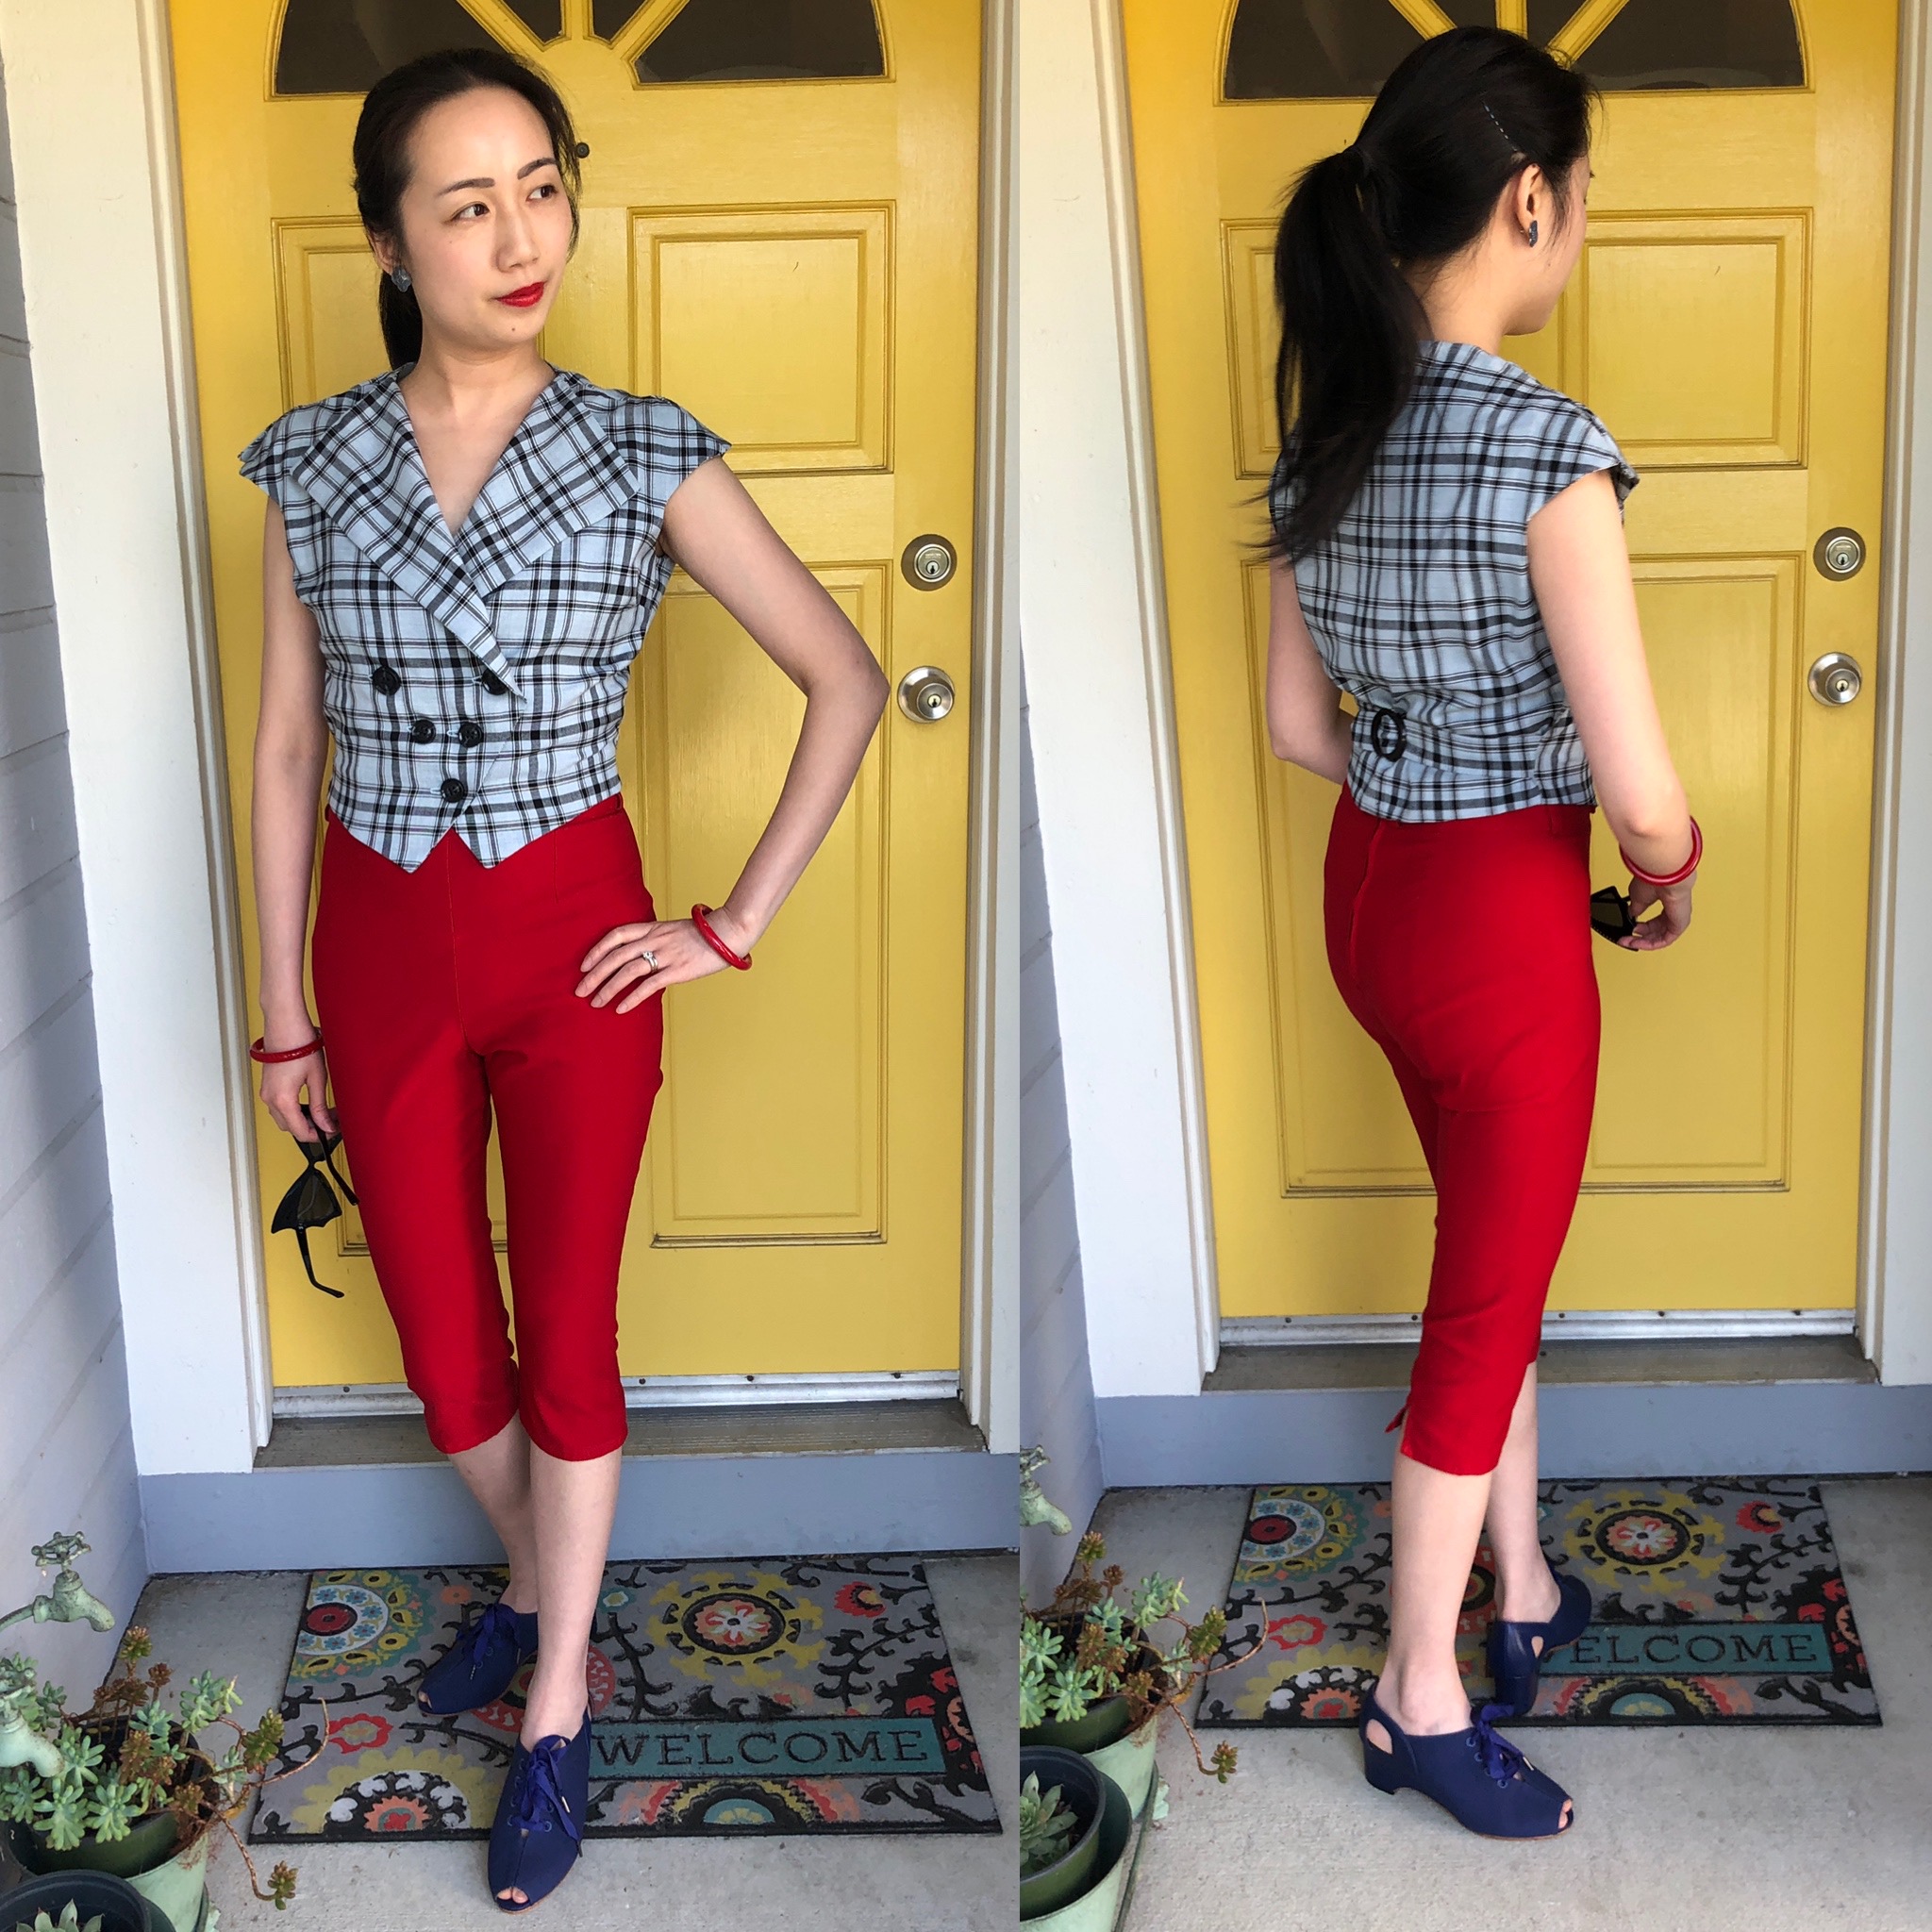
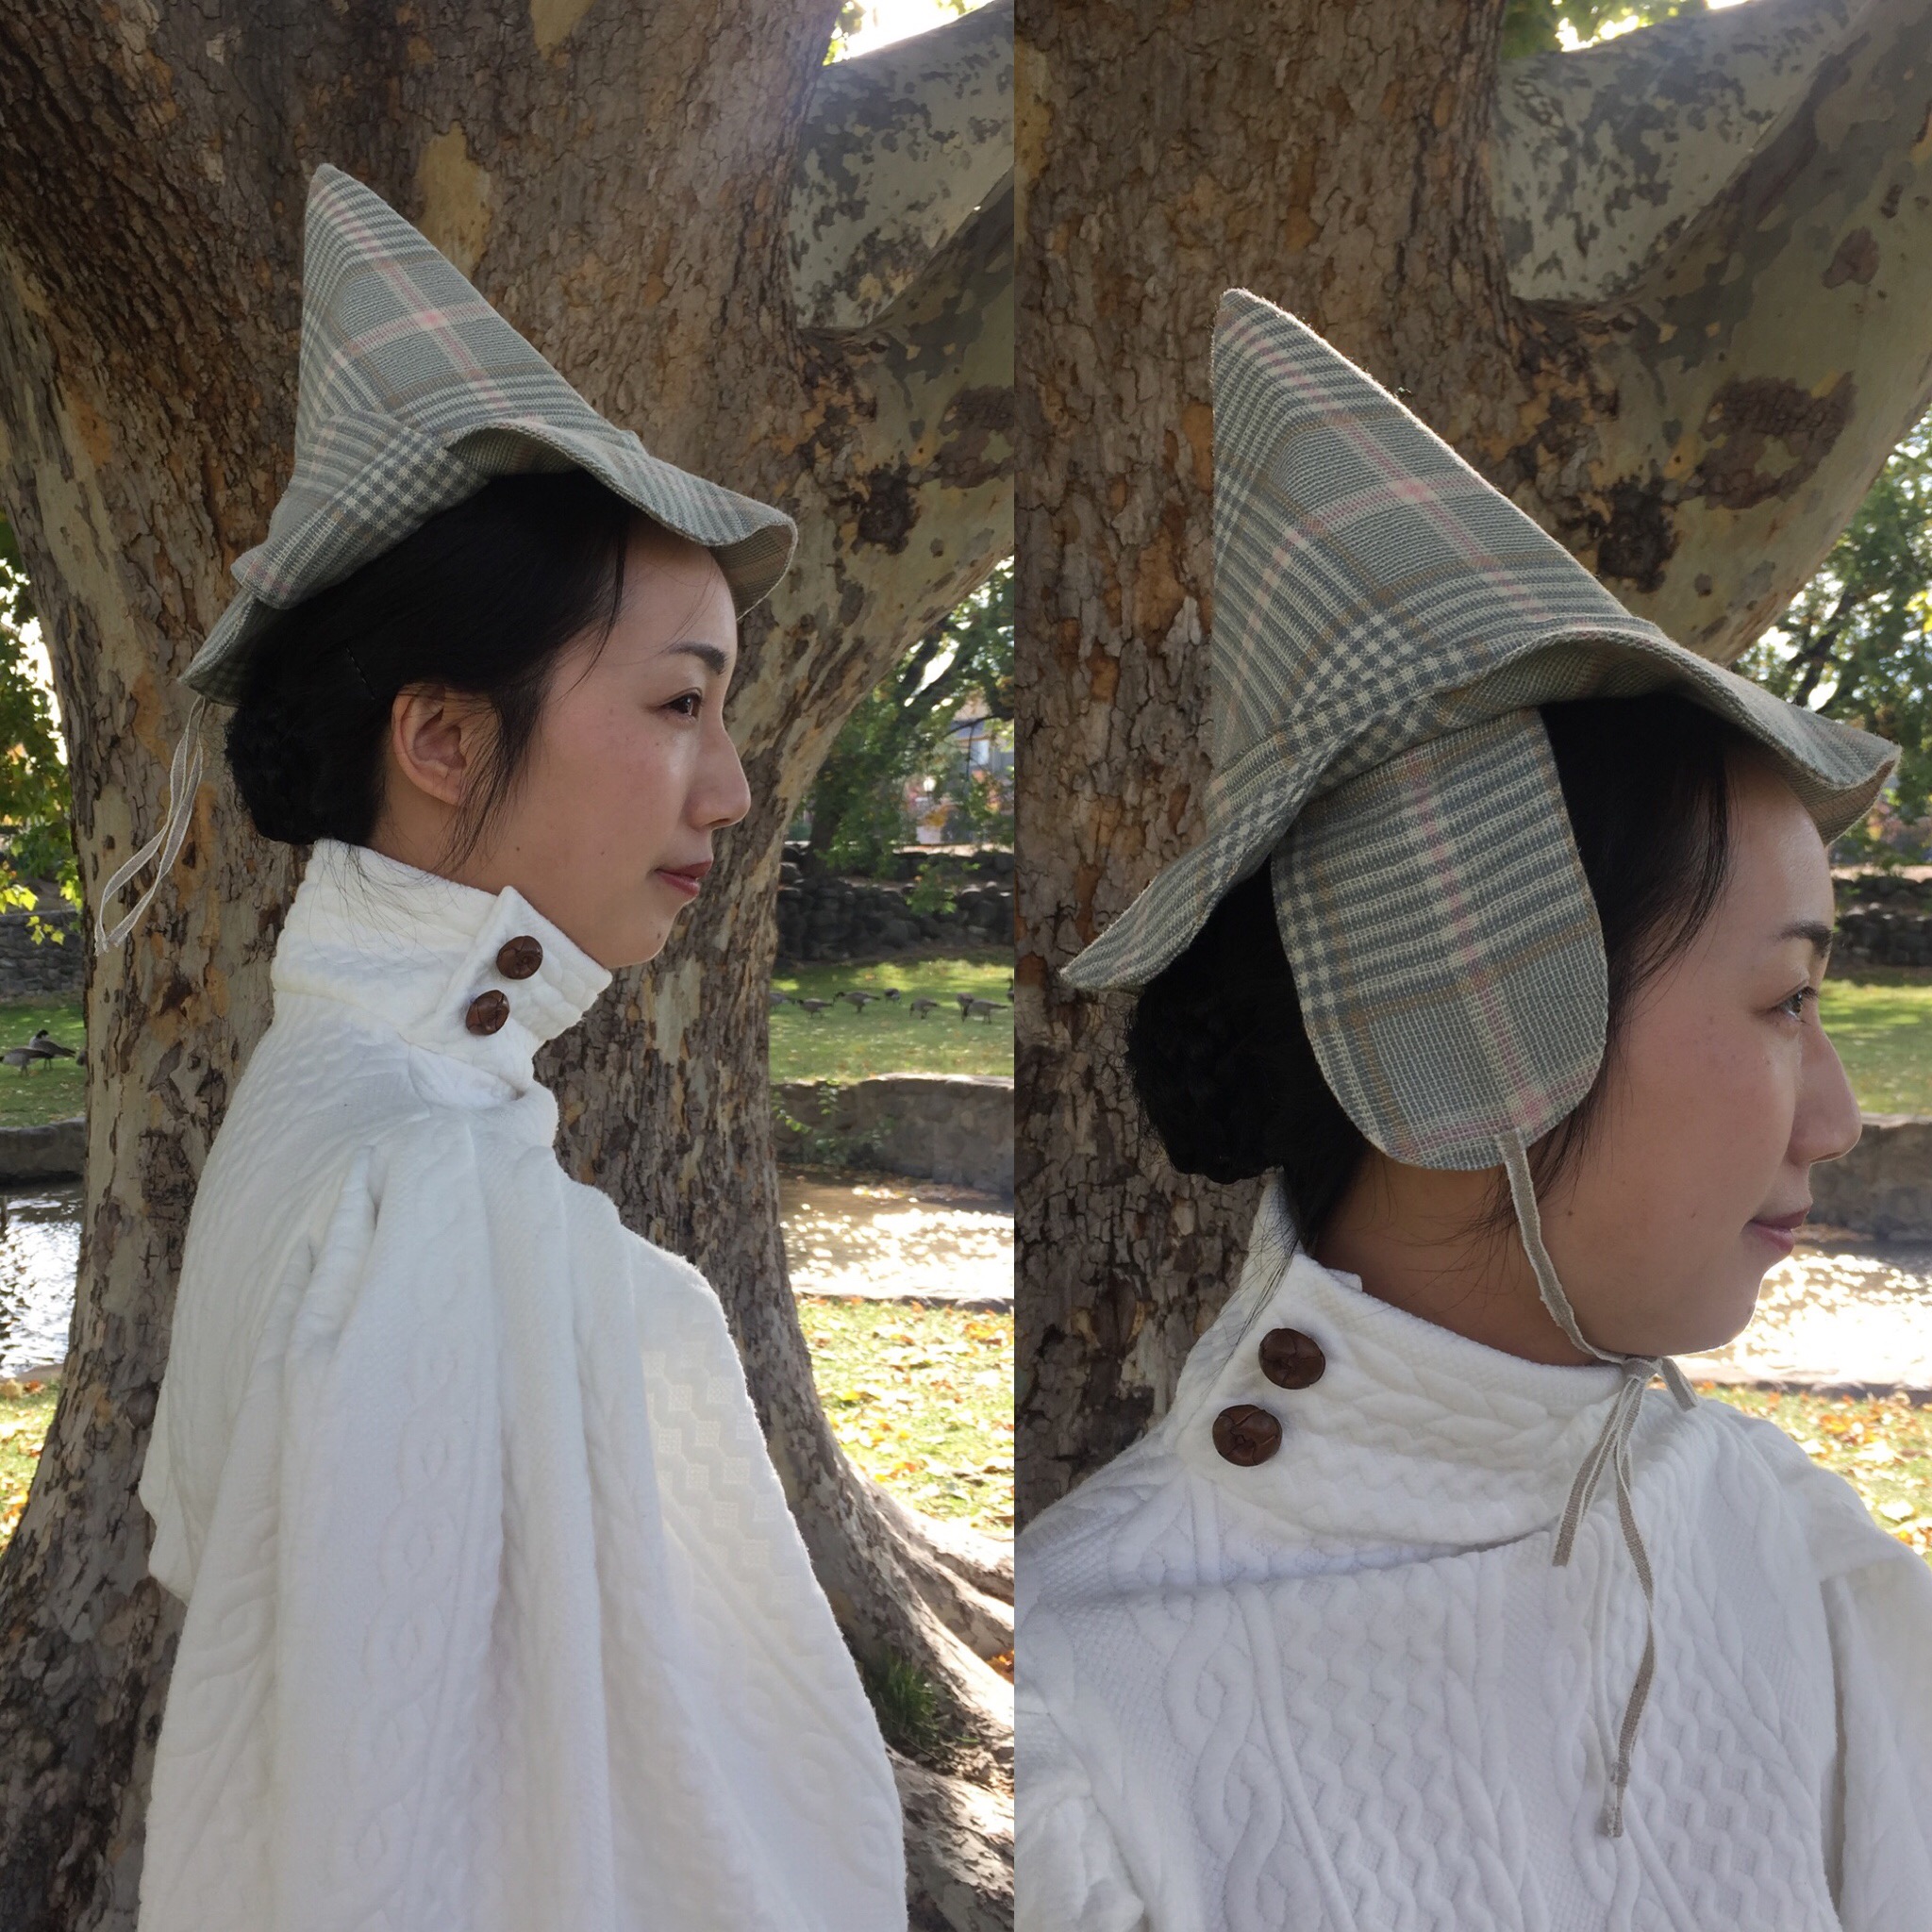
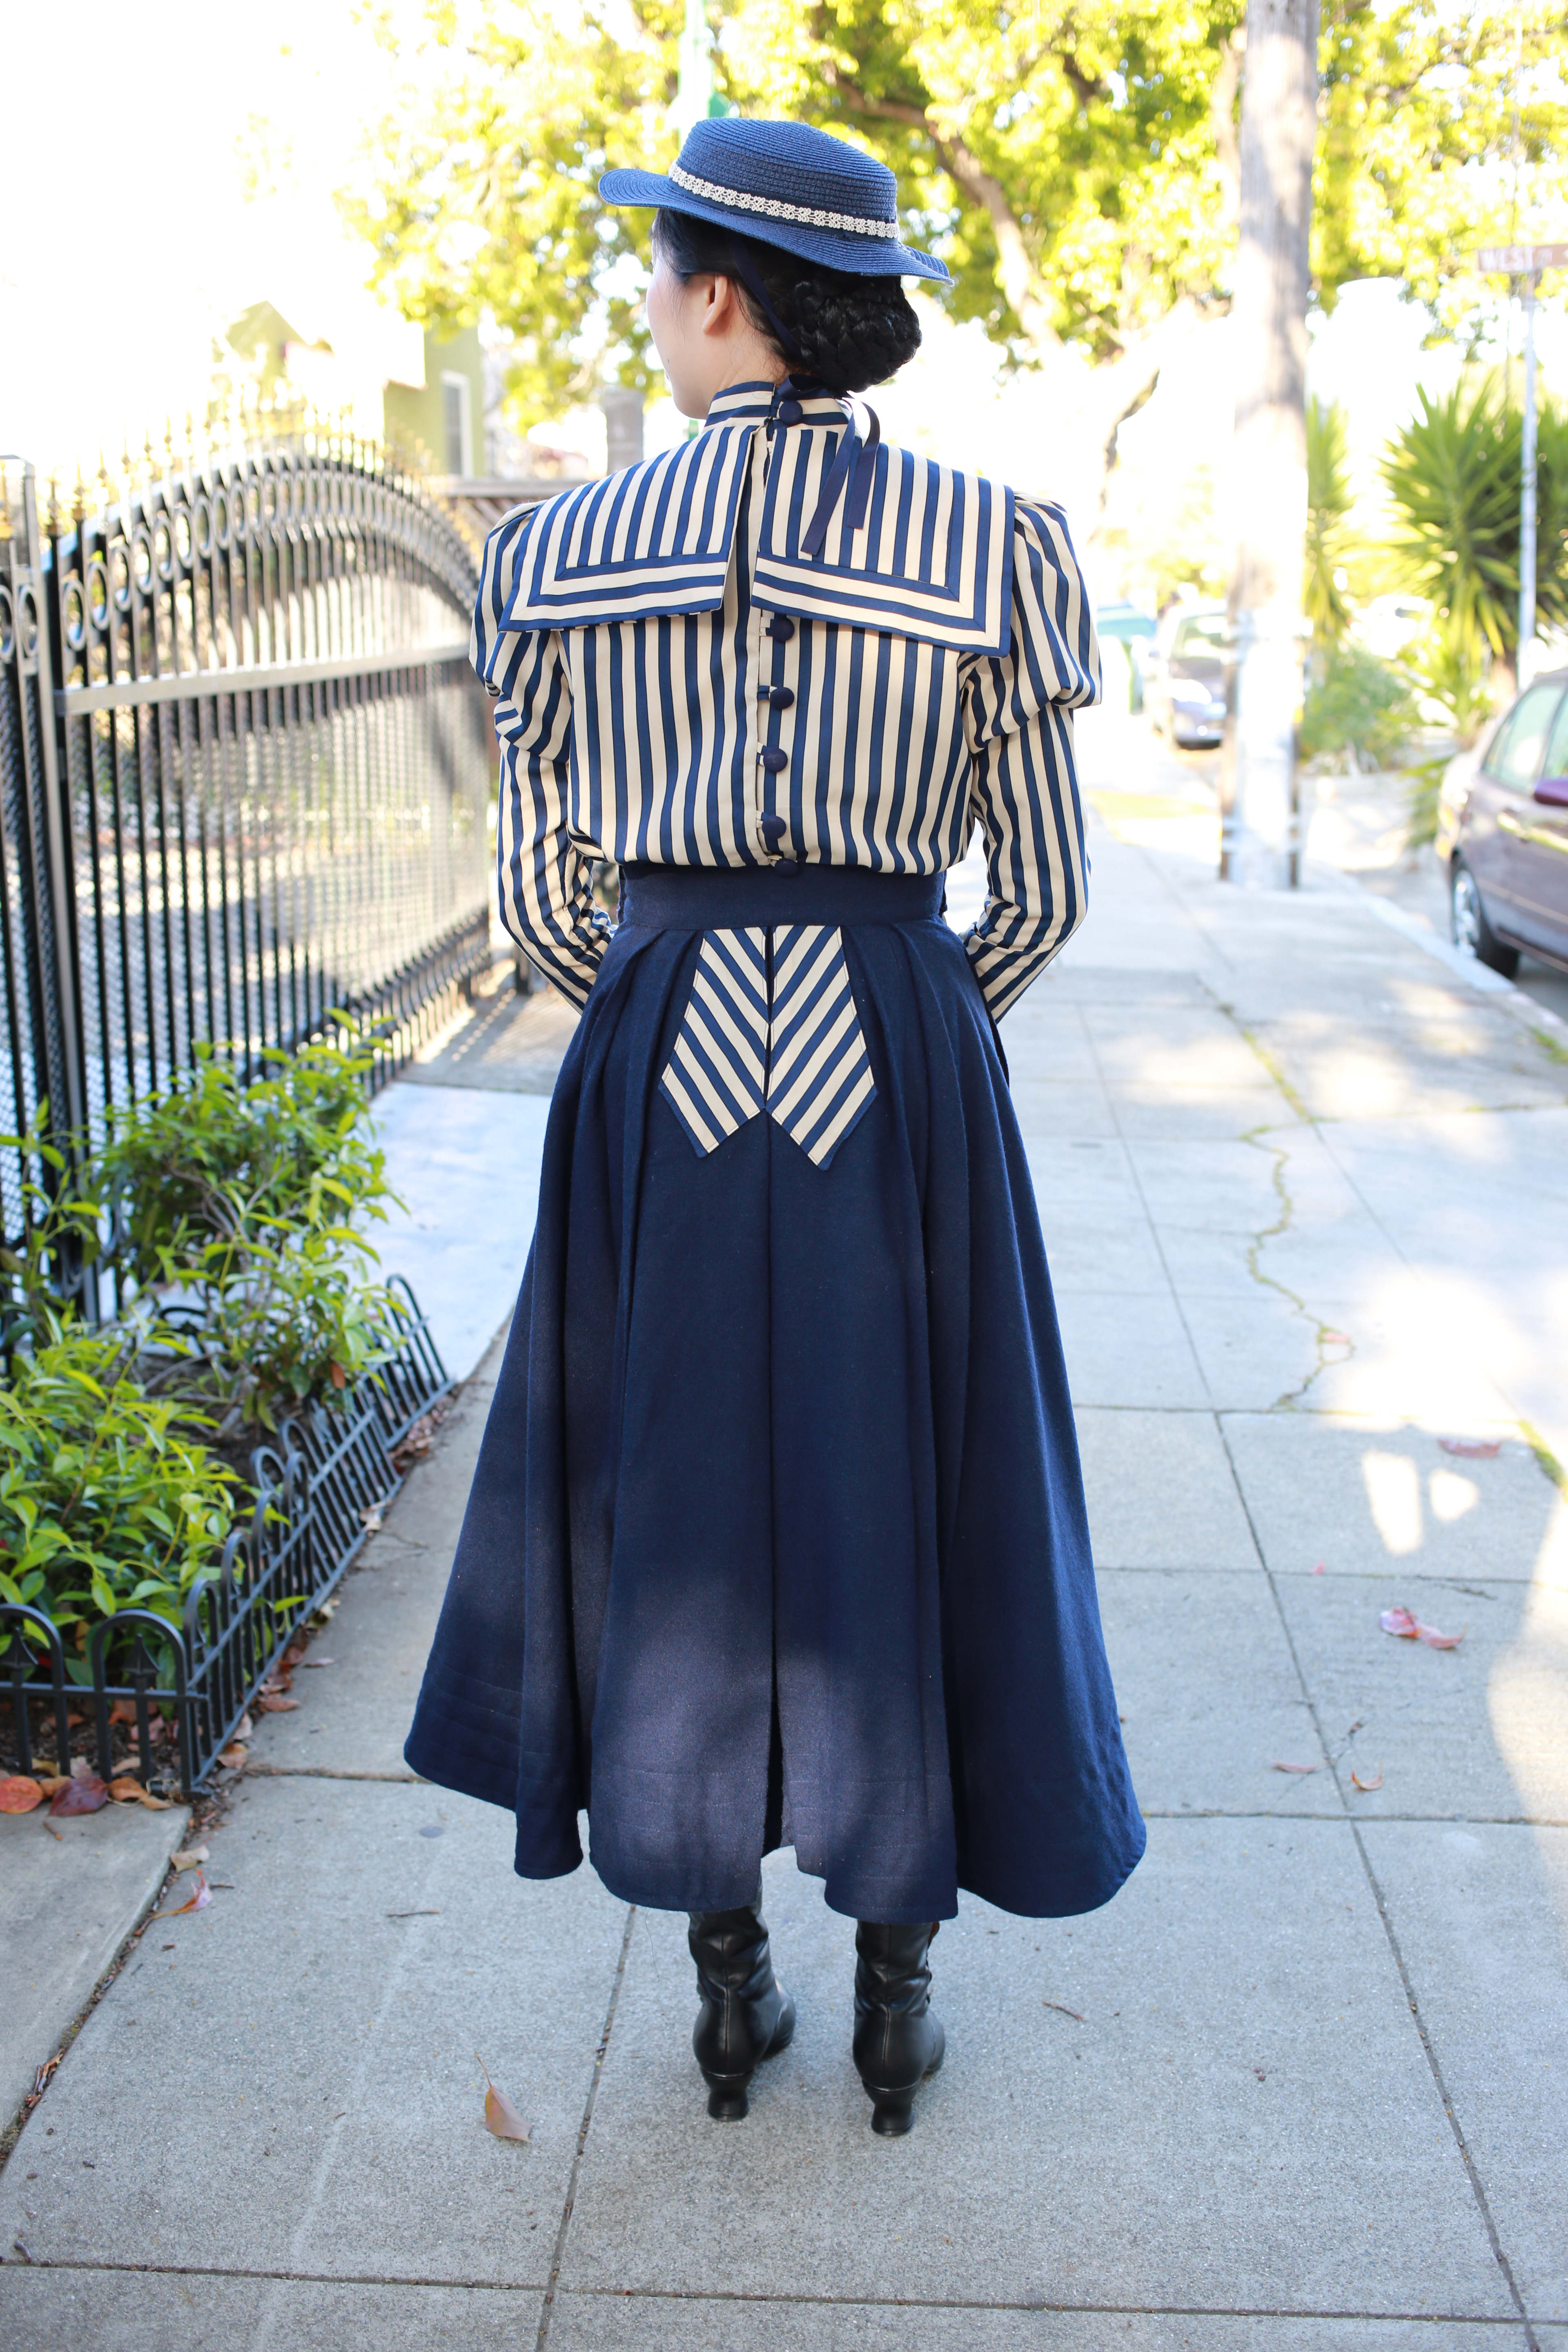
The flaps can be worn tied up but do not meet in the back.

Your hat is now done! Go forth and have witchy adventures in the woods!IMG_3293

IMG_3298.JPG

Do you like this sweater? I’ll be posting a tutorial for it too, no knitting experience required! Please subscribe to my blog or follow me on Instagram @freshfrippery to make sure you get notified when the tutorial is posted!

All patterns and tutorials are provided free on my blog. I don’t charge for them but if you would like to donate towards my domain registration and data costs of hosting the many photos on my site, consider buying me a “coffee”: https://ko-fi.com/freshfrippery

Thank you!Screen Shot 2019-11-27 at 9.28.46 PM

URWS1641.JPG

Victorian Bicycling Outfit at Roaring Camp Railroads

Last month I went to a wonderful steam train ride and BBQ, hosted by the Greater Bay Area Costumer’s Guild at Roaring Camp Railroads in Felton, California. I wore a Victorian/Edwardian-inspired bicycling outfit with a boater hat.

9N6A3285

Photo by Chris Wiener

9N6A3291

Photo by Chris Wiener

9N6A3294

Photo by Chris Wiener

The blouse, skirt, and hat were made by me (with construction details at the end of this post), and the boots are Tavistocks from American Duchess.

Roaring Camp Railroads was very picturesque, with a charming little Western “town,” and a beautiful ride through the redwood forest on a real steam train. I highly recommend taking your family!

There were plenty of places to lounge around, like our cowgirl Elizabeth did.IMG_8232

Natalie had fun balancing on the tracks.IMG_8414.JPG

There were also couples, like Kim and David, enjoying the day out.IMG_8245.JPG

It was my first time on a steam train, so it was quite the adventure!IMG_8372

A covered wagon was available for photos.IMG_8369

We went deep into the woods . . .IMG_8309

. . . to commune with nature . . .IMG_8350

. . . and to have Elizabeth eaten by a tree.IMG_8326

After the filling BBQ I relaxed by doing some fence-sitting.IMG_8396 copy.JPG

There was quite the turn out of Victorians, steampunks, and cowboys!

from GBACG FB.jpg

Photo by GBACG

In a previous post I described how I made my blouse, but upcycling an ugly 1990s dress to take it back 100 years! Before and after:

For my skirt, I used the Edwardian Bicycle Skirt pattern from Black Snail Patterns on Etsy. The skirt was made out of a navy wool-blend fabric. (I started with almost 4 yards of 60″ fabric, and had about 1.5 yards left over that I turned into a cape that was too warm to wear at Roaring Camp that day).  The front and back of the skirt was accented with decorative panels made from the same fabric of my blouse, as well as matching fabric-covered buttons.IMG_6299IMG_6296

The hem was stiffened a little by a self-facing that was top-stitched in place.IMG_6313

I made my boater hat by my usual refashion of removing extra layers of braid in a cheap hat, hot-gluing the brim back to the crown, hiding the joins with ribbon and lace, and then adding trimmings. FFGJ0368.JPG

Project costs:

  • 4 yards wool blend fabric: $45 including shipping from Facebook destash group
  • Skirt pattern PDF: $6.16 from Etsy (bought during a sale)
  • 1990s dress: $12 + $5 shipping from Facebook
  • Boater hat: $2.80 from eBay (with coupon)
  • Gimp braid, butterflies, ribbon, small & big covered button kits: $0 (leftovers from previous projects: Regency coat, Crimson Peak hat, a 20s dress, a Downton Abbey maid outfit, and a floral vest!)
  • Thread, glue, misc. from stash: ~$3

Total cost: $73.96

This was a comfortable outfit for a day of traveling; I didn’t even wear a corset. 😉

IMG_8451.JPG

NEBZ9597.JPG

Outlander 18th Century Plaid Dress

In a few weeks I am going to an Outlander-themed dinner party hosted by my local costuming guild. I don’t subscribe to premium cable so I have never actually seen the show, just lots of pictures, but I am always a fan of dressing up and eating!

I’m aware that there are some fabulous silk dresses in the second season of the show, but I wanted something relatively quick and inexpensive, so I decided to go with a plaid 18th century dress using a pattern I’ve worked with before. (I used the Period Impressions 1770 Polonaise Pattern when I made my Ljusoga dress).

I found a decent plaid cotton from the “Wales plaid” Fabric.com collection. (I ended up purchasing it through Amazon due to a 20% off promotion and free shipping!) It was cheap enough I used the same fabric for lining the bodice and skirt. I dithered for a long time as to whether I should make the fabric out of the same fabric or make a fancy quilted one. In the end I could not find a suitable pre-quilted fabric or bedspread to repurpose, and some well-priced wool appeared on a destash group I am part of, so my decision was made.IMG_1861

In real life the bodice fit is rather different (and much better!) because I would be wearing stays to provide a smooth front. My mannequin is not wearing stays because it does not have a compressible torso and the boobs would be in the wrong place. Right now the front is pinned with regular straight pins while I await some proper 18th century reproduction pins in the mail. IMG_1866

See how the middle point of the back of the bodice rides up a little? I’ve got to adjust my underpinnings a bit to fix that, but what prevents it from flipping up all the way is a split bum pad.IMG_1864

My old half-moon bum pad was too small and not up to the task of the much larger faux butt I wanted for this outfit, so I made a new double bum pad. The split down the back  is what gives it this particular shape. I should have curved the top edges but this was a rather quick project. It is just twin trapezoid pillows bound with a single twill tape at the top.IMG_1740

The front comes forward enough to increase my hips too. The way I constructed these bum pads is not period correct, but works for my particular body shape.IMG_1739

See how gloriously wide it makes the petticoat compared to my real figure?IMG_1859

Final project costs:

  • 8 yards (45 inch wide) cotton plaid fabric: $45.31 from Amazon (affiliate link) including tax and discounts; I still have leftover fabric.
  • 2.5 yards (60 inch wide) brown wool fabric: $20 plus $6.50 shipping from Facebook; Normally I use 3 yards for a petticoat but this was wide enough to do piecing in the back.
  • Pattern: $0 (already used for another project)
  • Bum pad fabric, stuffing, and twill tape: $0 (left overs from other projects)

Total (without notions): $71.81 (Not bad! I was originally planning $50 just for the main dress and I can reuse the petticoat for other outfits).

Tudor Kirtle (Part 3): Kirtle and Smock

Tudor Kirtle (Part 3): Kirtle and Smock

I finally had some sun and a weekend at home to take some pictures. I had 4 garments that were finished and not photographed, including this kirtle and smock. I made the kirtle earlier in the year for a faire I ended up not being able to attend, so I don’t have any pictures of it worn yet.img_0729

The kirtle is made of a blue worsted wool and lined with a linen-blend, which was also used to make the smock. Both garments are made with patterns from the Tudor Tailor.img_0731

The kirtle has spiral lacing on both sides. I chose to have the openings on the side to increase the versatility of the kirtle. I can wear it as-is, or with other clothing over it.img_0734

The back has a rounded neckline.img_0739

Parts 1 and 2 discuss my construction details.

The smock is rather straight-forward, and is really a series of rectangles of varying sizes. Most of the time was spent on the collar and cuffs, so if you wanted a plain one the sewing would go very quickly.

Final project costs:

  • 4 meters blue worsted wool: $104.88 from Aliexpress. (I probably could have made this out of 3 meters, but bought 4 to be safe. I still have plenty to make sleeves).
  • 6 yards Kaufman handkerchief linen/cotton: $45.17 with tax from Fabric.com. (I used this for the smock and lining, and have enough left over for a 18th century chemise).
  • 10 yards linen tape: $10.40 including tax from Britex Fabrics.

Total: $160.45

This is a bit more than my usual projects, but wool is not cheap (even though I felt I got a decent deal on the fabric), and I have plenty of materials left over for other projects.

I would like to make a pair of sleeves and a partlet to wear with it. I already own a few other accessories, such as a straw hat, my gorgeous American Duchess Stratfords (affiliate link),  and a beautiful blackwork coif commissioned from Romantic Recollections!img_0744screen-shot-2016-12-26-at-3-21-45-pm

Tudor Kirtle (Part 2): The Skirt

Part one, learning from my bodice mistakes, is here. This post is about what I learned while making the skirt the wrong way.

After cutting out the skirt panels, which are really just two large rectangles, one for the front and one for the back, I folded the tops over, stitched them, and then folded them over again to enclose all raw edges. (Have you figured out yet what I did wrong?) Then I pleated them and stitched the top of the pleats in place. (Each long edge of each panel was folded in once because it was the selvage).img_9245

The panels were stitched together at the sides, leaving room for pocket slits. Then the pleated edge of the skirt was sewn to the bottom edge of the bodice, right sides together. (Here my sewing got very sloppy because I was making the kirtle last minute for an event). This is what the interior of the kirtle looked like:fullsizeoutput_c7

Remember from part one how I realized the worsted wool was too fine for boning, and the reed showed through? Since I had folded the tops of the pleats over twice, the extra bulk showed through on the other side! It wasn’t obvious when the skirt was on a hanger, but once I put it on my stomach pushed the pleats outward, causing a visible line on the outside where I did not want it.

I realized at that point that what I should have done was pleat the skirt panels, attach them to the bodice, then finish sewing the bodice lining over the pleats to enclose the raw edges.

I was too lazy to take it all apart due to all the hand-sewing involved, so I ended up having to unfold part of the pleats and trim off the stitched edge with scissors. Here is the inside again:img_0618

I should still trim the raw edge with pinking shears to prevent fraying, but now there is not a bulky line that shows when worn!fullsizeoutput_c8

Then when hemming I made the mistake of just folding up the bottom a certain number of inches and stitching without pinning and putting it on before sewing because I was in a hurry and thought I had cut things pretty evenly.

Yeah, it wasn’t that even, and wool stretches. So, after my event got rained out and I couldn’t go, I put the kirtle on and had some friends help me look it over so I could re-hem it evenly.

The kirtle is now done, but I have been waiting for a sunny day to take pictures, since I haven’t had a chance to wear it out. All the pictures in this post were taken indoors, some at night, and you can see it made the wool seem like four different colors!

To wear under the kirtle, I made a smock using a pattern from the Tudor Tailor book I bought on Amazon (affiliate link). It is also awaiting proper photos. Meanwhile, here is a teaser picture!img_9824