Tag Archives: cotton

Floral Milkmaid Dress for Spring (Plus Some Tips and Tricks)

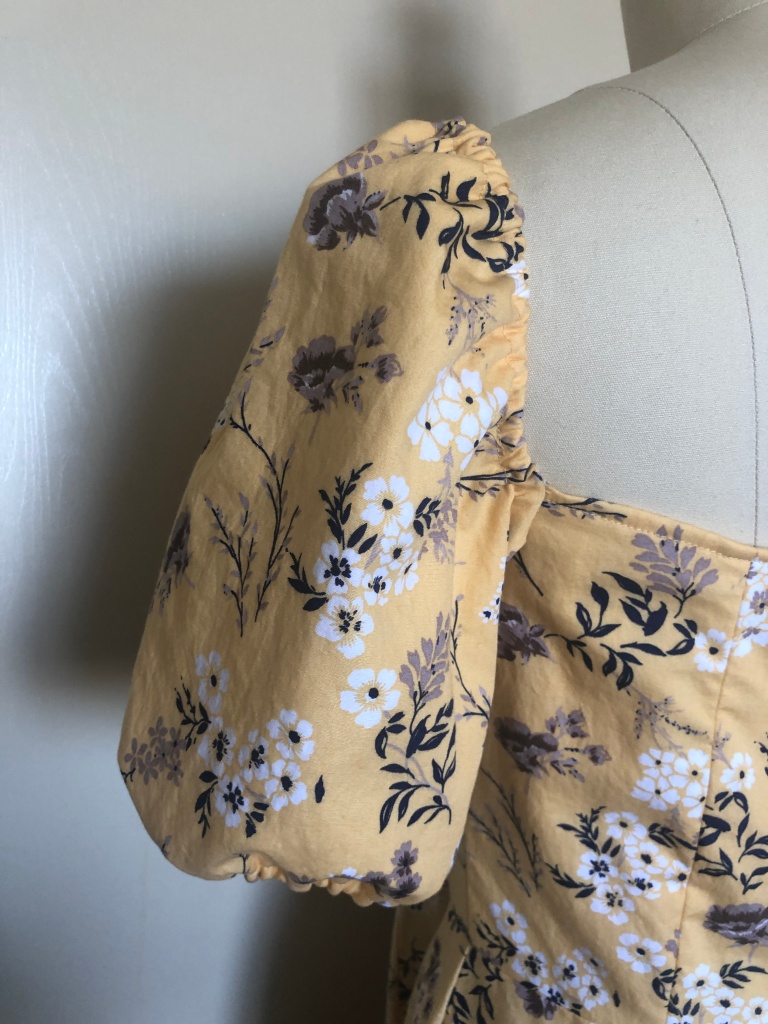
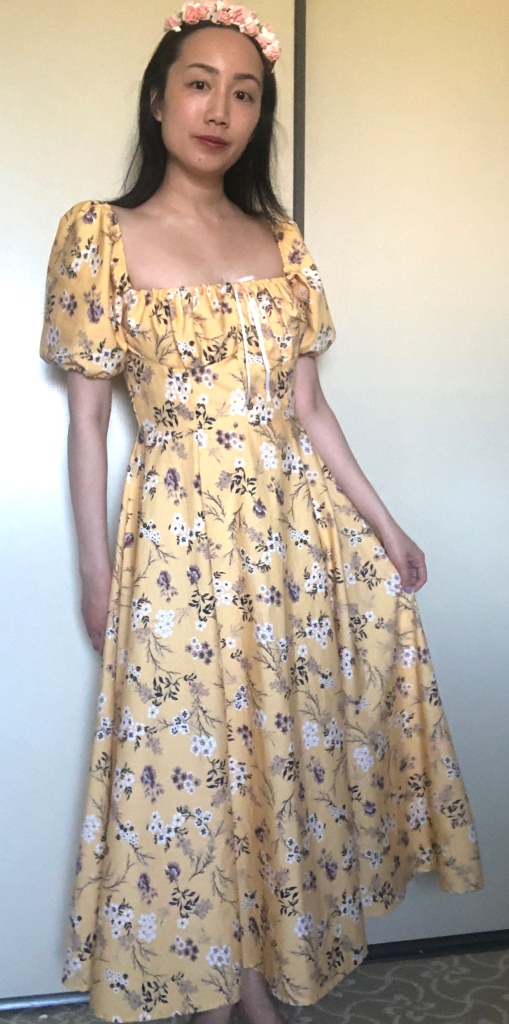
Warm weather means pretty cotton frocks to me so I just recently completed this yellow floral dress, inspired by the cute “milkmaid” style dresses. A lot of cotton prints are a bit thin and require some lining, and I have a special trick to save time by using my serger instead of cutting out the lining twice (later in this post).

Note: I am a member of the Janome Maker program and this skirt is sewn on a Janome Skyline S9 and a Janome FA4 serger. (This post is sponsored by Janome but all content and opinions are mine).

The dress is made of 100% cotton and the yellow print has white and gray flowers and foliage. (I bought 3 yards of a 58″ wide fabric and had some left over). I did not want the top to be see-through so I needed to line it. For this particular dress I decided to flat-line it, which means each individual lining piece is attached to the fashion fabric before the garment is assembled. (This is different from the approach of constructing the fashion and lining layers separately, then putting them together).

The classic method of flat-lining is to cut out the lining and fashion pieces and stitch them together, but I have a time-saving hack using my Janome FA4 serger! First, I put the fashion layer on top of the lining fabric, put in a few pins to keep it from shifting, and cut it out roughly with my rotary cutter.

Then I serge the edges of the fashion fabric, while using the built-in blade of my serger to trim away the excess lining. This saves me the trouble of carefully cutting out the lining and making sure all the edges line up perfectly before sewing!

After serging/flat-lining all the pieces I sewed the seams together normally. This is the bodice without the bust cups:

The bust cups are oval pieces of fabric that are gathered at the top and bottom to fit into the U shapes of the bodice. (The top is folded down to make a drawstring channel for the ribbons, which meet in the middle to make the top adjustable).
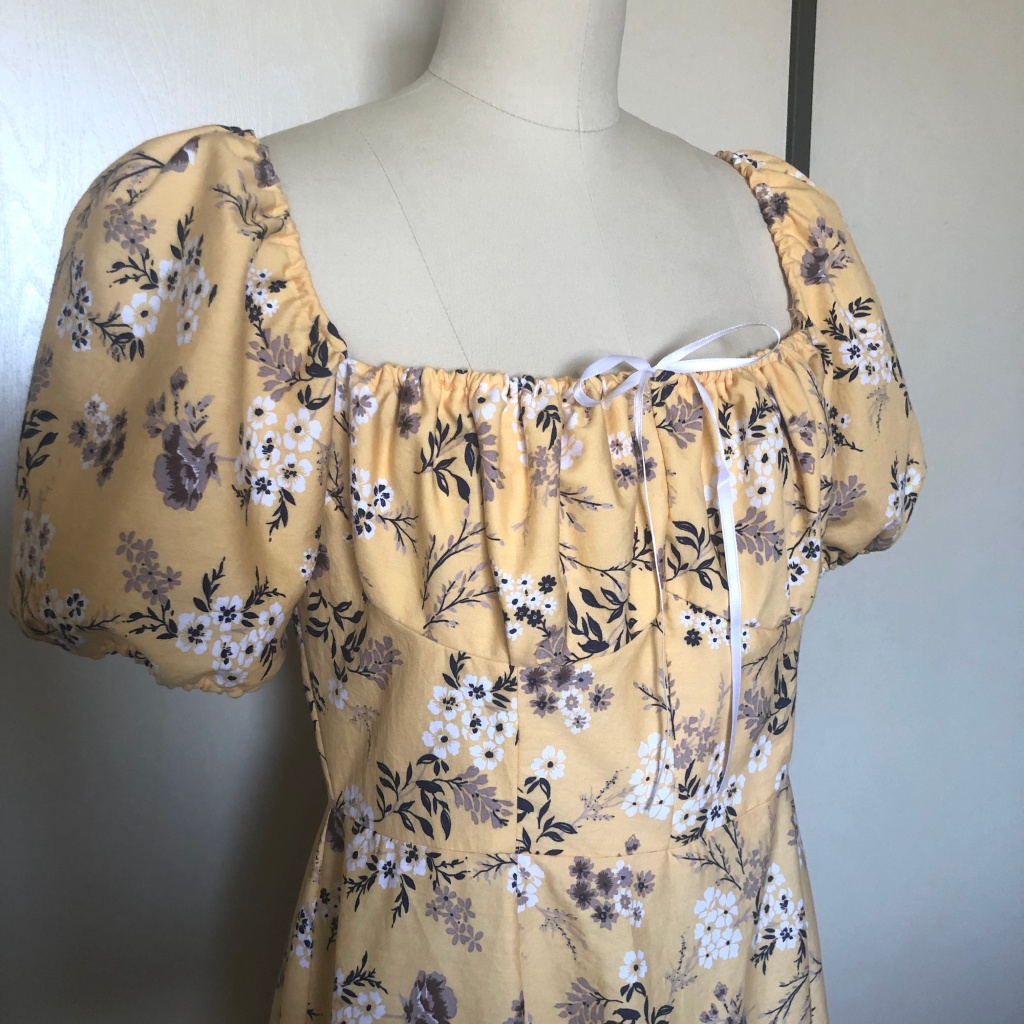
The sleeves have channels on both the top and bottom for elastic to gather it into a puffed sleeve. The underarm of the sleeve is sewn directly to the underarm of the dress while the top of the elasticated sleeve turns into the shoulder of the dress. A few tips I have for sewing this kind of style sleeve: (1) Finish off the top of the back bodice by folding down the serged edges before you attach the sleeve, otherwise you will end up with an odd corner in the back where some serging is visible. (2) Anchor one end of the elastic by sewing it down in the channel where the sleeve attaches to the back of the dress. Use a safety pin to keep the other end of the elastic from sliding back in the channel. Try on the dress, unpin the elastic and pull it tight until the sleeve fits you over the shoulders, then pin it back until you sew it down permanently. Tip #2 is especially important if you don’t have a helper; you can fit the sleeves yourself in a mirror because the loose elastic is in front!

The dress closes in the center back with an invisible zipper. Janome makes a concealed zipper foot (Z) that makes it easy to install one!

I am looking forward to wearing this dress this summer!

Thank you for reading!
1930s Floral Blouse and Sporty Shorts

1930s Floral Blouse and Sporty Shorts

It’s not a secret I love the 1930s, and my usual daily uniform consists of a buttoned vintage-style blouse, high-waisted pants, and a cardigan. I originally purchased the Wearing History 1930s Day or Evening pattern intending to make solid-colored, long-sleeved, long-peplumed blouse for a fall outfit, but decided to start with the short-sleeved, short-peplumed version.

The fabric I used is a Liberty of London print that was a holiday gift. It’s a modern print with flowers and strawberries but I thought suited the 1930s pattern very well. The green buttons, chartreuse grosgrain ribbon, and white buckle were all vintage.

I did modify the pattern to allow for buttons since that’s my favorite style of blouse. The original pattern has 2 closure options for the center front: a hidden placket with snaps, or button loops and buttons. This means if you use the pattern as-is, your right and left fronts will meet in the center. If you decide to modify the pattern to have buttonholes, you need to take account adding enough ease in your fabric to allow for the overlap. You don’t need to change any other pattern pieces. Please also note that if you like the center bow in the stock images, using the pattern as-is may be a better choice.

My shoes are from American Duchess. The hat is an 18th century straw bergere that I trimmed with flowers and ribbon. The purse is a crocheted 1930s reproduction.

Another small modification I made was to take the shoulders in slightly. This is not an issue with how the pattern is drafted; I have narrow shoulders so that is a change I normally make for many patterns. The other consideration is that strong shoulders are historically appropriate for 1930s and 1940s blouses, but can be overwhelming on my smaller frame. I cut out the blouse and sleeves as directed, but at the attachment point I took a larger seam allowance in the upper half of the armscye. This allows for a slight reduction in both the bodice and sleeve without the need to redraft.

I paired this blouse with a some sporty shorts I made out of a white pique fabric. I made the shorts with the same pattern hack I used to make my plaid shorts: I used the upper portion of the pants of the Decades of Style 1930s Last Resort Beach PJs pattern I used for my own set then added a waistband.

There is an invisible zipper down the center back seam and a hook and bar at the waistband. The bottoms are finished with simple turned up hems.

I’m happy to add this 1930s blouse to my wardrobe and to recommend this pattern!

1870s Bustle Gown (Black Snail Patterns Victorian Seaside Dress)

In February my local costume guild went to see an exhibit of James Tissot paintings at the Legion of Honor Museum in San Francisco, and we dressed up in bustle gowns. The exhibit was wonderful and it was lovely to see my fellow costumers.

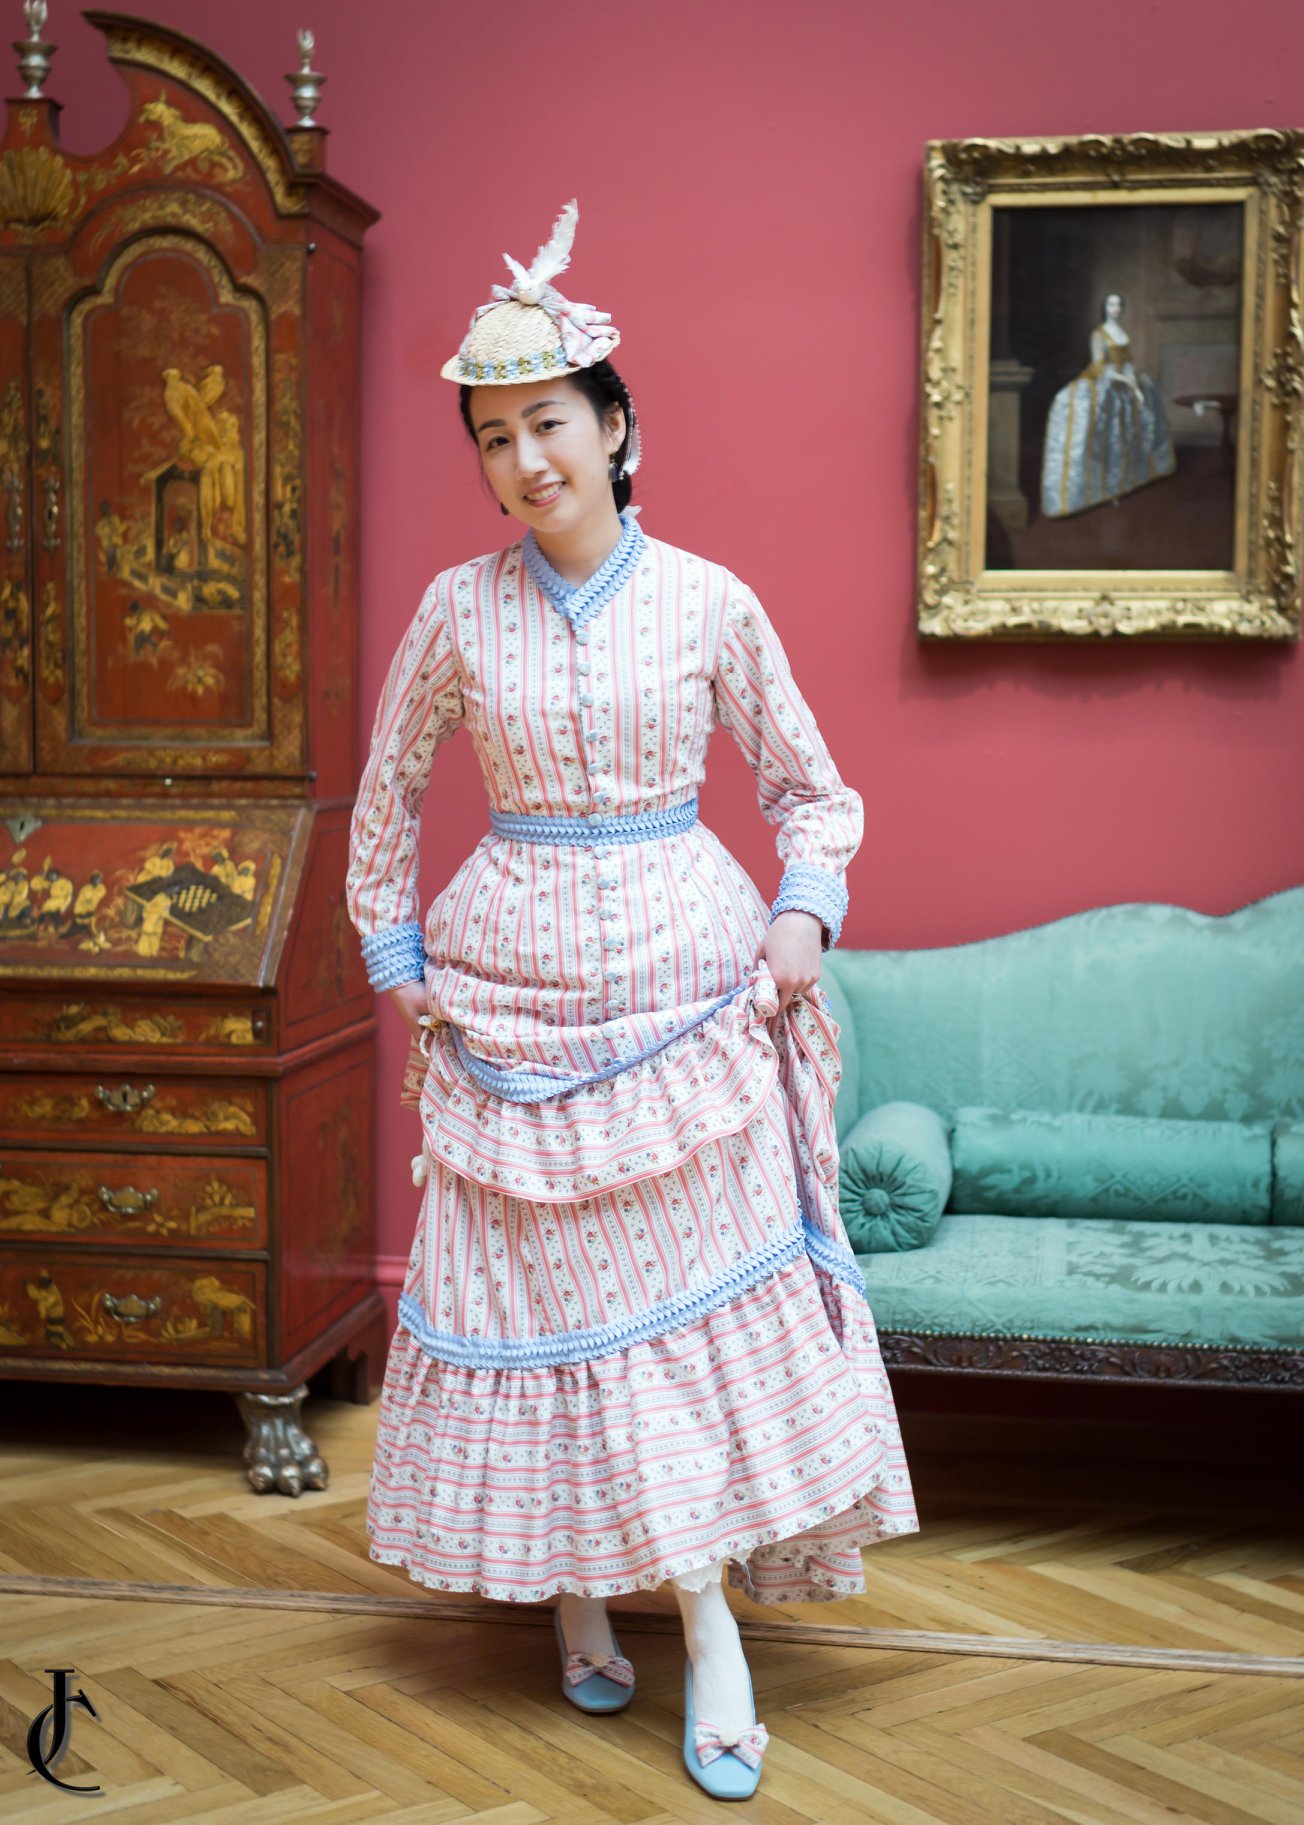
I made myself an 1870s bustle dress using pink and white striped floral cotton and the Victorian Seaside Dress pattern from Black Snail Patterns.

I used a cotton that was very lightweight which helped the fluffy bustle layers stay fluffed!

My shoes are American Duchess Tissot shoes that I dyed blue and made shoe clips for out of my fabric scraps.IMG_5553

The blue trim is pleated grosgrain ribbon, which I put on the collar, cuffs, belt, and skirt flounces. I made my hat using a palm fan (more on that later in this post)!IMG_5566

My buttons were made using vintage fabric over vintage covered button kits. (The bodice actually closes with hooks and bars and the buttons are decorative). I prefer this technique because it means I can adjust the fit more easily and I don’t have to make a lot of buttonholes!IMG_5579

I recommend the Black Snail pattern. It consist of a bodice with an attached “apron,” a skirt, and long sleeves. The bustle effect is achieved by having ruffled flounces on the apron and skirt, and by having hidden ribbon ties underneath the apron.

The pieces all fit together well and the sizing chart was accurate. I was impressed that even the very large pieces of the skirt panels fit together, which means the pattern was graded well.IMG_5574

The sleeve is an 1870s two-part coat sleeve with a seam down the elbow and another seam on the inside of the arm. It is loose-fitting and appropriate to the era, and the fullness of the sleeve head needs to be eased into the shoulder of the bodice.IMG_5571

I made some simplifications to the Black Snail pattern in order to speed up the project:

  • I did not bother making a skirt placket and facing for the underskirt, since the top half is covered by the apron overskirt anyway.
  • The pattern calls for the back half of the underskirt to be cartridge pleated into the waistband. I did regular pleats since the top would be hidden.
  • I cut my flounces using the straight grain instead of on the bias like the pattern calls for. This is so I could use the selvedge instead of hemming the many yards of flounced fabric. However, this meant that my flounce stripes are horizontal instead of diagonal so you should cut on the bias if you prefer the diagonal. (The other reason why I used the straight grain is because I had limited fabric and the bias cut takes up more yardage).
  • The bustle effect comes from gathering up the apron overskirt in the back with twill tape. The pattern asks you to sew pieces of tape to the bodice then sew buttons to strategic parts of the overskirt that get attached to buttonholes on the tapes. In order to skip making the buttonholes I just used tapes on the skirt as well to tie to the bodice tapes.
  • The pattern calls for self trim to cover where the skirt and flounces meet. Instead of doing that I used purchased pre-pleated grosgrain trim from Amazon (affiliate link), which is available in other colors.

Just a warning: if you purchase the pre-printed pattern please make sure you have large paper around your house. There are some pattern pieces where you are told to extend the piece by up to 15 inches. (This was done by cutting a piece through the middle, inserting some paper, then drawing lines to connect the original pieces).  I had to do this for a number of the larger pieces, and I didn’t expect to do so much assembly for a pattern I did not print at home. I’m not sure if the reason behind this was to save paper costs, but I would have gladly paid a little more for the pattern to avoid the extra work.

Here’s some photos I took of the dress in progress so you can see what the apron looks like up and down. JULE6537

Black Snail recommends 11 yards of 51″ wide fabric for this dress. I only had 9 yards of 42″ fabric but made it work by using straight grain flounces instead of cutting my flounces on the bias like the pattern recommends.

Underneath my skirt I wore a “phantom bustle” (made during a class taught by Christina Deangelo) and two antique petticoats.EEWR4333PTLV3670DEGD9186

On top I wore this custom silk brocade late Victorian corset by Redthreaded. I own several other pieces by them and they are all very well-made. They offer both ready-to-wear and custom sizing and the owner Cynthia Settje is committed to great customer service and fair treatment and wages for her employees.

Screen Shot 2020-03-14 at 3.31.34 PM

Photos by Redthreaded

My hat base was made by me using a palm fan I had around the house! I trimmed it with leftover fabric from my dress, some leftover floral trim from my 18th century shepherdess outfit, and a little bird I got from the craft store. (I am wearing glass intaglio earrings from Dames a la Mode).IMG_5599

The fabric is a long pleated rectangle with pointed ends.IMG_5595

When I said palm fan, I literally meant a palm fan.IMG_5419

I soaked it in water to soften it, cut off the handle, and molded it around a bowl.IMG_5425

After it was dry I machine-sewed the ends together and trimmed off excess. IMG_5430

Voila, a hat base!IMG_5432

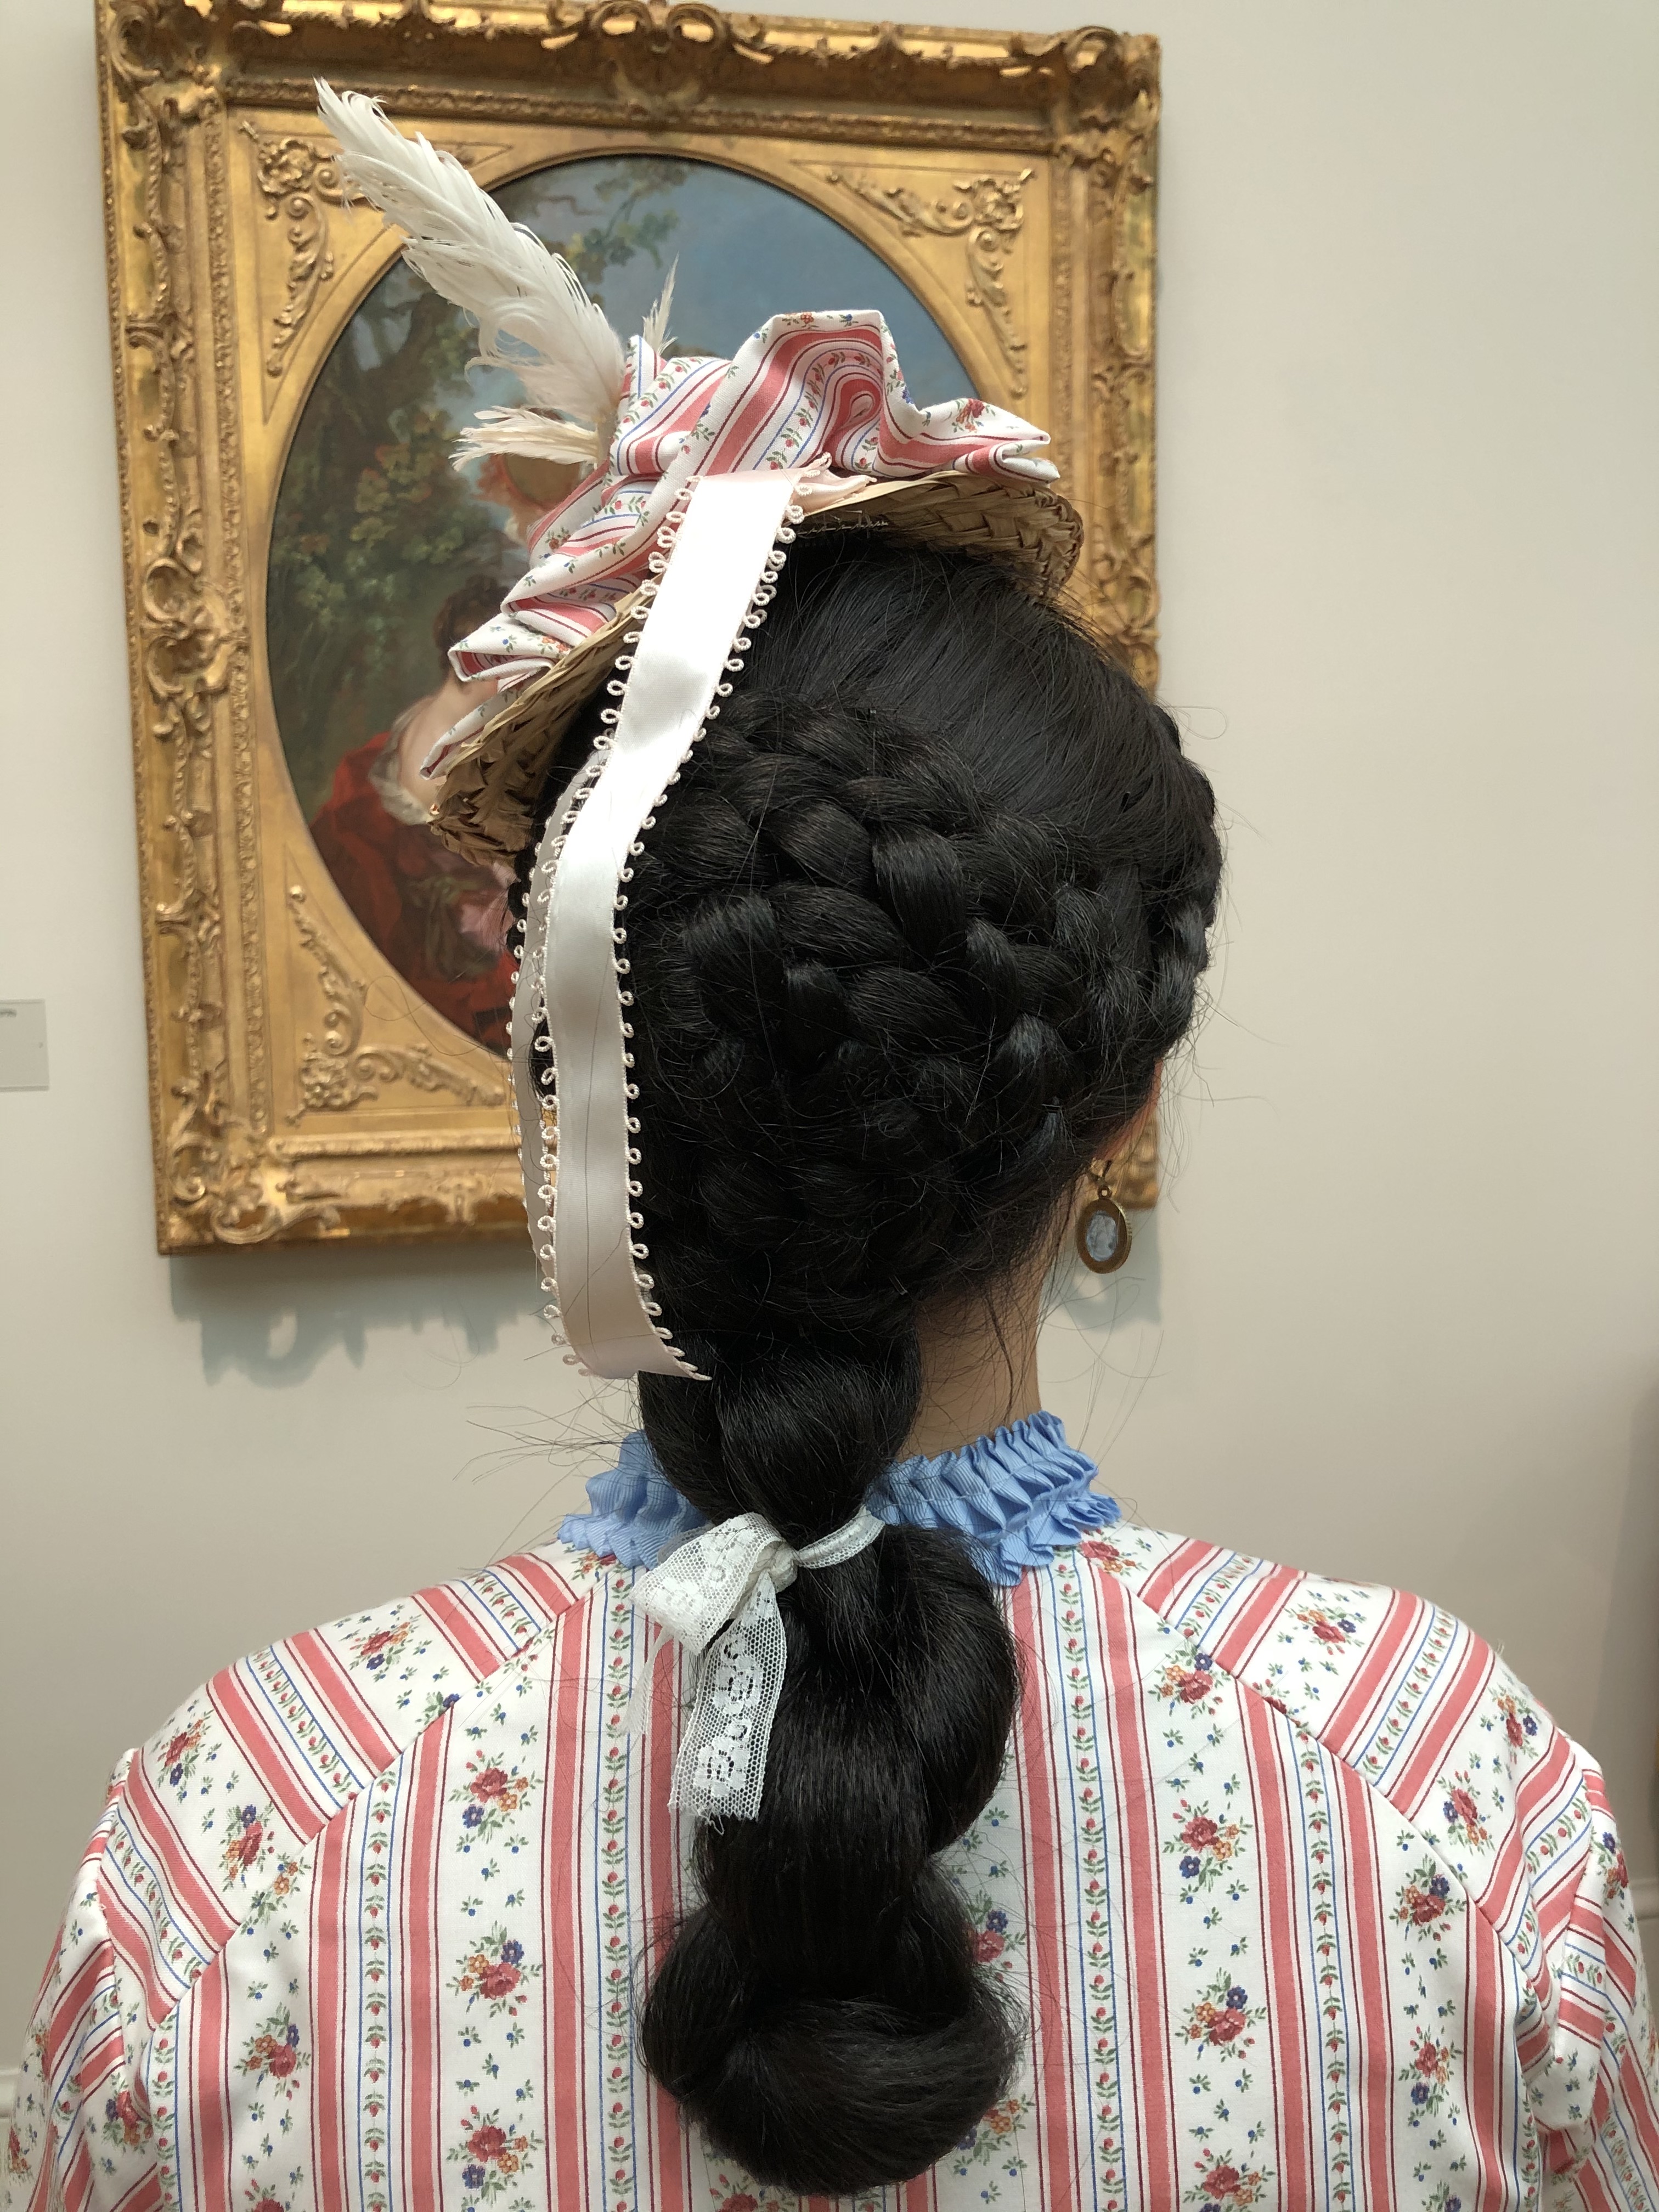
For my hair I wore 3 false hair pieces: a large braided bun, a crown braid, and twist hanging from the bun.IMG_5591

I used a remnant of pink ribbon I had around the house to trim the hat, but I think for a future wearing I’d like to replace it with a much wider and longer ribbon.

Project costs (not including undergarments and accessories):

  • Pattern: $20.70 from Black Snail Patterns (purchased during a sale with free shipping).
  • 9 yards cotton fabric: $35 including shipping from Facebook
  • 25 yards pleated trim: $13.06 from Amazon (during a sudden and lucky price drop! Plus I still have leftovers!)
  • Lining: $0 (scraps pieced together from previous project leftovers)
  • Thread, notions, etc: ~$5

TOTAL: $73.16 (woohoo for bargain shopping!)

I had such a lovely time. Thank you John Carey for these photos with some of my favorite beautiful ladies!


Edwardian Dress at the Monet Exhibit at the de Young Museum (Plus Butterick B6229 Pattern Hack)

Last weekend my local costume guild organized an outing to see an exhibit of Monet paintings at the de Young Museum in San Francisco and I wore a dress made of blue cotton sateen and antique lace.IMG_7850

I had to take photos looking upwards because my broad-brimmed hat created shadows on my face, and I was also trying to hide a splint on my hand, so sorry about the weird poses! It was a bit cold that morning so I wore an antique Edwardian blouse underneath my dress as a guimpe.IMG_7818

I needed a quick and simple dress so I used Butterick B6229, with modifications. I picked that pattern because I was already familiar with it after using it for my Downton Abbey maid costume, and knew it fit.IMG_8004

This is what the pattern looks like before I hacked it.IMG_7539

The 4 main changes I made to the pattern for this dress:

  • I changed the dress from front-opening to back-opening. The front button closures were turned into back hook/bar closures. (Cut the front bodice piece as one piece instead of two, and cut the back bodice piece as two instead of one. Do the same for the skirt panels).
  • The sleeves were shortened. (I cut them off a little below the elbow and turned the edges inside the sleeve. You don’t need to cut the cuff pattern pieces).
  • I cut a square neckline and omitted the standing collar. (I pinned the lace collar and strudel panel on the unfinished dress while it was on a dress form and marked where to cut the neckline).
  • Instead of having the belt go completely around my waist it does not cover the center lace panel. (I shortened the belt and based on my waist measurement minus the lace panel plus seam allowance).

IMG_8013

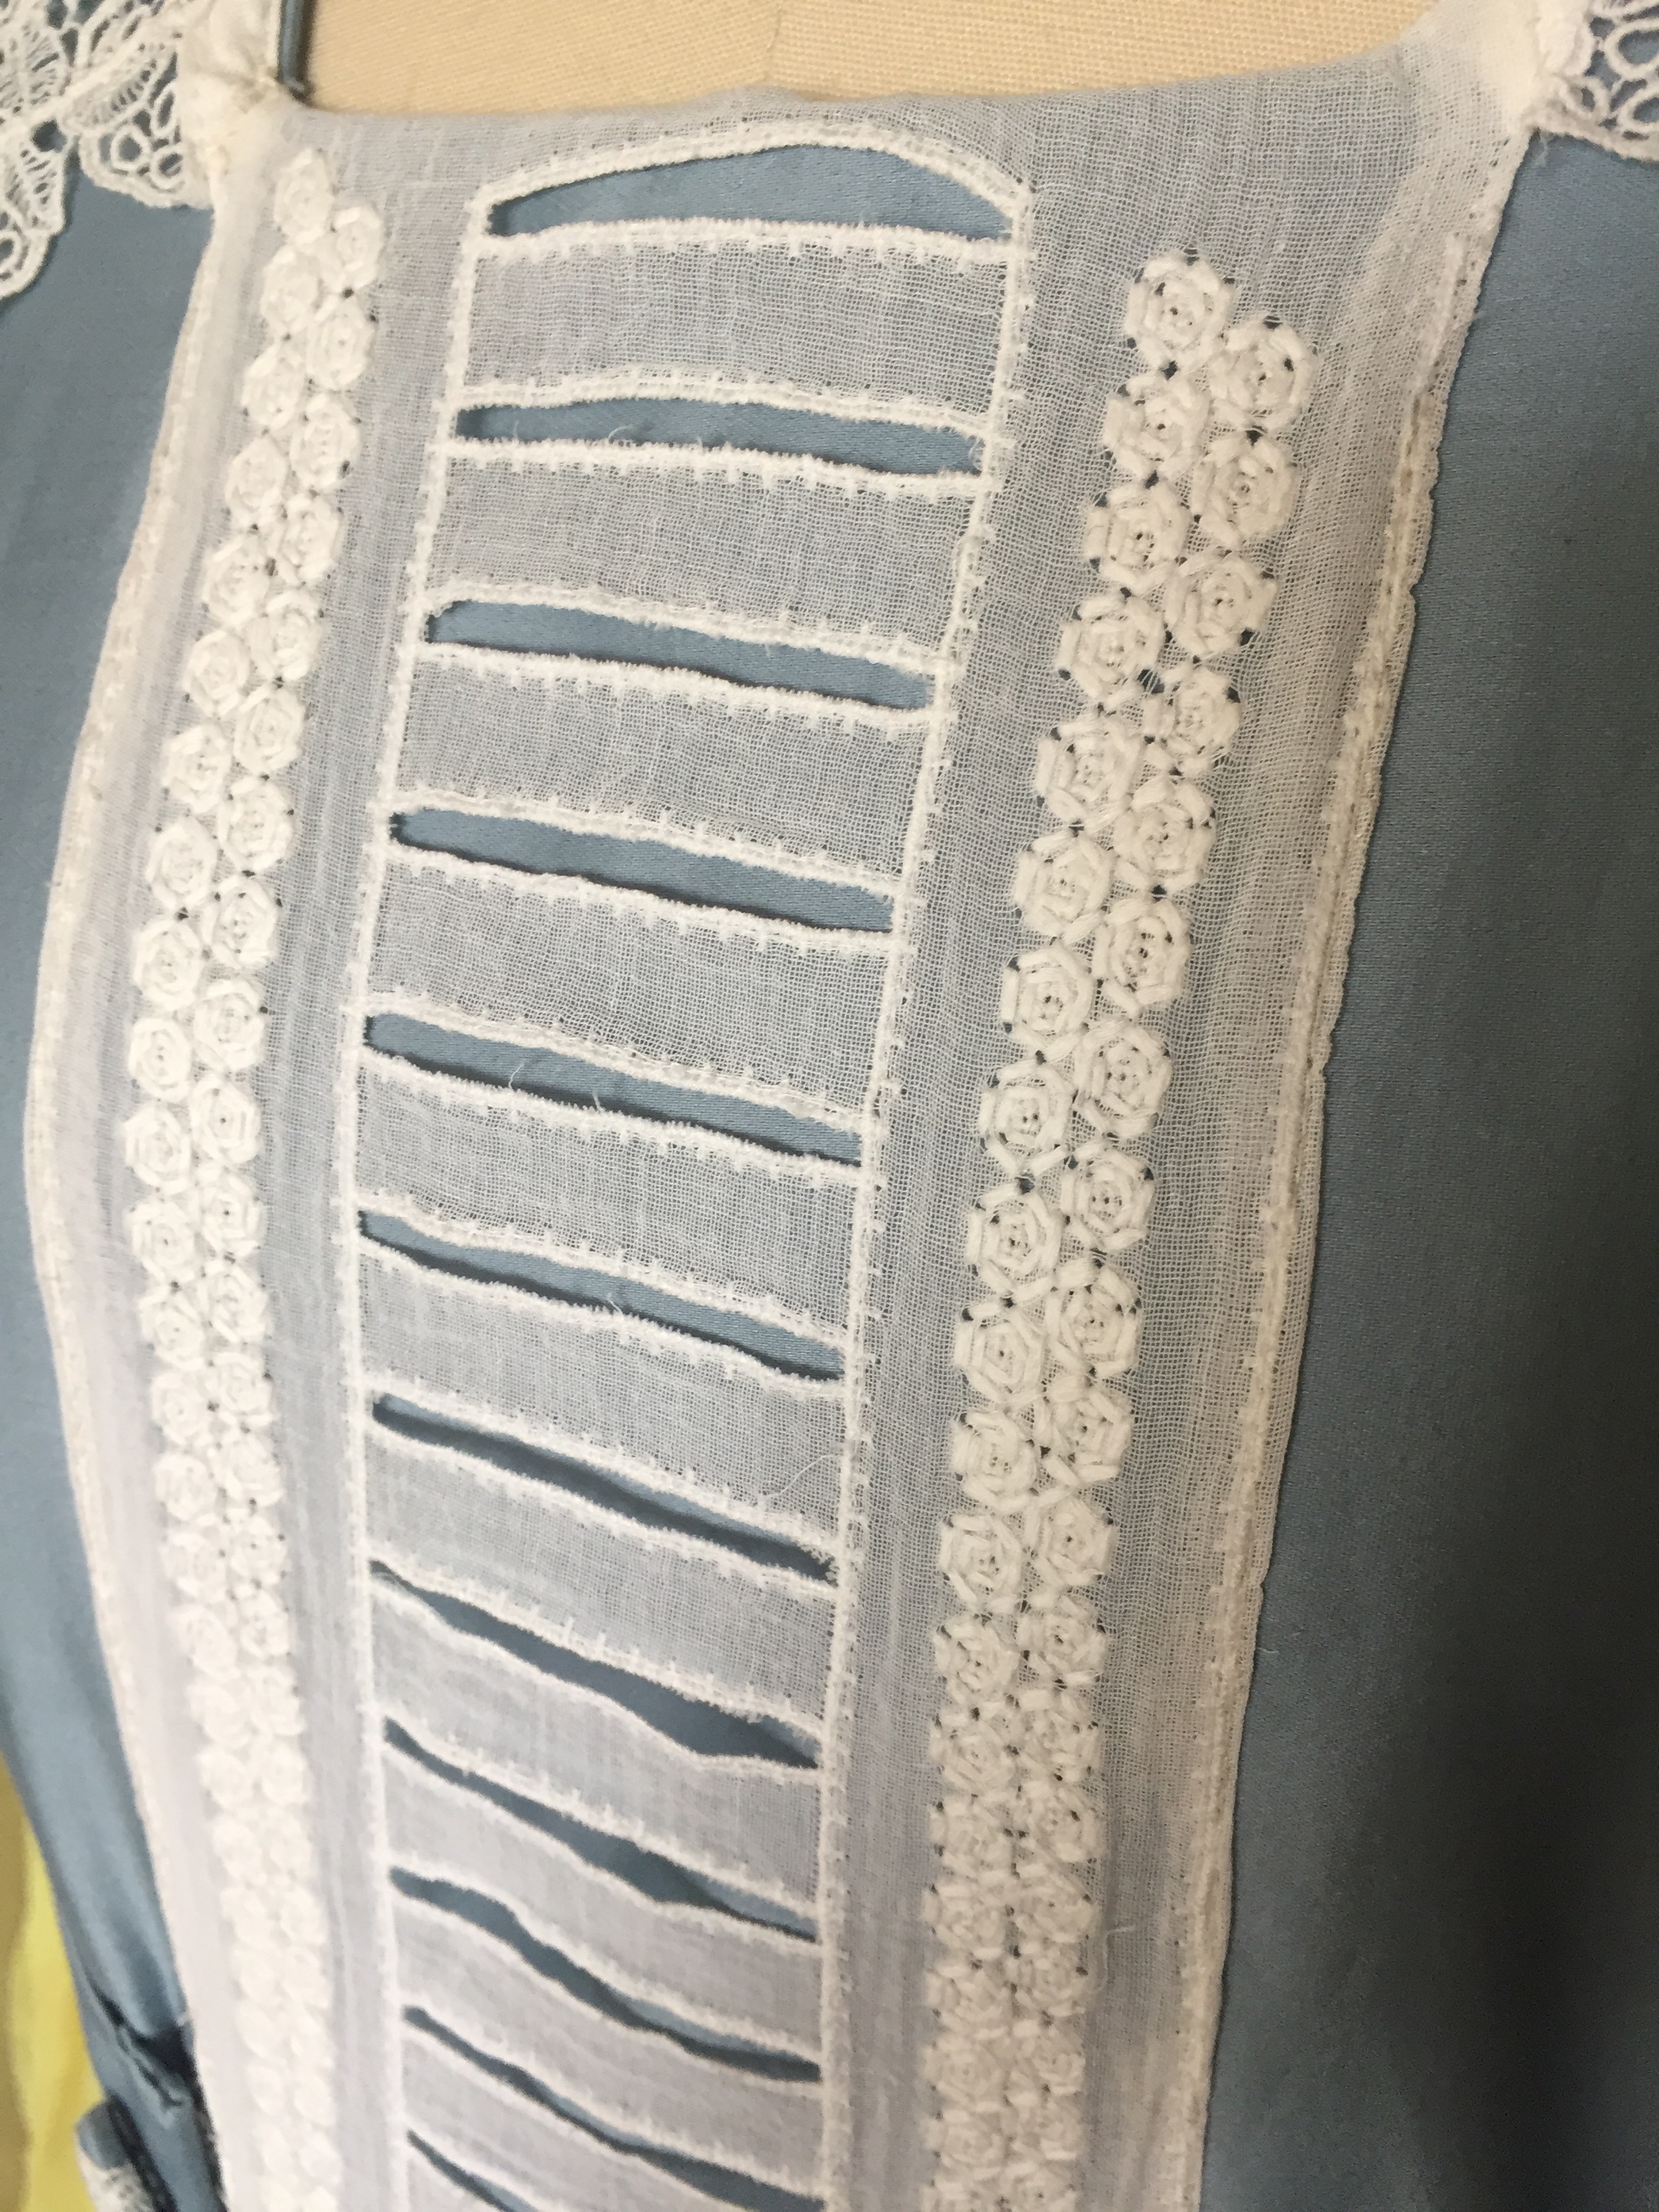
I am calling this my Strudel Dress because of the slits in the lace panel down the front. I bought the panel a while back and wasn’t sure what to do with it until I realized it was perfect for this dress. I had just barely enough; I literally had 1 inch of lace left over. My shoes are American Duchess Theda Edwardian shoes, aka “Skeletor,” which also have a bit of a strudel-y look to them.IMG_7560.JPG

The Supima cotton sateen I used has a lovely sheen to it, but is a bit thin and prone to wrinkling so I flat-lined all the pieces with cotton broadcloth. In retrospect I should have skipped the flat-lining for a more flowy Edwardian look, but perhaps having no flat-lining would have made the dress wrinkle even more when I sat down.IMG_8006

The dress closes in the back with hooks and bars, and the belt is sewn down on one side and attaches on the other with hooks and bars. The buttons are decorative only. (They were made with a covered button kit).IMG_8018

The collar is antique lace, picked up at the Costume College Bargain Basement.IMG_8007

The “strudel” lace is from a Costume College marketplace vendor.IMG_8008

The antique lace cuffs were a scrap piece left over from my Downton Abbey maid project, and I had just enough!IMG_8015

Dress Cost:

  • 3 yards blue Supima cotton sateen: $13.20 including tax with stacked coupons at Joann’s
  • 3 yards white cotton lining: $12 including shipping from eBay
  • Pattern: $0, already previously used
  • Lace panel: $5.50 from Costume College vendor
  • Lace collar: $1 from Costume College bargain basement
  • Lace cuffs: $0, leftover from other project
  • Lace for buttons: $0, gifted
  • Buttons, thread, hooks and bars: ~$3 from stash, bought in bulk

Total cost: ~$34.20

Woohoo, less than $35 for a dress!

My hat was made from a straw beach hat I already had and I don’t recall how much I spent on it, but they are easy to find. I hot-glued a lot of fake flowers from my stash onto the hat and filled in a few spots with assorted feathers. (Tip: buying a floral garland from the craft store is cheaper than buying individual stems).IMG_7915

Oops, I just noticed that stray thread. I admit this dress was a bit of a rush job. Aside from the closures and hemming, I made the bulk of it in a weekend using a machine and forgot to iron flat all the seams like I usually do.

There was a neat doorway in the garden where I posed for some photos.IMG_7952 copy

And here are some of the other lovely ladies that were there that day. There were many more that I forgot to capture.IMG_7855

Overall it was a lovely day!IMG_7906

1830s Cotton Day Dress

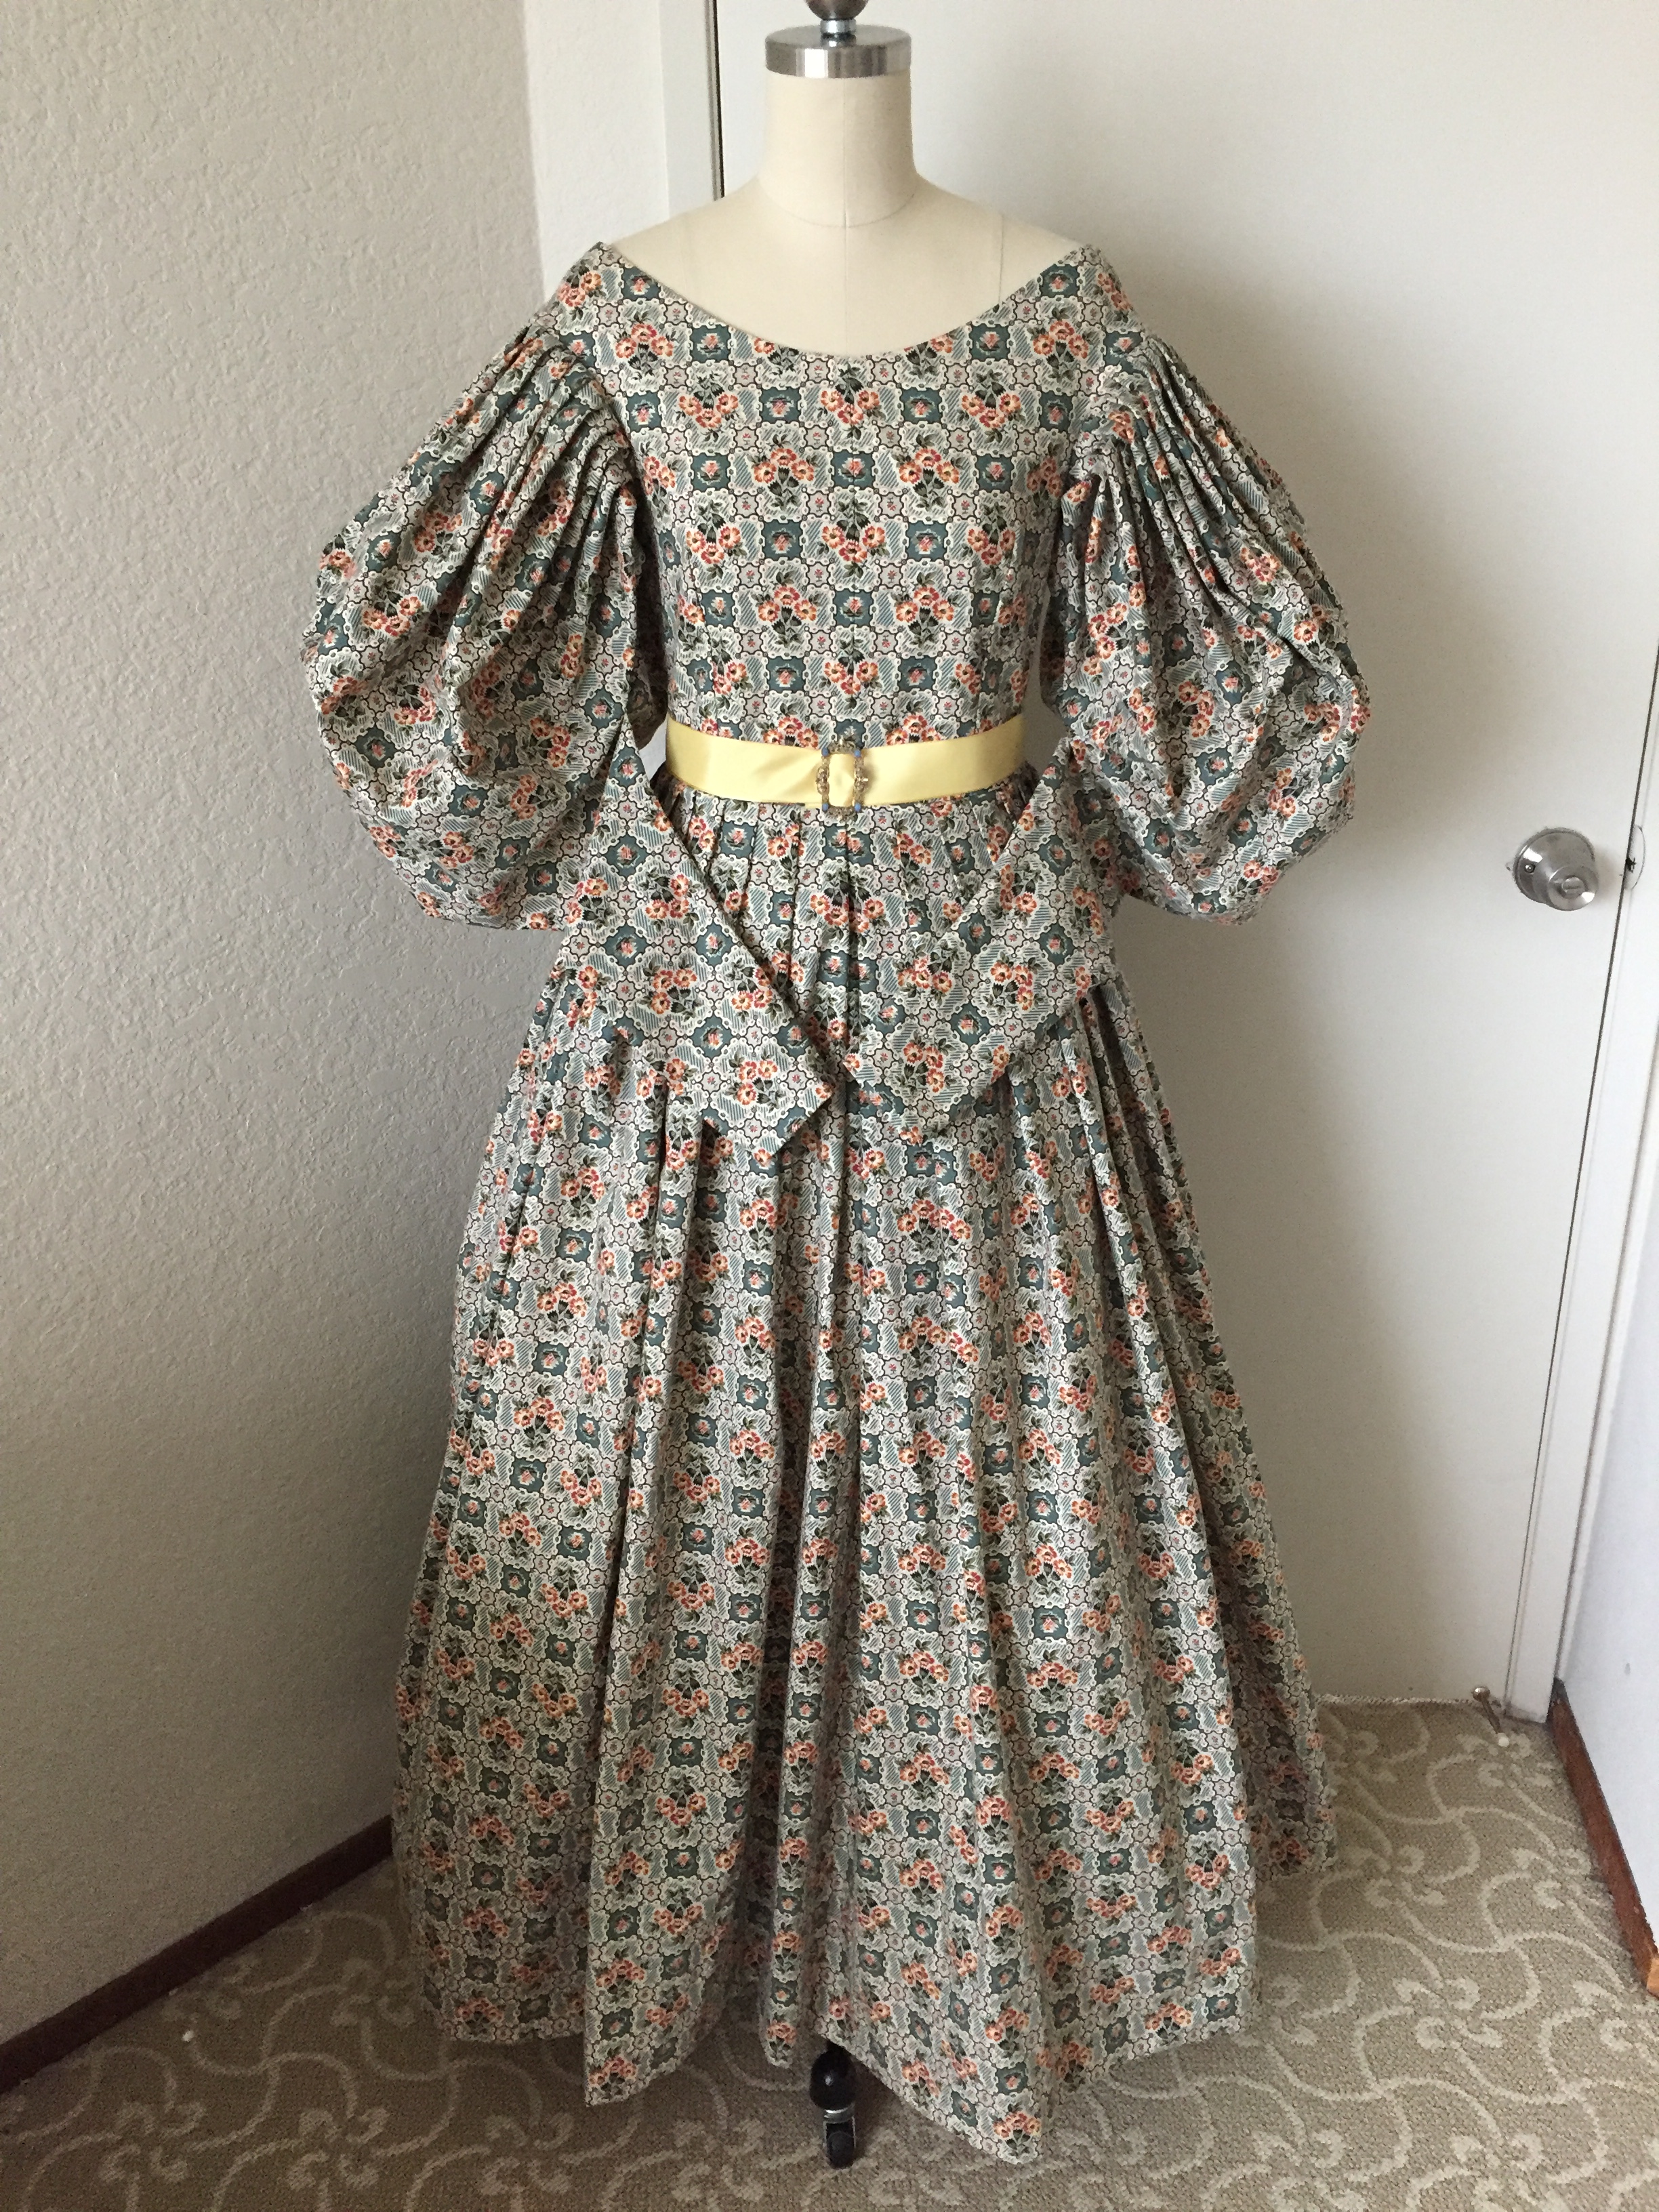
I have an 1830s-themed picnic later this year, so I made another Romantic era gown! Although I already have the plaid silk dress that I wore to the Dickens Fair, the thought of wearing silk to an outdoor summer picnic did not sound very comfortable. Instead, I decided to have a washable cotton dress in a busy print that could hide stains.IMG_6177.JPGIMG_6179.JPG

The dress is shown above without the sleeve plumpers or the petticoats properly starched, so there will be a lot more poof when I wear it! The fabric is a quilting cotton by Andover Fabrics from their Maling Road collection, shown below with one of the hidden pockets I put in the side seams.IMG_5788.JPG

Although the cotton I bought was not advertised as a reproduction print, I thought the general checkered feel of it was similar to this antique wool gown at the Victoria and Albert Museum.Dress-With-Lace-Pelerine

The cotton pleats up beautifully, as seen in my sleeves. (Since the sleeves have about a yard of fabric, deep pleats are needed to get all that fabric into the armscye. Gathering will be too bulky).IMG_6182.JPG

I have lots of details about construction, undergarments, and accessories in my post about my plaid silk gown, so I’ll just go over the things I did differently in this gown.

As before, I used the Truly Victorian TV455 1830s Romantic Era pattern to make my dress, but this time I redrafted the sleeve pattern to have a more defined difference between the upper and lower sleeve, using the Workwoman’s Guide as a reference (drawing not to scale):IMG_6428.JPG

Other changes I made to the construction (mostly to speed things up):

  • I skipped the piping because the print was so busy, and I wanted this project to be fast!
  • I used the variation of the pattern that omits the pleating at the top of the bodice because I will be outdoors and wearing a pelerine that covers the pleating anyway.
  • I did not line the sleeves this time; this reduced the bulk when pleating.
  • Rather than having an opening in the lower sleeve that closes with hooks and eyes, I just sewed the sleeve seam shut. This means that the wrist area of the sleeve is not very tightly fitted, but still looks slim enough since I have slender hands I can carefully slide in. Having the seam fully shut made construction much easier since I had no lining, and is one less thing to fuss with when dressing.
  • Last time I flat-lined my silk with an organdy interlining, then made a separate polished cotton lining. This time I skipped the lining and flat-lined my cotton print with a plain cotton interlining. Here’s a time-saving tip I posted to my Instagram stories:IMG_5757.JPG

I will be reusing the delicate cotton pelerine I made for my silk gown.IMG_6187.JPG

The yellow ribbon belt is just a placeholder; I am considering a teal or coral velvet ribbon for the sash. I also purchased a lovely carved antique abalone shell belt buckle to use with this dress. It is probably Edwardian instead of Victorian, but it has the right size and proportions.IMG_6221.JPG

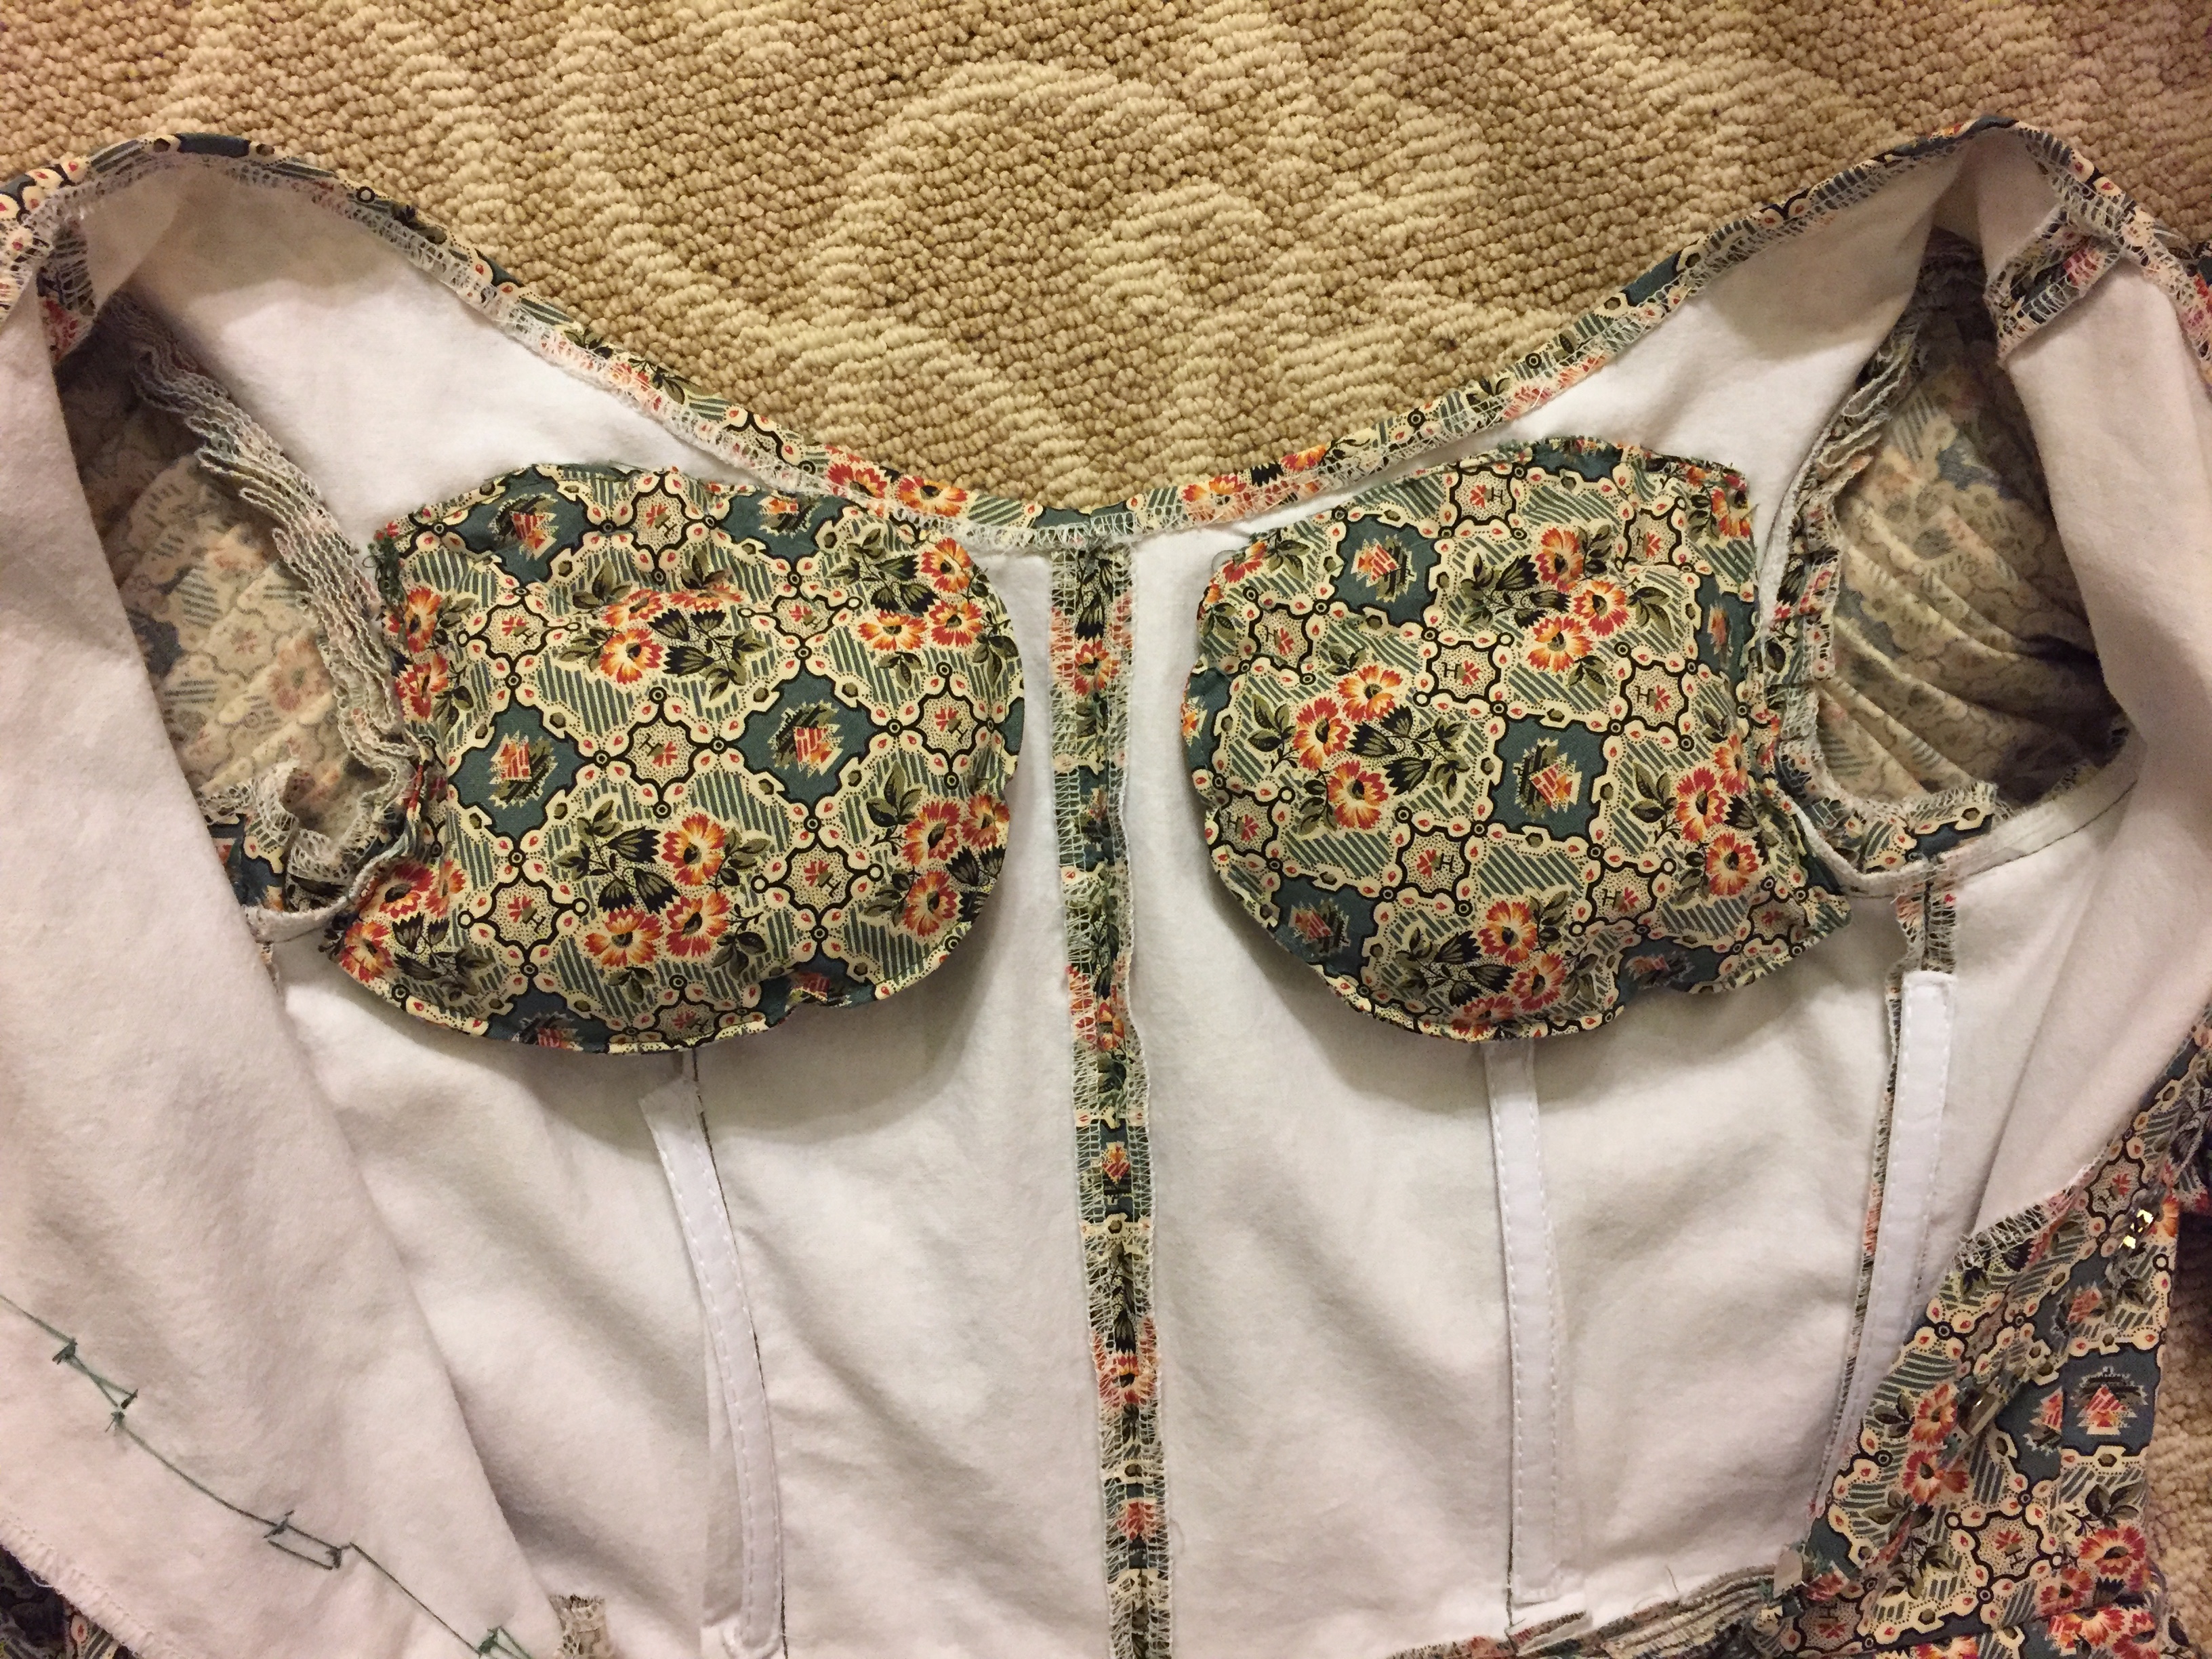
I put bust pads inside the gown, which are just cotton pouches stuffed with Poly-fil. They are not really meant to make your bust bigger, but fill out the hollow near the front of your underarm. The size, shape, and placement will depend on your body.
IMG_6401

As you can see, the neckline is just flipped down and hand-stitched into place.

Materials:

  • 8 yards of 44″ wide quilting cotton: $66.75 including shipping from eBay
  • Pattern: $0, previously used twice!
  • Bodice lining: $0 (leftover scraps from other projects)
  • Thread, hooks and eyes, Poly-fil. ~$3 (already in stash and purchased in bulk)
  • Ribbon: TBA

Not including accessories that means the dress will be around $70-75, since I already have all the undergarments, bonnet, shoes, and pelerine!

Here’s a storage tip: I now have three 1830s gowns and I don’t want to have the sleeves crushed in my packet closet. I also didn’t want to make multiple sets of sleeve plumpers. I put a plastic bag inside each sleeve and then put Poly-fil inside the bag. That meant the enormous sleeves of my 1830s dresses could muscle my other dresses in the closet out of the way.IMG_6403

IMG_6404

My event is still more than 3 months away, so I won’t be posting final worn photos for a little while, but I am glad to be done! (I don’t normally finish things this far in advance, but I wanted to make this gown while my previous 1830s dress was still fresh in my mind).IMG_6189.JPG

Wearing History Dahlia 1940s Gathered Blouse

This post is way overdue, because I made this 1940s-style blouse in August and have been enjoying it ever since! It was made using the Wearing History Dahlia 1940s Gathered Blouse pattern, with some modifications I’ll detail below.IMG_3702

This blouse is made with vintage cotton I found at the Costume College Bargain Basement. There was just enough, with careful cutting, for me to make this blouse and run the border of the print down the center front and as faux cuffs on the sleeves.IMG_3703

I used a combination of View A and B because I wanted the V-neck of View A but the button front of View B. (This also means instead of having the side closure of View A, I put hooks and eyes down the center of the peplum).

The blouse pattern doesn’t actually have a yoke. I just did a tuck in the back to hide a flaw in the fabric. I also did a neck facing instead of binding.IMG_3699

I did keep the lovely gathers in the shoulder! That is one of my favorite parts of the pattern.IMG_3701

I made button loops and self-covered buttons for the closure.IMG_3697

The last change I did was to shorten and slim the sleeves a bit because I have a small frame and skinny arms. I think the sleeve pattern as-is would work for most people; it is accurate to the slightly boxy look of the 1940s.IMG_3665

My modifications were for personal preference and not because of any flaw in the pattern. I found that the sizing was accurate and the pieces fit together. I highly recommend Wearing History and the Dahlia 1940s Gathered Blouse pattern!

Outlander Dinner Party

Last night I went to a lovely Outlander-themed dinner party at the Sequoia Lodge in Oakland. The wooden building surrounded by trees definitely contributed to the mood!  We were greeted by a bagpiper as we entered. Later, as part of the dinner entertainment there were also musicians signing and playing instruments, and some dance demonstrations.

I wore a gown I made for the occasion out of cotton plaid. I am also wearing a wool petticoat, 2 under petticoats, a double-bum pad, a pair of stays, a chemise, a fichu, and a pair of beautiful black 18th century Dunmore shoes from American Duchess.IMG_2029

It was my first time using pins to close an outfit instead of hooks and eyes. I bought some reproduction 18th century gown pins from Larkin and Smith. (I am using a combination of the medium and fine pins). I am still figuring out how to do it without stabbing myself or putting weird wrinkles into my dress, but I am getting better! (Hint: the stays are for safety as much as they are for support). You can read about construction details in my previous post.IMG_2037

My hair is rather short at the moment (even too short to braid properly) so I put it into a tiny bun on the back of my head and covered it with a large fake braided bun.IMG_2034

My fichu is actually a small vintage cotton organza tablecloth. It has lovely floral whitework, scalloped edges, and best of all, zero effort on my part! (For those that are curious, it is about 35×35 inches wide. If you are tall or broad-shouldered I’d recommend a larger square).IMG_2006

As usual, I was too busy chatting and stuffing my face with the delicious meal (puff pastry wrapped asparagus with prosciutto, roasted fowl with buttered leeks, roasted blue and gold potatoes, haggis, and sweetmeat cake with marzipan) to take as many pictures as I should have, but here are a few more!

You’d never realize that Christina of The Laced Angel and Natalie both finished their jackets that afternoon. Christina started the same day! IMG_2024

The tables were set up in  large U in the lodge. This was the side I was sitting on.IMG_2050

There was a range of social classes and decades at the dinner.IMG_2060IMG_2064

I especially loved the variety in jackets! (You can catch a glimpse of the bagpiper to the right of the photo).IMG_2015

I had a delightful time, and I think everyone else did too. (There was even a couple celebrating their 25th wedding anniversary, and they were married 25 years ago in the same location!)IMG_2032.JPG

A Giraffe Dress and Elephant PJs Using Fabrics from Tanzania

Earlier this year my friend Kim visited Tanzania and brought me back some great African fabric as a special gift.

I used this vibrant giraffe print to make myself a long dress for summer. It’s opaque enough that I was able to skip a lining, making it a perfect cotton dress for warmer weather.img_0713

I cut it out a few months ago but only recently finished because I got distracted by the Tudor kirtle.img_0714

I think it looks like the giraffes are having a chat and perhaps giving a little side-eye.img_0715

I used Vogue 8789 for the pattern, and just extended the length of the skirt to use up the width of the fabric. (You may recognize the bodice as being the same shape as my Black Swan 1950s  Ball Gown). The dress used 3 meters of fabric.img_0716

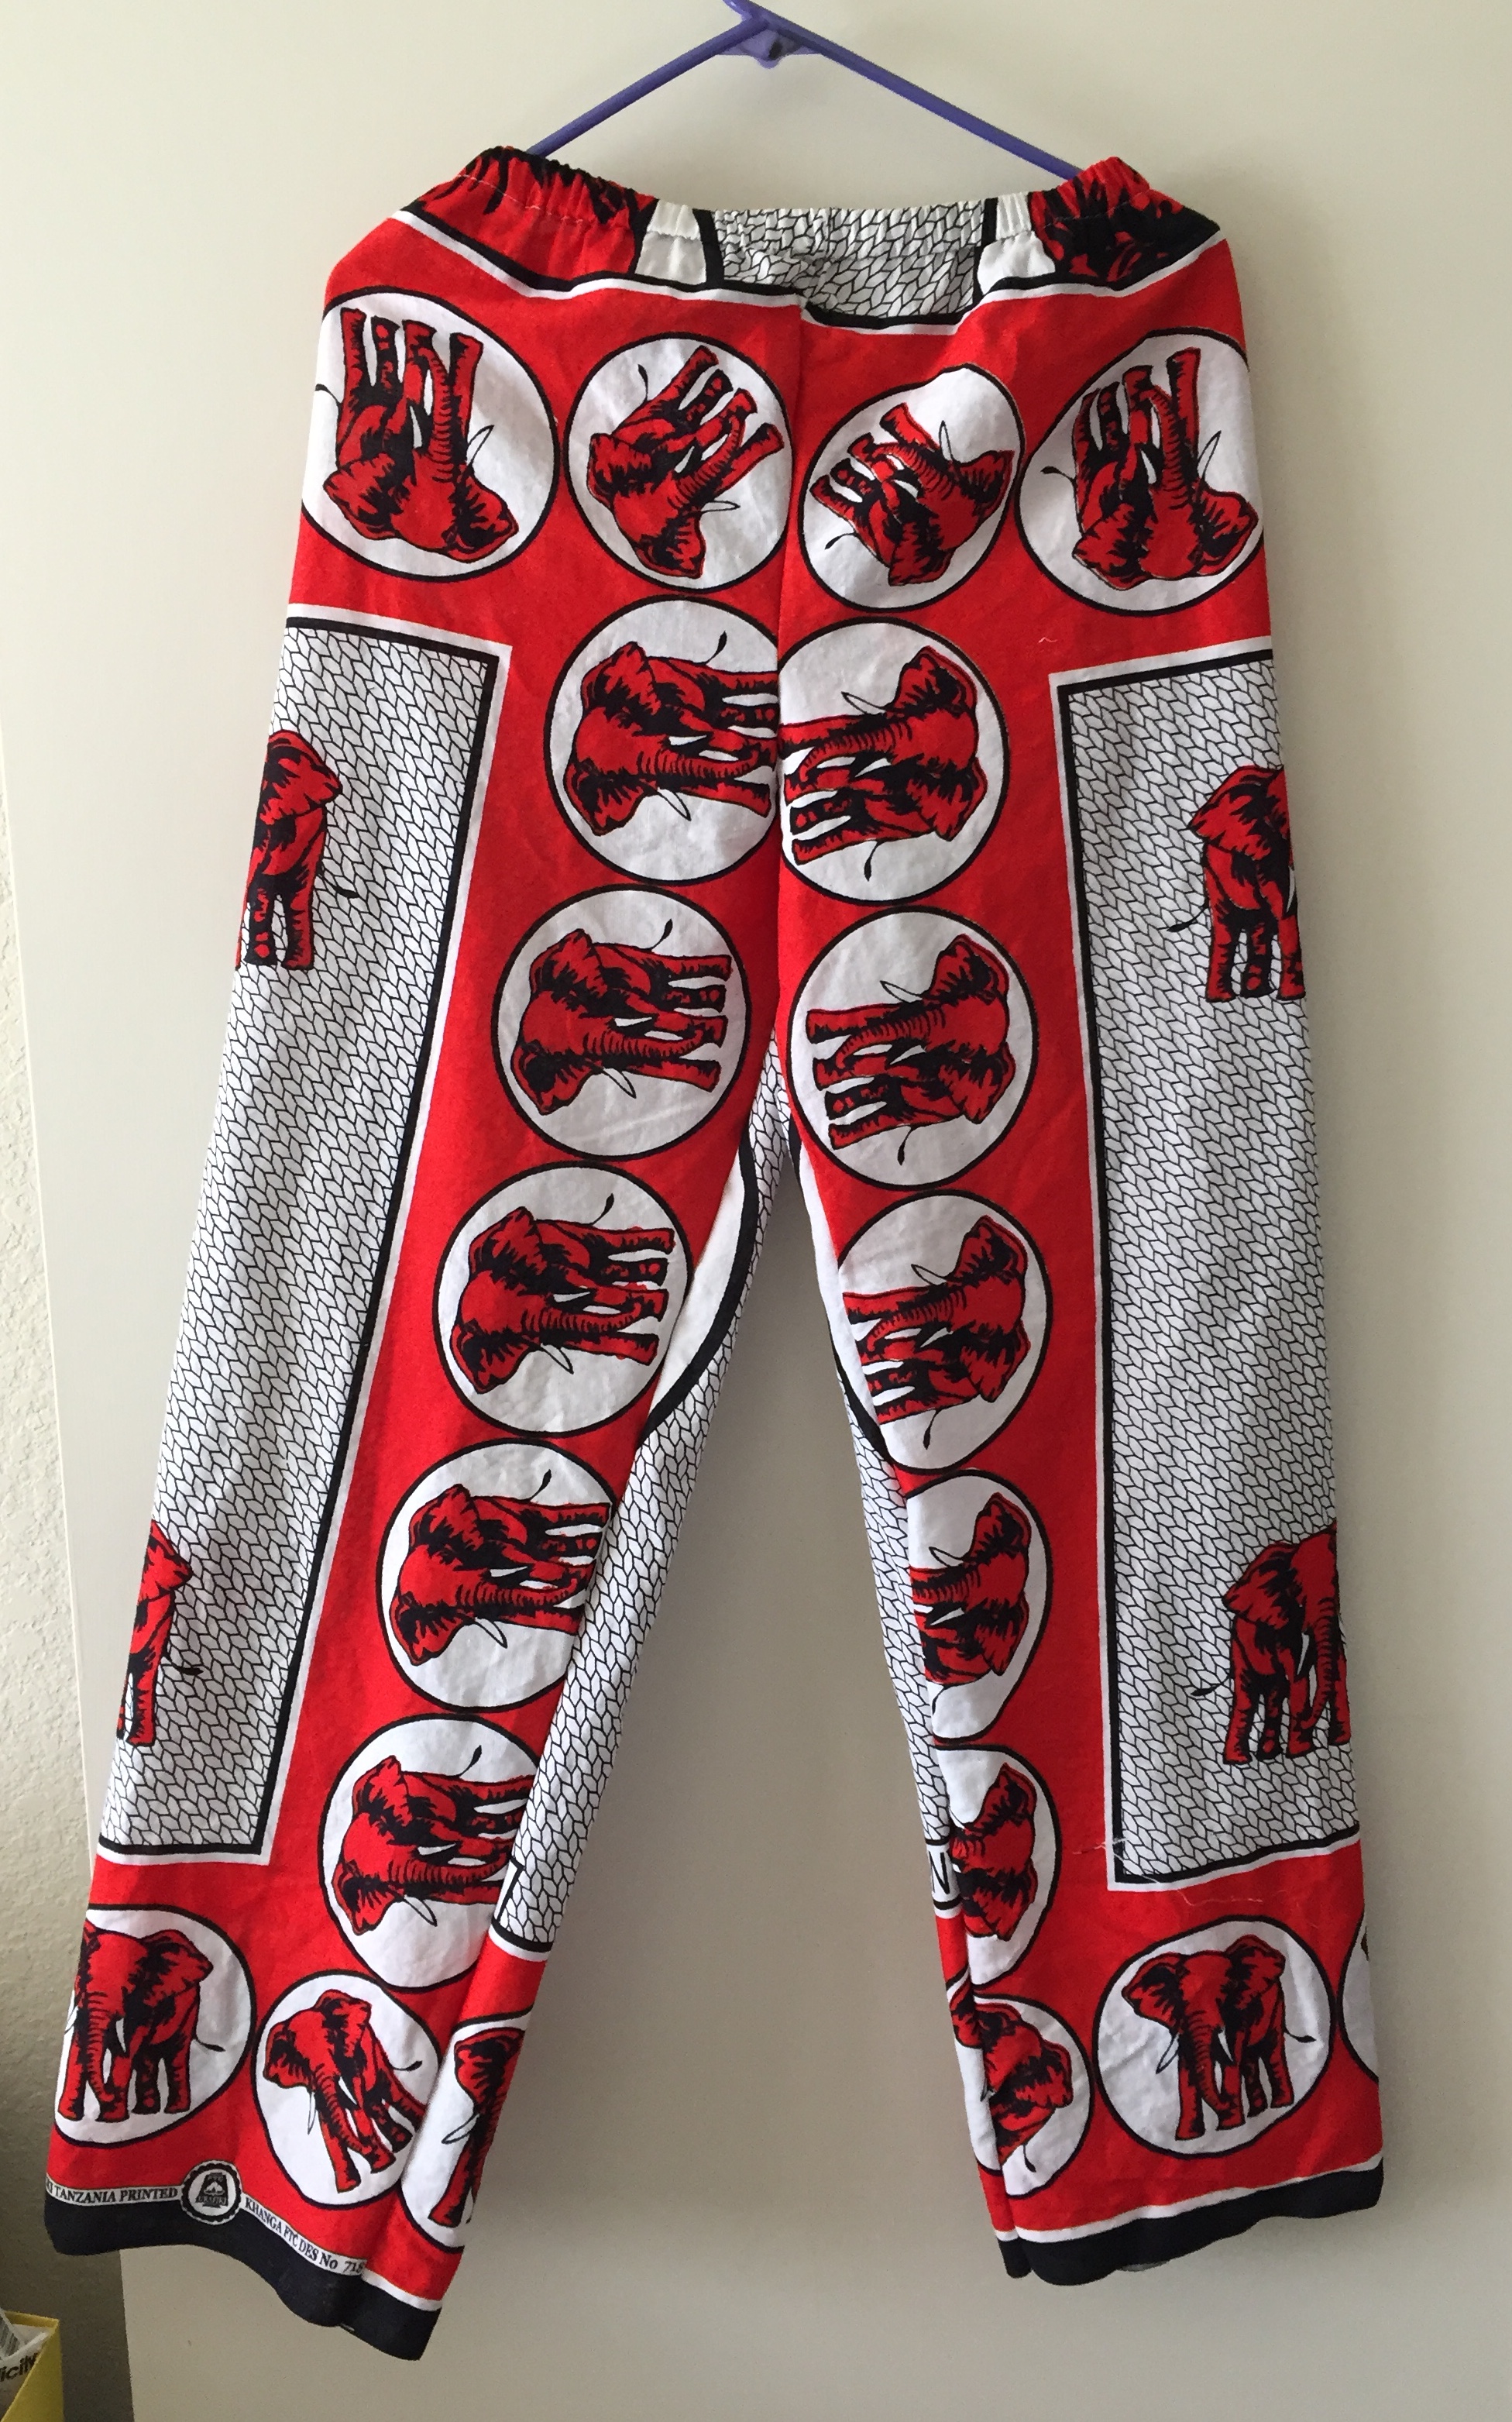
The other fabric I received from Kim was a kanga. (You can read about them and how they are used on KangaUSA). This elephant kanga is printed with the phrase “Wanyama ndiyo urithi wetu tuwatunza,” which is Swahili for “Animals are our inheritance, we should protect them.”IMG_9037.JPG

Because of the shape of the fabric and the way the print is formatted I had to think about how to cut the fabric, but realized that pajama bottoms are a great way to use a rectangular print.img_9038

The pattern is Butterick 6837, which I’ve used a number of times in the past to make PJs for myself and my family. If you have a serger and put in an elastic waistband you can make PJ pants in about an hour with enough practice.IMG_9040.JPG

I was able to use up the kanga with very little fabric wasted. Because of my height I had to piece a little fabric at the top to make it long enough, but a shorter person could skip this step. This project was so quick it was my first sewing project right after attending Costume College in August, when I wanted something easy.

I’m still working on my last project of 2016, but Happy New Year!

1840s Fan Front Dresses at the Dickens Fair – and Twins!

Last weekend I went to the Dickens Christmas Fair and wore my 1840s fan-front dress, along with a few other friends wearing the same style. One of my friends had the same orange and navy fabric that we purchased independently by coincidence, so we had a good time being twins!img_0498

I made this dress last year so you can read about my construction details on a previous post. I am wearing a bonnet by Lynne Taylor, a shawl from eBay, and ivory silk stockings and Tavistock button boots from American Duchess.img_0538img_0535

Our “backstory” for that day at fair was that Elizabeth had consumption (hence the dark eye make up). As her dear devoted sister I made her many nutritious broths and teas, which tasted like almonds.img_0509

She spent a lot of time coughing while the rest of us enjoyed ourselves!img_0502

I love this cotton print very much, and I think the orange bows that Elizabeth surprised me with were a nice touch this time.img_0507

1770s Robe à l’Anglaise Retroussée Using Ikea’s Ljusöga Fabric

At Costume College I wore my finished robe à l’Anglaise retroussée, previously debuted in an unfinished form at the Pirate Festival.  I don’t have all my formal portraits yet, but Andrew Schmidt, the official CoCo photographer, put up this picture as one of the preview shots.

18th century elegance by Andy Schmidt

Photo by Andrew Schmidt

The dress is made from one king-sized Ikea duvet cover! And I still have plenty of fabric left over for another project, such as a jacket. The bodice is lined with linen and I used the Period Impressions 1770 Polonaise and Petticoat pattern. (I highly recommend this pattern. It was simple to follow, relatively quick to put together, and I had to make very little adjustment to the fit).IMG_8771

(I am wearing red Kensingtons with paste buckles and clocked silk stockings, all from American Duchess). The back of the dress can be worn down as a regular Anglaise, or retroussée by looping the two twisted rayon cords around the fabric-covered buttons.IMG_8772

IMG_8983

I would like to get a bigger hat (this one goes with a different outfit) but ran out of time. I also attempted hair buckles, but that was a disaster, so I  just put my hair up in a high bump over a rat, then put flowers in the back.IMG_8774IMG_8776


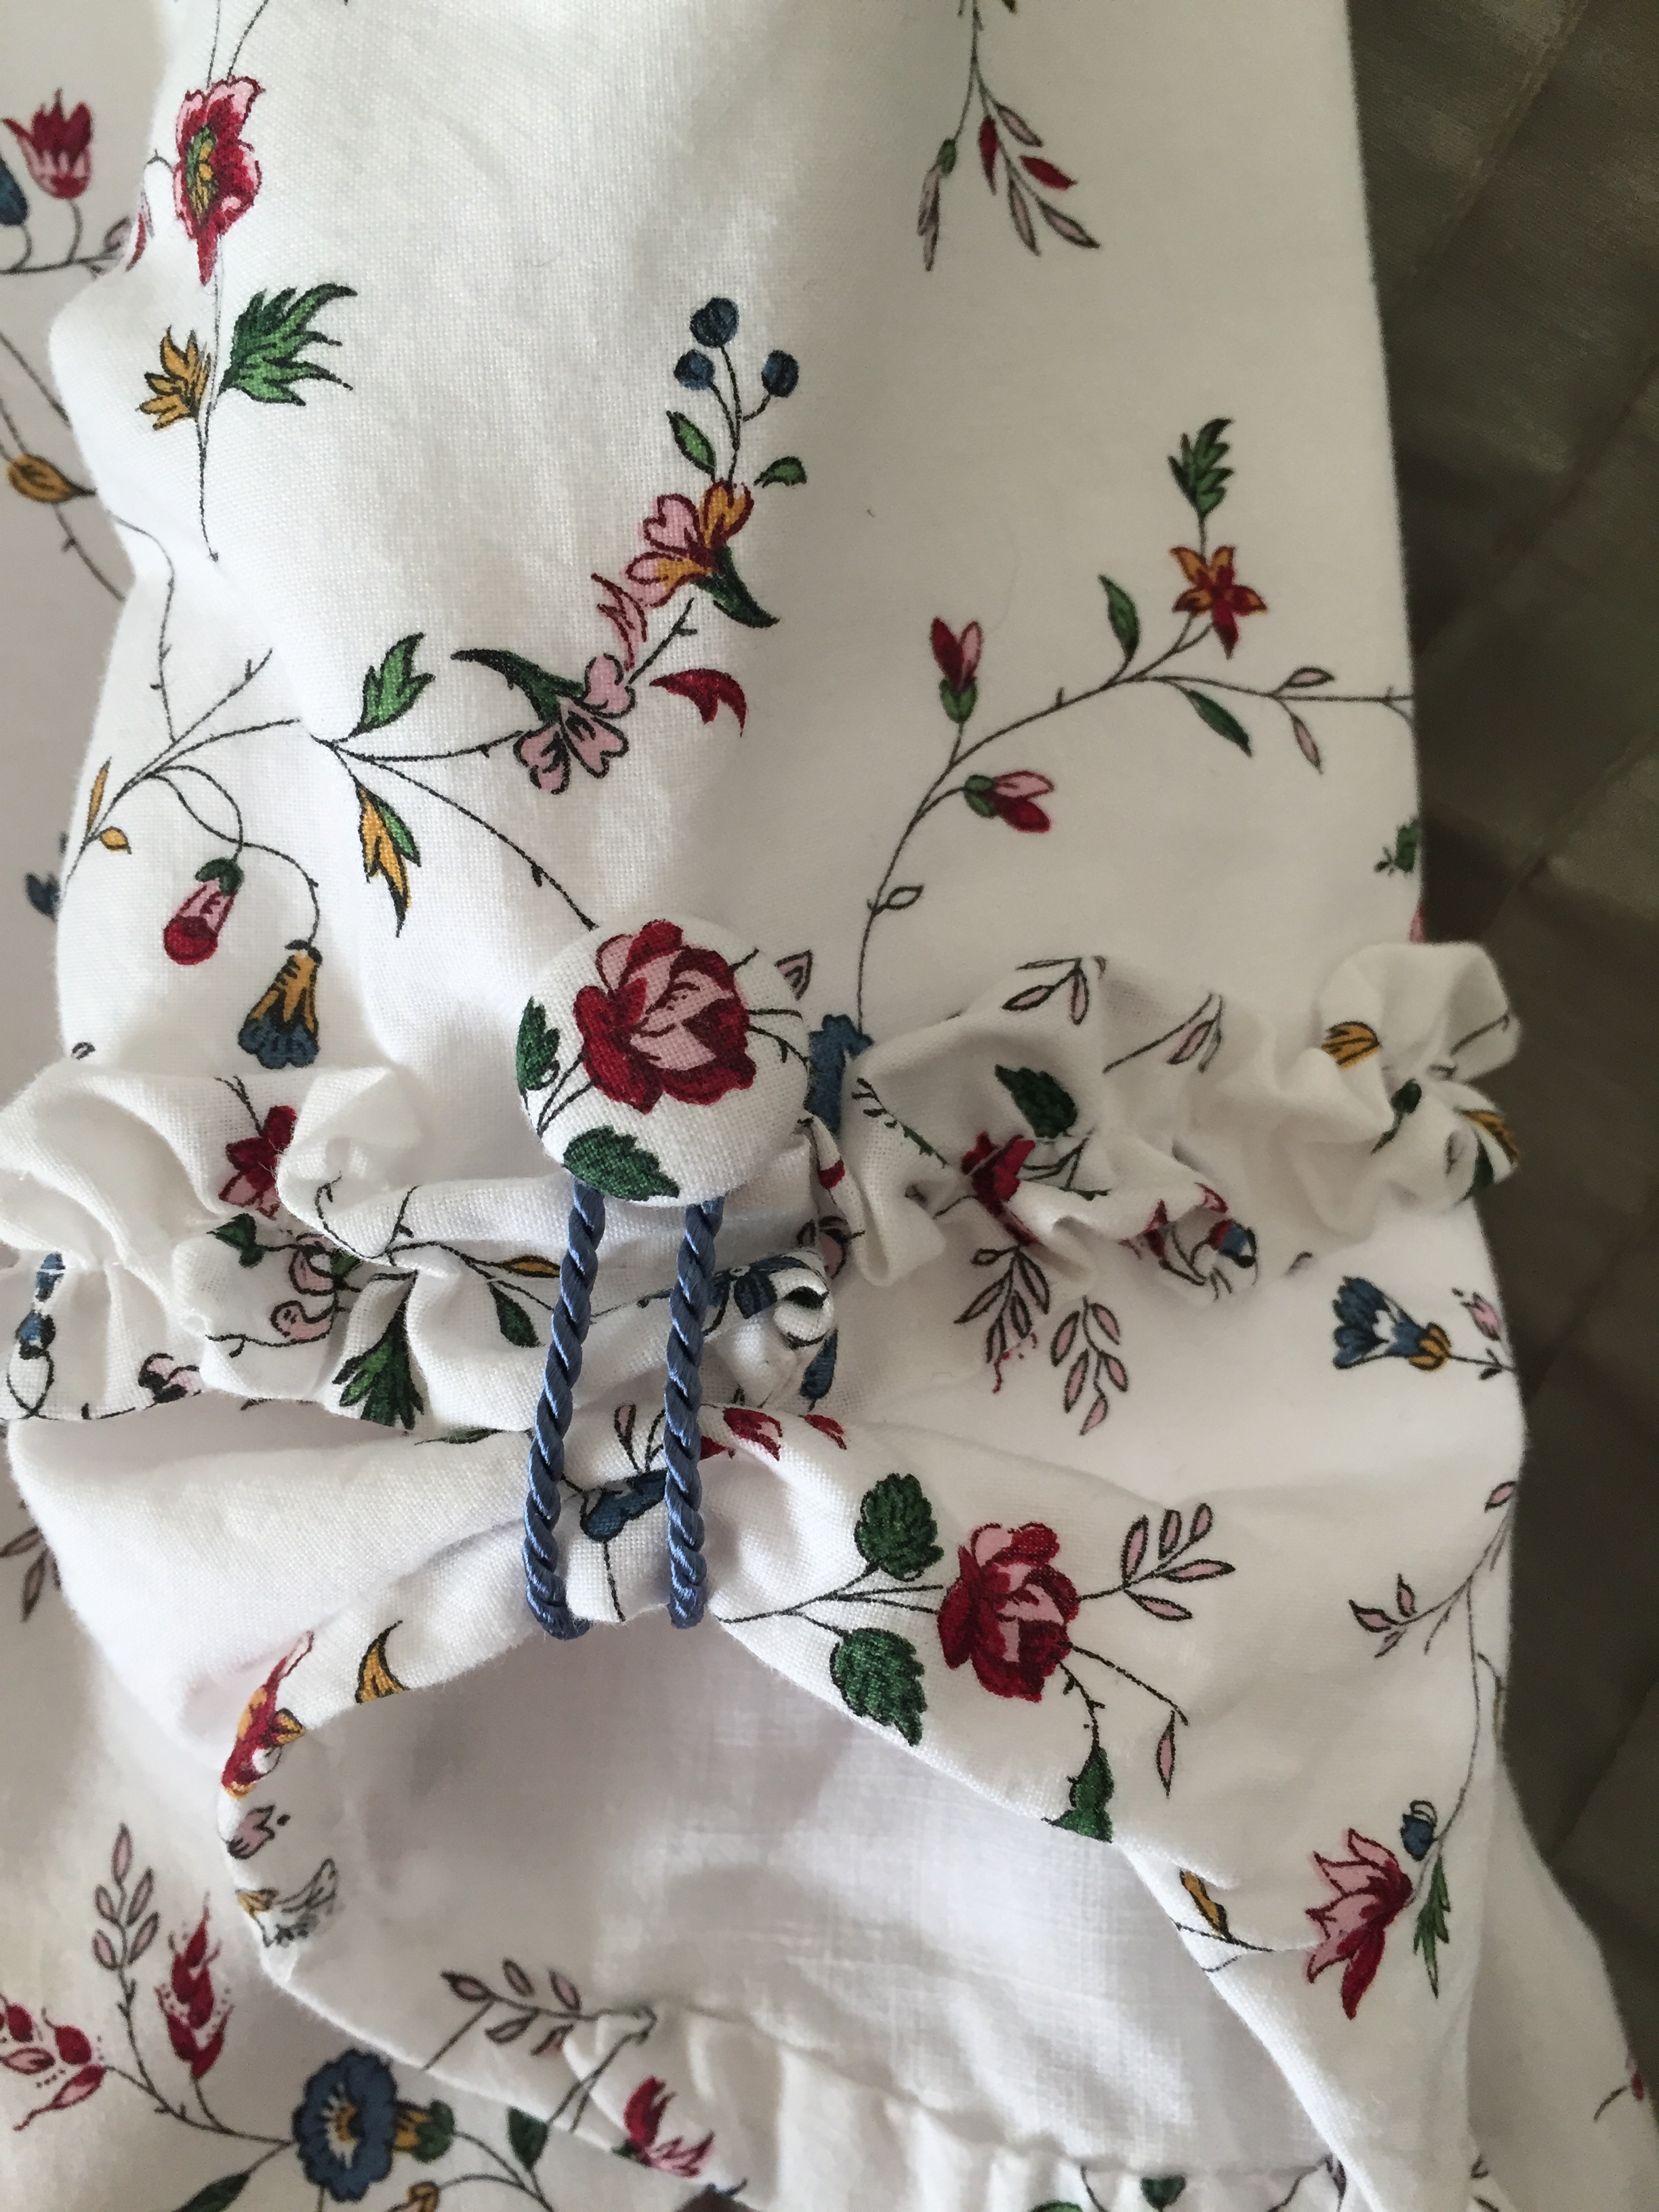
The sleeves also have a little loop of rayon cord and a slightly smaller fabric-covered button.IMG_8982

Unlike the previous time I wore this dress, this time I am wearing the correct stays. Here’s a silly selfie in the hotel bathroom while still in PJs and messy hair. Now you know what I look like in the mornings! (Well, except for the stays).IMG_8731

Project costs:

  • Ikea king-sized duvet cover: ~$30
  • Linen lining: $0, leftover from another project
  • Period Impressions pattern: $13.95 + $4.85 shipping from Etsy
  • Buttons: from stash
  • Rayon cord: ~$5 from Britex

Total: ~$53.80

Way under budget! I got to splurge a little on the accessories. 😉 Onsite I happened to hear about Dames a la Mode’s trunk sale, and bought this lovely set that I wore with my dress.IMG_8973