Category Archives: Victorian

Shawl with Surprise Hood Pattern and Tutorial

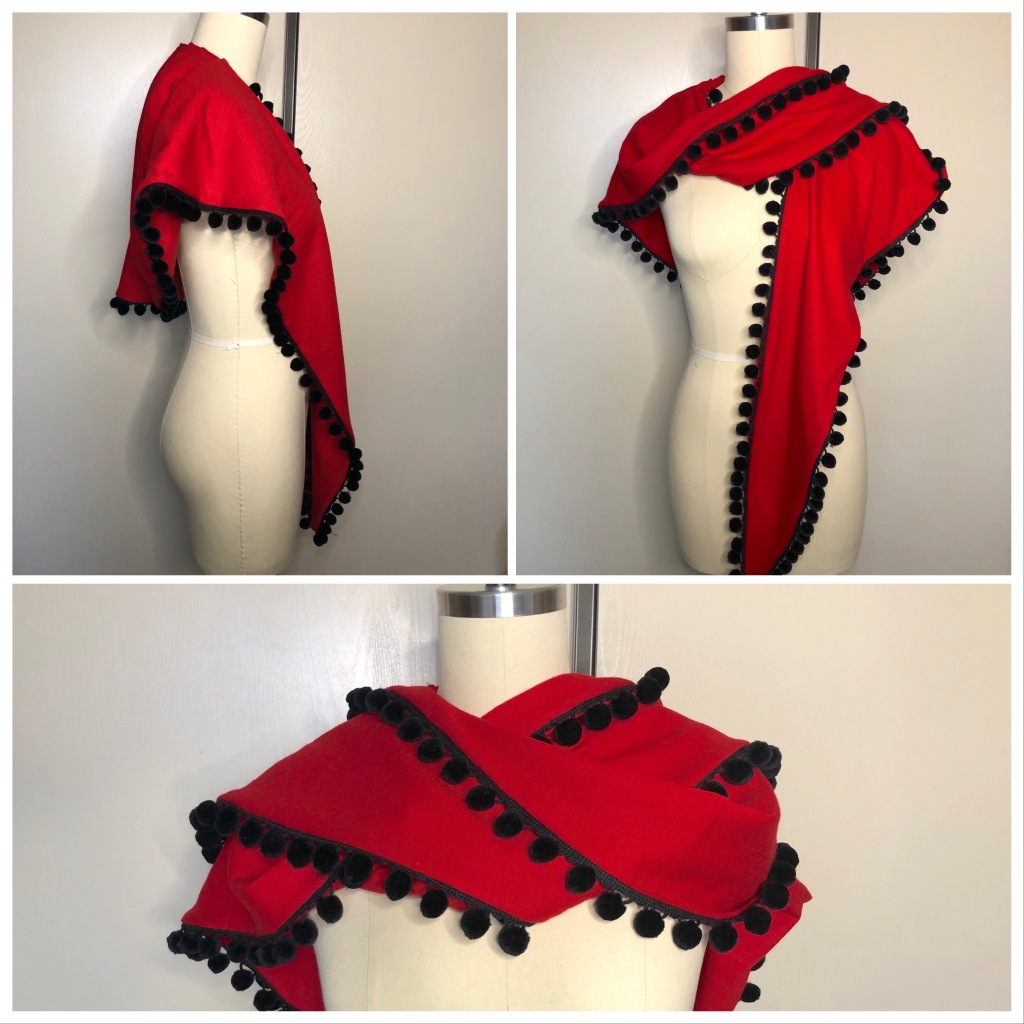
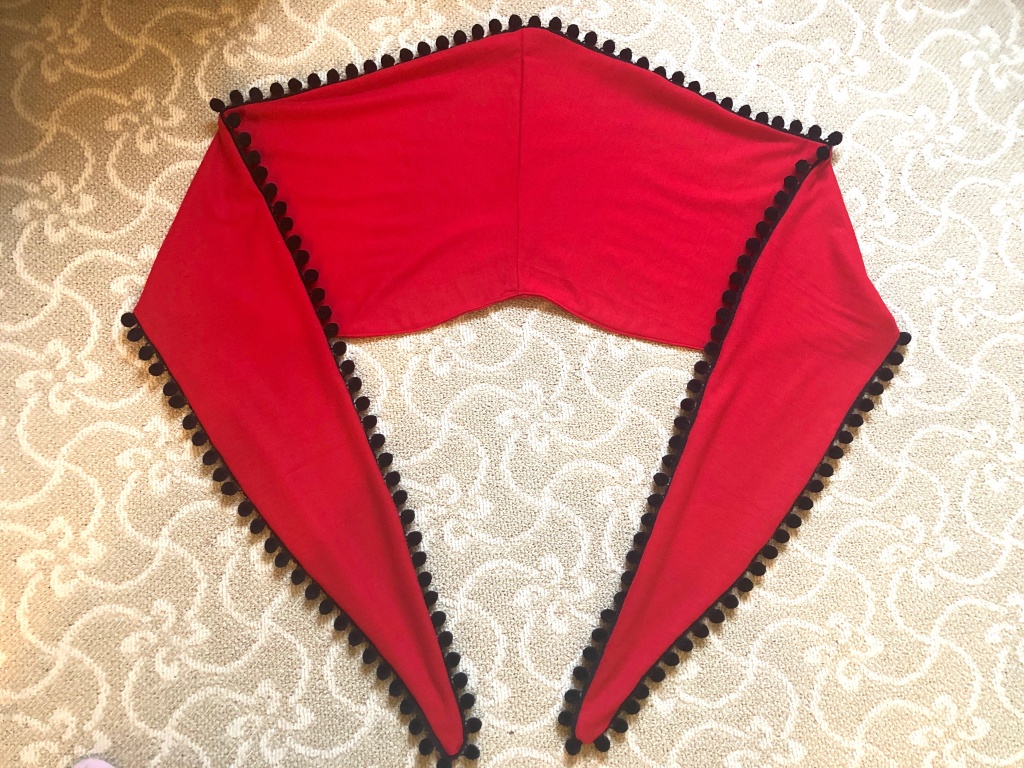
Winter is here and I wanted a cute and cozy accessory that was a nice shawl, but also a surprise hood and scarf! I made this out of a wool knit jersey but other soft fabrics with a bit of drape would work as well. I added some pompom trim for whimsy but that is optional; this surprise hood would work well untrimmed, or finished with decorative stitching or other touches. This was inspired by Victorian mantelets with front lappets, knit sontags, chic old Hollywood head scarves, and modern cozy.

Note: I am a member of the Janome Maker program and this project was sewn on a Janome Skyline S9. (This post is sponsored by Janome but all content and opinions are mine).

WHAT YOU WILL NEED

  • Soft fabric with drape (wool jersey, lightweight cable knit, rayon challis, lightweight wool suiting, etc.)
  • The yardage depends on how wide your fabric is. (I used 1.5 yards of a 58″ wide fabric by alternating the wide and narrow ends of the pattern pieces while cutting).
  • Thread, scissors, chalk, pins.
  • Optional: 5 yards pompom/ball fringe trim, lace, rickrack, etc.

DRAFTING THE PATTERN

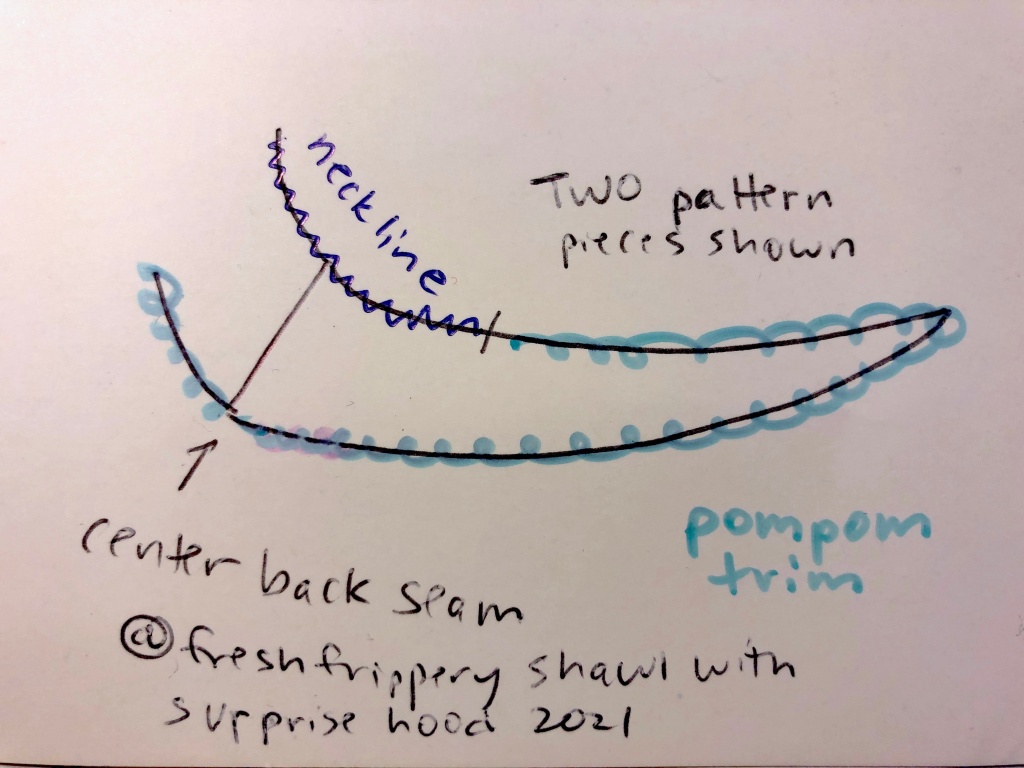
Don’t worry if you don’t have any pattern drafting experience! I’ve broken it down into squares/rectangles/triangles so if you have a ruler you can draw these shapes. Start with these basic geometric shapes; I find it is easiest to draw the square first, then the rectangle, then the triangle on a large piece of paper. (It doesn’t have to be fancy or special drafting paper; a roll of gift wrap works great).

Next, draw the curves indicated in red on the diagram. Then, discard the shaded areas.

Now you have your pattern that you can cut out of paper and use to trace onto your fabric! (This includes 1/2 inch seam allowance. You can add more when cutting out your fabric if you want your shawl a little wider or are skipping any trim).

CONSTRUCTION

Cut out 4 identical pieces of fabric. 2 will be the fashion layer and 2 will be the lining. (If you want, you can use a different fabric for the lining but then the hood will be a different fabric when flipped up).

Sew the center back seam of the 2 fashion pieces together. Repeat for the lining layer. Press the seams flat.

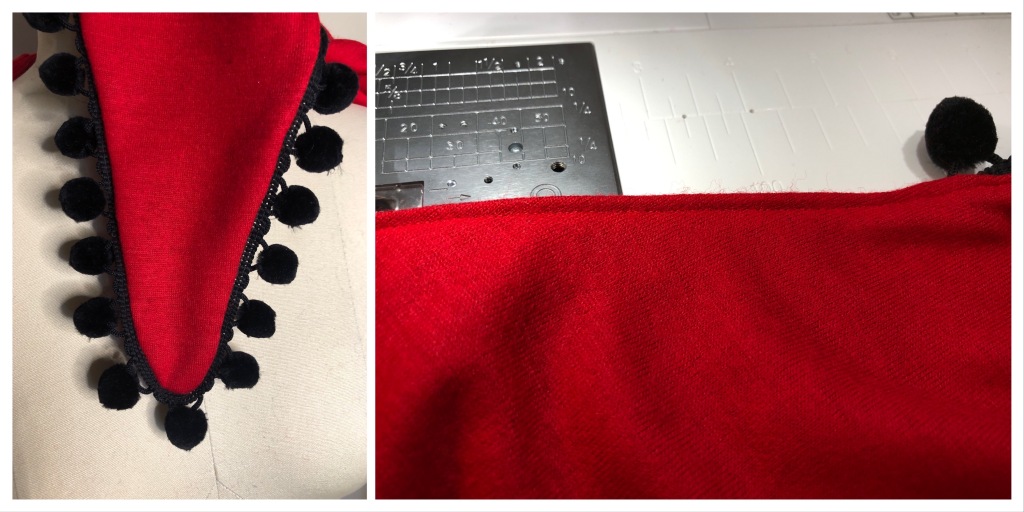
Put the fashion and lining layers right sides together. If you plan to use pompom trim or lace, this is the time to sandwich your trim in between the two layers as shown, with the edges flush. (This is so that the pompom balls are “inside” when sewing the edges but will be on the “outside” when the shawl is flipped right side out). You will have trim everywhere except the neckline. (If you are using rickrack, instead of sandwiching it in the layers you should sew it to the fashion layer before it is attached to the lining).

Sew all along the outer edges of the shawl, except for the neckline, as shown in the earlier image.

Turn the right sides out through the opening in the neckline, exposing the pompom trim. Fold in the raw edges of the neckline and topstitch closed.

Right now you will have a long flat piece as shown below. (The ends are folded in so I could fit everything in the photo).

Pleat the neckline area (up to where the pompoms start) to fit the curve of your neck. The finished curved area should cover the back half of your neck. (If you have a dress form handy, an easy way to determine how to do the pleats is to pin the center back seam to the center back of the form, pin where the pompom trim starts to the shoulder point on the form, then pleat using the neck of the form as a guide). To keep the pleats in place, stitch down the pleats over the previous topstitch line either by machine or by hand.

Optional: Use one of the embroidery stitches to add some extra decorative details to your shawl. Some ideas include using a continuous stitch along the edges of the shawl, or putting a monogram on the tails. You can also do a decorative stitch along the edge after the shawl is sewn, rather than using pompom trim. (These examples are under the Decorative stitch menu on my Janome Skyline S9).

HOW TO WEAR

This can be worn multiple ways!

  1. Wear the draped back and front tails down as a shawl.
  2. Pull up the draped back over your head as a hood (with the tails in front or pushed behind your shoulders).
  3. Wrap one or two front tails around your neck like a scarf.
  4. Combine 2 and 3 for a chic hooded scarf look.

Which one is your favorite?

Thank you for reading! Be sure to follow me on Instagram @freshfrippery for the first peek at any new projects!

I am happy to provide all patterns and tutorials for for free on my blog. It is absolutely optional, but if you would like to donate towards my domain registration and the data costs of hosting the many photos on my site, consider buying me a “coffee”: https://ko-fi.com/freshfrippery.  Thank you!

1870s Bustle Gown (Black Snail Patterns Victorian Seaside Dress)

In February my local costume guild went to see an exhibit of James Tissot paintings at the Legion of Honor Museum in San Francisco, and we dressed up in bustle gowns. The exhibit was wonderful and it was lovely to see my fellow costumers.

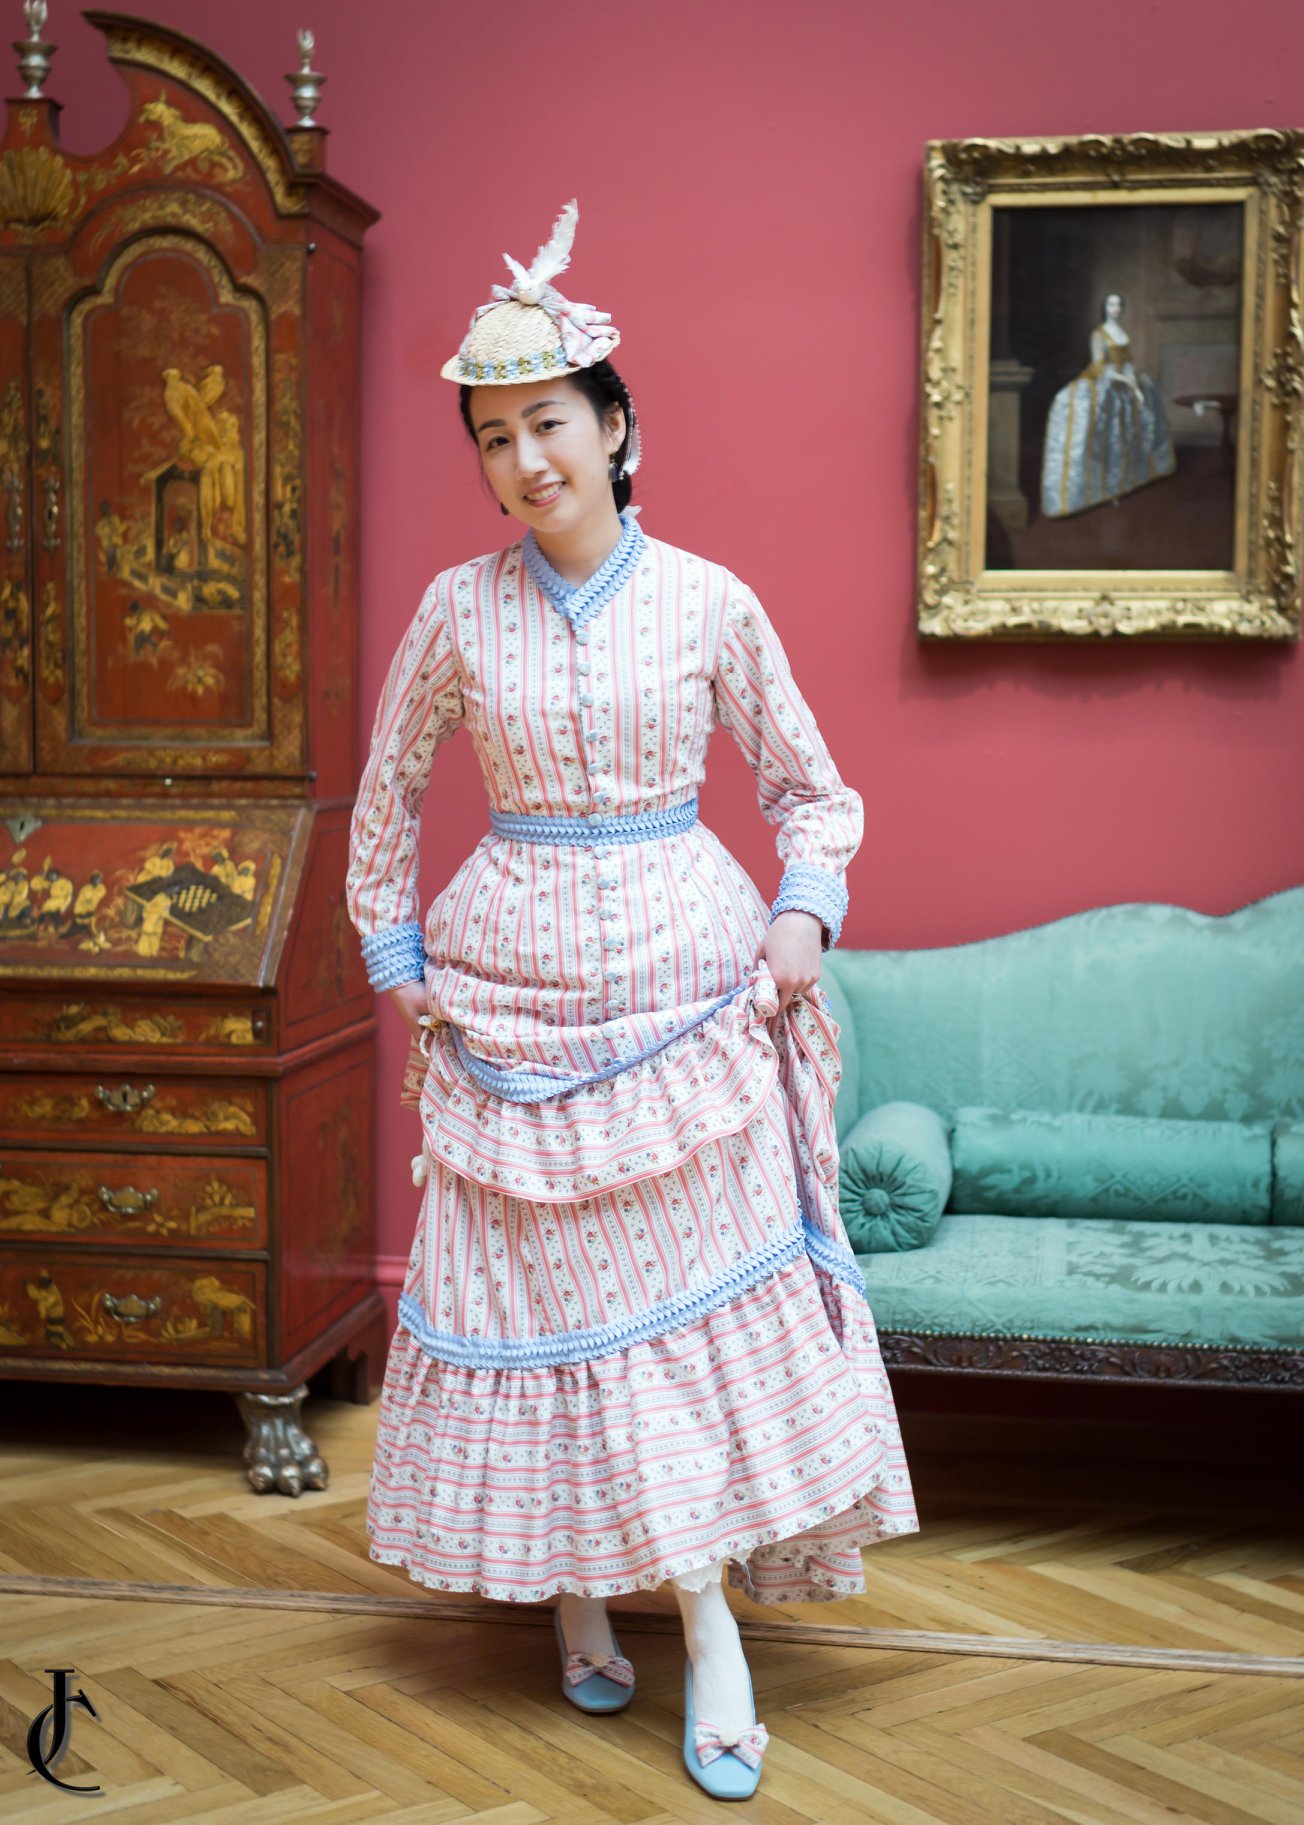
I made myself an 1870s bustle dress using pink and white striped floral cotton and the Victorian Seaside Dress pattern from Black Snail Patterns.

I used a cotton that was very lightweight which helped the fluffy bustle layers stay fluffed!

My shoes are American Duchess Tissot shoes that I dyed blue and made shoe clips for out of my fabric scraps.IMG_5553

The blue trim is pleated grosgrain ribbon, which I put on the collar, cuffs, belt, and skirt flounces. I made my hat using a palm fan (more on that later in this post)!IMG_5566

My buttons were made using vintage fabric over vintage covered button kits. (The bodice actually closes with hooks and bars and the buttons are decorative). I prefer this technique because it means I can adjust the fit more easily and I don’t have to make a lot of buttonholes!IMG_5579

I recommend the Black Snail pattern. It consist of a bodice with an attached “apron,” a skirt, and long sleeves. The bustle effect is achieved by having ruffled flounces on the apron and skirt, and by having hidden ribbon ties underneath the apron.

The pieces all fit together well and the sizing chart was accurate. I was impressed that even the very large pieces of the skirt panels fit together, which means the pattern was graded well.IMG_5574

The sleeve is an 1870s two-part coat sleeve with a seam down the elbow and another seam on the inside of the arm. It is loose-fitting and appropriate to the era, and the fullness of the sleeve head needs to be eased into the shoulder of the bodice.IMG_5571

I made some simplifications to the Black Snail pattern in order to speed up the project:

  • I did not bother making a skirt placket and facing for the underskirt, since the top half is covered by the apron overskirt anyway.
  • The pattern calls for the back half of the underskirt to be cartridge pleated into the waistband. I did regular pleats since the top would be hidden.
  • I cut my flounces using the straight grain instead of on the bias like the pattern calls for. This is so I could use the selvedge instead of hemming the many yards of flounced fabric. However, this meant that my flounce stripes are horizontal instead of diagonal so you should cut on the bias if you prefer the diagonal. (The other reason why I used the straight grain is because I had limited fabric and the bias cut takes up more yardage).
  • The bustle effect comes from gathering up the apron overskirt in the back with twill tape. The pattern asks you to sew pieces of tape to the bodice then sew buttons to strategic parts of the overskirt that get attached to buttonholes on the tapes. In order to skip making the buttonholes I just used tapes on the skirt as well to tie to the bodice tapes.
  • The pattern calls for self trim to cover where the skirt and flounces meet. Instead of doing that I used purchased pre-pleated grosgrain trim from Amazon (affiliate link), which is available in other colors.

Just a warning: if you purchase the pre-printed pattern please make sure you have large paper around your house. There are some pattern pieces where you are told to extend the piece by up to 15 inches. (This was done by cutting a piece through the middle, inserting some paper, then drawing lines to connect the original pieces).  I had to do this for a number of the larger pieces, and I didn’t expect to do so much assembly for a pattern I did not print at home. I’m not sure if the reason behind this was to save paper costs, but I would have gladly paid a little more for the pattern to avoid the extra work.

Here’s some photos I took of the dress in progress so you can see what the apron looks like up and down. JULE6537

Black Snail recommends 11 yards of 51″ wide fabric for this dress. I only had 9 yards of 42″ fabric but made it work by using straight grain flounces instead of cutting my flounces on the bias like the pattern recommends.

Underneath my skirt I wore a “phantom bustle” (made during a class taught by Christina Deangelo) and two antique petticoats.EEWR4333PTLV3670DEGD9186

On top I wore this custom silk brocade late Victorian corset by Redthreaded. I own several other pieces by them and they are all very well-made. They offer both ready-to-wear and custom sizing and the owner Cynthia Settje is committed to great customer service and fair treatment and wages for her employees.

Screen Shot 2020-03-14 at 3.31.34 PM

Photos by Redthreaded

My hat base was made by me using a palm fan I had around the house! I trimmed it with leftover fabric from my dress, some leftover floral trim from my 18th century shepherdess outfit, and a little bird I got from the craft store. (I am wearing glass intaglio earrings from Dames a la Mode).IMG_5599

The fabric is a long pleated rectangle with pointed ends.IMG_5595

When I said palm fan, I literally meant a palm fan.IMG_5419

I soaked it in water to soften it, cut off the handle, and molded it around a bowl.IMG_5425

After it was dry I machine-sewed the ends together and trimmed off excess. IMG_5430

Voila, a hat base!IMG_5432

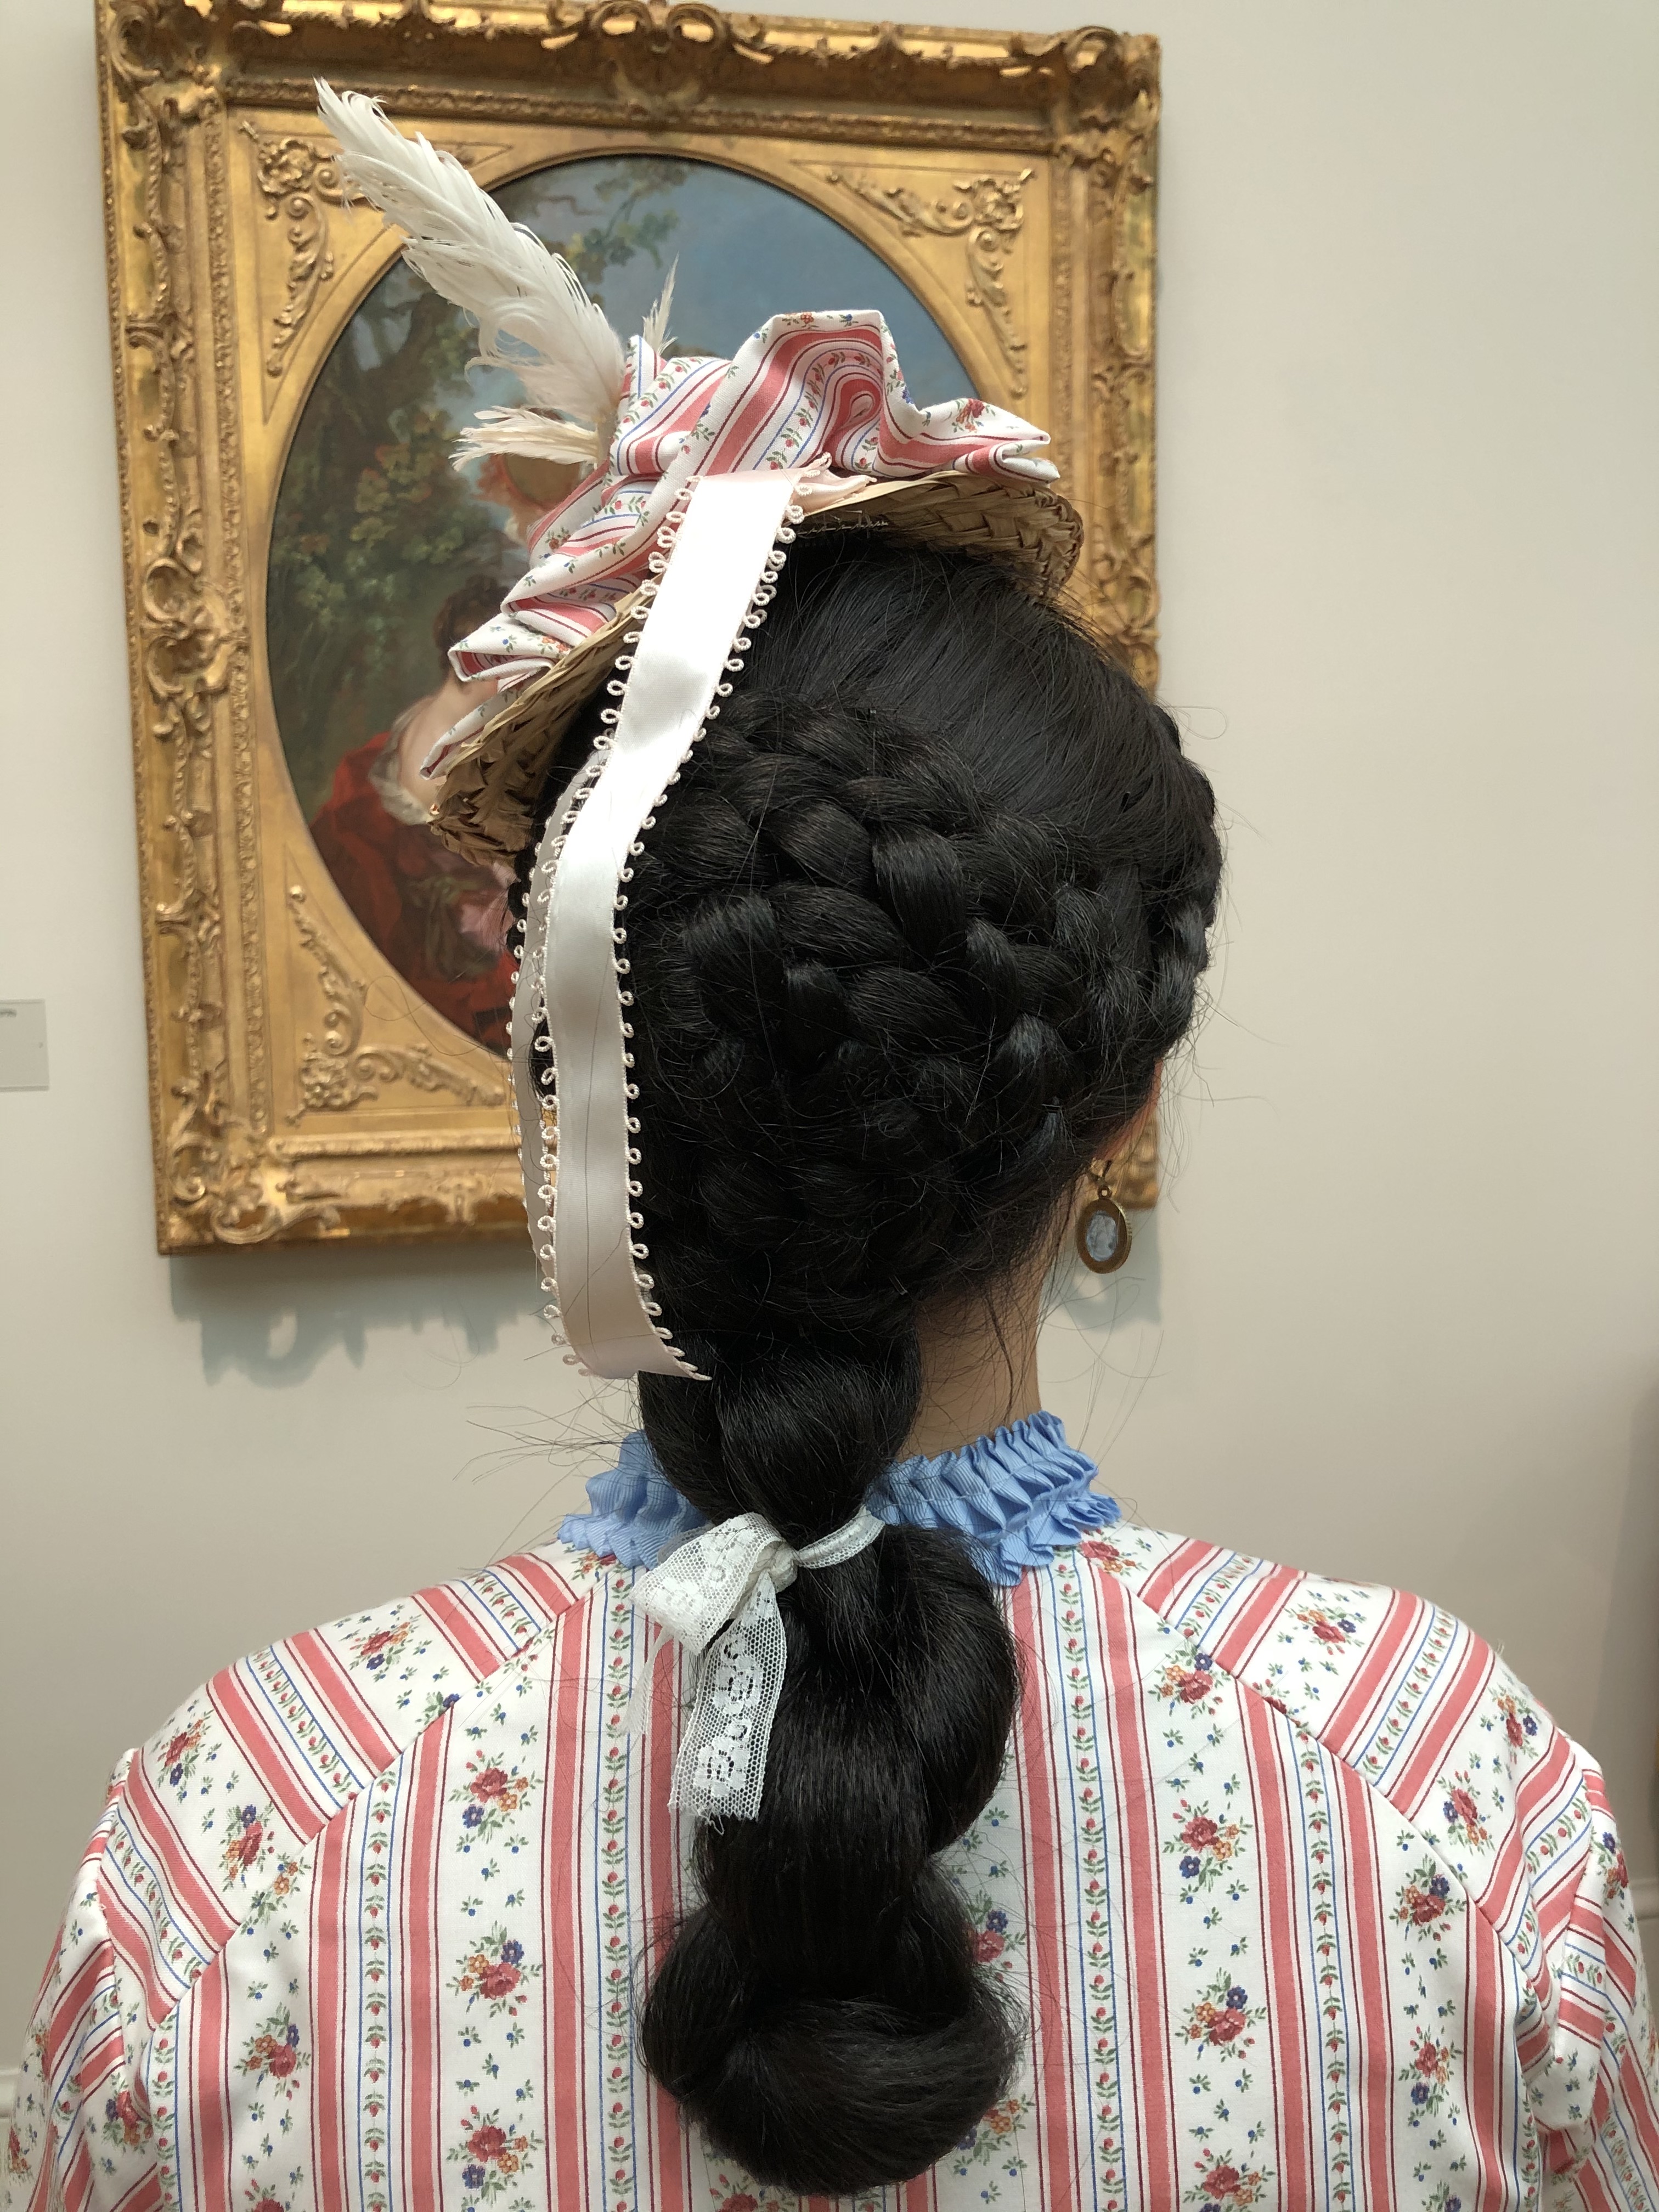
For my hair I wore 3 false hair pieces: a large braided bun, a crown braid, and twist hanging from the bun.IMG_5591

I used a remnant of pink ribbon I had around the house to trim the hat, but I think for a future wearing I’d like to replace it with a much wider and longer ribbon.

Project costs (not including undergarments and accessories):

  • Pattern: $20.70 from Black Snail Patterns (purchased during a sale with free shipping).
  • 9 yards cotton fabric: $35 including shipping from Facebook
  • 25 yards pleated trim: $13.06 from Amazon (during a sudden and lucky price drop! Plus I still have leftovers!)
  • Lining: $0 (scraps pieced together from previous project leftovers)
  • Thread, notions, etc: ~$5

TOTAL: $73.16 (woohoo for bargain shopping!)

I had such a lovely time. Thank you John Carey for these photos with some of my favorite beautiful ladies!


1890s Bicycling Sweater Tutorial and Sewing Pattern

If, like me, you’ve long admired the 1890s bicycling or sporting sweaters but did not know how to knit, this sewing tutorial and pattern is for you, no knitting required!WCIH9664

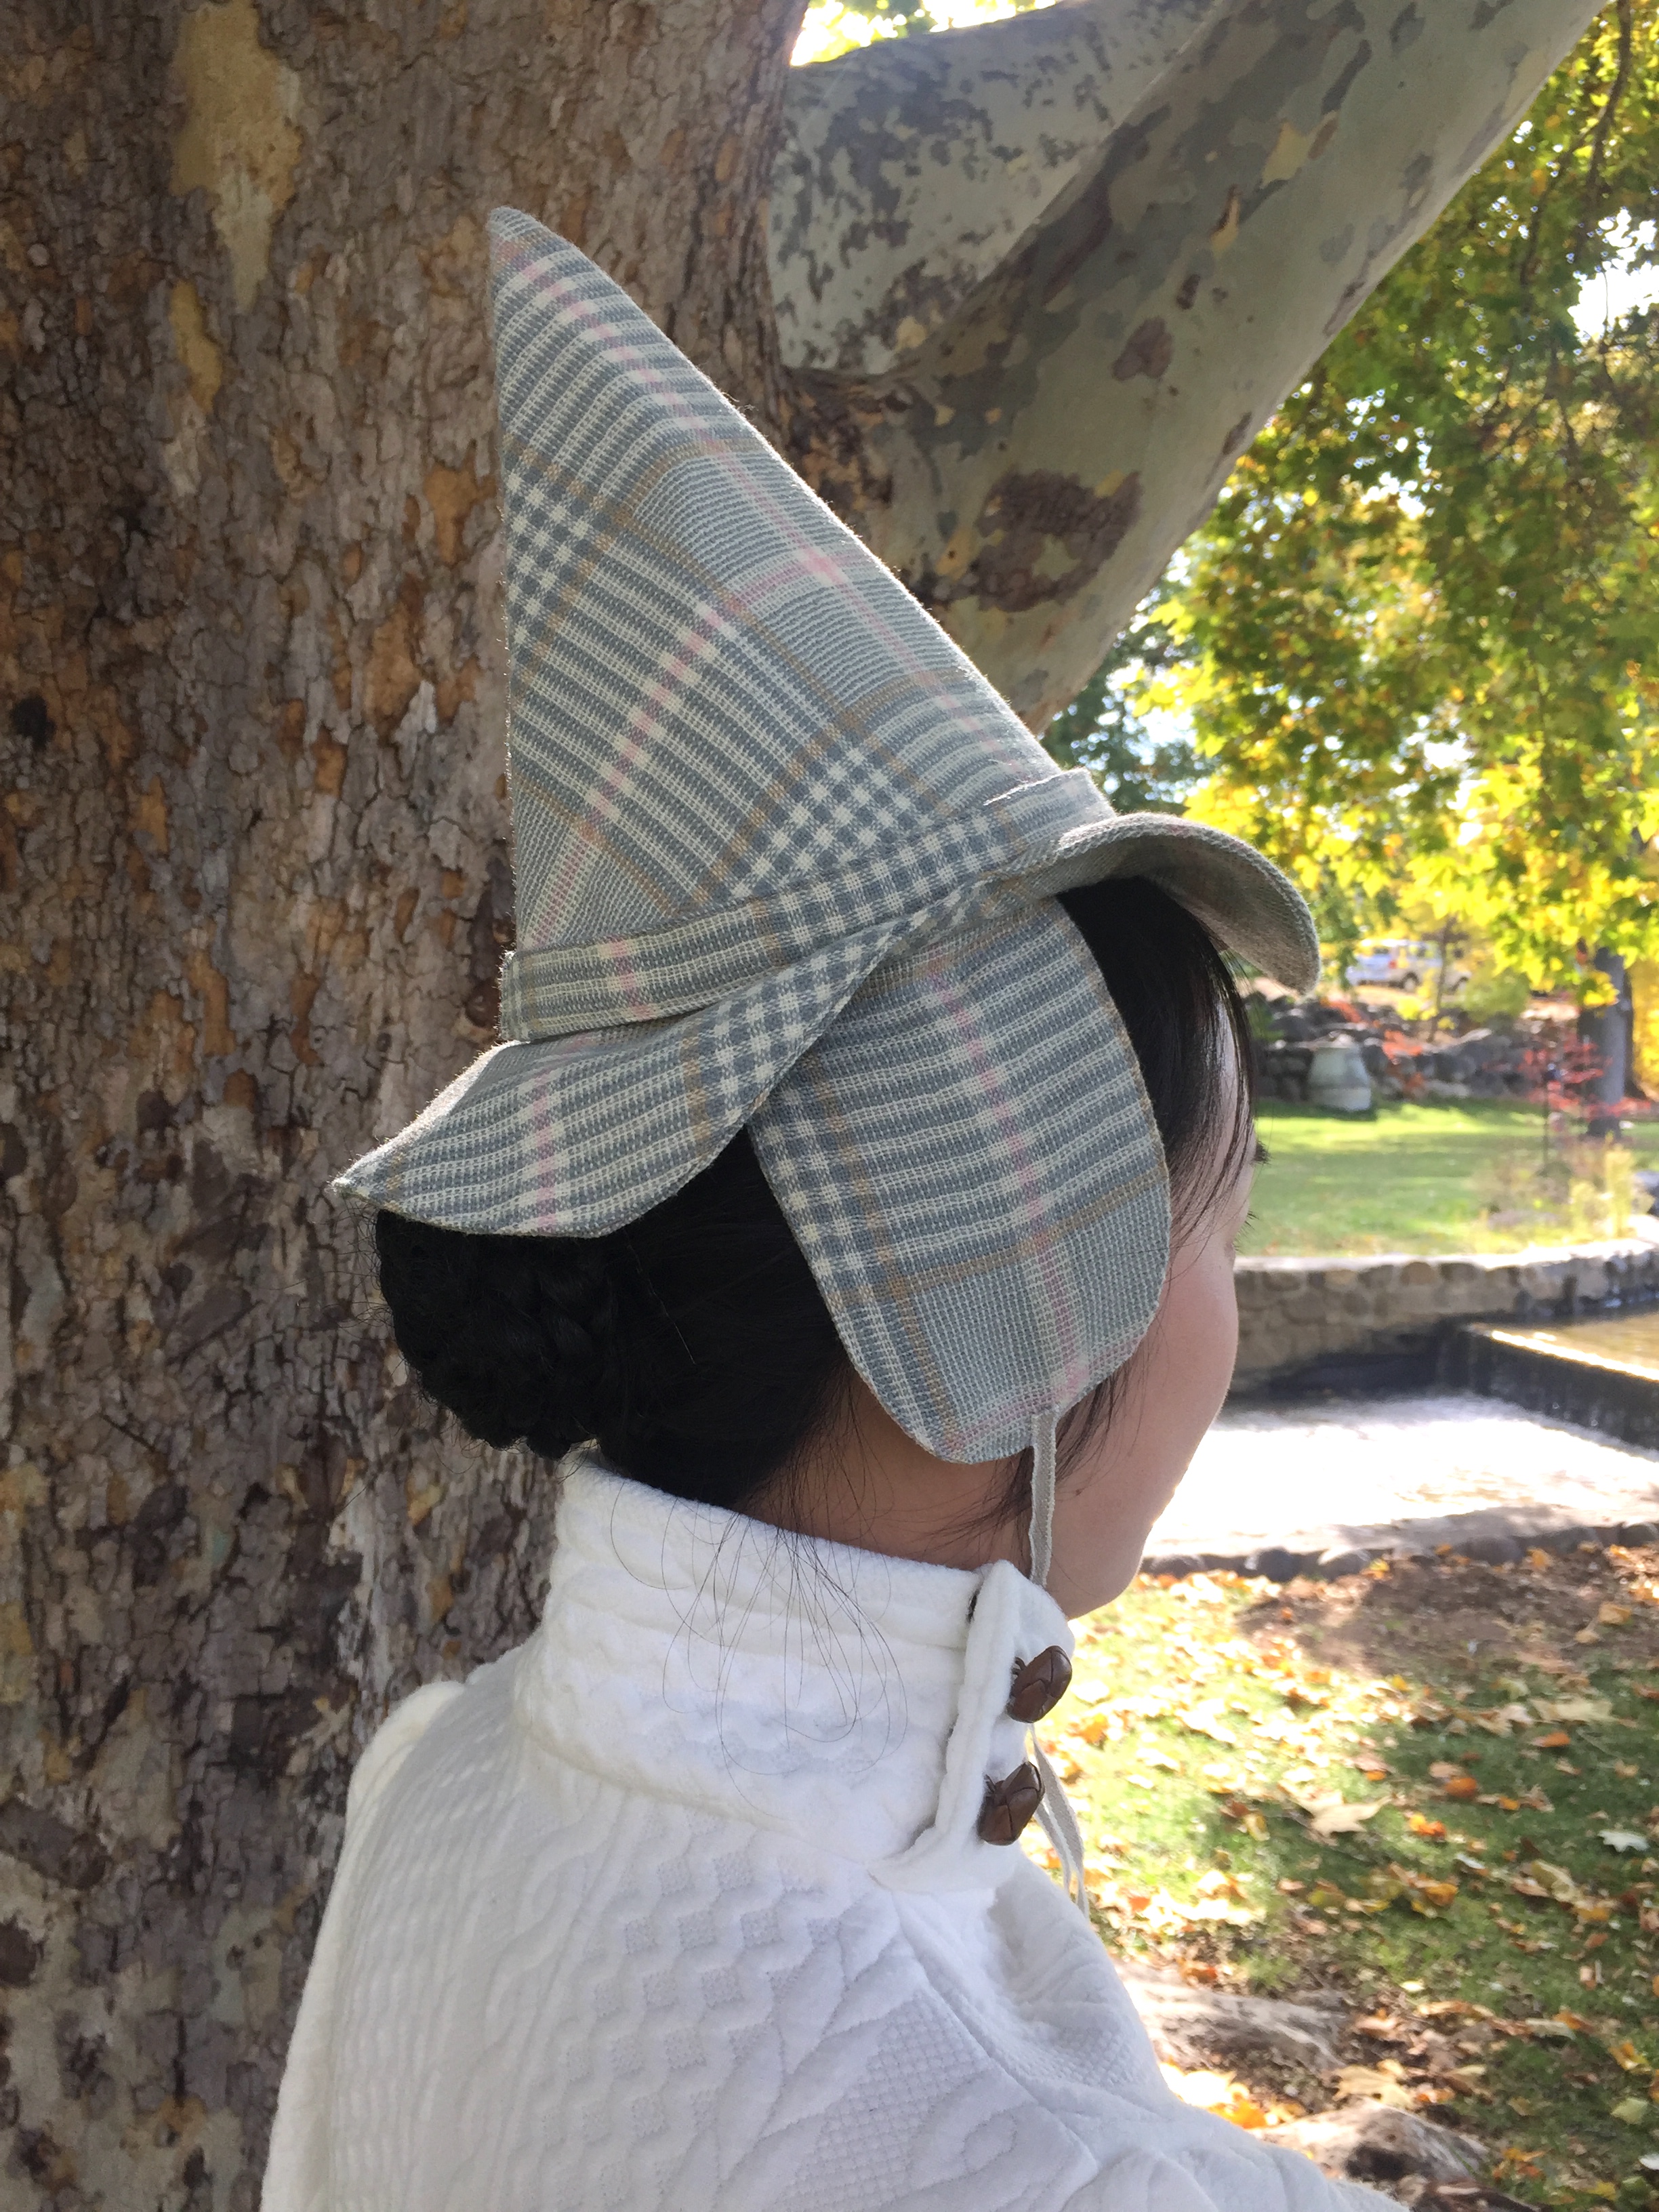
I wore this sweater to the Reno Tweed Ride, along with a wool skirt and witch hat I made. (A tutorial for the Professor McGonagall-inspired deerstalker hat is in my previous blog post).IMG_3336

This lovely example is from the Met Museum. It features a heavy knit, giant upper sleeves, fitted lower sleeves, a turtle neck collar, and buttons.The Met Museum.jpg

I have made a simplified version with a similar silhouette using 2 yards of 59″ wide  “Telio cable knit” fabric from Amazon (affiliate link). It also comes in pink, gray, and blue. It’s not a real yarn sweater knit but it is inexpensive because of its wide width, easy to get, and most importantly it is chunky and not thin. If you want a more authentic look you can look for a real cable knit fabric in cotton or wool, but it will be more pricey because those come in smaller widths. (If you end up using a “real” knit it will be stretchier so cut a slightly smaller size of pattern).

This tutorial assumes some basic pattern drafting skills and also that you have a serger. (This will keep the knit fabric from fraying and also keep the seams stretchy).

The pattern pieces were drafted to fit a woman with a 34″ bust and 28″ waist (or slightly larger because of the stretch). If you are busty or have a soft belly I have an alternative pattern piece for the front that will fit at least a 36″ bust and 30″ waist, with some extra stretch for slightly larger measurements. (If you don’t fit these measurements I will explain what to do below as well).

All pieces include a 1/2″ seam allowance.

BODICE PATTERNIMG_4296

The pattern pieces for the front (red lines) and back (purple lines) of the sweater resemble a sleeveless top. They are mostly the same except the front piece is a little wider and the neckline is cut a little lower. If you are flat-chested or like a tighter fit use two of the back pattern pieces (and cut the neckline lower on one piece to make it a front). If you use two back pieces this will fit a 34″ bust/28″ waist. If you use the front and back this will fit a 36″ bust/30″ waist. This will fit larger sizes depending on how stretchy your fabric is.

For each piece FOLD YOUR FABRIC IN HALF and put the pattern piece on top, with the folded edge on the right. When you cut through 2 layers of fabric and open them you will have a complete pattern piece. Do not cut the fold!

IMG_4299

If you are slightly larger than the measurements you can scoot the pattern piece towards the left and add extra inches to the folded size.

If you are very different from the measurements you can make your own pattern by taking a sweater that fits you and tracing the main body as a guide. Remember to add seam allowances! IMG_5443

BODICE CONSTRUCTION

After you have your front and back, sew them (right sides) together at the sides using your serger. Repeat by sewing the shoulders together. (Note: on the extant sweaters the shoulders are not sewn together but fastened by buttons. If you prefer that look then you’ll want to not sew your shoulders closed at this part. You’ll also want to extend the top shoulder area of your front bodice piece to ensure an overlap, and serge the raw edges. I opted to sew my shoulders closed because my fabric is stretchy enough that the neck opening was sufficient).

For an extra fitted look (or if you’re wearing a corset) I recommend putting it on inside out, pinching out any excess on the side, marking it with chalk, and sewing and trimming the excess. Do this before you put on the sleeves or collar!

To keep the raw edges from fraying, also serge along the edges of your armholes, neck opening, and bottom hem. Turn up the excess length on the bottom hem and stitch down with your preferred technique (with your serger, zig-zag stitch on sewing machine, or straight stitch if you don’t mind losing horizontal stretch).

You should now have a sleeveless top.

UPPER AND LOWER SLEEVE PATTERN

Each sleeve consists of two parts: a large puffed upper sleeve and a fitted tube-like lower sleeve.IMG_4302IMG_4303IMG_4290

As you can see, the upper sleeve is huge. (The sleeves are the main reason I chose a wide width knitted fabric). If you are uncomfortable drafting a curved sleeve head based on the diagram above you can start with an existing large puffed sleeve pattern from your collection. Perhaps you have a Regency or Victorian dress pattern in your stash? Trace that puffed sleeve, then slice it down the vertical center. Pull the two halves apart. Further. Keep going. Yes, they really are that big. Then fill in the missing middle by tracing your new pattern on another (really large) piece of paper. If the sleeve isn’t tall enough to match the measurements given, you can also slice it horizontally and extend.

The lower sleeve is mostly a tube that tapers below the elbow. I have long slender arms; you may have to widen this part of the pattern if you have a more athletic build.

SLEEVE CONSTRUCTION

Sew the long edges of the lower sleeve (right sides) together to make a tube. (Again, use your serger for the sleeve construction to avoid fraying).

Sew the straight edges of the upper sleeve (right sides) together to make a giant um, thing. Serge all edges of your sleeve openings now because it may be too thick to put through your serger once it is gathered/pleated.

Gather the bottom opening of the upper sleeve so that it fits into the top part of the lower sleeve and sew the two parts together. You should now have something resembling a chicken drumstick. IMG_5459

When worn, you will push part of the lower sleeve up so that the bottom of the upper sleeve hangs over it, like the next photo:IMG_3032

Pleat the top part of the upper sleeve to fit into the armhole of your top. The direction of your pleats is a matter of personal preference, but just make sure you mirror them on the other sleeve. IMG_3298

Put on the sweater, push the lower sleeve to the desired location as described above, and mark where you want your sleeve to end (at the wrist).

Fold up the excess at the end of the sleeve and stitch down to have a finished edge in the same way you did the bodice hem.

COLLAR PATTERN

The turtleneck collar is based on trapezoids. Fold your fabric in half and put the shorter edge of the trapezoid against the fold and cut out your shape, ending up with sort of a hourglass drum. Do this twice.

IMG_4292

COLLAR CONSTRUCTION

For each piece you are going to fold it down the center horizontally, right sides together (so that it is inside out). Sew the side seams and then flip it right side out. The top doesn’t need to be sewn because it was on the fold. Serge the bottom (long edge) shut.

IMG_4307.JPG

Pin the collar pieces to the neck opening of your bodice. The front and back collar pieces are going to overlap on the sides where you put your closures. You will want the front to overlap the back on the outside. Sew the collar pieces to the neck opening, right sides together so that the serged seams are hidden inside when worn.IMG_5494

For closures you will add buttons on each side of the collar. The number will vary depending on the size of your buttons. IMG_3361

I put hidden snaps on my collar because my knit was too thick to put through the buttonholer on my sewing machine, and I was not about to make buttonholes by hand! If you’re not as lazy as me or you have a thinner knit you can certainly make buttonholes for your buttons.IMG_3037

Now you are done and your 1890s sweater is ready for a Tweed ride, historical costume event, or even everyday wear as history bounding!

PROJECT COSTS:

I paid $23.06 including shipping and tax for 2 yards of “Telio cable knit” fabric from Amazon (affiliate link). The buttons, snaps, and thread were items previously purchased cheaply and/or in bulk so my total cost was about ~$25 for this project. Obviously, your costs will differ depending on what kind of fabric and buttons you buy, but this is to demonstrate that a historical sweater doesn’t need to be expensive!

FINAL THOUGHTS:

I hope this tutorial was an understandable and accessible way for people who cannot knit (or don’t have the time) to make an 1890s sweater. If you make one with my tutorial please comment below or send me a message on Instagram @freshfrippery and let me know!

For those of you brave souls who actually want to knit your own, there is a knitting pattern for an 1890s sweater by Kelsey Patton on Ravelry. 

For now I am wearing my sweater with a wool skirt but I have plans to make some bicycling pants in the future.

Have fun and go on splendid adventures with your sweater!

I am happy to provide all patterns and tutorials for for free on my blog. It is absolutely optional, but if you would like to donate towards my domain registration and the data costs of hosting the many photos on my site, consider buying me a “coffee”: https://ko-fi.com/freshfrippery.  Thank you!Screen Shot 2019-11-27 at 9.28.46 PM

IMG_3336

1830s Dresses at the Romantics Picnic

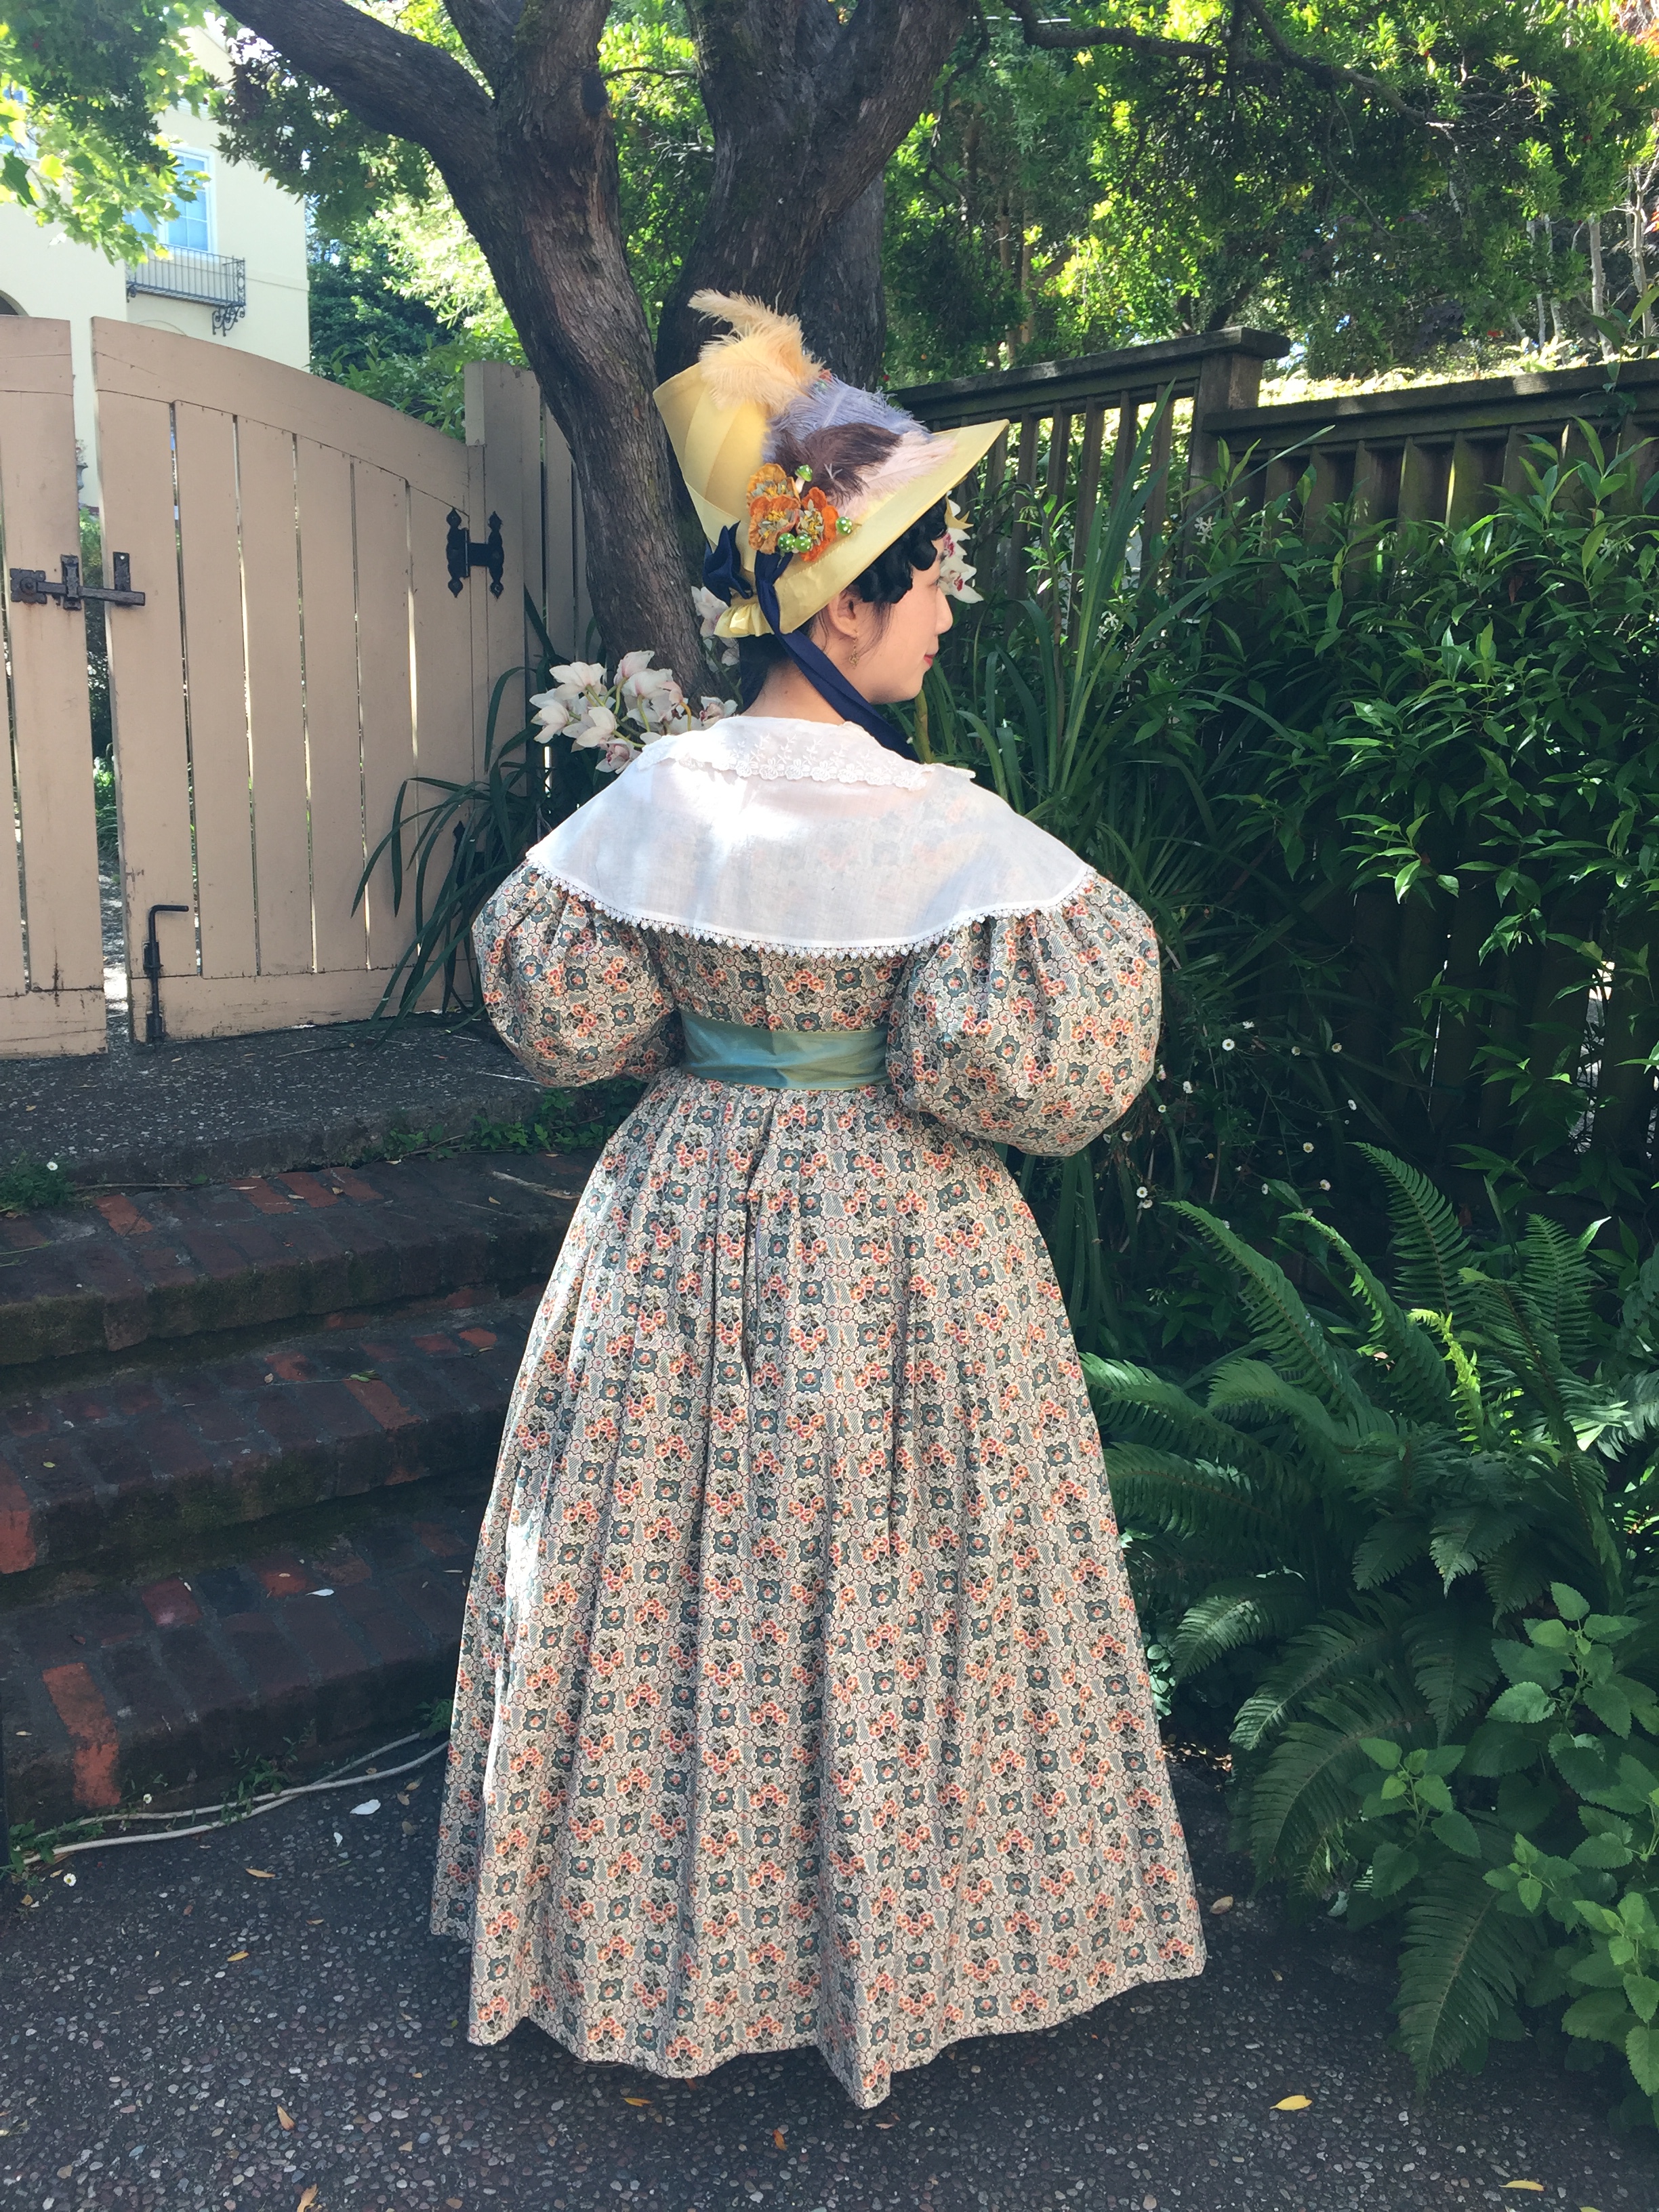
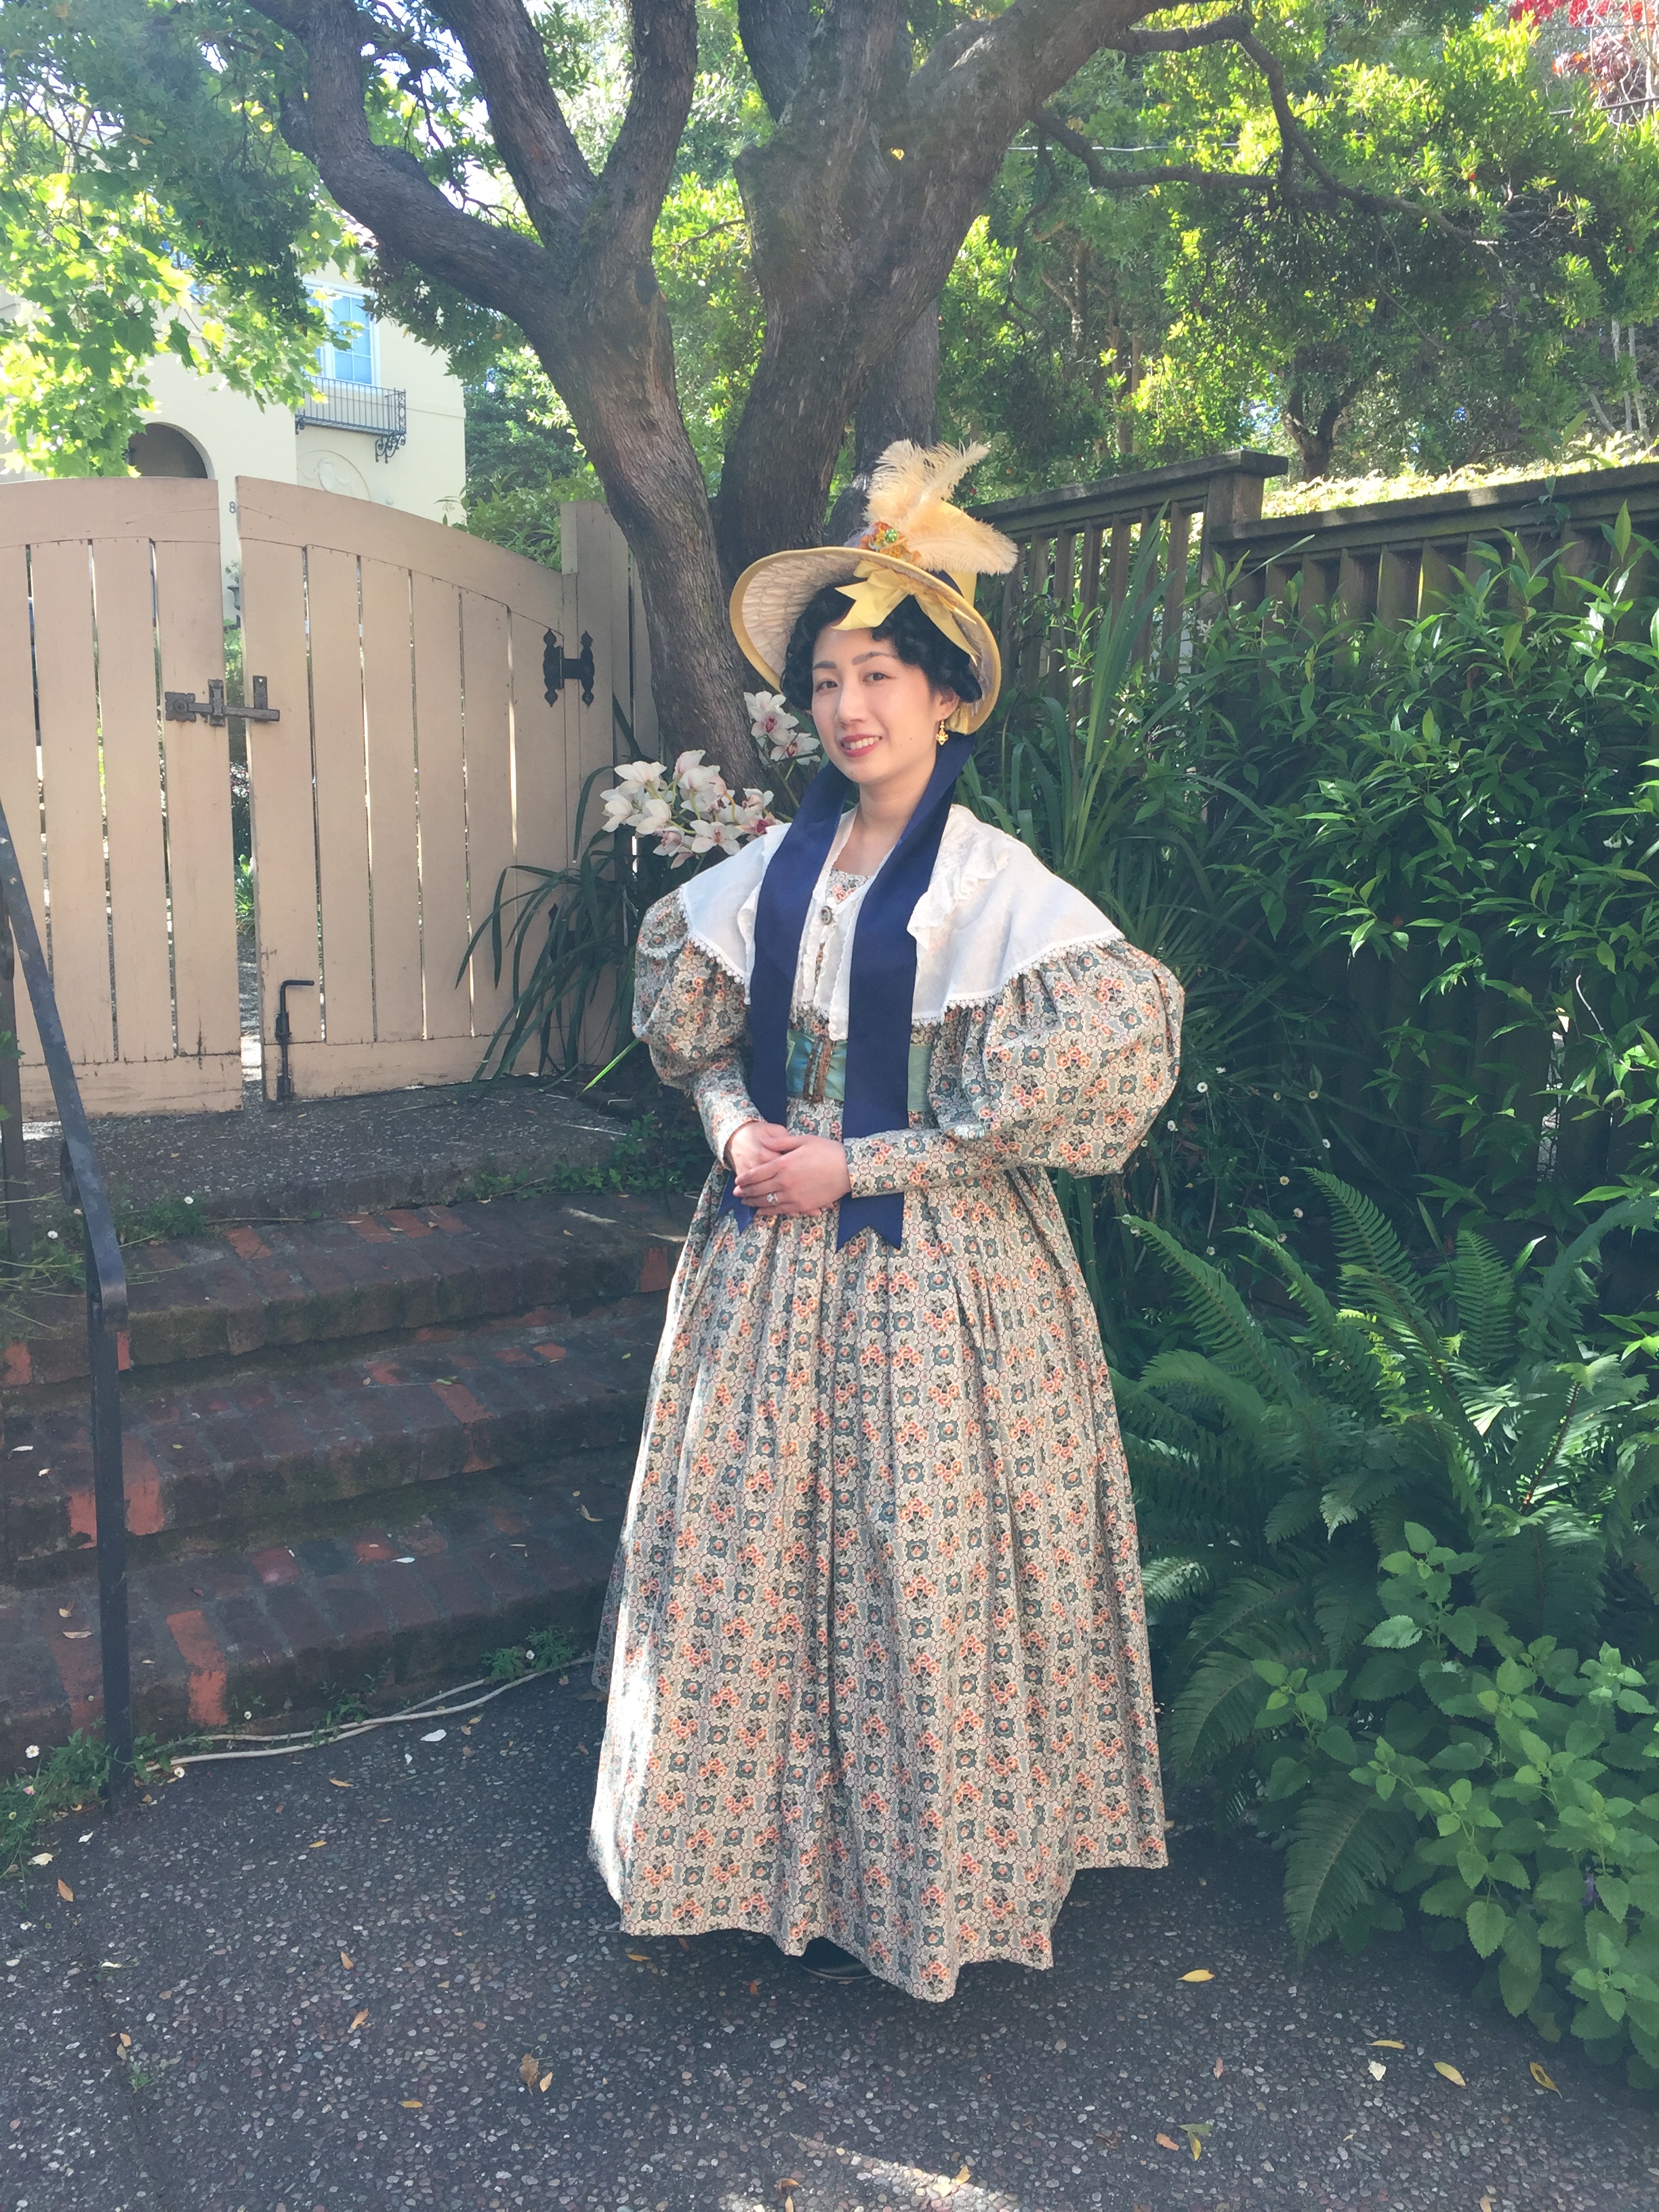
This past weekend the Greater Bay Area Costumer’s Guild held an 1830s-themed picnic, and I finally got to wear the 1830s cotton day dress I made a few months ago. Before the picnic I got dressed and took a few photos at a friend’s house.IMG_8621

I reused some accessories (like the bonnet and pelerine) from my 1830s silk dress ensemble, paired with a new moire ribbon belt and carved shell buckle. IMG_8618.JPG

Thank you to my friend Kaila who helped me get dressed, and wore a lovely silk gown that day.IMG_8609.JPG

Also joining us was Mena who had the most epic frilled cap!IMG_8622.JPG

The picnic was at Ardenwood Farms and it was a lovely day with a good turnout of wonderful costumes! I was impressed by how many people embraced the silly hair and giant sleeves of the 1830s. (The following group photos are all by Lori Clayton, used with permission). IMG_8431jkl

There were lots of charming ensembles in a variety of colors.IMG_8449IMG_8442IMG_8437

There were also a few gentleman in attendance (not all pictured).IMG_8399

And some of us got sassy showing off our corded petticoats.IMG_8441

The picnic spread was delicious.IMG_8634.JPG

Overall I had a lovely day out with friends! (Photo below by Sara of La Dauphine).from Sara McKee.jpg

The rest of my photos can be found on my Flickr album. IMG_8627

1830s Romantic Era Plaid Silk Day Dress (Plus Tips on How to Put Together Your Own 1830s Outfit)

As promised in my last post about the Gigot Girl Gang visiting the Dickens Fair, here are construction details about my 1830s Romantic Era day dress, made out of a plaid silk taffeta. Undergarments and accessories and the various vendors I used are also detailed in this post. The sections are: materials, pattern, construction, belt, bonnet, pelerine, undergarments, hair, accessories, project costs, and vendor list.IMG_4468.JPGIMG_4506.JPGIMG_4598.JPGIMG_4609.JPG

MATERIALS

My dress is made of a plaid silk taffeta, with the bodice lined in polished cotton, with an interlining of stiff cotton organdy. (In retrospect the organdy was a little too stiff and I’d use something softer next time). The skirt is unlined. The sleeves are lined with polished cotton as well. Because the sleeves are so large and so much material is pleated into the armscye, I think if I were to make this dress again I would not line the sleeves to reduce bulk. The silk from Fabric Mart Fabrics was advertised as “navy and yellow” but ended up being closer to purple and even more gorgeous than I expected. It changed colors depending on the light.IMG_3441.JPG

If silk is not in your budget, many beautiful gowns from this period were made in cotton prints. In my experience, silk shantung in dark colors or busy prints will hide the slubs pretty well if you can’t afford smooth taffeta. (Silk shantung has fewer slubs than dupioni).

PATTERN

I used the Truly Victorian TV455 1830s Romantic Era pattern to make my dress. I previously used this pattern to make an evening version of the 1830s dress.  I find TV patterns fit very well as long as you follow their instructions to pick the right bodice pieces for your measurements. I have found though, that many TV patterns run long in the bodice (even though I am not shortwaisted), so I recommend trimming any excess off the bottom to avoid having the waist of your skirt sit too low and look unflattering. Definitely make a mockup to ensure a good fit. Below is a photo of my final pattern overlaid on the original pattern. As you can see, I had to shorten the bodice quite a lot at the bottom. I also raised the neckline a little (personal preference) and took in the shoulders because mine are narrow.IMG_3427.JPG

One other change I made was that instead of using the included skirt pattern I just used 3 panels of my fabric. That way I could have seams on each side (where I added pockets), and a seam down the back for an opening.

The TV pattern includes sleeve patterns for day and evening looks. (I have not tried it myself, but Black Snail makes an 1830s evening dress pattern as well).

CONSTRUCTION

I’m not going to lie, pattern-matching a non-symmetrical plaid is not easy. But it makes a really beautiful effect in the end. Look at the front and back of the bodice!IMG_4601.JPG

(I should have taken photos before wearing it and getting it all wrinkled!)IMG_4606

I normally hate doing piping, but it was really part of the look for this era, so I piped the front center seam, the neckline, the armscyes, the shoulders, the sleeves, the side seams, and the cuffs.

Do yourself a favor and buy a piping foot. I did not have a piping or zipper foot that fit my antique sewing machine, and it was um, difficult.

The skirt is knife-pleated and sewn directly to the bodice bottom. I hid a pocket in each side seam of the skirt, and the back opening has a placket. I could have done cartridge-pleating for the skirt but decided it was too much hand sewing to handle this time. (If you want to do cartridge pleating, using gingham ribbon across the top makes an easy guide, as described in my post about how I made my 1840s dress). I increased the density of the pleats in the back of the skirt to subtly increase the “poof” in the back.

The hem is folded up, and up again, to make a deep facing for extra structure. Can you see where the tiny stitches are?IMG_4613.JPG

How about now? =)IMG_4616.JPG

The back of the dress closes with hooks and eyes. I use the kind meant for skirts for extra strength, instead of the tiny hooks and eyes.

I’m showing you a photo of the bodice in progress so you don’t repeat a mistake that I made.IMG_3568.JPG

Above is a photo of pattern pieces cut out. I had carefully pattern-matched everything so that the front, side, and back pieces would line up continuously like a barber pole. However, I forgot to take into account seam allowance! The photo below shows the pieces sewn together; whomp whomp. I had already flat-lined, pleated, and piped the front and back so I didn’t want to recut. IMG_3569.JPG

Matching plaids and pleats while taking into account curvature and sandwiching piping made me rethink the life choices that brought me to this point). Everything was done symmetrically so it still looks good enough for me, even though it’s not the way I envisioned.IMG_3570.JPG

I forgot to take a photo of the interior, but my silk is flatlined with my interlining (cotton organdy), and the polished cotton lining is sewn separately and whipstitched in. The boning is sewn to the seams of the lining. (I also used pre-cased plastic boning to save on time).   This is not the most historically accurate method, but made a clean interior and I didn’t have to do much hand-sewing to whip down raw edges.

BELT

The belt consist of a long piece of vintage ribbon, cut to my size and sealed at the ends with Fray Check, and a reproduction metal buckle. Some of the ladies in our group used antique buckles found on eBay, but reproductions are easily available. Mine is a gold oval one with bees purchased from Kansas Mercantile, which is also available from Ensembles of the Past on Etsy. The ribbon I used is a wide and thick rayon ribbon I bought from a vendor at Costume College. It was too wide but I folded one side down to fit.

BONNET

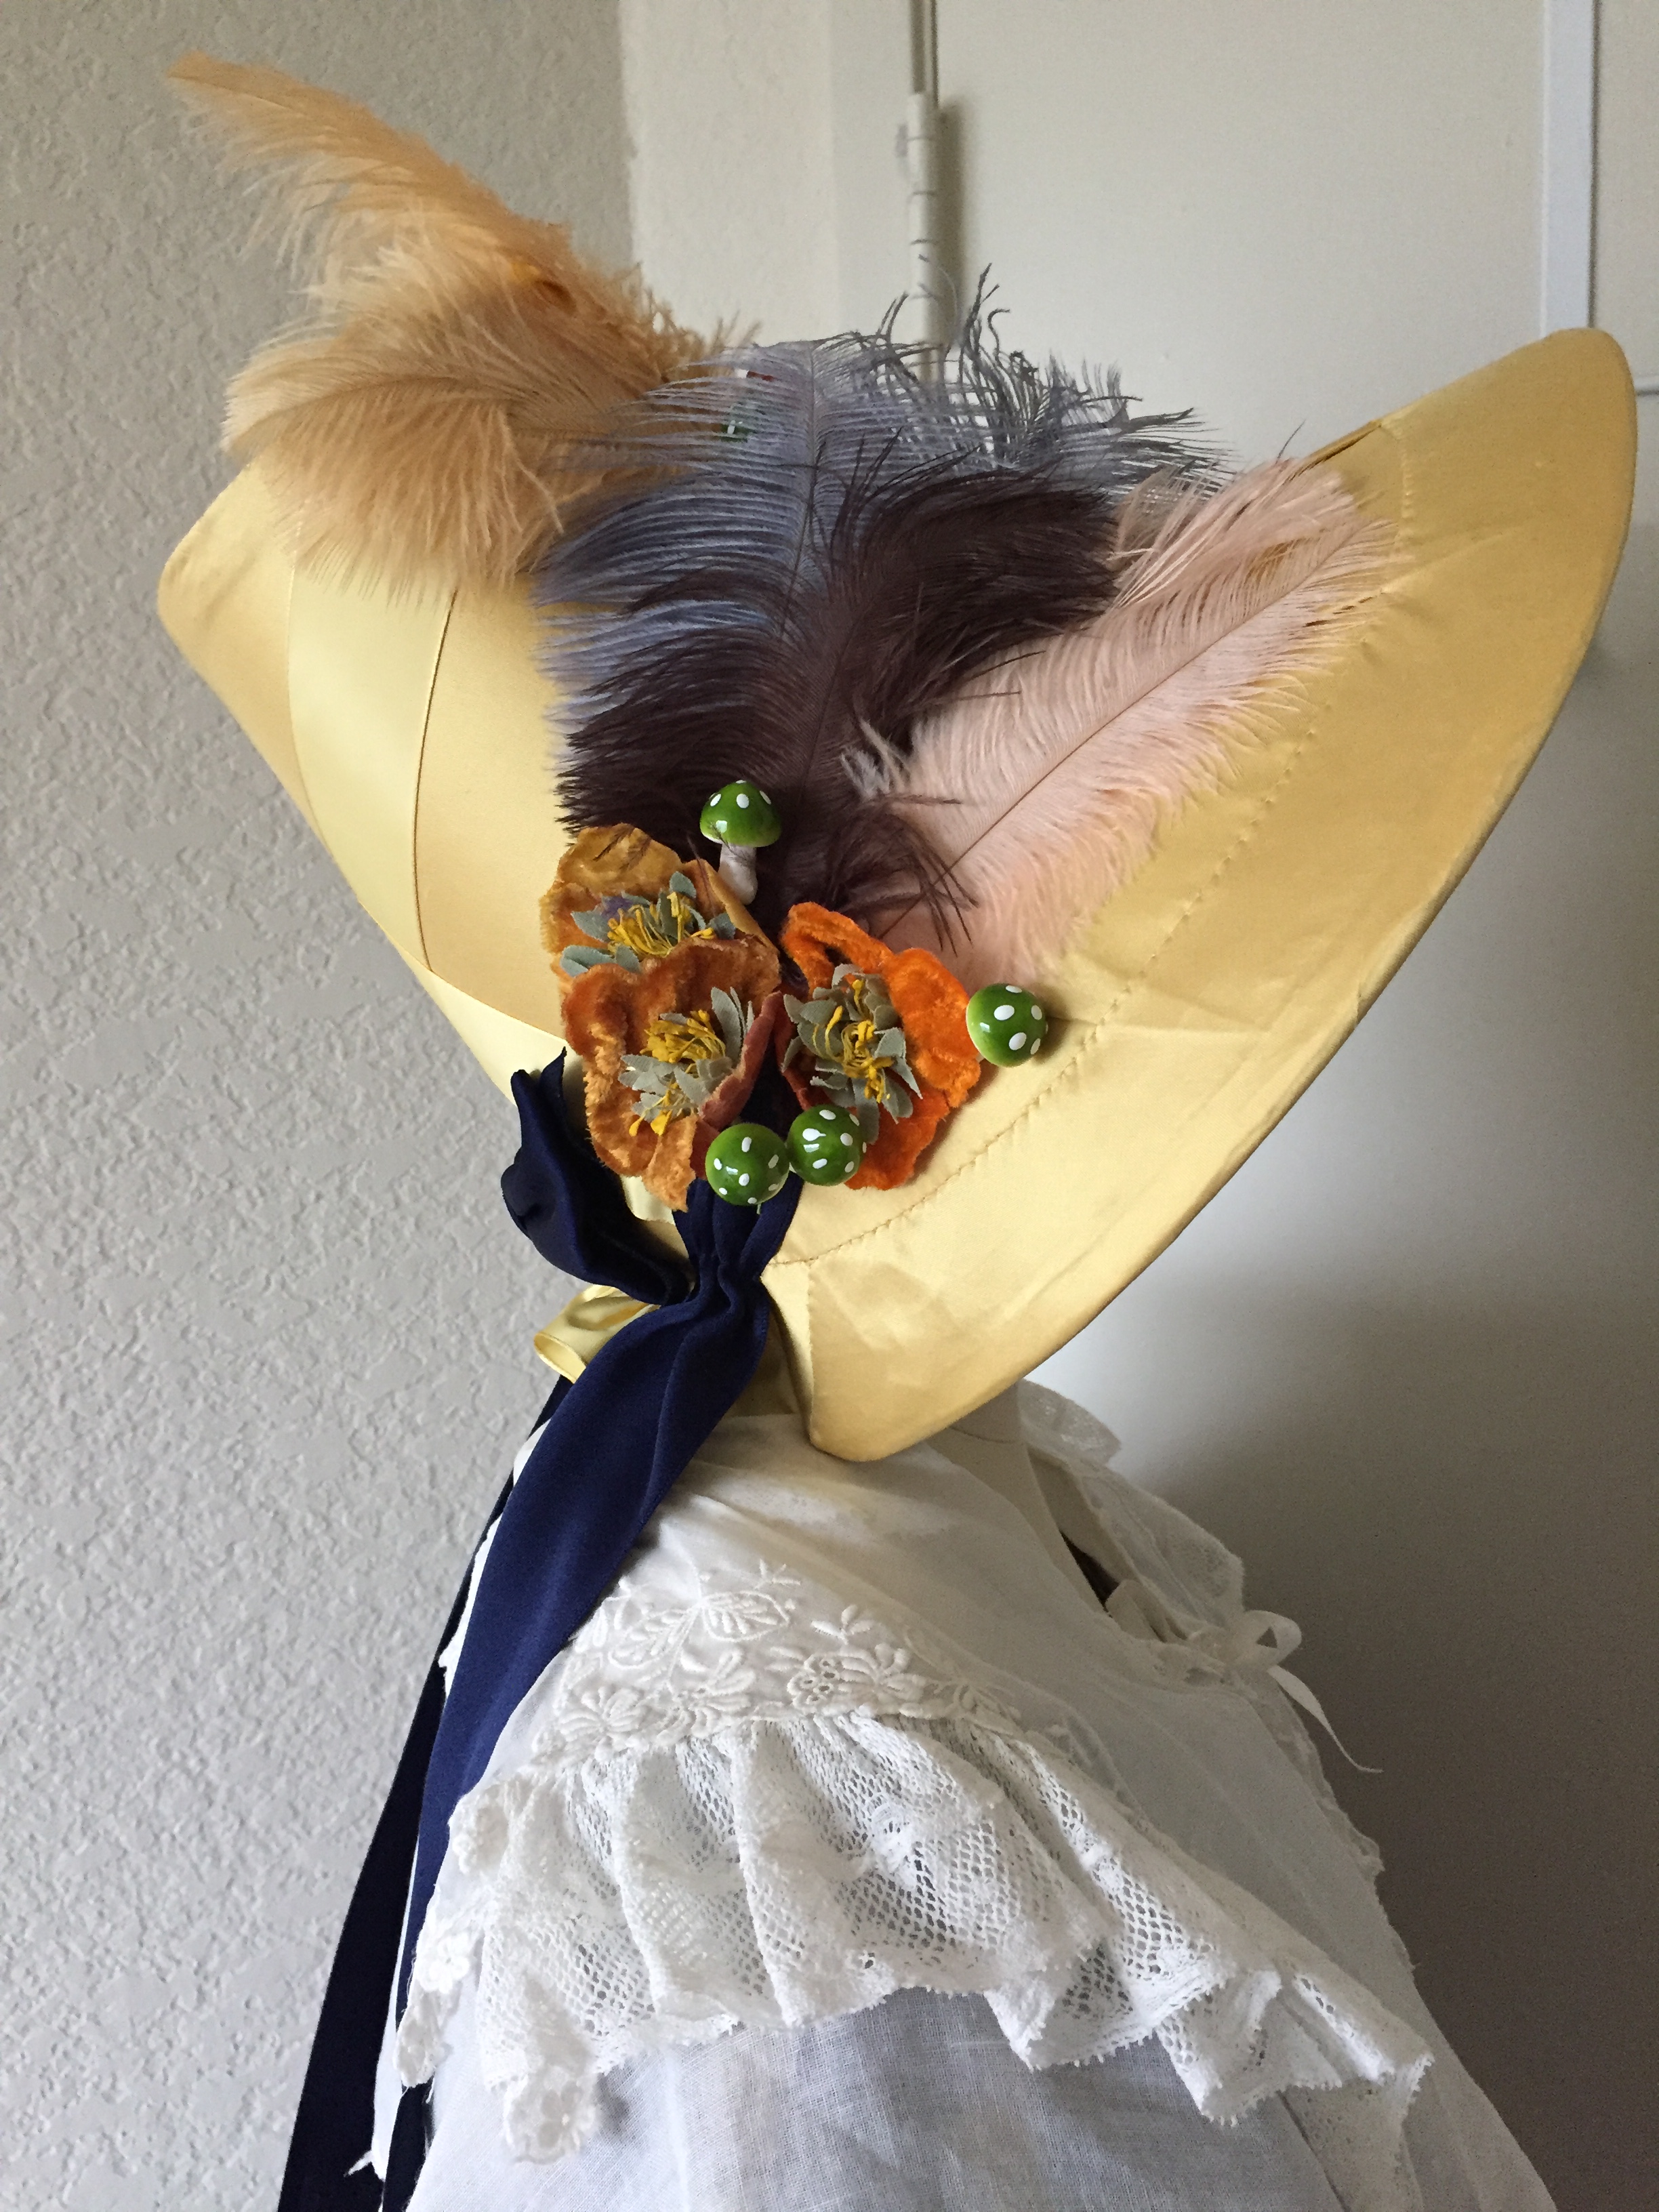
No respectable lady would go outdoors without a head covering, and the 1830s is a great period for putting a lot of outrageous thing onto your hat. Lynn McMasters and Black Snail both make Romantic bonnet patterns if you want to try your hand at millinery. I was recovering from an injury and could not hand-sew a buckram form when I put together my ensemble so I commissioned a bonnet from House of Loli on Etsy. I sent her some yellow and cream silk taffeta for the bonnet, and then added vintage flowers and mushrooms and feathers to to it.IMG_4629IMG_4630IMG_4635IMG_4626
PELERINE

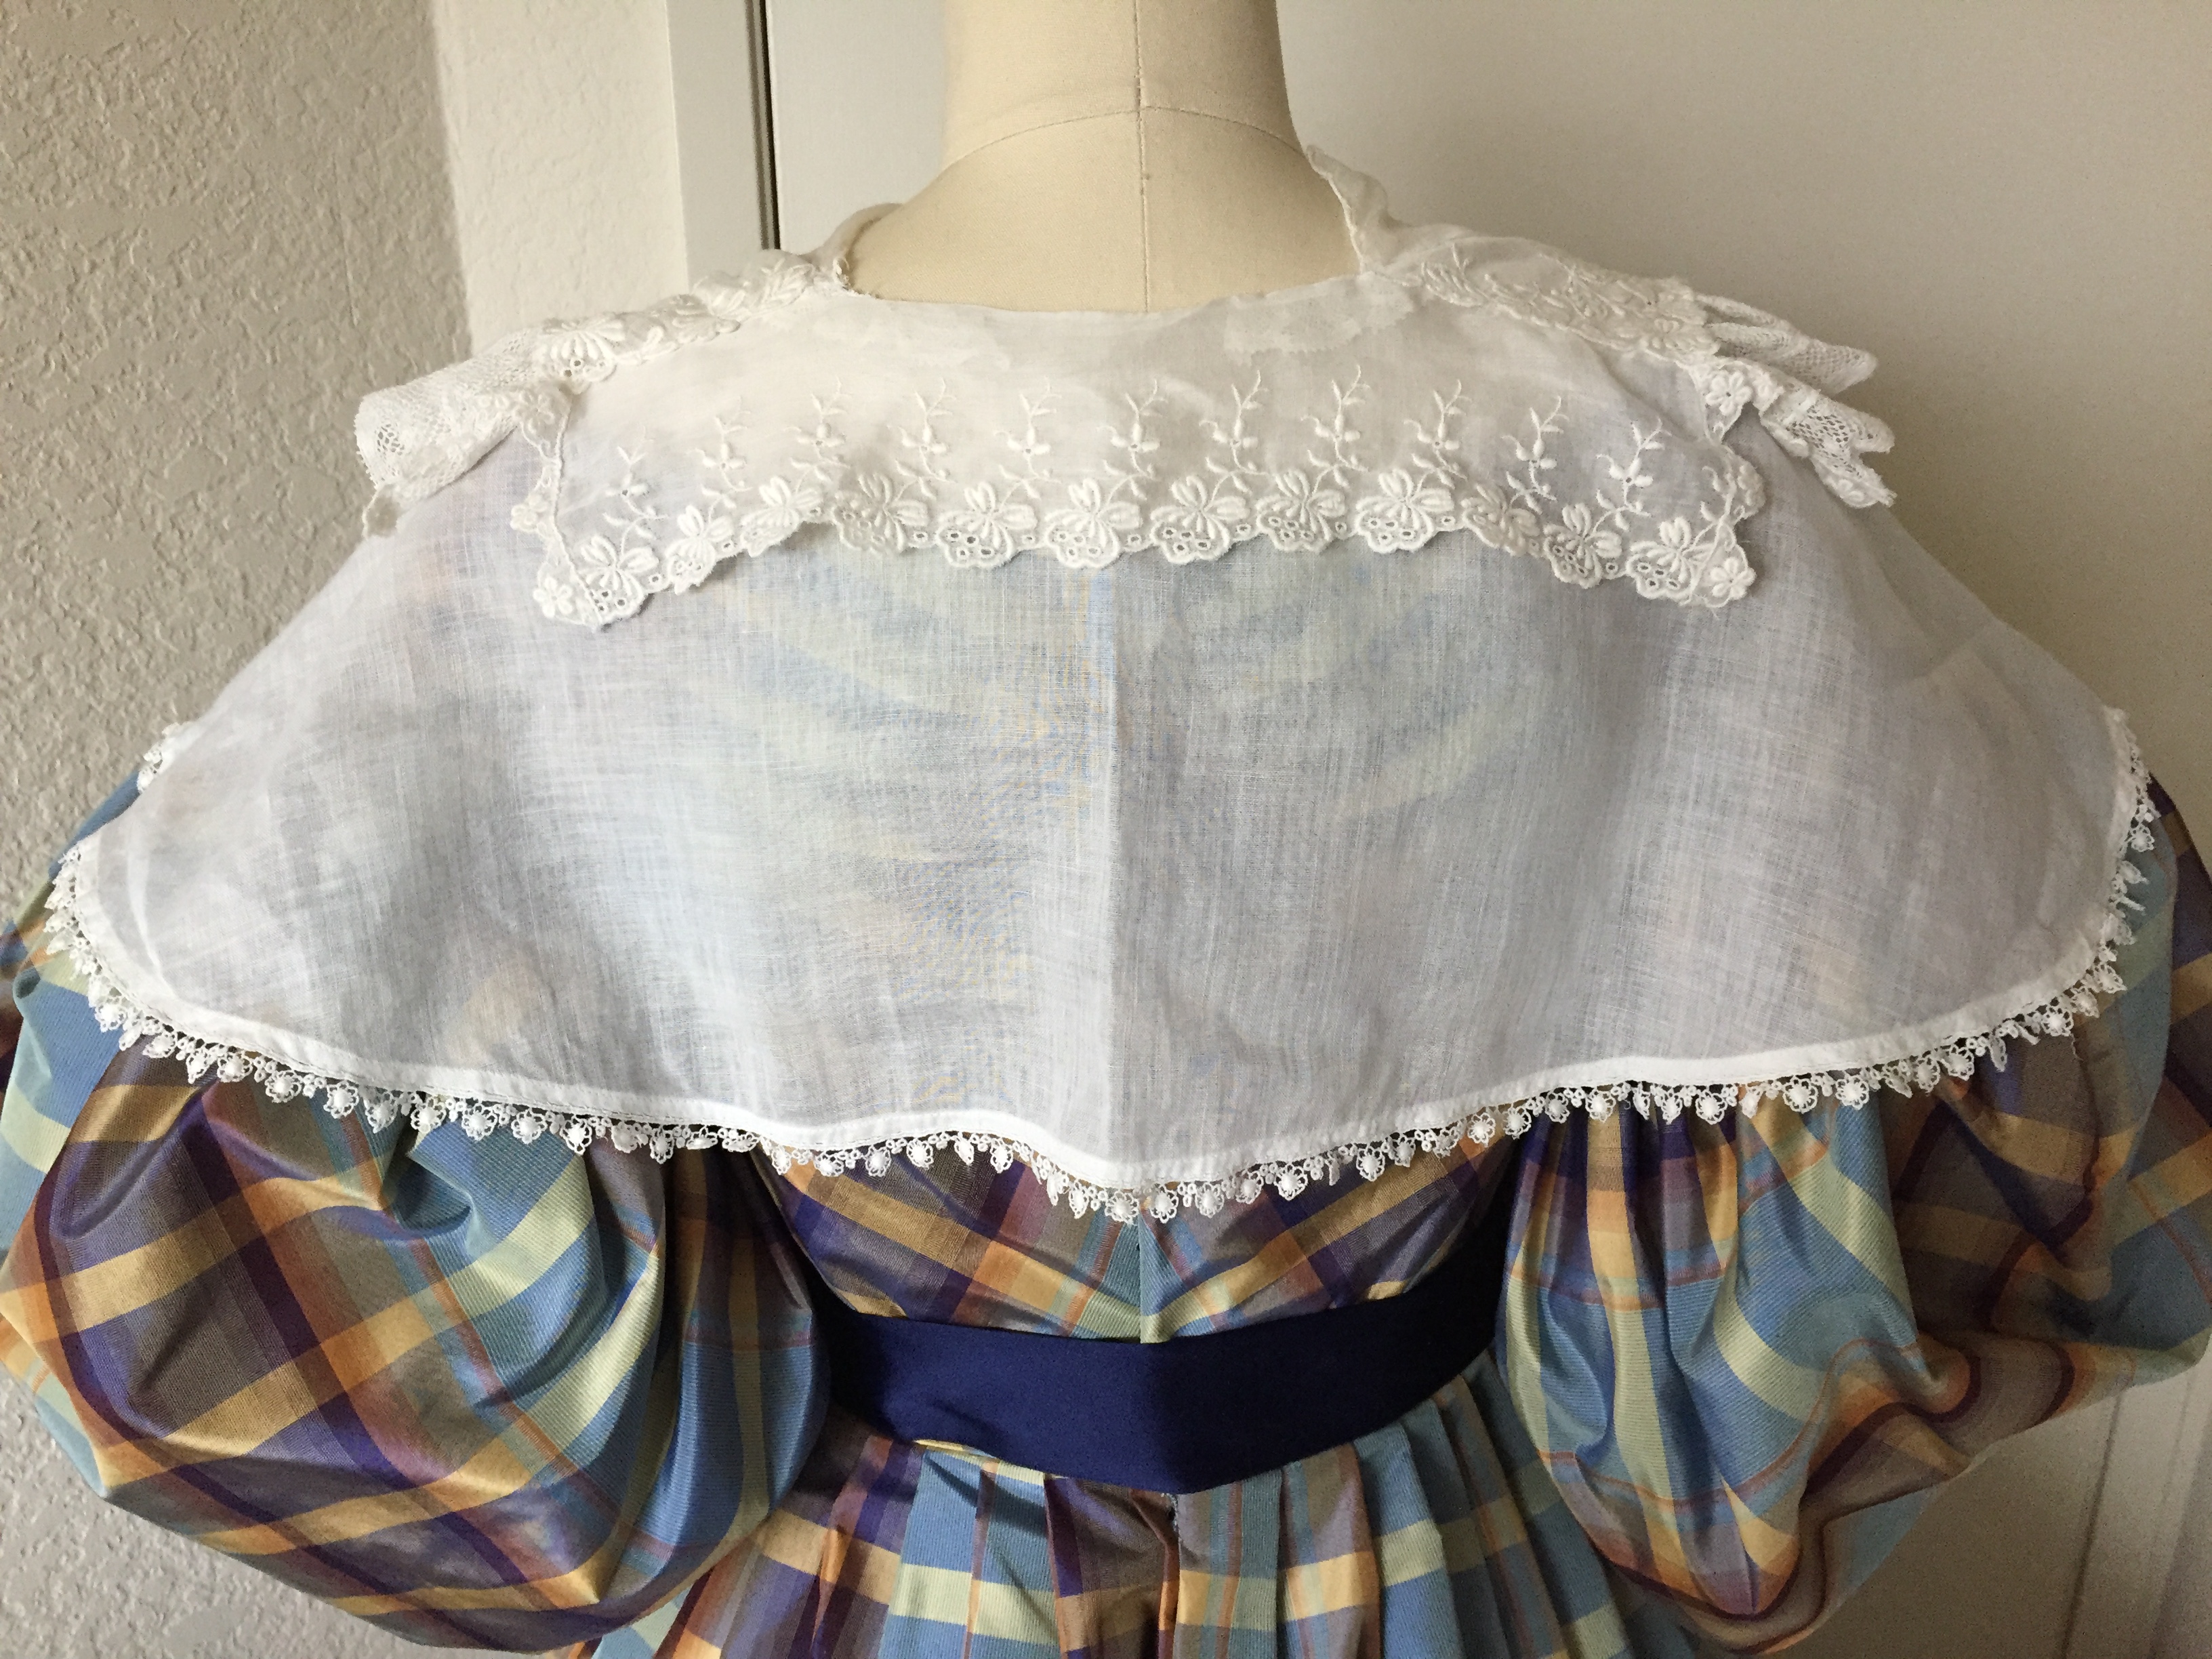
Period ensembles often include a little cape over the dress, either made of the same fabric as the gown, or a fine cotton. I made mine by assembling a few vintage lace collars together to make it look like one pelerine. If you look at my previous post of the Gigot Girl Gang you’ll see that there are lots of options to making one of your own style: small, big, transparent, or opaque. Mine closes with a little bit of silk ribbon. I think for future wearings I will use something heavier to weight it down, like a brooch, because my pelerine kept going askew.IMG_4623IMG_4624

UNDERGARMENTS

The undergarments needed for the whole ensemble are a chemise, stays, corded petticoat, tucked petticoat, and sleeve plumpers. IMG_4303.JPG

I’m too lazy to make a new chemise for each era, so I have a drawstring one that allows me to change the neckline for each gown. I have details on how I made by hacking an 18th century American Duchess pattern in a previous post.

I don’t like making any sort of corsetry, so I purchased the Charlotte stays from Redthreaded. They are very soft and comfortable because they rely on cording and a curved busk instead of boning. If you are on a budget or want more support using steel, Redthreaded also sells ready-made 1830s stays. My stays from the Atelier line are an investment, but they truly are a work of art, and I plan to use them for 1820s and 1840s garments as well.IMG_4444.JPG

Screen Shot 2018-12-23 at 2.06.12 PM

Photo by Redthreaded

If you want to make your own stays, Black Snail has a pattern for the stays (which also includes a pattern for a chemise, corded petticoat, and plumpers).

I purchased my corded petticoat from Hand Stitches in Time during a sale, but even at full price they would be worth it to avoid what is to me a very tedious task of sewing in all those cording channels! Mine is the 60 row corded petticoat. However, if you want to make your own petticoat I have heard great things about the corded petticoat workbook from Historical Sewing.IMG_4299.JPG

Over the corded petticoat I wore a tucked petticoat that I made out of cotton organdy. It is very simple to make. Take 2 long rectangles of fabric and sew into a tube. Hem the bottom. Mark parallel lines around one end of the tube and make as many tucks as you wish until the petticoat is the length you want. Pleat the top into a waistband. To determine how long of a rectangle you should make, determine the length you want your petticoat to be (waist to mid-calf) and add 1 inch for each tuck you want to make.IMG_4301.JPG

You will want to dip both petticoats in starch, let them air-dry, and iron them for maximum poof! You know they’re ready when they can stand up by themselves like petticoat ghosts. I find it handy to let them dry upside-down in the shower using skirt hangers.IMG_4226.JPG

The last bit of undergarments is the sleeve plumpers. The last time I made an 1830s dress I had to figure out the sleeve supports myself, and they ended up being a little odd. Abby of American Duchess has a plumper pattern that is much easier to use, and I highly recommend it. She has a PDF pattern and Youtube video that shows how they are made. I did a little experiment when making mine.IMG_E4230

The one on the left (above) is stuffed with Polyfil. The one on the right is stuffed with shredded memory foam. The one on the right is a bit lumpier, but compresses more easily for stuffing into the armhole in the dress. (A historically correct method would be to use feathers or down). I could have made my plumpers even bigger but I was afraid of not being able to get them through the armhole. IMG_E4245

As described in Abby’s video, there are ties to tie them to the dress so they don’t move around. In some museum photos you’ll see the plumpers tied to the stays (I believe mainly to show them off), but it is much easier to put the plumpers into the dress and then put the dress on, than to try to get the dress over the pumpers while you’re wearing them!

HAIR

My hairstyle consists of mainly false hair. I have a large braided hair bun on top of my head and 2 curled hair clips in the front, based on the style in this 1835 portrait by August Canzi.


The bun is easy to make. Just take false braiding hair (I use the Sassy brand from Sally Beauty Supply), make a thick braid, and wrap it around a hair donut.IMG_4640.JPG

The front clips are made from 2 “side swept bang clips” you can buy on Amazon or eBay. Just make sure you get “side swept” bangs instead of regular ones because they are longer. Wrap the hair in curlers and dip into boiling water for 10 seconds to set the curls. Put on a towel to dry and take the curlers out when they are completely dry.IMG_4378.JPG
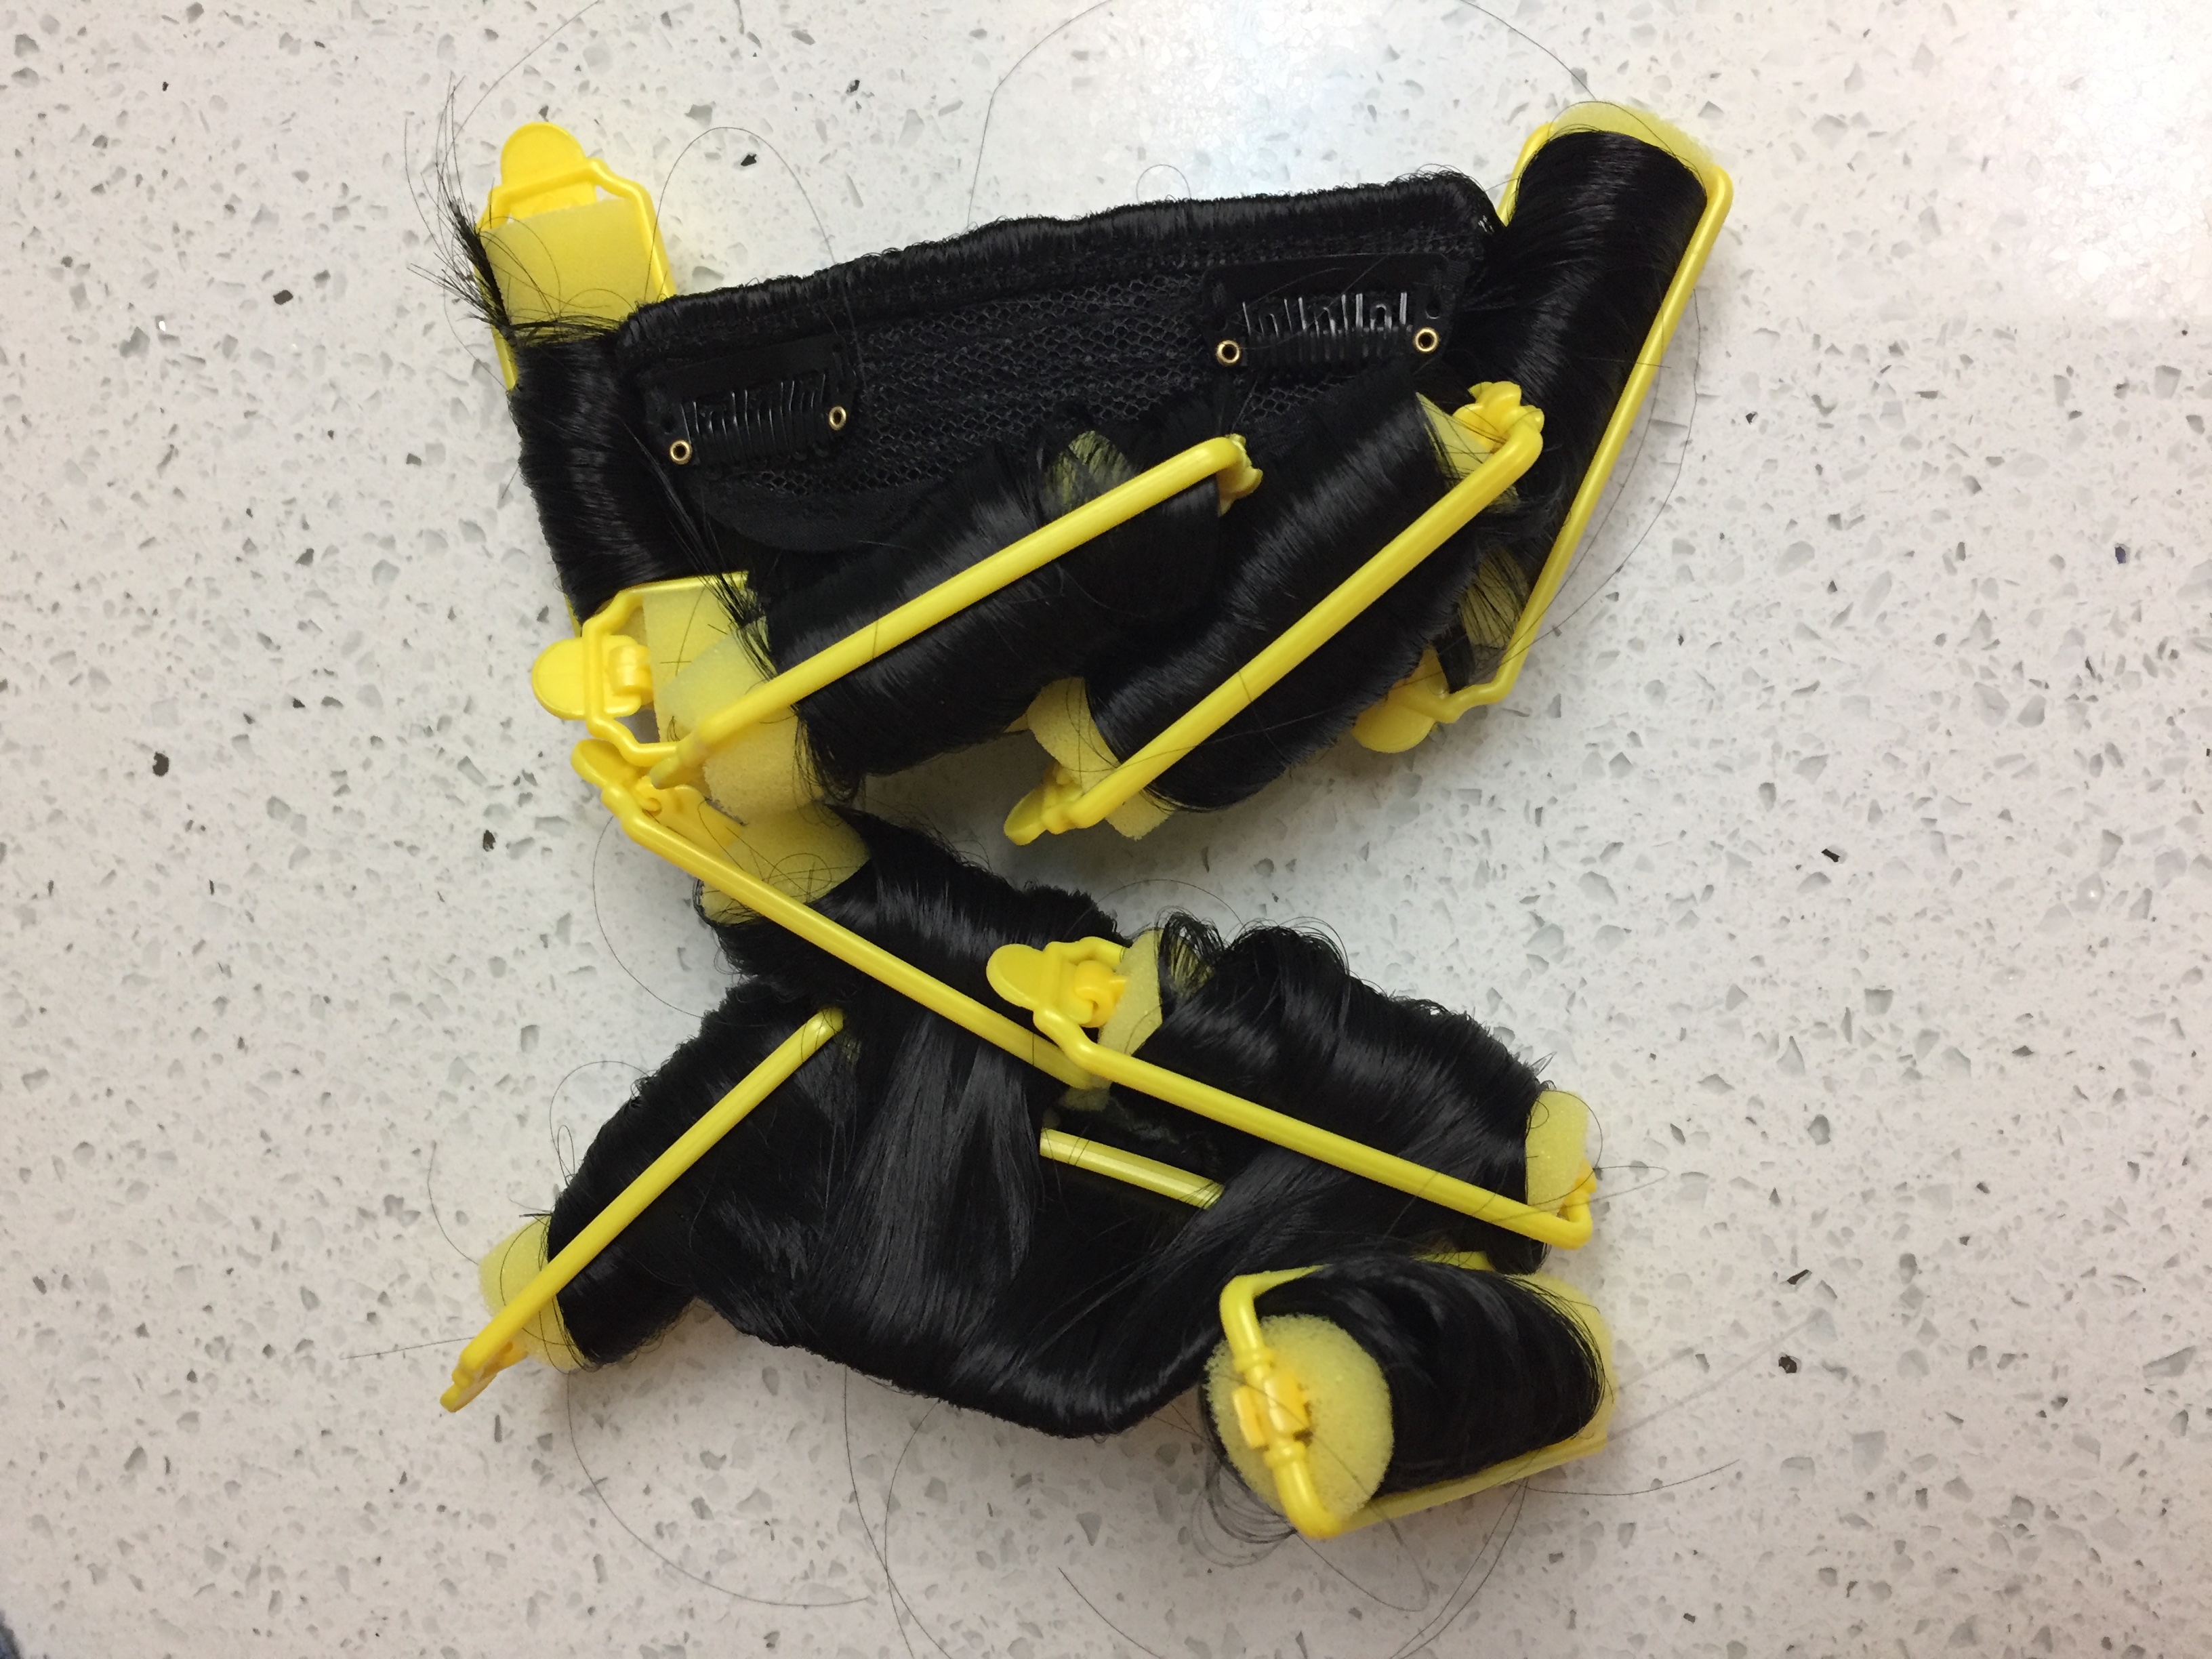
The bun is bobby-pinned onto my head while the bangs have wig clips already pre-attached.

If you have long hair, make 2 braids that cross over the top of your head and pin them down to act as anchors for the bun. I have shorter hair cut into layers that makes braiding difficult, so I made a small bun as an anchor, and pomaded all the shorter hairs into place.

The 1830s is full of elaborate hairstyles involving Apollo knots, fancy loops and braids, flowers, etc. You might have fun exploring those for evening ensembles, but if you want simple and easy the bun and bang clips are the fastest way to get the look.

OTHER ACCESSORIES

Besides the belt and bonnet, my other accessories were a round vintage fur muff, grape cluster earrings by The Lady Detalle, and a brooch from American Duchess, given to members of our Gigot Girl Gang. My shoes were the Gettysburg from American Duchess. (I added insoles and a non-slip adhesive pad to the bottom of the shoes). I also had silk stockings and a pair of silk gloves from the 1930s.


IMG_7106IMG_4344.JPG

PROJECT COSTS

If you are starting from scratch, and especially if you plan to outsource all your undergarments, having a full 1830s garment can be quite the investment. However, you don’t have to have 1830s stays. Some of the other ladies cheat with Victorian corsets from later eras. Long-line Regency stays would work as well. I use a chemise from another time period. You can fake having a corded petticoat by using enough starched petticoats or by putting horsehair crinoline into your skirt. You might be able to retrim a bonnet you already have. Instead of a perlerine maybe you have a nice shawl. You probably have some flat shoes that could pass. (Square-toed modern ballet flats are perfectly acceptable for 1830s; just add some ribbon ties). The muff and jewelry are optional. If this isn’t your first costume rodeo and you already have a lot of similar items, don’t feel like you need a whole new set of undergarments. Since it’s possible to “make do,” I’m giving the cost of just the dress. (I don’t want you to have sticker shock at the entire ensemble that I have been collecting for a while, and be discouraged. Repeat after me: You don’t need all new stuff to have a good time).

  • 8 yards silk taffeta: $84.99 + $7.50 shipping from Fabric Mart Fabrics. (Make sure you get on their mailing list to be notified of their crazy sales. I am able to afford silk dresses because I wait until silk drops to ~$10/yard).
  • TV pattern: $0 (used already for a prior 1830s dress)
  • Navy thread: $1.80 from Fabric Mart Fabrics
  • Belt buckle: $13.59 including shipping from Kansas Mercantile
  • Navy ribbon spool: ~$4 from Costume College vendor (with plenty left over)
  • 3 yards polished cotton for bodice and sleeve lining: ~$5 from garage sale
  • 1 yard cotton organdy for bodice interlining: ~$5
  • Hooks and eyes, other thread, cord, etc. from stash: $5

Total for dress: $126.88 (not awful for a huge silk dress, with leftover silk and ribbon for other projects!)

I made the plumpers from materials left over from other projects, so it was “free.” The organdy for making the tucked petticoat is about $5/yard from Vogue Fabrics. (Depending on your size you will probably use 3-4 yards).

Other items you may already have: stays, chemise, petticoats, bonnet, shoes, stockings, gloves, jewelry. Be creative; I reuse my accessories and undergarments for various outfits and eras all the time!

VENDORS

Happy sewing!QGIN4307

Crimson Peak Picnic Outfit Costume

Last year I made a Crimson-Peak inspired costume to wear to a spooky tea party.  I skipped a cost tally at the time because there were some fixes and upgrades I wanted to make so the outfit wasn’t done. You can see this older post to view the original version and inspiration images from the Guillermo del Toro movie. I wore it again at Costume College this year in its final form.

44353198072_e0b45219a7_o

Photo by Gloria of In the Long Run

My Crimson Peak group was rounded out by Adrienne as evil sister-in-law Lucille and Elizabeth as another Edith. (After CoCo Adrienne added more details to her costume to make it more screen accurate, and Elizabeth has some really gorgeous textures in her flowers, so be sure to see their IG accounts for more photos).IMG_0732IMG_0735

My blouse is made of a finely-pleated silk chiffon, with a cotton gauze base. I put crinkled silk in hot tea then cold vinegar, which caused everything to shrivel up into tiny little pleats. The silk, cotton, and lace was all dyed with black tea. The collar is interfaced with cotton organdy.IMG_0258

The back closed with silk-covered buttons and loops.IMG_0253

The skirt was made with a bronze silk and I swapped out the heavier glass buttons I had before to these faux tortoise shell ones. Underneath I wore this lace petticoat and bum pad.JMQB6829

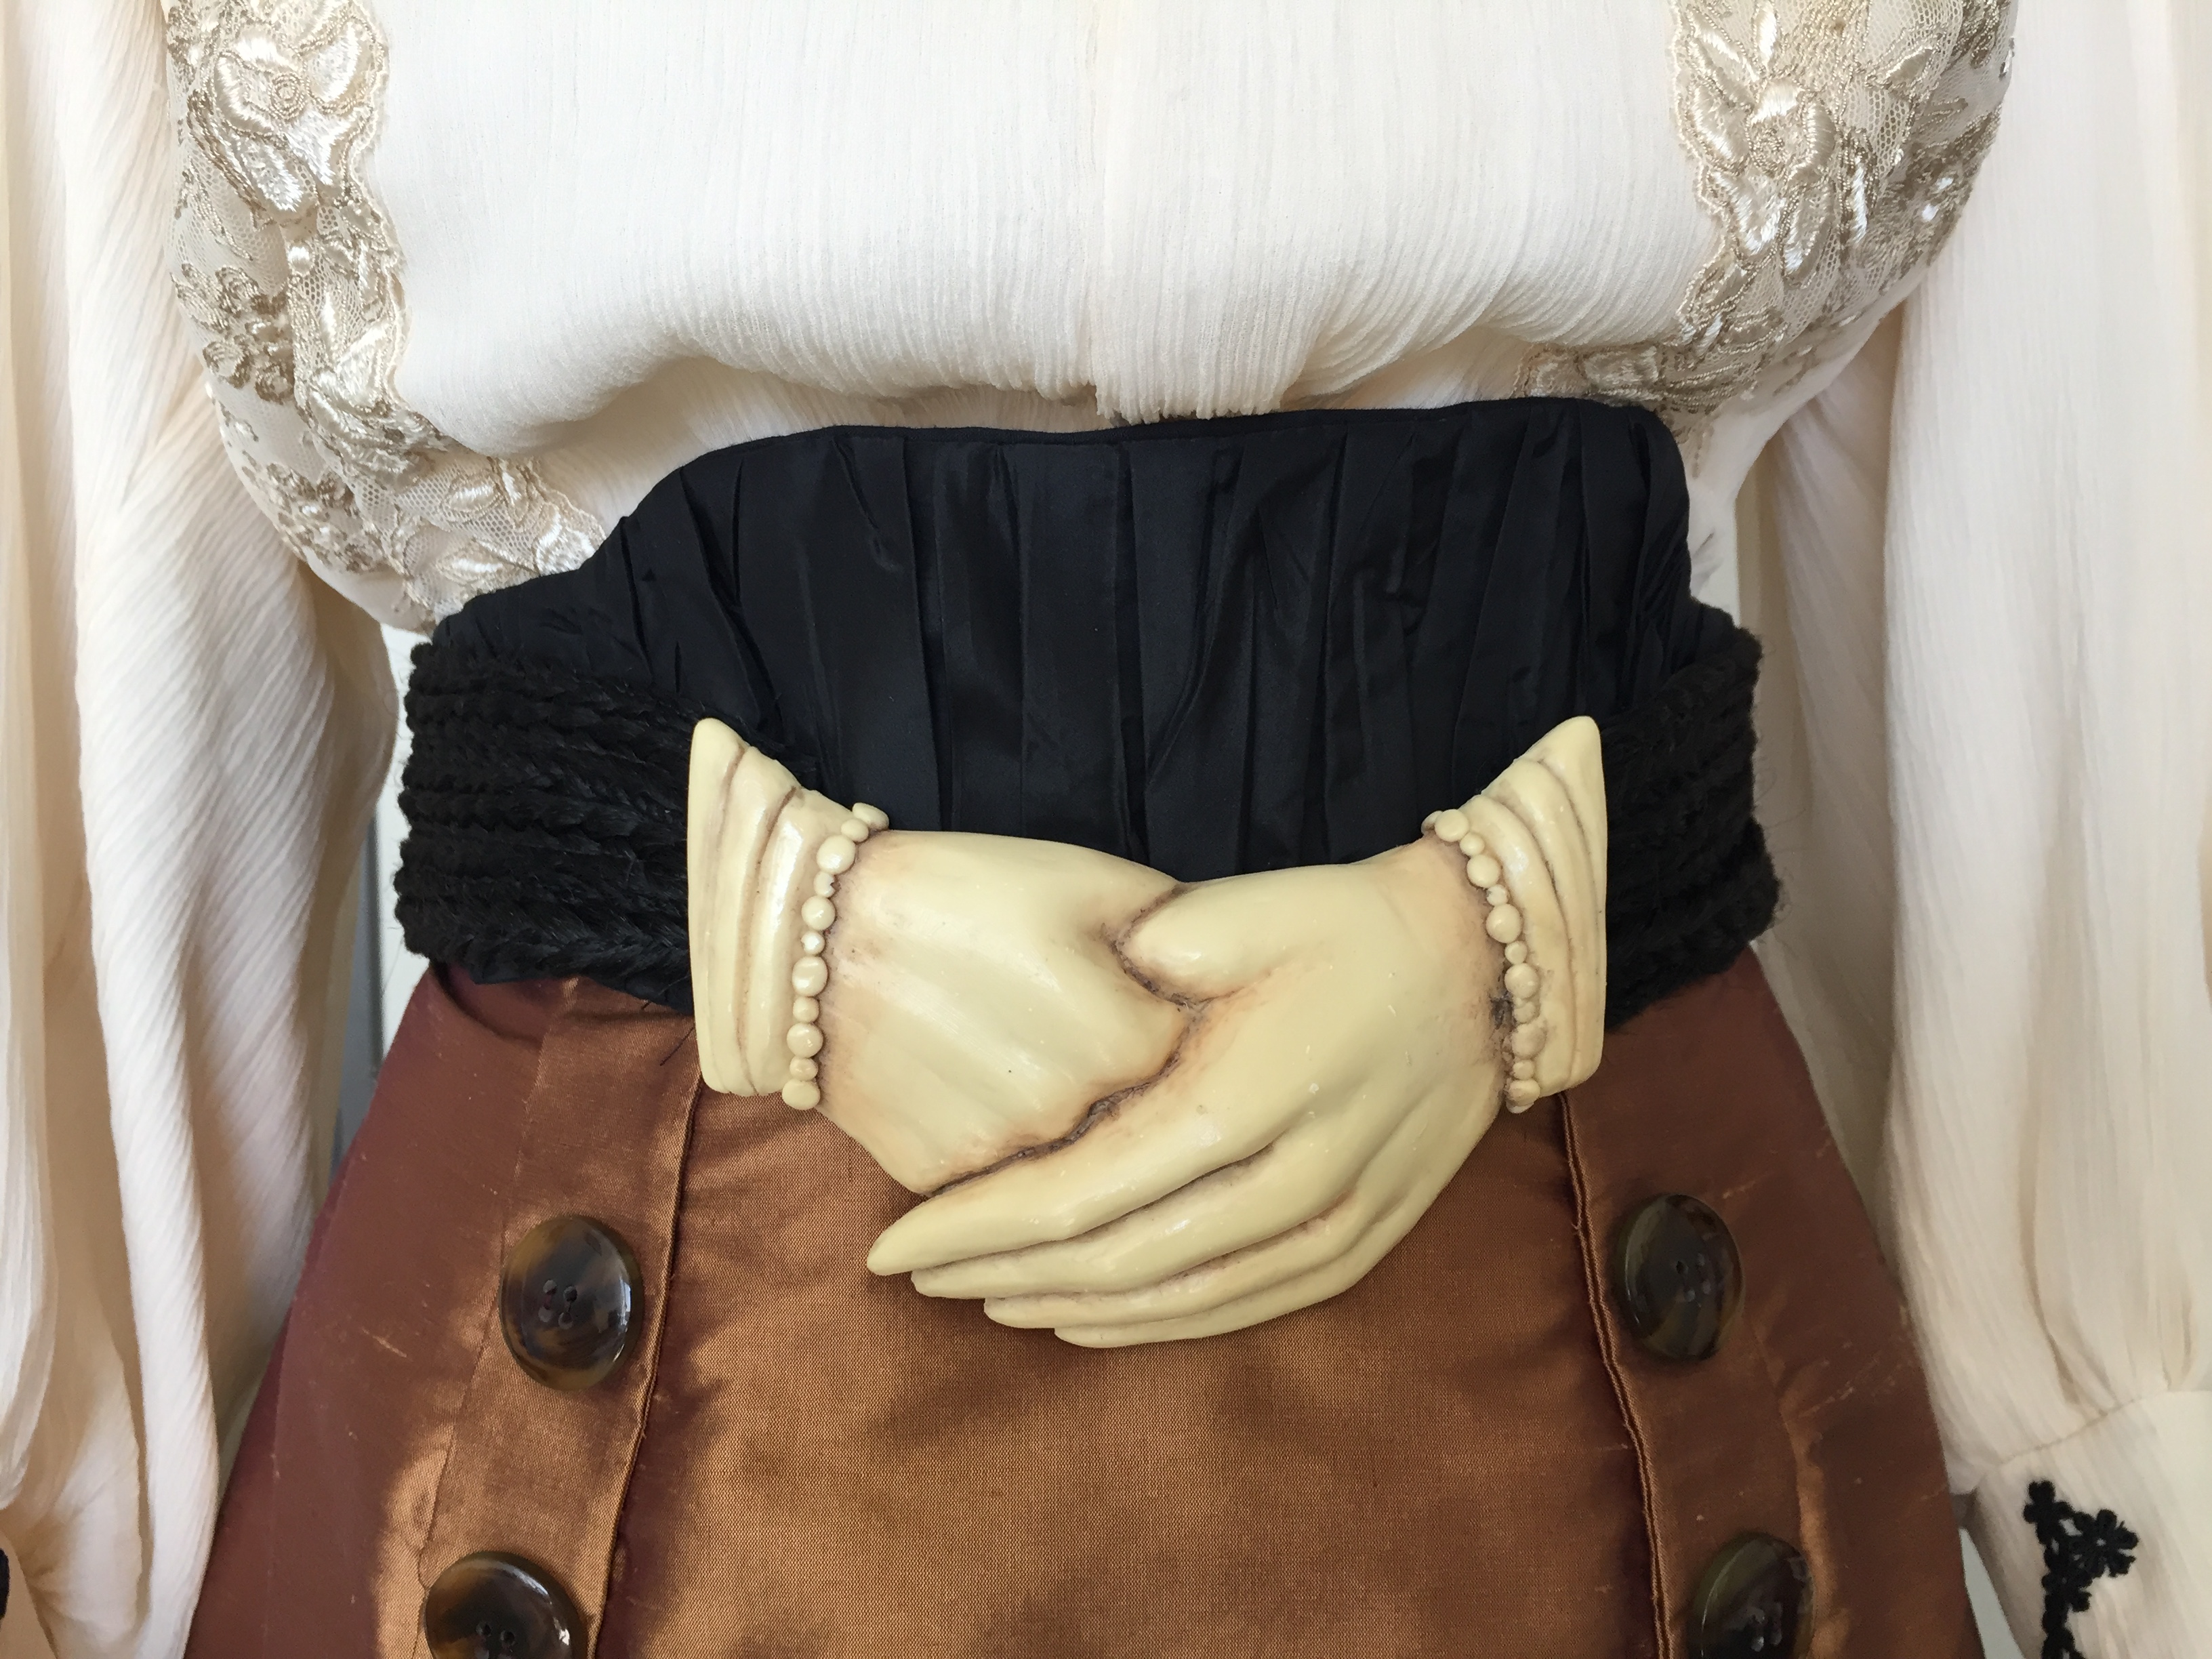
The belt was made by pleating silk scraps and sewing down box braids to the top. IMG_0289IMG_0287.JPG

I bought the buckle on Etsy, but I’m afraid the shop appears to be closed now.

You can see how I made my hat (by cutting down a taller straw hat) and why I chose this particular design in my previous post about this costume.IMG_0760.JPG

I am proud to say that our group was Kate Hawley approved! The costume designer for Crimson Peak left us a comment on Instagram!IMG_E1265 copy.JPG
43495172235_dedd48e46b_o

Photo by Gloria of In the Long Run

Project materials:

Skirt:

  • 5 yards bronze silk taffeta from friend’s garage sale: $43.50
  • Fan tail skirt e-pattern from Black Snail Patterns on Etsy: $6.19
  • 10 faux tortoise-shell buttons from eBay: $5.98 including shipping

Belt:

  • Hand clasp belt buckle by Anneliese van Overbeek (Etsy): $66.48 including shipping
  • 24 pack of box braids from Aliexpress: $5.90 including shipping
  • Black silk taffeta (scraps left over from other project): $0

Blouse:

  • 2 meters crinkled silk chiffon from Halo Silk Shop (Aliexpress): $22
  • 4 yards cotton gauze from Amazon (affiliate link): $17 (I have plenty left over)
  • 1 yard beige lace from Britex Fabrics in SF: $17.55
  • 2 meters black floral lace from Aliexpress: $4.22
  • More miscellaneous beige lace, thread, tea, organdy, buttons, etc. from stash or leftovers from other projects: ~$5

Hat:

  • Straw boater hat from Amazon (affiliate link): $13.98 (You can find cheaper boaters on eBay but I was in a hurry so Prime to the rescue!)
  • Painted feather butterflies from Amazon (affiliate link): $10.99
  • “Ribbon” was scrap of silk from my skirt fabric
  • Hot glue

Miscellaneous costs from stash (thread, hooks and eyes, hot glue, etc.): $5

TOTAL COST: $223.79

For footwear I wore Tavistock boots and silk stockings from American Duchess.

I enjoyed wearing this costume and I’d like to make a dark version! I have the hand belt in black, so Goth Edith is on my to-do list!

Costume College 2018 Outfit Recap

I went a little overboard at Costume College this year and brought 8 costumes. Originally I thought I’d just dress up for the evening events and then bring some vintage dresses for casual daywear. Then I got recruited into various group costumes and things snowballed from there . . . I’ll be following up this post with more featuring the costumes worn by the other talented individuals at Costume College, but for now, here is my parade!

At the Thursday Night Pool Party the theme was “In the Realm of the Goblin King,” so of course I had to dress as Jareth! Elizabeth was my baby Toby.IMG_0366

The boots are American Duchess Tavistocks and the blouse is a vintage Gunne Sax. Everything else was cobbled together from modern clothes.IMG_0476

On Friday I  wore my Victorian bicycling outfit with the “Adventurer’s” group of sporting ladies.IMG_0639IMG_0643IMG_0613

Friday night I wore my Crimson Peak Edith picnic outfit, along with my Elizabeth as another version of Edith, and Adrienne as our “sister-in-law” Lucille. I’ve worn this outfit before but it wasn’t fully finished then. I’ve made a number of upgrades and will be making a more detailed construction post on the blog.IMG_0674IMG_0737IMG_0735

It was a delightful surprise to even get some kudos on Instagram from Kate Hawley, costume designer for Crimson Peak!IMG_E1265

On Saturday I was a member of a surprise group of Downton Abbey maids. It was decided I was the “head maid” since I had the most lace, and our pregnant friend Christine played the part of “the fallen maid” that got a little too friendly with the young master of the house.IMG_0790IMG_0797

We passed out buttons as prizes to people who could identify us correctly. (As Asian costumers we’ve experienced people calling us by each others names at conventions for years, so we thought it’d be fun to dress alike this year). Christine also made embroidered patches for us to wear with this same design.IMG_0823

Saturday night was the grand gala! I have so many wonderful pictures for a future post, but here I am in my Vice Admiral Holdo, along with my brilliant friend Kelsey in her Queen Amidala.IMG_1017IMG_1022

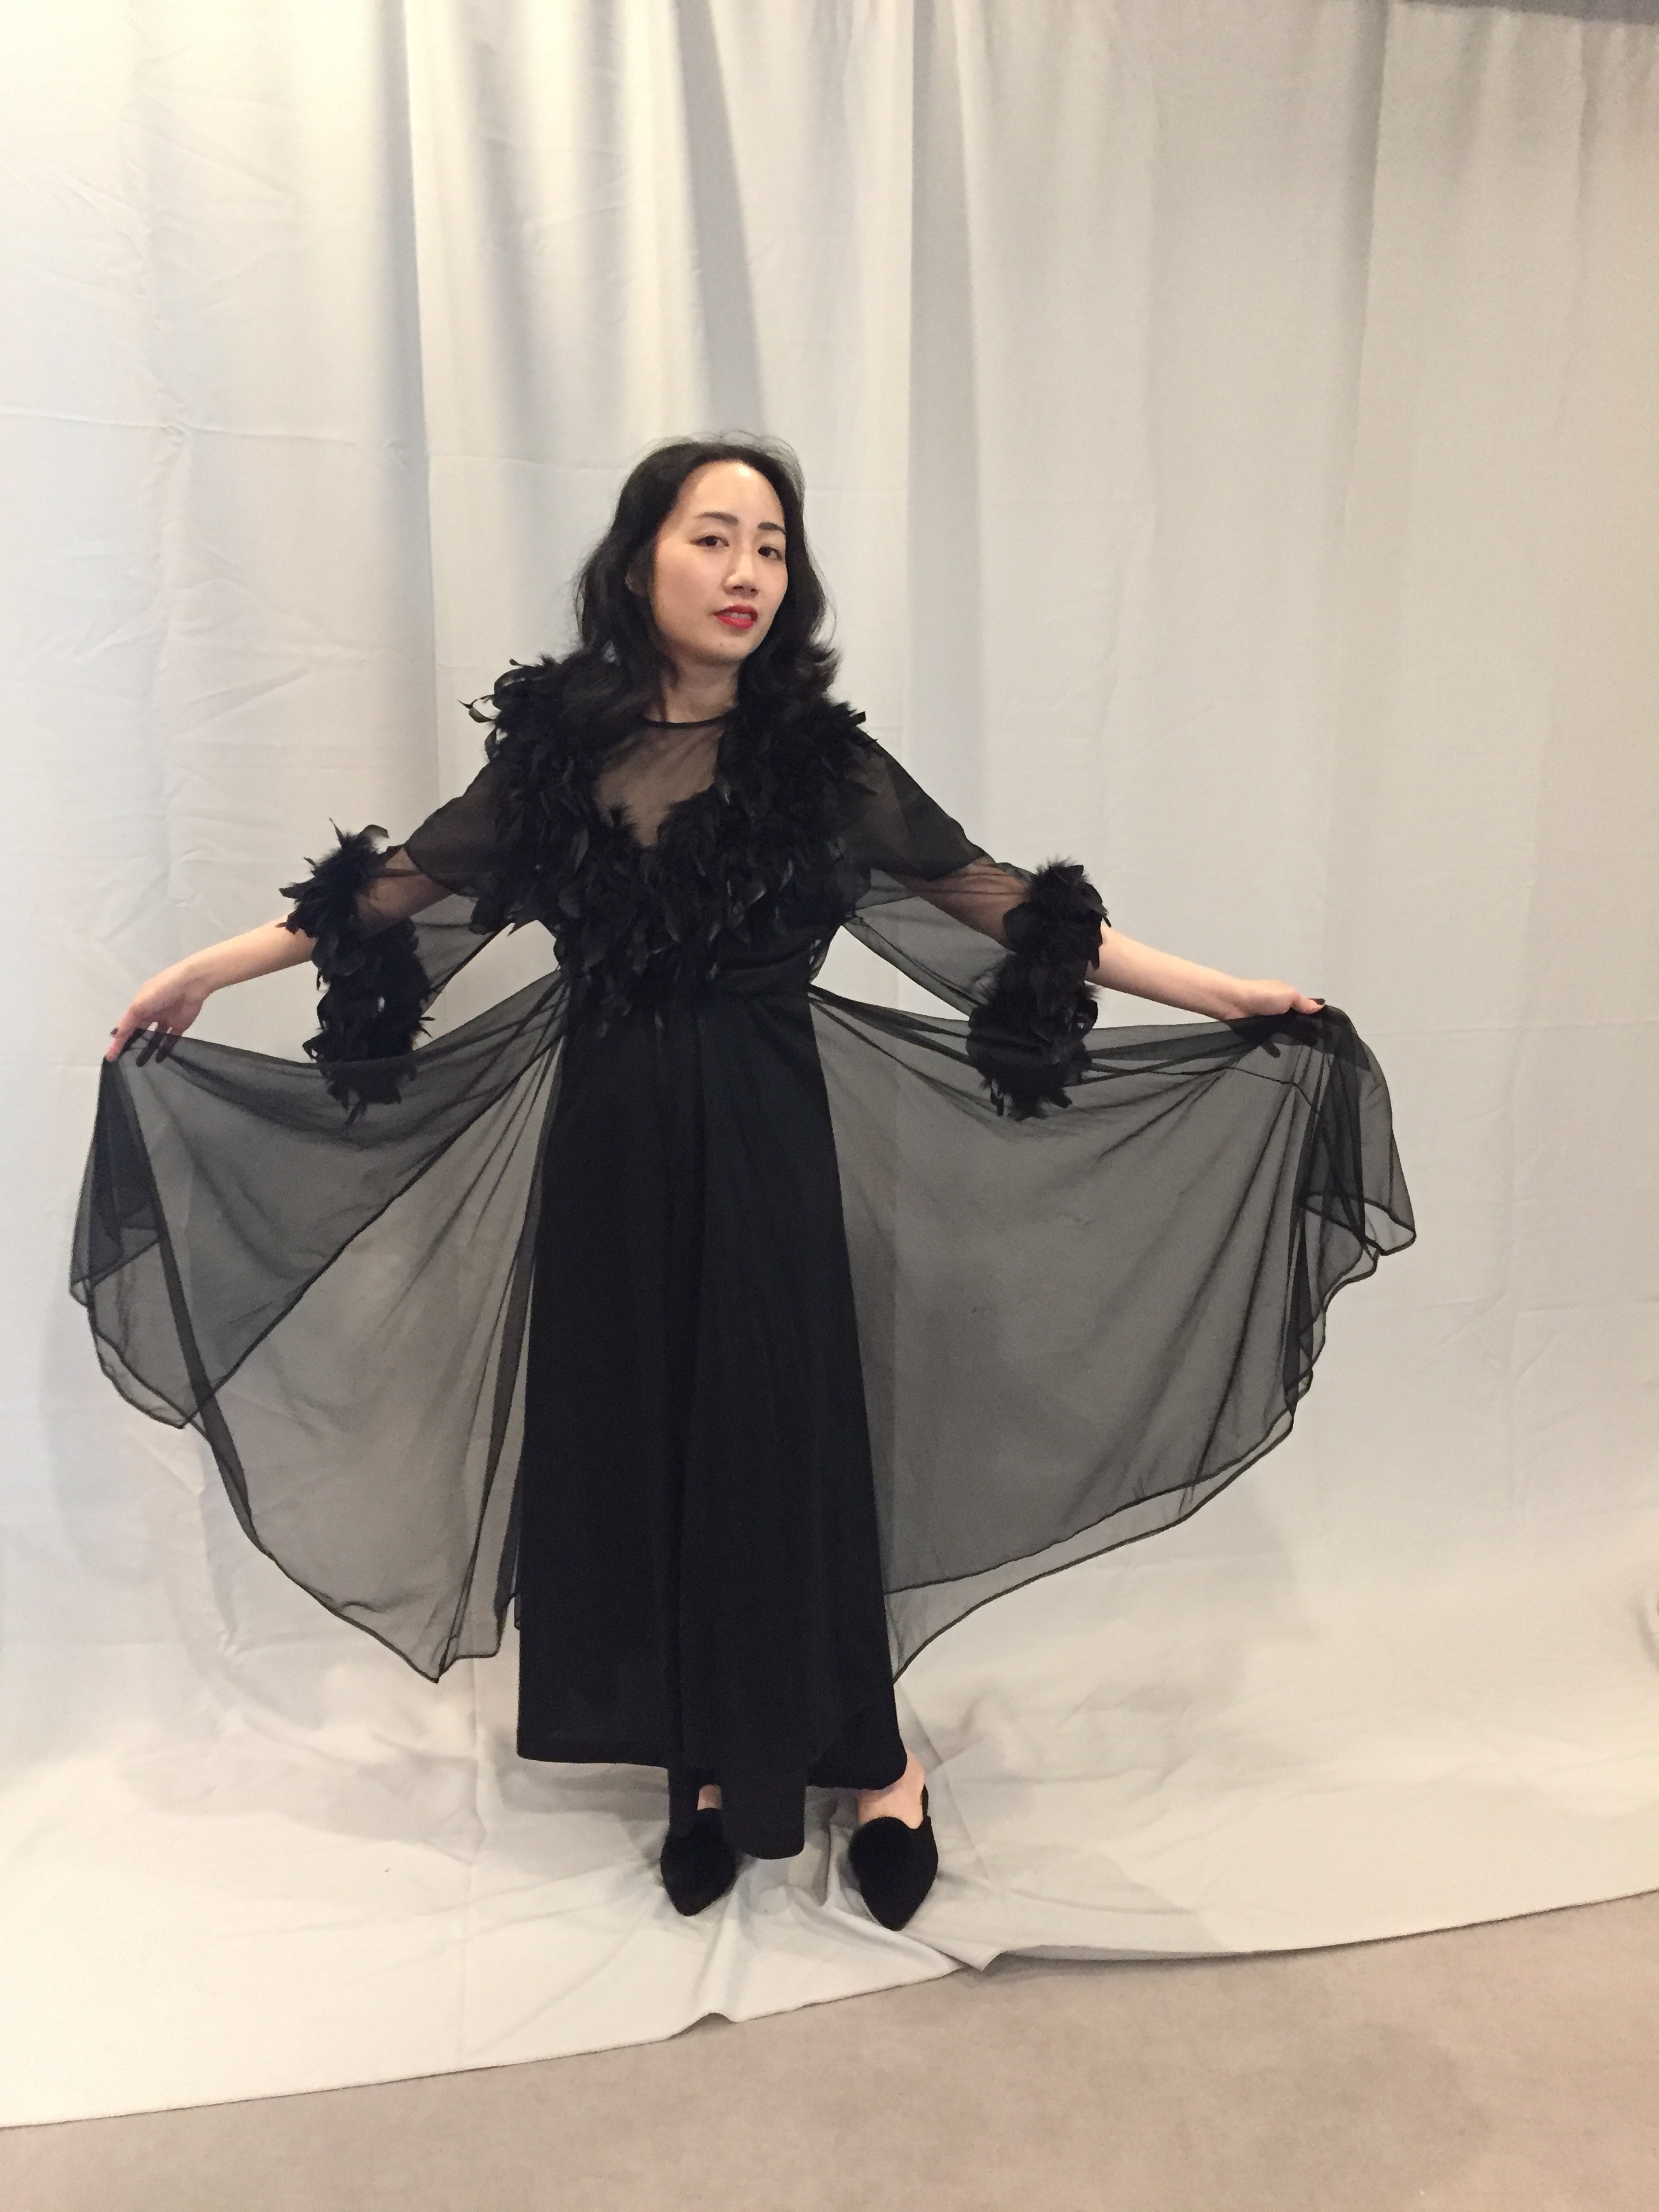
On Sunday I wore a vintage peignoir with feather trim over a black nightgown, and joined other ladies wearing their glamorous “Sunday undies.” IMG_1136IMG_1139IMG_1169

For the rest of the day on Sunday I rewore my vintage-style Star Wars First Order uniform, with a new purse and re-tailored collar. I had the privilege of a photoshoot with Gloria of In the Long Run, and here is a preview image I received. I can’t wait to see the final photos!38122893_551589561924580_164237582304018432_o.jpg

Adrienne also took this slow-motion villain cape action video. (Click on the link, not the photo). https://www.instagram.com/p/Bl2G7-vDvse/?taken-by=freshfripperyScreen Shot 2018-08-10 at 10.17.34 AM.png

For those of you keeping track, outfit #8 was a fuzzy Totoro kigurumi (which I forgot to photograph).  It was very useful during the evenings when I wanted to feel cozy. (FYI, for anyone feeling a little unease, I am an outlier that brings more costumes than average. You are absolutely not required to dress all day, every day for CoCo. Many people attend classes in jeans, and not every attends the evening social events).

I had an incredible time at Costume College! Stay tuned for more posts featuring other costumers.

The Lilac Petticoat (Upcyling an Old Bridesmaid’s Dress)

My last project was all about taking a 70s bridesmaid’s dress and giving it new life as a petticoat and bum pad for a late Victorian or Edwardian costume.C18CCFD1-8D0C-4032-9873-C16C3C447BA4

There was so much lace, taffeta, and chiffon that I couldn’t resist. (The striped fabric is a scrap from another project).IMG_0155

I love upcycling and repurposing, but it has to be from something that is modern and mass-produced, really damaged vintage, or ugly and unwearable as-is. I was on the fence about this dress because it’s not entirely bad looking, and there might be someone out there who likes to wear 70s bridesmaid’s dresses. Might be. This is what the dress looked like before. 91758DB7-052D-4B41-8F10-616F530AD3AB

In the end I decided there were enough issues with it that it would be better to repurpose it. The dress had some stains and tears, it was meant for an unusual figure (slim and super tall), and the lace was scratchy. I figured super models who like itchy clothing are hard to come by, so out came the seam ripper. (Can you guess what movie I was watching?)IMG_0130

A list of my modifications:

  • I separated the bodice and skirt and removed the back zipper.
  • I put a new waistband at the top of the skirt and added a hook/eye closure.
  • I hemmed up the bottom of the skirt lining and enclosed a strip of horsehair braid for structure.
  • I removed the bottom flounce of lace because it was too long.
  • To make a bum pad out of the bodice I sewed up the openings, stuffed it using parts of a lumpy pillow I was about to throw out, and added some ribbon ties.


There was nearly no cutting, so aside from the loss of a zipper, some lace, and some hooks and eyes, some intrepid fashion archaeologist could conceivably remake this dress in the future.

Note: I don’t condone cutting up nice vintage! Please don’t cut up nice old wedding dresses unless they are really trashed. There are plenty of neglected polyester prom dresses that you can use for your own petticoat project.

This dress was thrifted, and most everything else was leftover from another project, so this cost me about $20-25 total! I don’t think I could have bought all that lace new for that price.

Victorian Bicycling Outfit at Roaring Camp Railroads

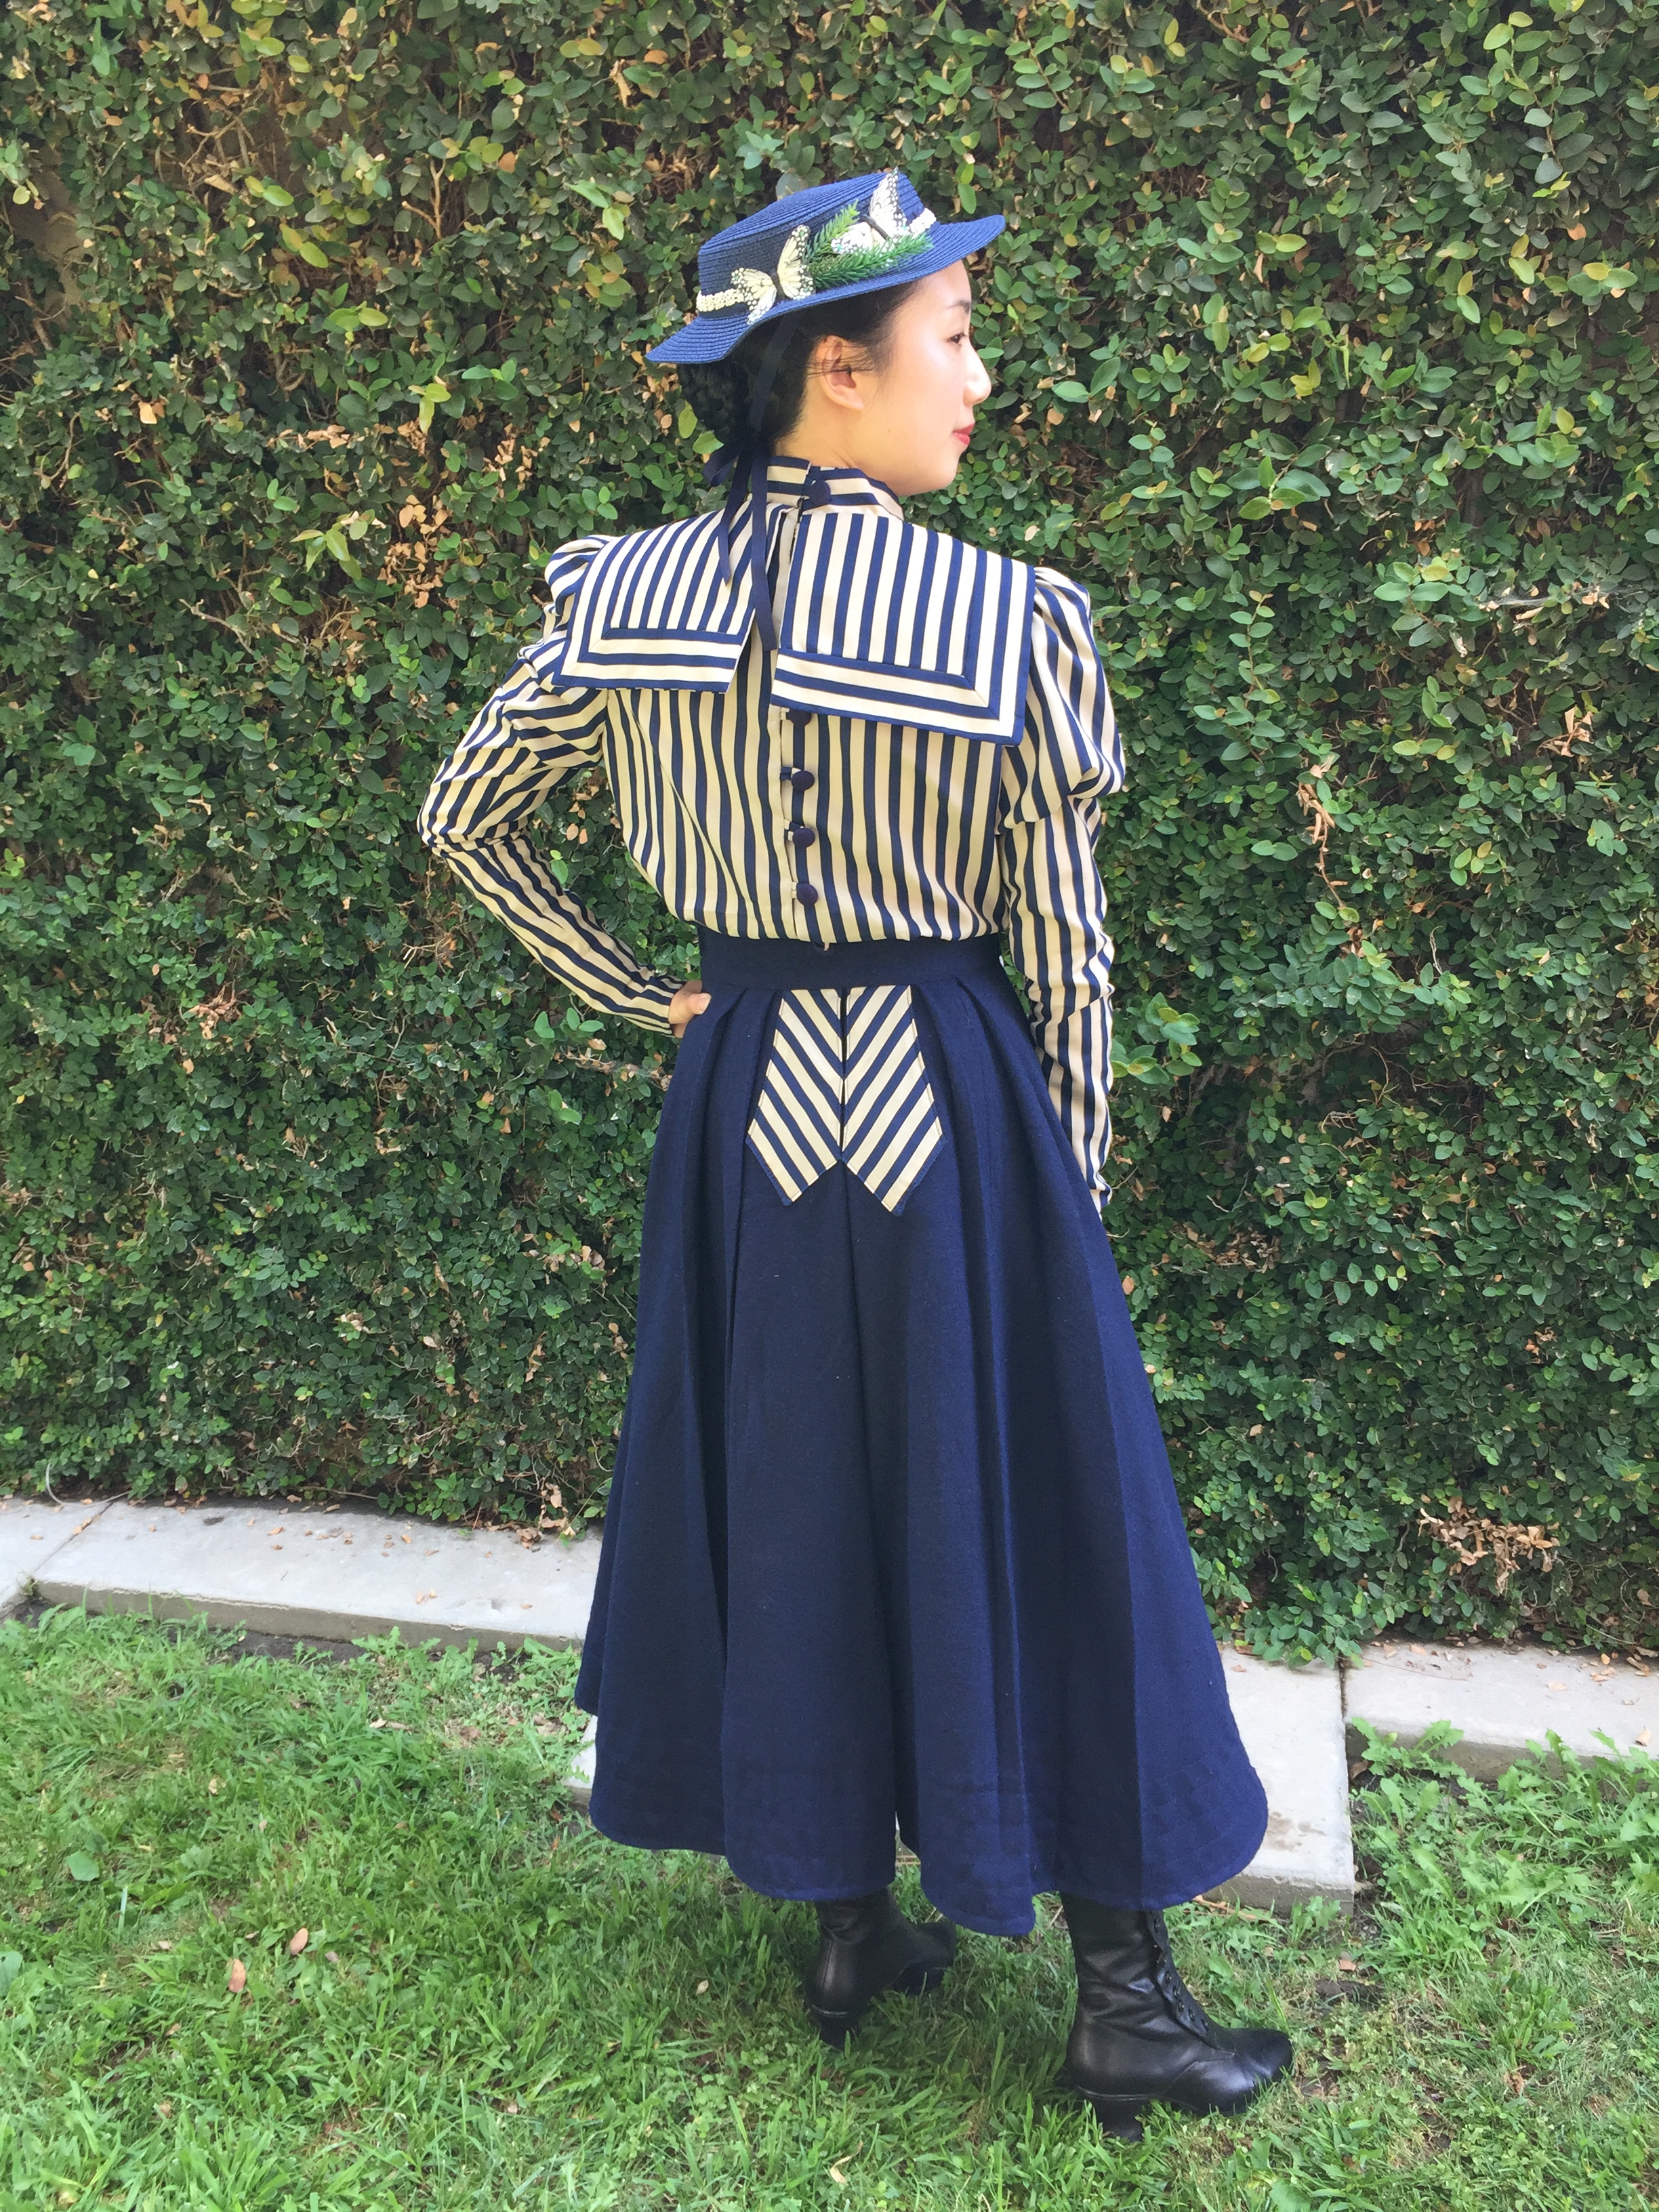
Last month I went to a wonderful steam train ride and BBQ, hosted by the Greater Bay Area Costumer’s Guild at Roaring Camp Railroads in Felton, California. I wore a Victorian/Edwardian-inspired bicycling outfit with a boater hat.

9N6A3285

Photo by Chris Wiener

9N6A3291

Photo by Chris Wiener

9N6A3294

Photo by Chris Wiener

The blouse, skirt, and hat were made by me (with construction details at the end of this post), and the boots are Tavistocks from American Duchess.

Roaring Camp Railroads was very picturesque, with a charming little Western “town,” and a beautiful ride through the redwood forest on a real steam train. I highly recommend taking your family!

There were plenty of places to lounge around, like our cowgirl Elizabeth did.IMG_8232

Natalie had fun balancing on the tracks.IMG_8414.JPG

There were also couples, like Kim and David, enjoying the day out.IMG_8245.JPG

It was my first time on a steam train, so it was quite the adventure!IMG_8372

A covered wagon was available for photos.IMG_8369

We went deep into the woods . . .IMG_8309

. . . to commune with nature . . .IMG_8350

. . . and to have Elizabeth eaten by a tree.IMG_8326

After the filling BBQ I relaxed by doing some fence-sitting.IMG_8396 copy.JPG

There was quite the turn out of Victorians, steampunks, and cowboys!

from GBACG FB.jpg

Photo by GBACG

In a previous post I described how I made my blouse, but upcycling an ugly 1990s dress to take it back 100 years! Before and after:

For my skirt, I used the Edwardian Bicycle Skirt pattern from Black Snail Patterns on Etsy. The skirt was made out of a navy wool-blend fabric. (I started with almost 4 yards of 60″ fabric, and had about 1.5 yards left over that I turned into a cape that was too warm to wear at Roaring Camp that day).  The front and back of the skirt was accented with decorative panels made from the same fabric of my blouse, as well as matching fabric-covered buttons.IMG_6299IMG_6296

The hem was stiffened a little by a self-facing that was top-stitched in place.IMG_6313

I made my boater hat by my usual refashion of removing extra layers of braid in a cheap hat, hot-gluing the brim back to the crown, hiding the joins with ribbon and lace, and then adding trimmings. FFGJ0368.JPG

Project costs:

  • 4 yards wool blend fabric: $45 including shipping from Facebook destash group
  • Skirt pattern PDF: $6.16 from Etsy (bought during a sale)
  • 1990s dress: $12 + $5 shipping from Facebook
  • Boater hat: $2.80 from eBay (with coupon)
  • Gimp braid, butterflies, ribbon, small & big covered button kits: $0 (leftovers from previous projects: Regency coat, Crimson Peak hat, a 20s dress, a Downton Abbey maid outfit, and a floral vest!)
  • Thread, glue, misc. from stash: ~$3

Total cost: $73.96

This was a comfortable outfit for a day of traveling; I didn’t even wear a corset. 😉

IMG_8451.JPG

NEBZ9597.JPG

Upcycling a 1990s Dress into an 1890s Blouse

I recently completed a steampunk-flavored, not quite historically accurate, but oh my I love stripes 1890s/1900s-inspired blouse by upcycling an unflattering 1990s dress into a wearable blouse. (It time-traveled 100 years back!)IMG_5696

The original dress had an elastic waist, zipper back, pencil skirt, and puffy three-quarter sleeves. I cut off the skirt and used the sleeves to make new sleeves.IMG_5699

I made a waistband and buttoned back using scraps from the dress. I made button loops instead of button holes because I couldn’t overlap the back panels because of the pre-existing sailor collar.IMG_5708

Here’s a look at the original dress:

The original was so frumpy!IMG_E5469

I have some navy blue wool that I plan to use with the Black Snail Edwardian Bicycle Skirt pattern.il_570xN.1057503348_1n8f

I’ve used some scraps from the dress to make covered buttons for the skirt.IMG_5691

With different accessories I plan to use this with a Victorian bicycling outfit and a Wild West event for next year. I hope this will be a versatile blouse!IMG_5712.JPG