Category Archives: Fantasy

Making a Hobbit Dress to Watch the Rings of Power

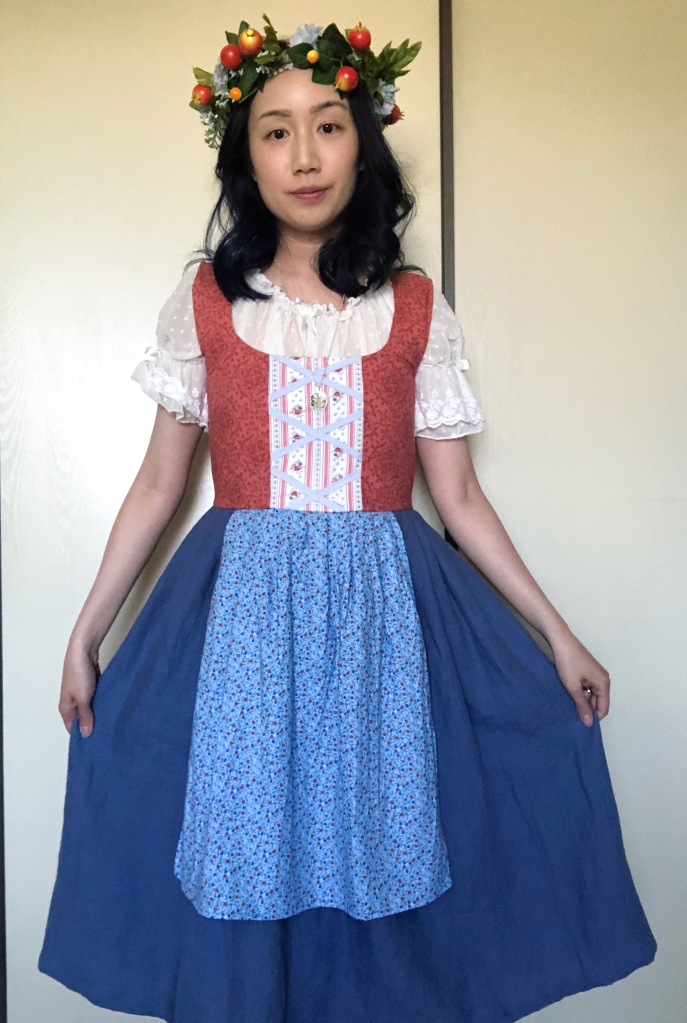
If you are a fan of the Lord of the Rings books or movies, you’re probably a fan of hobbits, those charming folks whose ladies wear very cute pastoral outfits. With the new Rings of Power show coming out soon I thought this would be a good time to show you an easy hobbit lady outfit. Many of the hobbit women wear a 4 separate garments: a blouse, a bodice that laces up the back, a skirt, and an apron. To simplify the sewing and getting dressed, I decided to turn the last 3 items into one zippered dress. This dress also works great for a trendy cottage core look, and is a wonderful stash-buster for combining all those various fabric scraps you have that aren’t enough to make up a full garment by themselves.

Note: I am a member of the Janome Maker program and this skirt is sewn on a Janome Skyline S9 and a Janome FA4 serger. (This post is sponsored by Janome but all content and opinions are mine).

Materials needed:

  • 2 yards fabric for skirt (I used 58″ wide blue linen)
  • 1 yard fabric for apron (I used a floral print; you can use a lace fabric too)
  • 1 yard fabric for bodice
  • 1 yard fabric for bodice lining
  • Fabric scrap for center front bodice
  • 1-2 yards colored twill tape or ribbon
  • 1 zipper plus various matching threads

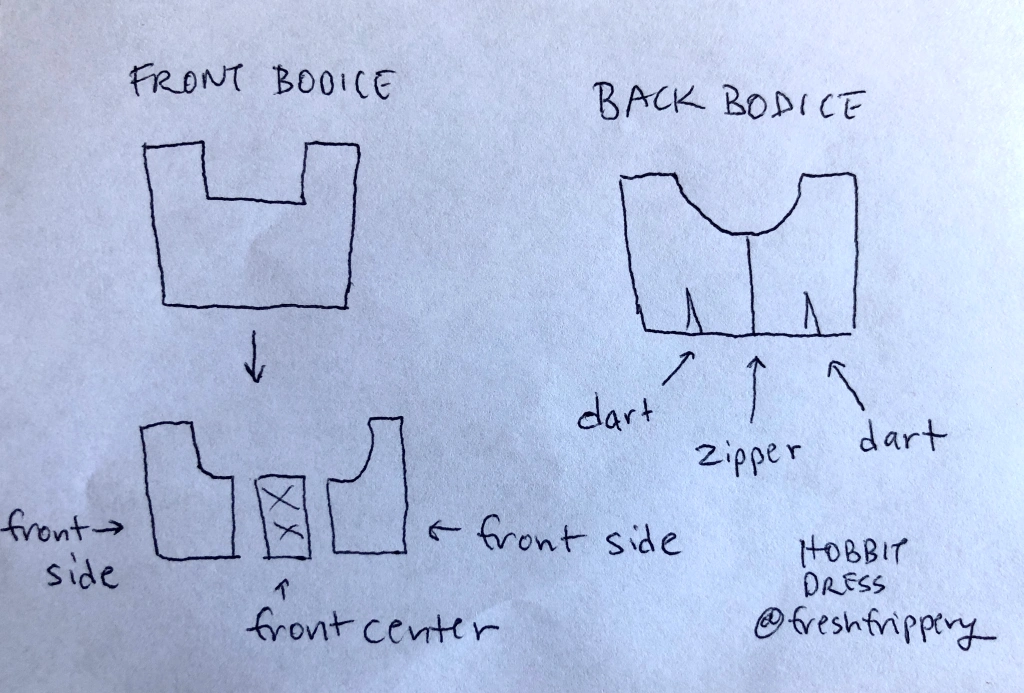
I self-drafted my own pattern (with the basic shapes shown below) but you can start with any square-necked basic bodice, or a dirndl-style dress that fits you. You will take your pattern and slice the front bodice into 3 parts (a front center and 2 front sides). The front center is going to be a different color of fabric that we will add criss-crossed twill tape or ribbons to. The width of your front center will depend on your body measurement, but for reference I cut a 6″ wide panel (for a 5″ finished panel with seam allowance) for a 34″ bust.

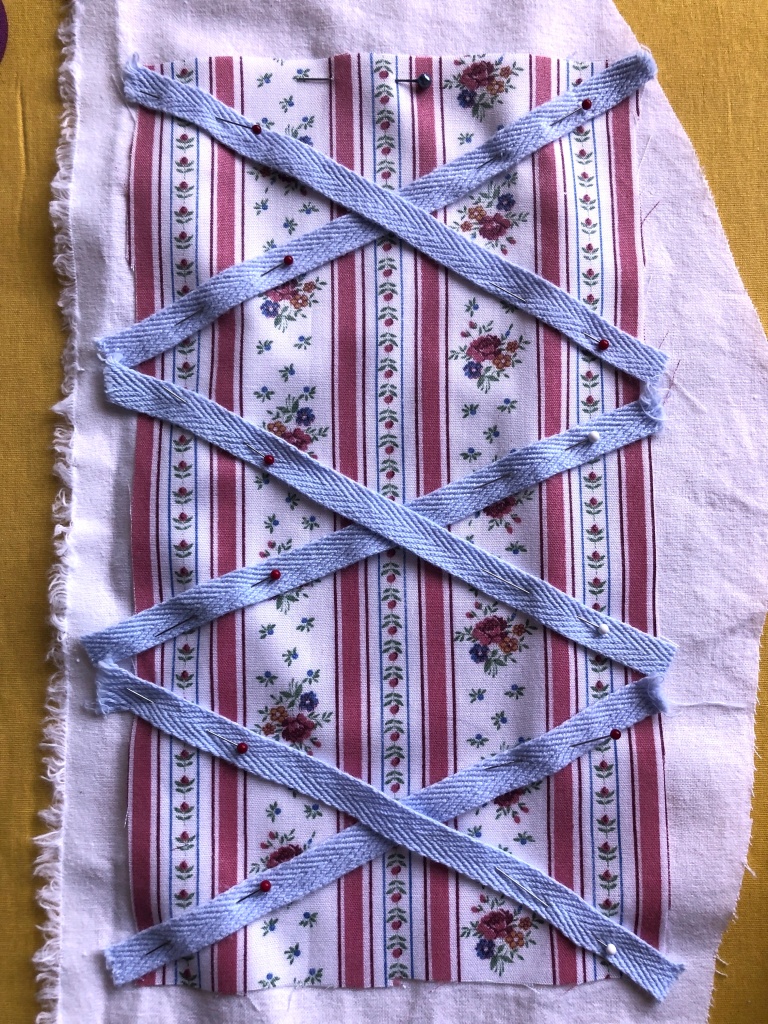
The first thing you will make is the front center panel. Put down strips of twill tape or ribbon in a criss-cross pattern on your rectangle and stitch them down. The raw edges will get trimmed and then sewn to the front side pattern pieces. (If your decorative fabric is thin like mine, then you will want to back it with a second piece of fabric).

Once you have the front center prepped you’ll sew it to the front sides, then sew the bodice backs to the front sides, and also join the shoulder seams according to your dress pattern. For the bodice lining you’ll do similar construction except you’ll skip making a decorative front center panel. Don’t forget to put darts in your back panels if your pattern calls for them.

Stitch the fashion and lining layers right sides together at the necklines and flip right side out, creating a clean edge at the neckline. For the armholes fold the raw edges in, pin in place, and top-stitch. For the center back where the zipper will go, serge the raw edges.

To make the skirt I used 2 rectangular panels of 58″ wide fabric cut to a length of 30″ but the length can vary based on your preference for a longer or shorter skirt. (I am 5’6″ and after some length is taken up through construction and hemming the skirt falls a few inches below my knee).

Optional: If you want a pocket you can cut a strip from one of the skirt panels and use that to cut out pocket pieces. I like to use my cell phone and hands as guides for how big the pocket should be. Serge all the raw edges of the skirt and pocket pieces first. Stitch one pocket piece to one skirt panel at the edge, right sides together. Put the right sides of the skirt panels together with the pocket pieces flipped out to be right sides together as well. Sew down the skirt side seams and around the pocket as shown by the pins, leaving an opening for your hand to reach in.

For the apron I cut out a 22″ wide and 20″ long rectangle (with the exact size according to your preference). You will want to hem the sides and bottom of the apron to finish the edges before pinning it to the center of the front skirt panel at the top edge and then serging the raw edge of the top of the skirt.

Split the back skirt panel down the middle to allow for a zipper and serge the new raw edges.

Pleat the top of the skirt to fit your bodice, matching up the side seams of each. Sew the bodice to the skirt and press the waist seam open and flat.

Insert a zipper down the center back from the bodice to part way down the skirt, then finish the rest of the back skirt seam.

Hem the bottom of the skirt by folding it up twice to your desired length, and your hobbit dress is done! Pair it with a cute blouse and a floral headdress and you will fit right in at the Shire!

Thank you for reading!

Elven/ Moon Goddess/ Medieval Fantasy Dress

I made this fantasy costume back at the start of the year and realized I never wrote up a post! With the 20th anniversary of the Lord of the Rings films coming up, this is a good time to finally blog about this dress with elven vibes. I had fun walking around in nature, pretending to be regal, and hope to wear it to an actual event some time!

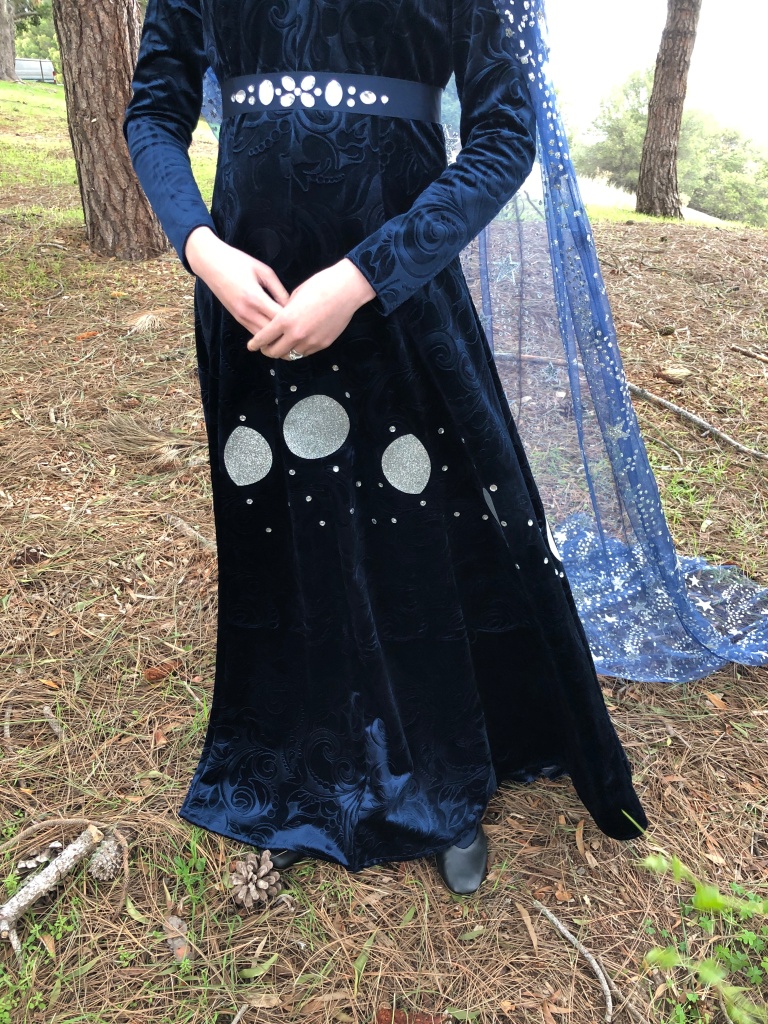
I made the main body of the dress using an embossed navy blue velvet, and the cape is a sheer netting with silver glitter stars.

I created moon phase appliqués out of silver glitter heat transfer vinyl with my Silhouette machine to decorate the front of the dress. (If you’re not familiar with HTV, the material is on a plastic backing. You iron on the appliqué and then peel off the plastic backing, revealing your design).

@freshfrippery

How I made the moon phase decals for my moon goddess costume #learnontitkok #crafty

♬ sonido original – xsunix

I glued crystals around the moons using E6000 Fabri Fuse (which is not the same as regular E6000). I glued larger crystals onto a piece of grosgrain ribbon to make the belt.

The pattern I used is Butterick B4827. It is a princess-seamed fantasy dress and I made very few modifications. I turned the lace-up back into a zipper back, and I added the cape. The cape is a long rectangle, pleated into the back neckline, with a cut open center slit part way down the back to access the zipper.

The front of the cape is sandwiched into part of the armscye shoulder seam, with excess removed, as explained in this video.

@freshfrippery

Reply to @sunflowerstardust how I put the cape on my moon goddess dress. #sewing #costume #learnontiktok

♬ original sound – freshfrippery

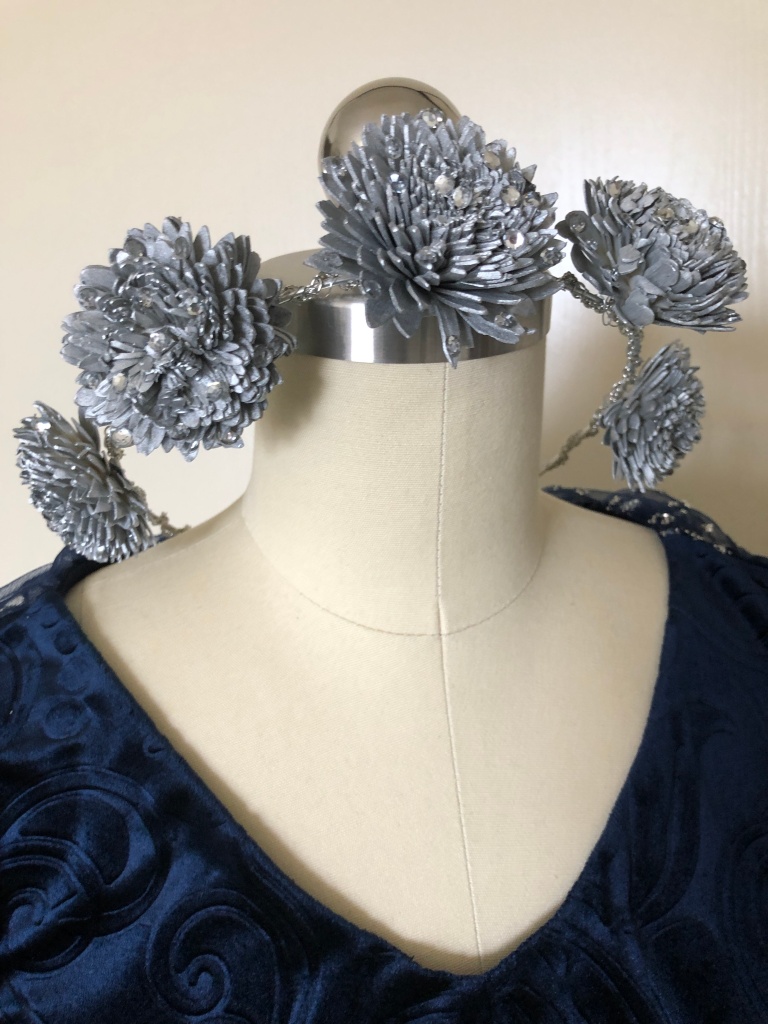
I made my flower crown by spray-painting sola wood flowers with Rustoleum silver spray paint. The base of the circlet is silver floral wire, and the flowers and a necklace are attached to the base using 26 gauge wire. I also glued crystals onto the petals using E600 Fabri Fuse. This video shows the process:

I have a few scraps left of the velvet and I am planning to make a pouch for carrying items. In my haste to whip up the long seams of this dress quickly, I serged all the panels together and forgot to add pockets!

Materials used:

  • 4 yards embossed navy velvet: $52.59 including tax and shipping from Amazon. The blue is sold out but there are other colors like black and ivory still available from Amazon (affiliate link). You can also find it at Fabric.com
  • 2 meters glitter star fabric: $19.84 including shipping from Aliexpress
  • Butterick B4827: $0 (previously used for another medieval princess project). However, I originally purchased it for $7.99 from Amazon (affiliate link).
  • Crystals, glue, flowers, thread, ribbon, wire, paint, etc. were items I already owned and mostly left over from other projects, but I’d estimate if I had to go buy that all new from a craft store I’d spend ~$20.

Total cost: $72.43 out of pocket plus miscellaneous stash items.

Thank you for reading! I took these photos on a cloudy day. Maybe one day I’ll get a chance to take some atmospheric night time photos!

A Hobbit Lady Costume for a Picnic

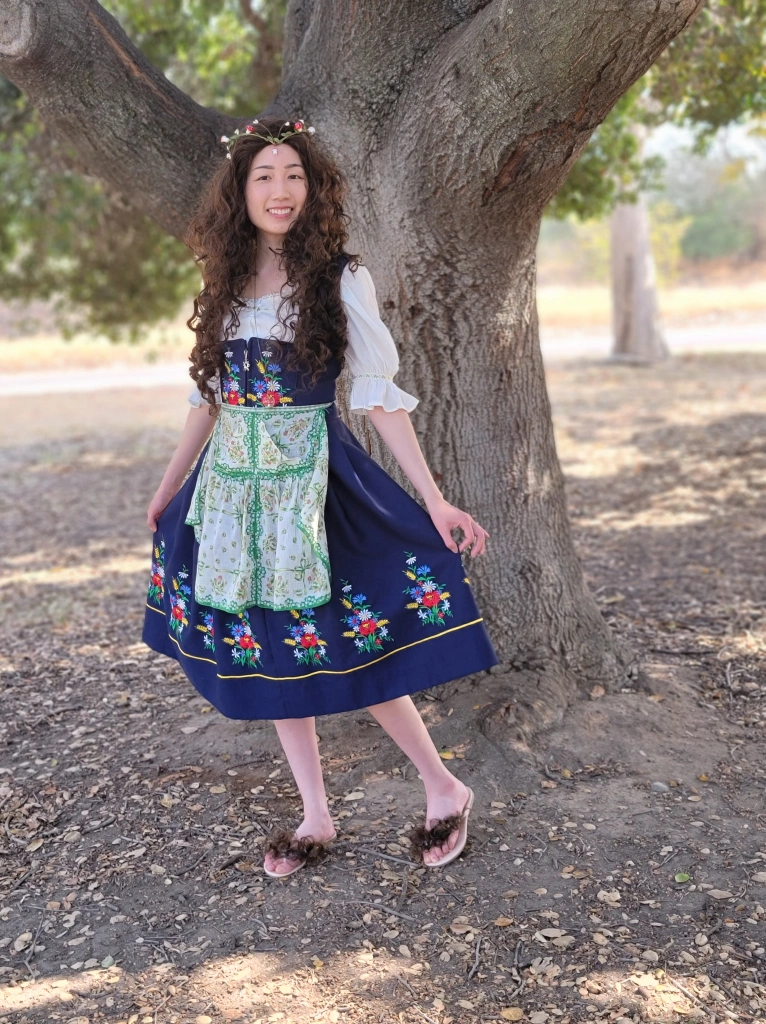
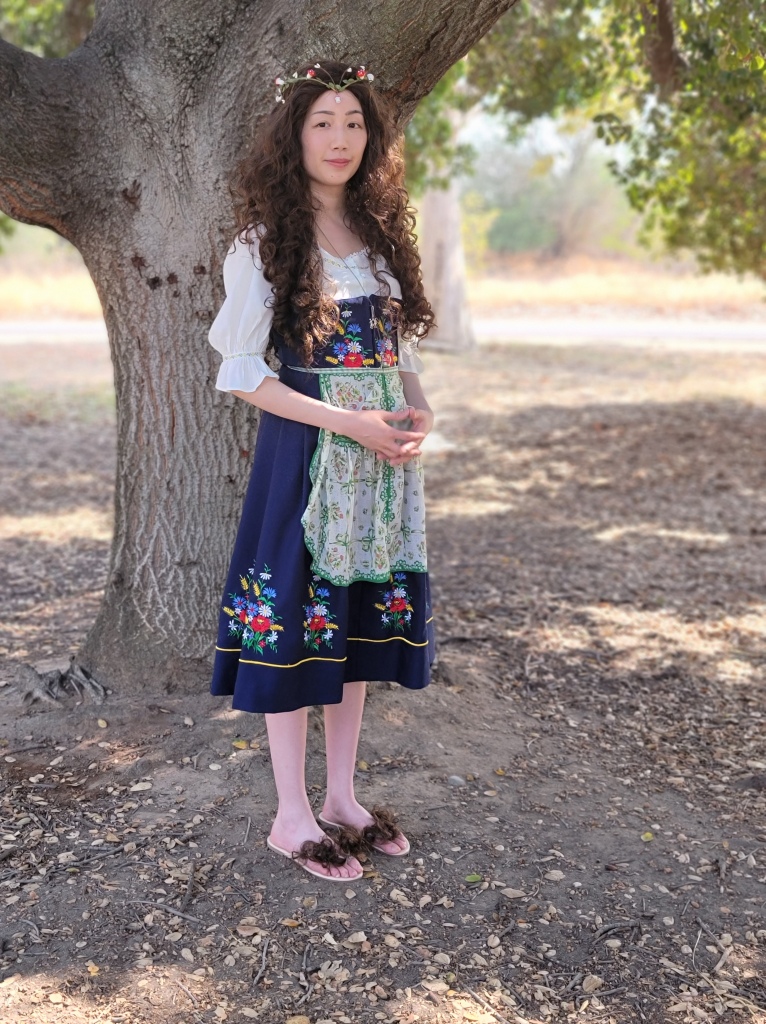
Last weekend I was invited to a hobbit picnic full of food, friends, and hairy hobbit feet! I didn’t have time to make a dress so I put together an outfit using items mostly from my closet. I’ve gotten questions about where I got my items so I will list my sources so you can put together your own hobbit costume!

My dress is an embroidered dirndl that I bought secondhand from eBay, but it was originally made by a company called Ernst Licht, an Oktoberfest/Tracht supplier.

My blouse is originally an Amazon one that I modified. It is called the “Floerns Women’s Square Neck Puff Sleeve Button Lace Elegant Top Blouse” (affiliate link). I removed the wide ruffled lace because it was a bit stiff and scratchy, and replaced it with a cheerful floral yellow trim. I used the same trim on the sleeves. (The elastic in the sleeves was a little tight so I removed some and covered it with the trim).

My wig is also from Amazon. It is called the “Karlery Women’s Fluffy Curly Dark Brown wig Halloween Cosplay Wig Anime Costume Party Wig” (affiliate link) and I thought it was very nice for $26.98! It was incredibly full and fluffy and a very natural-looking color and texture.

If you prefer a shorter wig with more defined curls, Arda makes a “Rosie Classic” that works well for hobbit costumes and some of my friends were wearing that wig at the picnic.

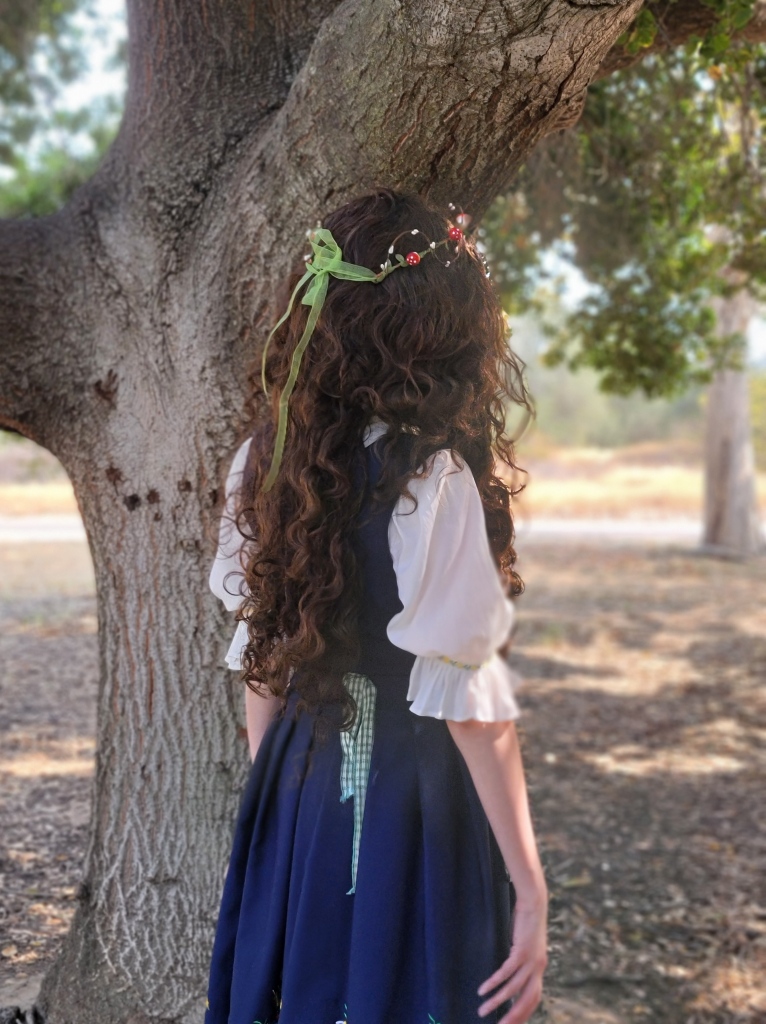
The mushroom crown was a birthday present from friends so I’m not sure where it was originally from, but if you search “mushroom tiara” on Etsy you’ll see items with a similar aesthetic.

For the hairy hobbit feet I hot-glued hair to a pair of nude sandals. (My wig was so full I was able to cut some curls from it without making a difference in the way it looked). You can get the same sandals “Shoe Land Falema Women’s Flip Flops Casual Thong flat sandals Comfort Slides” from Amazon (affiliate link) and I found them to true to my usual size.

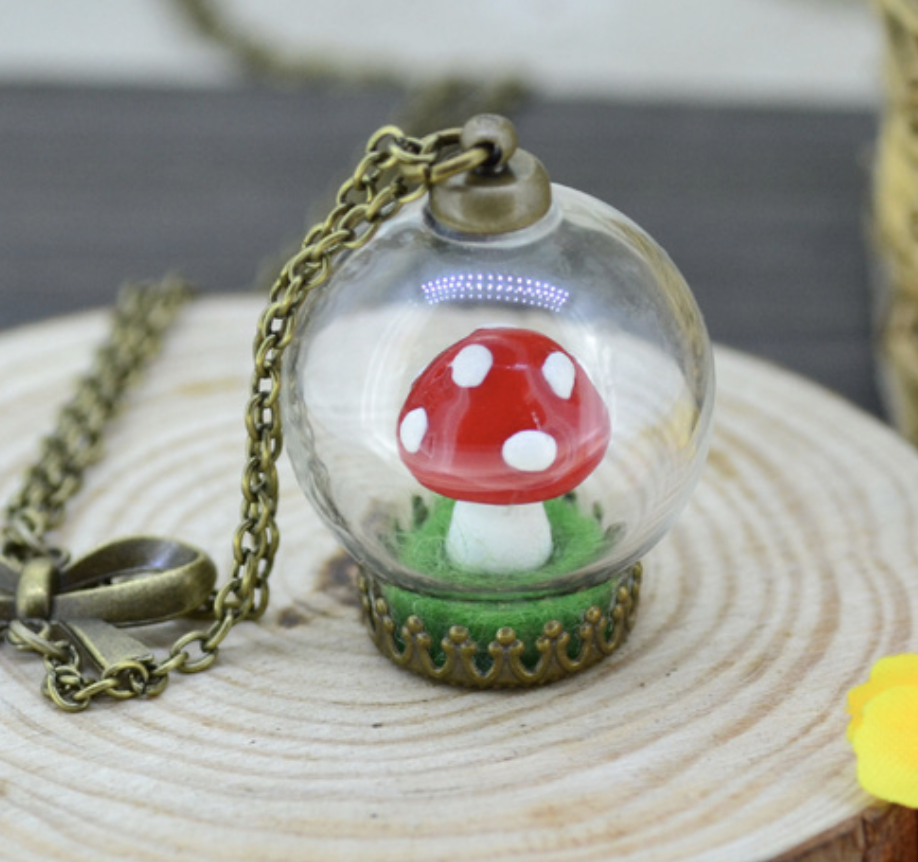
I wore a mushroom in a glass dome necklace I bought on eBay many years ago. It’s no longer available there but I’ve seen some very cute ones if you search for “mushroom terrarium necklace.”

The apron I wore is a vintage one gifted by a friend. It is made from cute printed handkerchiefs! You could make your own by sewing together some handkerchiefs, or make a simple apron by just gathering up a rectangle of colorful fabric and adding waist ties.

I hope this post was helpful to you for putting together your own hobbit costume!

(Thanks La Dauphine Costuming for taking photos of me!)

DIY Generic Jedi Costume for Rebel Legion (A Head to Toe Guide)

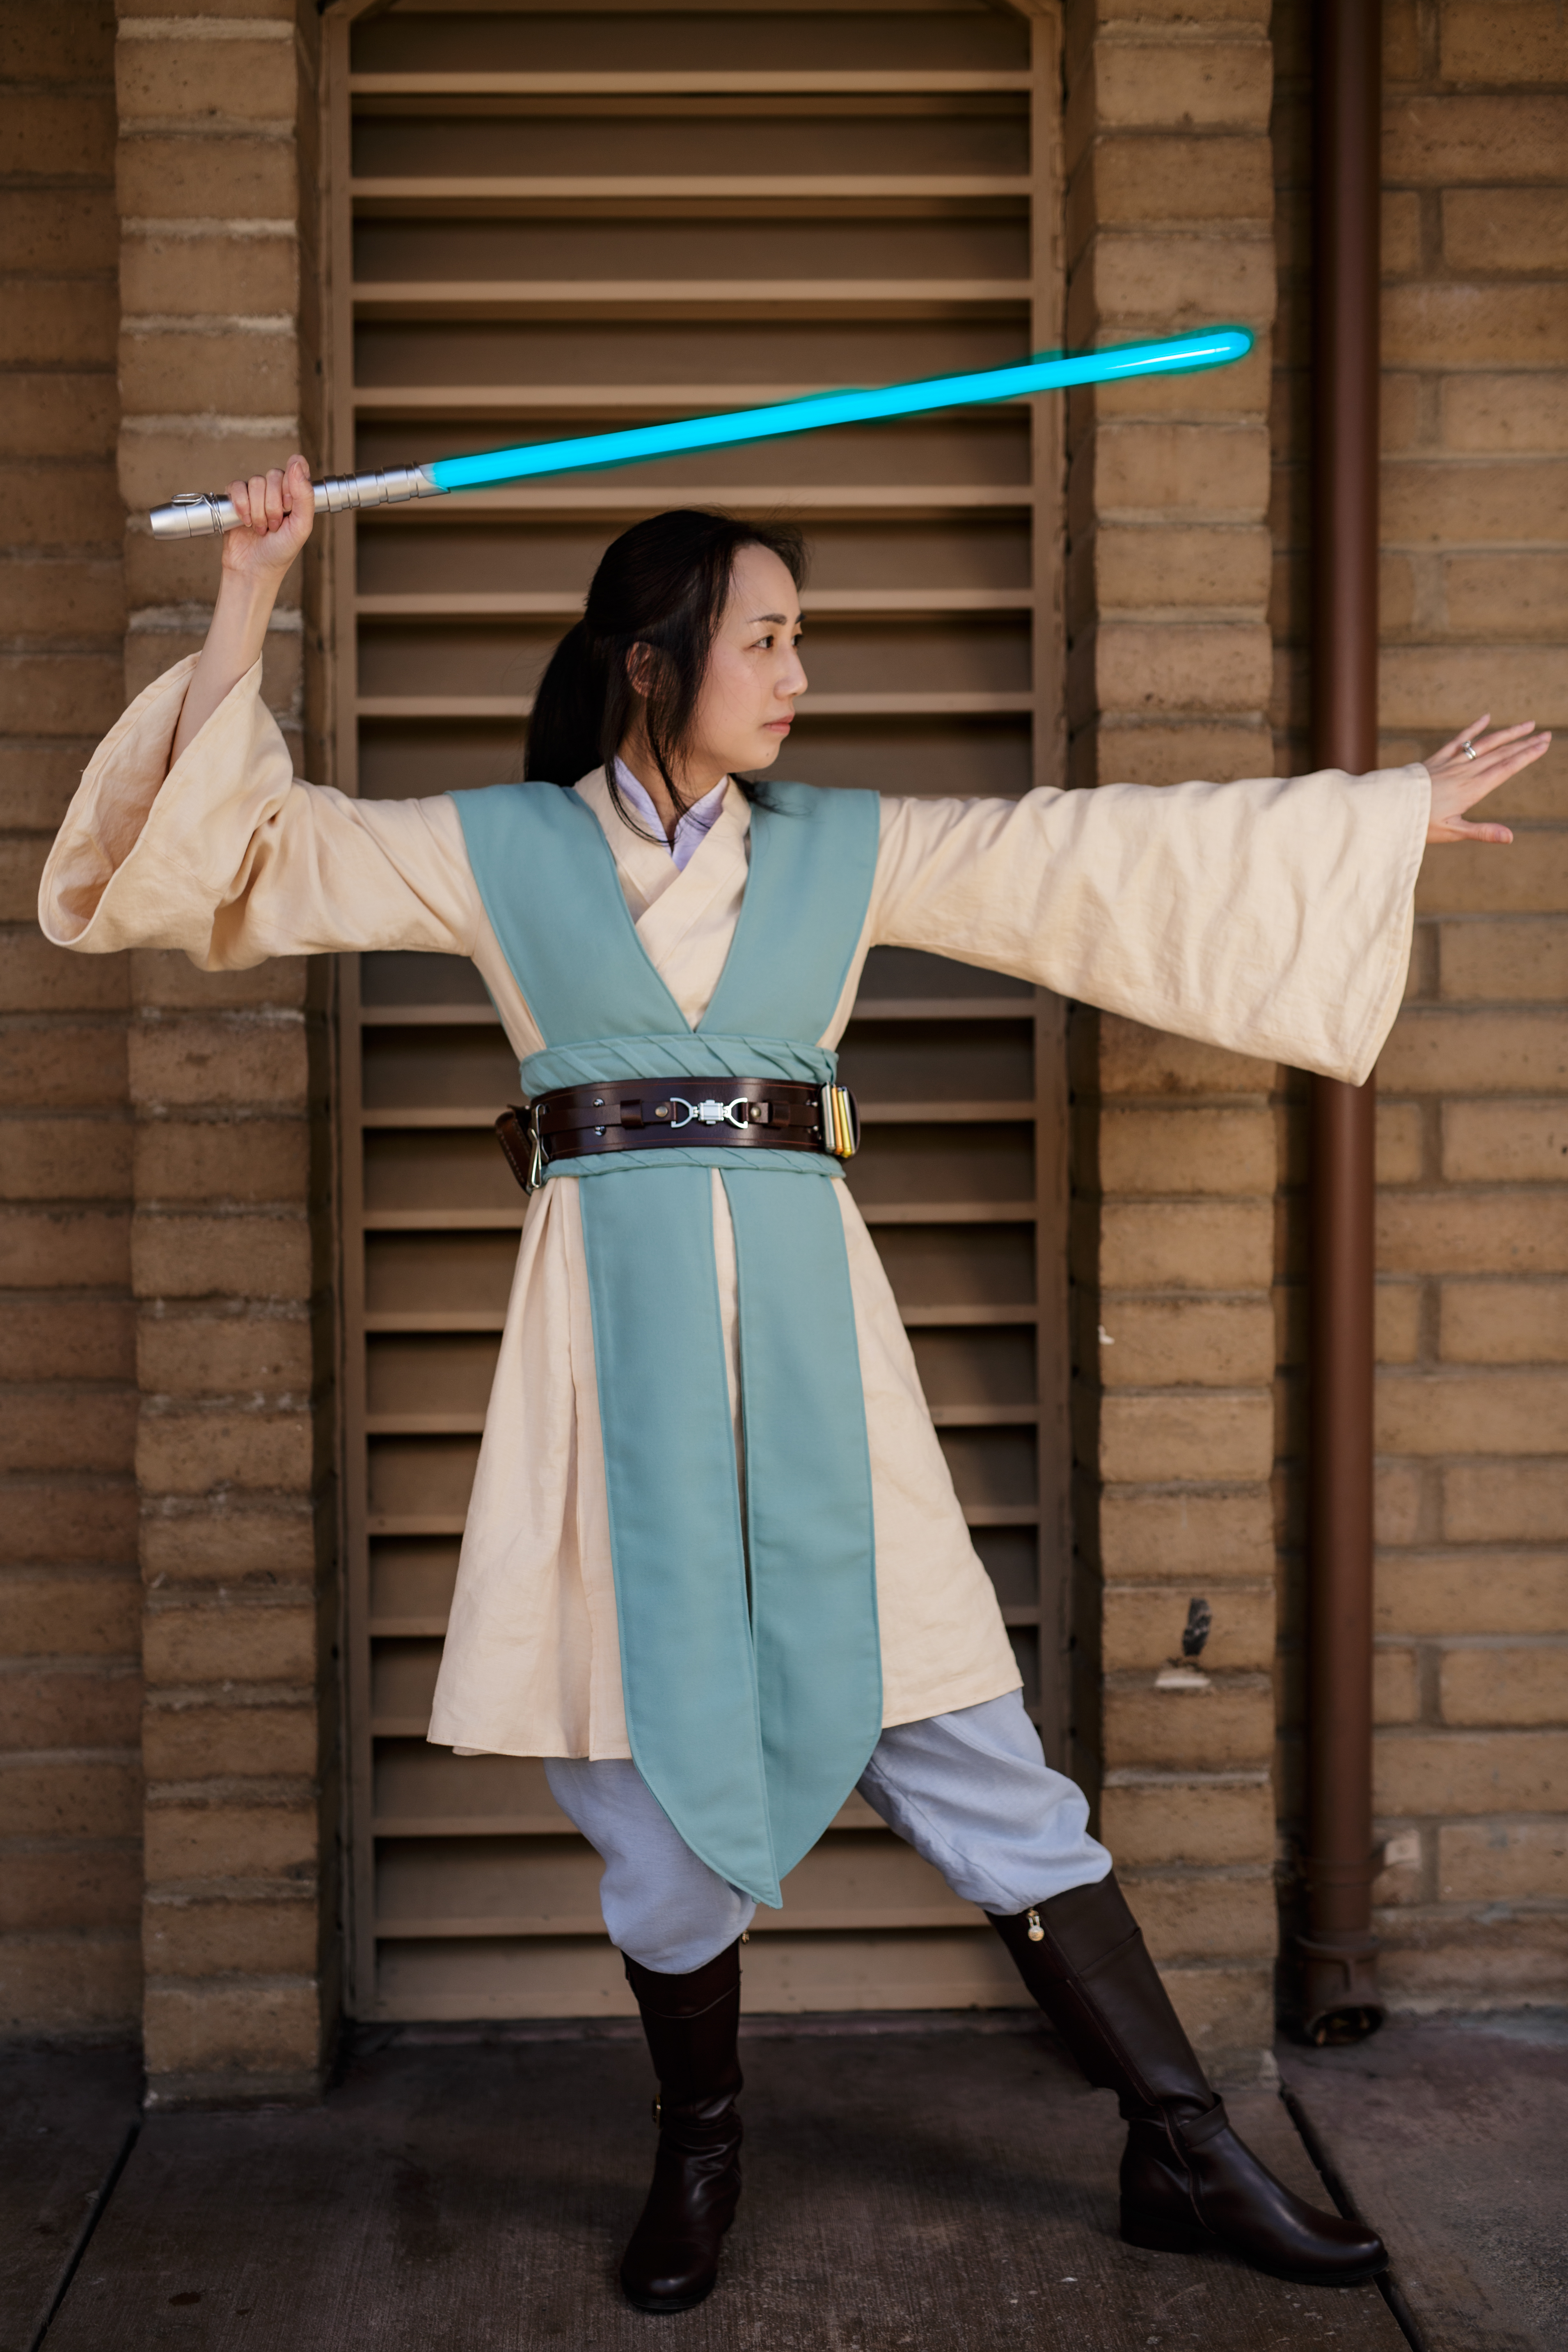
I’ve had some questions about how I put together my Jedi costume, which is not of any particular character that appeared in the Star Wars universe, but follows the guideline of what a Jedi would have worn in the Old Republic. This kind of costume is called a “generic Jedi” in the Rebel Legion organization, of which I am a member. I made my costume according to the Rebel Legion Jedi Costume Standards, which is a useful reference even if you want a costume for fun and not for RL approval. (Please note, I am not a RL judge and this post reflects my own experience making my costume and is not an official guide of any sort).

Miss Vivien_s Con-Ex-4

Photo by Ribidib

Miss Vivien_s Con-Ex-1

Photo by Ribidib

The fun thing about doing a generic Jedi is you get to put a lot of your personality into it. You can choose your own colors and there are different kinds of shapes that are allowed. I’ll discuss some of the options available to you in each section.

The basic parts you need for a Jedi costume are:

  • Outer tunic (the beige part of my outfit)
  • Tabards (the blue parts that go over my shoulders and down the front)
  • Obi (the blue sash around my waist)
  • Pants or skirt
  • Belt
  • Boots
  • Lightsaber
  • Lightsaber clip on belt

For RL approval you need at least 3 out of these 4 items:

  • Inner tunic (the white part of my outfit)
  • Two or more (leather or resin) pouches
  • Food capsules (the colored things on my belt)
  • Hooded robe

I didn’t want to hang too many things on my belt so I opted to have only one pouch and fulfilled my requirements by having the other items. (If you are petite you may have trouble fitting two pouches and eight food capsules onto the sides of the belt and have to opt for one pouch and four food capsules).hoodfront.JPG

My inner and outer tunics, pants, and robe are made of linen. The obi and tabards are wool. These materials were personal preferences due to breathability and durability but natural materials are not required if you are on a budget.

The RL Costume Guide linked above has suggested colors; Jedi tend to be earth-tones so you’ll see a lot of brown, black, gray, beige, etc. but other colors are approvable. My blue ensemble is not particularly common but still allowed.

OUTER TUNIC:

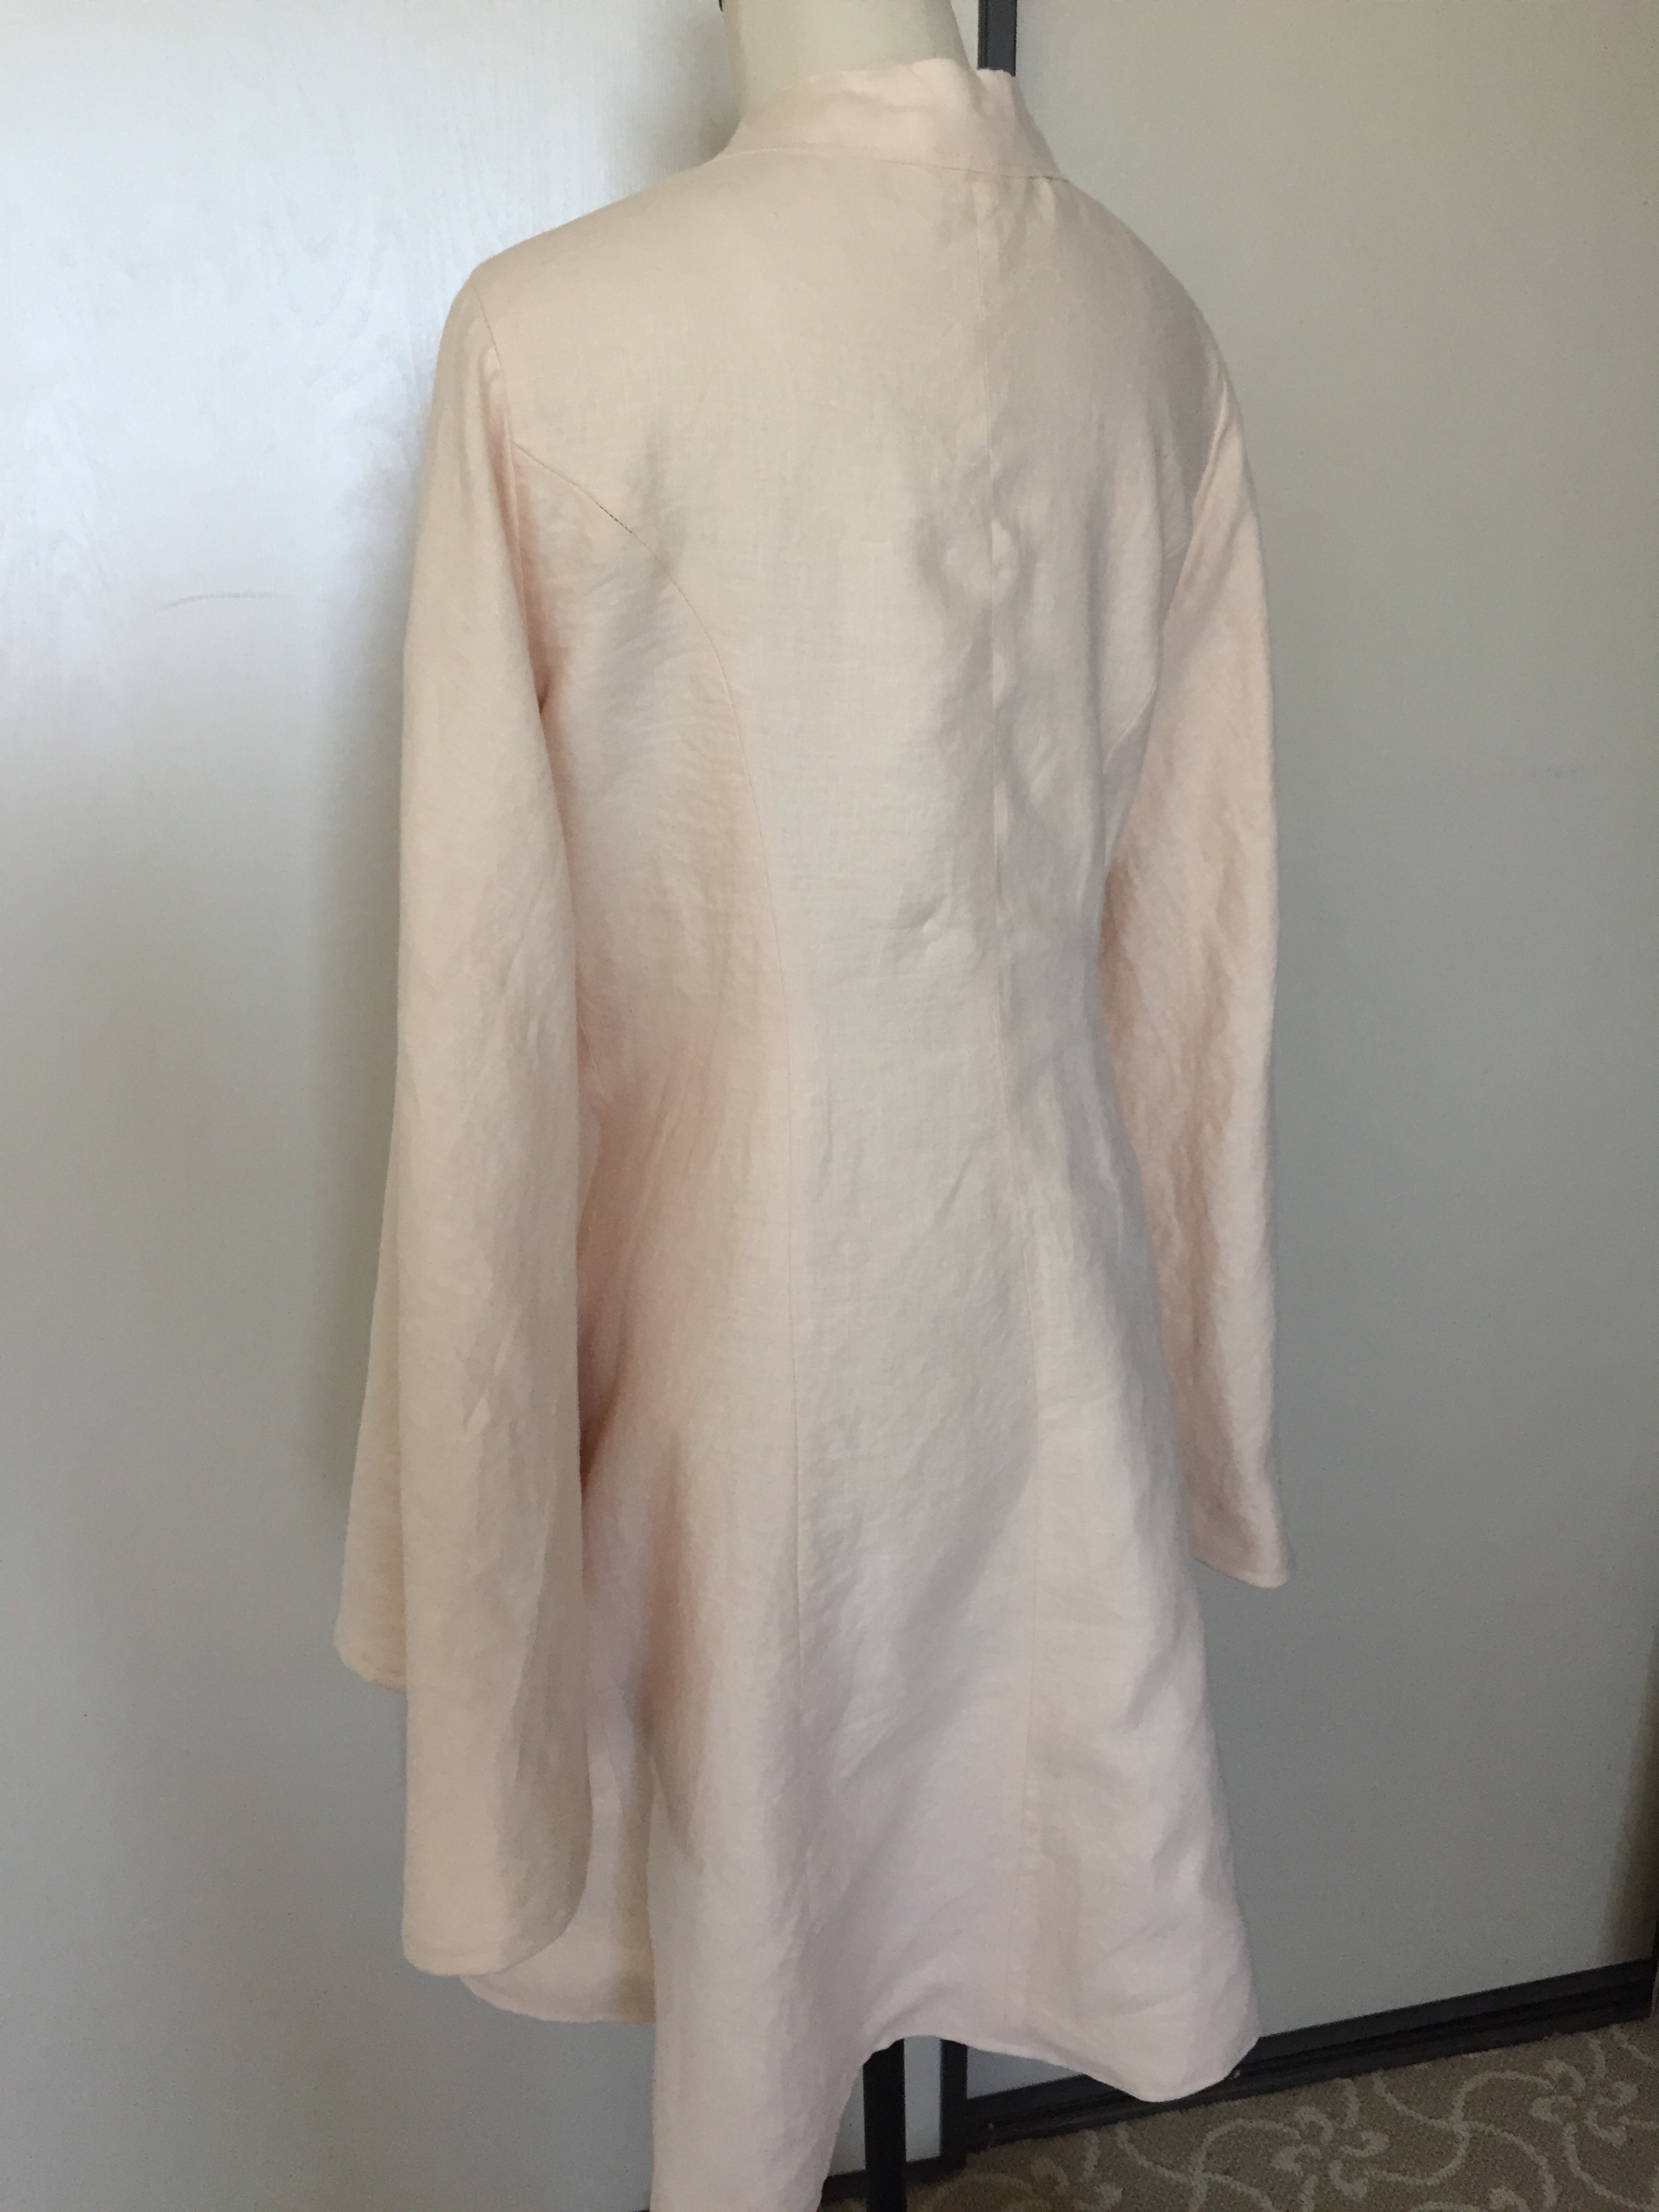
The outer tunic is similar to a kimono in concept in that one side folds over the other side and there are big sleeves. IMG_0407

IMG_0410

You can see the opening on the right side here.IMG_0408
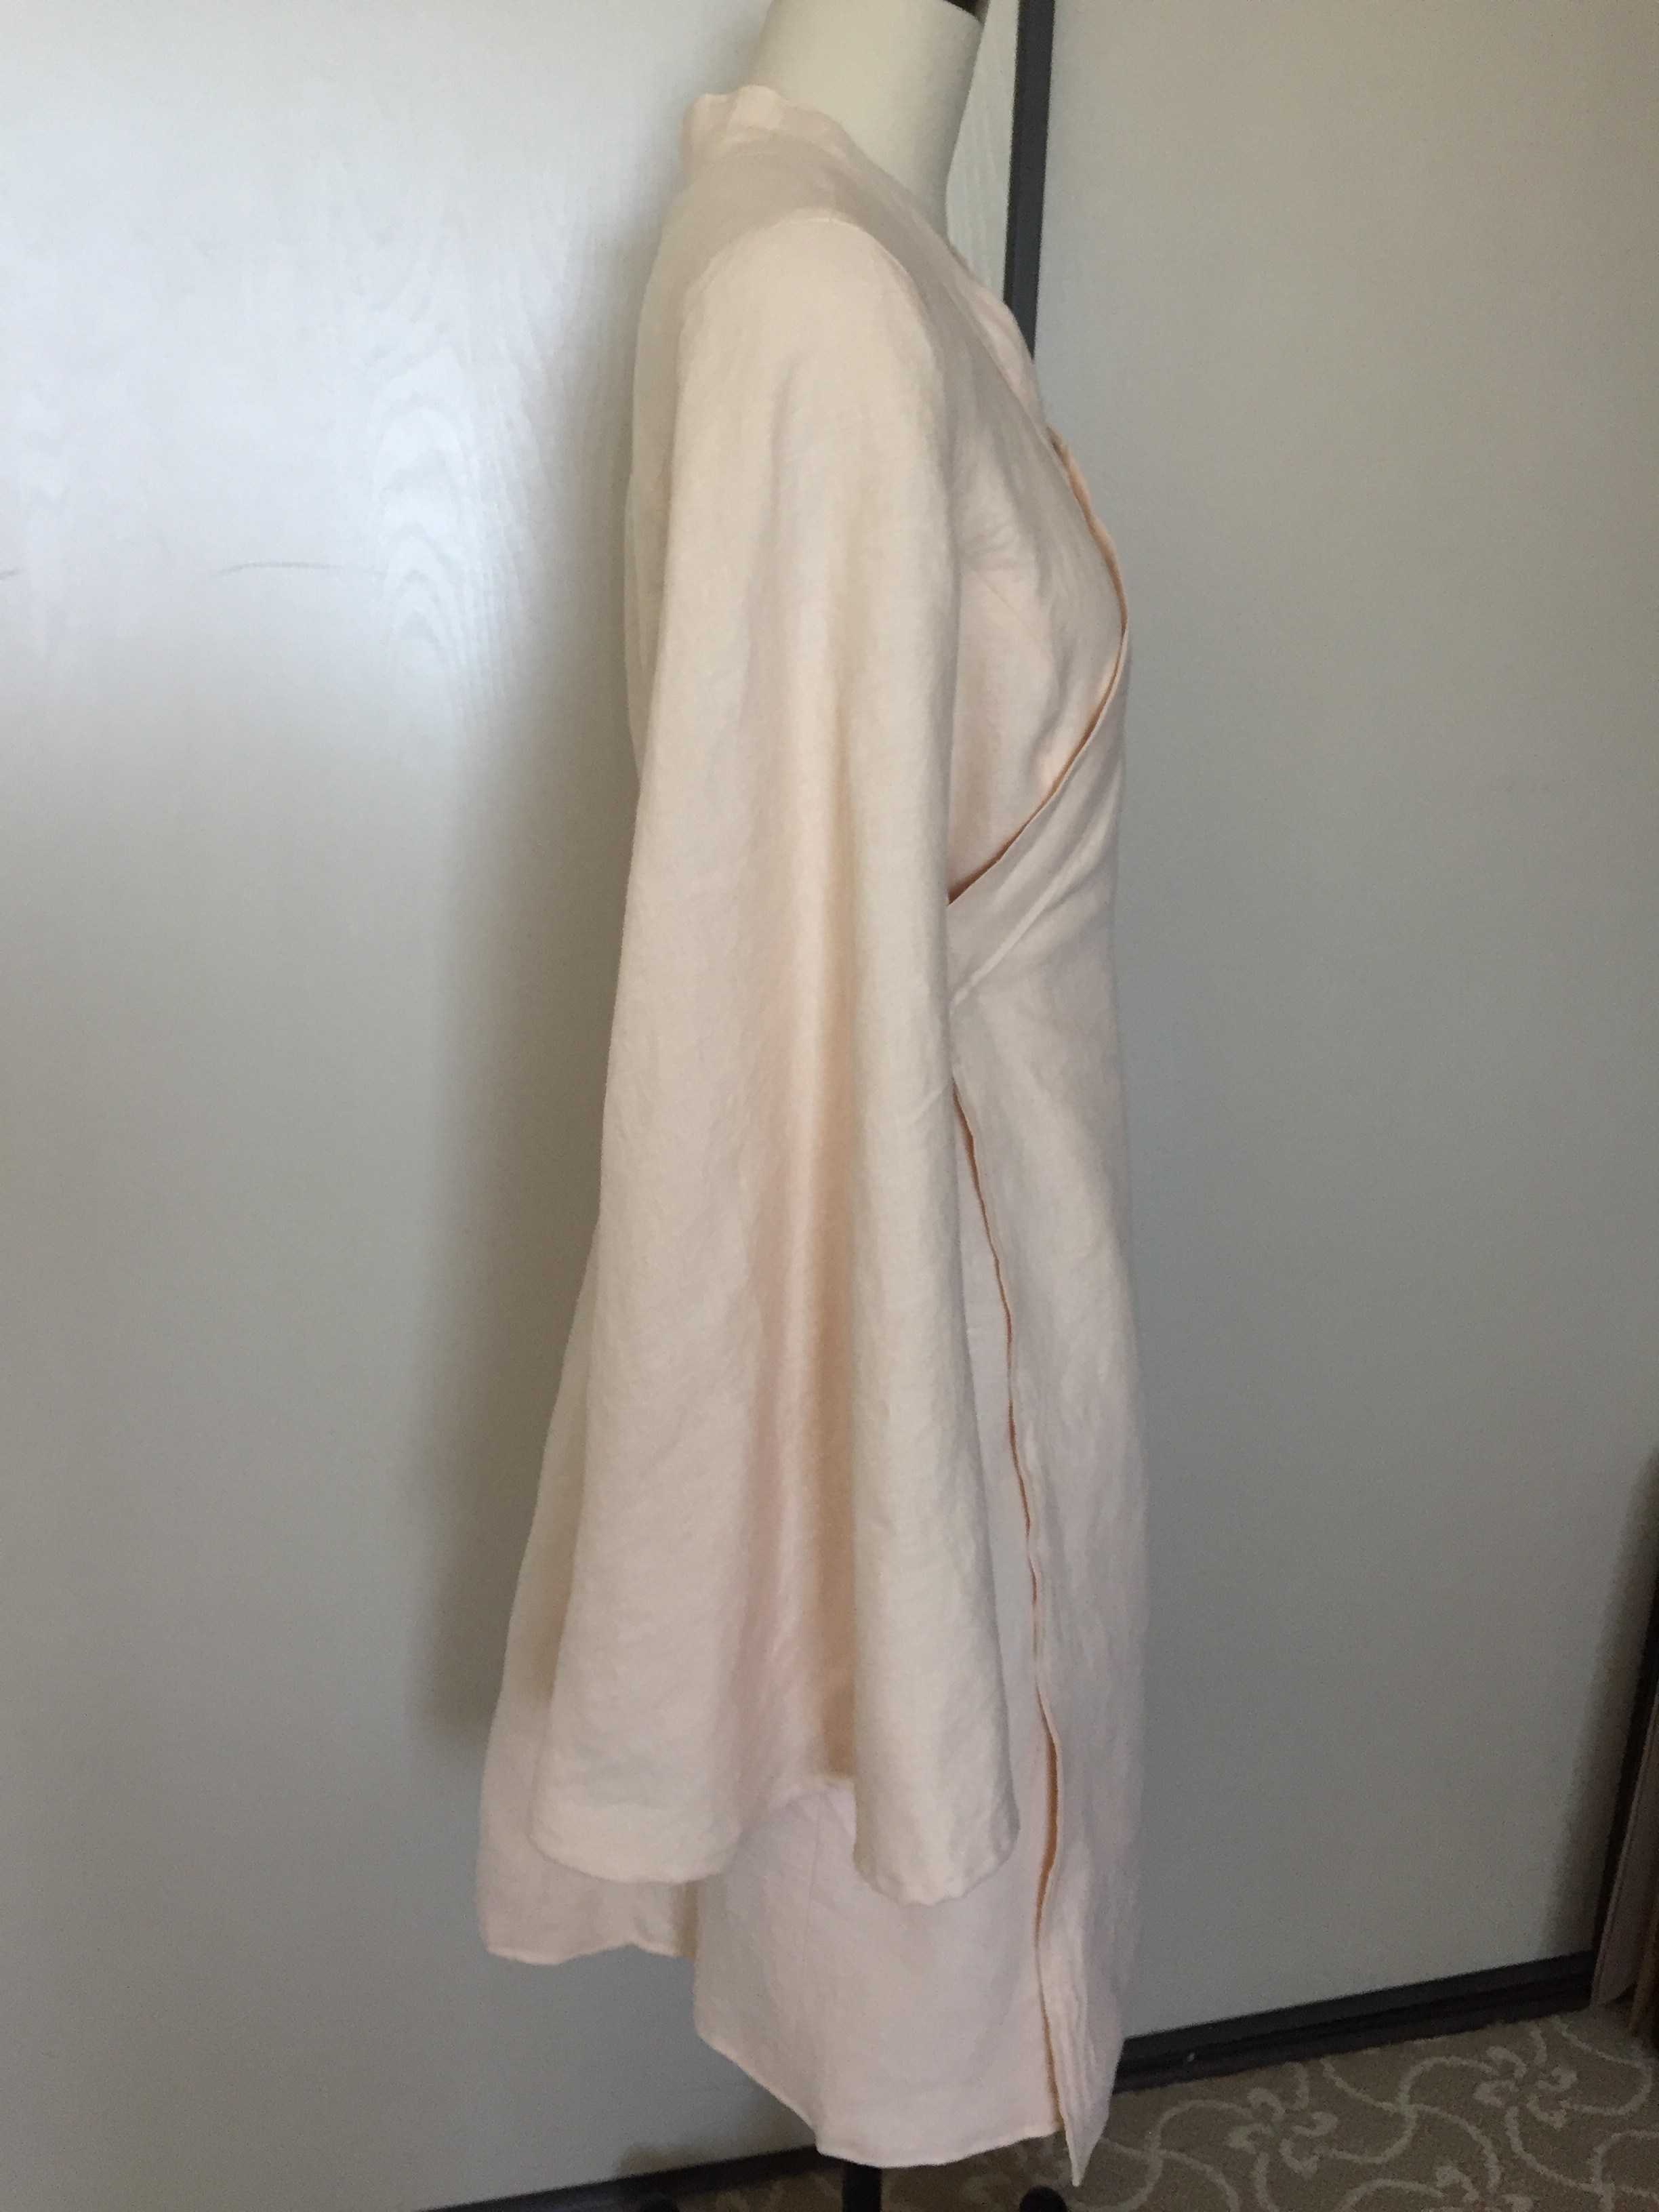
There are lots of tutorials and free patterns online for Jedi robes and tunics, so I will not reproduce them here. However, most of those are meant for male or unisex figures. They assume you have a boxy tunic that will be fitted to you with the belt, but creates some extra bulk at the waist. I opted to have a tunic with curved princess seams in the front and back to be more figure flattering. If you are not female-bodied or you want to save time by not worrying about extra seams, the free online Jedi tunic patterns are great. Otherwise, I would modify a wrap dress pattern for your Jedi.

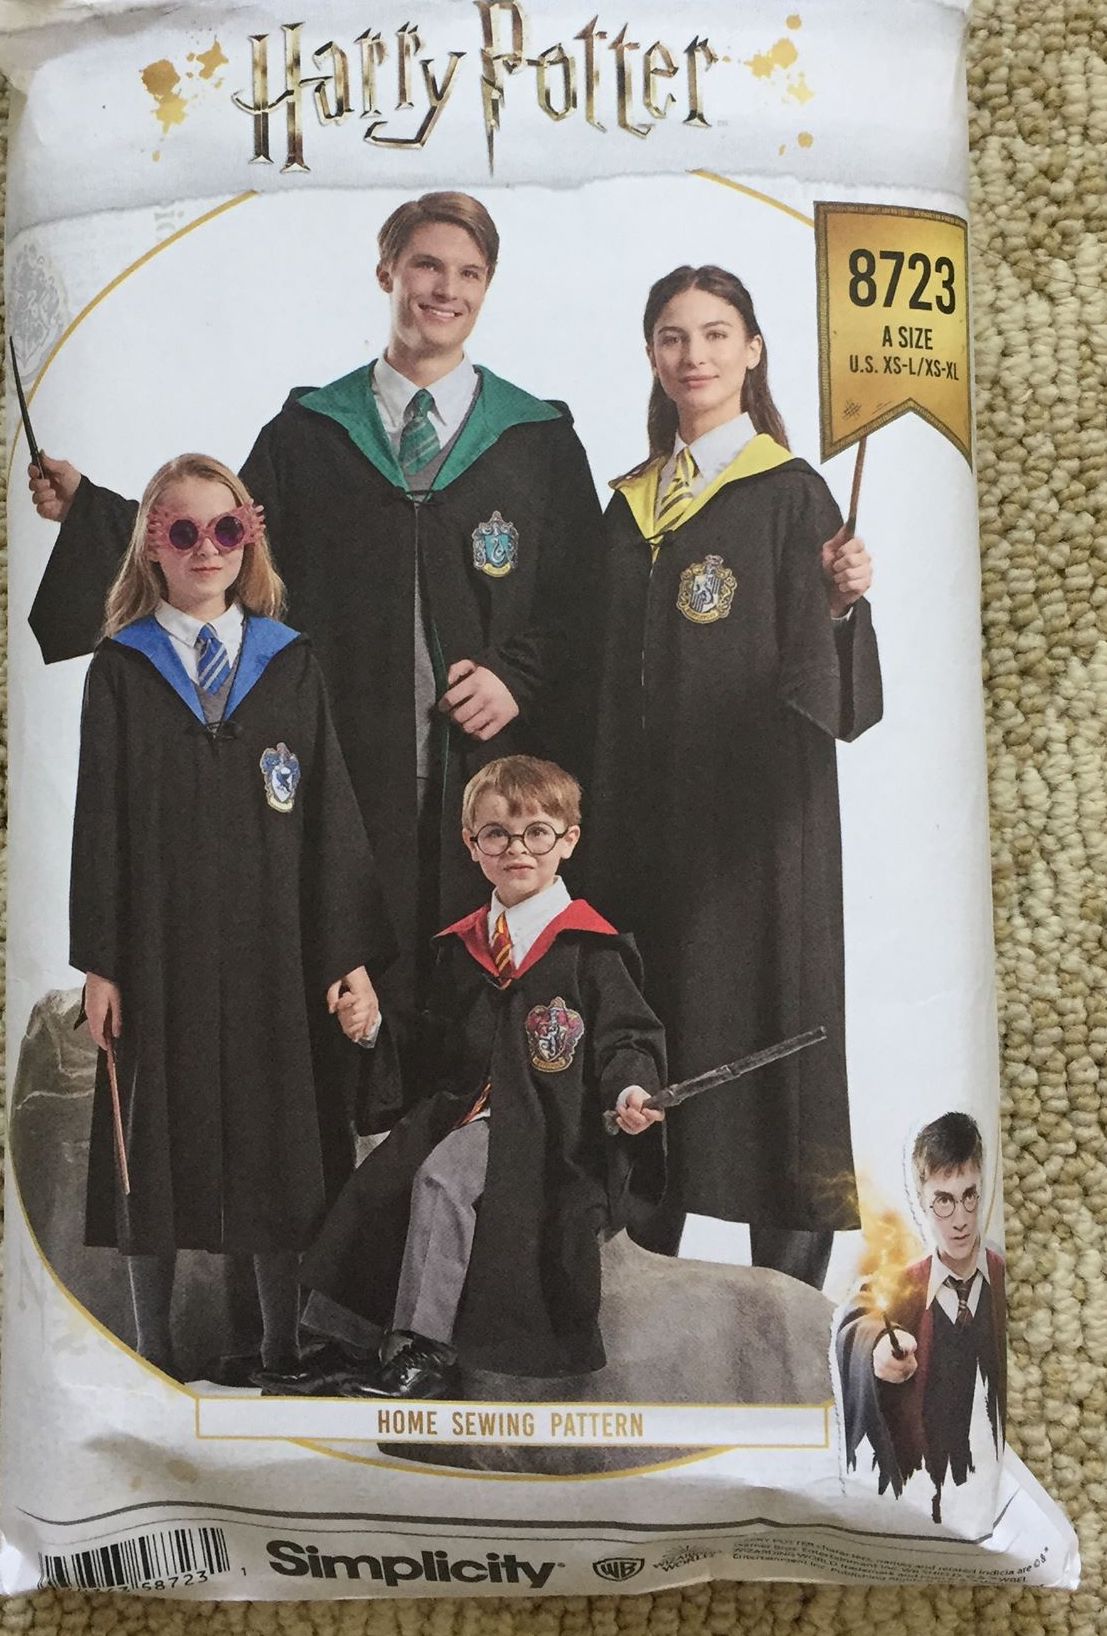
I already had this McCalls M6940 Game of Thrones pattern (affiliate link) for a cosplay project so I modified it:68385897_722415068187496_2174166372844568576_n

  • Start with View A (the picture on the right).
  • Tape the skirt hip gore (yellow part with the lion) pattern piece to the skirt hip (red part above it) pattern piece so that you can use it as one big pattern piece. You should not have that extra horizontal seam at your hip on your Jedi tunic.
  • Shorten the skirt. My preference is above knee-level but you can make yours shorter or longer. (For RL approval it will need to cover your butt at least). You can also have a “hi-lo” tunic where the back is longer than the front.
  • Make a wide band (about 2 inches wide) for your collar instead of the narrower one in the pattern.
  • Use different sleeves. The Jedi sleeves are big cone shapes like wizard robes. I already had Simplicity 8723 Harry Potter robe pattern (affiliate link) so I borrowed the sleeves from that pattern, but made them longer. (For RL approval your sleeve should be knuckle-length).68369096_2548470338771719_1778429370386350080_n.jpg
  • Closures: instead of visible ties as shown on the McCall’s pattern, you want to have hidden closures on your Jedi tunic. I put hooks and bars on the right side of my tunic, and then a hidden ribbon tie on the inside left for extra security.IMG_0405IMG_0404

Unless your fabric is thick I recommend lining your tunic to give it better drape. A thin, flimsy tunic is going to look a little off if you want to look like an Old Republic Jedi or get RL approval. (If you are doing this as a casual Halloween costume then by all means do what’s quick and easy if you prefer!) I used two layers of “blanched almond” 100% linen from Fabricmart for mine. I have not used it myself but I have heard that Joann Fabrics has a “linen look” linen-rayon blend that is pretty good if you don’t have the budget for full linen. Crinkle cotton gauze is also a popular choice. You may be able to find a good polyester/cotton blend but it may be hot to wear.

INNER TUNIC: 

Although not required I highly recommend having one. It’s a layer that you can launder without having to wash your whole costume each time. You can either make a full shirt or just a dickey (false shirt with just a collar and a bit of a front and back). The important part is that the collar shows.  Mine is a full wrap shirt with a band collar about 2 inches wide. IMG_0402

As you can see it is a very simple shape, with just a snap closure, because you won’t be seeing most of it while the costume is worn. My pattern is self-drafted but you can modify any basic shirt pattern. The easiest thing would be finding a wrap blouse pattern  with a V neck to start with, but if you have some basic sewing skills you can extend one “flap” of the shirt pattern over and cut out the neckline to be a V shape.IMG_0403

Mine is made out of linen because it wicks moisture. Wearing lots of Jedi layers can get warm!

TABARDS:

When worn, tabards look like two pieces that go over your shoulders and down the front and back of your outer tunic.  They are NOT straight rectangles because they need to be angled to sit right. You can cut them out as Y-shapes but I preferred to have pieces where the seam was hidden by the obi because it saved fabric. Here is an in progress shot to show you what I mean.  The top pieces need to be long enough to cover the front and back; there is NO shoulder seam for Jedi tabards.IMG_8962.JPG

The exact dimensions are going to depend on your height and how broad your shoulders are. They should be wide enough to extend past your shoulders slightly. Mine are 5″ wide  but I am not a very large person. For the upper pieces cutting out rectangles about 6″ x 36″ wide was a good starting point for me. I am 5’6″ tall and that was enough fabric to have 0.5″ seam allowances and a lot extra to trim off when angling the ends. (The tabards are double thickness so cut 4 identical rectangles out).

The bottom half of the tabard is where you have a lot of chances to show off your personal preferences.

  • The ends can be squared off, pointed, or rounded. Mine are pointed and curved on one side.
  • The length can vary but must be at least as long as your outer tunic (for RL approval).
  • You can have the tabards meet and become one piece hanging in the front.
  • The back tabards can cross or not.
  • They can be fabric or leather.
  • You can put decorative symbols on them with paint or embroidery.IMG_8928.JPG

For the lower tabards I started with 4 rectangles that were 6″ x 28″, which like the upper tabards were enough for seam allowance and extra for trimming. My curve starts about 6 inches from the end.

I constructed the tabards by sewing the right sides together, turning them right side out, and top-stitching. They are the same on the front and back.

OBI:

The obi is the wide sash around your waist. The RL standards say that the obi should be the same width as your tabards or about the 3 times the width of your belt. I did the first option so my obi is 5″ wide, but yours should be proportional to your height and shoulder width. The length will depend on your waist measurement. You’ll want to have add at least several inches for overlap in the back, plus more for seam allowance.

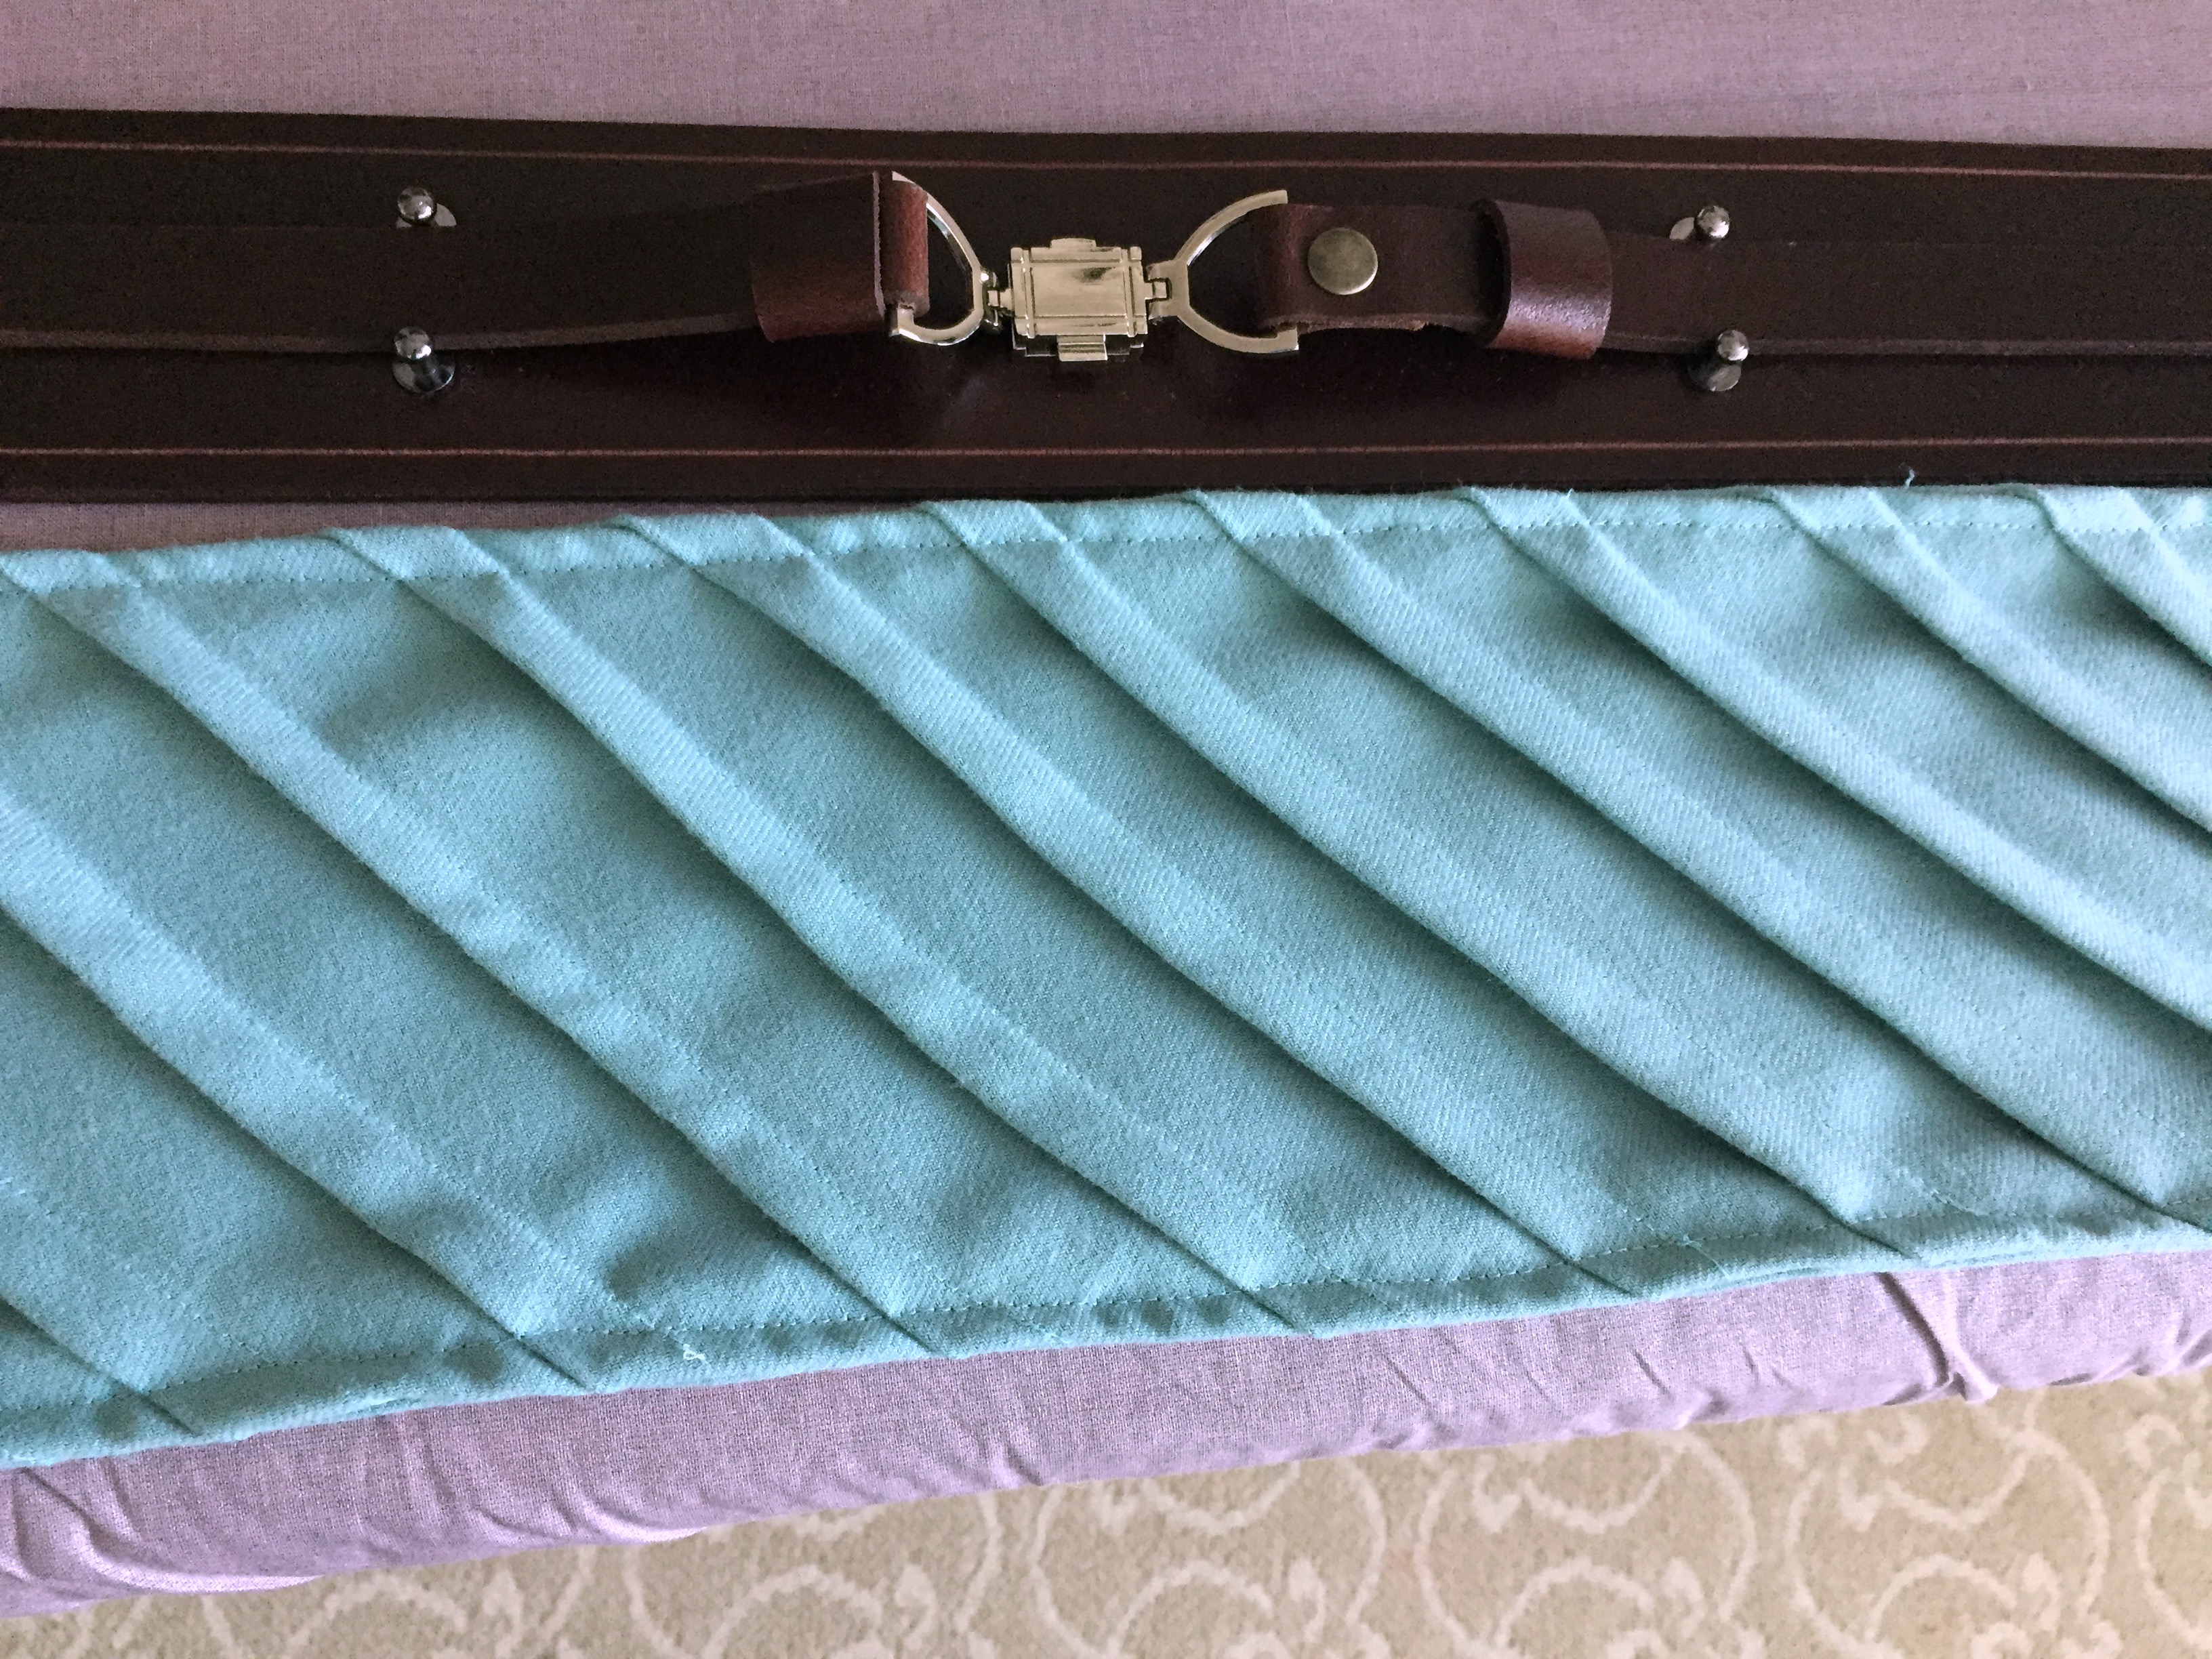
The easiest obi is just a long rectangle, but a lot of people like to add texture and visual interest. Mostly this means pleating or scrunching up the top layer horizontally. I put in a series of diagonal tucks. I have not seen anyone else do this so I want to note that even though I got approved, if you are going for RL submission your judge’s opinion may vary. IMG_8956.JPG
The obi cannot have any visible closures. You can use velcro, hooks and eyes, or snaps but they must be hidden in the back overlap. (I used 2 large snaps). Some people also do not add closures and rely on the belt to keep the obi closed, but that makes it a little harder to get dressed.

I recommend sewing your tabards to your obi. (Then you put it on like a backwards vest, with the obi closure in the back).  This will keep them from shifting while you are wearing them and they will hang symmetrically without having to adjust  them each time. If you are clever about it, when you sew the tabards to the obi you will form small pockets between the tabards and obi for your credit cards and cash, or stickers and trading cards to pass out to kids.

BELT:

Leather and pleather belts are both approvable, but I chose a leather belt for durability since I plan to wear this costume a lot. My belt was custom-made for me by Mag Mel Creations on Etsy.  David does really great work and has wonderful customer service; I highly recommend his shop.

The classic Jedi belt consists of a wide belt with a skinny belt down the middle, with a buckle and studs holding the skinny belt in place.  My belt is dark brown leather and 2.5 inches wide but the width can vary depending on your height. There are different buckle types you can get but mine is the “Obi-wan” style. The buckle in front is not actually the main closure for the belt. Jedi belts overlap in the back and closes with studs (mine), Velcro, or snaps that are then hidden by a loop of leather that slides over the opening. IMG_8522.JPG

Your belt can be brown or black but should match your boots.

BOOTS:

Like the belt, your boots can be brown or black but need to coordinate with the belt. If you are following RL standards:

  • They should be tall but not extend over the knee.
  • Boots should be low-heeled.
  • Laces are not allowed.
  • Zippers are ok but need to be facing the inside of your leg.
  • Decorative buckles are ok but not if they are overly numerous.
  • I have an elastic gusset down the back of my boots, which are considered ok if they are discreet and blend in.

Like the belt, boots can be leather or pleather, but if you are going to be trooping a lot or marching in parades get some good quality leather boots to be kind to your feet!

I have very narrow calves so my options are limited, but I was able to get “Gabi” boots from Slimcalfboot.com during a sale. They also have a sister company called Wideshaftboot.com.Screen Shot 2019-05-24 at 1.39.46 PM

PANTS:

Getting pants are the easiest part of the ensemble! Only a little bit between the bottom of your tunic and top of your boots show, so there’s a lot of leeway to choose pants. You may even already have some in your closet that work.

  • Pants should be plain and in a solid color.
  • If there are pockets they should be hidden by your tunic. (No cargo pants with pockets down the side of your leg).
  • Whether they close with elastic, drawstrings, or buttons doesn’t matter because it won’t show. (Your outer tunic is supposed to be long enough to cover your butt).
  • Skirts are also allowed by RL instead of pants but they are supposed to be long enough to not expose any skin.

I made my own pants to match my robe, but many people buy nursing scrubs or use khakis. My pattern is self-drafted but you can use a pajama pants pattern and then taper the legs a bit.IMG_0398.JPG

I added 2 pockets to the back big enough for a phone and a wallet. My waistband is elastic because that’s a lot faster than putting in a zipper and placket. IMG_0400.JPG

ROBE:

The robe is an optional item but fun! Jedi robes are very oversized with really large hoods and sleeves. I used the aforementioned Simplicity 8723 Harry Potter robe pattern (affiliate link) but made a few adjustments:

  • Wizard hoods are pointed. Jedi hoods are rounded. You’ll want to cut off the pointy tip and round out the back of your hood pattern piece.
  • You’ll need to cut your hood bigger by extending the pattern pieces in all directions. Jedi hoods are HUGE. Did I emphasize they are SUPER BIG? They are so large that when you wear them the sides of the hood cover your shoulders. hoodfront
  • When the hood is down, the back of it almost touches your butt. To get all that fabric into your neckline you’ll need to do big pleats. (Your hood does not need to be lined, but I did because I wanted all the seams and edges to be very neatly finished. I’ve seen Jedi with serged one-layered hoods get approved so it’s not necessary).robeback.JPG
  • The sleeves are humongous and long enough to cover your hands. If you are using the Harry Potter robe pattern you’ll need to extend the length of the sleeves.
  • The robe should be close to floor-length.  (The RL standard is no more than 2 inches off the floor). The HP robe pattern only goes to about knee length so you’ll want to lengthen the robe. Please note, if you plan to run, drop the robe!68369096_2548470338771719_1778429370386350080_n

POUCHES:

Jedi have leather pouches attached to their belts. (If you want to use it as a RL minimum extra you’ll need 2). The pouches are allowed to be pleather or resin. There is a lot of leeway to the pouches as long as they match the look of your belt. A lot of people use military surplus ammo pouches because they are easy to find and inexpensive. You may prefer to find a pouch large enough to hold a phone or wallet. I opted for a small pouch due to my proportions, and because I already put pockets in my pants.

My pouch is a military surplus leather slingshot pellet holder (affiliate link) that I darkened with a few layers of shoe polish and wax.

IMG_0016.JPG

Some Jedi belt makers will also make you a custom matching pouch if you ask.

LIGHTSABER:

Lightsabers are a very personal item with lots of possibilities. As a generic Jedi and not a specific character you can pick a design that appeals to you instead of looking for screen accuracy.  If you want a fun costume you can pick up a plastic lightsaber at a toy shop. If you want a nicer one with a metal hilt the cost varies wildly depending on design, if it has a sound board, if it can do multiple sound effects, if it can change colors, if you had a saber smith do custom engraving, etc. I’ve seen lightsabers cost anywhere between $50-$1000 or more. There are a number of companies out there making lightsabers so make Google your friend. IMG_9995

However, if you are interested in mine, it is a YDD from Amazon (affiliate link), which was recommended to me as being good for small hands. At about $80 with sound effects it is a great deal. I like the smooth look because it’s comfortable to hold. As far as I can tell it is the same as the Kyojin Tiny Giant from Pach Store, but I have not purchased from that company myself.Screen Shot 2020-01-15 at 9.06.25 PM

LIGHTSABER CLIP:

There are two main ways to attach your lightsaber hilt to your belt depending on your lightsaber. If your hilt has a D ring then you will need a “hook” type of attachment and if your hilt has a Covertec wheel then you will need a Covertec-style belt clip (affiliate link).

I have a hook attachment for my belt. You can buy “Jedi lightsaber clips” but a really cost-effective way to get the look and function is to buy an archery quiver clip (which is used to hold the quiver of arrows to your belt) from a sporting goods store. Mine is a “Neet chrome belt clip” (affiliate link). One end hooks onto your belt and the other end is a hook for your D ring.

IMG_0016

FOOD CAPSULES:

Clipped to the belt are also little metallic pieces called “food capsules.” If you are going for RL approval you will need at least a set of 4; some people have 8. I bought my Jedi food capsules on Amazon (affiliate link), and they come in a set of 8 but I only use 4 of them.IMG_0017.JPG

HOW MUCH FABRIC DO I NEED?

The amount of fabric you use will depend on your size of course, but to give you a rough idea this is how much I used (as a 5’6″ tall slender person):

All fabric was wide widths (about 54″).

HOW MUCH WILL THIS COST?

The cost of your Jedi costume will vary widely depending on what sort of materials you use, how fancy your lightsaber is, and whether your goal is to be Rebel Legion approvable or have a quick Halloween costume. I plan to wear this costume multiple times a year for many years and need to be comfortable during long hours so I invested in nice fabrics (all linen and wool) and high quality genuine leather boots and belt. Including my lightsaber (which was on the low end of the price range) I spent about $500. DON’T PANIC.  If you use cotton or polyester fabric and pleather boots and belt I think you could put together a Jedi for $200, or even maybe $100 if you get creative at the thrift store. If you are on a budget I’d recommend going to a thrift store and looking for used boots there, and seeing what curtains and sheets you could use to make your garments instead of buying new fabric. If you have a bit of skill you can try your hand at making your own belt as well. (If you are not looking for RL approval you have a lot more flexibility in terms of faking the look with a store-bought belt). If you skip the robe, which takes up a lot of fabric, that will bring your costs down as well.

I wrote this guide with Rebel Legion approval in mind, but if you are not interested in that you can simplify or skip items. Also please keep in mind that your goals are your goals. Don’t let anyone make you feel embarrassed if you have a low budget, like unusual color combinations, or want a costume for fun and not for official approval.

Good luck and May the Force Be With You!Miss Vivien_s Con-Ex-1

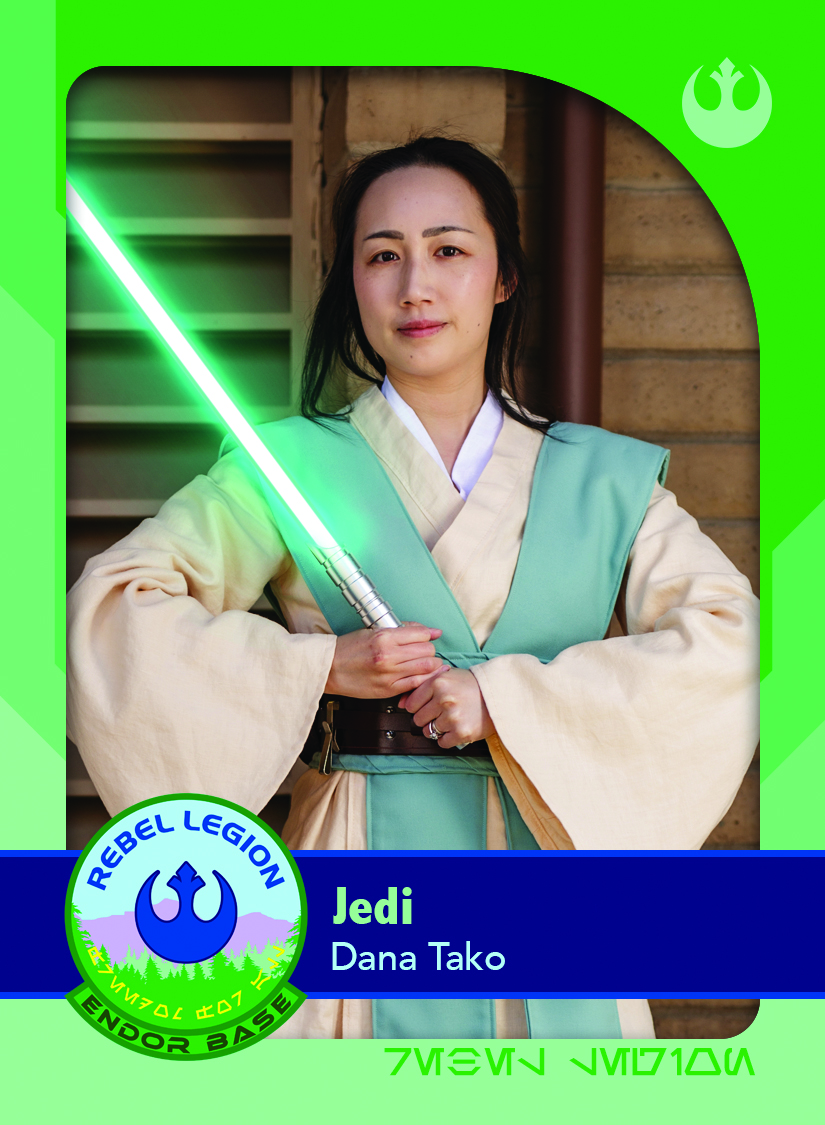
EndorBaseCards_2.3x3.5_plusBleed_VivienLeeJedi_Front

My Rebel Legion trading card, graphics by Colin Adams (OddViking)

HEY WHAT’S UP WITH ALL THESE “AFFILIATE LINKS”?

I am required to disclose that if you buy something through the Amazon link I get a small percentage of the sale that goes towards my domain registration fees and other costs associated with hosting the many photos on this website. (I don’t generate a profit on this blog; I just hope to break even). If you feel extra generous you can buy me a “coffee.” Thank you for reading!
Professor McGonagall-inspired Deerstalker Witch Hat Pattern and Instructions

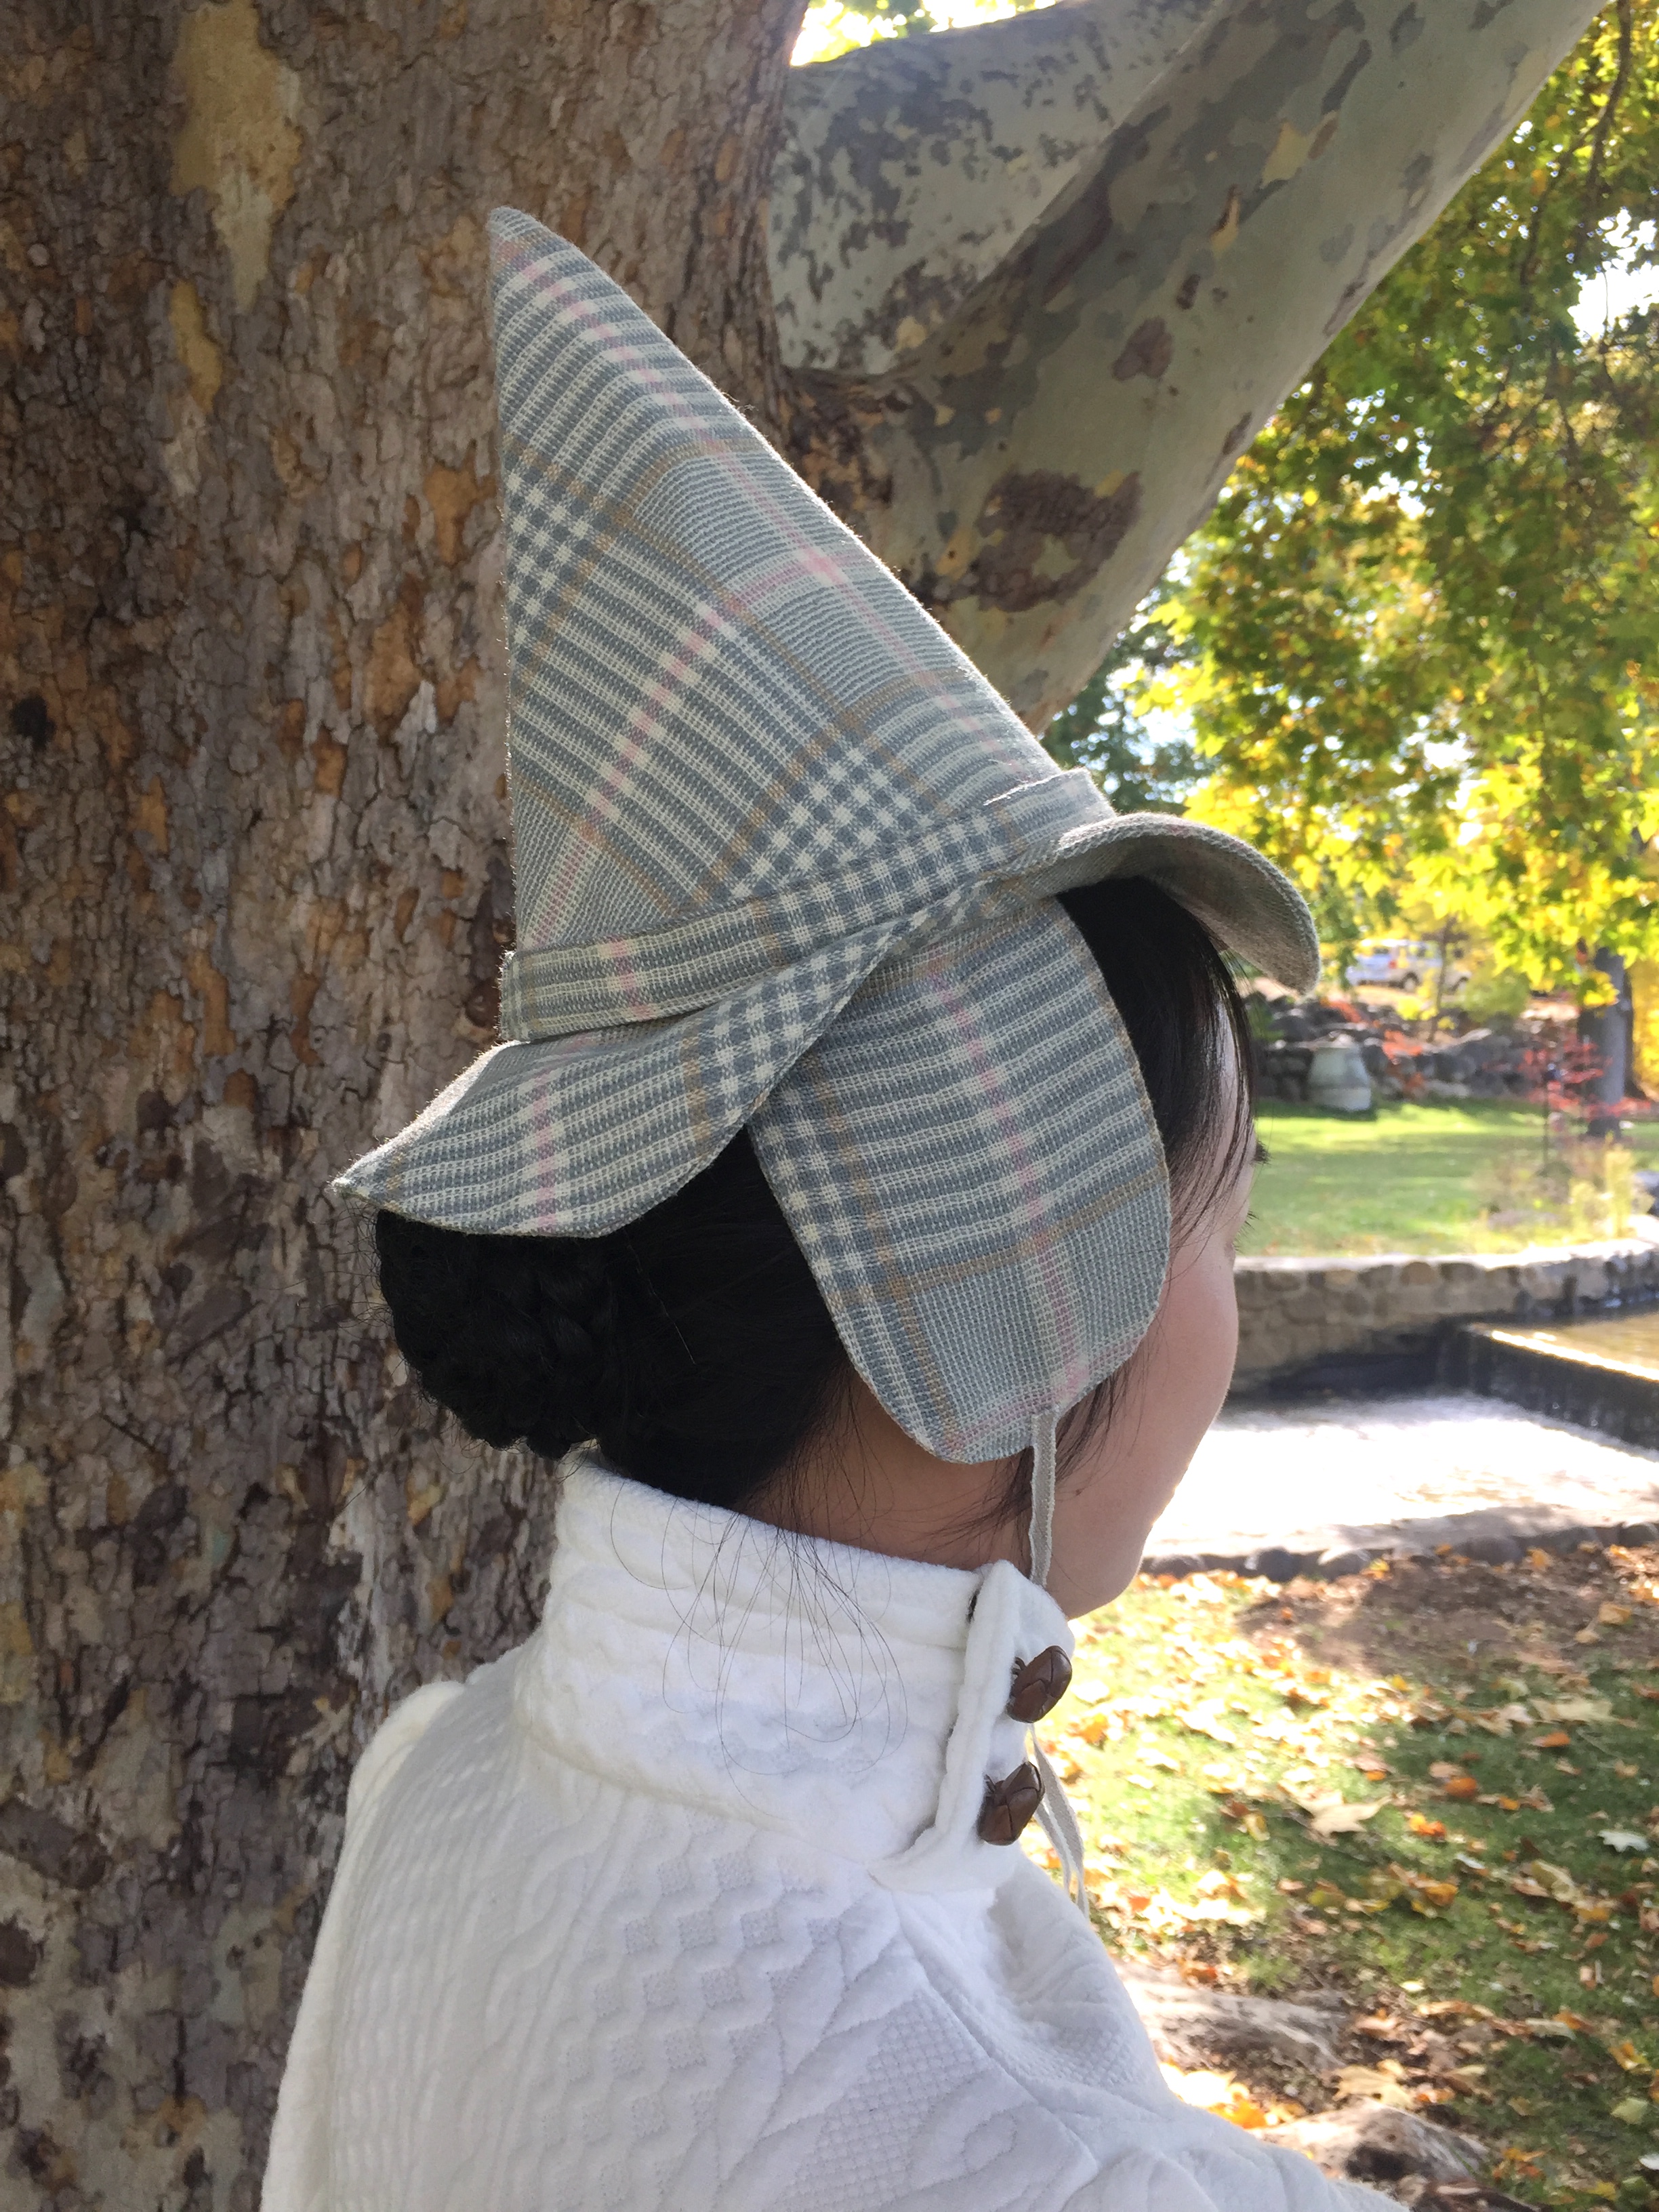
Professor McGonagall is my favorite character in the Harry Potter books/movies, and I love her tartan hat with the little ear flaps. I recently made my own and got some requests to share the pattern so here you go!IMG_3350

The hat has flaps on the ears that you can wear down or tied up. My hat is made from wool left over from a matching skirt that I made. The nice thing about this project is that it doesn’t require a lot of fabric and can be made from scraps.

IMG_3361

This hat sits on top of the head (and the pieces are sized for my 22″ head). If you want the hat crown big enough to cover your head you’ll need to resize the pieces a bit.

IMG_3359

This is the movie hat for reference.

cd4900d583933744699700073d474bd7.png

PATTERN PIECES AND MATERIALS

The hat uses several simple shapes and in the sections below I’ll describe how to draft and assemble them. I apologize in advance that I have a lot of pictures of the pattern pieces and finished item, but not the construction process since I made this at night right before a trip. However, construction is pretty straightforward! The pattern pieces include a 3/8″ seam allowance.

Materials:

  • Tartan/plaid print fabric (wool or cotton flannel)
  • Fusible foam interfacing
  • Regular fabric interfacing or stiff cotton organdy
  • Lining fabric
  • Ribbon or twill tape for ties and inner binding
  • Small comb
  • Thread, etc.IMG_3438

THE CROWN

The pattern:

The shape is a big cone. The center of the cone (which will be the front of the hat) is a little longer than the edges (which will be the back of the hat) since the crown tilts backwards a bit. To draft this shape you can draw a giant circle with a 19″ diameter, and then cut out about 1/3 of it as a starter shape, then use the measurements in the diagram below to help you get close to the final shape. The other option is to draw a triangle with 8.5″x8.5″x16″ triangle and then add the rounded part on the bottom. IMG_3439

Assembly:

Cut 1 fashion fabric, 1 lining, and 1 interfacing. For the lining I used a scrap of nylon (but any thin fabric is fine). For the interfacing I used single sided foam stabilizer which gives your crown some stiffness and structure. I use Bosal brand (Amazon affiliate link) In-R-Form, which is designed for purses but makes nice hats.IMG_3046

Iron lining to foam interfacing first; I’ll refer to it as “lining” from now on because it’s become one piece. Sew the back seams of the lining together (right sides together) to make a cone shape and trim excess bulk from the seam area. Sew fabric into cone shape the same way and flip right side out. Put fabric cone over lining cone and stitch bottom edges together to create your crown.

THE BRIM

The pattern:

The shape is a modified circle with a hole in the middle. To draft it draw a 12″ wide circle (or trace a large plate). In the center draw a 5.25″ wide circle (or trace a bowl). Cut out and discard the inner circle. Draw a curve on the sides like a butternut squash; this is to allow you to pull up your earflaps later. (Fold the pattern in half and cut both sides at the same time to keep it symmetrical).IMG_3442

Assembly:

Cut out 2 brims from fashion fabric and 1 brim from interfacing. You’ll want the brim to be thin and a little floppy so do not use the foam you used for the crown. I used some stiff cotton organdy because I had that available, but you can use other kinds of fabric interfacing.

The goal is to end up with a donut with the interfacing inside, so layer your pieces in this order: fabric, fabric, interfacing (with fabric right sides together).

Stitch the outer edge of all the pieces together, then flip inside out from the center hole in order to have the fabric facing out and the interfacing sandwiched in. Then topstitch the outer edges (for neat finished look) and topstitch the inner edges (to keep the layers together for the next step).

Sew the bottom edge of the crown to the inner edge of the brim, making sure the raw edges of both pieces face into the hat. Trim extra bulk from the foam if needed.

THE EAR FLAPS

The pattern:

The ear flap is a tongue shape. You can draft this piece by making a 4.5″ x 5.75″ rectangle and curving one end. (Fold the rectangle in half length-wise and cut off a rounded corner to make sure it’s symmetrical). The straight edge is the side that will be sewn to the hat.IMG_3443

Assembly:

For each flap cut 2 fabric and 1 interfacing (4 fabric and 2 interfacing total). The ear flaps should be soft so use a very thin and light interfacing, such as the lining to your hat. The assembly for each flap is just like the brim. Summary: put the fabric right sides together with the interfacing on top, sew together on the outer edges, flip right side out, topstitch all edges.

Stitch one flap to each side of the hat underneath the brim. This should be along the area where the brim curves in. I recommend pinning the pieces to the hat and trying it on to make sure the flaps cover your ears before sewing down. Sorry I forgot to take a picture before I sewed in the binding.IMG_3447

To cover up the raw edges inside the hat, hand-stitch in a ribbon, twill tape, or bias tape. I used a 1-inch wide music print twill tape because it was cute, but actually this is too wide and will cause ripples like my hat. If you want a smoother appearance a 1/2 inch ribbon is preferred.

Since this hat sits on top of your head, for security I sewed a small comb in the front.IMG_3448

THE HATBAND AND TIES

The pattern:

The hatband is just a long finished strip. Cut a long rectangle 22 inches long x 2 inches wide.IMG_3449

Assembly:

Sew down the long edges, right sides together, making a tube. Turn right side out and topstitch both long edges. Sew the small ends together to make a big circle. Put the band on the base of the crown and tack down in several places next to the brim to keep it from falling off.

Here’s a top view to show that the top of the band is not stitched down, just the bottom.IMG_3446

For the ties cut 2 pieces of ribbon or twill tape and stitch to the ends of each earflap. I plan to mostly wear my flaps up so the the tape is stitched to the side of the flap that will not show. For an extra neat appearance you can sandwich the ties into the flaps during construction, but if they are sewn to the outside you can switch them later.

My ties are 18 inches long each so that they can also be tied under the chin. If you don’t plan to have the extra versatility you can make them shorter. I used a linen twill tape I had in the stash because it matched my wool, but a wide ribbon would look cute too!

IMG_3351The flaps can be worn tied up but do not meet in the back.

Your hat is now done! Go forth and have witchy adventures in the woods!IMG_3293

IMG_3298.JPG

Do you like this sweater? I’ll be posting a tutorial for it too, no knitting experience required! Please subscribe to my blog or follow me on Instagram @freshfrippery to make sure you get notified when the tutorial is posted!

All patterns and tutorials are provided free on my blog. I don’t charge for them but if you would like to donate towards my domain registration and data costs of hosting the many photos on my site, consider buying me a “coffee”: https://ko-fi.com/freshfrippery

Thank you!Screen Shot 2019-11-27 at 9.28.46 PM

URWS1641.JPG

His and Hers Roman Costumes

My local costume guild had an event called “Nectar and Nectar and Ambrosia: Day with Dionysus on Mount Olympus” at a winery where Roman and Greek costumes (both fantasy and historically accurate) were encouraged. I challenged myself to make costumes for both myself and my husband in the span of a week, with materials I already had at home. In the end, the outfits really only took a few hours each (with the use of a serger) and a lot of the materials I used were leftovers from other projects or unwanted items people were giving away for free (so this was a budget and eco-friendly endeavor!)IMG_1198.JPG

Please note, these are historically-inspired, but ultimately fantasy costumes. They were good enough for the party I went to, but this is a costume tutorial, not a scholarly article. =) IMG_1236

Roman Women’s Outfit 

Roman tunics can be rather simple. I got this diagram from a friend and made a short-sleeved version of the bottom figure. As you can see, it is basically a giant tube sewn at the sides. At the top there are areas where you stitch together to make neck and arm openings.IMG_0308

You then add a belt to create the shape at the waist.IMG_1398

I stitched together parts of the top to allow room for my head, and used some decorative gold buttons I got from a friend. IMG_1400

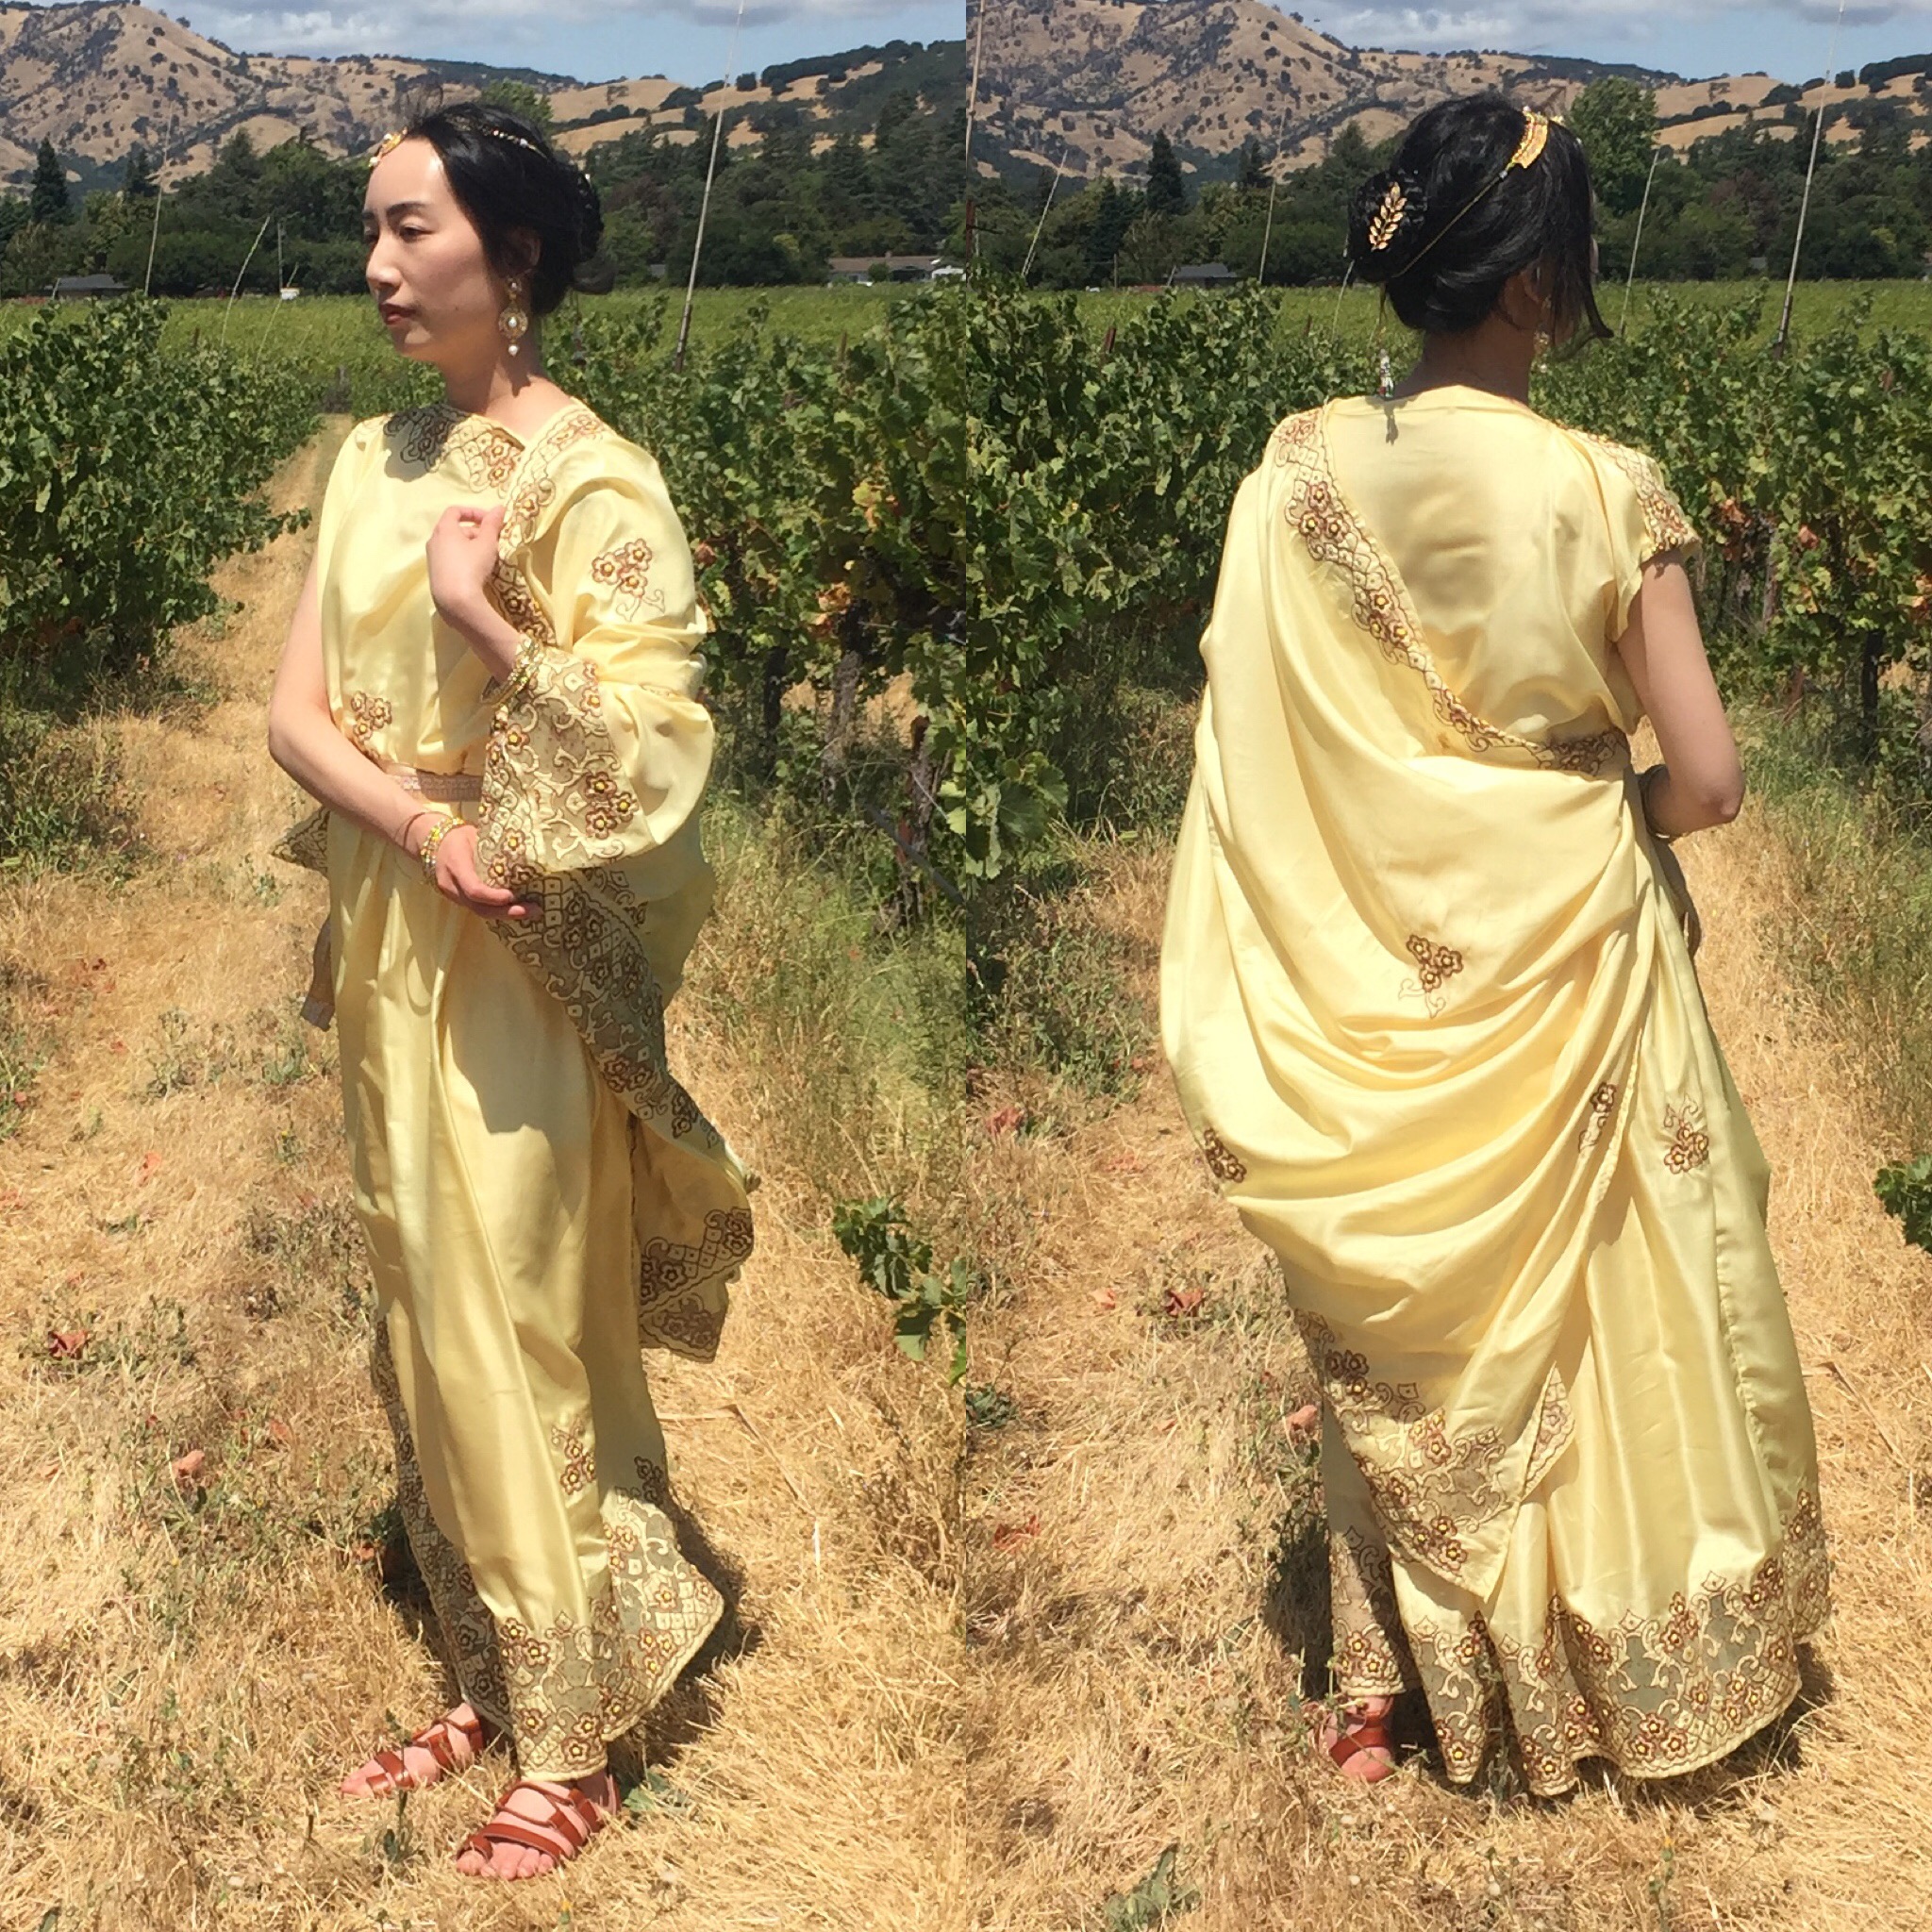
I was gifted a beautiful embroidered silk sari by a friend who was moving and destashing. The sari had a number of snags and holes that I was perfectly fine with for a fantasy party outfit. Maybe it wouldn’t have worked for a ballgown, but hidden in lots of folds it was fine! The sari also had some areas of sheer netting and beaded flowers which are not historically correct for the Roman era, but good enough for me!IMG_1409

My sari was 6 yards long, but not wide enough to cover the full length of my body. IMG_1422For the simplest sewing, get a very wide fabric (55″ or so) or a solid (so you can use it lengthwise) so you don’t have to have a waist seam or worry about pattern-matching. Since my sari was only 44″ wide and most of the nice embroidery was on the long edge, I had to piece together mine with a waist seam hidden by a belt.IMG_1424

The final width of my top (measured across the embroidery) is 25″ plus seam allowances but of course this will depend on your measurements and how long you want your “sleeves.” (I also have narrow shoulders and limited fabric so I didn’t have a lot of gathering in the front).

So if you have very wide fabric and are not super tall, 1 yard each of fabric for the front and back of your tunic is plenty for many people. Add a few more yards for your palla and you are Roman!IMG_1408IMG_1411.JPG

I didn’t have a lot of left over fabric after cutting the tunica, so my “palla” is too short to be fully wrapped around me properly, so I tucked one corner into my belt, then draped it over my opposite shoulder and arm. For reference, mine ended up 76″ x 44″ but I recommend a longer one if you want a fuller look.IMG_1370.JPG

I think the ripples look quite nice when they hang just right.IMG_1244

My belt was made from some soft woven ribbon from a gift box. I sewed some gimp braid down the center. The braid was left over from another project. For those of you keeping track, that means so far everything was free!IMG_1410

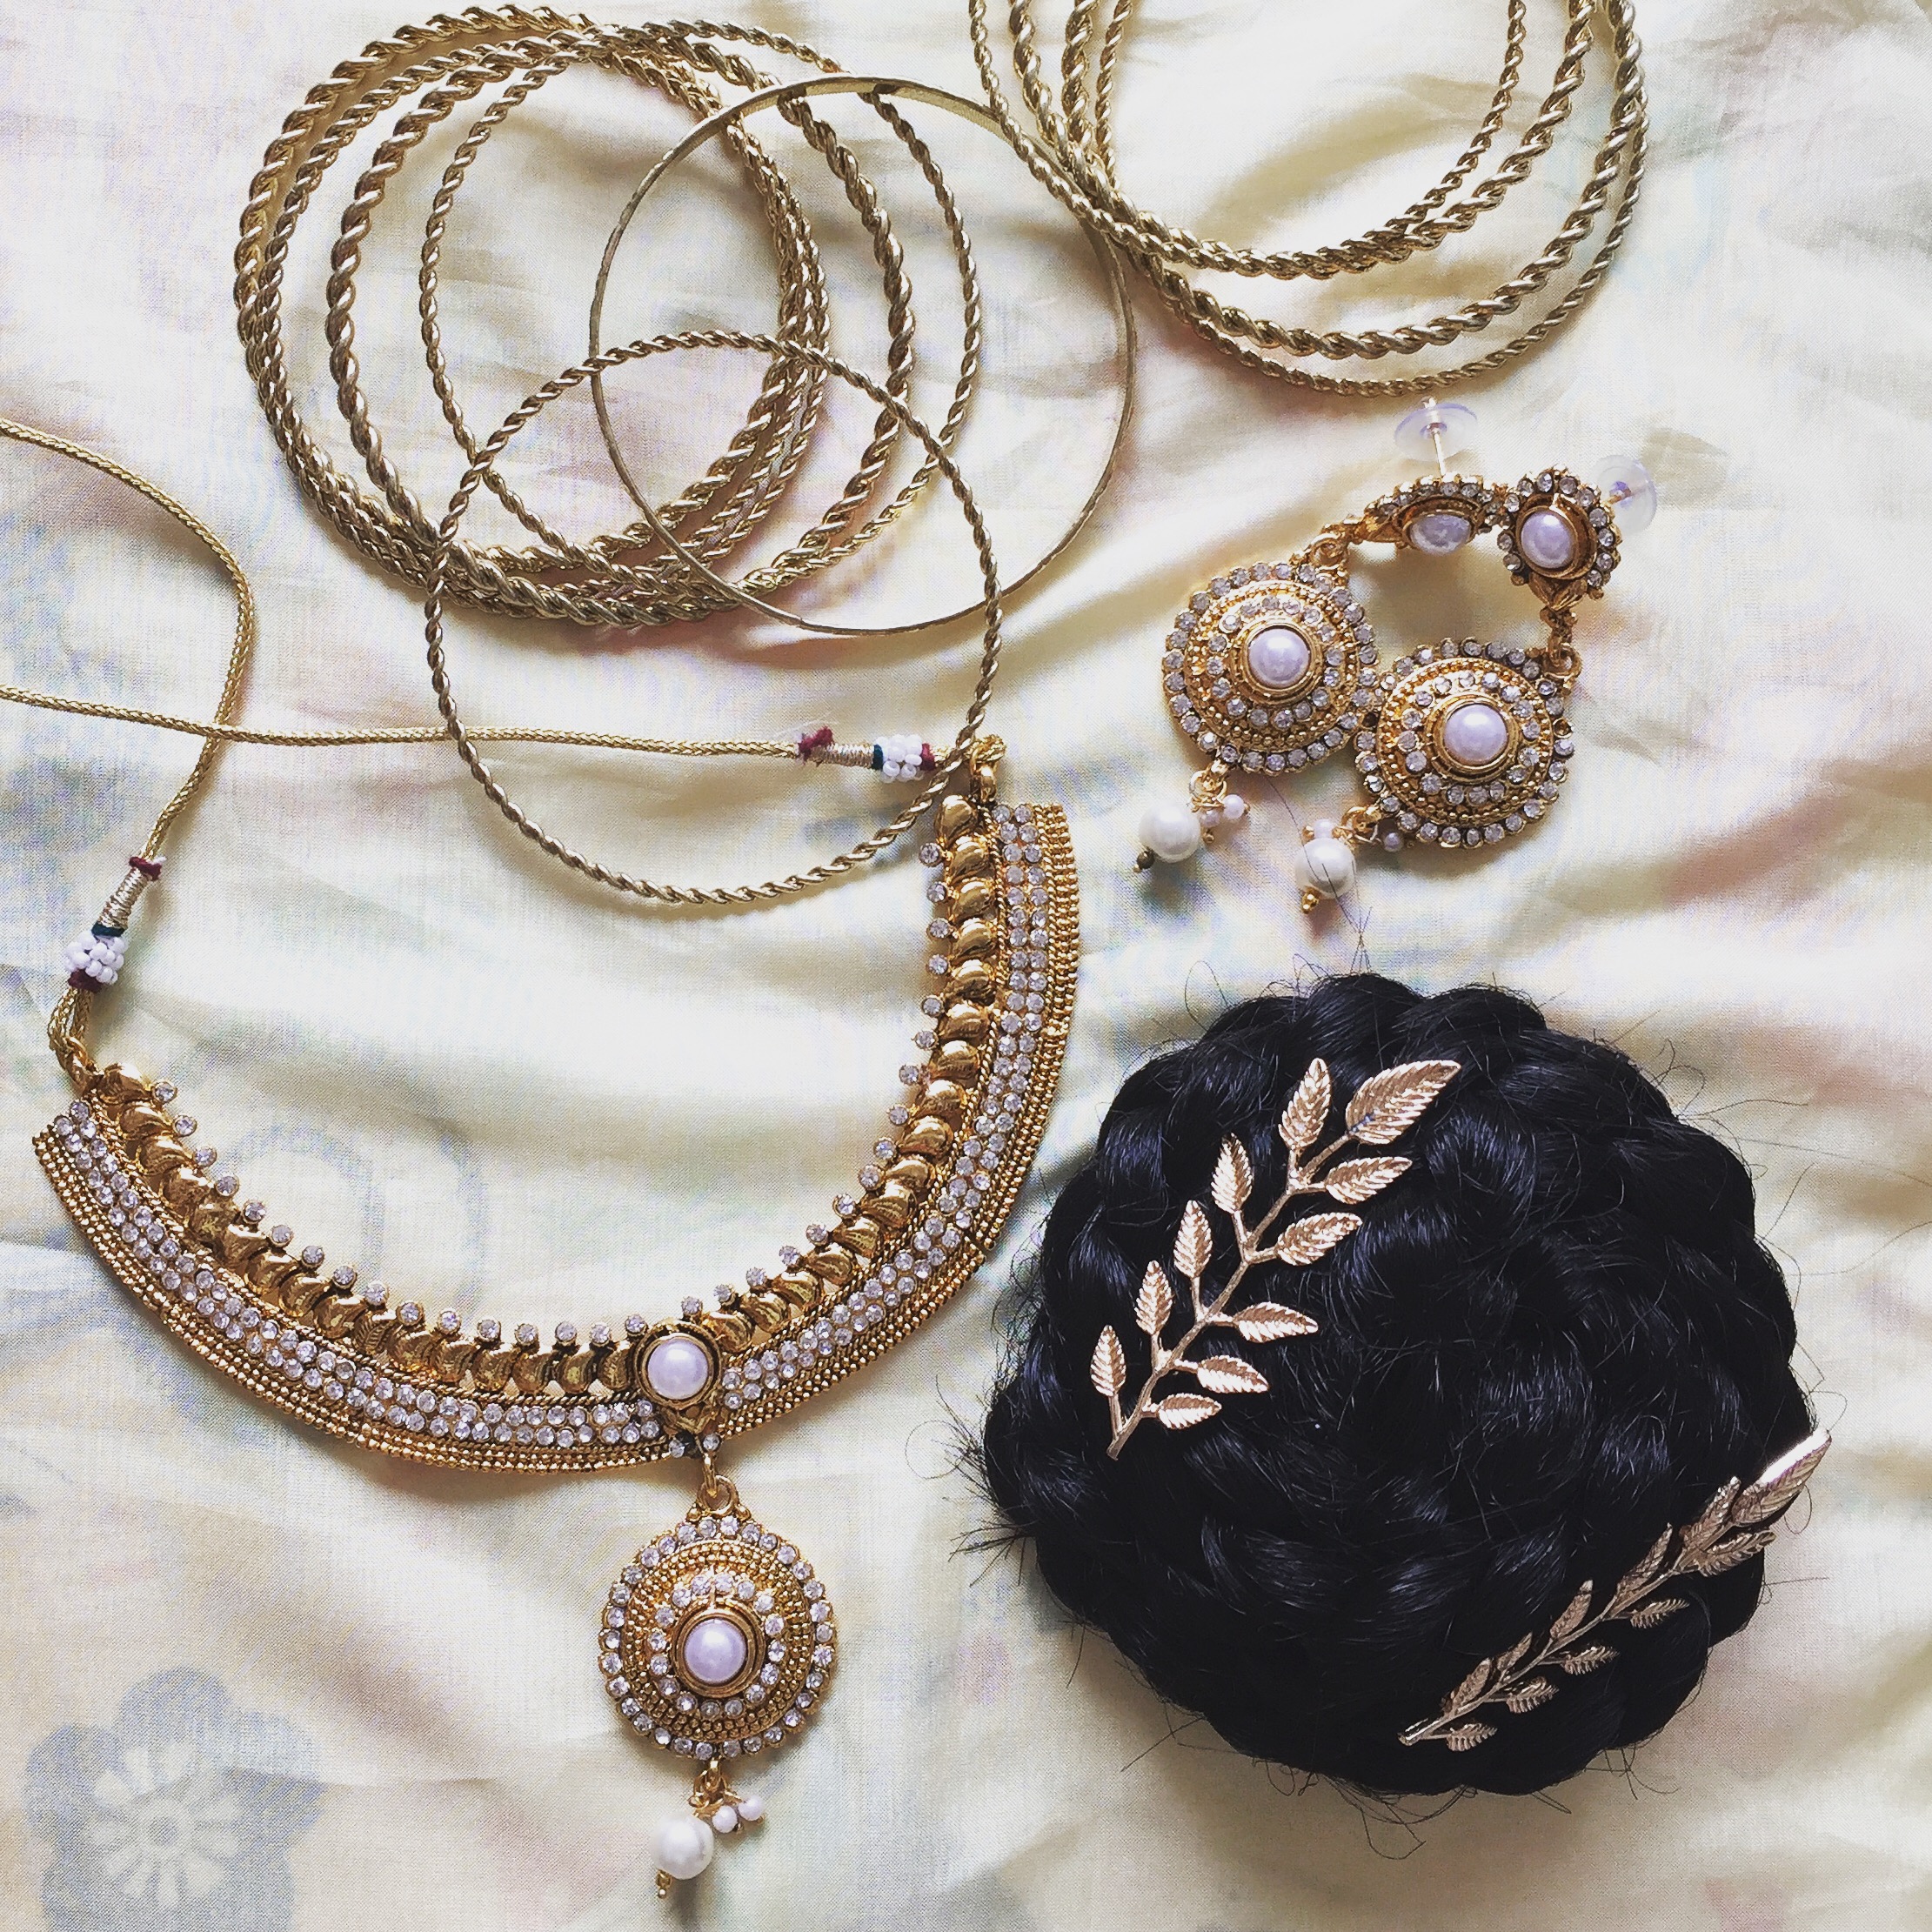
For accessories I wore pieces from an Indian bridal jewelry set I already owned. I wore the necklace on my head with some large earrings and bangles.IMG_1280

I put my hair up and also made a false braided bun with leaf pins that I already owned.TMPR6435.JPG

Underneath the dress I wore a full-length slip (that I actually got from a swap party and mended), plus some Roman-looking sandals from Target.

Roman Men’s Outfit 

IMG_1167.JPG

My husband’s tunic is constructed similarly to mine, except it is shorter and has longer sleeves. He also doesn’t have peekaboo shoulders because the sleeve seam is sewn shut, but the neck hole is made the same way. Originally his was 1 yard wide, but he ended up wanting even longer sleeves so I had to add some rectangles of fabric at the top sides like a t-shirt. His is made from white cotton I had leftover from my Gibson Girl petticoat project. I sewed trim across the sleeve  and shoulder seams and neckline before hemming the sleeves. Extra trim was tied around his waist like a belt. IMG_1791.JPG

For the first time my husband’s outfit cost more than mine! (Although still it was only about $10 of materials).

I had originally planned to drape some colored fabric around him with a brooch, but he declined the extra layer of fabric since it was a warm day. He also wore sandals from Target. It took us a while to find the largest pair they had in the women’s section. =)

It was a fun event with creative costumes on a beautiful day with friends like Natalie and Kelsey.IMG_1181

Kelsey and Todd as Caesar.IMG_1187

Adrienne and Elizabeth as Artemis and Diana.IMG_1209

I’m tempted to make more Roman outfits now. This was easy and comfortable, and rather flattering for just wrapping fabric!VMOB9427.JPG

Twinkling Lights Space Dress with LEDs

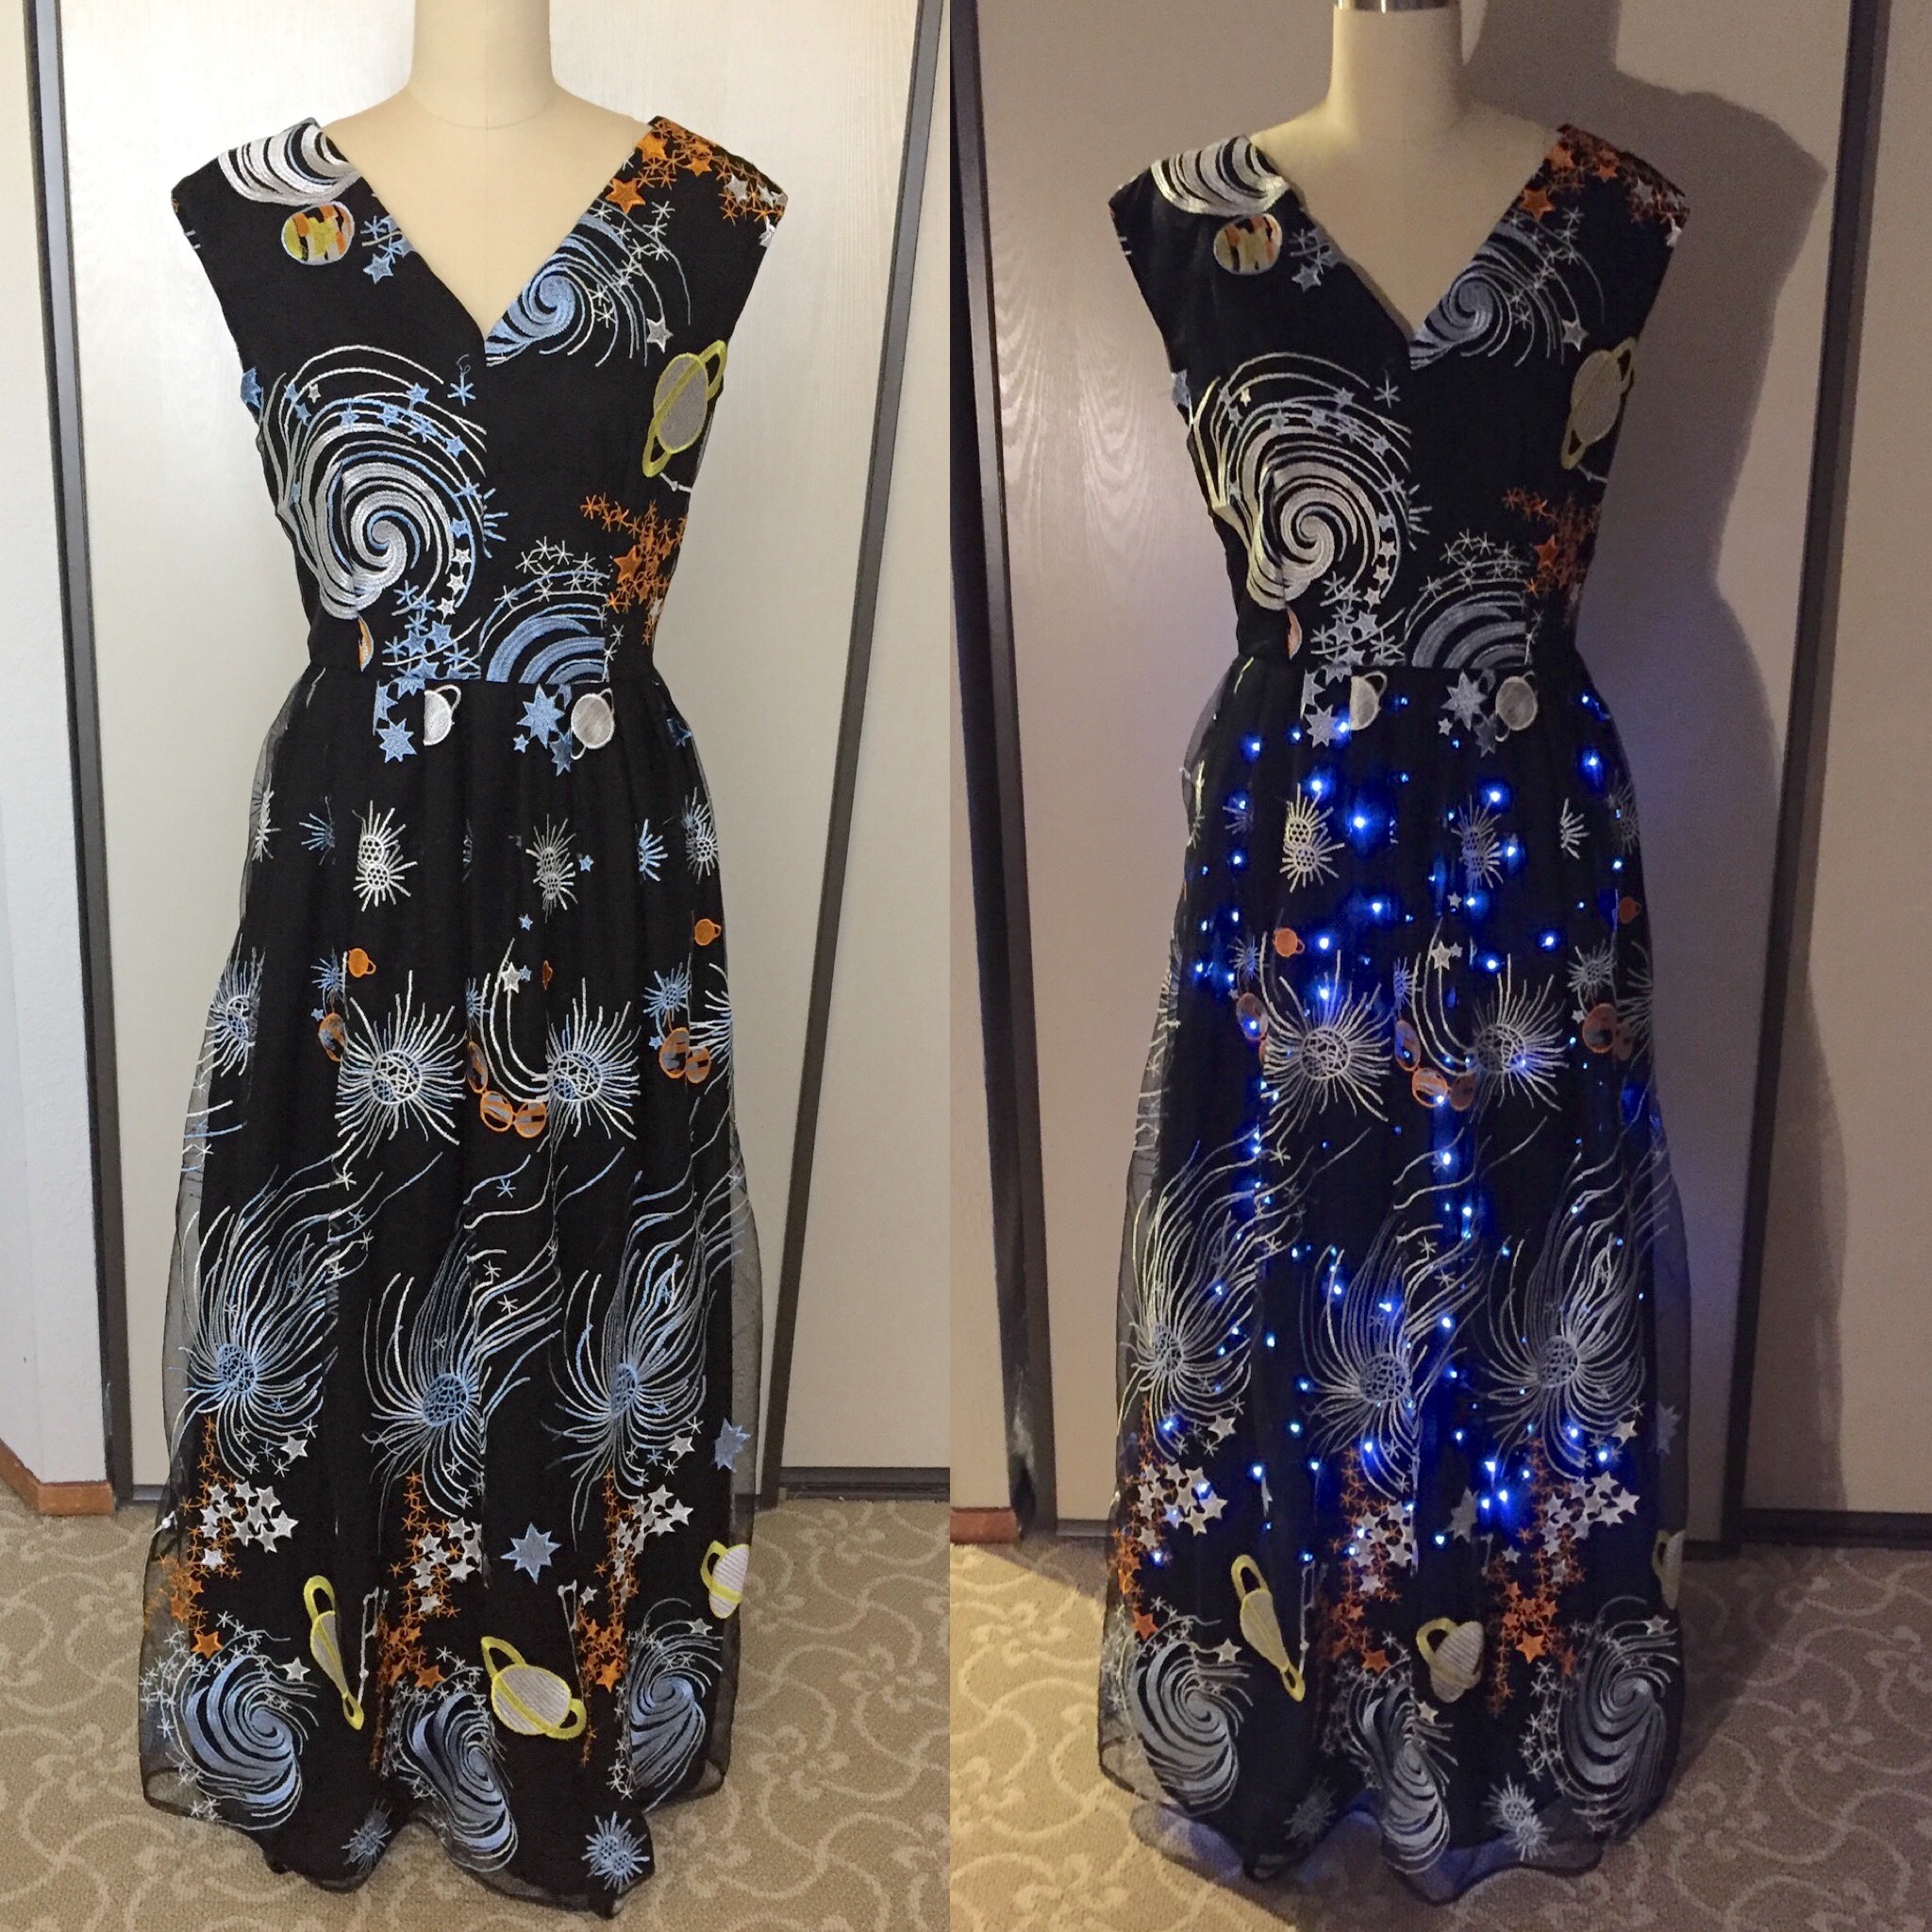
I am excited to show you my space dress, which had hidden LED lights I could turn on to make a twinkling galaxy with stars! I wore this last weekend to a private evening event at the Lawrence Hall of Science.JJPQ1221

IMG_0093

For the bodice pattern I used Vogue 8789, a 1950s dress pattern, but modified the skirt to be longer and slimmer. IMG_9752

I have used this pattern a number of times and like how easy it is to put together. The front and back of the bodice has 2 pieces each with darts, and the neckline facing just flips inside.IMG_9754

The space fabric is an embroidered galaxy-themed mesh. Since it’s transparent I flat-lined it with opaque black peach skin fabric for the top. For the skirt, I needed to maintain some transparency to let the lights show through, so the skirt is lined with a semi-sheer black chiffon. IMG_9758

Underneath the skirt I wore a petticoat with the lights sewn on in a random pattern. That way I could wash the dress separately. (It’s easier if you attach the lights while the finished petticoat is on a dress form, rather than trying to sew the lights to the fabric first). I made the petticoat about a foot shorter than the skirt of the dress because I was afraid I’d accidentally put my foot in the wrong place and trip on the light strands. (This is why the lights don’t go all the way to the bottom of the dress).IMG_0244

The petticoat is just a large rectangle gathered at the top with an elastic waistband. (Use a wide elastic at least 1 inch wide, otherwise the weight of the battery pack will make the petticoat sag). My battery pack had 3 AA batteries. I’ve seen some that use coin-sized batteries that are lighter, but this is what I happened to have on hand.IMG_0249

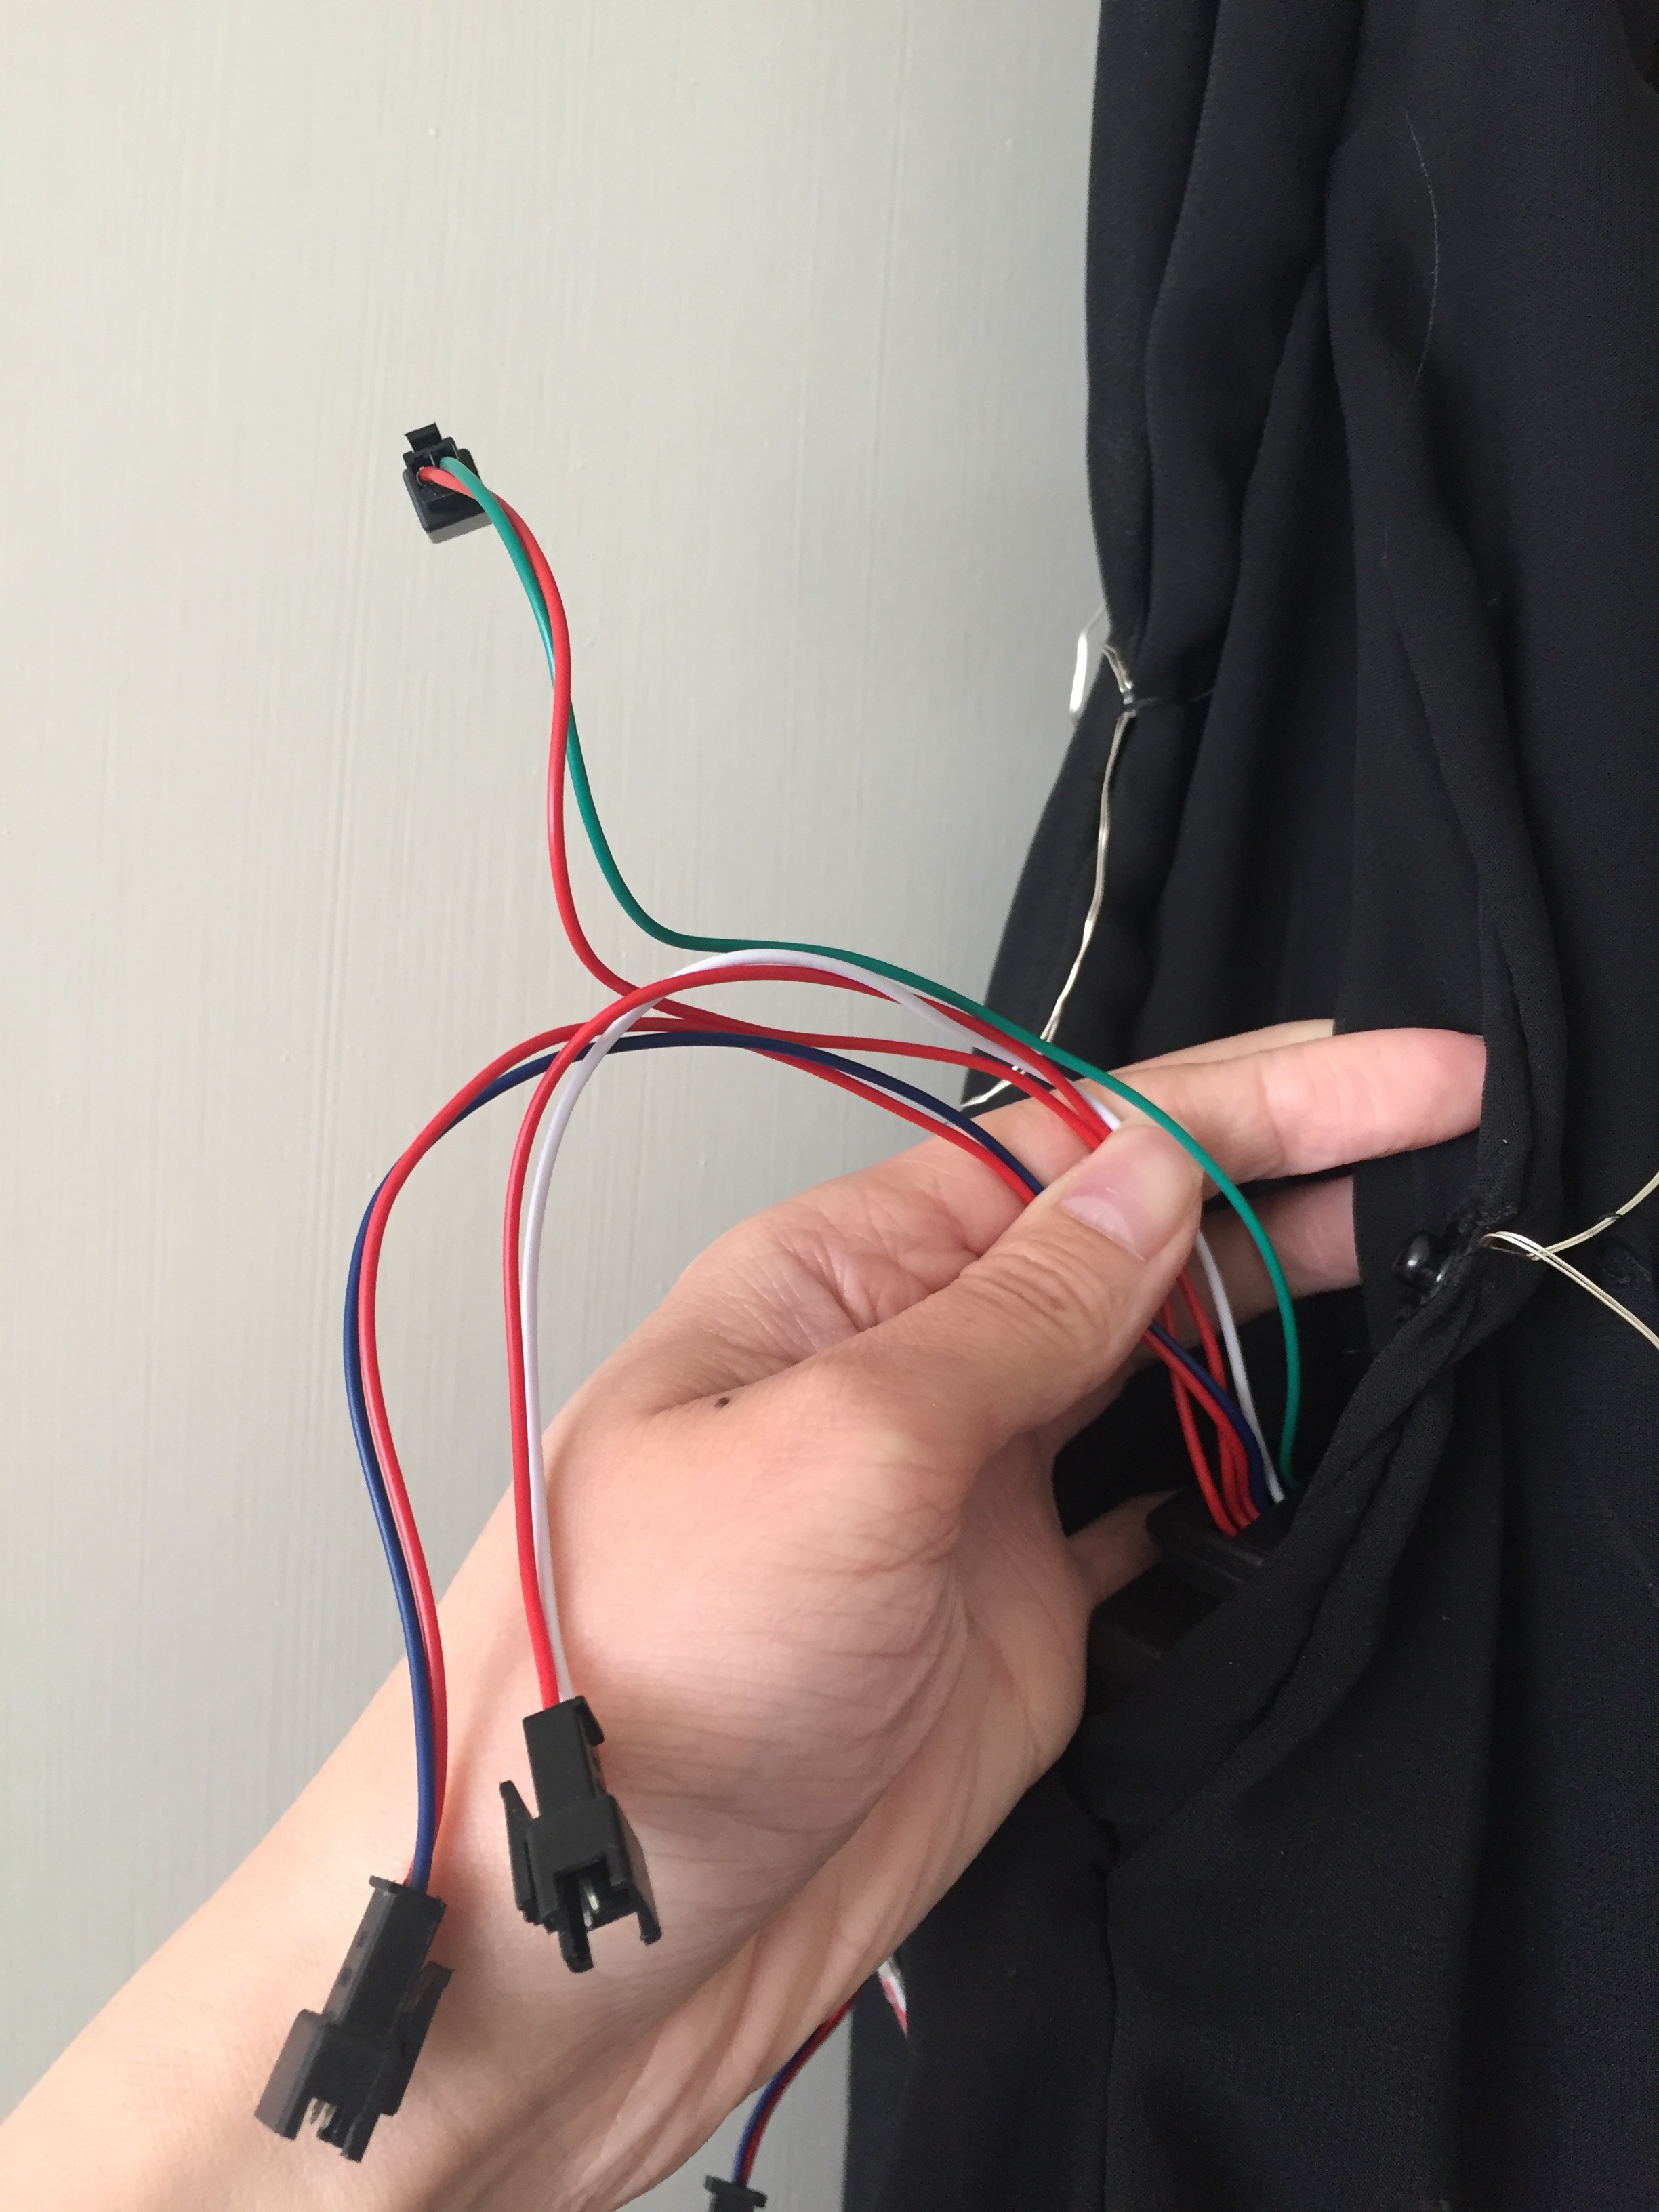
The side seam of the petticoat had a pocket for the battery pack, plus a snap to close it. The 3 sets of wires from the battery pack connected to the 3 strands of lights I had on the skirt. (Multiple strands allows you to have them twinkle because they are not all blinking on and off at the same time). I could also have them on continuously all at once.IMG_0246

I got my lights and battery for free, but it is easy to find “LED fairy lights” on Amazon and other sites. Look for battery-operated lights and long strands so you don’t have to use too many. I have not purchased this particular set on Amazon (affiliate link), but if I were to make this again I’d upgrade to these lights that have a remote control!

This dress is a bit hard to photograph in action, but here is an outdoor shot at night. You can visit my Instagram to see a video of the dress blinking.IMG_0108

I wore shoes that I dyed and rhinestoned. IMG_9767.JPG

My solar system necklace was from ThinkGeek.IMG_0250.JPG

DRESS PROJECT COSTS:

  • 3 yards space fabric: $33.57 on Aliexpress
  • 5 yards black chiffon: ~$7 from Fabricmart Fabrics. (I bought it during a $1/yard sale and bundled it with other items for shipping).
  • Thread, zipper, snap, etc. from stash: $2
  • LED lights: $0 (I got them for free but otherwise I’d spend ~$12 on Amazon)
  • 3 AA batteries: ~$1

Total cost: ~$42.57 (or ~$53 if I had to buy the lights)

If you make a space dress of your own I’d love to see it! IMG_0152

Medieval Princess Dress

I recently made a medieval princess dress that isn’t historically correct (although inspired by 14th century cotehardies), but was fun to make, and a gift for teenage me. When I was in high school I wanted to have a medieval princess dress for prom but had neither the sewing skills to make one or the money to buy one, so this is a fulfillment of a dream! IMG_9966

Yeah, it was a bit breezy that day.IMG_9980

This dress was also a reminder that costuming and sewing is supposed to be fun, even if the details are “wrong.”  This dress has inexpensive polyester velvet, a zipper down the back, shiny jacquard trim, polyester sleeve tippets and a wrap belt made from curtain fabric, an impractical train, and princess seams! To someone concerned about historical accuracy these might be a bunch of no-nos, but this gown, despite all its anachronisms, is something I would have loved and felt pretty in back in high school. This dress is a gift for little former me.IMG_9969

I used Butterick B4827 as my pattern base. I skipped the back eyelet lacing and used an invisible zipper instead. The tippets and belt were drafted by me.  My goal was to machine-sew as much as possible, so the hem, neckline, and cuffs were machine-stitched and then covered with jacquard trim.MJNT1739.JPG

The tippets are T-shaped pieces of fabric sewn together and then turned inside-out to hide the raw edges. The tops of the Ts are then overlapped to make the cuffs.

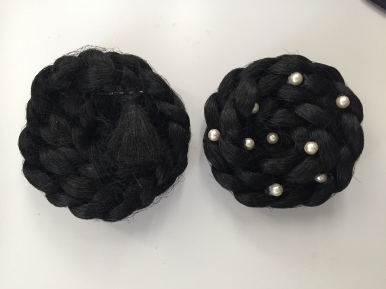
The hair consists of 2 fake braided buns on a headband:

  1. Cover a headband in fabric matching your hair; I used black velvet.
  2. Make a short braid and cover in a hair net to help control flyaways.
  3. Wire the braid to the headband using gold wire, and insert pearls as you go.
  4. Make 2 long braids and coil each one into a bun shape.
  5. Use bobby pins to secure the bun shape.
  6. Glue pearls to each bun.
  7. Cover each bun with a hair net to control flyaways.
  8. Glue the bun to each end of the headband.

Project materials:

  • 7 yards micro-velvet from Fabric Wholesale Direct: $62.93 (I had some leftover; if you are petite and cut carefully you might be able to get a dress out of 5-6 yards).
  • 1 yard gold jacquard damask 118″ wide from FWD: $10.99
  • 6 yards jacquard trim from eBay: $12.62 (including tax and shipping)
  • Thread, buttons, pearls, wire, etc. from stash: ~$5
  • 2-3 packages of fake braiding hair and headband from stash: ~$10

Total cost: All of the fabric was a gift from my friends at Fabric Wholesale Direct, so my out of pocket cost was about $27.62 (instead of ~$101.54 plus tax and shipping). Thanks FWD!

If you’d like to make a medieval dress of your own, check out this tutorial I made. Happy sewing!EJIY8518

Vintage-Inspired Star Wars First Order/General Hux Costume

Recently I went to a themed party wearing a General Hux First Order costume with vintage styling. I had a lot of fun putting together this outfit and pretending to be sinister. Want this look? I’ve got links to all the accessories and base dress in this post.YAFE4962

General Hux wears a tunic and greatcoat with First order emblems and armbands signifying his rank, as well as a funny little hat with a metal emblem.IMG_8926IMG_8927IMG_8928

I substituted a dress for his tunic and a cape for his greatcoat. My gloves are vintage kid leather with lots of little cut outs, and my shoes are the 1940s Nita ankle strap heels from Royal Vintage Shoes.IMG_9632

I didn’t have time to make it all from scratch (except the cape) so I purchased an “Audrey Hepburn” dress on Amazon (affiliate link). The dress has a keyhole neckline and some cute button details. It has some stretch, and I would definitely size down if you are between sizes. I had to exchange the first dress I bought for a smaller size. The sleeves were a little wide on me, but I have skinny arms, so you may not have to tailor them like I did.IMG_E8909

The dress comes with a matching fabric belt with a pleather backing. I flipped the belt around, cut off the buckle, and added this metal buckle blank (Amazon affiliate link) to make it look more like a leather First Order belt. You can also buy it at your local Tandy Leather store.
IMG_9489

I bought the medium sized (3″ wide) shoulder patch from Mirror Universe on Etsy.IMG_E8911

You can buy the arm bands online, but I made my own using white soutache trim (Amazon affiliate link). At first I tried to sew the soutache directly on the sleeve, but it was a little difficult getting everything to stay straight. In the end, I sewed the white soutache trim onto some matte black ribbon, put Misty Fuse on the back, and ironed the ribbon strips onto the sleeve. A few tips:

  • Misty Fuse is like Wonder Under or Stitch Witchery, except it’s black and very light. It doesn’t add bulk, and is dark so even if you mess up a little it won’t show up like white iron-on adhesive.
  • Use matte ribbon, not a shiny satin ribbon, to keep your ribbon backing from being too obvious.
  • Open up the sleeve seam so that you can tuck the raw ends of your ribbon and soutache inside before sewing it closed again for a clean finish.

IMG_9634

My “stewardess pillbox” hat was purchased from Amazon (affiliate link). I added some vintage veiling, and added a nice metal pin that I purchased from The Empires New Clothes on Etsy.

IMG_9487

IMG_E8914

Just for fun, I wore a “Thirst Order” pin from Dahlia Bunny on my dress.Screen Shot 2018-06-04 at 9.28.44 PM

The cape is self-drafted, but not difficult to make. I used a soft, low-pile velvet that I draped on my dress form. Originally, I made it floor length and super full so I started with 4 yards of fabric that became significantly less in the end. A last minute addition was a red lining to make my dress stand out, which meant more last minute shopping online with Prime to get this faux dupioni (Amazon affiliate link).IMG_9619

A trick for when you have an item that is two colors (or you’re just lazy) and you can’t topstitch without the wrong color thread showing on one of the sides: sew some Misty Fuse or Stitch Witchery onto the wrong side of the fabric. When you flip it over and iron the edges your cape and lining will fuse together.IMG_9527.JPG

Since it is somewhat off the shoulder I added snaps to the dress and cape to hold them together. This was done right before the party, so it’s not lined up perfectly. Next time I think I will add more snaps or hooks and bar so the collar will hug my neck better.

Final project cost tally:

  • Dress: $29.99 from Amazon
  • Hat: $13.99 from Amazon
  • Patch: $11.74 ($7.99 + $3.75 shipping) from Etsy
  • Hat pin: $13.45 ($9.95 + $3.50 shipping) from Etsy
  • Dress pin: $9 from Etsy
  • Cape fabric: $30 from Facebook
  • Cape lining: $8.72 from Amazon
  • Belt buckle: $4.17 from Amazon
  • Soutach: $4.99 from Amazon
  • Thread and misc from stash: ~$3

Total: $129.05

The shoes, gloves, and seamed stockings are part of my regular vintage wardrobe.

I had so much fun with this outfit! I am looking forward to wearing it again! (Sorry for the slightly blurry photos; the event had really dim lighting!)

IMG_9554

UPDATE: I later wore this costume to Costume College and got a wonderful photoshoot from Gloria of In the Long Run! 43952806792_d6dd4a1810_o

How to Make Your Own DIY Mermaid Tail Tutorial

Happy Mermay! I recently completed a shiny sequined mermaid tail, and decorated a shell bra bikini top to go with it. I am not sure yet where I will wear this, but it was fun being a mermaid for a little while!IMG_9098.JPG

The shell bra was purchased from Aliexpress, and then I added hot-fix rhinestones and sewed on faux pearls.pic13

I used the mermaid sequin scale fabric and power mesh lining from Fabric Wholesale Direct for the tail, which has a swim mono fin inside.pic12

This is actually a pretty easy project, and a simple pattern.pic2

The complete tutorial with a materials list and illustrated instructions can be found on the FWD website.  Thanks Fabric Wholesale Direct for the fabrics and the chance to play mermaid for a day!IMG_9048.JPG

(All the fabrics for this project were provided to me by FWD, but I was not paid for this post).