RSS Feed

Tag Archives: plaid

Plaid Galore (Using American Duchess Cape and Wearing History Blouse Patterns)

Earlier this year I made a mauve wool 1910s wrap cape using the free pattern from American Duchess.   I’m happy to see so many other people making it! The cape even has its own Instagram hashtag #ADcapecult. SXFB6622

I lined the cape with a blue and black plaid fabric I got from a friend but constructed my cape in a way to make it reversible. LEYY6663

The cape is inspired by an antique cream and black one.IMG_7297

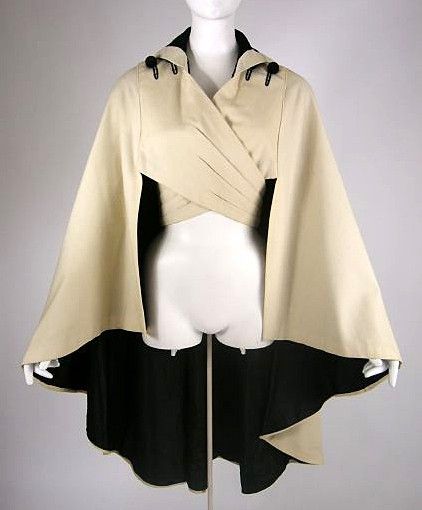
I made mine using a light-weight wool for spring/fall usage.IMG_7486

One of the cute details this cape has is the contrast on the collar, which I repeated on the lining to make it fully reversible. QLWZ6538

This cape pattern is available in PDF format but is a gridded pattern you have to scale up. To save time I just printed the pattern extra large and taped the pieces together. IMG_7402

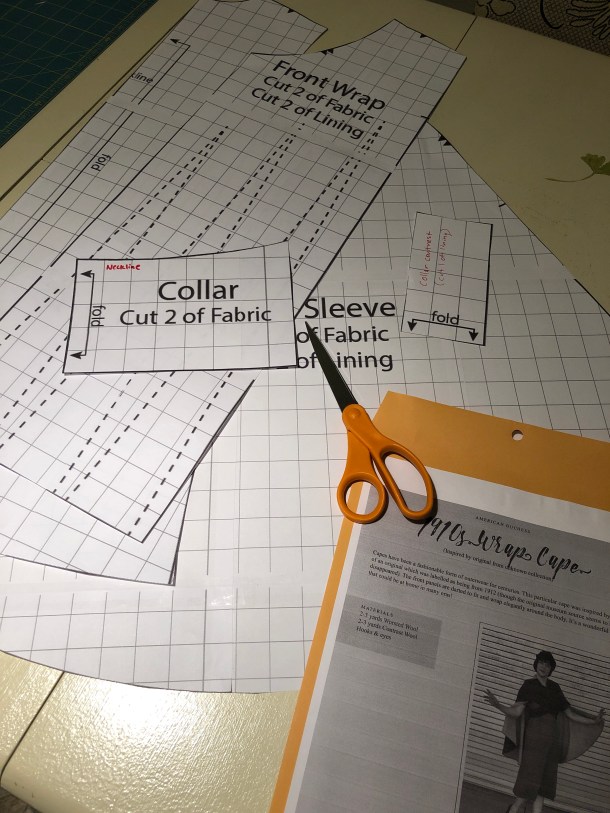
The closures are hidden under the back of the cape. The front pieces wrap around and you can finish them either by with hooks and bars or a ribbon bow. I had to trim a little bit off the ends because of my body shape. If you are large-busted you may need to change the size of the darts on the front wraps.

Overall, it’s an easy, good-looking cape and I plan to use this pattern again for a witchy wardrobe!IMG_0007

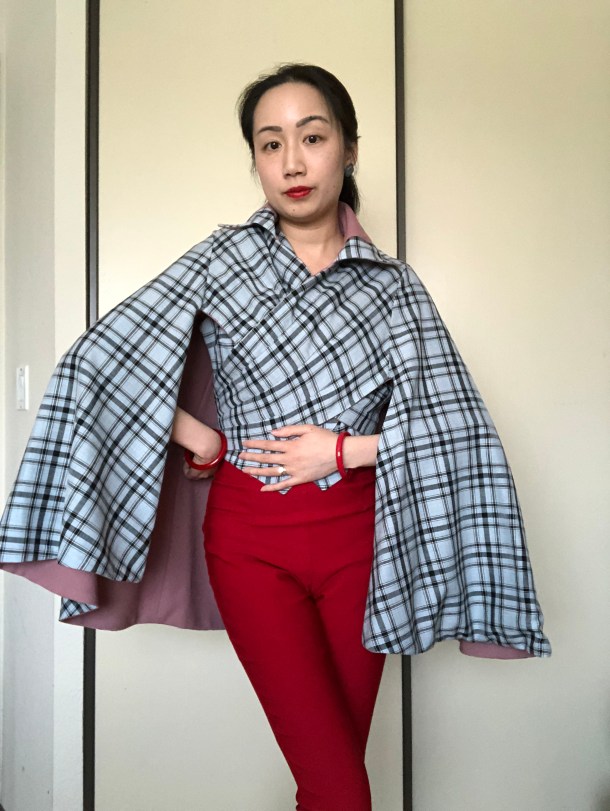
I had plenty of the plaid fabric left over and used it to make this cute 1930s double-breasted blouse pattern from Wearing History. IMG_6938JERR7630RRXR6541

I’ve coordinated the house in the outfit above with the Daphne retro wedge sandals from American Duchess.

Like all the other Wearing History blouse patterns I made, I am quite happy with how this turned out. It is not a complicated pattern because there are not many pieces. There’s some leeway to adjust the fit by moving the buttons and buttonholes a bit.IMG_6927

The shoulders have a split which make for a cute detail. Plus there’s a belt in the back with a buckle.SLWP7455

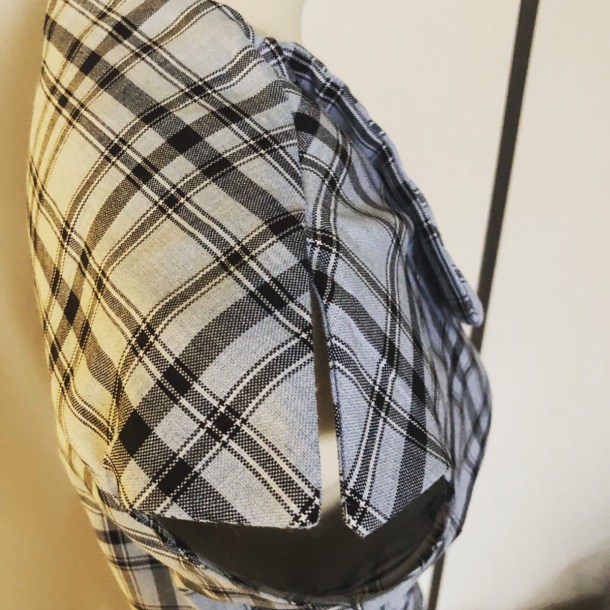
I loved the way this blouse looked with the red cigarette pants, but I had enough fabric left over I decided it would be also fun to make matching shorts. This way I would have the look of a romper but the convenience of a 2-piece outfit. IMG_0098

To make the shorts I hacked an existing pattern I already had: the Decades of Style 1930s Last Resort Beach PJs. I used the upper portion of the pants because I wanted the high-waisted look. You can see the beach PJs I made in an earlier post.

I had fun making my little mini capsule wardrobe!

FMDS8136

Advertisement

Outlander Dinner Party

Last night I went to a lovely Outlander-themed dinner party at the Sequoia Lodge in Oakland. The wooden building surrounded by trees definitely contributed to the mood!  We were greeted by a bagpiper as we entered. Later, as part of the dinner entertainment there were also musicians signing and playing instruments, and some dance demonstrations.

I wore a gown I made for the occasion out of cotton plaid. I am also wearing a wool petticoat, 2 under petticoats, a double-bum pad, a pair of stays, a chemise, a fichu, and a pair of beautiful black 18th century Dunmore shoes from American Duchess.IMG_2029

It was my first time using pins to close an outfit instead of hooks and eyes. I bought some reproduction 18th century gown pins from Larkin and Smith. (I am using a combination of the medium and fine pins). I am still figuring out how to do it without stabbing myself or putting weird wrinkles into my dress, but I am getting better! (Hint: the stays are for safety as much as they are for support). You can read about construction details in my previous post.IMG_2037

My hair is rather short at the moment (even too short to braid properly) so I put it into a tiny bun on the back of my head and covered it with a large fake braided bun.IMG_2034

My fichu is actually a small vintage cotton organza tablecloth. It has lovely floral whitework, scalloped edges, and best of all, zero effort on my part! (For those that are curious, it is about 35×35 inches wide. If you are tall or broad-shouldered I’d recommend a larger square).IMG_2006

As usual, I was too busy chatting and stuffing my face with the delicious meal (puff pastry wrapped asparagus with prosciutto, roasted fowl with buttered leeks, roasted blue and gold potatoes, haggis, and sweetmeat cake with marzipan) to take as many pictures as I should have, but here are a few more!

You’d never realize that Christina of The Laced Angel and Natalie both finished their jackets that afternoon. Christina started the same day! IMG_2024

The tables were set up in  large U in the lodge. This was the side I was sitting on.IMG_2050

There was a range of social classes and decades at the dinner.IMG_2060IMG_2064

I especially loved the variety in jackets! (You can catch a glimpse of the bagpiper to the right of the photo).IMG_2015

I had a delightful time, and I think everyone else did too. (There was even a couple celebrating their 25th wedding anniversary, and they were married 25 years ago in the same location!)IMG_2032.JPG

Outlander 18th Century Plaid Dress

In a few weeks I am going to an Outlander-themed dinner party hosted by my local costuming guild. I don’t subscribe to premium cable so I have never actually seen the show, just lots of pictures, but I am always a fan of dressing up and eating!

I’m aware that there are some fabulous silk dresses in the second season of the show, but I wanted something relatively quick and inexpensive, so I decided to go with a plaid 18th century dress using a pattern I’ve worked with before. (I used the Period Impressions 1770 Polonaise Pattern when I made my Ljusoga dress).

I found a decent plaid cotton from the “Wales plaid” Fabric.com collection. (I ended up purchasing it through Amazon due to a 20% off promotion and free shipping!) It was cheap enough I used the same fabric for lining the bodice and skirt. I dithered for a long time as to whether I should make the fabric out of the same fabric or make a fancy quilted one. In the end I could not find a suitable pre-quilted fabric or bedspread to repurpose, and some well-priced wool appeared on a destash group I am part of, so my decision was made.IMG_1861

In real life the bodice fit is rather different (and much better!) because I would be wearing stays to provide a smooth front. My mannequin is not wearing stays because it does not have a compressible torso and the boobs would be in the wrong place. Right now the front is pinned with regular straight pins while I await some proper 18th century reproduction pins in the mail. IMG_1866

See how the middle point of the back of the bodice rides up a little? I’ve got to adjust my underpinnings a bit to fix that, but what prevents it from flipping up all the way is a split bum pad.IMG_1864

My old half-moon bum pad was too small and not up to the task of the much larger faux butt I wanted for this outfit, so I made a new double bum pad. The split down the back  is what gives it this particular shape. I should have curved the top edges but this was a rather quick project. It is just twin trapezoid pillows bound with a single twill tape at the top.IMG_1740

The front comes forward enough to increase my hips too. The way I constructed these bum pads is not period correct, but works for my particular body shape.IMG_1739

See how gloriously wide it makes the petticoat compared to my real figure?IMG_1859

Final project costs:

  • 8 yards (45 inch wide) cotton plaid fabric: $45.31 from Amazon (affiliate link) including tax and discounts; I still have leftover fabric.
  • 2.5 yards (60 inch wide) brown wool fabric: $20 plus $6.50 shipping from Facebook; Normally I use 3 yards for a petticoat but this was wide enough to do piecing in the back.
  • Pattern: $0 (already used for another project)
  • Bum pad fabric, stuffing, and twill tape: $0 (left overs from other projects)

Total (without notions): $71.81 (Not bad! I was originally planning $50 just for the main dress and I can reuse the petticoat for other outfits).