RSS Feed

Tag Archives: vintage style

1950s Wearing History Leslie Skirt in Green Linen

A few months ago I used the Wearing History Leslie skirt pattern to make a cute high-waisted 1950s skirt that also has some Edwardian vibes if made up in a long length. I was drawn to the high waist with the sweetheart shape and the column of buttons down the front. I used a green linen and top-stitched it with decorative vines in a lighter green to give it a bit of an elven feel.

Keep in mind that the actual pattern (based on a vintage one) runs longer than the illustrations show. I made the shorter daytime length, and it still hits me mid-shin. The pattern is available as a printed and print at home version in 26-48″ waist sizes.

I enjoyed wearing it to the Filoli Gardens with a vintage hat and embroidered Hungarian blouse.

Due to the high waist, depending on the same of your body you may have to adjust how deep the curve is. There is also a little adjustment possible from how much overlap you make in the front, but you can shift too much without distorting the sweetheart shape.

I liked the gathered hip gores and thought they were flattering. I repeated the top-stitching there to emphasize the shape of the front panels.

I made self-covered buttons out of the same green linen.

Here’s a helpful hint: When cutting open your buttonholes you can put a pin there to stop your seam ripper from accidentally ripping too far.

I think this is a rather versatile skirt I can wear with vintage looks, cottage core style, and dress it up or down. I am considering making the floor-length evening version (without buttons) in a taffeta one day. Thanks for reading!

Advertisement

1930s Crane Coat Dress

My last project of 2019 was a 1930s coat dress using the Miss L’s Coat Dress pattern from Decades of Style.  My color scheme was inspired by Japanese cranes (featured in the embroidered appliqués on my coat).20200125-IMG_3624

(Thank you Lauren for taking all these pictures of me wearing it at the GBACG Open House!) The defining feature of this coat dress is the fabulous sleeves! All the curved black and white stripes you see are pieced together during construction; they are not appliqué. 20200125-IMG_3612

I made my coat out of a vintage twill fabric. The stripes are black cotton velvet and white canvas with a layer of sheer white organza on top. (I didn’t have any sateen in the sash and the plain canvas looked too flat next to the velvet so I added the organza to add some texture). The front of the coat features long darts, pointed lapels, a stand up collar, and big cloth-covered buttons.20200125-IMG_3621

The black and white stripes meet at the underside of the sleeve. (Not perfect but close enough for me!)IMG_4934

The back of the coat has double princess seams that are top-stitched. My collar is red rayon challis with a canvas interlining. 20200125-IMG_3617IMG_4920

All the accent materials (the velvet, canvas, organza, and rayon) are scrap pieces from past projects of mine. The buttons were purchased at a rummage sale for $2 for a large bag and I still have some left over! The main coat fabric was purchased on eBay as part of a larger lot for a bargain price. The lining was $1/yard clearance fabric. My “splurge” were the embroidered crane appliqués from Aliexpress and they still cost me less than $10, so overall I spent probably $30 on supplies to make this coat because I’m good at hoarding useful materials. =)20200125-IMG_3620

Some notes if you plan to make your own coat:

  • This is not a beginner pattern. I would not say it’s unduly difficult and the instructions are very good, but this should not be your first project!
  • You should be comfortable with fish eye darts, top-stitching, interlining, grading curves, and setting a sleeve.
  • There are a lot of pieces and a lot of steps, so make sure you have a way of labeling all the bits as you go.
  • The lining must be attached by hand so be comfortable with some hand-sewing.
  • The pattern is true to size; follow the size chart.
  • Use a mid-weight fabric. I made mine out of twill but I’ve also seen some really lovely wool and velvet versions of this coat on Instagram. You want enough structure but not something so thick that sewing the curves on the sleeves makes bulky seams.
  • This pattern takes some time but I feel like it’s quite worth it in the end! I got a lot of nice comments when I wore it and people asking if it was a real vintage coat, so Decades did a great job on the pattern.

I enjoyed making and wearing this coat. Thank you Decades of Style for the pattern! 20200125-IMG_3623

(My shoes are from American Duchess. My hat is vintage with faux pearls).

Edwardian Dress at the Monet Exhibit at the de Young Museum (Plus Butterick B6229 Pattern Hack)

Last weekend my local costume guild organized an outing to see an exhibit of Monet paintings at the de Young Museum in San Francisco and I wore a dress made of blue cotton sateen and antique lace.IMG_7850

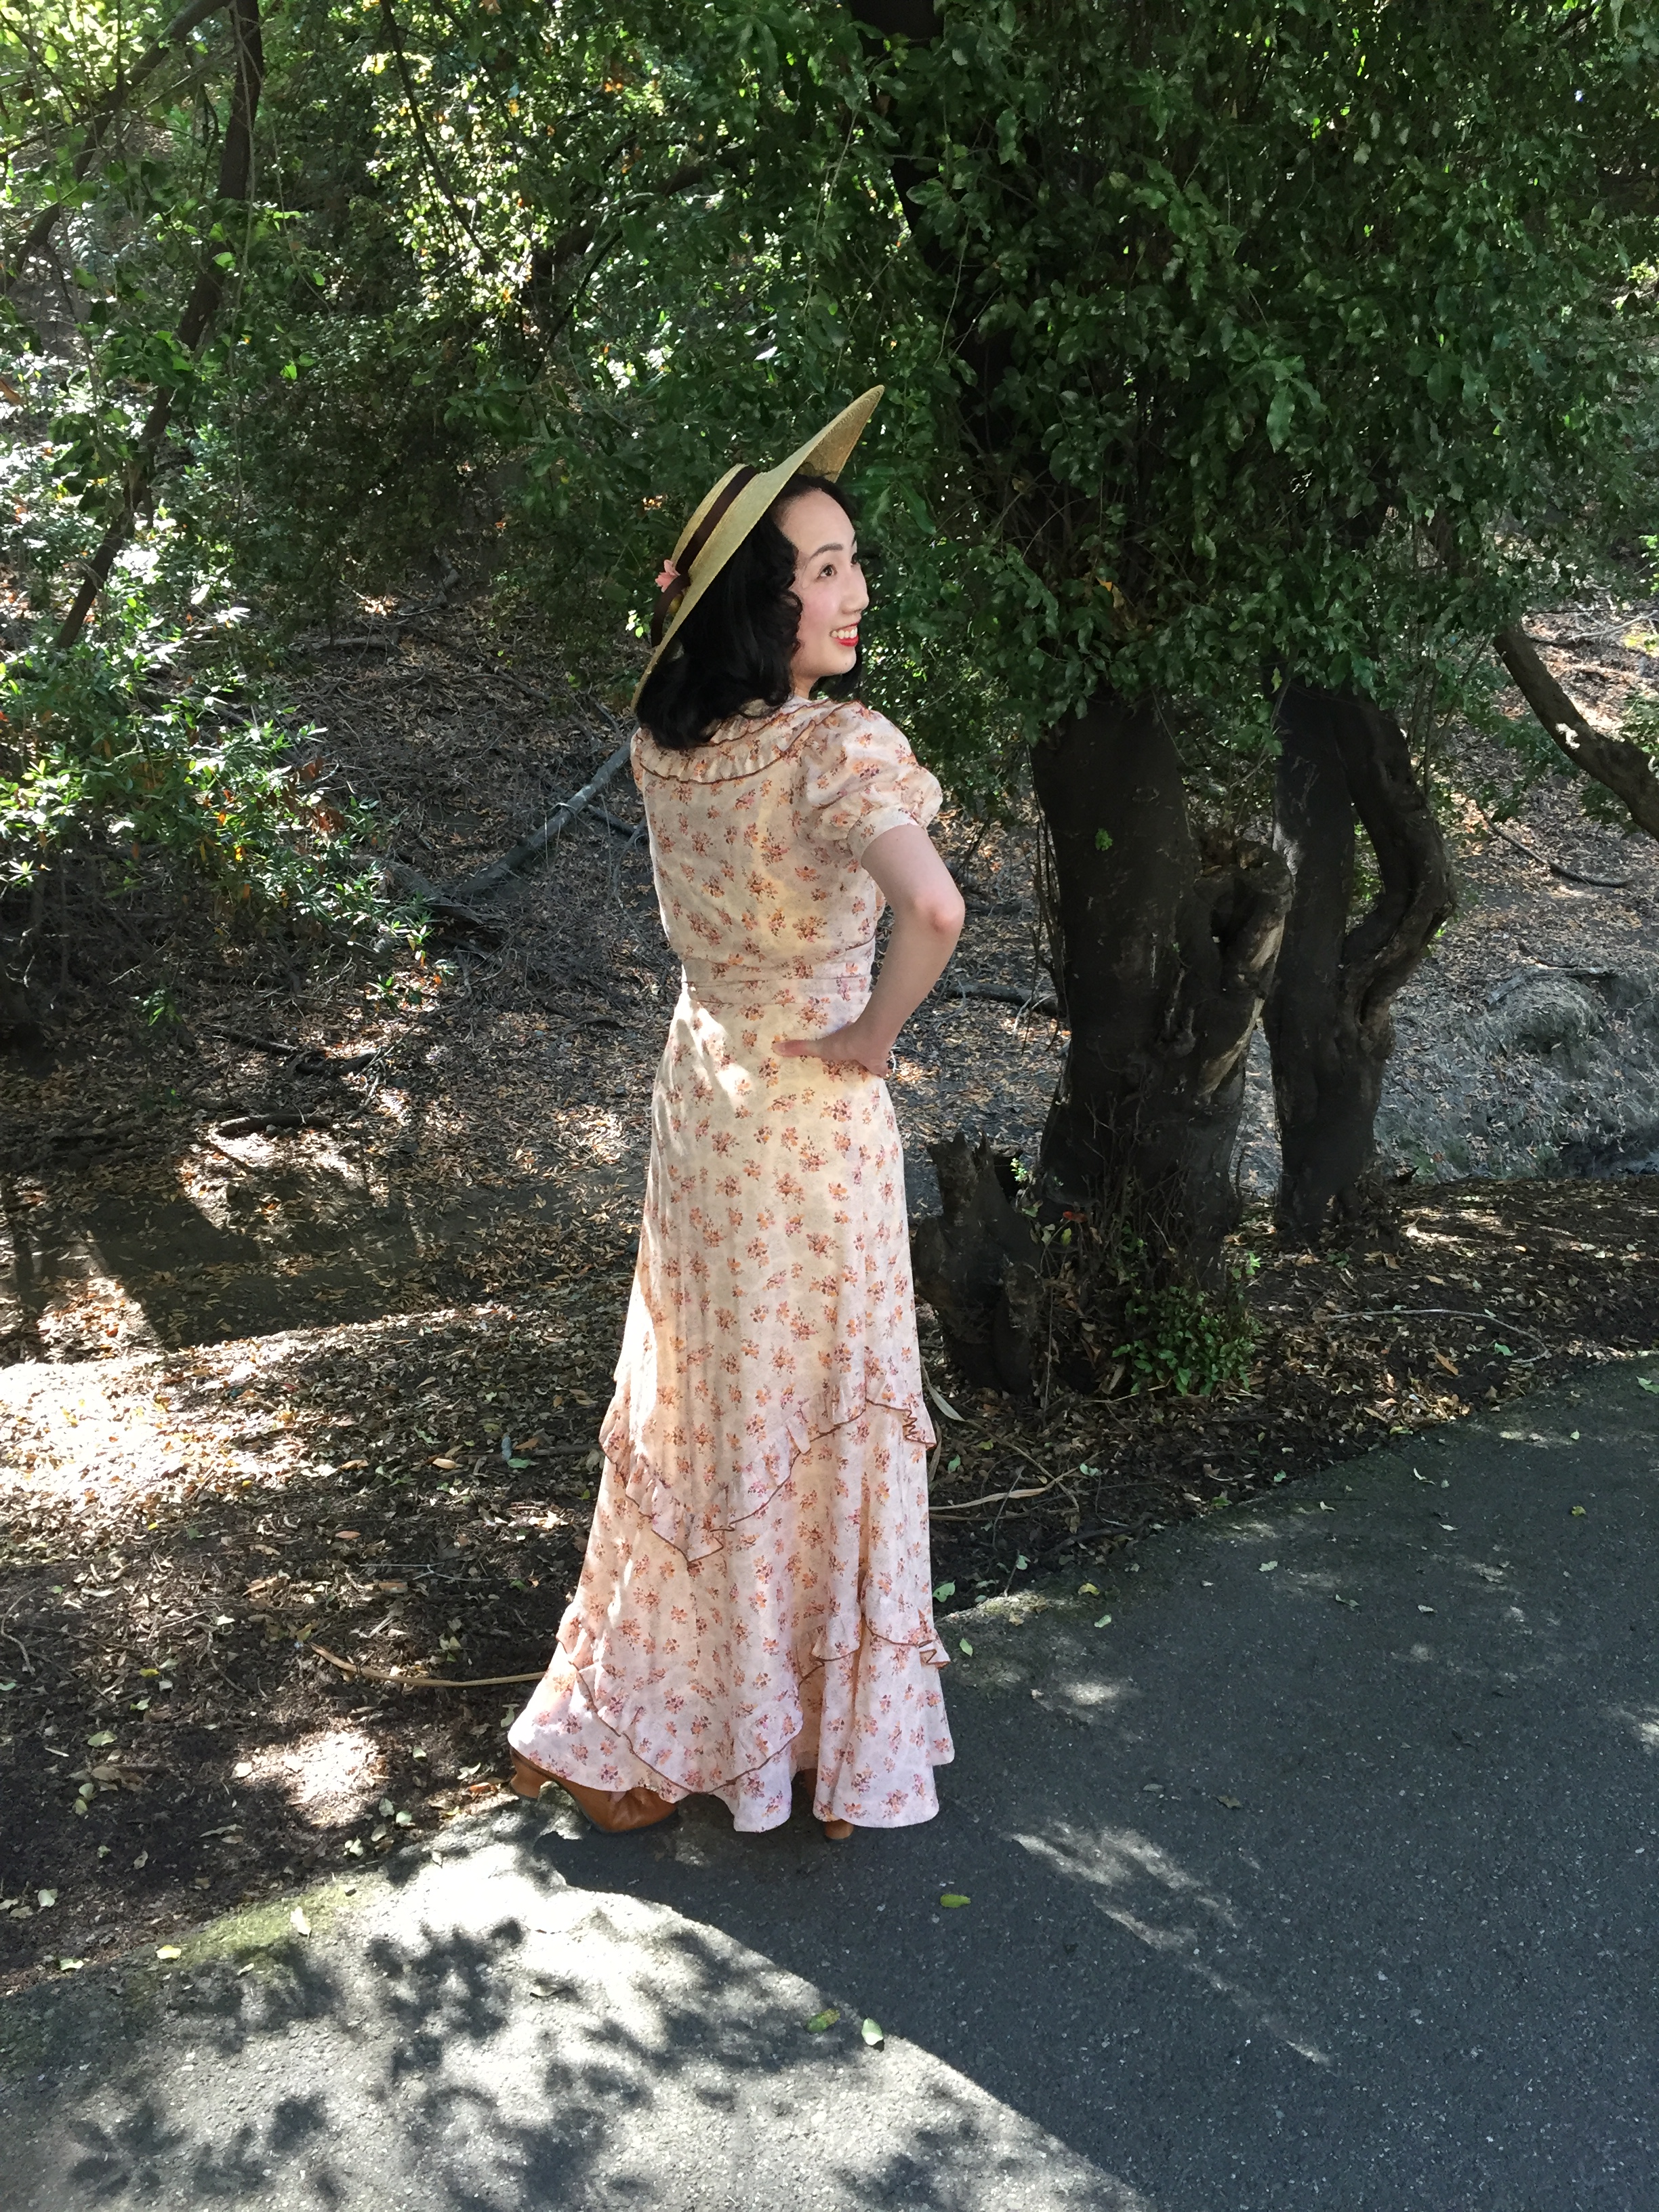
I had to take photos looking upwards because my broad-brimmed hat created shadows on my face, and I was also trying to hide a splint on my hand, so sorry about the weird poses! It was a bit cold that morning so I wore an antique Edwardian blouse underneath my dress as a guimpe.IMG_7818

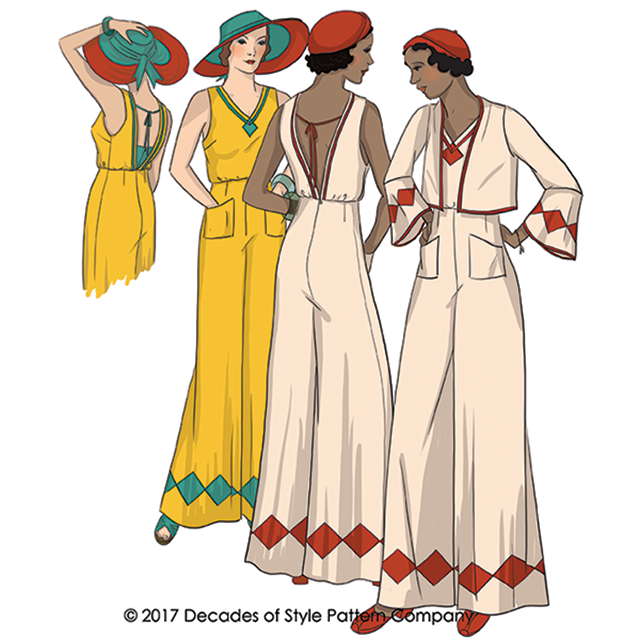
I needed a quick and simple dress so I used Butterick B6229, with modifications. I picked that pattern because I was already familiar with it after using it for my Downton Abbey maid costume, and knew it fit.IMG_8004

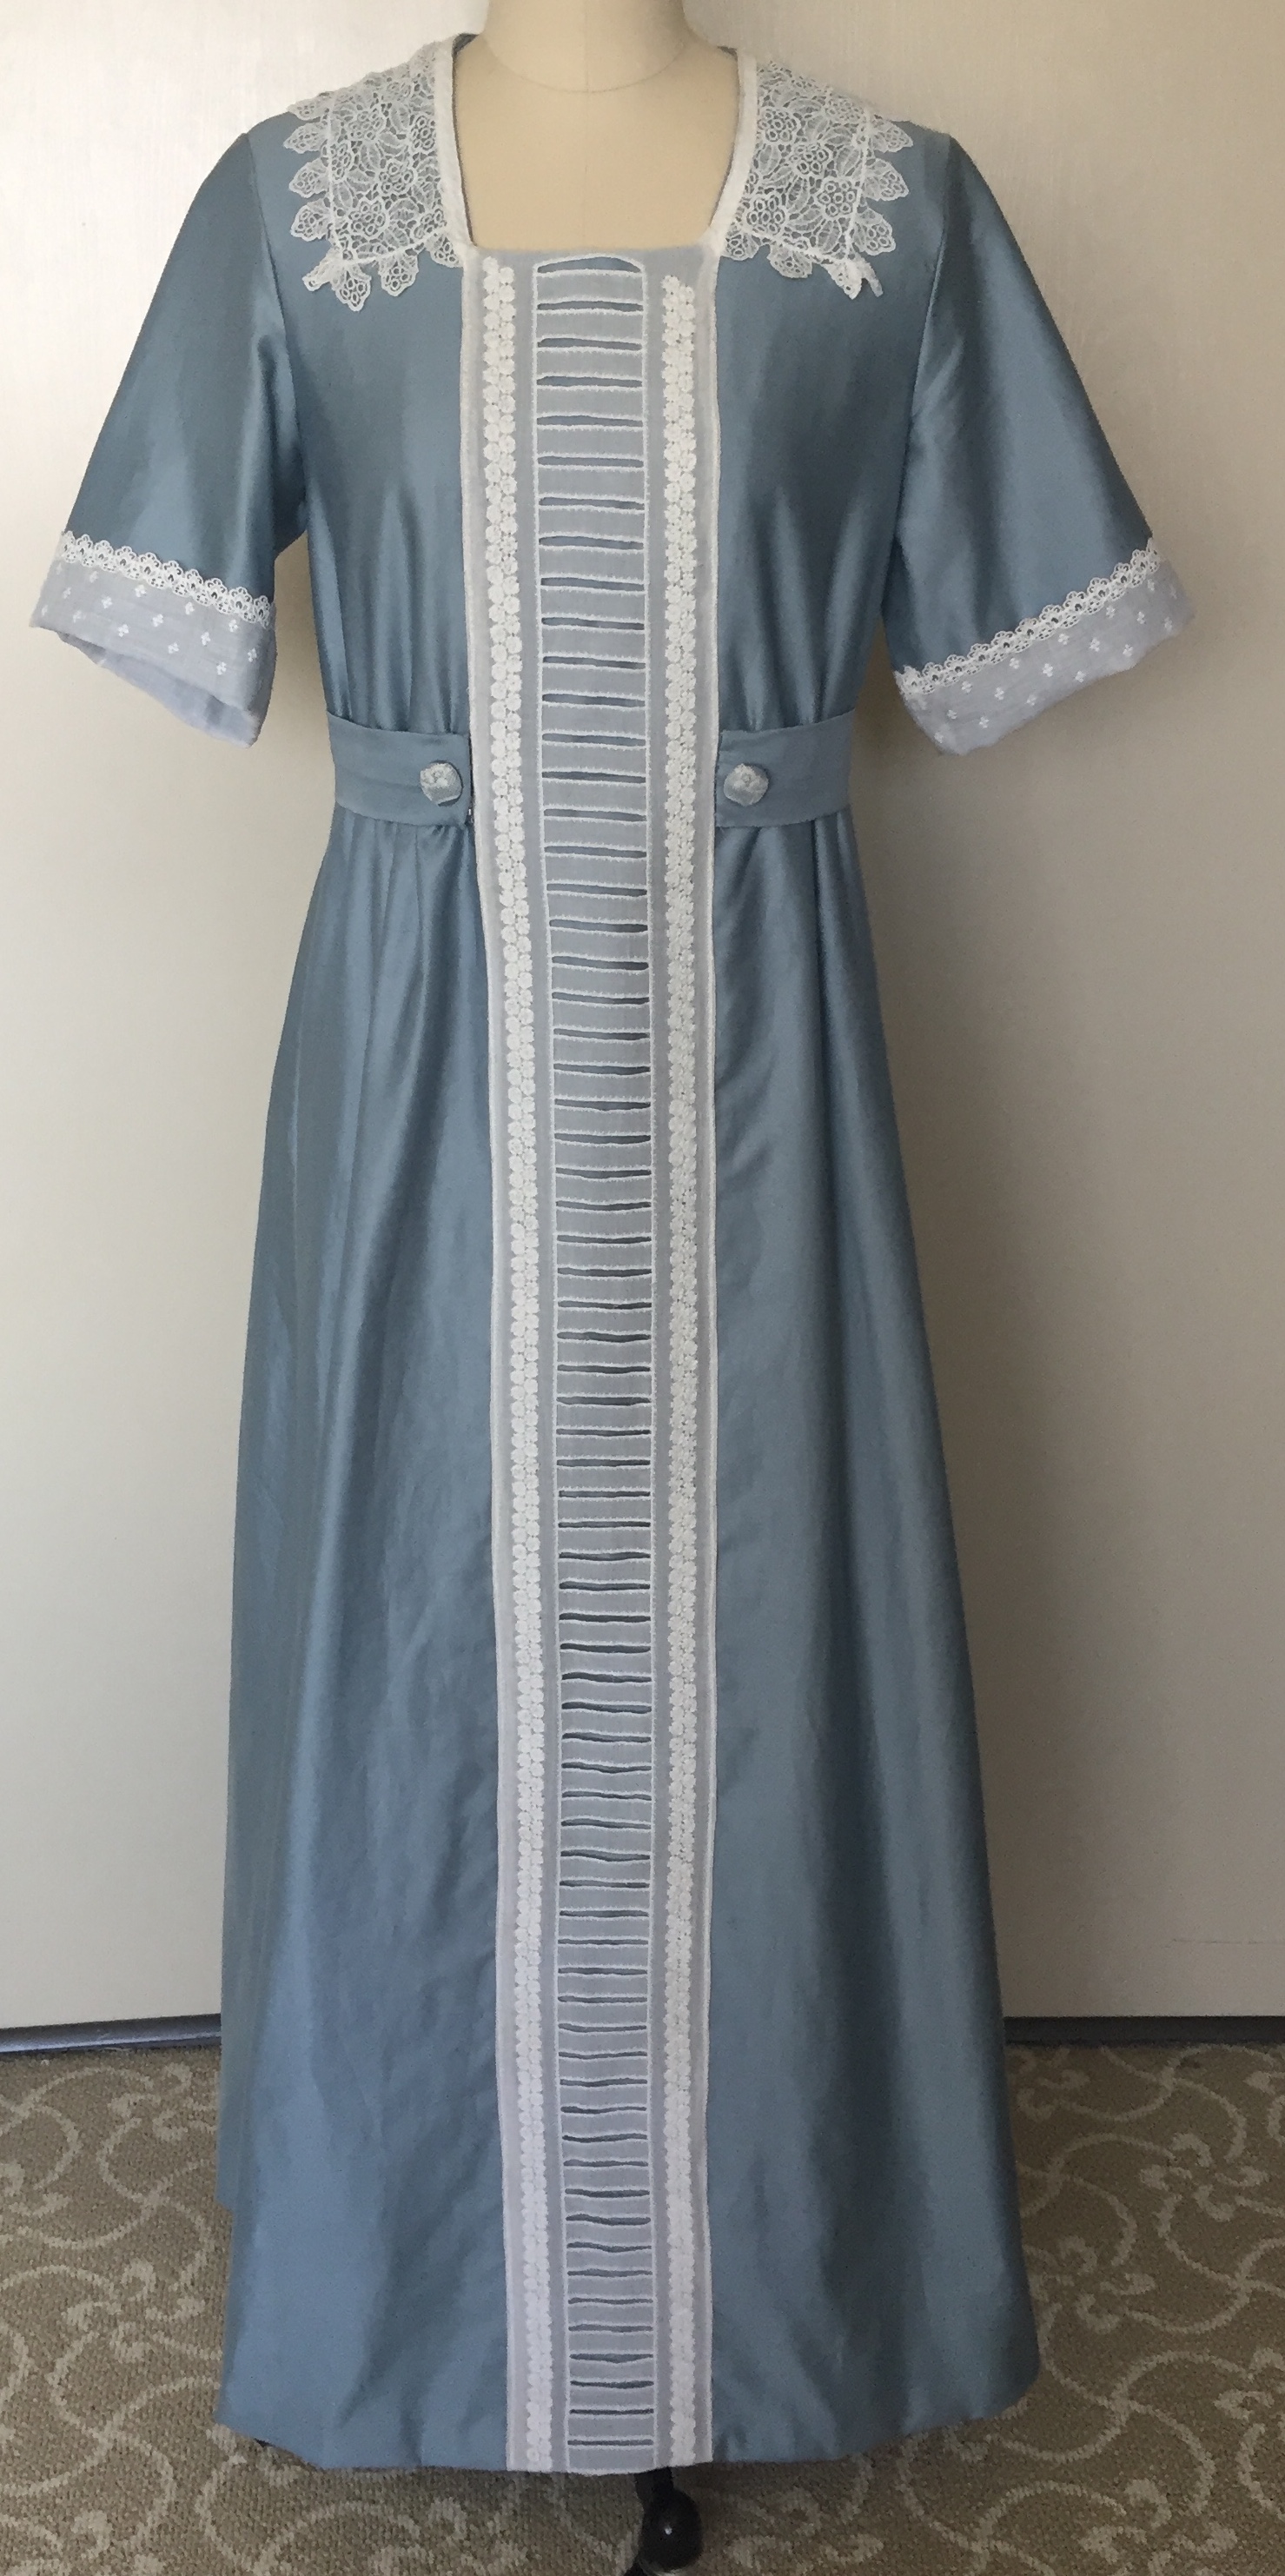
This is what the pattern looks like before I hacked it.IMG_7539

The 4 main changes I made to the pattern for this dress:

  • I changed the dress from front-opening to back-opening. The front button closures were turned into back hook/bar closures. (Cut the front bodice piece as one piece instead of two, and cut the back bodice piece as two instead of one. Do the same for the skirt panels).
  • The sleeves were shortened. (I cut them off a little below the elbow and turned the edges inside the sleeve. You don’t need to cut the cuff pattern pieces).
  • I cut a square neckline and omitted the standing collar. (I pinned the lace collar and strudel panel on the unfinished dress while it was on a dress form and marked where to cut the neckline).
  • Instead of having the belt go completely around my waist it does not cover the center lace panel. (I shortened the belt and based on my waist measurement minus the lace panel plus seam allowance).

IMG_8013

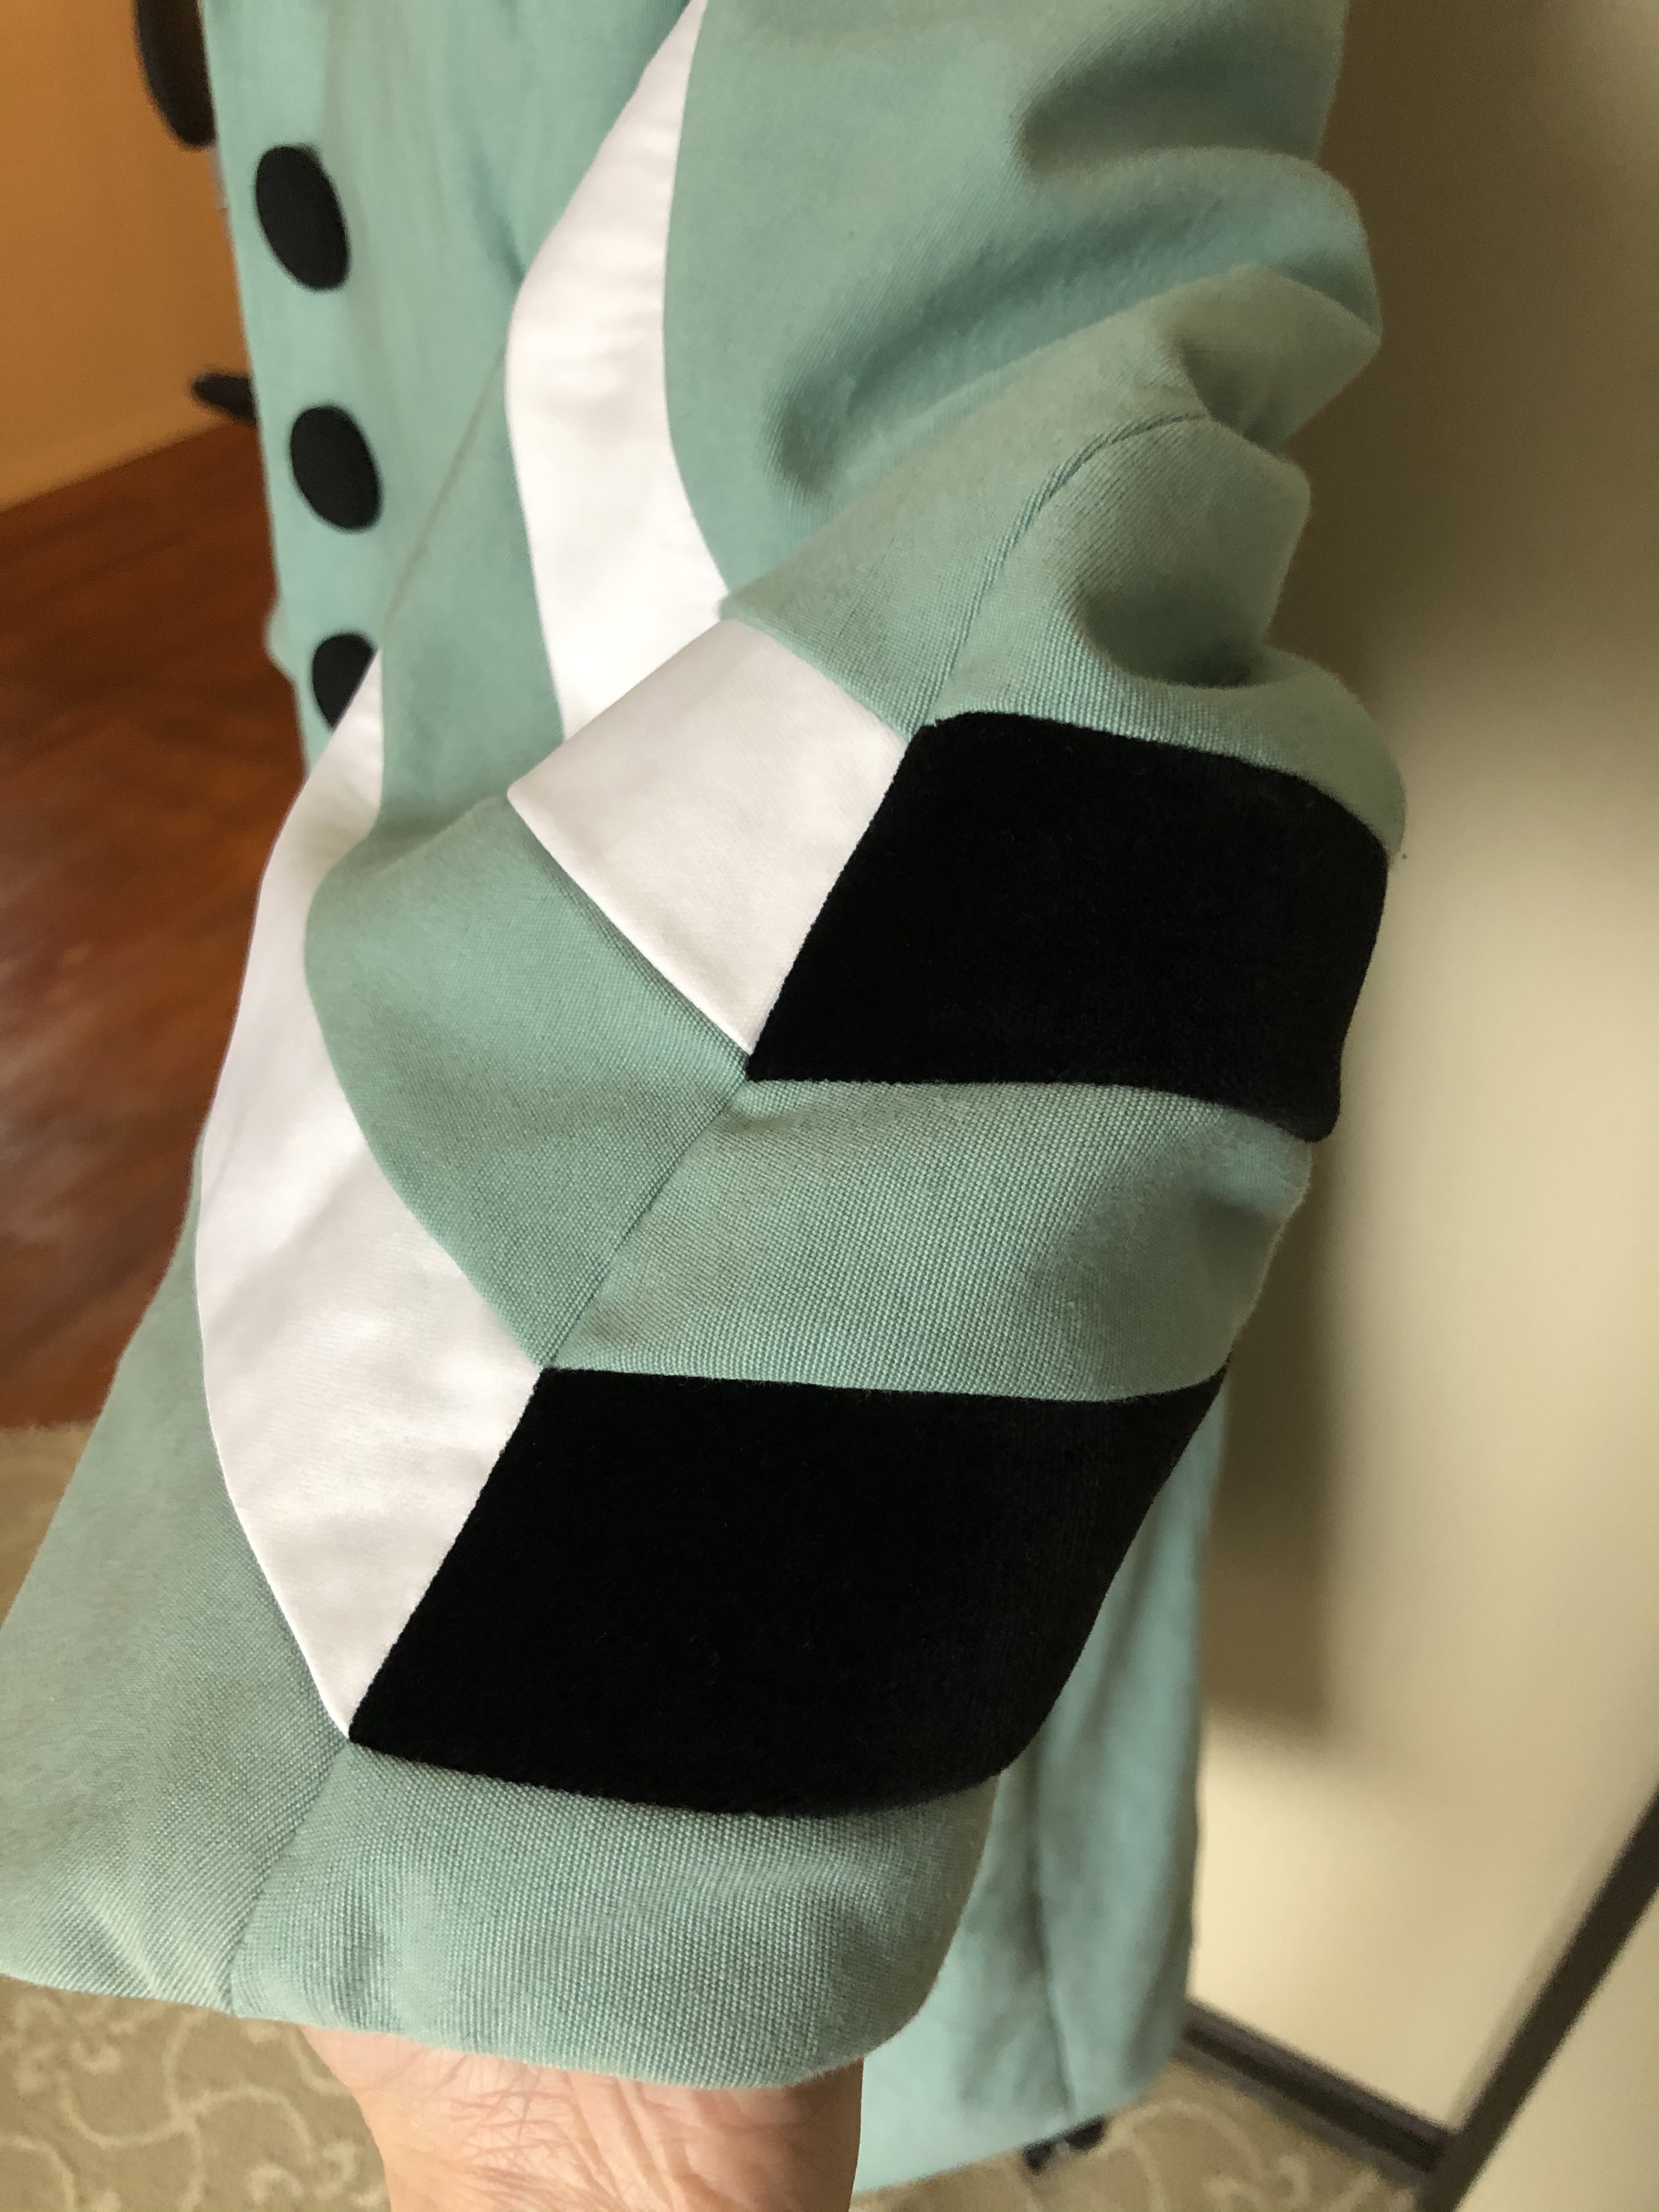
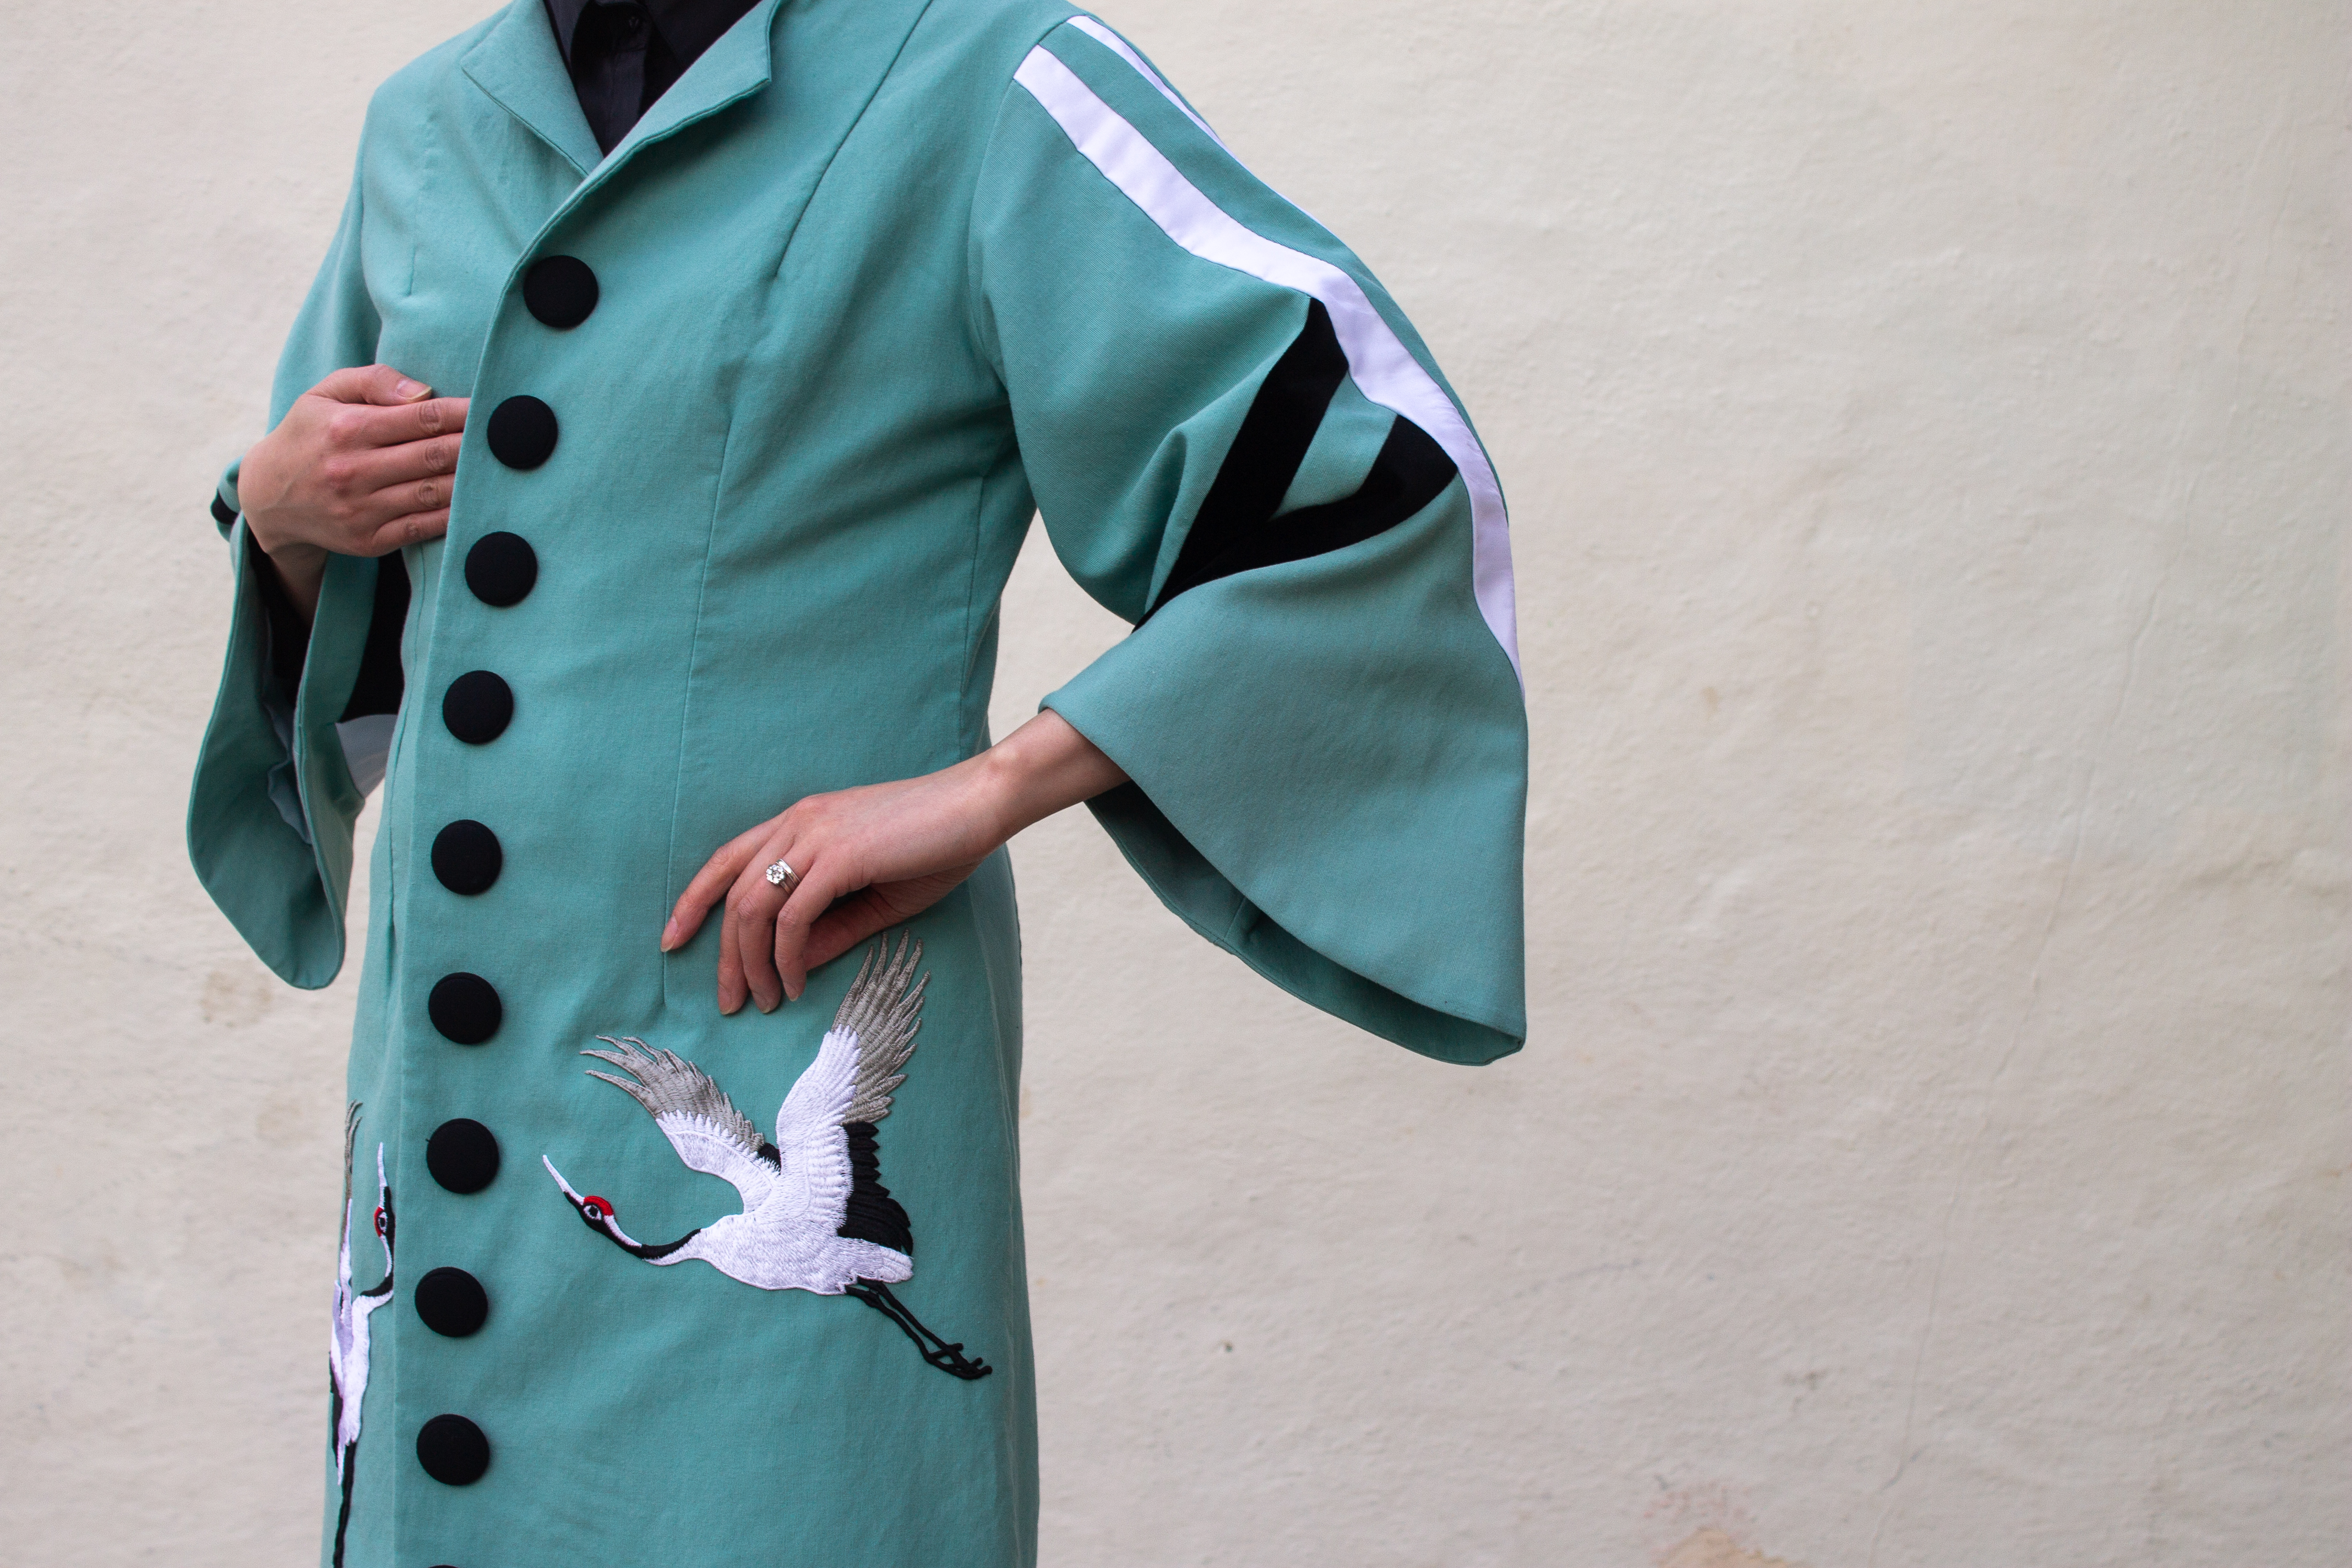
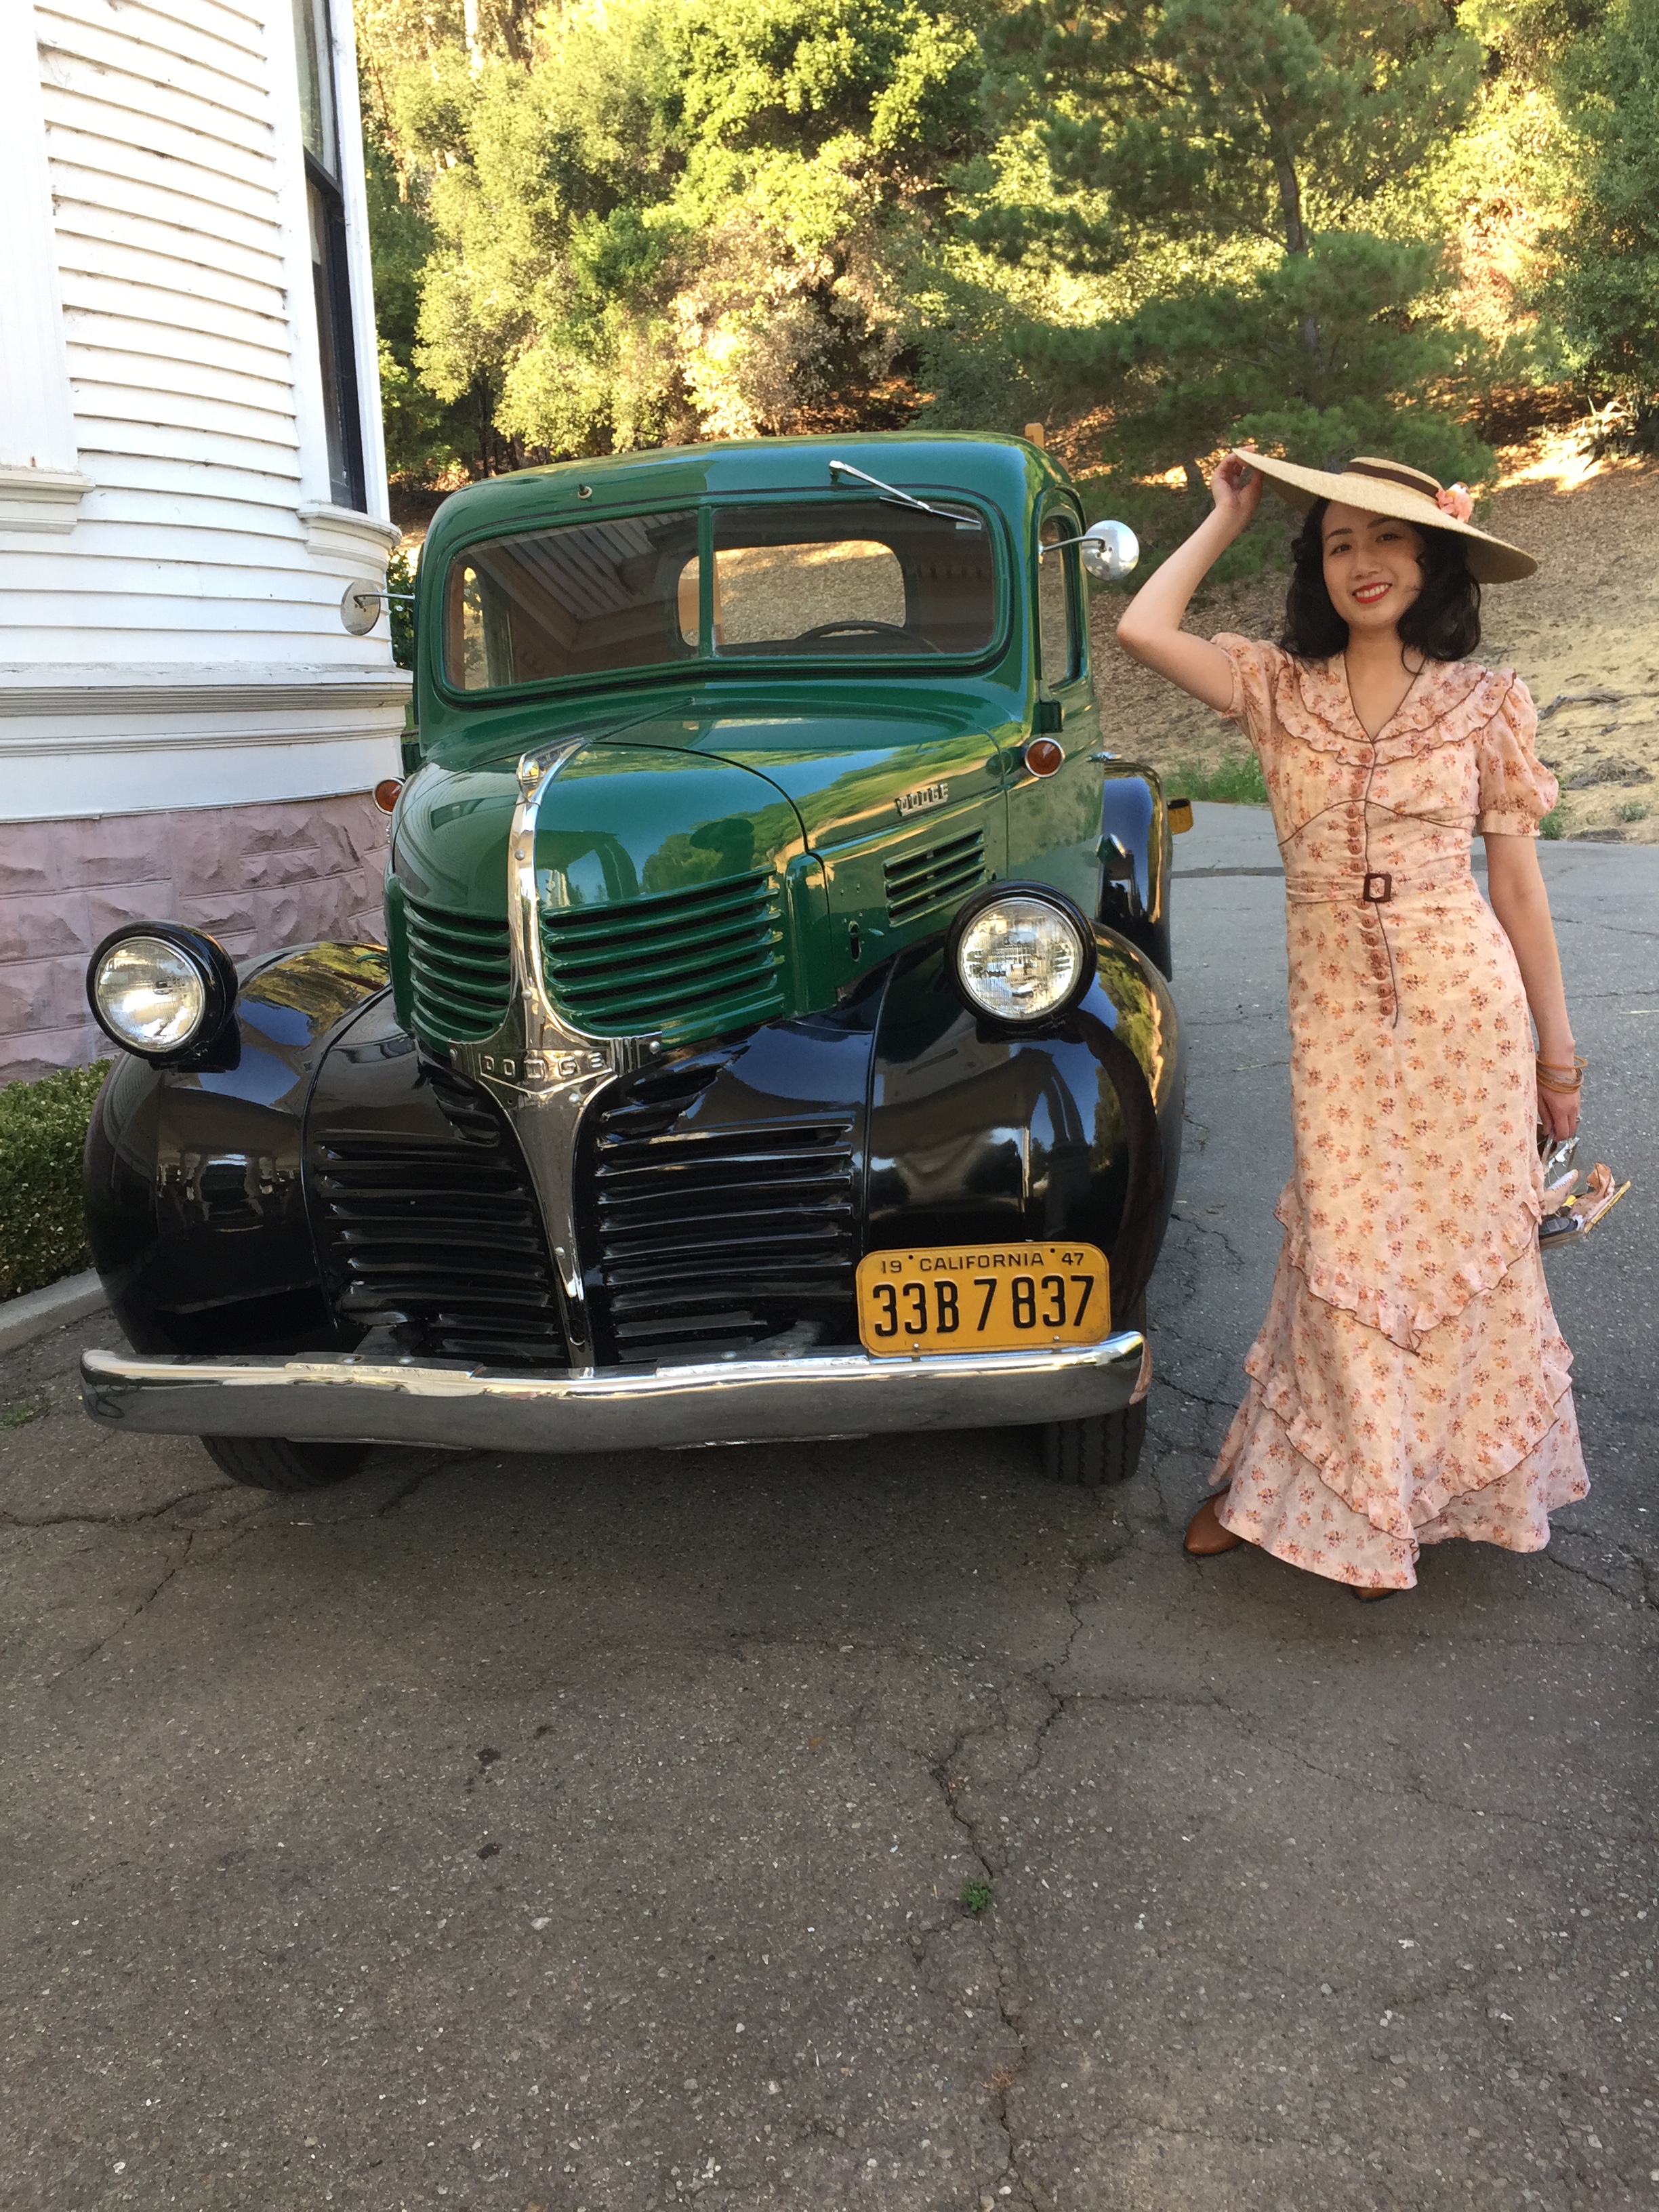
I am calling this my Strudel Dress because of the slits in the lace panel down the front. I bought the panel a while back and wasn’t sure what to do with it until I realized it was perfect for this dress. I had just barely enough; I literally had 1 inch of lace left over. My shoes are American Duchess Theda Edwardian shoes, aka “Skeletor,” which also have a bit of a strudel-y look to them.IMG_7560.JPG

The Supima cotton sateen I used has a lovely sheen to it, but is a bit thin and prone to wrinkling so I flat-lined all the pieces with cotton broadcloth. In retrospect I should have skipped the flat-lining for a more flowy Edwardian look, but perhaps having no flat-lining would have made the dress wrinkle even more when I sat down.IMG_8006

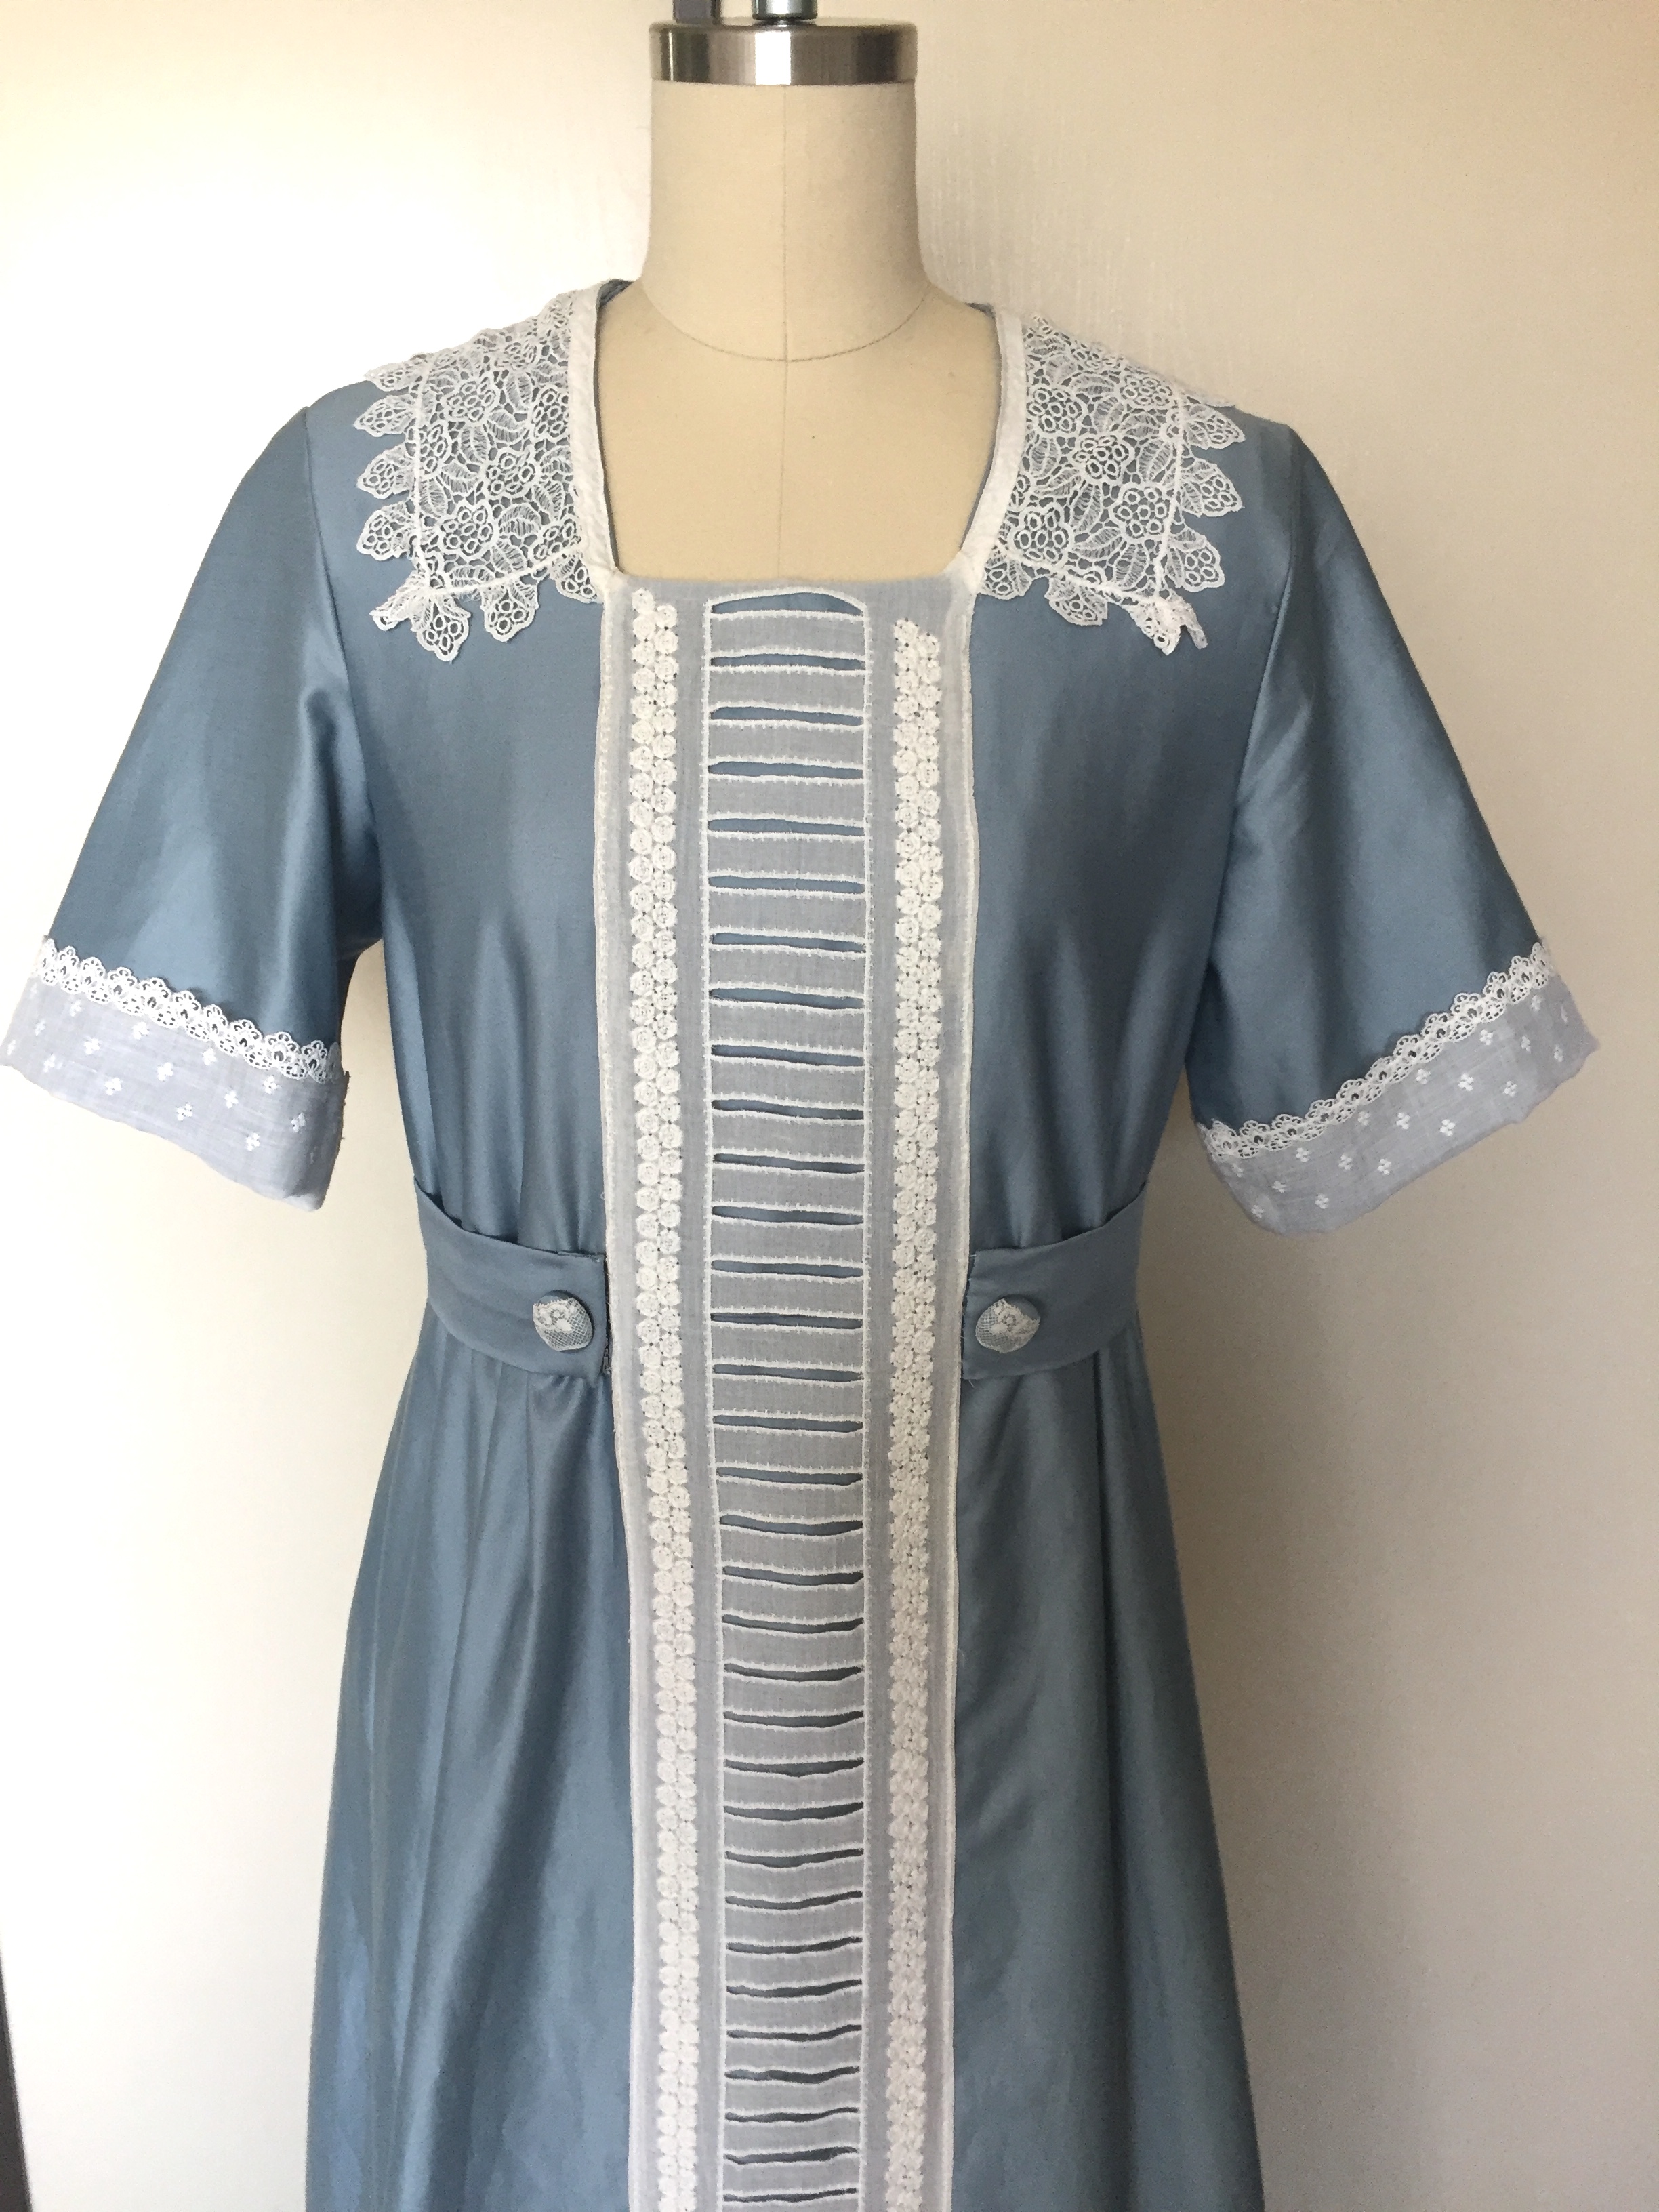
The dress closes in the back with hooks and bars, and the belt is sewn down on one side and attaches on the other with hooks and bars. The buttons are decorative only. (They were made with a covered button kit).IMG_8018

The collar is antique lace, picked up at the Costume College Bargain Basement.IMG_8007

The “strudel” lace is from a Costume College marketplace vendor.IMG_8008

The antique lace cuffs were a scrap piece left over from my Downton Abbey maid project, and I had just enough!IMG_8015

Dress Cost:

  • 3 yards blue Supima cotton sateen: $13.20 including tax with stacked coupons at Joann’s
  • 3 yards white cotton lining: $12 including shipping from eBay
  • Pattern: $0, already previously used
  • Lace panel: $5.50 from Costume College vendor
  • Lace collar: $1 from Costume College bargain basement
  • Lace cuffs: $0, leftover from other project
  • Lace for buttons: $0, gifted
  • Buttons, thread, hooks and bars: ~$3 from stash, bought in bulk

Total cost: ~$34.20

Woohoo, less than $35 for a dress!

My hat was made from a straw beach hat I already had and I don’t recall how much I spent on it, but they are easy to find. I hot-glued a lot of fake flowers from my stash onto the hat and filled in a few spots with assorted feathers. (Tip: buying a floral garland from the craft store is cheaper than buying individual stems).IMG_7915

Oops, I just noticed that stray thread. I admit this dress was a bit of a rush job. Aside from the closures and hemming, I made the bulk of it in a weekend using a machine and forgot to iron flat all the seams like I usually do.

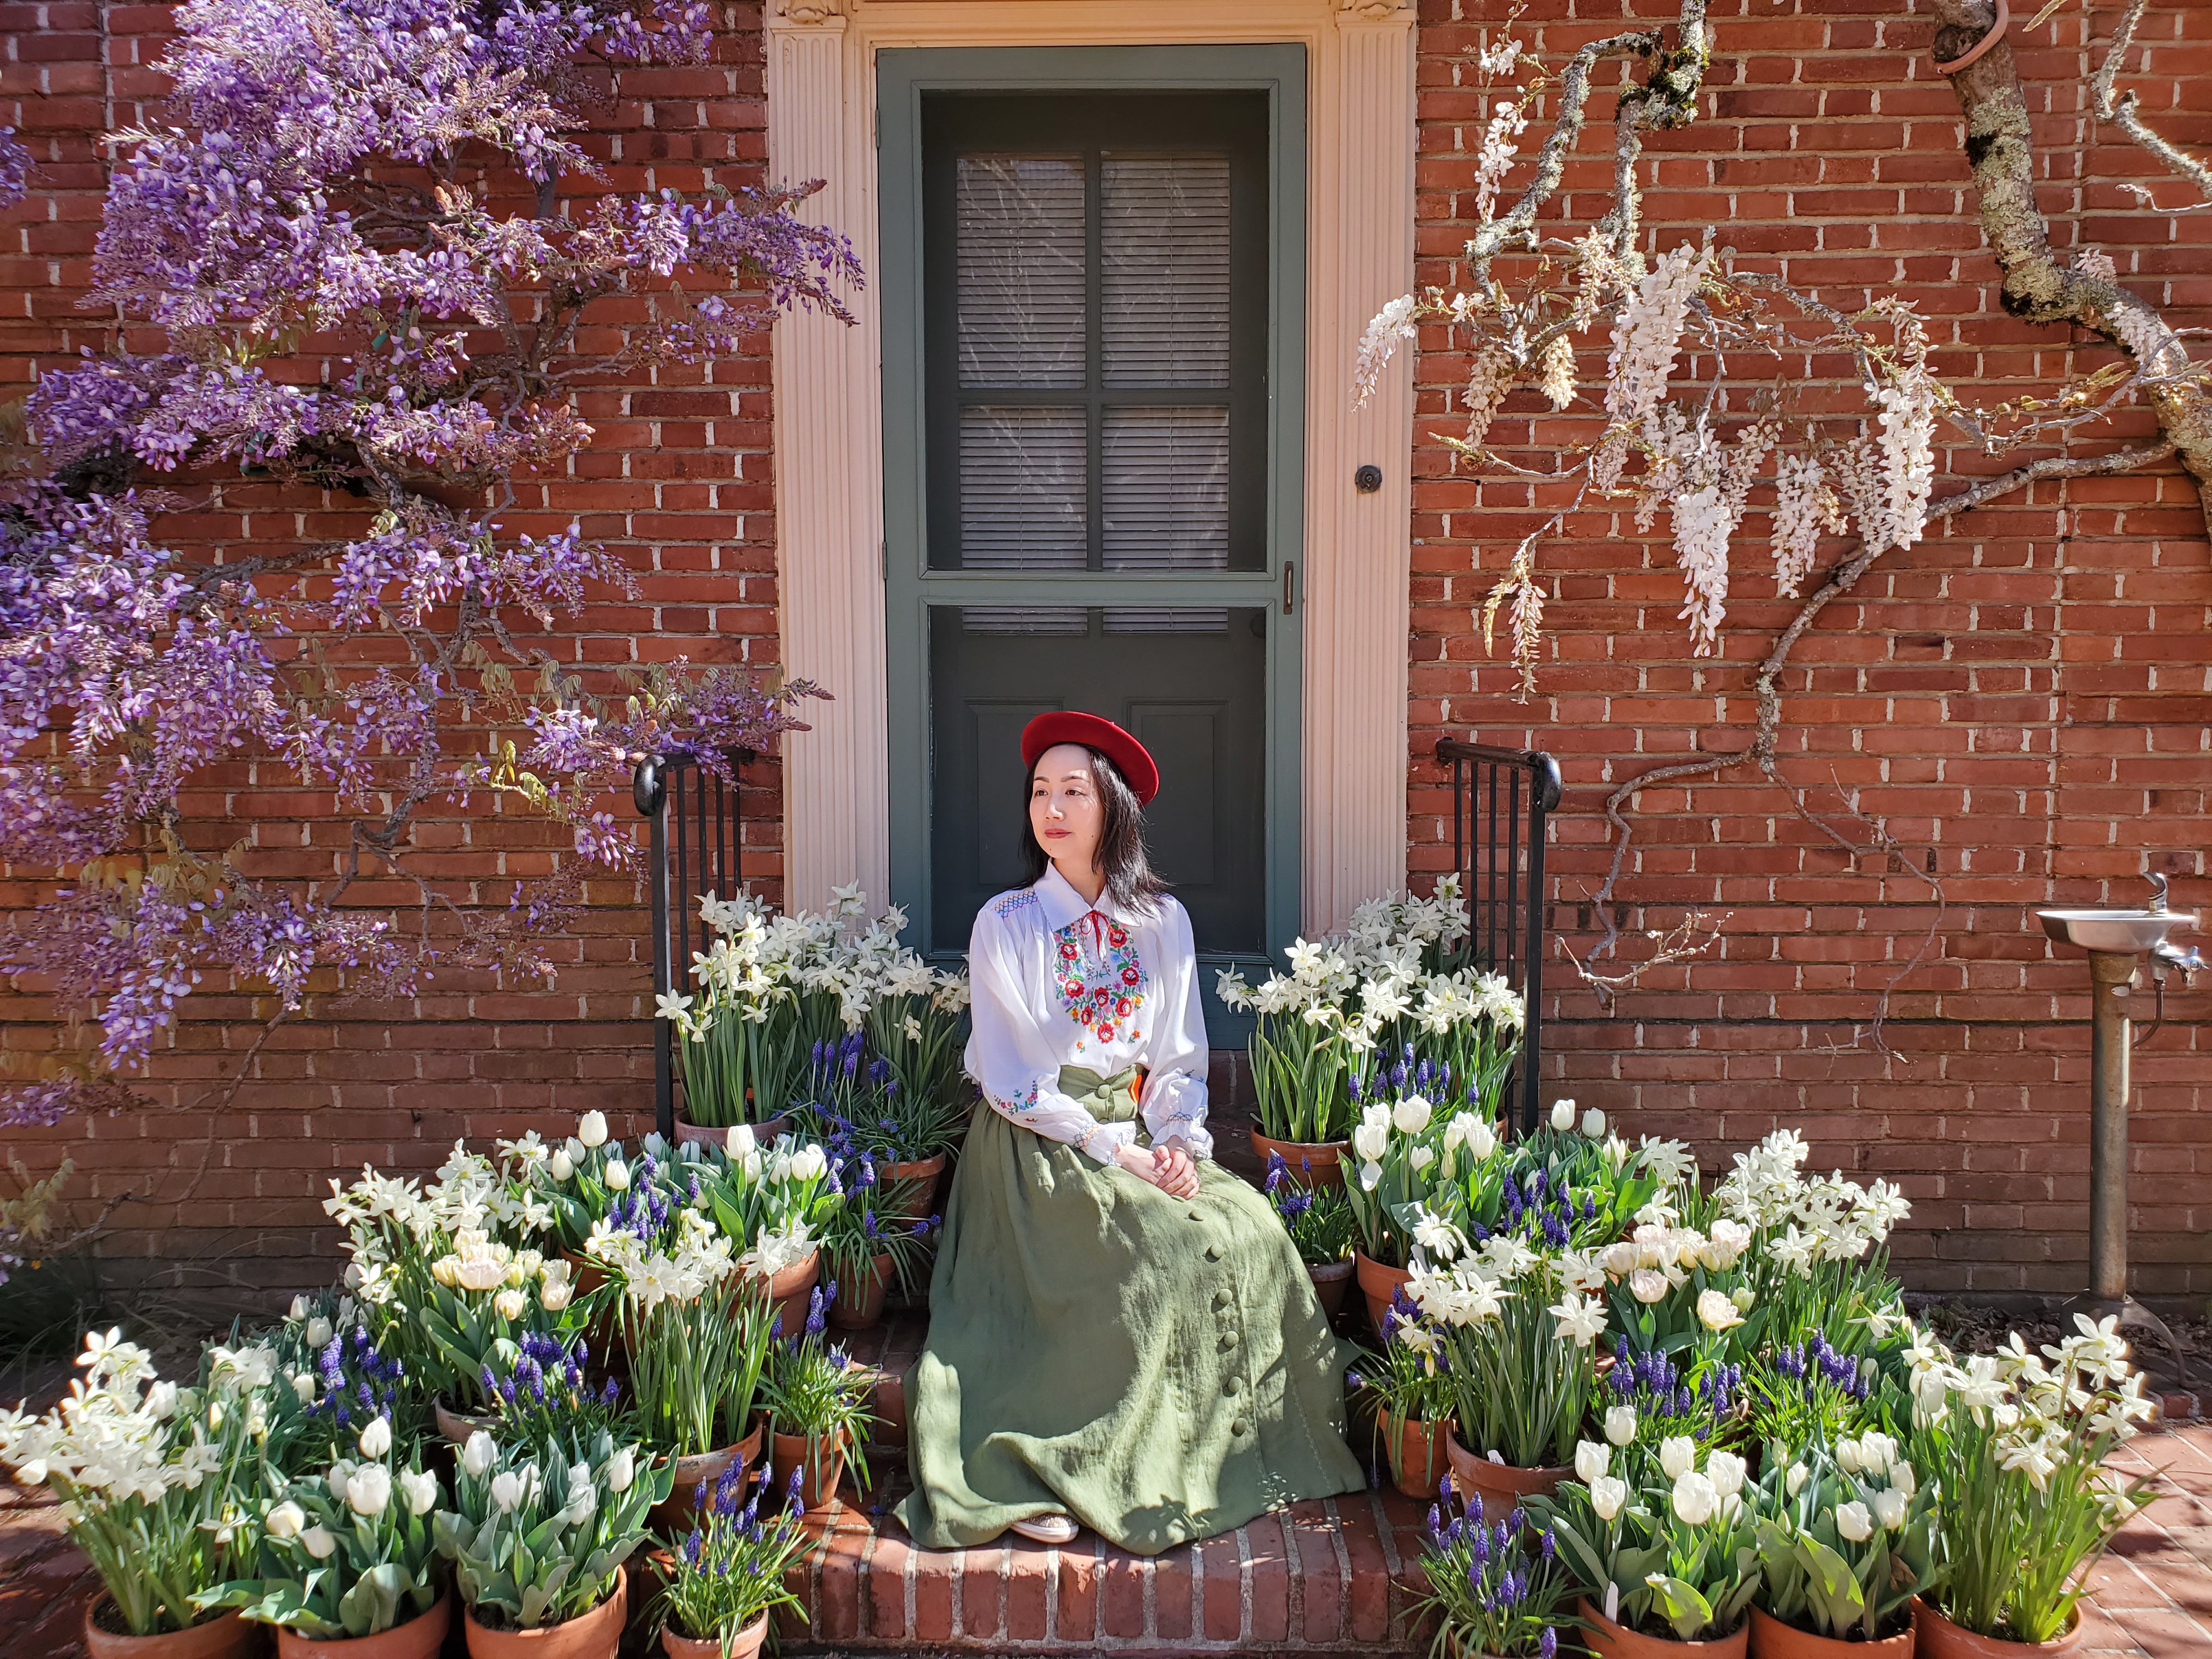
There was a neat doorway in the garden where I posed for some photos.IMG_7952 copy

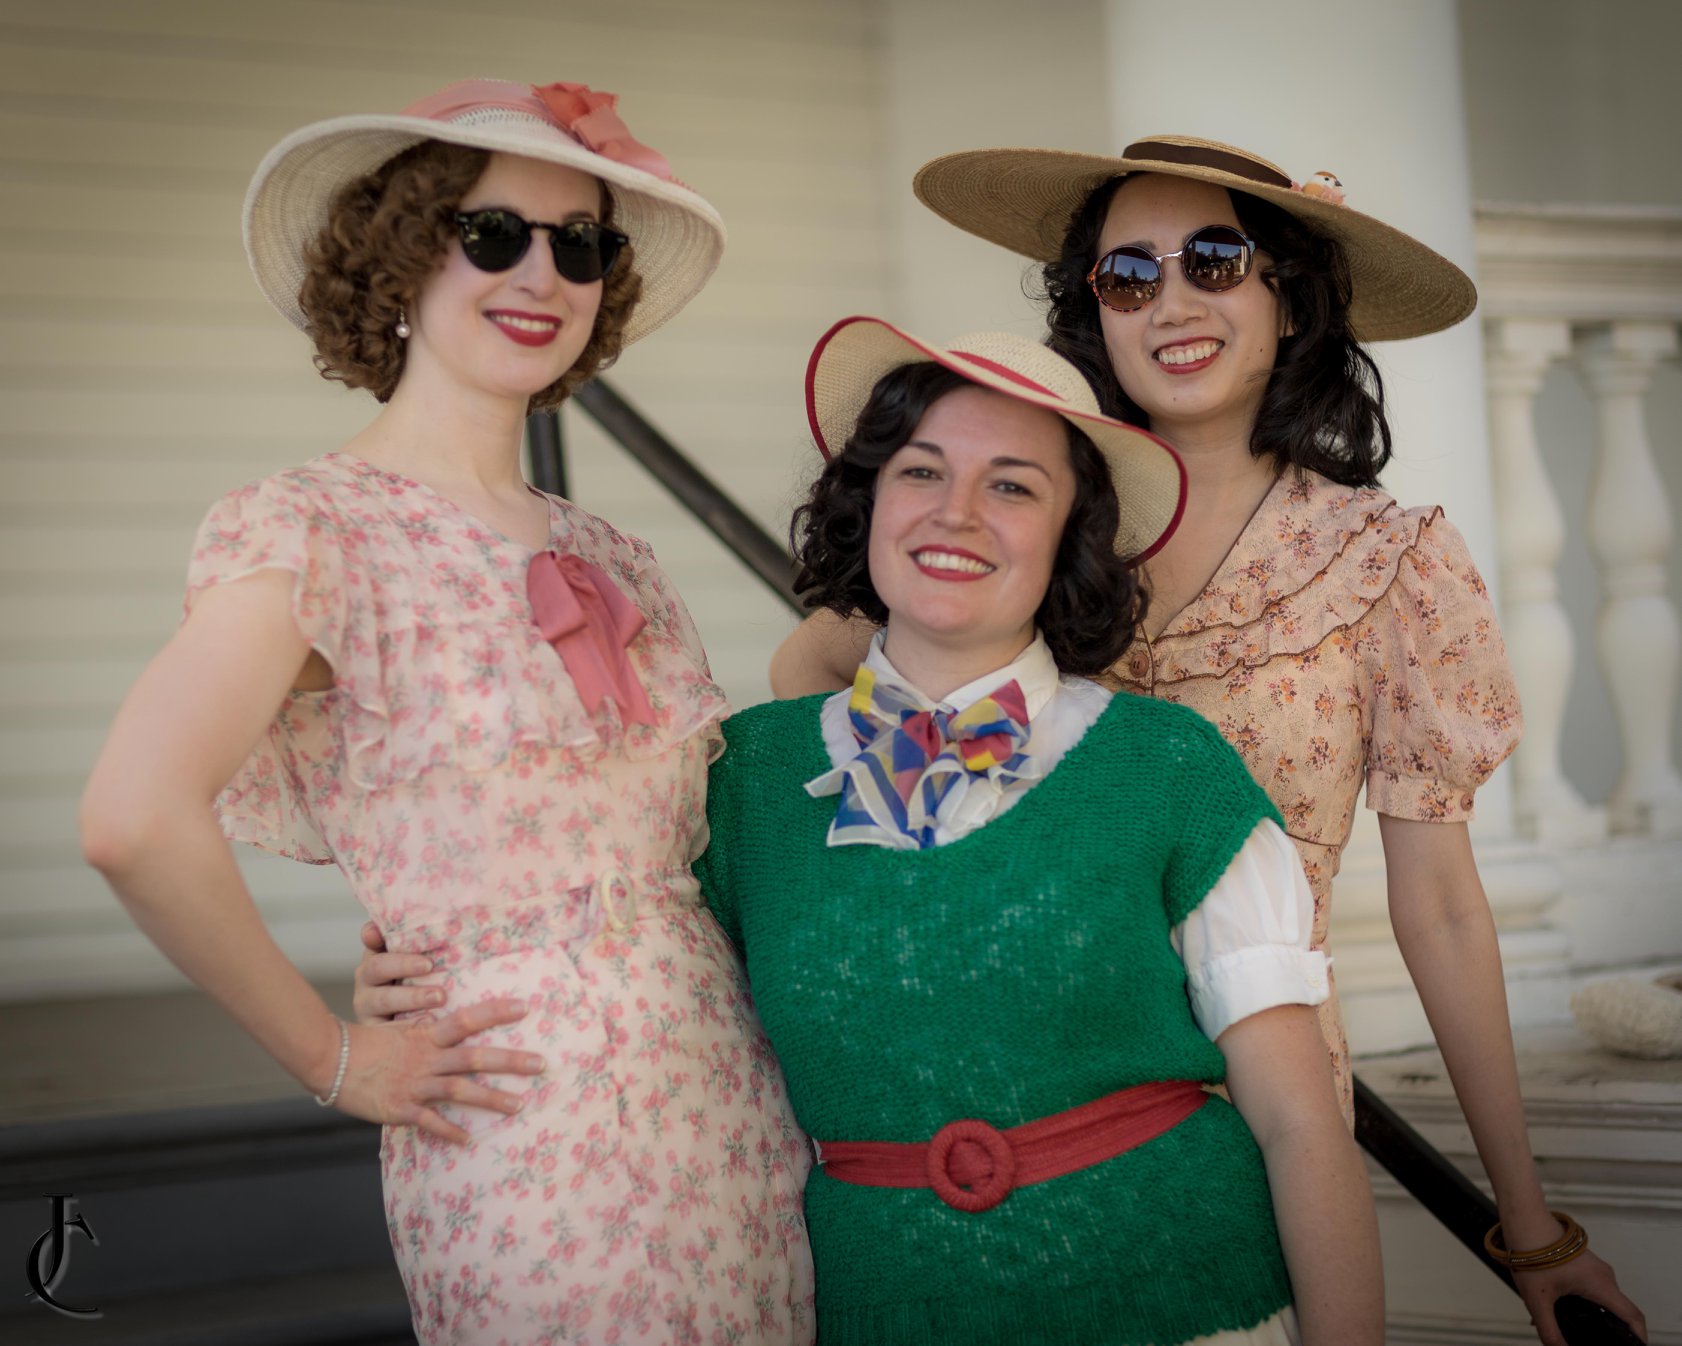
And here are some of the other lovely ladies that were there that day. There were many more that I forgot to capture.IMG_7855

Overall it was a lovely day!
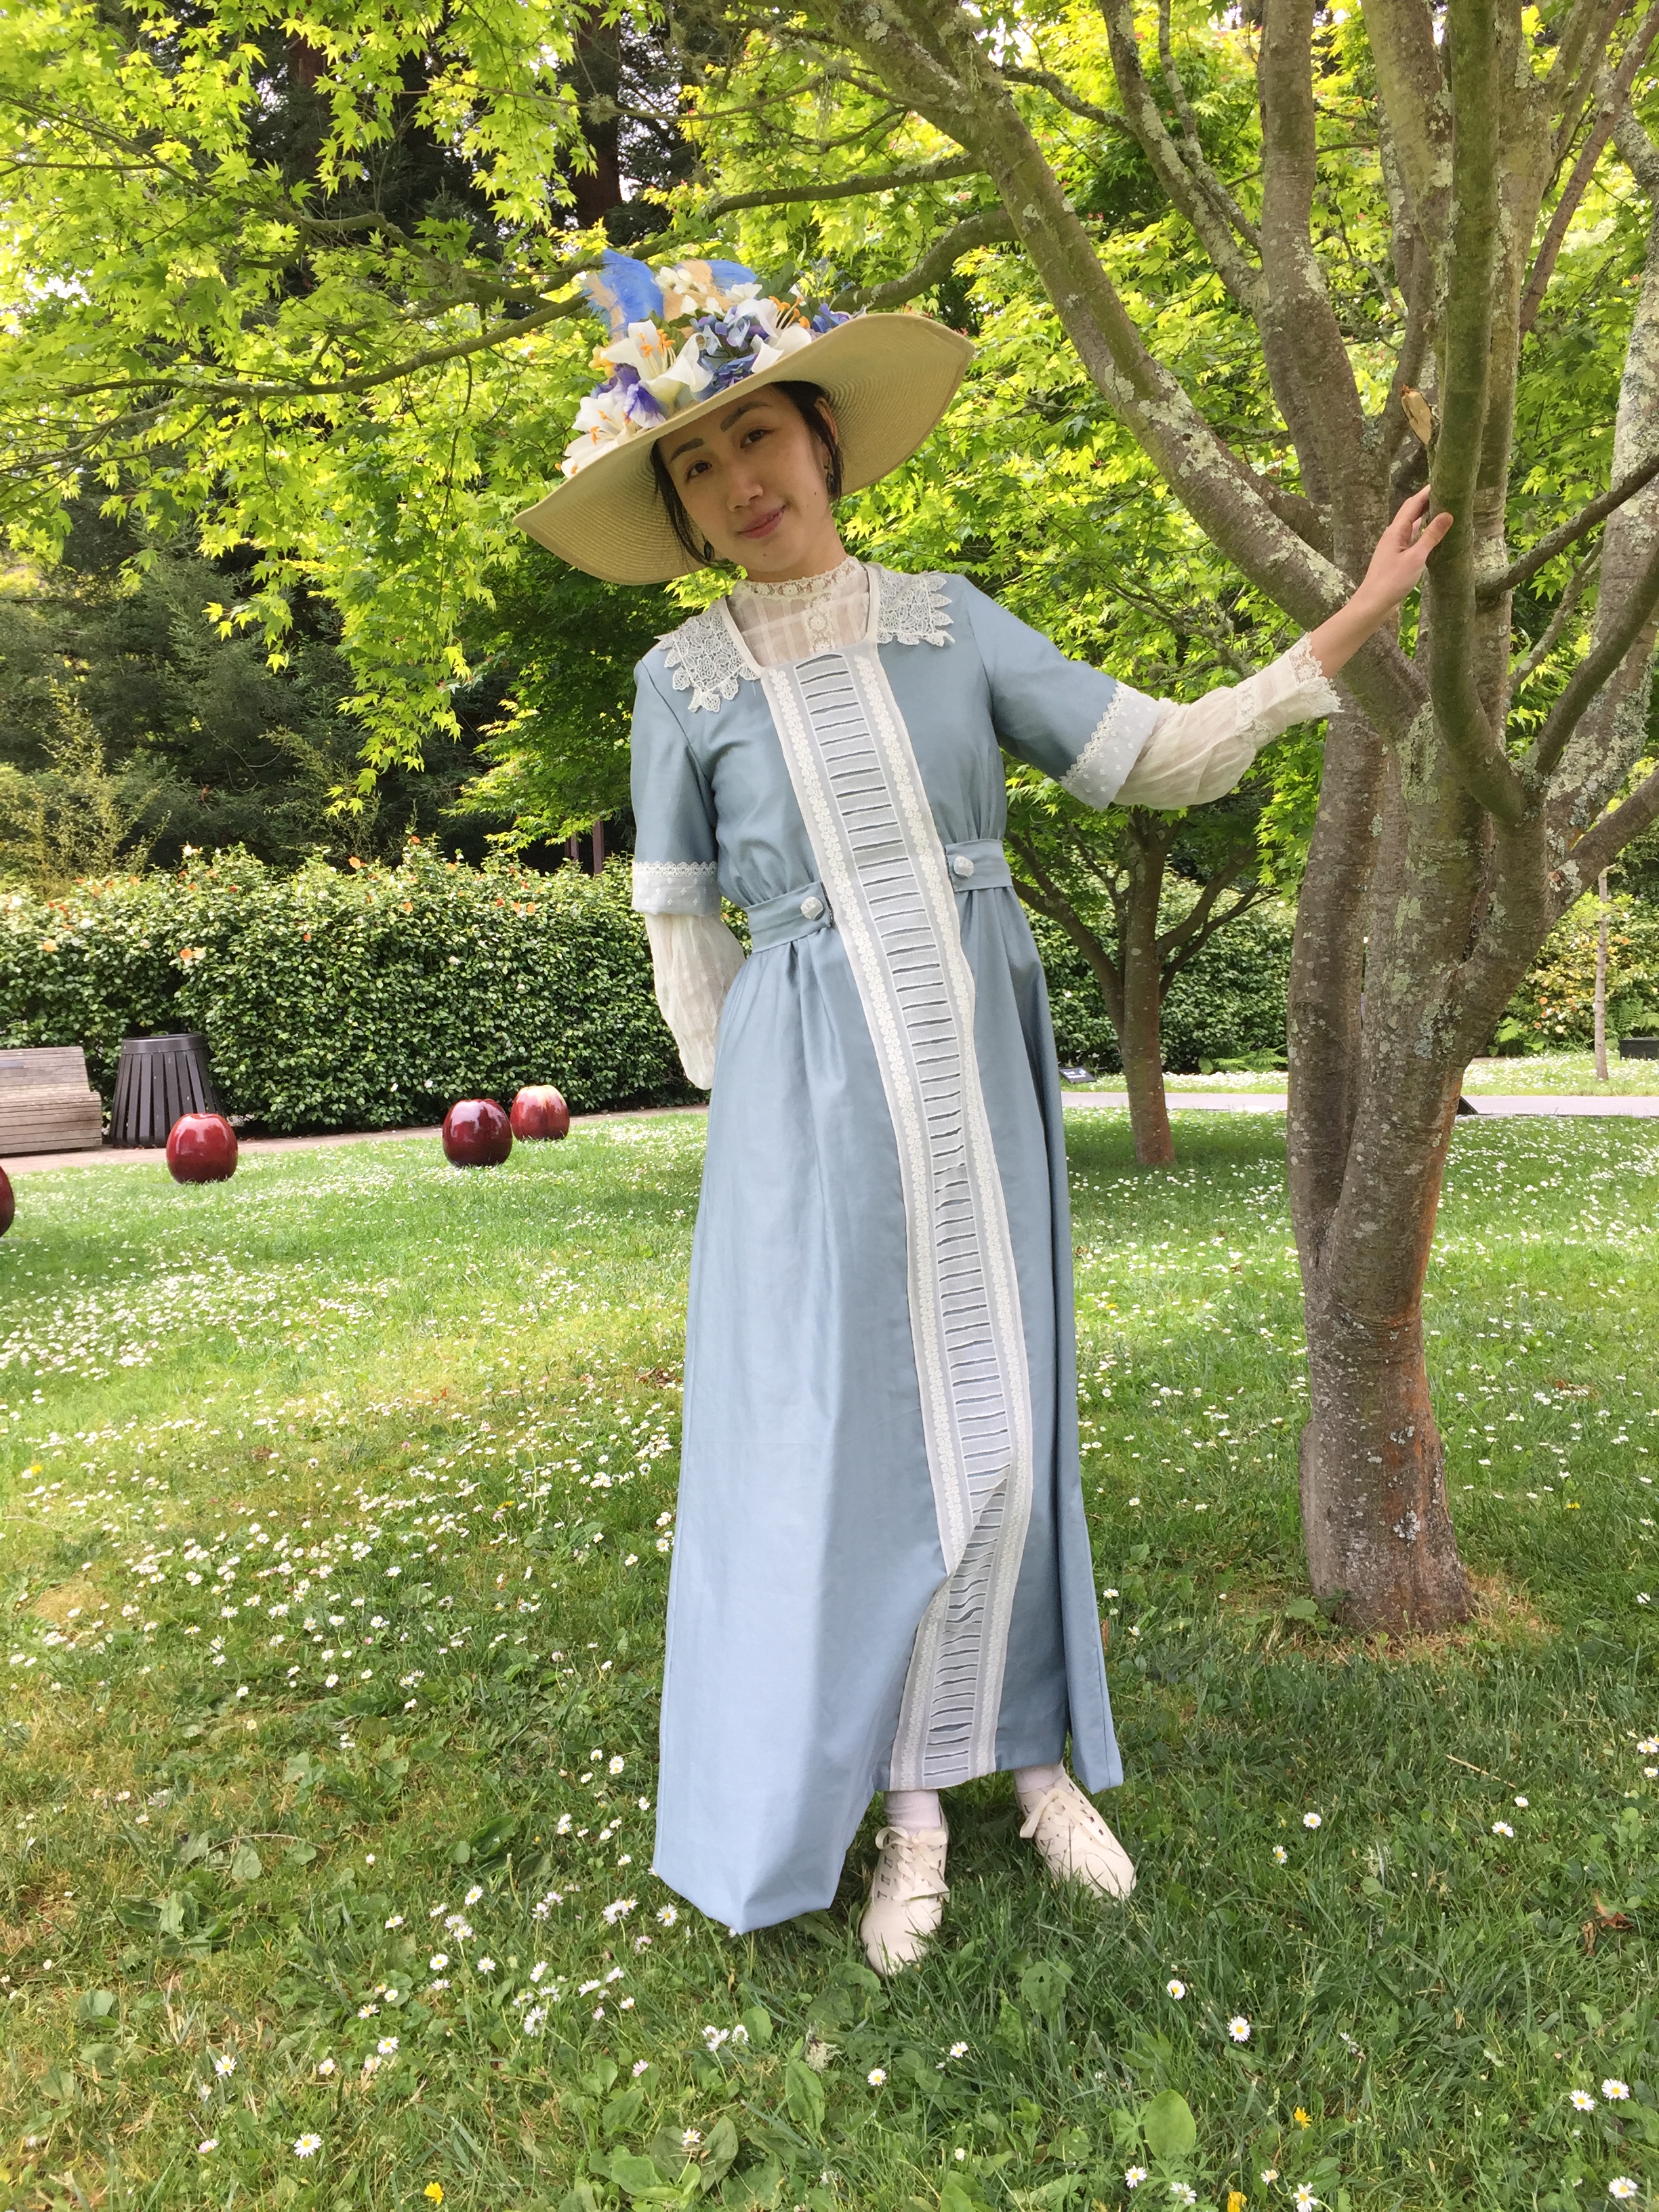
IMG_7906

Gatsby Summer Afternoon 2018 Picnic

(Hi everyone! Sorry I’m a bit behind on blogging because I’ve had to limit my computer time due to a hand injury, so posts are written slowly, bit by bit. I haven’t forgotten that I need to give details of my Crimson Peak outfit, and I have posts planned for my Gibson Girl project!)

Last month I went to the annual Gatsby Summer Afternoon at the Dunsmuir House in Oakland, CA. It went by so quickly I didn’t take a lot of pictures this year but I’ll share the ones I have!

Here I am with Kelsey (in 1930s sportswear) and Natalie (in a self-made dress using vintage fabric).IMG_1943

My dress is vintage, but actually 1970s vintage that happens to look like a 1930s dress! (Although the colors, cut, and print are correct for the time period I could tell it wasn’t really 1930s because of the label inside the dress, and because the brown trim is serging instead of piping). It was apparently quite convincing, because I was a finalist in the fashion contest!IMG_1896

You can barely see them but I am wearing Gibsons from American Duchess, an 18th century straw bergere that I trimmed, and vintage Bakelite and cut steel bangles.IMG_1878

I considered a few other pairs of shoes but ultimately chose the ones in the middle.IMG_1828.JPG

We might have gotten a little rowdy at some point. Kelsey found a croquet mallet that matched her outfit perfectly and decided to menace Mena with it.IMG_1951

As always there were vintage cars!IMG_1971

Thank you John Carey of these following photos of me with the other Vintage Style Council gals!41497323_1687158268078098_3411786410644996096_o41572276_1687159128078012_7237750721100120064_o

I had a lovely time as always. See you there next year!

Decades of Style 1930s Beach Pajamas Pattern Review

My last completed project (actually done before Gatsby but not photographed until later) was a pair of 1930s beach pajamas, using the Decades of Style 1930s Last Resort Beach PJs pattern.PHOTO 7.JPG

When deciding if a pattern is good I have these criteria:

  • Is the sizing chart accurate?
  • Do the pieces fit together?
  • Does the finished item look like the pattern envelope?
  • Does the garment fit and flatter?
  • Do the instructions make sense?

Um, check, check, and check! I’ve used Decades of Style before and once again I’m impressed by the quality of their work and highly recommend this pattern.3015_webart_final

I did not make the jacket so I can’t comment on that, but the beach PJs themselves went together nicely. If you’ve made pants before this should be easy for you. It is a pair of high-waisted pants with a top that doesn’t have too many pieces. I made the backless version because I didn’t have a long zipper in the right color, but there is an optional triangle pattern piece for the back if you want to be able to wear a regular bra.PHOTO 8.JPG

I made a small change in that I made and used bias tape to bind the neckline and armholes, and added a bow. The pattern includes facings and I did not use those since I wanted decorative binding.

The pants legs are also really long! This is great for tall people, or someone who wants to wear high heels. I had to cut a few extra inches off my hems, but that is a very easy fix, and better than finding out near the end that the pattern runs short.

The pockets in the pattern are a nice touch (even if I accidentally made one of mine higher because I was sewing late at night)! They are a functional size, and are a cute detail.

Just for fun, this is a picture of a mockup I did in a flower fabric I picked up from the CoCo Bargain Basement. I just roll-hemmed the raw edges, but it’s good enough to wear around the house as a lounge outfit.IMG_3606

I used rayon challis for this project, so mine are nice and soft, just like real PJs!. I see this being a very comfortable outfit for a future Gatsby picnic, or the beach! IMG_4105.JPG

Project costs:

  • 8 yards navy rayon challis: $30.32 from Fabric Wholesale Direct. (You only need 3-4, but I doubled up because i wanted a thicker garment).
  • 1 yard red rayon challis: $3.99 from FWD
  • 4 cones serger thread: $10.36 from FWD. (Since I was doubling up the fabric I sealed the layers together with a serger during flat-lining).
  • 1 blue zipper: ~$1 from eBay (part of a lot)
  • Pattern: $27.75 from Decades of Style (including shipping and tax, bought during a sale)

I got the first three items from FWD in exchange for a tutorial on their website, so my actual out-of-pocket cost was less than $30, instead of $73.42!

I like this pattern a lot, and would love to make it again if I find the right print.

Summary: Buy this pattern from Decades, and see you on the beach!IMG_4445