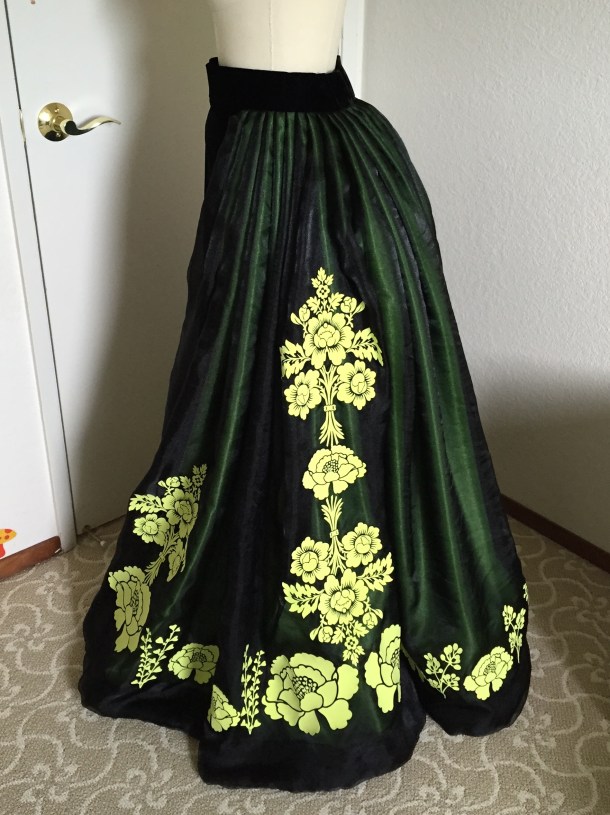
At long last the skirt for my Lady Tremaine outfit is done! I’ll post a tutorial for the under and overskirts later, but for now here are some pictures of the two together.
First is a side view. I stuffed a pillow under the skirt for the photos, but later I will be making a small bustle pad specific for this outfit.
Here is a view showing the open front with the black velvet underskirt.
And a view from the back.
I took some liberties with the flowers. I used a lot of poppies and leafy sprigs, while Lady Tremaine’s skirt has more abstract flowers and vines.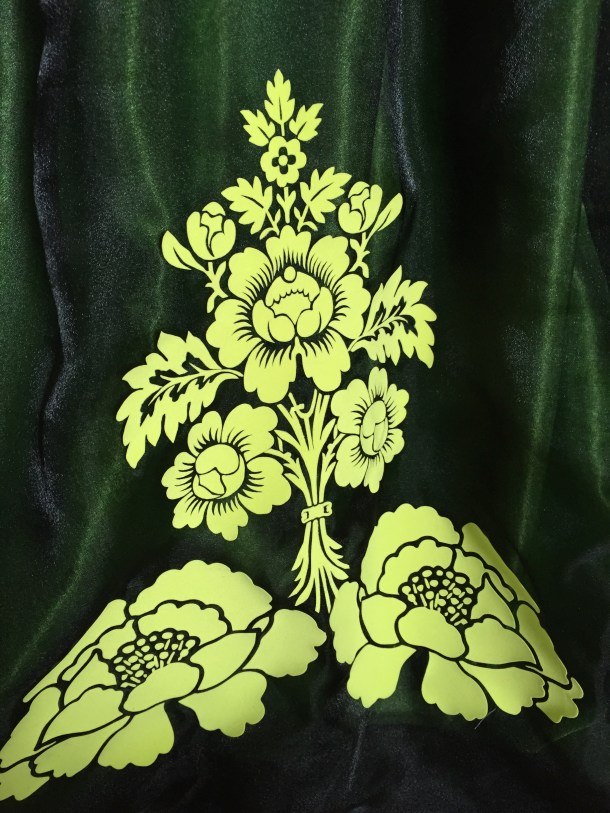

Since the skirt is open in the front, I put the closures on the side. The skirt is pleated into a velvet waistband made from the same fabric as the underskirt, and closes above the hip with some heavy duty hooks and eyes.
If you’ve been following the story, getting the material for the appliques was quite the saga!
- Supplier #1 sent me a bright neon green flocking material, when I wanted chartreuse. I couldn’t find chartreuse flocking anywhere, so I switched to wool-blend felt.
- Supplier #2 had to send me felt swatches twice, after the first set got lost in the mail.
- After I received the swatches, Supplier #2 said they didn’t have the full amount of chartreuse felt I wanted.
- I felt the felt (ha!) I did get in the end didn’t cut cleanly enough for the flowers to have neat edges, so I went back to flocking.
- I took a gamble on Supplier #3, where I bought a roll of flocking. Despite being labeled “green,” it was a little too yellow for me, but still better than the bright neon green I got at first.
I would have preferred a color in between the two below, but the bottom is still closer to what I wanted.

I used a Silhouette machine to cut the outlines of the appliques, then used a little hook and spatula to weed out the excess material (which took a really, really long time). What is left behind is velvety flocking on one side (and attached to a plastic backing sheet), while the other side has a heat-sensitive adhesive that melts into the fabric.
This was probably the most terrifying project I’ve done! The iron had to be hot enough to fuse the flocking, but not so hot it would melt the organza. I had to make sure the adhesive didn’t bleed through the organza into something else underneath, so I had to protect the areas around and beneath the applique with plenty of parchment paper.
Heat-transfer flocking is best done with a large heat press, but I used an iron. I had a little bit of puckering in some areas, but I think the iron gave me more control, especially over the small detailed areas, even though it took longer!
For the bodice I will be using black heat transfer flocking, which is luckily much easier to find. However, I’ll have to experiment again with the temperature sweet spot that will fuse flocking to sequins without melting them.


 12-14-19")
