Monthly Archives: March 2020

Vintage-Style Cowgirl Split Riding Pants / Skirt for a Western Train Ride Event

Last month I made myself a cowgirl ensemble with a pair of split riding pants (with a button on panel to turn it into a skirt) using some cheerful blue wool and the 1919-1920 riding pants pattern by Wearing History.IMG_6640

The leftover wool was used for a self-drafted matching vest, lined with the same floral cotton as my blouse. GXWCE5351

I wore the ensemble during a ride on the Sacramento River Train with my local costume guild. IMG_6583

At the event I wore the pants without the extra skirt panel, but for a future wearing I plan to use this versatile garment with the skirt panel buttoned in (which makes them surprise pants!) IMG_E6491

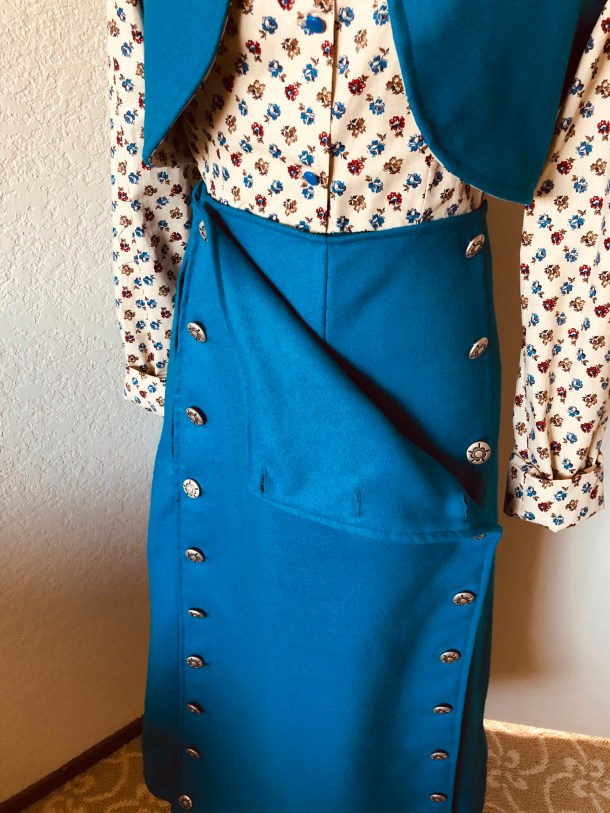
I used 20 silver-colored metal shank buttons that have been in my stash for years. I think I paid 25 cents a button a long time ago and have been saving them for a project that needed 20 buttons! I got the wool for a great bargain too ($20!)IMG_E6486

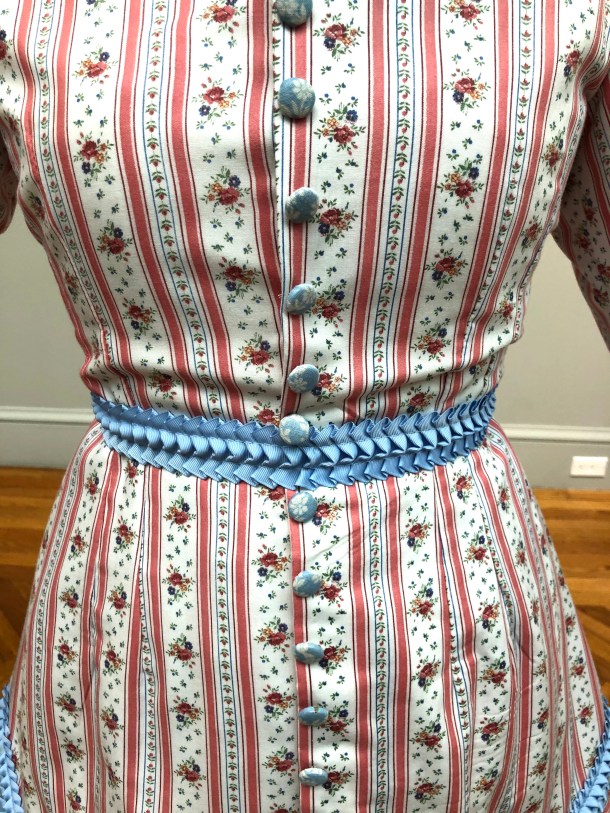
The blouse was up-cycled from a second-hand cotton dress! I removed the skirt and used the extra fabric to make new sleeves and cuffs (replacing the 3/4 sleeves), extend the hem of the blouse, and also line my vest.  (It would have been even less work to just cut the skirt off a few inches below the waist seam, but it had a lot of gathered material that would have created bulk below the split riding pants).ABUU0472IMG_6478

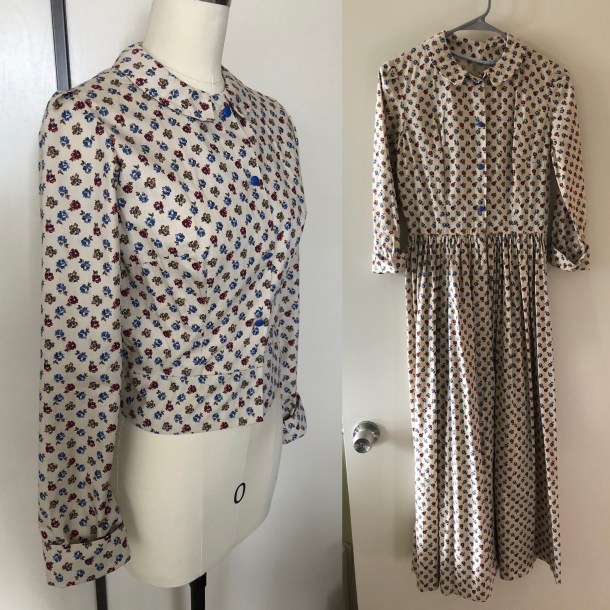
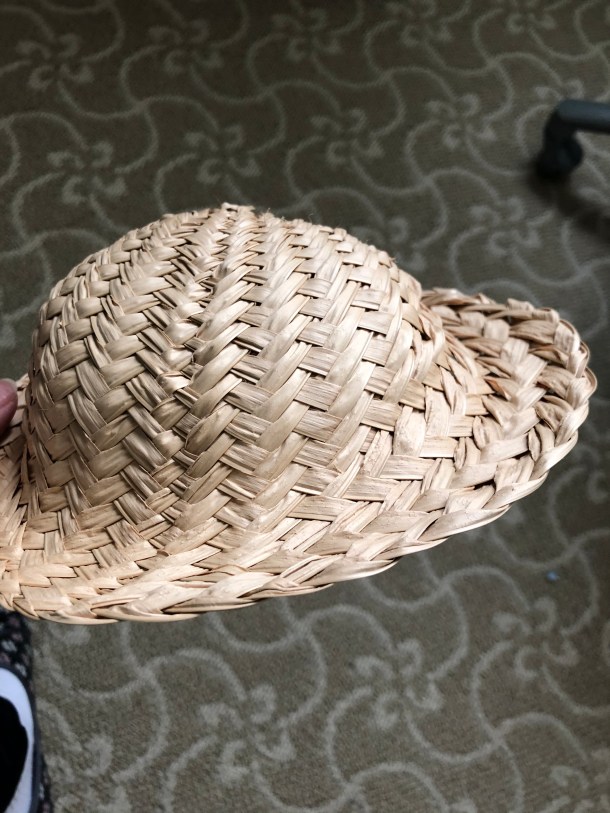
For my other accessories I wore American Duchess Tavistock boots, vintage fringed sueded gloves with studs, a wool hat with a silver emblem I got from Poshmark, and a pleather pouch from Amazon.IMG_6693IMG_6691IMG_6830

The pouch (Amazon affiliate link) had slits in the back for threading the belt through to wear as a hip pouch, plus internal loops to wear as a purse. It’s “old-time” enough that I think it’ll end up in other costume ensembles!IMG_6831

Some notes about the Wearing History pattern: It comes with a short and long version of the skirt. Since I had limited fabric I cut the shorter version and was able to get a vest out of the scraps. (I used 3 yards of 54″ wool). The pants are unlined.Screen Shot 2020-03-24 at 5.23.22 PMThe skirt panel is faced with self-fabric and contains all the buttonholes while the buttons are sewn onto the pants. There are two options to attach the skirt panel. You can have one side sewn into the seam of the pants (which means you won’t lose the panel and you can make half as many buttonholes) or you can have the panel completely removable. If you have the panel attached you fold it over to one side and button it down.  I opted to have the panel completely removable because my self-faced fabric folded over would have meant 4 layers of medium-weight wool and more bulk than I wanted. (If you use a lightweight wool or other fabric you don’t have to be concerned about that).IMG_6485

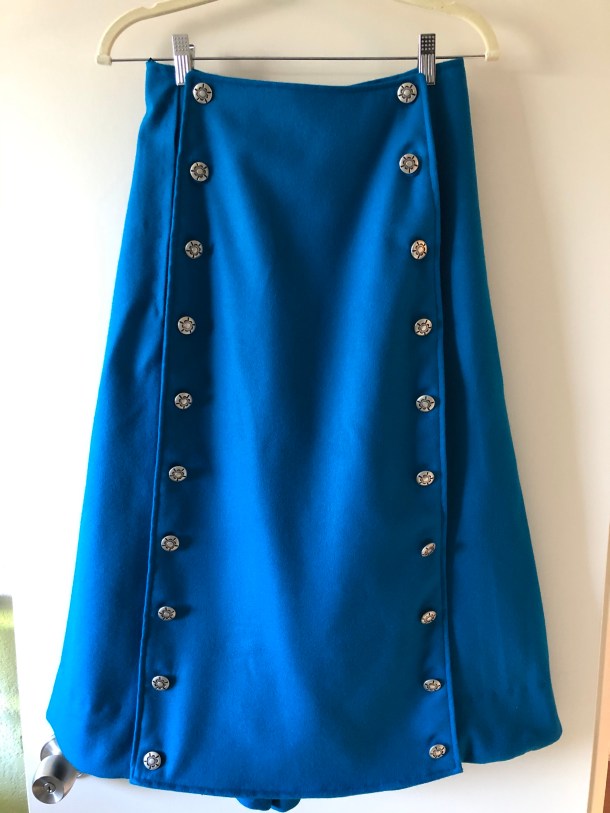
The back of the skirt has an inverted box pleat that you can stitch down the center back seam. I did not do the stitching, in order to make the back more skirt-like. IMG_6501

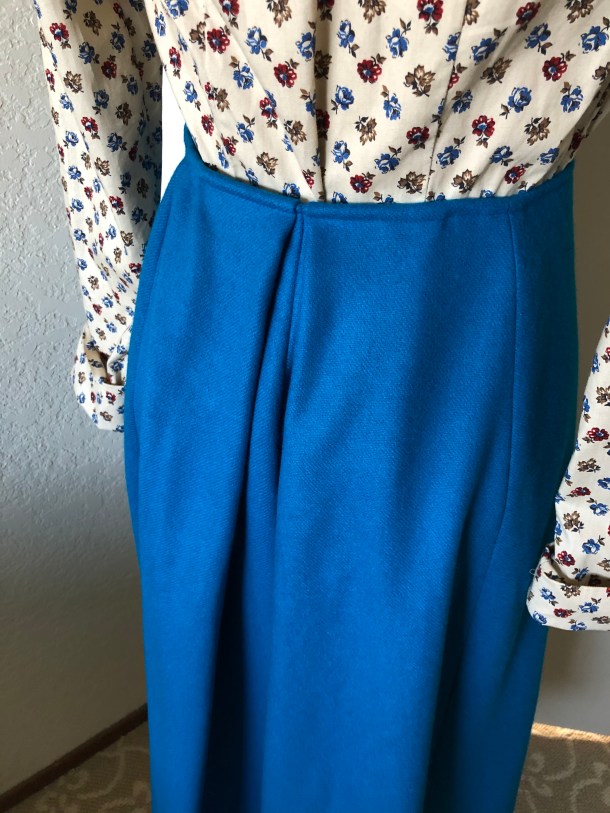
The pants are very full so even if the skirt is buttoned in place in the front there should be plenty of range of motion due to the extra fabric in the sides and back.IMG_6595

Pattern difficulty is “advanced” according to Wearing History. This is because this is a reproduction of an antique pattern from 1919-1920 and assumes certain basic knowledge. Wearing History has added some really helpful notes, but this is not the kind of modern pattern that has step-by-step illustrations.  You should know how to make and attach a placket for the opening and the facings on the bottom hem. (These are rectangular pieces you make yourself from scraps, and are not included in the pattern).IMG_8727

I am an experienced costumer maker and have made pants before, so I did not find this pattern particularly difficult, but it is not a beginner pattern for sure. I highly recommend this pattern if you are experienced or an ambitious intermediate seamstress. It was definitely fun to wear with the rest of my guild!IMG_8713

The last 3 photos are by Lauren Moyer, one of our wonderful GBACG board members.IMG_8724

Giddyap!

1870s Bustle Gown (Black Snail Patterns Victorian Seaside Dress)

In February my local costume guild went to see an exhibit of James Tissot paintings at the Legion of Honor Museum in San Francisco, and we dressed up in bustle gowns. The exhibit was wonderful and it was lovely to see my fellow costumers.

I made myself an 1870s bustle dress using pink and white striped floral cotton and the Victorian Seaside Dress pattern from Black Snail Patterns.

I used a cotton that was very lightweight which helped the fluffy bustle layers stay fluffed!

My shoes are American Duchess Tissot shoes that I dyed blue and made shoe clips for out of my fabric scraps.IMG_5553

The blue trim is pleated grosgrain ribbon, which I put on the collar, cuffs, belt, and skirt flounces. I made my hat using a palm fan (more on that later in this post)!IMG_5566

My buttons were made using vintage fabric over vintage covered button kits. (The bodice actually closes with hooks and bars and the buttons are decorative). I prefer this technique because it means I can adjust the fit more easily and I don’t have to make a lot of buttonholes!IMG_5579

I recommend the Black Snail pattern. It consist of a bodice with an attached “apron,” a skirt, and long sleeves. The bustle effect is achieved by having ruffled flounces on the apron and skirt, and by having hidden ribbon ties underneath the apron.

The pieces all fit together well and the sizing chart was accurate. I was impressed that even the very large pieces of the skirt panels fit together, which means the pattern was graded well.IMG_5574

The sleeve is an 1870s two-part coat sleeve with a seam down the elbow and another seam on the inside of the arm. It is loose-fitting and appropriate to the era, and the fullness of the sleeve head needs to be eased into the shoulder of the bodice.IMG_5571

I made some simplifications to the Black Snail pattern in order to speed up the project:

  • I did not bother making a skirt placket and facing for the underskirt, since the top half is covered by the apron overskirt anyway.
  • The pattern calls for the back half of the underskirt to be cartridge pleated into the waistband. I did regular pleats since the top would be hidden.
  • I cut my flounces using the straight grain instead of on the bias like the pattern calls for. This is so I could use the selvedge instead of hemming the many yards of flounced fabric. However, this meant that my flounce stripes are horizontal instead of diagonal so you should cut on the bias if you prefer the diagonal. (The other reason why I used the straight grain is because I had limited fabric and the bias cut takes up more yardage).
  • The bustle effect comes from gathering up the apron overskirt in the back with twill tape. The pattern asks you to sew pieces of tape to the bodice then sew buttons to strategic parts of the overskirt that get attached to buttonholes on the tapes. In order to skip making the buttonholes I just used tapes on the skirt as well to tie to the bodice tapes.
  • The pattern calls for self trim to cover where the skirt and flounces meet. Instead of doing that I used purchased pre-pleated grosgrain trim from Amazon (affiliate link), which is available in other colors.

Just a warning: if you purchase the pre-printed pattern please make sure you have large paper around your house. There are some pattern pieces where you are told to extend the piece by up to 15 inches. (This was done by cutting a piece through the middle, inserting some paper, then drawing lines to connect the original pieces).  I had to do this for a number of the larger pieces, and I didn’t expect to do so much assembly for a pattern I did not print at home. I’m not sure if the reason behind this was to save paper costs, but I would have gladly paid a little more for the pattern to avoid the extra work.

Here’s some photos I took of the dress in progress so you can see what the apron looks like up and down. JULE6537

Black Snail recommends 11 yards of 51″ wide fabric for this dress. I only had 9 yards of 42″ fabric but made it work by using straight grain flounces instead of cutting my flounces on the bias like the pattern recommends.

Underneath my skirt I wore a “phantom bustle” (made during a class taught by Christina Deangelo) and two antique petticoats.EEWR4333PTLV3670DEGD9186

On top I wore this custom silk brocade late Victorian corset by Redthreaded. I own several other pieces by them and they are all very well-made. They offer both ready-to-wear and custom sizing and the owner Cynthia Settje is committed to great customer service and fair treatment and wages for her employees.

Screen Shot 2020-03-14 at 3.31.34 PM

Photos by Redthreaded

My hat base was made by me using a palm fan I had around the house! I trimmed it with leftover fabric from my dress, some leftover floral trim from my 18th century shepherdess outfit, and a little bird I got from the craft store. (I am wearing glass intaglio earrings from Dames a la Mode).IMG_5599

The fabric is a long pleated rectangle with pointed ends.IMG_5595

When I said palm fan, I literally meant a palm fan.IMG_5419

I soaked it in water to soften it, cut off the handle, and molded it around a bowl.IMG_5425

After it was dry I machine-sewed the ends together and trimmed off excess. IMG_5430

Voila, a hat base!IMG_5432

For my hair I wore 3 false hair pieces: a large braided bun, a crown braid, and twist hanging from the bun.IMG_5591

I used a remnant of pink ribbon I had around the house to trim the hat, but I think for a future wearing I’d like to replace it with a much wider and longer ribbon.

Project costs (not including undergarments and accessories):

  • Pattern: $20.70 from Black Snail Patterns (purchased during a sale with free shipping).
  • 9 yards cotton fabric: $35 including shipping from Facebook
  • 25 yards pleated trim: $13.06 from Amazon (during a sudden and lucky price drop! Plus I still have leftovers!)
  • Lining: $0 (scraps pieced together from previous project leftovers)
  • Thread, notions, etc: ~$5

TOTAL: $73.16 (woohoo for bargain shopping!)

I had such a lovely time. Thank you John Carey for these photos with some of my favorite beautiful ladies!