Tag Archives: gbacg

My 17th Century Masquerade Dress (Plus 10 Tips/Tricks for Sewing Costumes)

Years ago I made a black 1660s dress but wanted a more colorful one. I finally got my excuse to make one when my local costume guild decided to put on an event called “DuMasquerade,” a dinner event celebrating the works of Alexander Dumas. I made a dress out of purple taffeta and wore a dragon mask perched upon my head.

In this post I’ll show you the dress I wore, plus some tips/tricks to make your sewing faster and/or more polished. I only had a few weeks to make this dress so I definitely took some shortcuts!

I used the Nehelenia 1660s dress pattern since I was familiar with it, having used it before. This style of dress features a long skirt, a fully boned bodice with a pointed center front, and puffy sleeves, made of a purple taffeta fabric. I am happy to brag that I made this dress for less than $25! A friend found the fabric for $2.50/yard at a local shop, and I got the fancy trim on clearance for $1/yard. The ruffles are made from a cotton organdy curtain I got for free. The lining uses scraps from a previous project and the boning is 4 different colors/lengths of zip ties and boning bits I found around the house or was given to me from someone destashing. The bum roll uses scraps from another finished dress. I already owned the pattern, shoes, wig, and petticoats from previous costumes. I was so under budget for this dress I decided to buy those pearly bodice decorations from an Etsy shop called Recycled Rockstah. The dragon mask is a kid’s Halloween mask that I painted and attached to a headband. Some of my costume projects can get pricey but every so often I like to challenge myself to make something for a low cost, to remind myself of how I started costuming, and to let others know that with a little luck and patience (and keeping a stash!) it’s possible to look fancy for less. Yes, I had the privilege of time and experience, but I firmly believe costuming is for everyone and every budget. You don’t have to have silk to be valid.

TIPS/TRICKS

Tip/trick #1: Instead of making a corset as a separate garment, make your bodice fully boned. To do this you will cut out two linings and stitch them together with a series of parallel lines to make channels for your boning! Then you will cover this boned lining layer with your fashion fabric layer.
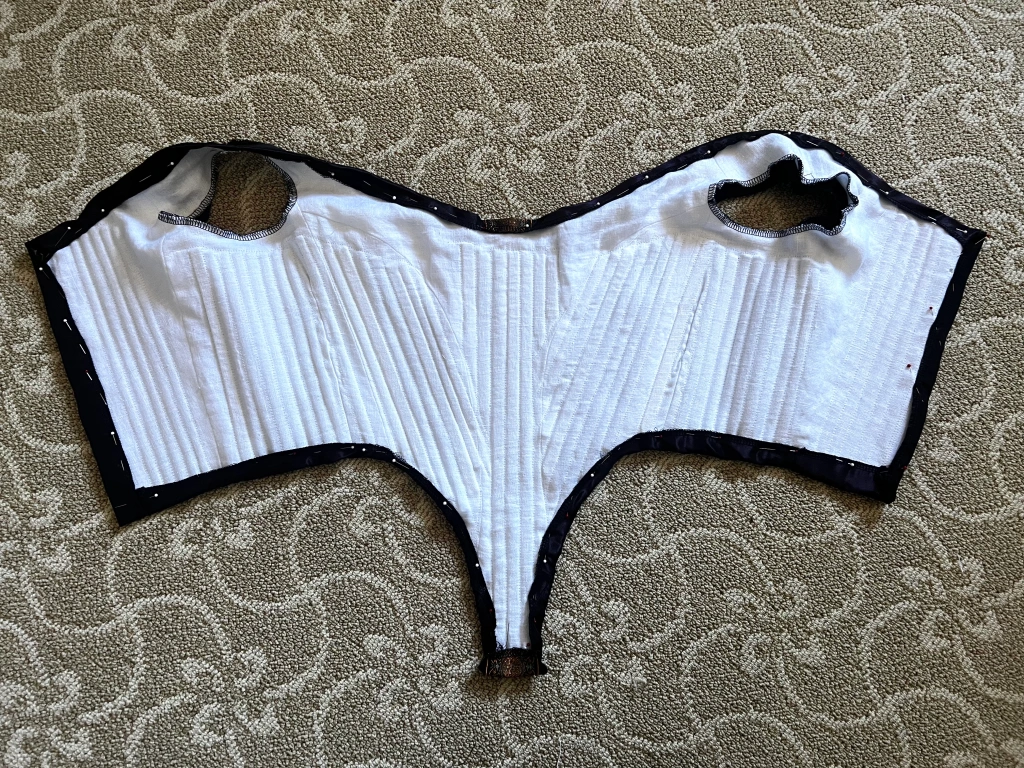
Tip/trick #2: When you cut out your bodice fashion fabric pattern pieces, extend the sides of the pieces that will make up the neckline, back closure, and bottom edge by about an inch. After you assemble the bodice fashion layer you can serge the raw edges, fold them over, and then whipstitch them to the lining. This way your linings won’t show when worn and you can skip making facings.

Tip/trick #3: To make your curved seams nice and smooth, you will want to clip after sewing. Iron your seam allowances open. Cut notches in the inner curve of the seam allowance and snip or cut notches in the outer curve of the seam allowance. Iron again on the right side of the fabric to make a very neat seam.

Tip/trick #4: To add extra body to thin fabric, flat-line it by adding an extra layer of fabric. However, to save time on cutting your pattern piece out twice, only cut out one layer and put it on the second. Use your serger to sew the pieces together and trim the excess at the same time!

Tip/trick #5: Use knife pleats instead of cartridge pleats. Historically many gowns of this type used cartridge pleating to gather up the skirt. However, this is time-consuming and uses hand-sewing so I prefer knife pleats when I want to make the costume quickly. First serge the raw edges of the top edge of your skirt, then pleat, then stitch down the pleats. 

Tip/trick #6: If you want to skip making a waistband for the skirt, and have the convenience of a one-piece dress instead of a separate bodice and skirt, when you stitch down your skirt pleats sew them to a piece of twill tape. Then you will whip-stitch your twill tape to the bodice. 

Tip/trick #7: If you are trying to sew thing tubular like a sleeve or cuff, remember you can remove the flatbed/storage tray of your Janome to turn it into a free arm machine, making it easier to maneuver your sewing project. 
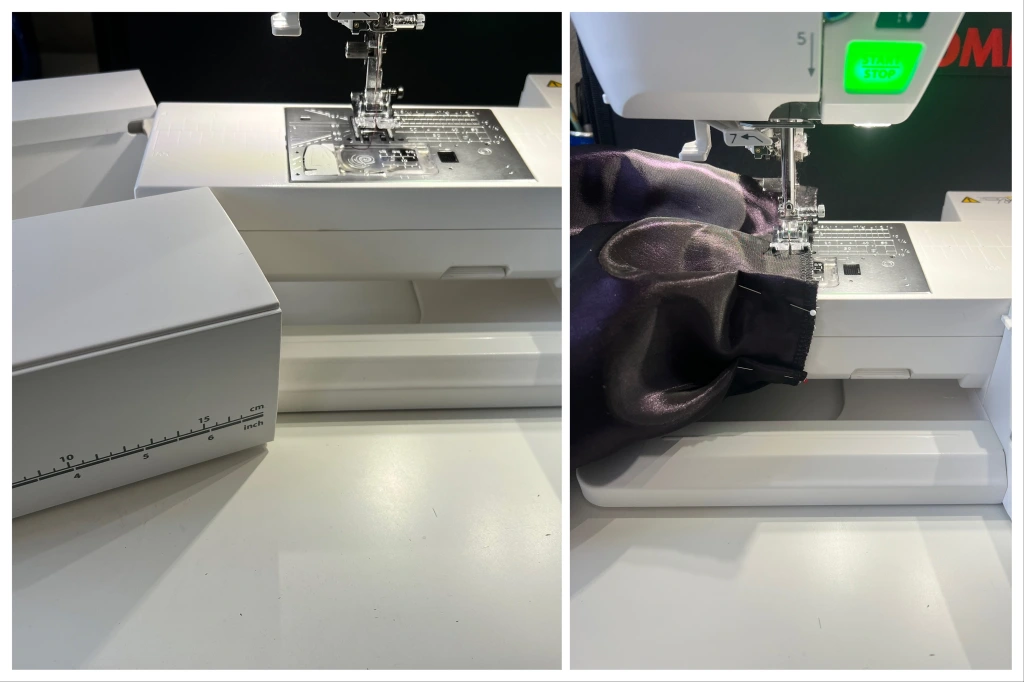
Tip/trick #8: To save time installing metal eyelets or sewing thread eyelets by hand, use the automatic eyelet stitch under your buttonhole menu. After sewing, use an awl to open the holes and put your lacing through. (My dress closes in the back with adjustable lacing).
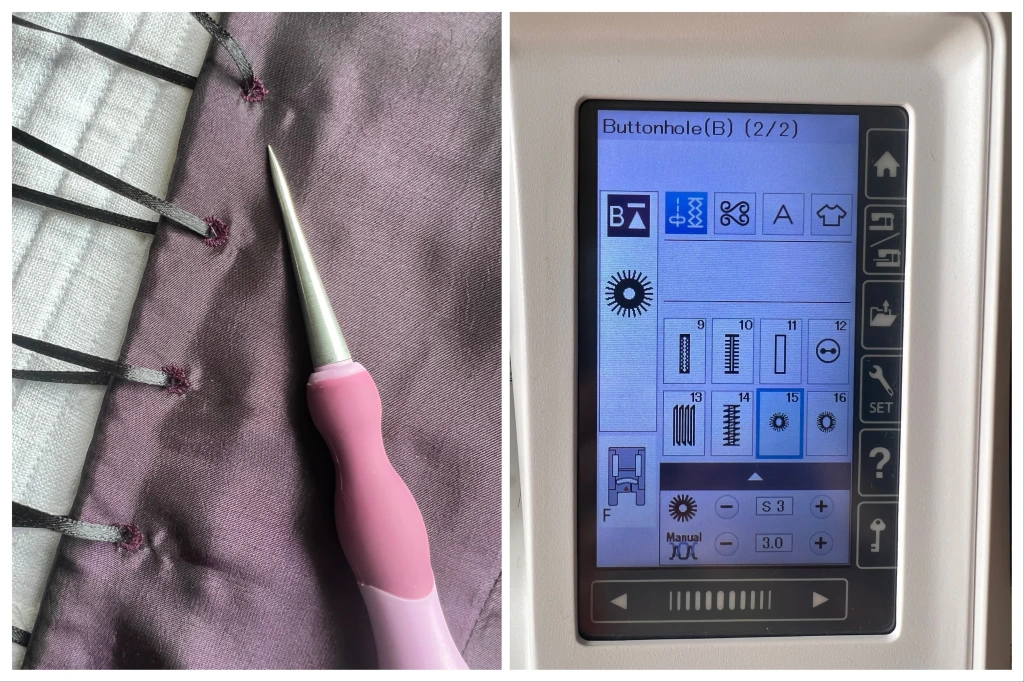
Tip/trick #9: To save time doing math, use an expandable sewing gauge to mark out where your evenly spaced eyelets should be. This also works for measuring out buttonholes and pleats.

Tip/trick #10: To avoid having an obvious machine-sewn hem, but not have to go through the effort of hemming your skirt by hand, you can cover your machine-sewn hem with a pretty trim. For this hem I serged the raw edge, folded it up inside the skirt, stitched it down, pinned on trim, and then sewed down both edges of the trim using a matching thread.

Thank you for reading and I hope this helps you with your costumes!
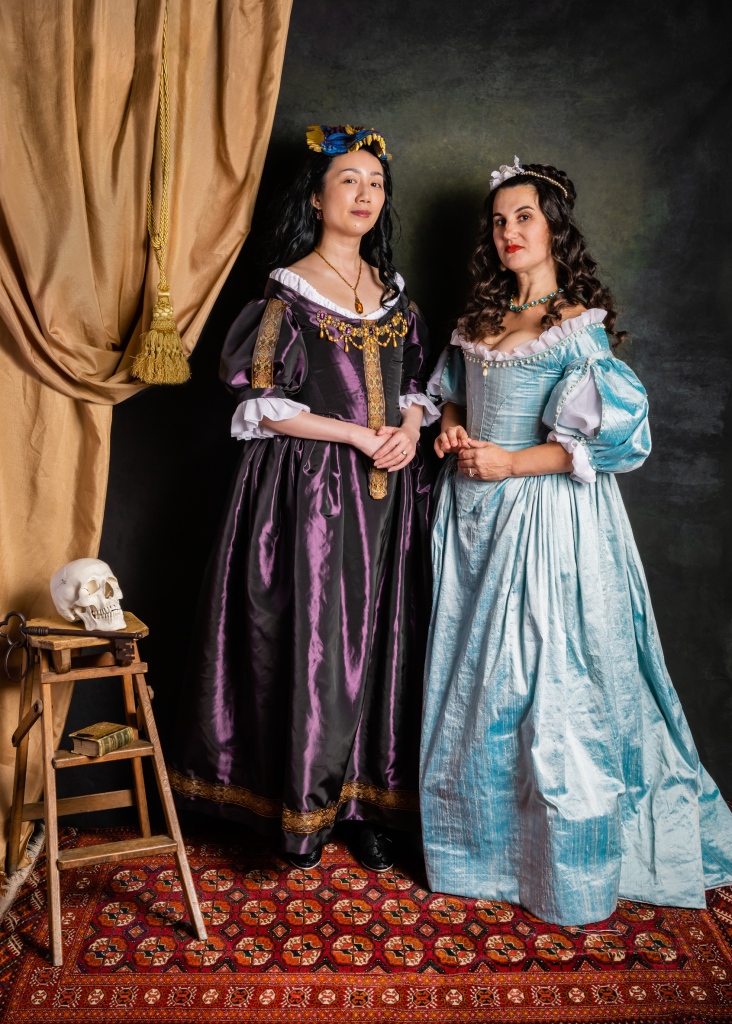
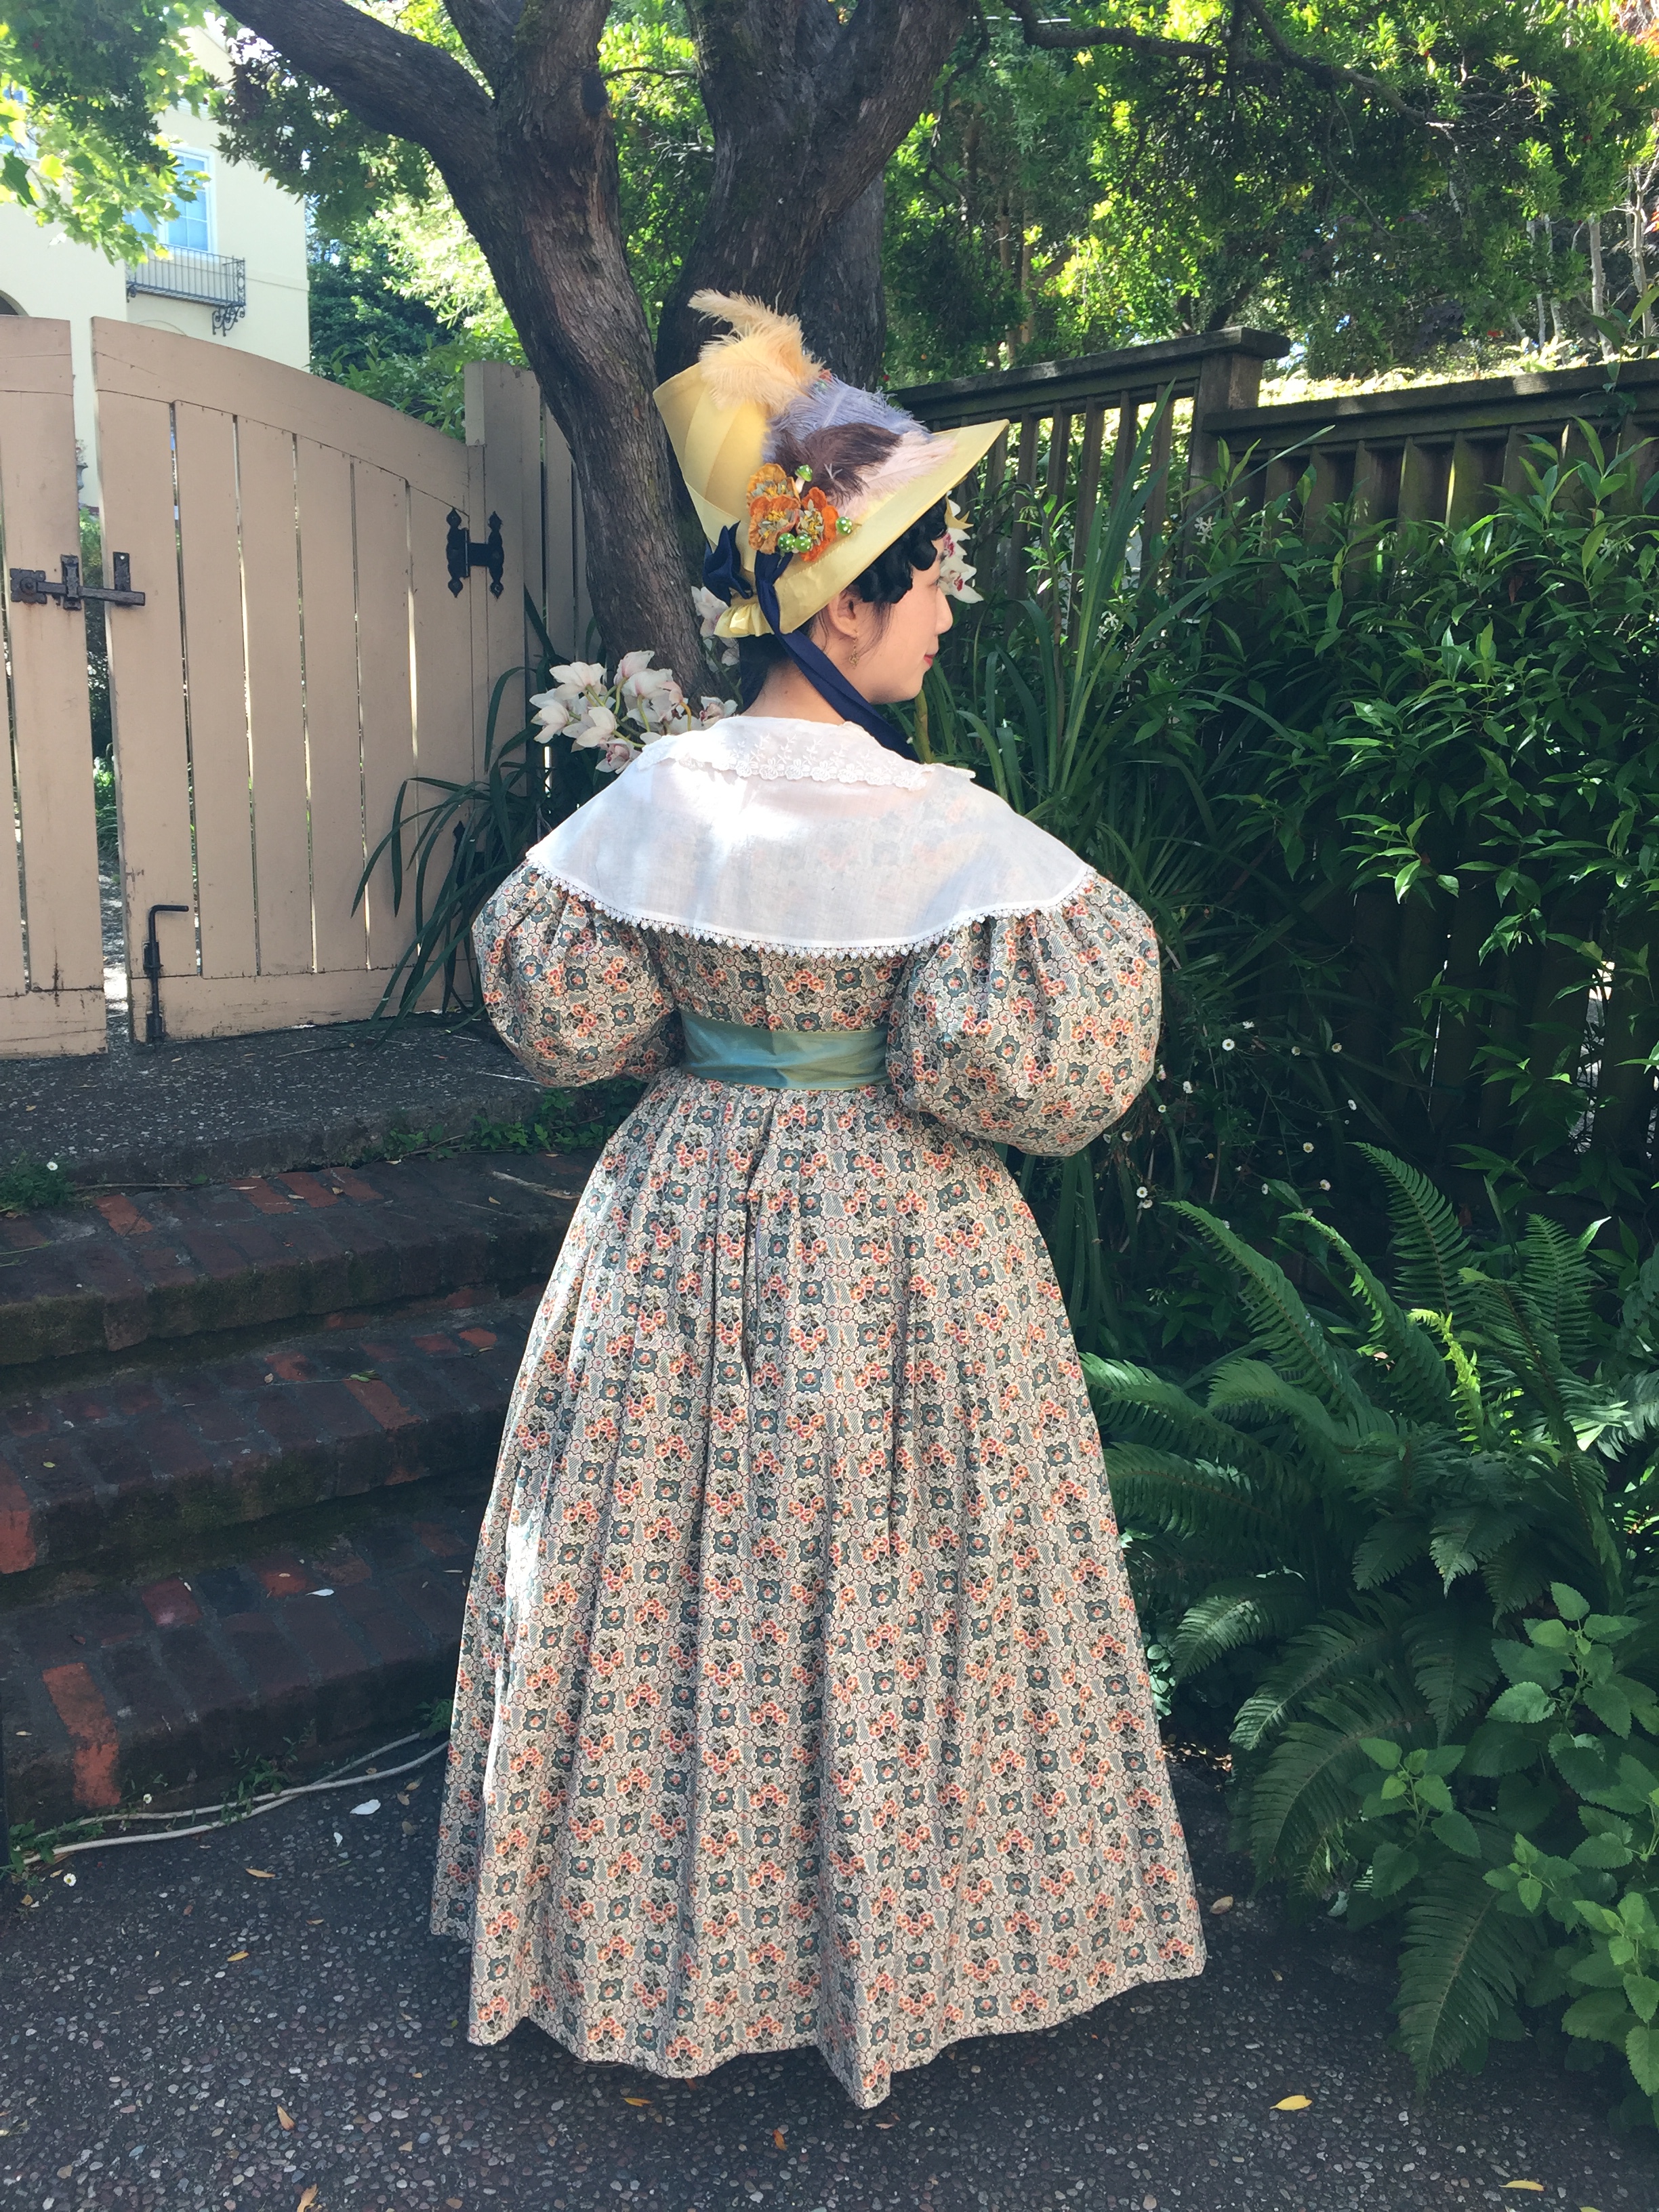
Photo by Daisy Rose Coby of Memento Moda. With my friend Sara of La Dauphine Costuming.

1830s Dresses at the Romantics Picnic

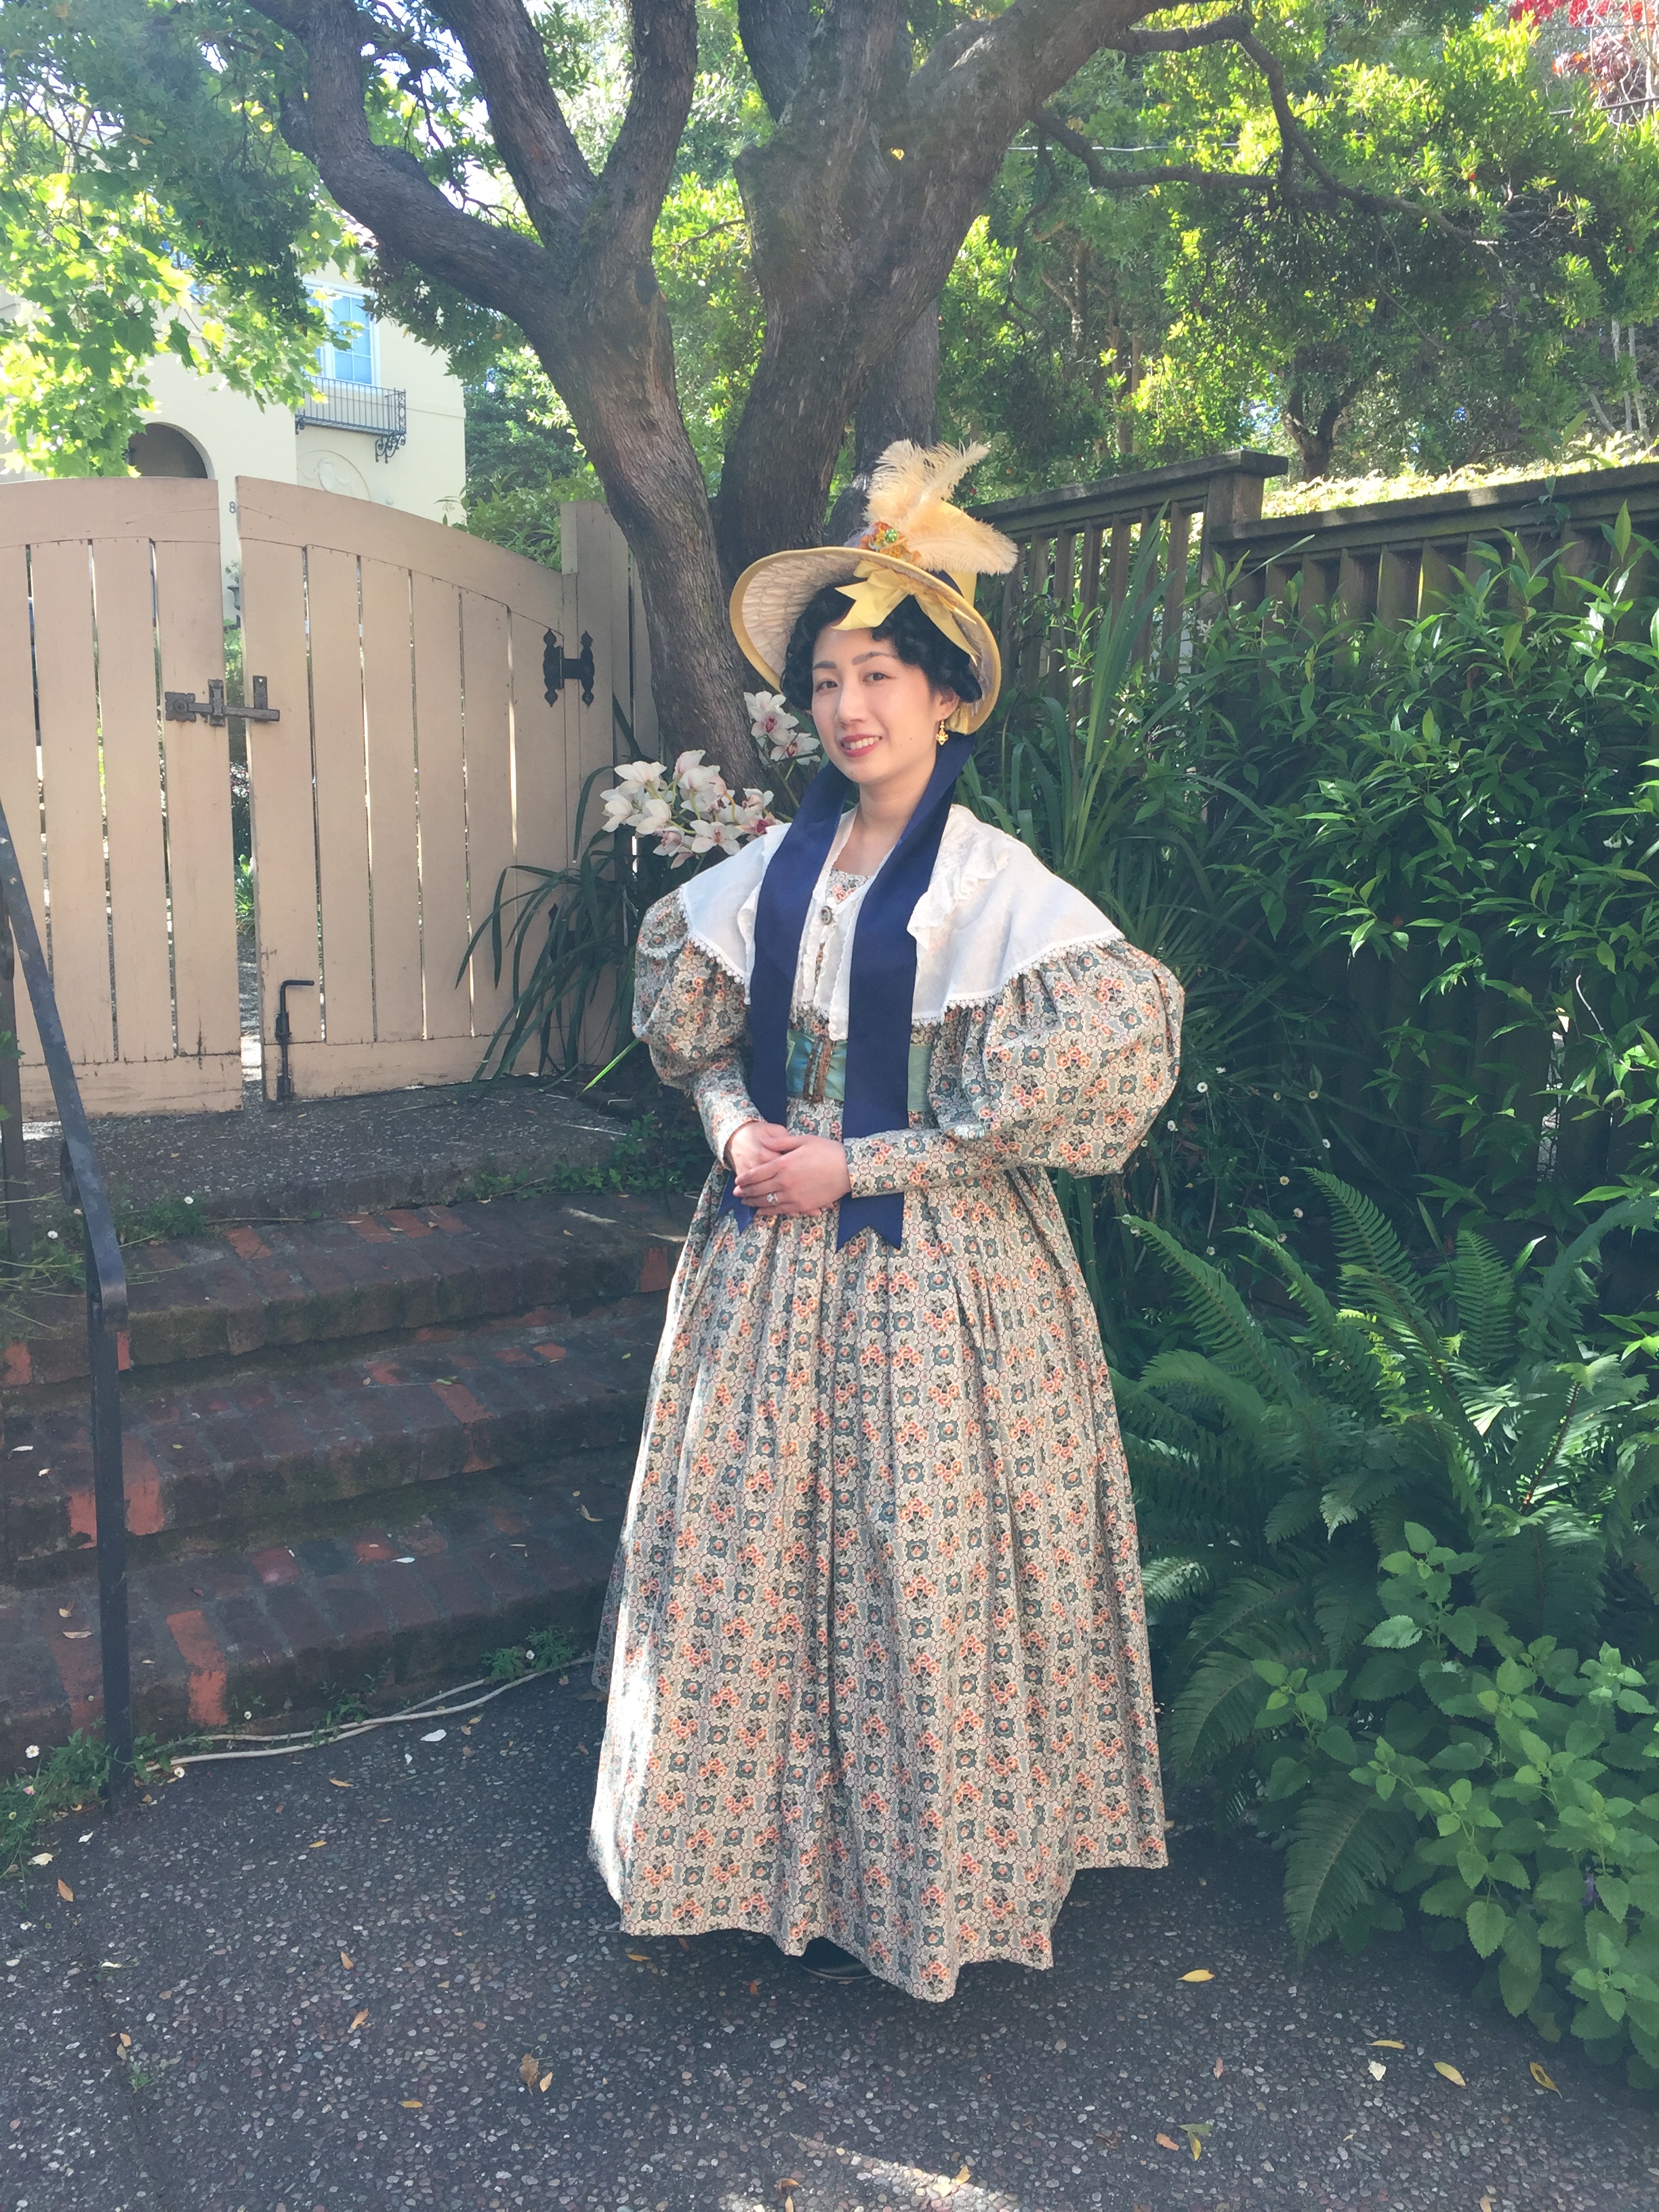
This past weekend the Greater Bay Area Costumer’s Guild held an 1830s-themed picnic, and I finally got to wear the 1830s cotton day dress I made a few months ago. Before the picnic I got dressed and took a few photos at a friend’s house.IMG_8621

I reused some accessories (like the bonnet and pelerine) from my 1830s silk dress ensemble, paired with a new moire ribbon belt and carved shell buckle. IMG_8618.JPG

Thank you to my friend Kaila who helped me get dressed, and wore a lovely silk gown that day.IMG_8609.JPG

Also joining us was Mena who had the most epic frilled cap!IMG_8622.JPG

The picnic was at Ardenwood Farms and it was a lovely day with a good turnout of wonderful costumes! I was impressed by how many people embraced the silly hair and giant sleeves of the 1830s. (The following group photos are all by Lori Clayton, used with permission). IMG_8431jkl

There were lots of charming ensembles in a variety of colors.IMG_8449IMG_8442IMG_8437

There were also a few gentleman in attendance (not all pictured).IMG_8399

And some of us got sassy showing off our corded petticoats.IMG_8441

The picnic spread was delicious.IMG_8634.JPG

Overall I had a lovely day out with friends! (Photo below by Sara of La Dauphine).from Sara McKee.jpg

The rest of my photos can be found on my Flickr album. IMG_8627

Wedgewood Blue Gibson Girl Gown and Undergarments

I attended a dinner party on the Delta King River Boat in Sacramento. The event was hosted by the GBACG and people were encouraged to wear clothing from 1870-1900. I decided to make a Gibson Girl dress out of a Wedgwood blue silk taffeta, trimmed with white lace.IMG_2870IMG_2856

My inspiration was the famous Wedgewood pottery. IMG_1670.JPG

I have some additional appliqués I purchased that I didn’t have time to add for this event, but will for the next wearing to make it even more like pottery. IMG_2096.JPG

The bodice is made with Truly Victorian’s 1892 ball gown bodice and 1893 bell skirt patterns. I found the fit of both to be good, but the bodice is very long and I had to cut a bit from the bottom, even though I am long-waisted.IMG_2796

Some bodice in-progress photos that show the amount that needed to be trimmed:

My jewelry is by In the Long Run. My gloves are vintage and the purse is from a bridal shop. I am wearing Tissots from American Duchess.IMG_2742

I did not use the sleeve pattern that came with the bodice pattern. Instead I gathered up a rectangle of silk chiffon to make flowing sleeves.IMG_2727

The top was gathered and serged.IMG_2673

The back closes with hooks and eyes.IMG_2729.JPG

I decorated the front with a silk chiffon sash and little flowers that I put faux pearl centers in. IMG_2725

I would have liked to hem the end of the sash and add little pearls to the edge, but I was recovering from a hand injury and couldn’t do any hand-sewing, so it’s just a pouf for now. Thus I had to get creative with ways to avoid it!

Ways to save on hand-sewing:

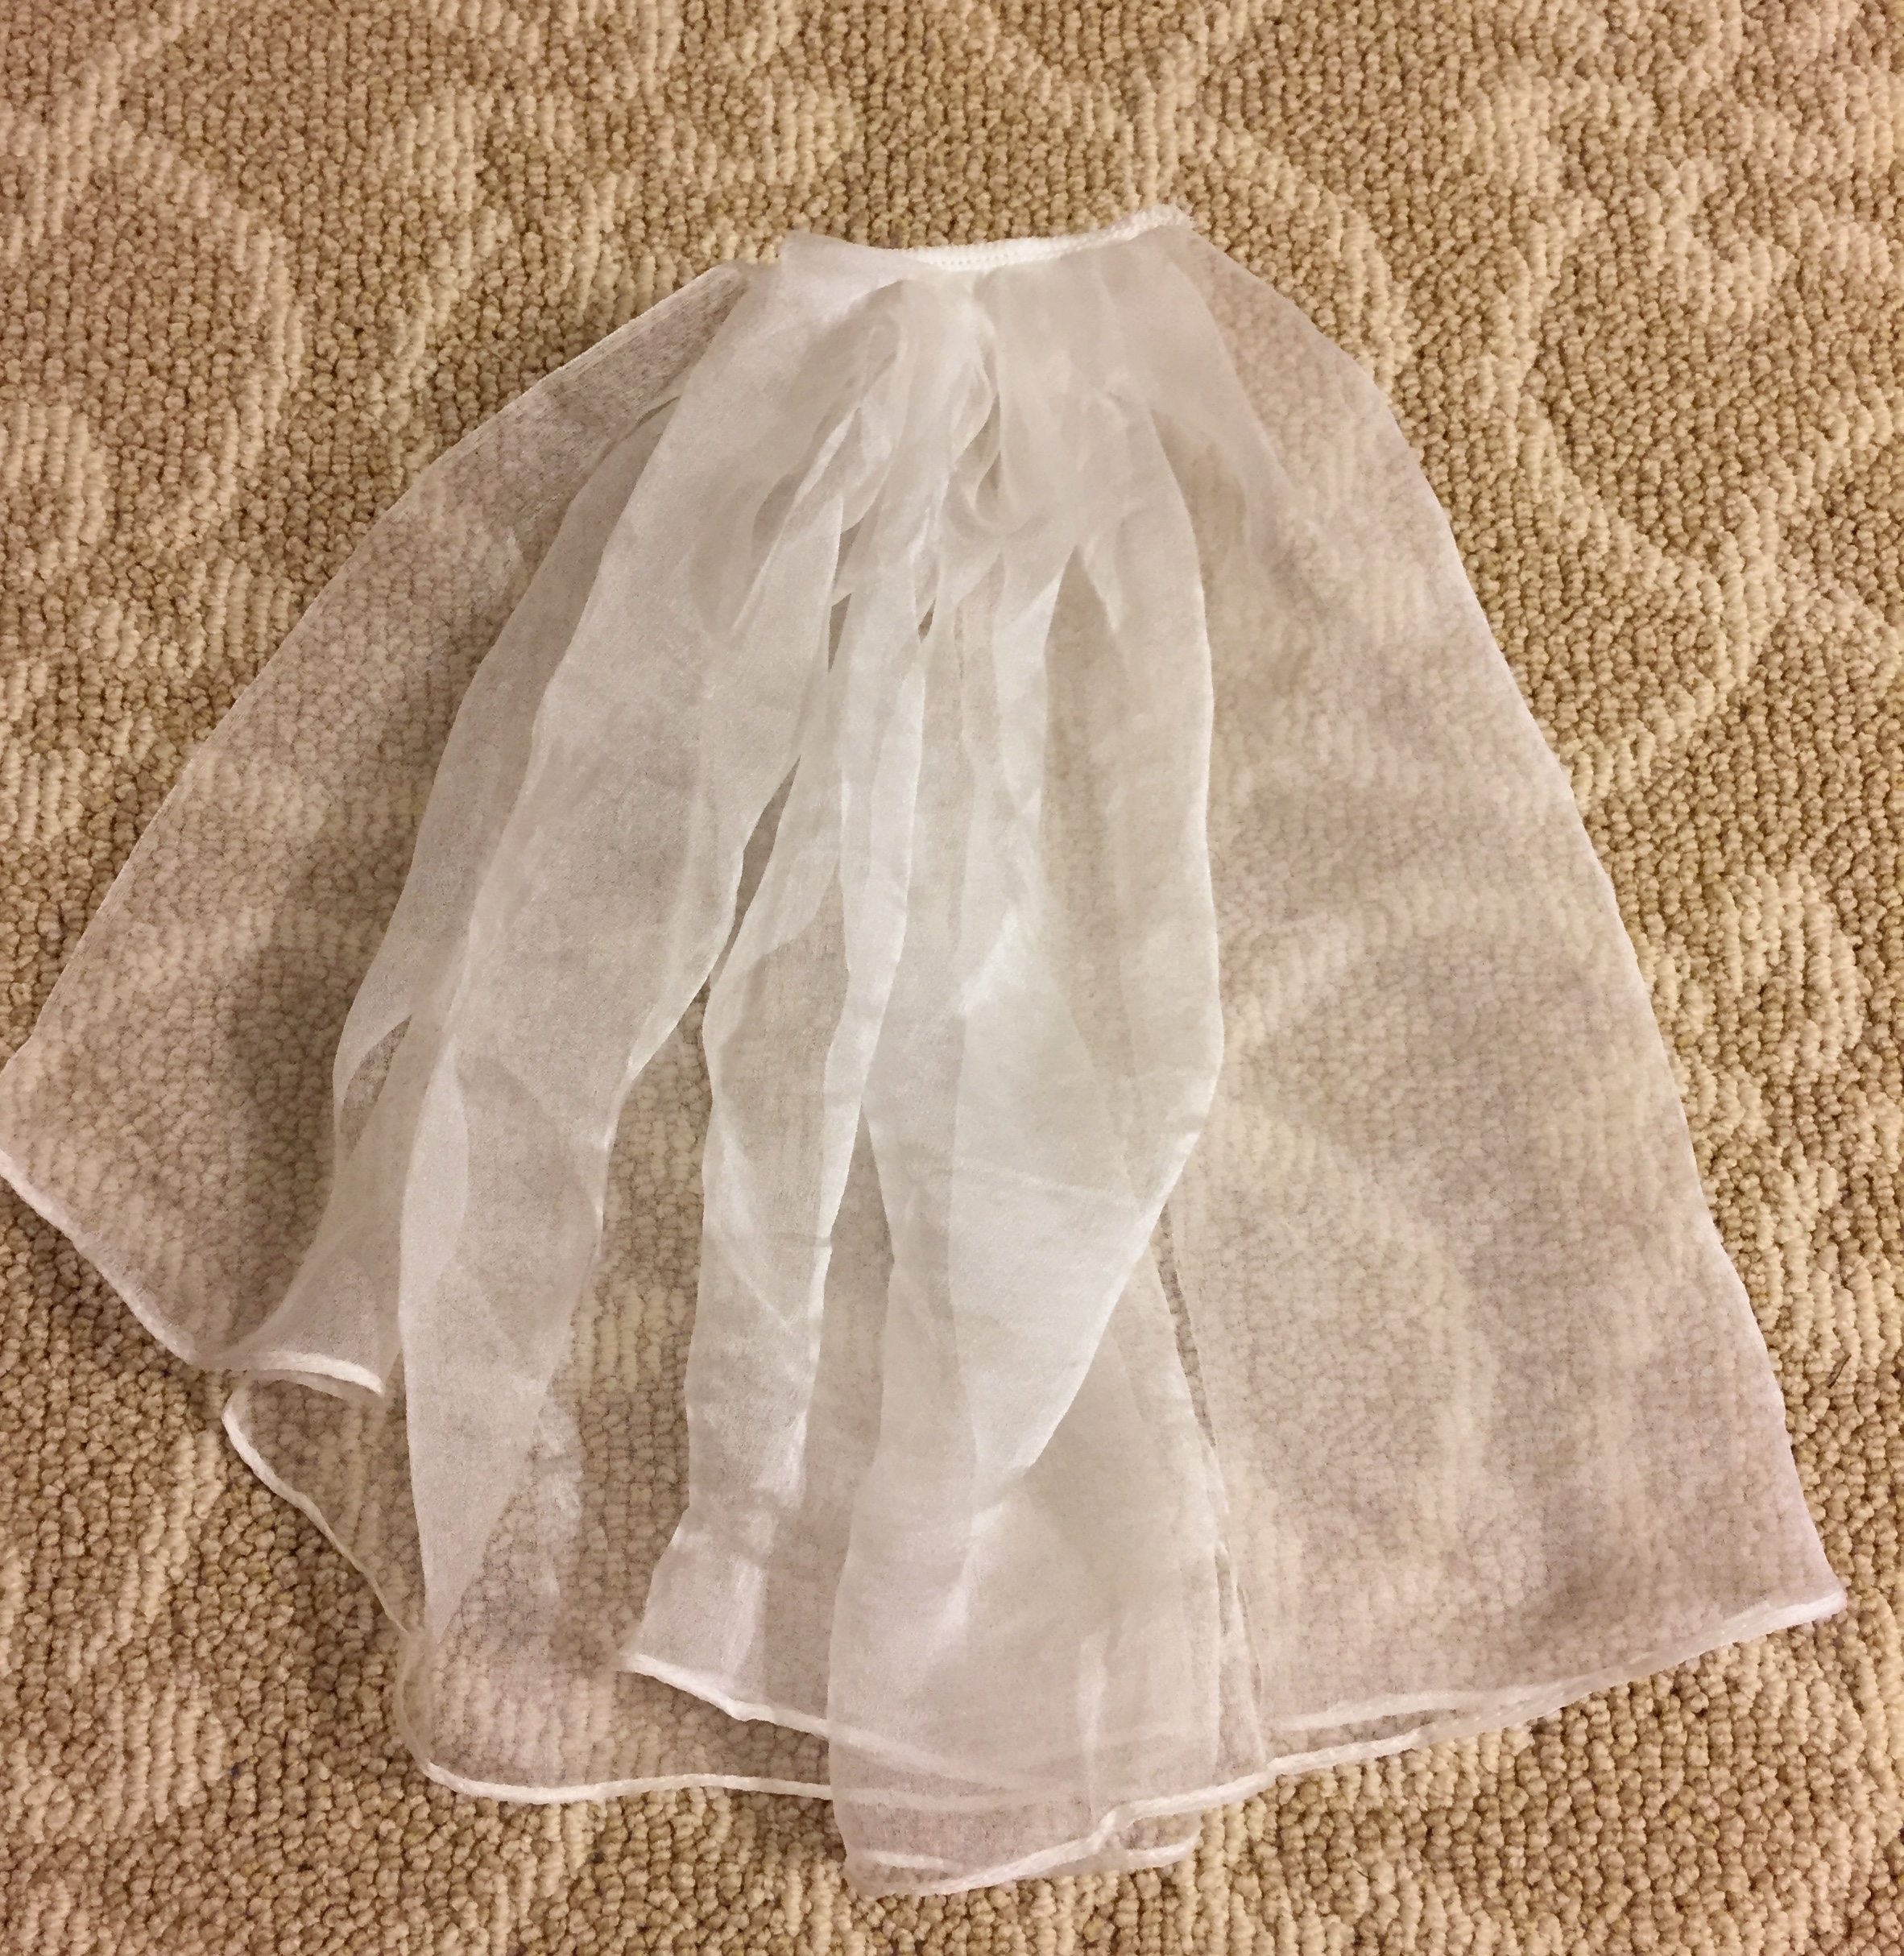
  • I used a white silk chiffon scarf to trim the bodice, so the edges were already hemmed!
  • I serged or machine-sewed any seam I could.
  • I hemmed the skirt by machine, and then covered the machine stitches by sewing lace over it.
  • Instead of cutting a facing, I used a wide vintage rayon ribbon as a hem facing.
  • I used boning that already came with a casing, so I didn’t have to make the casing. I also had casing that had little “fins” on it so that I could machine-sew the boning onto the seam allowance of the bodice.
  • I used hook and eye tape instead of individually sewing on hooks and eyes.
  • Oh horror: I serged the bottom of the bodice, then flipped it up and held the hem in place by ironing on Stitch Witchery!

Because I flat-lined the fashion fabric to a cotton base, and I couldn’t hand-baste the pieces together there is some puckering. Although it’s not up to my “usual standards” I am still quite proud of what I was able to do with what I could, and I had fun with my friends!IMG_2848

Underneath the skirt I wore a long petticoat based on the Truly Victorian bell skirt pattern, with a big ruffle and trim attached.IMG_2162.JPG

IMG_2175

I wore a custom S-bend corset from Redthreaded, with hip pads, and a bust pad. The padding is necessary to achieve the exaggerated Gibson silhouette. I went from an 8 inch differential in my waist and hips to 13 inches, with only a 1 inch waist reduction!

IMG_E2015IMG_2016

I used the “bust improver” pattern from Wearing History, which comes in 2 sizes. I recommend it to give your girls a little extra something!Screen Shot 2018-11-04 at 8.11.32 PM.png

IMG_2708

Project costs:

  • 8 yards silk taffeta: $113.44 including tax from the LA Fabric District (I still have 3 yards left!)
  • 10 yards white veins lace: $34.01 including shipping from Aliexpress
  • 15 pairs grape leaf appliques: $36 including shipping from Aliexpress
  • bodice pattern: $10.75 from Truly Victorian (digital file)
  • skirt pattern: $0 (already used previously)
  • vintage rayon ribbon spool: $3
  • silk chiffon: $0 (gift from friend)
  • 3 yards white cotton for petticoat: $12 from eBay
  • pink trim for petticoat: $3 from garage sale
  • boning, thread, hook and eye tape, flowers, etc. from stash: ~$10

Total cost: $222.20 (plus I have a lot of silk and lace leftover I’ll probably sell to recoup some costs). Normally I don’t tally the costs until the dress is finished, and I still have to add the grape appliqués, but at this point it’s additional labor and not additional materials, so I added everything up. (When I started this blog my goal was to make things for $100 or less, and I’m seeing costs creep up because of nice materials. Hopefully my next project is a lot cheaper!)

All the hair you can see in the picture below is my own, which is currently shoulder-length. I pinned a big hair rat to the top of my head and two smaller ones on the sides, and then all the hair was pulled over the rats and pinned into place. The messy center was hidden by a faux hair bun pinned on top.IMG_2856

I’m not sure yet, but this might be a nice gala gown for Costume College 2019, when it’s all done!


Victorian Bicycling Outfit at Roaring Camp Railroads

Last month I went to a wonderful steam train ride and BBQ, hosted by the Greater Bay Area Costumer’s Guild at Roaring Camp Railroads in Felton, California. I wore a Victorian/Edwardian-inspired bicycling outfit with a boater hat.

9N6A3285

Photo by Chris Wiener

9N6A3291

Photo by Chris Wiener

9N6A3294

Photo by Chris Wiener

The blouse, skirt, and hat were made by me (with construction details at the end of this post), and the boots are Tavistocks from American Duchess.

Roaring Camp Railroads was very picturesque, with a charming little Western “town,” and a beautiful ride through the redwood forest on a real steam train. I highly recommend taking your family!

There were plenty of places to lounge around, like our cowgirl Elizabeth did.IMG_8232

Natalie had fun balancing on the tracks.IMG_8414.JPG

There were also couples, like Kim and David, enjoying the day out.IMG_8245.JPG

It was my first time on a steam train, so it was quite the adventure!IMG_8372

A covered wagon was available for photos.IMG_8369

We went deep into the woods . . .IMG_8309

. . . to commune with nature . . .IMG_8350

. . . and to have Elizabeth eaten by a tree.IMG_8326

After the filling BBQ I relaxed by doing some fence-sitting.IMG_8396 copy.JPG

There was quite the turn out of Victorians, steampunks, and cowboys!

from GBACG FB.jpg

Photo by GBACG

In a previous post I described how I made my blouse, but upcycling an ugly 1990s dress to take it back 100 years! Before and after:

For my skirt, I used the Edwardian Bicycle Skirt pattern from Black Snail Patterns on Etsy. The skirt was made out of a navy wool-blend fabric. (I started with almost 4 yards of 60″ fabric, and had about 1.5 yards left over that I turned into a cape that was too warm to wear at Roaring Camp that day).  The front and back of the skirt was accented with decorative panels made from the same fabric of my blouse, as well as matching fabric-covered buttons.IMG_6299IMG_6296

The hem was stiffened a little by a self-facing that was top-stitched in place.IMG_6313

I made my boater hat by my usual refashion of removing extra layers of braid in a cheap hat, hot-gluing the brim back to the crown, hiding the joins with ribbon and lace, and then adding trimmings. FFGJ0368.JPG

Project costs:

  • 4 yards wool blend fabric: $45 including shipping from Facebook destash group
  • Skirt pattern PDF: $6.16 from Etsy (bought during a sale)
  • 1990s dress: $12 + $5 shipping from Facebook
  • Boater hat: $2.80 from eBay (with coupon)
  • Gimp braid, butterflies, ribbon, small & big covered button kits: $0 (leftovers from previous projects: Regency coat, Crimson Peak hat, a 20s dress, a Downton Abbey maid outfit, and a floral vest!)
  • Thread, glue, misc. from stash: ~$3

Total cost: $73.96

This was a comfortable outfit for a day of traveling; I didn’t even wear a corset. 😉

IMG_8451.JPG

NEBZ9597.JPG

18th Century Costumes at the Legion of Honor

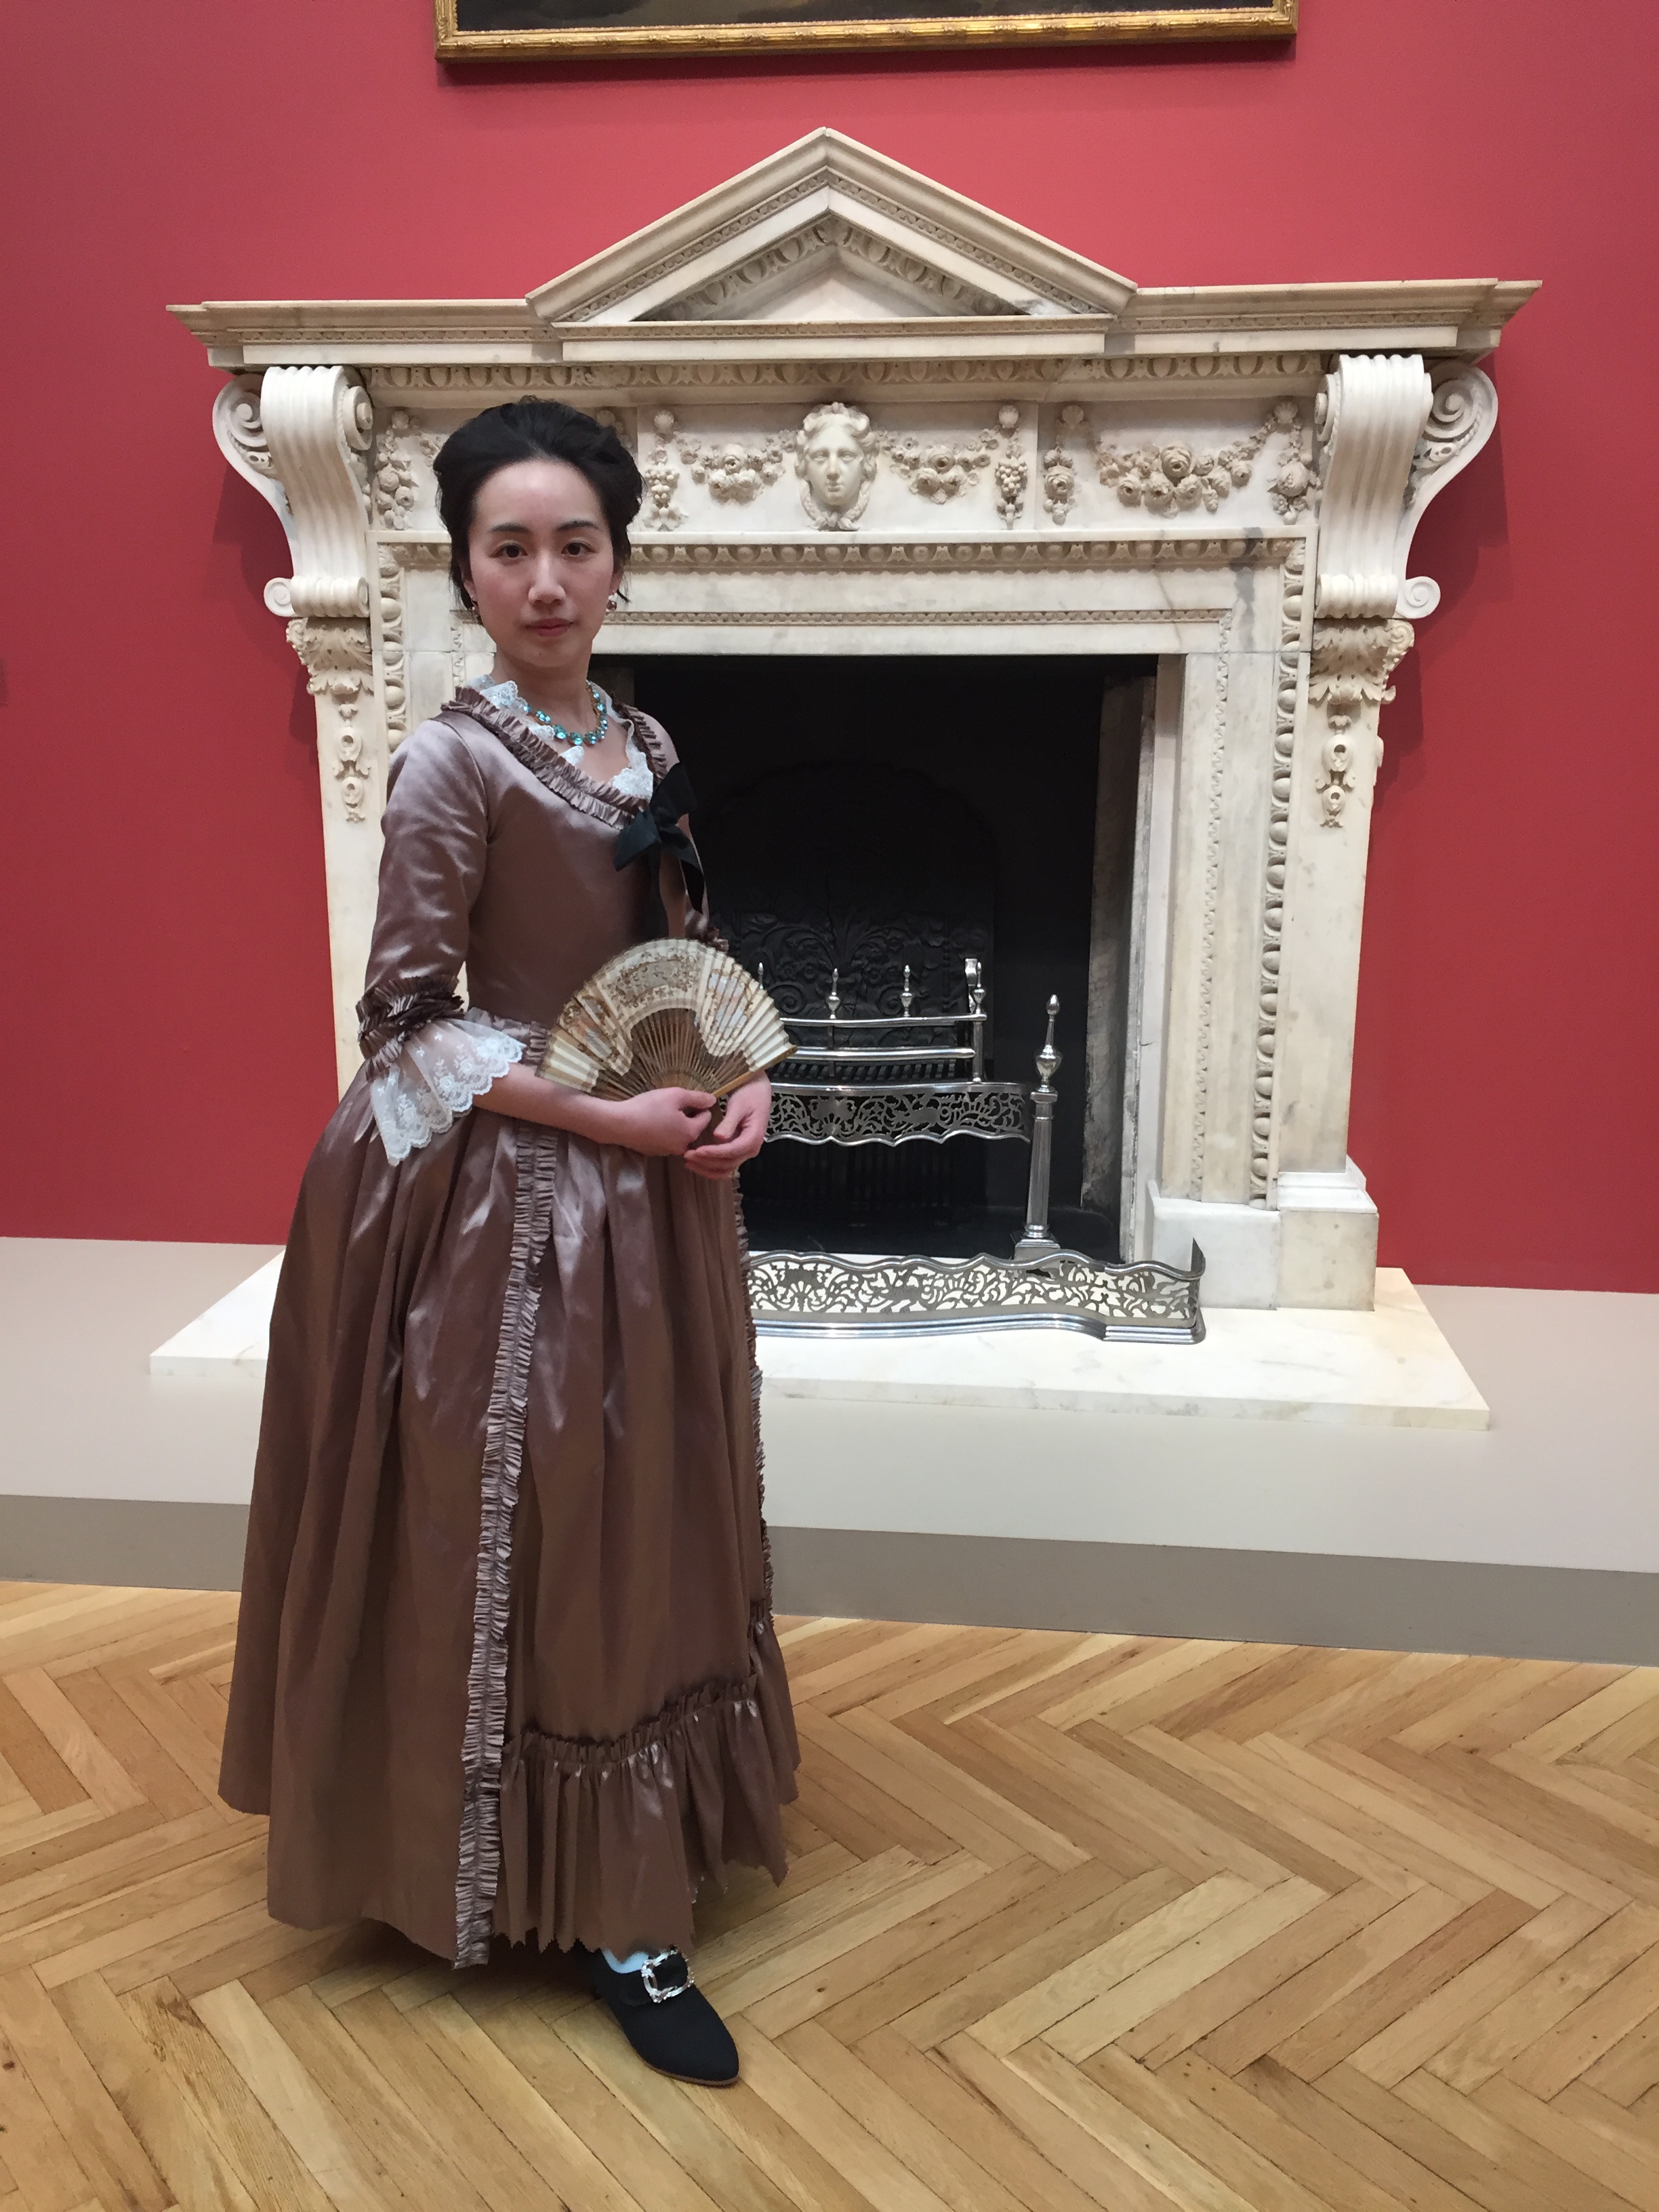
Yesterday I saw the “Casanova, The Seduction of Europe” exhibit with the Greater Bay Area Costumer’s Guild at the Legion of Honor Museum in San Francisco. It was full of incredible artwork, and even antique garments on display. I highly recommend it! I spent the last few weeks working on a new outfit to attend the exhibit instead of blogging about it, but it I will post more about the construction details once I get the last bit of trim on (which did not arrive in time). I wore my new mauve silk Italian gown pinned shut, as is historically correct, but will be changing it to a hook-eye-and opening. (I was paranoid about marking up the silk so I wore it a bit loose).

Many of the photos in this post are used courtesy of John Carey Photographic Imagery. Thanks John!

I love how this photo reminds me of candlelight!

28235509_1444740205653240_7574251756318558416_o

Photo by John Carey

This one is outside the museum.

28070584_1444740978986496_6306691411018361472_o

Photo by John Carey

Here’s a few full-body shots from my phone:IMG_6848IMG_6850

My shoes are 18th century black wool Dunmores from American Duchess (affiliate link) and the earrings and necklace are from In the Long Run Designs. My fan is an antique. IMG_6852

There was much gossip and court intrigue with my fellow Taffeta Sisters, Kelsey and Natalie.IMG_6955

Some of it was of a highly shocking nature!IMG_6868

There were many gorgeous costumes in attendance.

28071272_1444740812319846_2482247944423106324_o

Photo by John Carey

28162085_1444739882319939_3872600878878233833_o

Photo by John Carey

28164556_1444740768986517_9753430740362626_o

Photo by John Carey

28162079_1444741058986488_8766254981545986397_o

Photo by John Carey


There was unavoidable 18th century rump shaking.

Plus other silly shenanigans.


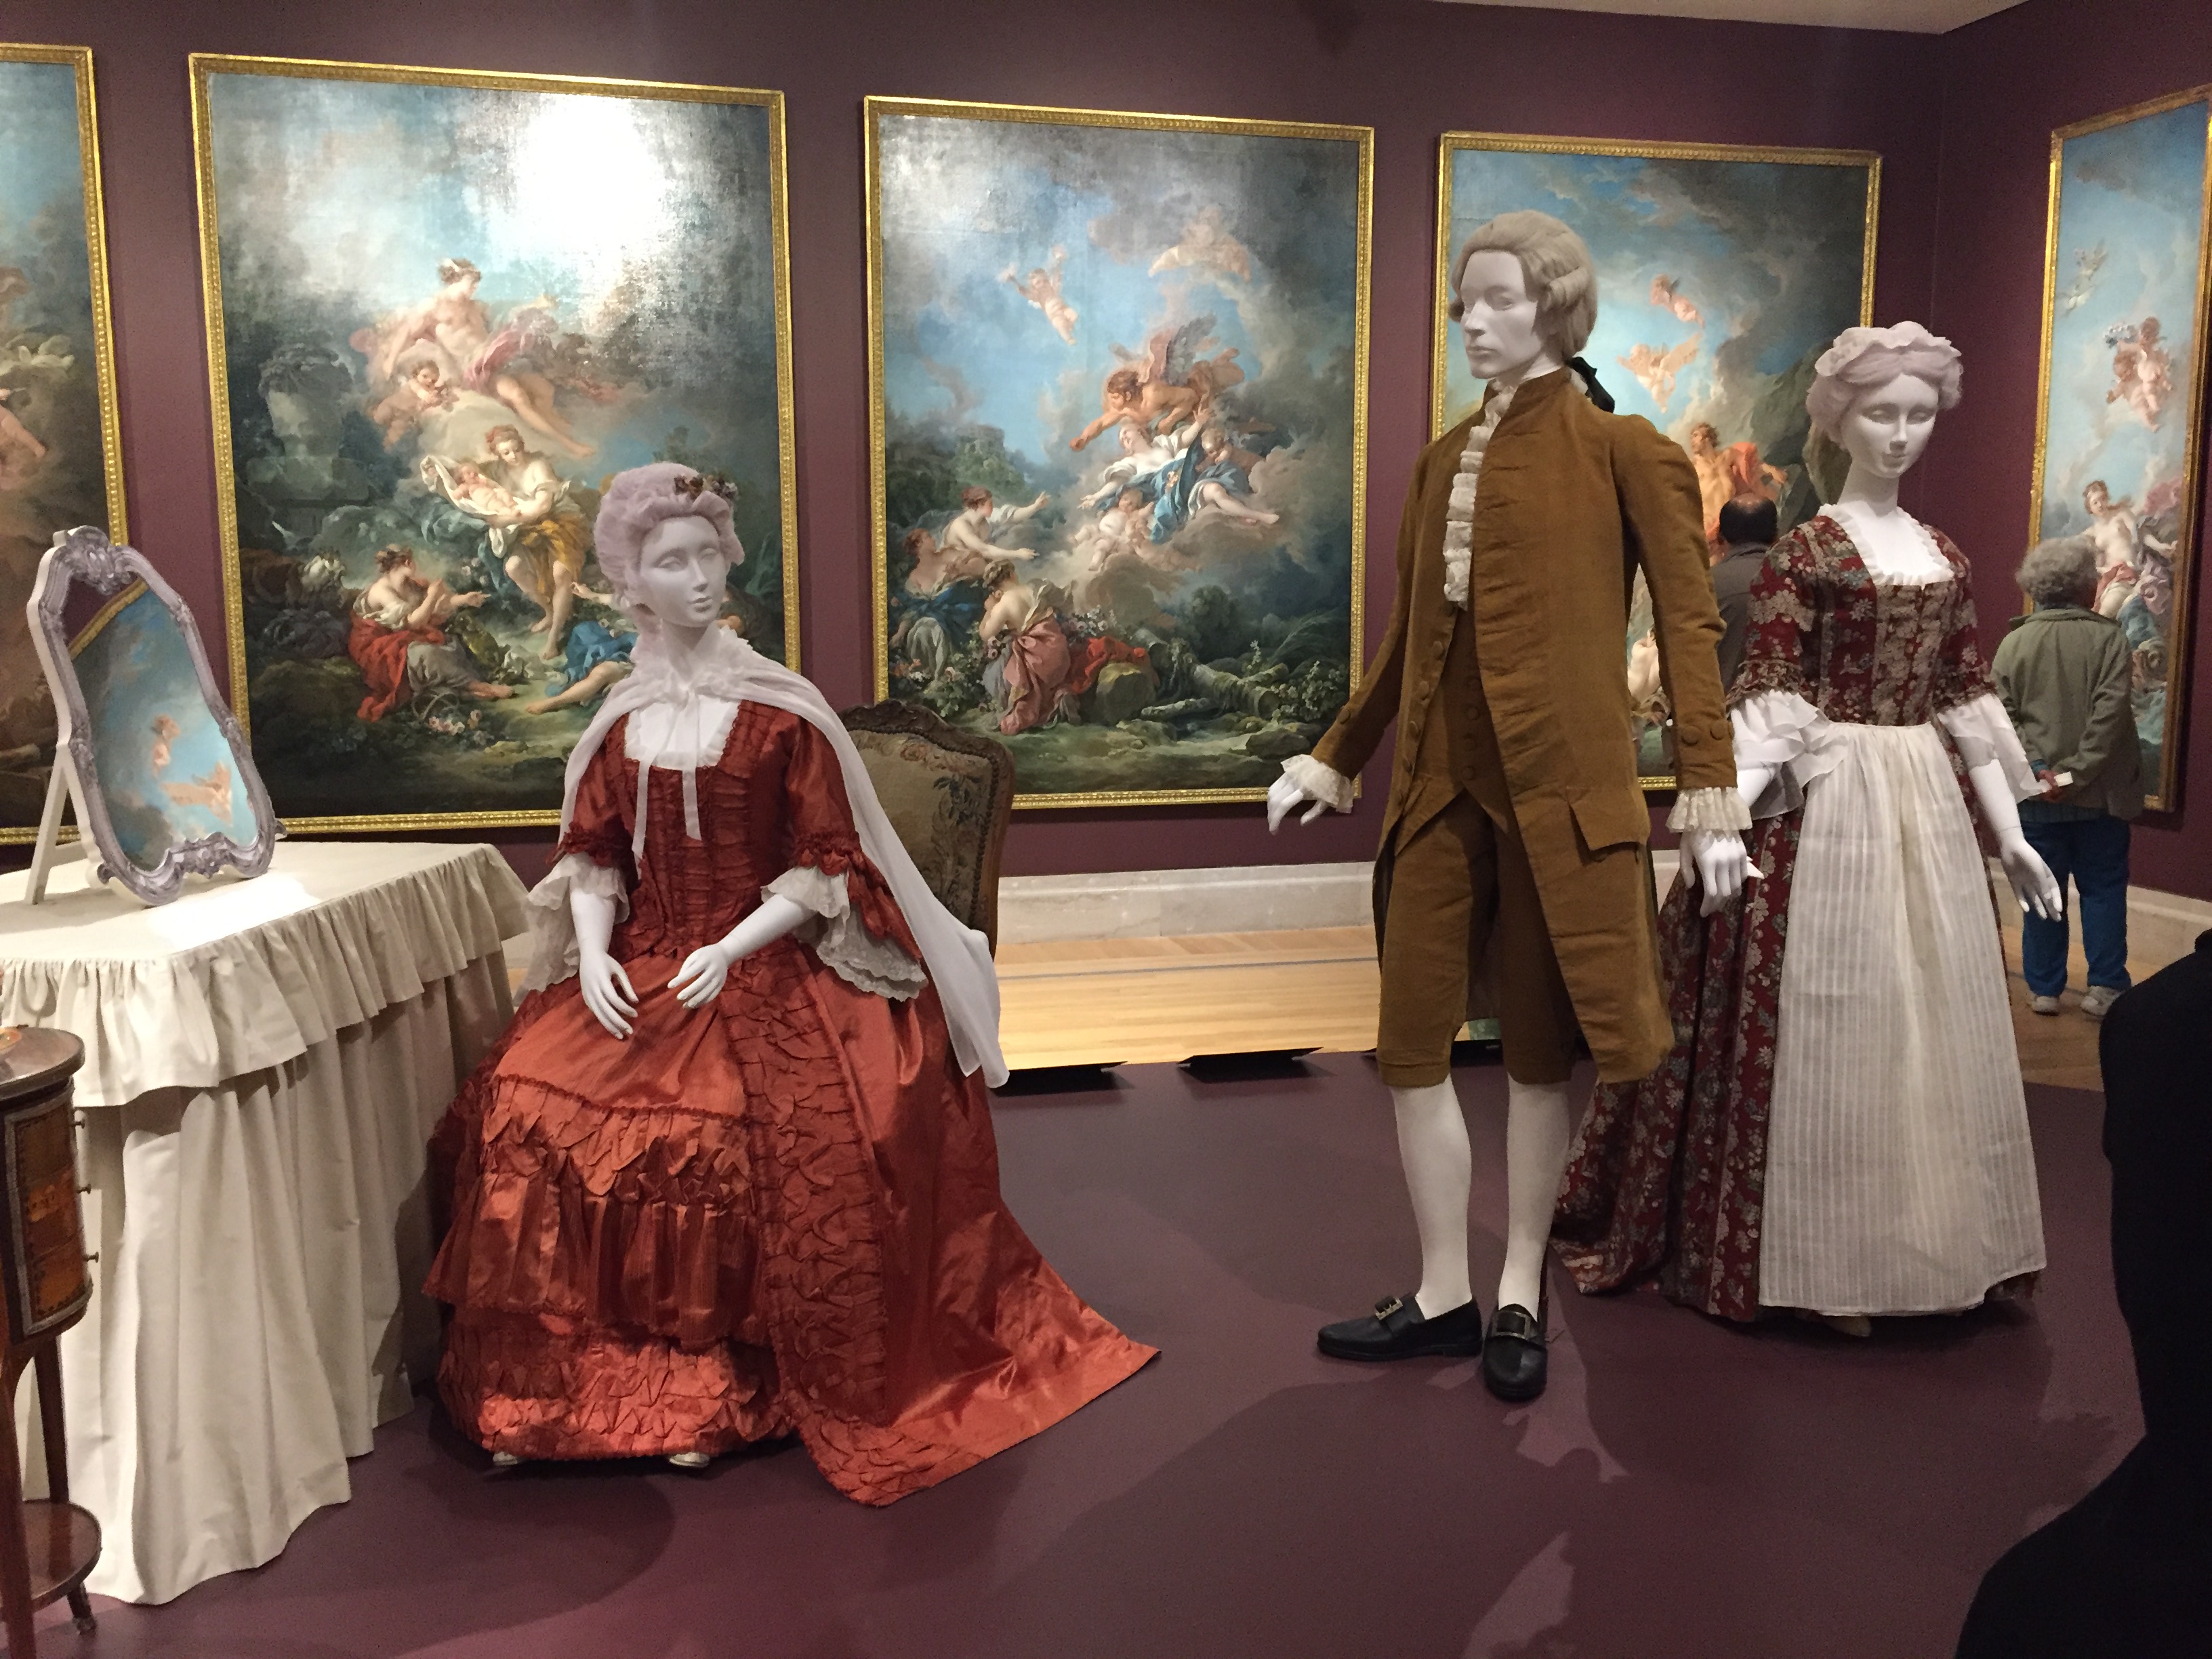
We enjoyed the stunning artwork, costumes, and artifacts on display.IMG_6814.JPGIMG_6829IMG_6805

I felt quite at home with the paintings. =) Many more photos have been uploaded to my Flickr account so please take a look!

28165039_1444739302319997_1270203275298556190_o

Photo by John Carey

Outlander Dinner Party

Last night I went to a lovely Outlander-themed dinner party at the Sequoia Lodge in Oakland. The wooden building surrounded by trees definitely contributed to the mood!  We were greeted by a bagpiper as we entered. Later, as part of the dinner entertainment there were also musicians signing and playing instruments, and some dance demonstrations.

I wore a gown I made for the occasion out of cotton plaid. I am also wearing a wool petticoat, 2 under petticoats, a double-bum pad, a pair of stays, a chemise, a fichu, and a pair of beautiful black 18th century Dunmore shoes from American Duchess.IMG_2029

It was my first time using pins to close an outfit instead of hooks and eyes. I bought some reproduction 18th century gown pins from Larkin and Smith. (I am using a combination of the medium and fine pins). I am still figuring out how to do it without stabbing myself or putting weird wrinkles into my dress, but I am getting better! (Hint: the stays are for safety as much as they are for support). You can read about construction details in my previous post.IMG_2037

My hair is rather short at the moment (even too short to braid properly) so I put it into a tiny bun on the back of my head and covered it with a large fake braided bun.IMG_2034

My fichu is actually a small vintage cotton organza tablecloth. It has lovely floral whitework, scalloped edges, and best of all, zero effort on my part! (For those that are curious, it is about 35×35 inches wide. If you are tall or broad-shouldered I’d recommend a larger square).IMG_2006

As usual, I was too busy chatting and stuffing my face with the delicious meal (puff pastry wrapped asparagus with prosciutto, roasted fowl with buttered leeks, roasted blue and gold potatoes, haggis, and sweetmeat cake with marzipan) to take as many pictures as I should have, but here are a few more!

You’d never realize that Christina of The Laced Angel and Natalie both finished their jackets that afternoon. Christina started the same day! IMG_2024

The tables were set up in  large U in the lodge. This was the side I was sitting on.IMG_2050

There was a range of social classes and decades at the dinner.IMG_2060IMG_2064

I especially loved the variety in jackets! (You can catch a glimpse of the bagpiper to the right of the photo).IMG_2015

I had a delightful time, and I think everyone else did too. (There was even a couple celebrating their 25th wedding anniversary, and they were married 25 years ago in the same location!)IMG_2032.JPG

GBACG Tissot Bustle Picnic

Yesterday I had a very lovely time at the Greater Bay Area Costumer’s Guild Tissot Bustle Picnic, held at Ardenwood Historic Farm in Fremont, CA.

I wore my dress with a pouch made from matching fabric, a parasol from Angelic Pretty, and a top hat made by Triple Fortune. I ran out of time to make a matching bonnet, but I have the black straw base started at least!

ImageFrom the front you can start to see a bit of my baby bump. =)

ImageThere were many beautiful outfits at the picnic. (Click on the link to view lots of ruffles and colors!)

Read the rest of this entry

Recycling a Polonaise into a Bustle Dress

In June I am going to the GBACG Tissot Bustle Picnic, but I do not have time to make a new bustle dress from scratch.

I am going to recycle an old dress into a newer one, which will hopefully leave me time to make accessories like a matching hat and reticule.

A few years ago I made a simple polonaise-inspired dress. It was a little sad and limp. I think I may have only wore it once because I am having trouble finding decent pictures of it. Here is one my friend Kim took:

Image

I recently realized it might have a fresh new life as a bustle dress. I experimented with 3 different sizes of bustle pads and decided on a medium one:

Image

I tucked it up on each side, added a petticoat and it’s already looking more bustle-y!

Image

I did not have enough of the linen toile fabric when I made it to do pattern-matching, but I still have a few scraps left. (I had about 2.5 yards of 45″ fabric). I am going to do some fiddling around with the leftover pieces of fabric to add some more frill to the back, and also experiment some more with tucking and pinning.

Image