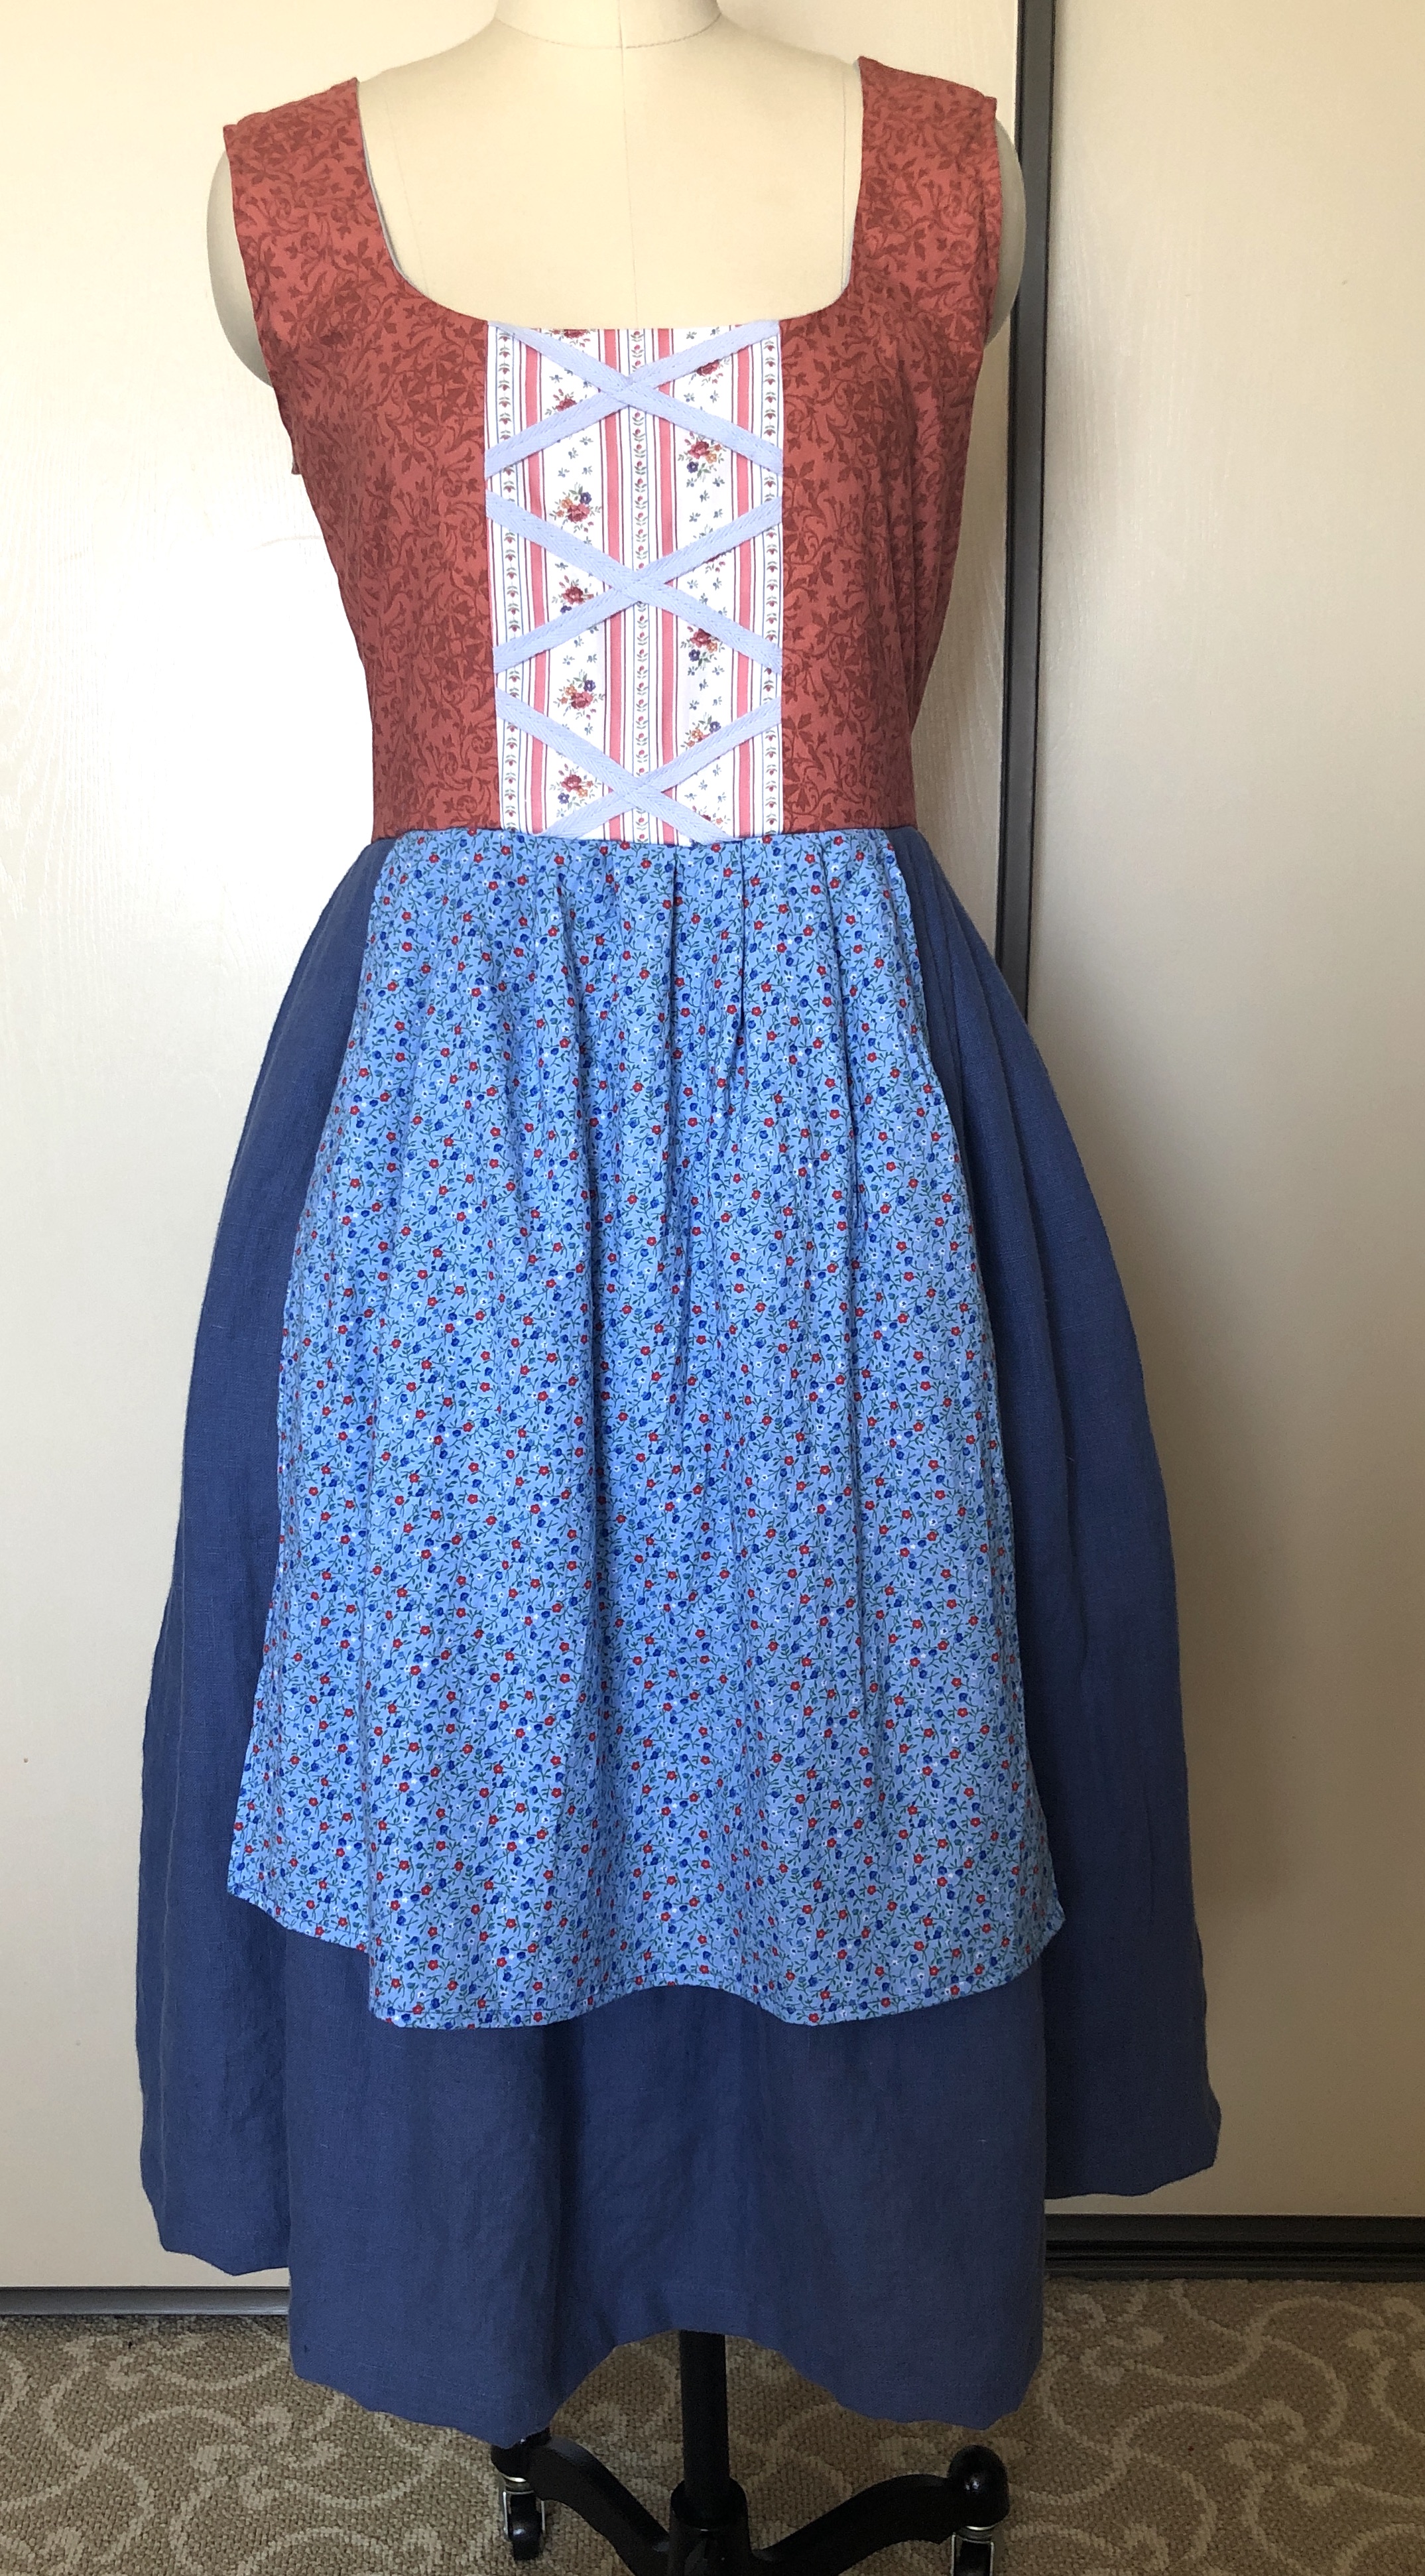
If you are a fan of the Lord of the Rings books or movies, you’re probably a fan of hobbits, those charming folks whose ladies wear very cute pastoral outfits. With the new Rings of Power show coming out soon I thought this would be a good time to show you an easy hobbit lady outfit. Many of the hobbit women wear a 4 separate garments: a blouse, a bodice that laces up the back, a skirt, and an apron. To simplify the sewing and getting dressed, I decided to turn the last 3 items into one zippered dress. This dress also works great for a trendy cottage core look, and is a wonderful stash-buster for combining all those various fabric scraps you have that aren’t enough to make up a full garment by themselves.

Note: I am a member of the Janome Maker program and this skirt is sewn on a Janome Skyline S9 and a Janome FA4 serger. (This post is sponsored by Janome but all content and opinions are mine).
Materials needed:
- 2 yards fabric for skirt (I used 58″ wide blue linen)
- 1 yard fabric for apron (I used a floral print; you can use a lace fabric too)
- 1 yard fabric for bodice
- 1 yard fabric for bodice lining
- Fabric scrap for center front bodice
- 1-2 yards colored twill tape or ribbon
- 1 zipper plus various matching threads

I self-drafted my own pattern (with the basic shapes shown below) but you can start with any square-necked basic bodice, or a dirndl-style dress that fits you. You will take your pattern and slice the front bodice into 3 parts (a front center and 2 front sides). The front center is going to be a different color of fabric that we will add criss-crossed twill tape or ribbons to. The width of your front center will depend on your body measurement, but for reference I cut a 6″ wide panel (for a 5″ finished panel with seam allowance) for a 34″ bust.
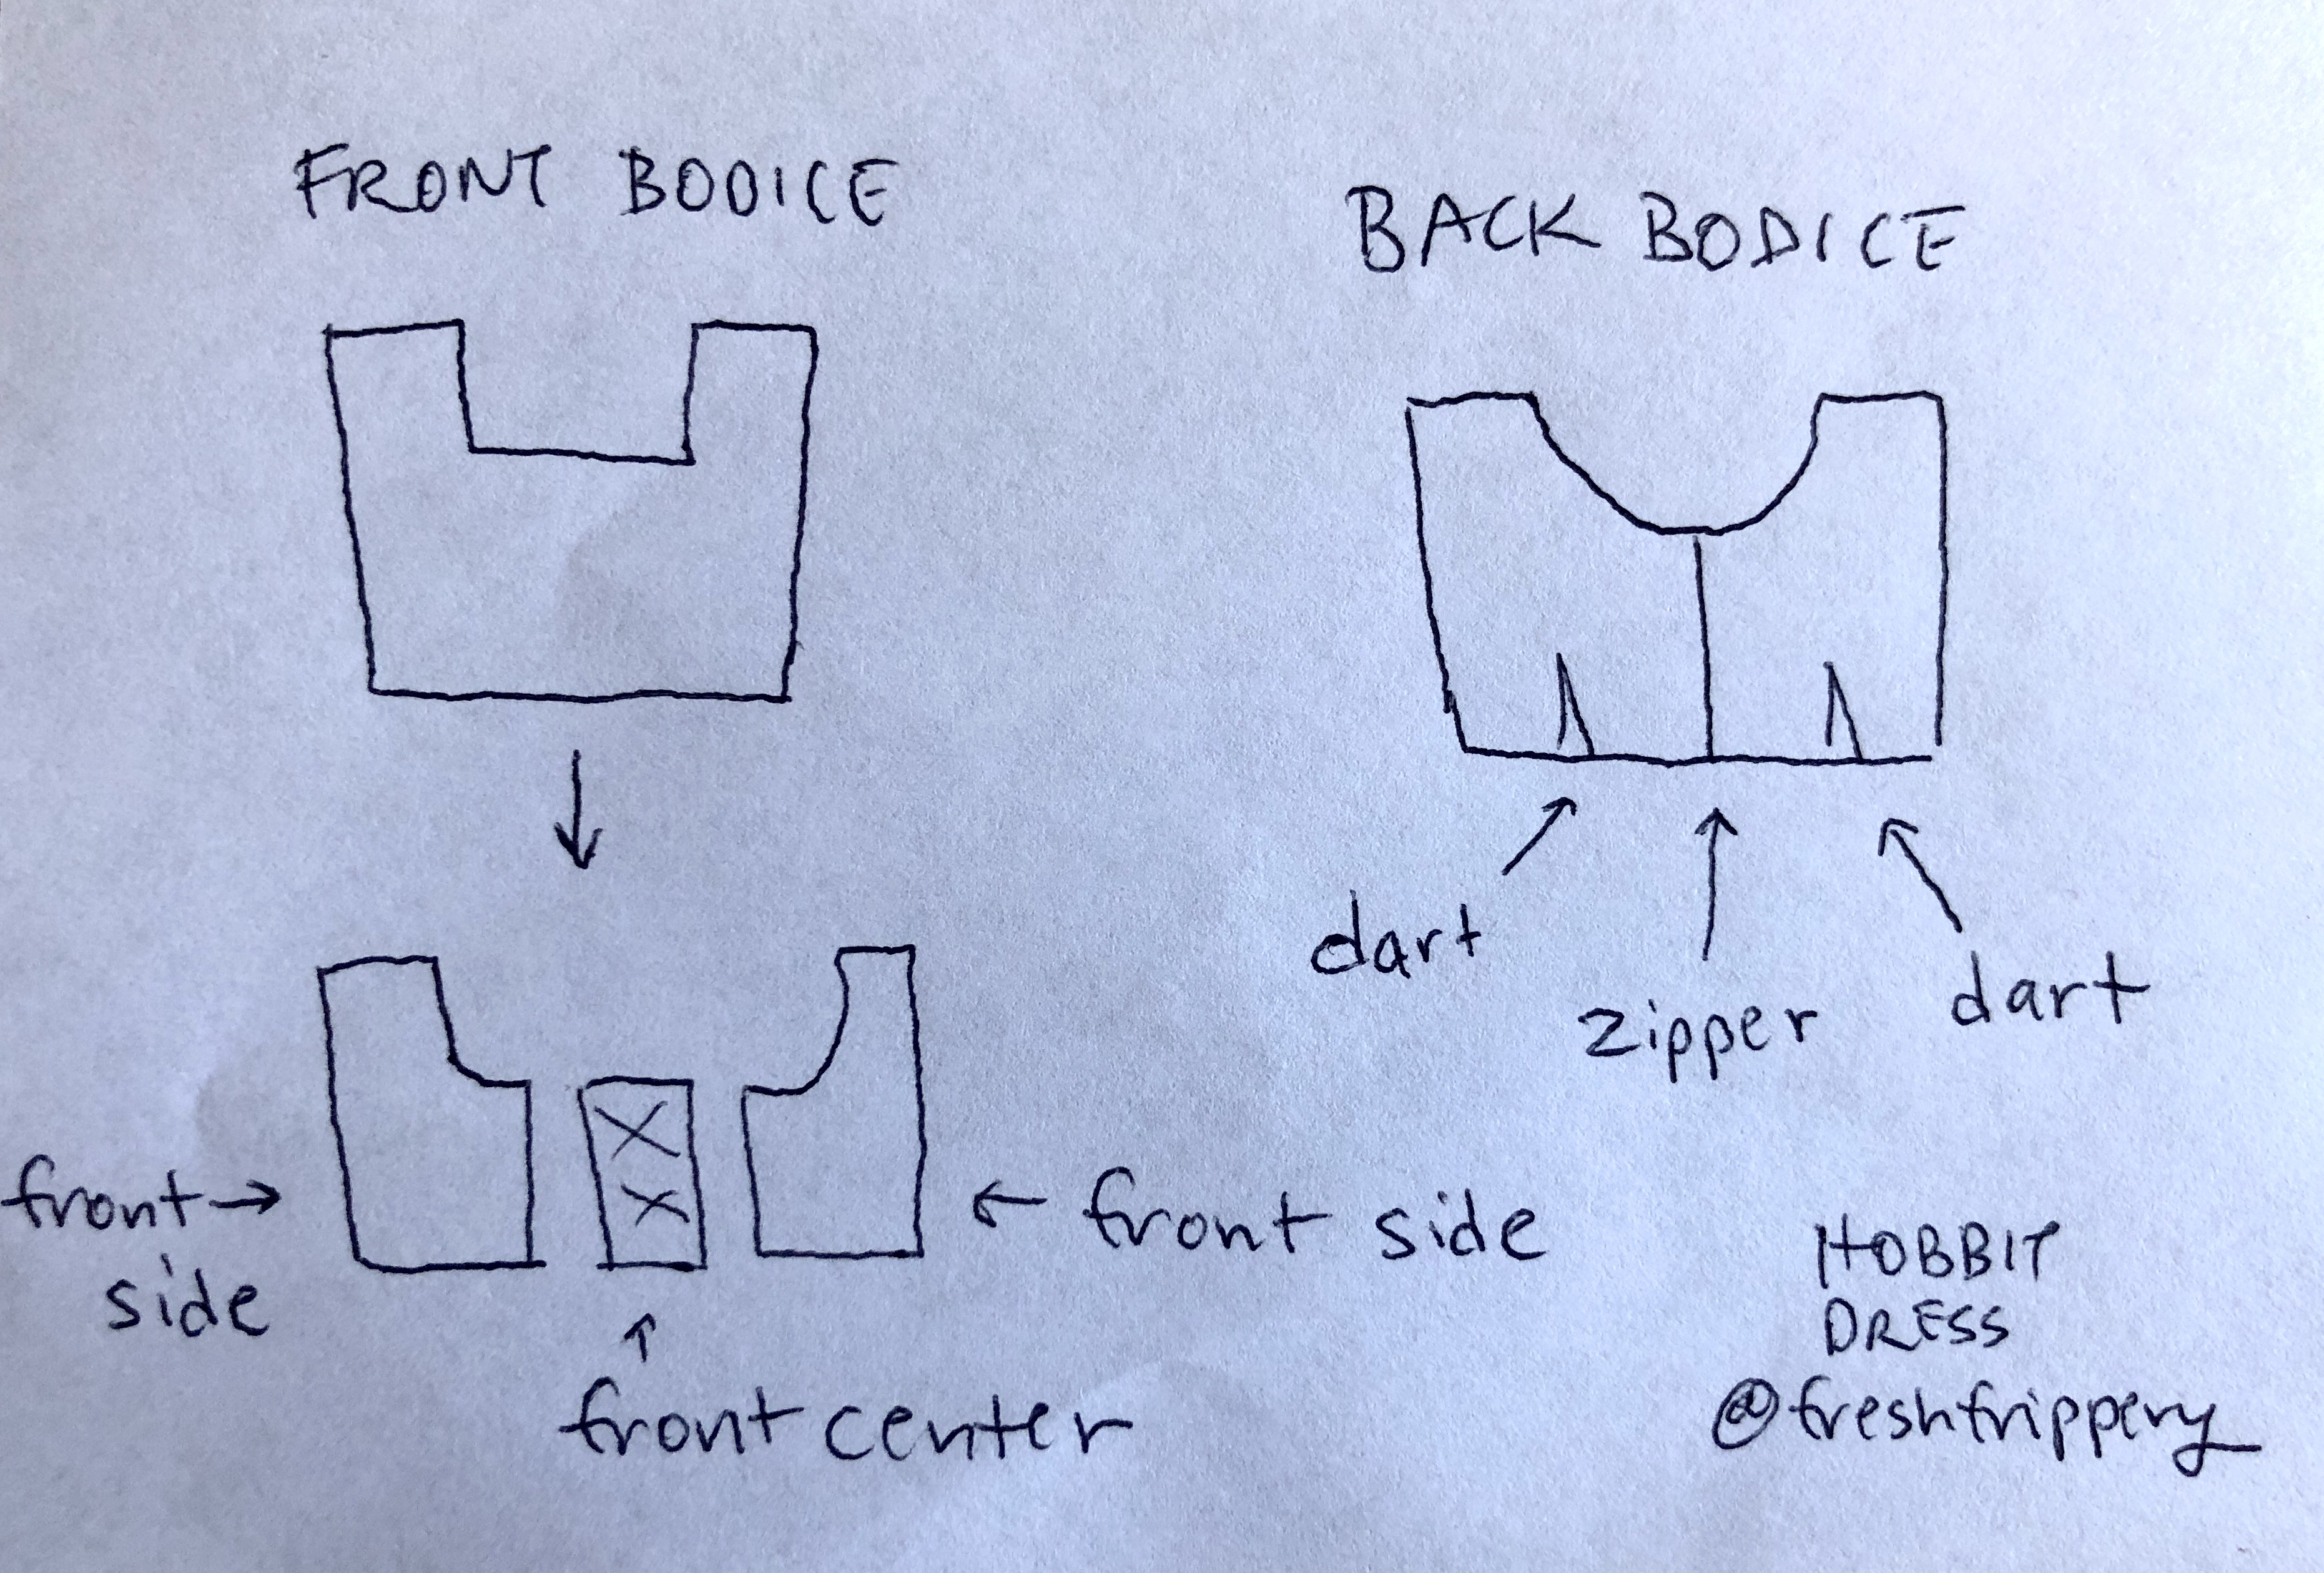
The first thing you will make is the front center panel. Put down strips of twill tape or ribbon in a criss-cross pattern on your rectangle and stitch them down. The raw edges will get trimmed and then sewn to the front side pattern pieces. (If your decorative fabric is thin like mine, then you will want to back it with a second piece of fabric).

Once you have the front center prepped you’ll sew it to the front sides, then sew the bodice backs to the front sides, and also join the shoulder seams according to your dress pattern. For the bodice lining you’ll do similar construction except you’ll skip making a decorative front center panel. Don’t forget to put darts in your back panels if your pattern calls for them.
Stitch the fashion and lining layers right sides together at the necklines and flip right side out, creating a clean edge at the neckline. For the armholes fold the raw edges in, pin in place, and top-stitch. For the center back where the zipper will go, serge the raw edges.

To make the skirt I used 2 rectangular panels of 58″ wide fabric cut to a length of 30″ but the length can vary based on your preference for a longer or shorter skirt. (I am 5’6″ and after some length is taken up through construction and hemming the skirt falls a few inches below my knee).
Optional: If you want a pocket you can cut a strip from one of the skirt panels and use that to cut out pocket pieces. I like to use my cell phone and hands as guides for how big the pocket should be. Serge all the raw edges of the skirt and pocket pieces first. Stitch one pocket piece to one skirt panel at the edge, right sides together. Put the right sides of the skirt panels together with the pocket pieces flipped out to be right sides together as well. Sew down the skirt side seams and around the pocket as shown by the pins, leaving an opening for your hand to reach in.

For the apron I cut out a 22″ wide and 20″ long rectangle (with the exact size according to your preference). You will want to hem the sides and bottom of the apron to finish the edges before pinning it to the center of the front skirt panel at the top edge and then serging the raw edge of the top of the skirt.
Split the back skirt panel down the middle to allow for a zipper and serge the new raw edges.
Pleat the top of the skirt to fit your bodice, matching up the side seams of each. Sew the bodice to the skirt and press the waist seam open and flat.
Insert a zipper down the center back from the bodice to part way down the skirt, then finish the rest of the back skirt seam.

Hem the bottom of the skirt by folding it up twice to your desired length, and your hobbit dress is done! Pair it with a cute blouse and a floral headdress and you will fit right in at the Shire!

Thank you for reading!


 12-14-19")

This dress is so pretty! You look fabulous.
Thank you so much! I’m happy you like it!
It’s very cute and creative. I really enjoy seeing what you come up with!
Thank you so much!