Tag Archives: Tudor Tailor

A Tudor Kirtle and Smock at a Renaissance Faire

Last year I made a Tudor kirtle and smock using patterns from the Tudor Tailor. (You can see my previous construction posts here).

However, due to rain and mud the Renaissance Faire I was supposed to attend with my friends got canceled. Finally, nearly a year later I got to wear my kirtle!IMG_4336

This is a lower-class garment, so there is no boning. The smooth front of the bodice is achieved with 2 layers of canvas sandwiched between a layer of worsted wool and the linen lining. I think my back is a tad long, hence the wrinkling, but I’m still pleased with the overall fit of my first kirtle. There are slits in the side to access my pockets.IMG_4342

I am wearing a blackwork coif commissioned from Romantic Recollections, and Stratford shoes from American Duchess (affiliate link).

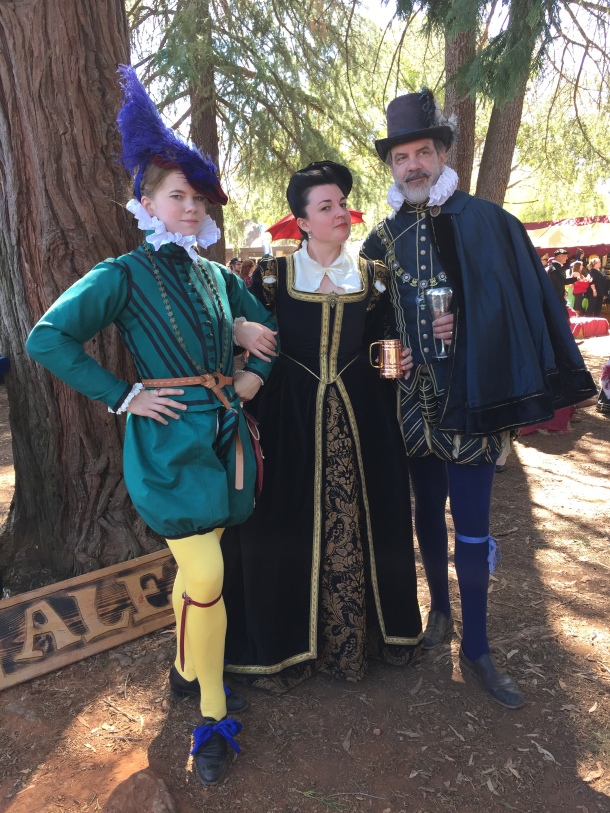
And like all good faires there were beautiful ladies (Amanda, Samantha, Kelsey, and Natalie) . . .IMG_4265

dashing gentlemen . . .IMG_4348

court gossip . . .IMG_4401

the Queen . . .IMG_4393.JPG

and codpiece parasol jousting (Elizabeth and Lynne).IMG_4380.JPG

This was my first Ren Faire (really!) and I had a great time. I’ve been to lots of other historical events, including SCA, but not a Ren Faire before so this was a new experience. I’ll be back!

Tudor Kirtle (Part 3): Kirtle and Smock

Tudor Kirtle (Part 3): Kirtle and Smock

I finally had some sun and a weekend at home to take some pictures. I had 4 garments that were finished and not photographed, including this kirtle and smock. I made the kirtle earlier in the year for a faire I ended up not being able to attend, so I don’t have any pictures of it worn yet.img_0729

The kirtle is made of a blue worsted wool and lined with a linen-blend, which was also used to make the smock. Both garments are made with patterns from the Tudor Tailor.img_0731

The kirtle has spiral lacing on both sides. I chose to have the openings on the side to increase the versatility of the kirtle. I can wear it as-is, or with other clothing over it.img_0734

The back has a rounded neckline.img_0739

Parts 1 and 2 discuss my construction details.

The smock is rather straight-forward, and is really a series of rectangles of varying sizes. Most of the time was spent on the collar and cuffs, so if you wanted a plain one the sewing would go very quickly.

Final project costs:

  • 4 meters blue worsted wool: $104.88 from Aliexpress. (I probably could have made this out of 3 meters, but bought 4 to be safe. I still have plenty to make sleeves).
  • 6 yards Kaufman handkerchief linen/cotton: $45.17 with tax from Fabric.com. (I used this for the smock and lining, and have enough left over for a 18th century chemise).
  • 10 yards linen tape: $10.40 including tax from Britex Fabrics.

Total: $160.45

This is a bit more than my usual projects, but wool is not cheap (even though I felt I got a decent deal on the fabric), and I have plenty of materials left over for other projects.

I would like to make a pair of sleeves and a partlet to wear with it. I already own a few other accessories, such as a straw hat, my gorgeous American Duchess Stratfords (affiliate link),  and a beautiful blackwork coif commissioned from Romantic Recollections!img_0744screen-shot-2016-12-26-at-3-21-45-pm

Tudor Kirtle (Part 2): The Skirt

Part one, learning from my bodice mistakes, is here. This post is about what I learned while making the skirt the wrong way.

After cutting out the skirt panels, which are really just two large rectangles, one for the front and one for the back, I folded the tops over, stitched them, and then folded them over again to enclose all raw edges. (Have you figured out yet what I did wrong?) Then I pleated them and stitched the top of the pleats in place. (Each long edge of each panel was folded in once because it was the selvage).img_9245

The panels were stitched together at the sides, leaving room for pocket slits. Then the pleated edge of the skirt was sewn to the bottom edge of the bodice, right sides together. (Here my sewing got very sloppy because I was making the kirtle last minute for an event). This is what the interior of the kirtle looked like:fullsizeoutput_c7

Remember from part one how I realized the worsted wool was too fine for boning, and the reed showed through? Since I had folded the tops of the pleats over twice, the extra bulk showed through on the other side! It wasn’t obvious when the skirt was on a hanger, but once I put it on my stomach pushed the pleats outward, causing a visible line on the outside where I did not want it.

I realized at that point that what I should have done was pleat the skirt panels, attach them to the bodice, then finish sewing the bodice lining over the pleats to enclose the raw edges.

I was too lazy to take it all apart due to all the hand-sewing involved, so I ended up having to unfold part of the pleats and trim off the stitched edge with scissors. Here is the inside again:img_0618

I should still trim the raw edge with pinking shears to prevent fraying, but now there is not a bulky line that shows when worn!fullsizeoutput_c8

Then when hemming I made the mistake of just folding up the bottom a certain number of inches and stitching without pinning and putting it on before sewing because I was in a hurry and thought I had cut things pretty evenly.

Yeah, it wasn’t that even, and wool stretches. So, after my event got rained out and I couldn’t go, I put the kirtle on and had some friends help me look it over so I could re-hem it evenly.

The kirtle is now done, but I have been waiting for a sunny day to take pictures, since I haven’t had a chance to wear it out. All the pictures in this post were taken indoors, some at night, and you can see it made the wool seem like four different colors!

To wear under the kirtle, I made a smock using a pattern from the Tudor Tailor book I bought on Amazon (affiliate link). It is also awaiting proper photos. Meanwhile, here is a teaser picture!img_9824

Tudor Kirtle (Part 1): The Bodice

Near the end of the summer I started on a wool Tudor kirtle to wear for a last minute outing to a Faire. I was so busy sewing that I didn’t blog about the process along the way, but took photos so future me wouldn’t have to repeat the sad mistakes of past me.

I am using patterns from The Tudor Tailor by Ninya Mikhaila and Jane Malcom-Davies to make the wool kirtle and the linen smock. It’s a great book with clear diagrams and historically accurate patterns. (You will have to know some basic drafting and how to scale things to yourself. I lucked out and am close to the measurements of the person the patterns are based on). I bought my copy of the Tudor Tailor on Amazon (affiliate link).

514017pmnzl-_sx413_bo1204203200_

This is the example shown in the book, which is back-lacing. (Mine is side-lacing). More variations on lacing, the shape of the neckline, and sleeves are in the book.5cc1d9067bfceb1a0f1b358f1769eb49

My kirtle bodice is made of a layer of blue worsted wool, a cotton canvas interfacing, and a linen/cotton blend lining. At first I thought it would be a good idea to put in a little bit of reed boning down the front for structure. I was wrong.(Here are the wool and canvas layers before being sewn together).img_9111

First, boning is not actually needed. Upper class clothing of the era could be highly structured, but the middle class look I am going for has a softer silhouette, and in some period portraits you can see the creases in the front of the bodice. Second, I was using a fine worsted wool, which is not very thick, and you could see the lines of the reed on the outside.img_9112

I took out the reed and pinned the canvas to the worsted wool, folding the extra fabric of the wool over the canvas.img_9113

After stitching those together by hand to keep the stitches from showing on the outside of the garment, I put the lining over the canvas and stitched that by hand as well.img_9199

Before I began I thought, “Hey kirtles have an easy shape, it shouldn’t take too long!” I sadly underestimated the amount of hand-sewing required if you are particular about having your stitches show.

Here is the outside when finished. (It looks a little wrinkly on the table, but it’s because it’s not actually flat, and should be slightly curved to fit a human body). The left side is the front, and the right side is the back. I made a slight point in the front bodice, but it can be cut to be curved or straight across.img_9122

I made this bodice to lace on both sides, so I put eyelets on each edge of the front and back pieces. My usual technique is to use metal eyelets that are then bound with matching thread.This gives me a guide to keep them even.IMG_9860.JPG

Next up, skirt successes and fails!