A few months ago I used the Wearing History Leslie skirt pattern to make a cute high-waisted 1950s skirt that also has some Edwardian vibes if made up in a long length. I was drawn to the high waist with the sweetheart shape and the column of buttons down the front. I used a green linen and top-stitched it with decorative vines in a lighter green to give it a bit of an elven feel.
Keep in mind that the actual pattern (based on a vintage one) runs longer than the illustrations show. I made the shorter daytime length, and it still hits me mid-shin. The pattern is available as a printed and print at home version in 26-48″ waist sizes.
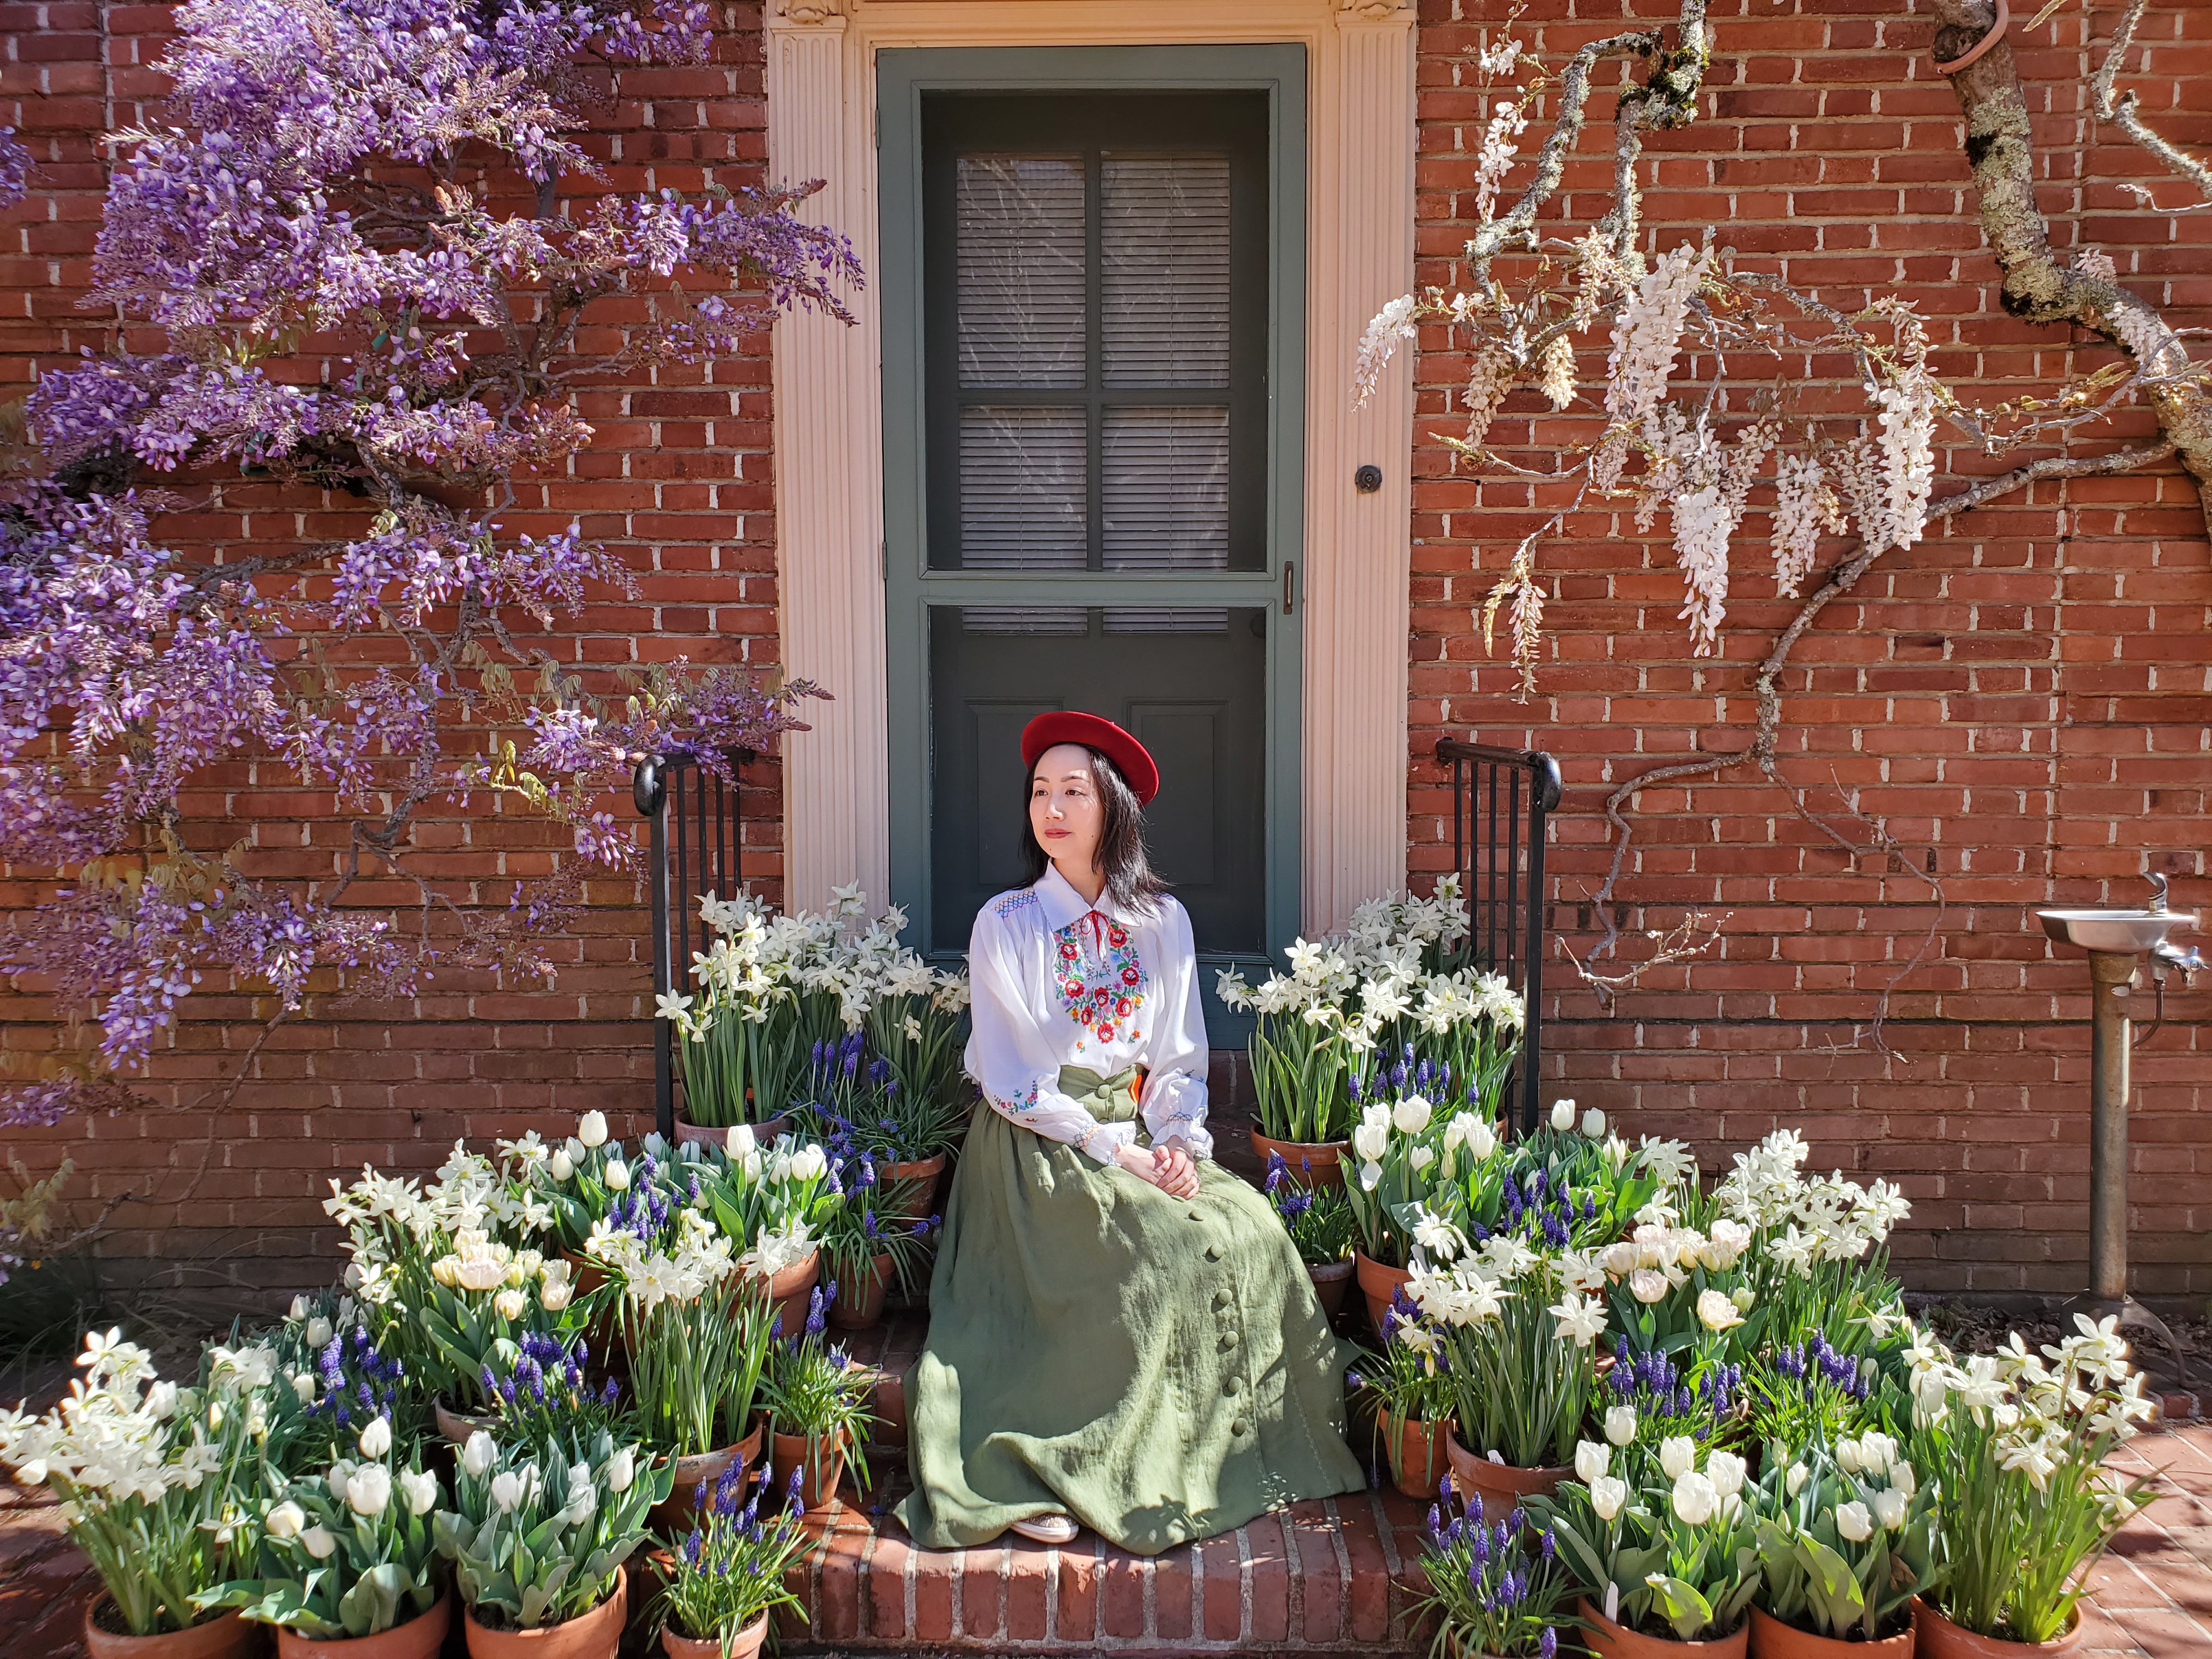
I enjoyed wearing it to the Filoli Gardens with a vintage hat and embroidered Hungarian blouse.
Due to the high waist, depending on the same of your body you may have to adjust how deep the curve is. There is also a little adjustment possible from how much overlap you make in the front, but you can shift too much without distorting the sweetheart shape.
I liked the gathered hip gores and thought they were flattering. I repeated the top-stitching there to emphasize the shape of the front panels.
I made self-covered buttons out of the same green linen.
Here’s a helpful hint: When cutting open your buttonholes you can put a pin there to stop your seam ripper from accidentally ripping too far.
I think this is a rather versatile skirt I can wear with vintage looks, cottage core style, and dress it up or down. I am considering making the floor-length evening version (without buttons) in a taffeta one day. Thanks for reading!
Winter is here and I wanted a cute and cozy accessory that was a nice shawl, but also a surprise hood and scarf! I made this out of a wool knit jersey but other soft fabrics with a bit of drape would work as well. I added some pompom trim for whimsy but that is optional; this surprise hood would work well untrimmed, or finished with decorative stitching or other touches. This was inspired by Victorian mantelets with front lappets, knit sontags, chic old Hollywood head scarves, and modern cozy.
Note: I am a member of the Janome Maker program and this project was sewn on a Janome Skyline S9. (This post is sponsored by Janome but all content and opinions are mine).
WHAT YOU WILL NEED
Soft fabric with drape (wool jersey, lightweight cable knit, rayon challis, lightweight wool suiting, etc.)
The yardage depends on how wide your fabric is. (I used 1.5 yards of a 58″ wide fabric by alternating the wide and narrow ends of the pattern pieces while cutting).
Thread, scissors, chalk, pins.
Optional: 5 yards pompom/ball fringe trim, lace, rickrack, etc.
DRAFTING THE PATTERN
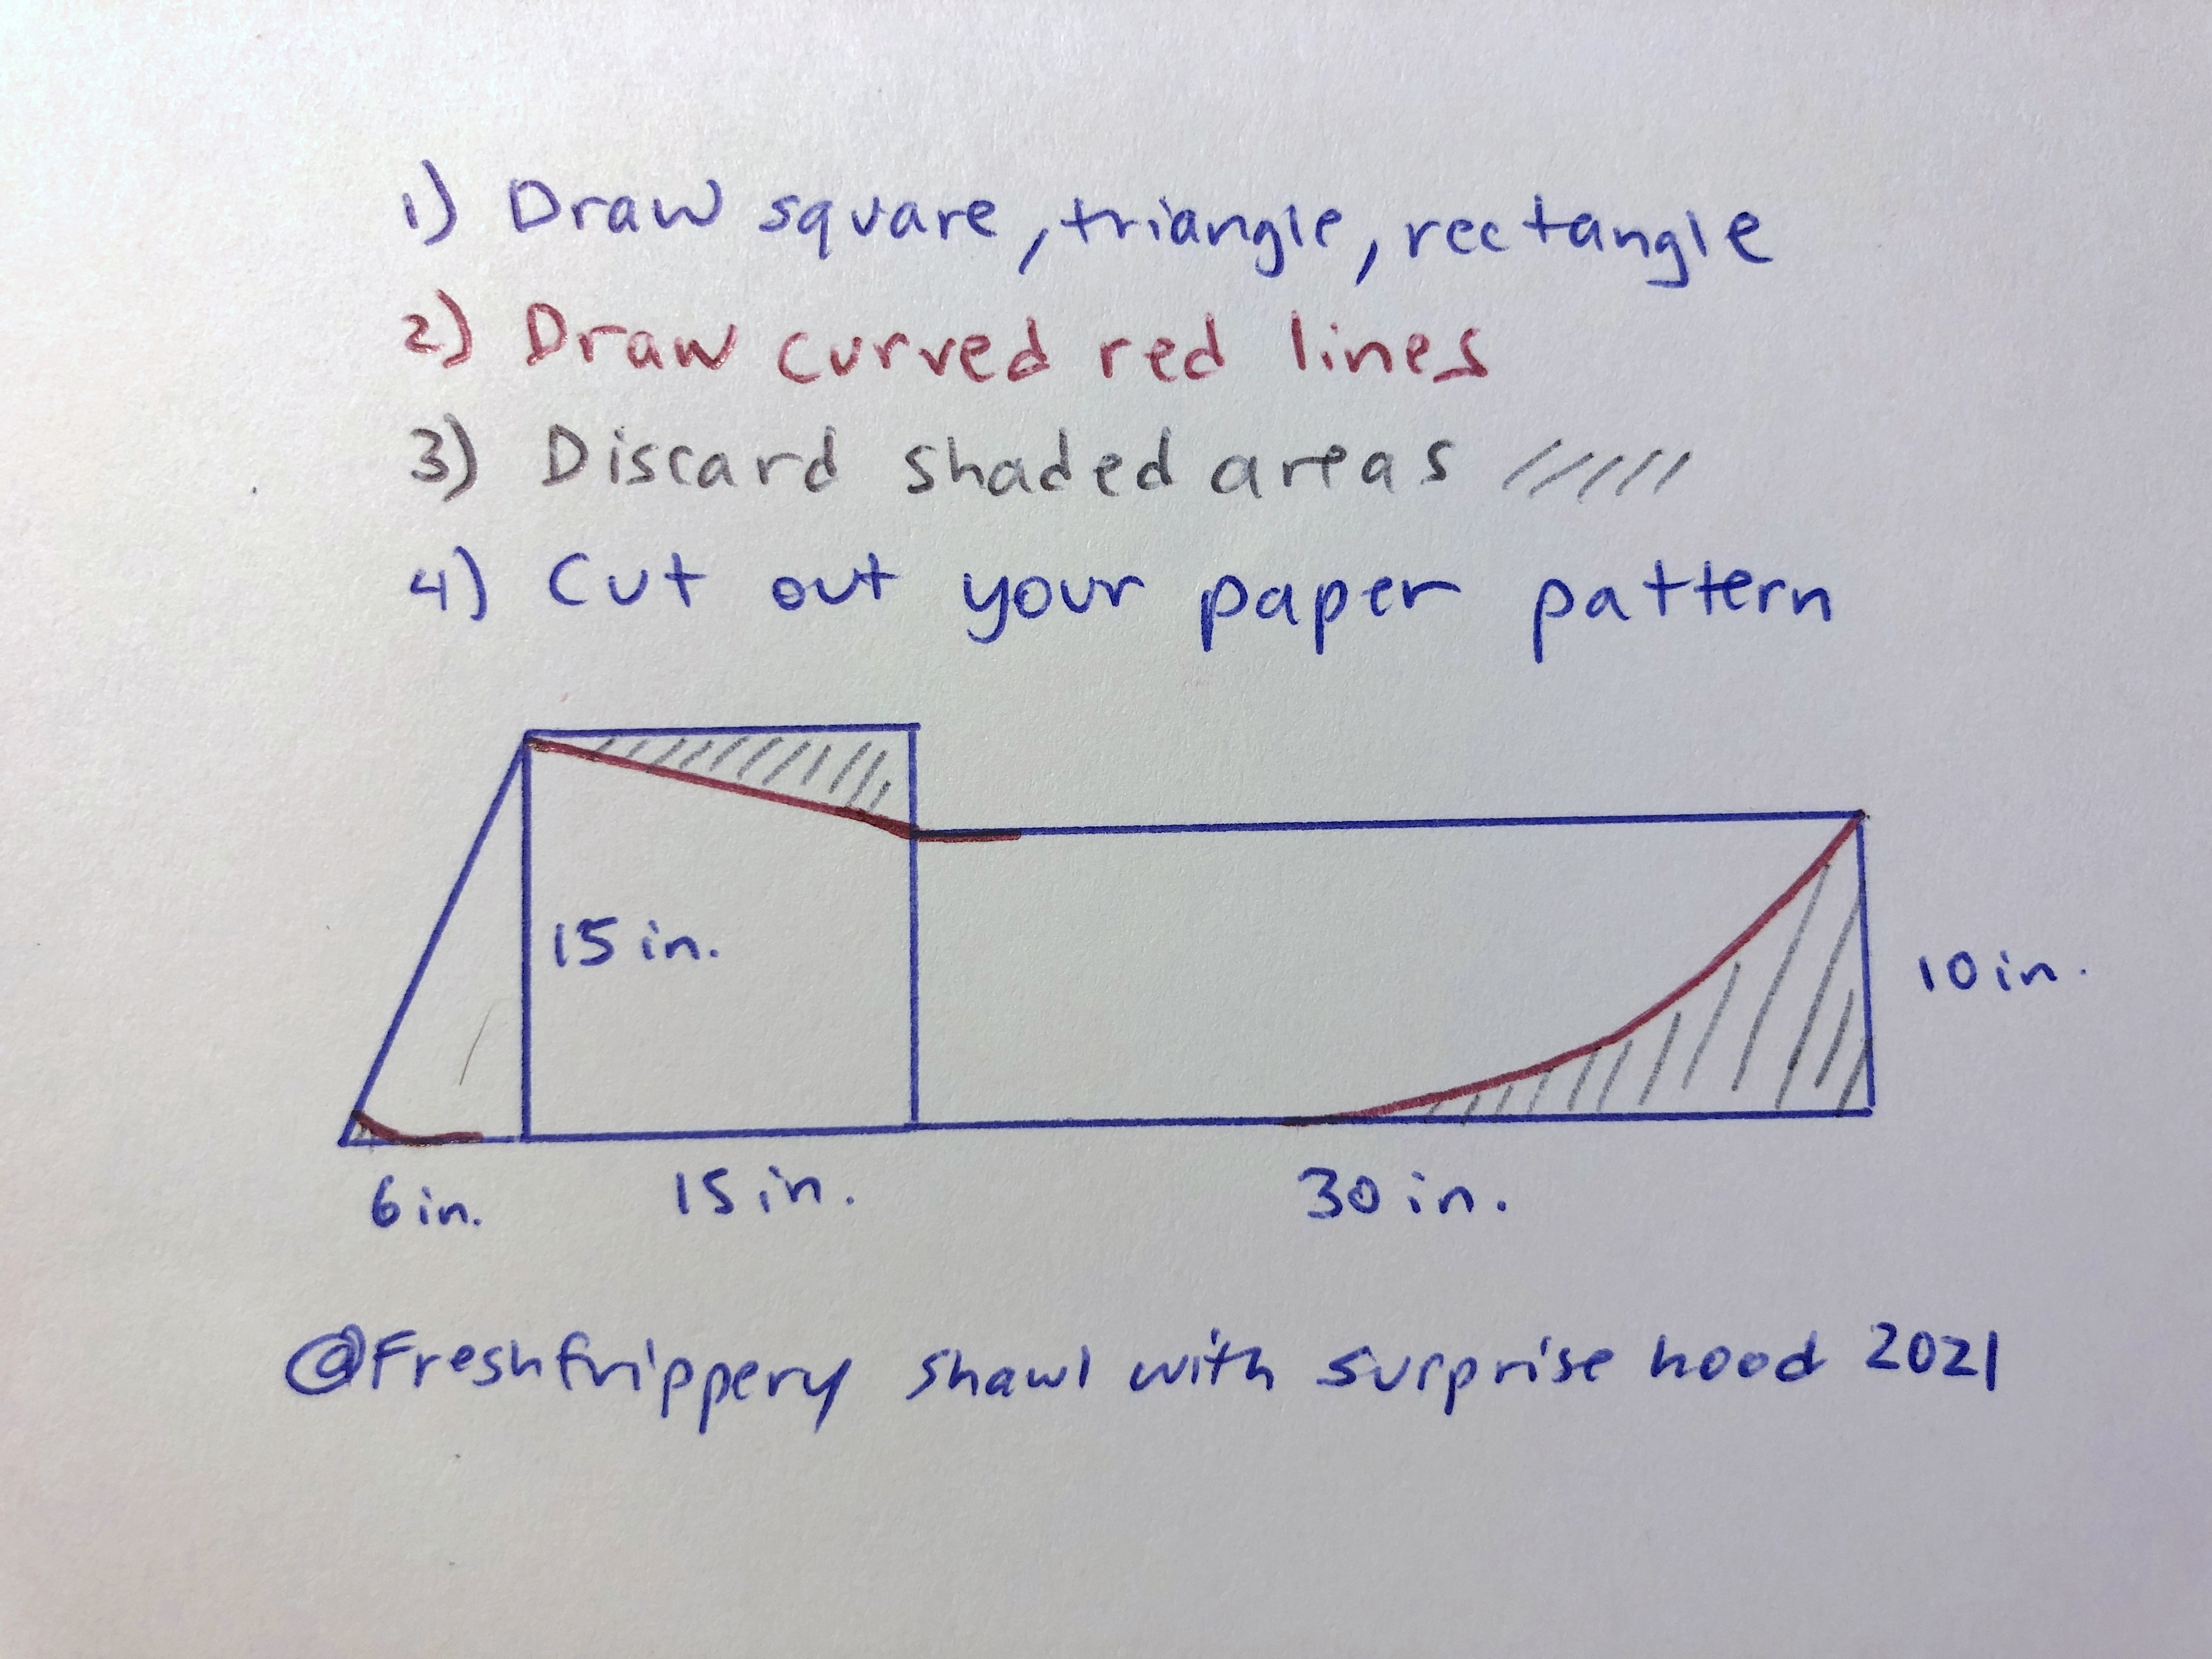
Don’t worry if you don’t have any pattern drafting experience! I’ve broken it down into squares/rectangles/triangles so if you have a ruler you can draw these shapes. Start with these basic geometric shapes; I find it is easiest to draw the square first, then the rectangle, then the triangle on a large piece of paper. (It doesn’t have to be fancy or special drafting paper; a roll of gift wrap works great).
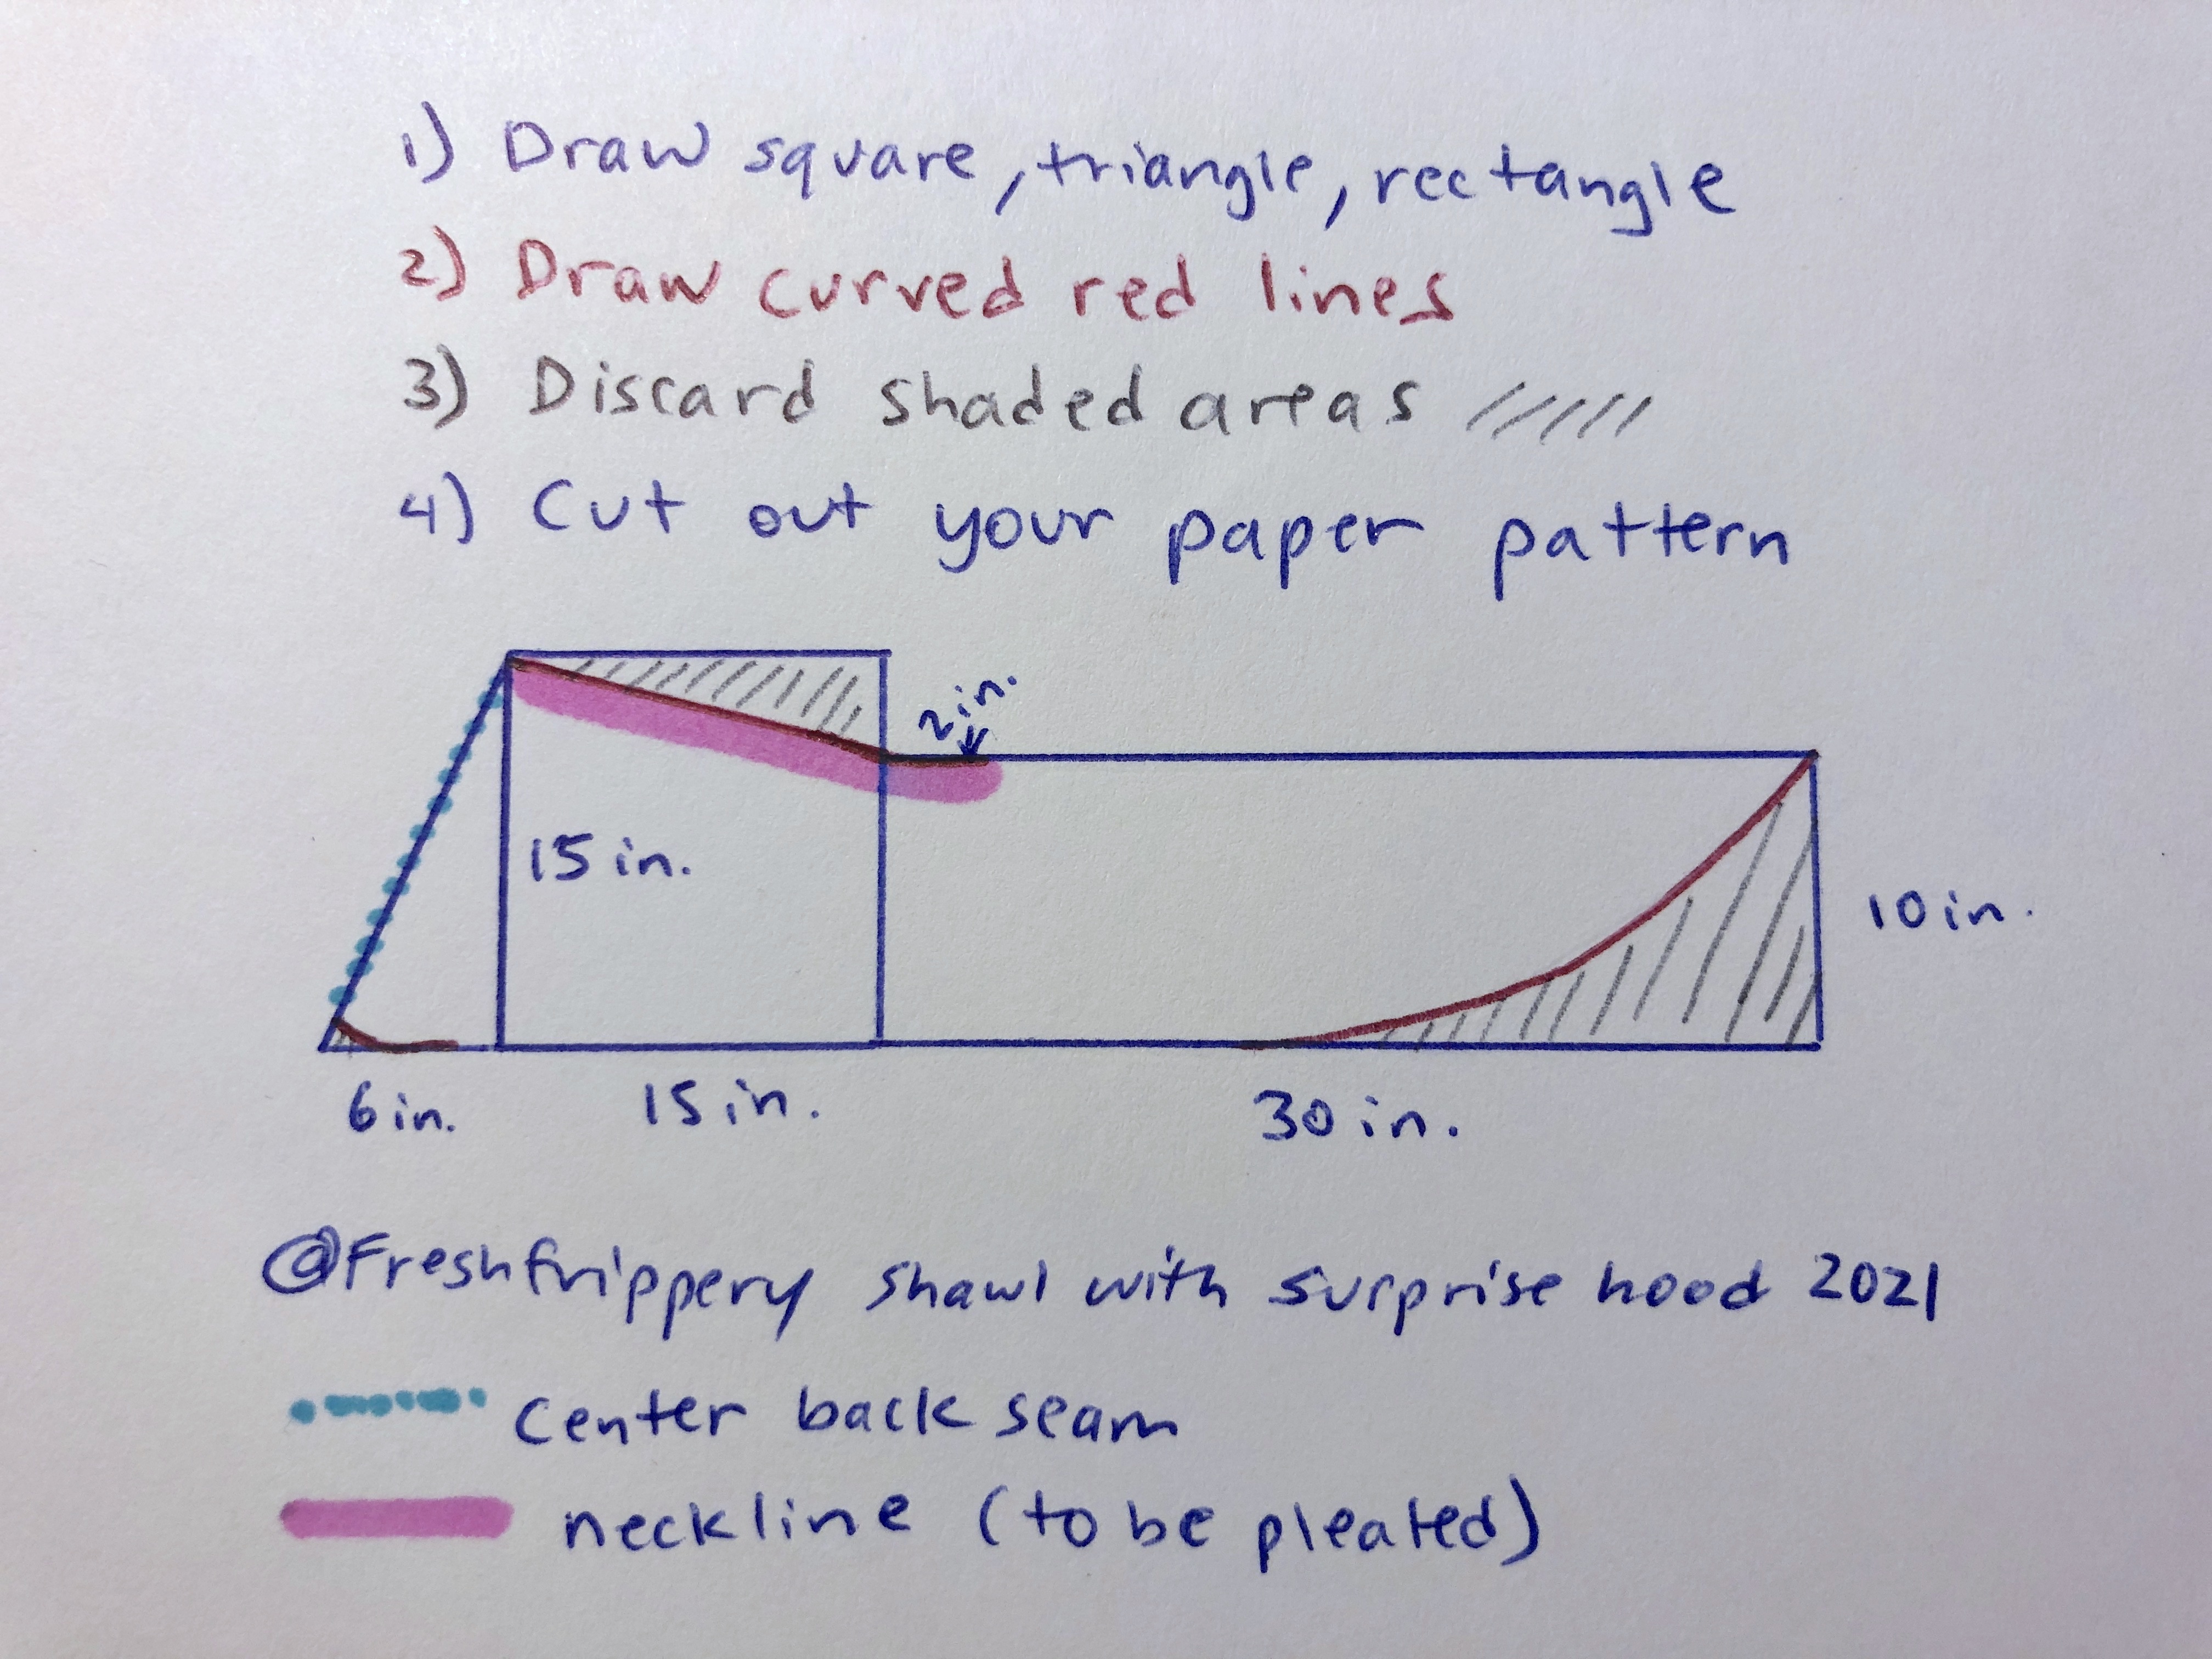
Next, draw the curves indicated in red on the diagram. Then, discard the shaded areas.
Now you have your pattern that you can cut out of paper and use to trace onto your fabric! (This includes 1/2 inch seam allowance. You can add more when cutting out your fabric if you want your shawl a little wider or are skipping any trim).
CONSTRUCTION
Cut out 4 identical pieces of fabric. 2 will be the fashion layer and 2 will be the lining. (If you want, you can use a different fabric for the lining but then the hood will be a different fabric when flipped up).
Sew the center back seam of the 2 fashion pieces together. Repeat for the lining layer. Press the seams flat.
Put the fashion and lining layers right sides together. If you plan to use pompom trim or lace, this is the time to sandwich your trim in between the two layers as shown, with the edges flush. (This is so that the pompom balls are “inside” when sewing the edges but will be on the “outside” when the shawl is flipped right side out). You will have trim everywhere except the neckline. (If you are using rickrack, instead of sandwiching it in the layers you should sew it to the fashion layer before it is attached to the lining).
Sew all along the outer edges of the shawl, except for the neckline, as shown in the earlier image.
Turn the right sides out through the opening in the neckline, exposing the pompom trim. Fold in the raw edges of the neckline and topstitch closed.
Right now you will have a long flat piece as shown below. (The ends are folded in so I could fit everything in the photo).
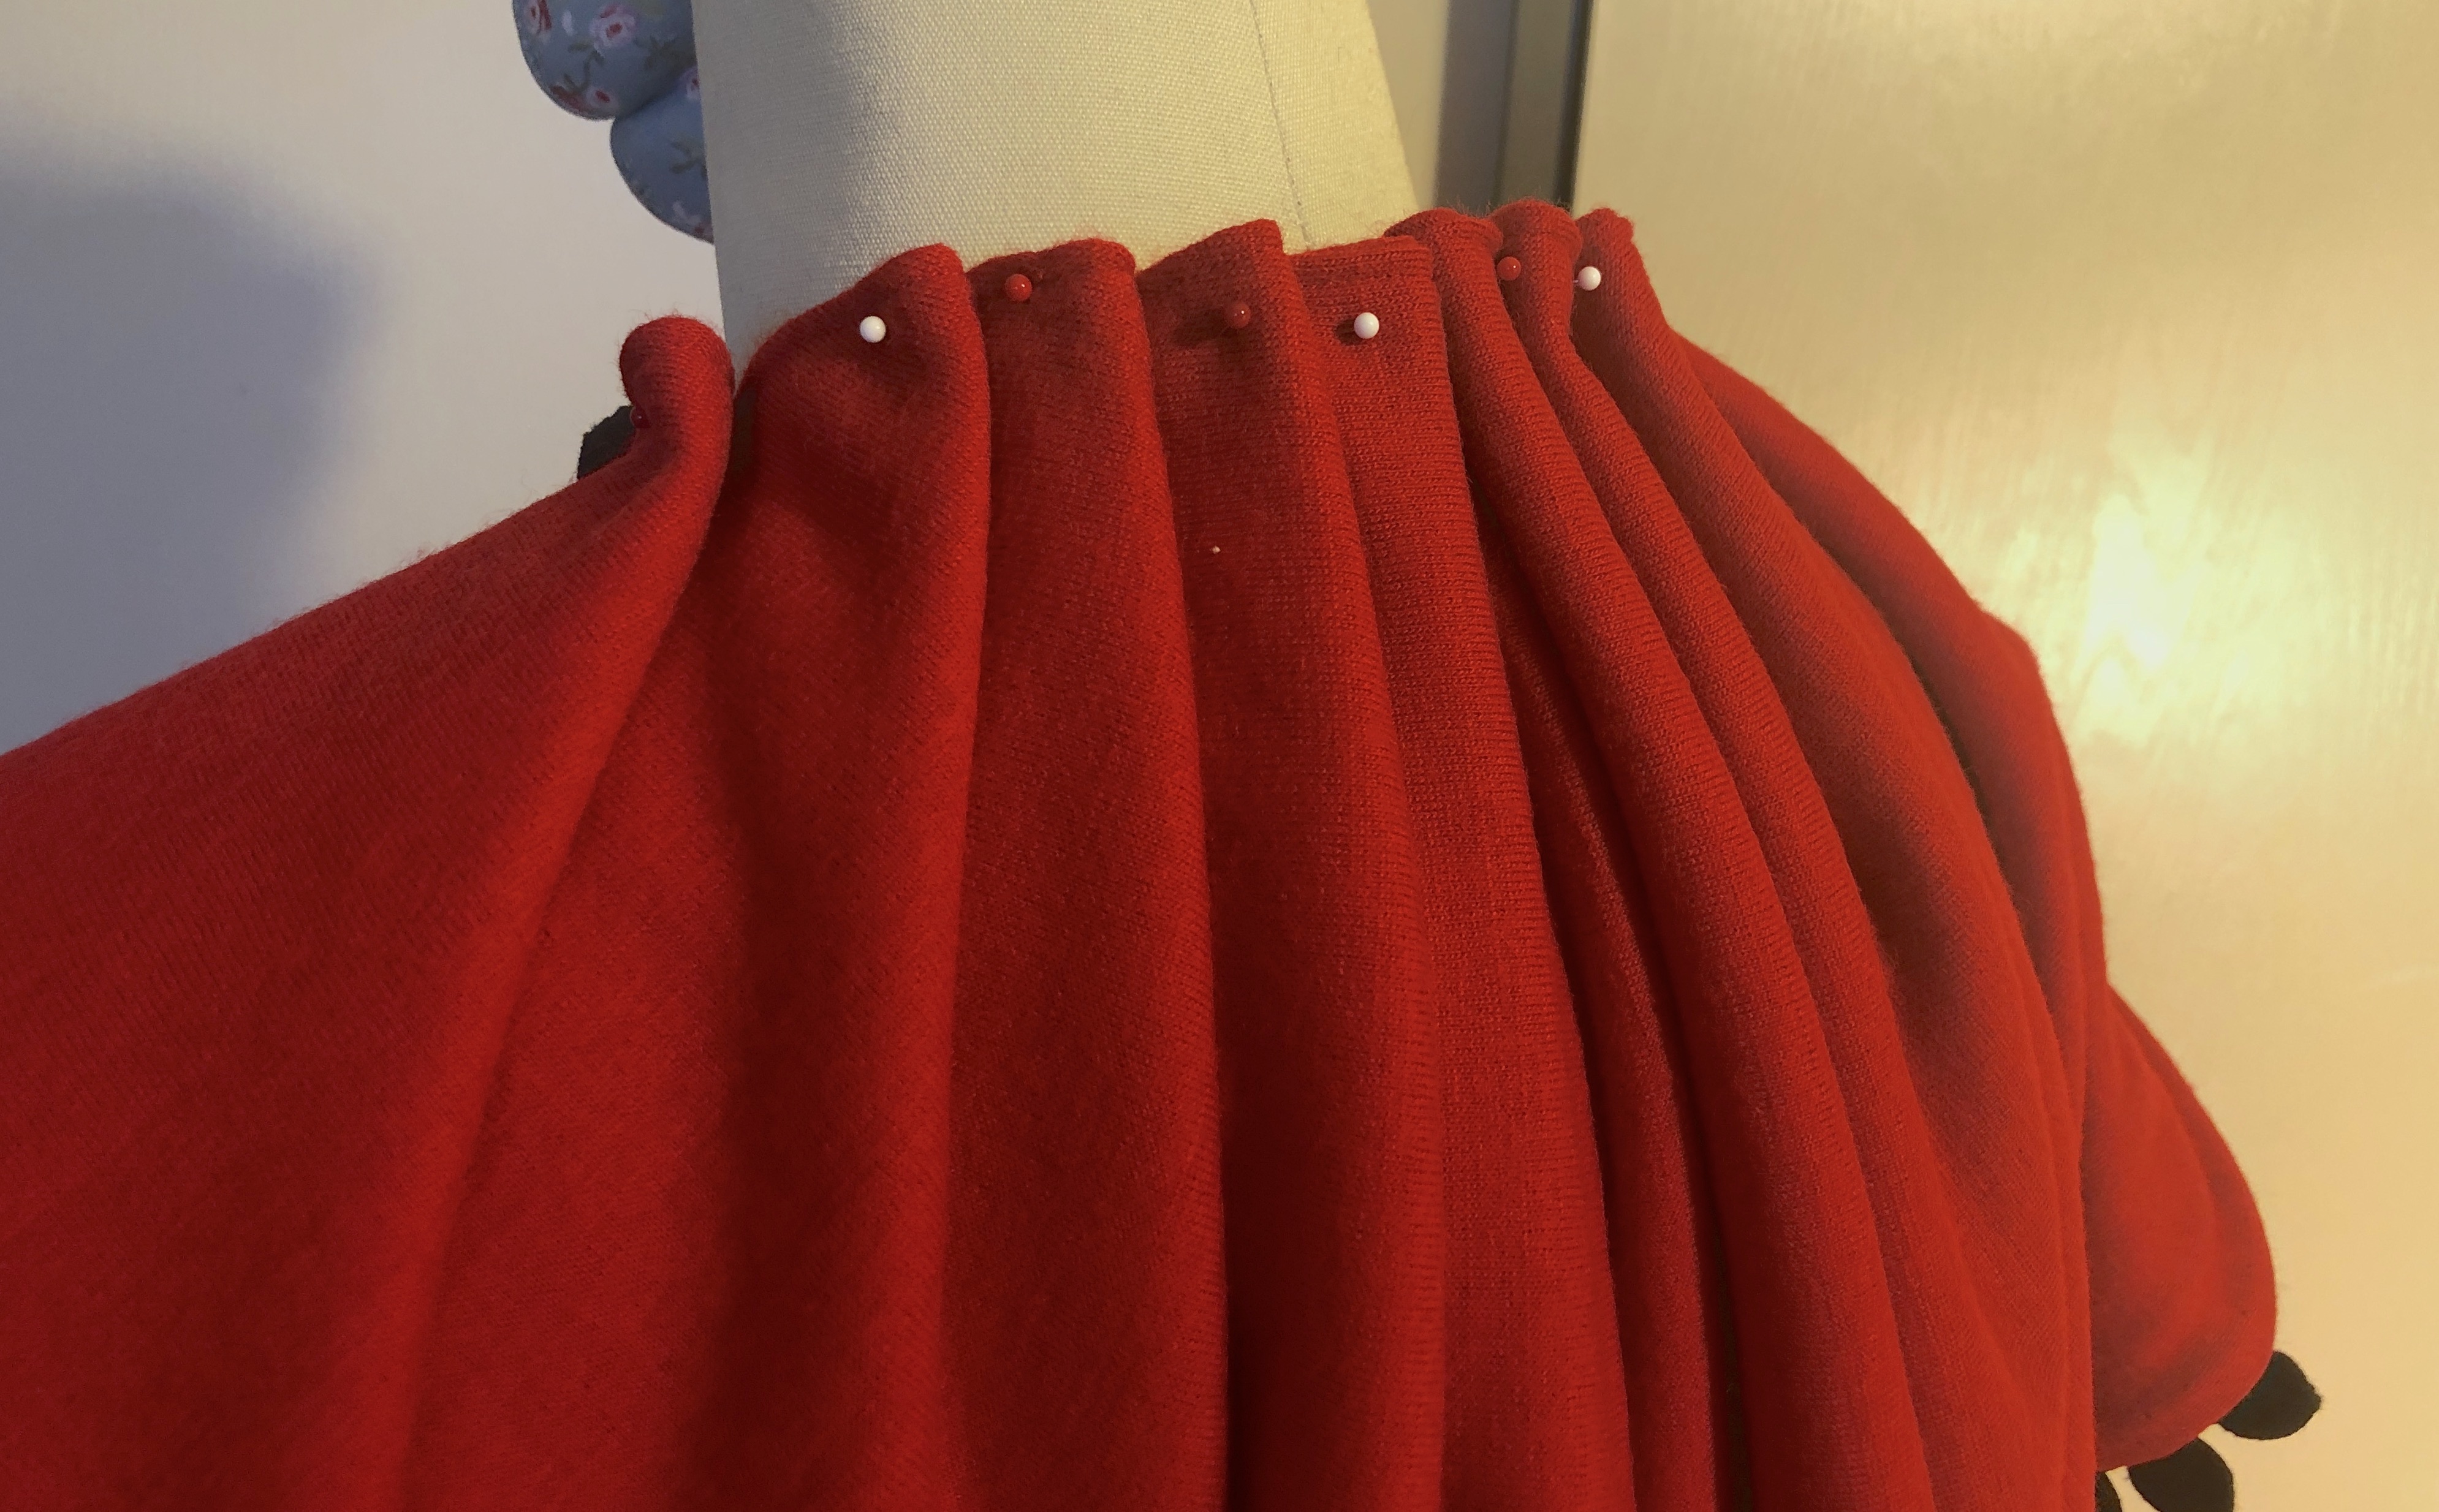
Pleat the neckline area (up to where the pompoms start) to fit the curve of your neck. The finished curved area should cover the back half of your neck. (If you have a dress form handy, an easy way to determine how to do the pleats is to pin the center back seam to the center back of the form, pin where the pompom trim starts to the shoulder point on the form, then pleat using the neck of the form as a guide). To keep the pleats in place, stitch down the pleats over the previous topstitch line either by machine or by hand.
Optional: Use one of the embroidery stitches to add some extra decorative details to your shawl. Some ideas include using a continuous stitch along the edges of the shawl, or putting a monogram on the tails. You can also do a decorative stitch along the edge after the shawl is sewn, rather than using pompom trim. (These examples are under the Decorative stitch menu on my Janome Skyline S9).
HOW TO WEAR
This can be worn multiple ways!
Wear the draped back and front tails down as a shawl.
Pull up the draped back over your head as a hood (with the tails in front or pushed behind your shoulders).
Wrap one or two front tails around your neck like a scarf.
Combine 2 and 3 for a chic hooded scarf look.
Which one is your favorite?
Thank you for reading! Be sure to follow me on Instagram @freshfrippery for the first peek at any new projects!
I am happy to provide all patterns and tutorials for for free on my blog. It is absolutely optional, but if you would like to donate towards my domain registration and the data costs of hosting the many photos on my site, consider buying me a “coffee”: https://ko-fi.com/freshfrippery. Thank you!
Last weekend was the annual Vampire Ball hosted by PEERS. I wore a dress I made from a 1950s pattern that I am calling my “black swan” ball gown because the many organza ruffles remind me of a tutu.
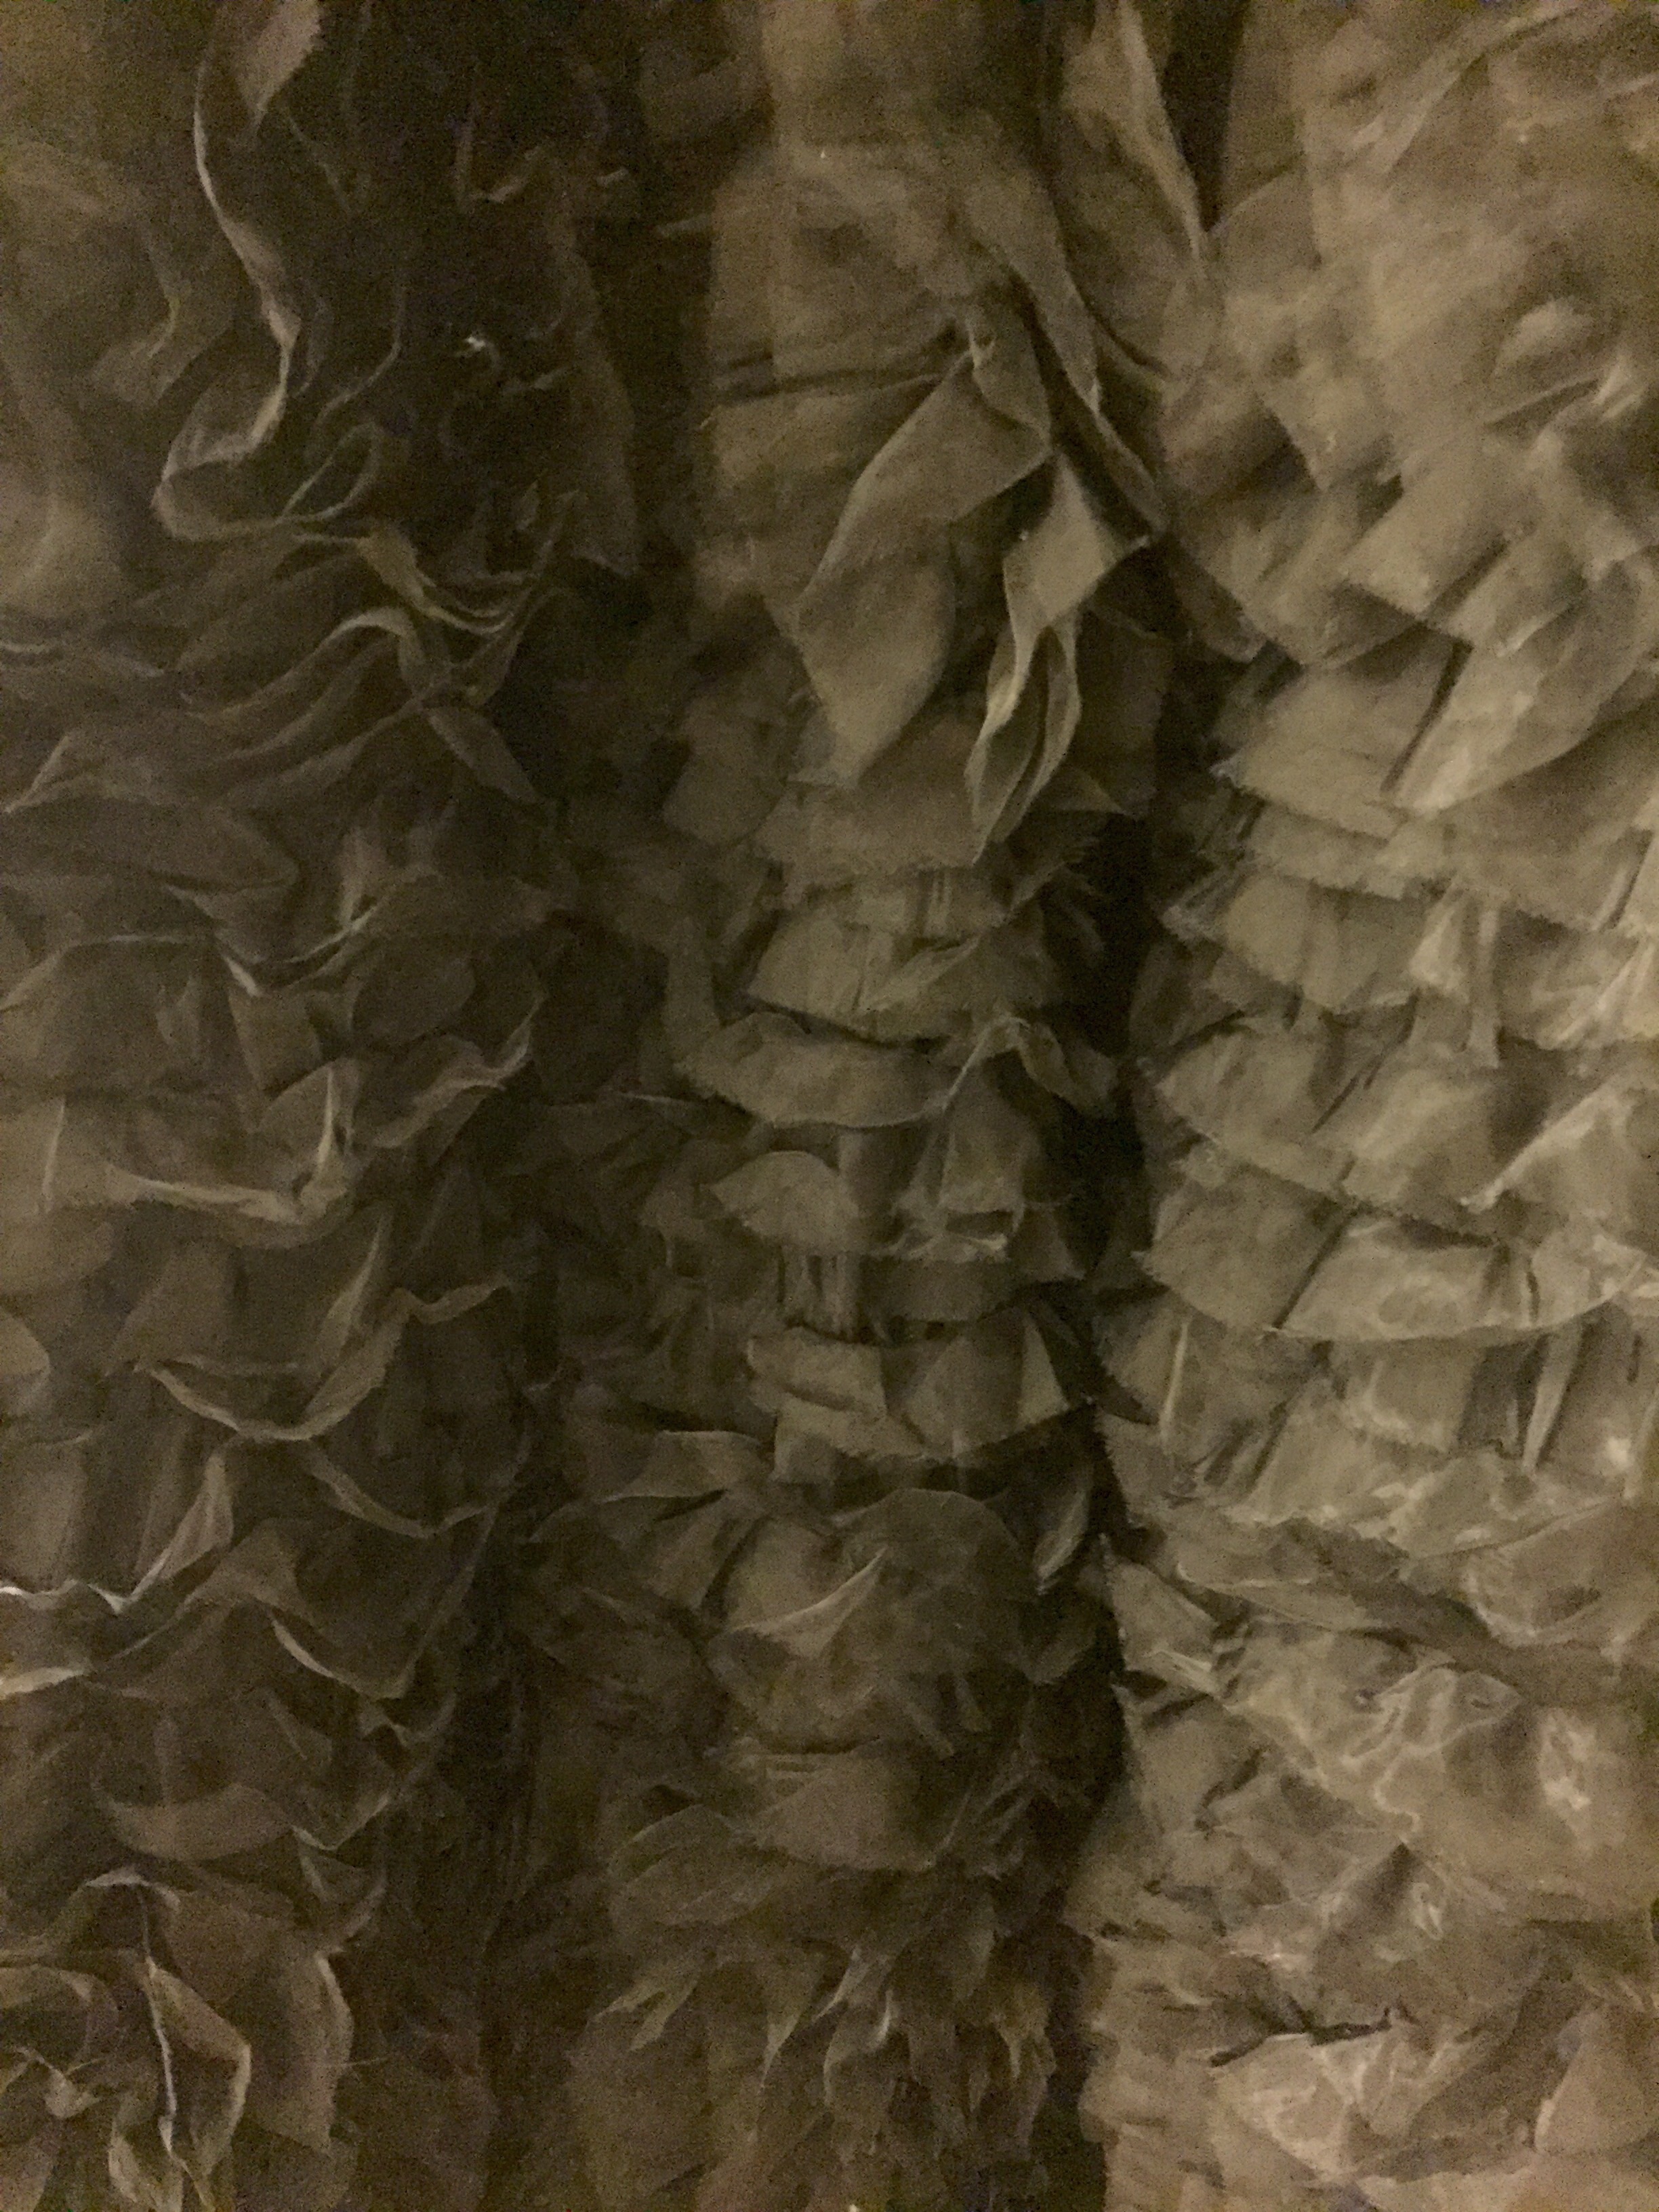
The skirt of my gown had what seemed like miles of organza ruffles. I was able to save a lot of labor by using fabric that already came pre-ruffled. I thought that the strips of ruffles all ran parallel to each other, but actually change direction every few rows. It made the fabric a little harder to sew, but probably added more visual interest. It was certainly very fluffy! (I had many people asking to pet my skirt).
The bodice was made using Vogue 8789. I highly recommend this pattern for its flattering shape and ease of construction. The facings for the neckline are cut as part of the bodice pieces, and folded inside and tacked. (I’m used to sewing and wearing historical garments that have more boning and structure up top, so this seemed to go together extremely quickly). The Vogue pattern has a short skirt and is meant for daywear, but I was able to adapt it to an evening gown by making the skirt longer and fuller. I felt very elegant in this dress; I think my friend Kim captured my mood perfectly in the photo below.
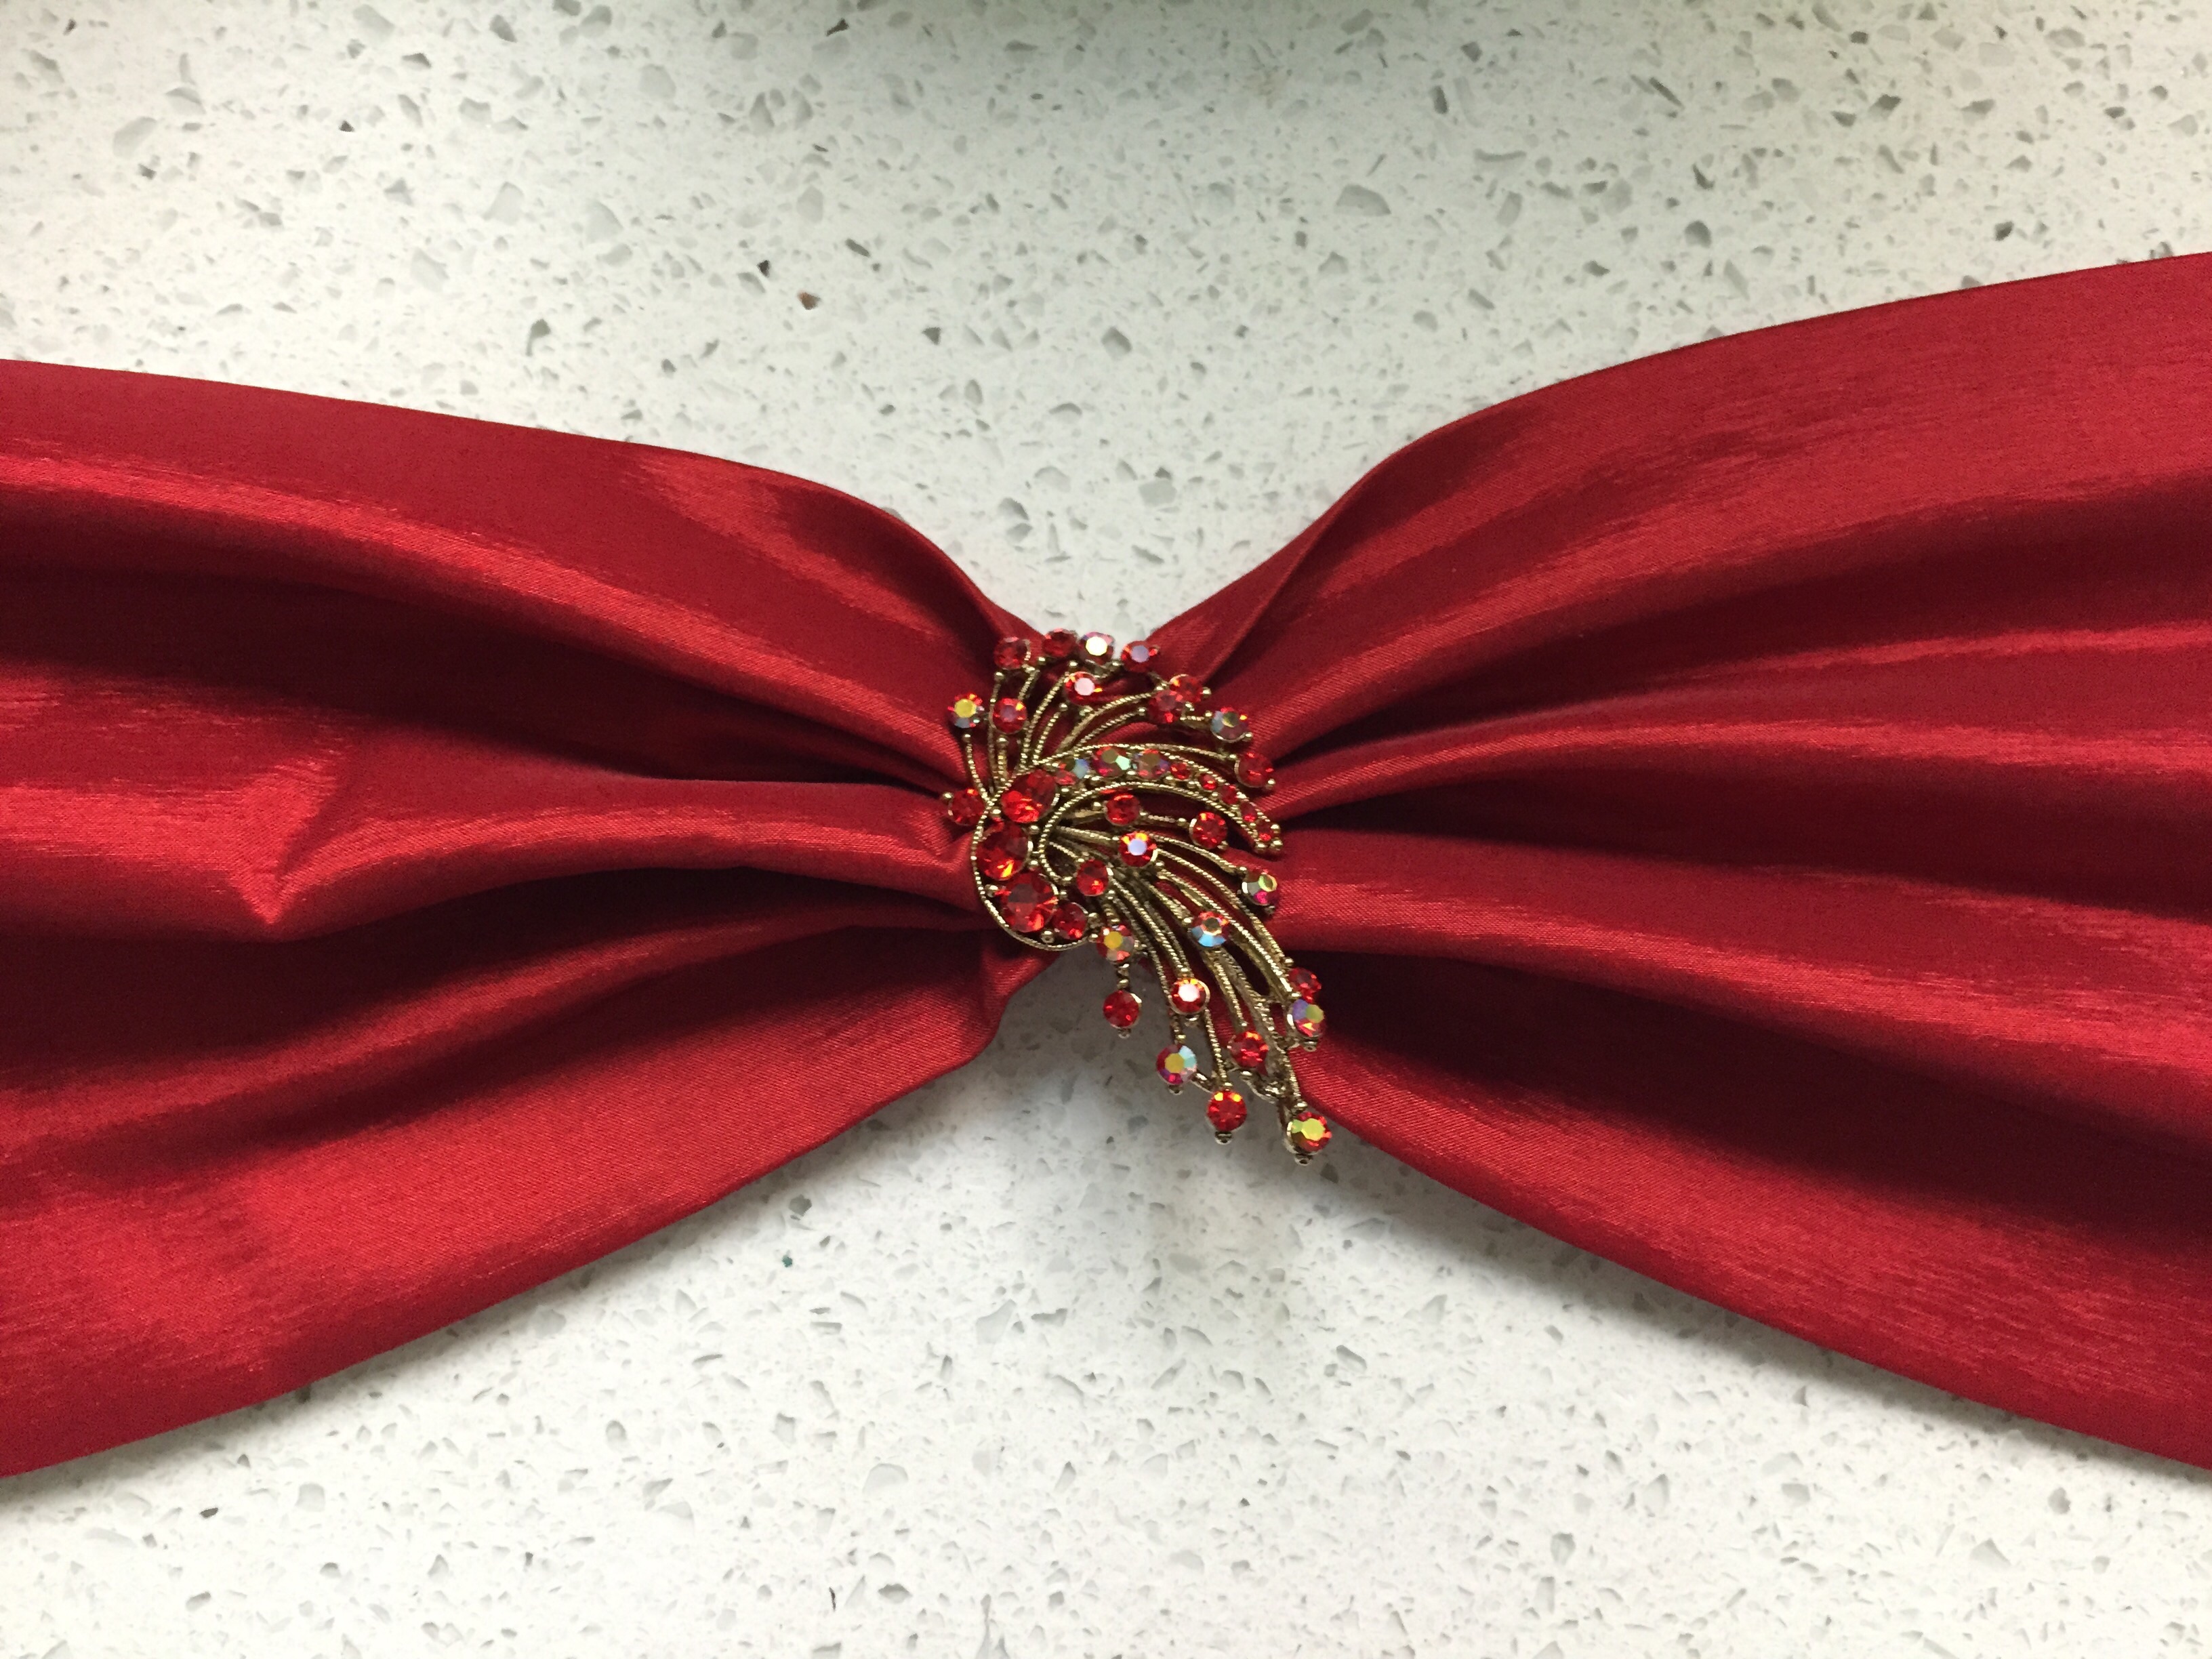
The sash was made of red stretch taffeta, tied into a large bow in the back. The front was accented by a rhinestone pin from my costume jewelry stash.
Black dresses are always hard to photograph, so here’s a lightened close-up of the fabric:
You can’t see my shoes but I was wearing my American Duchess tango boots to give me some extra height as I socialized with the undead.
Vogue 8789 pattern: $12.70 with shipping from eBay
Zipper and thread from stash
Total: $109.64
I want to thank Fabric Wholesale Direct for providing all the fabric for this project! The ruffle organza was a very cool fabric and definitely turned heads! It was also my first time using one-way stretch taffeta, and I found it to have a nice body and opacity, and be very easy to work with.
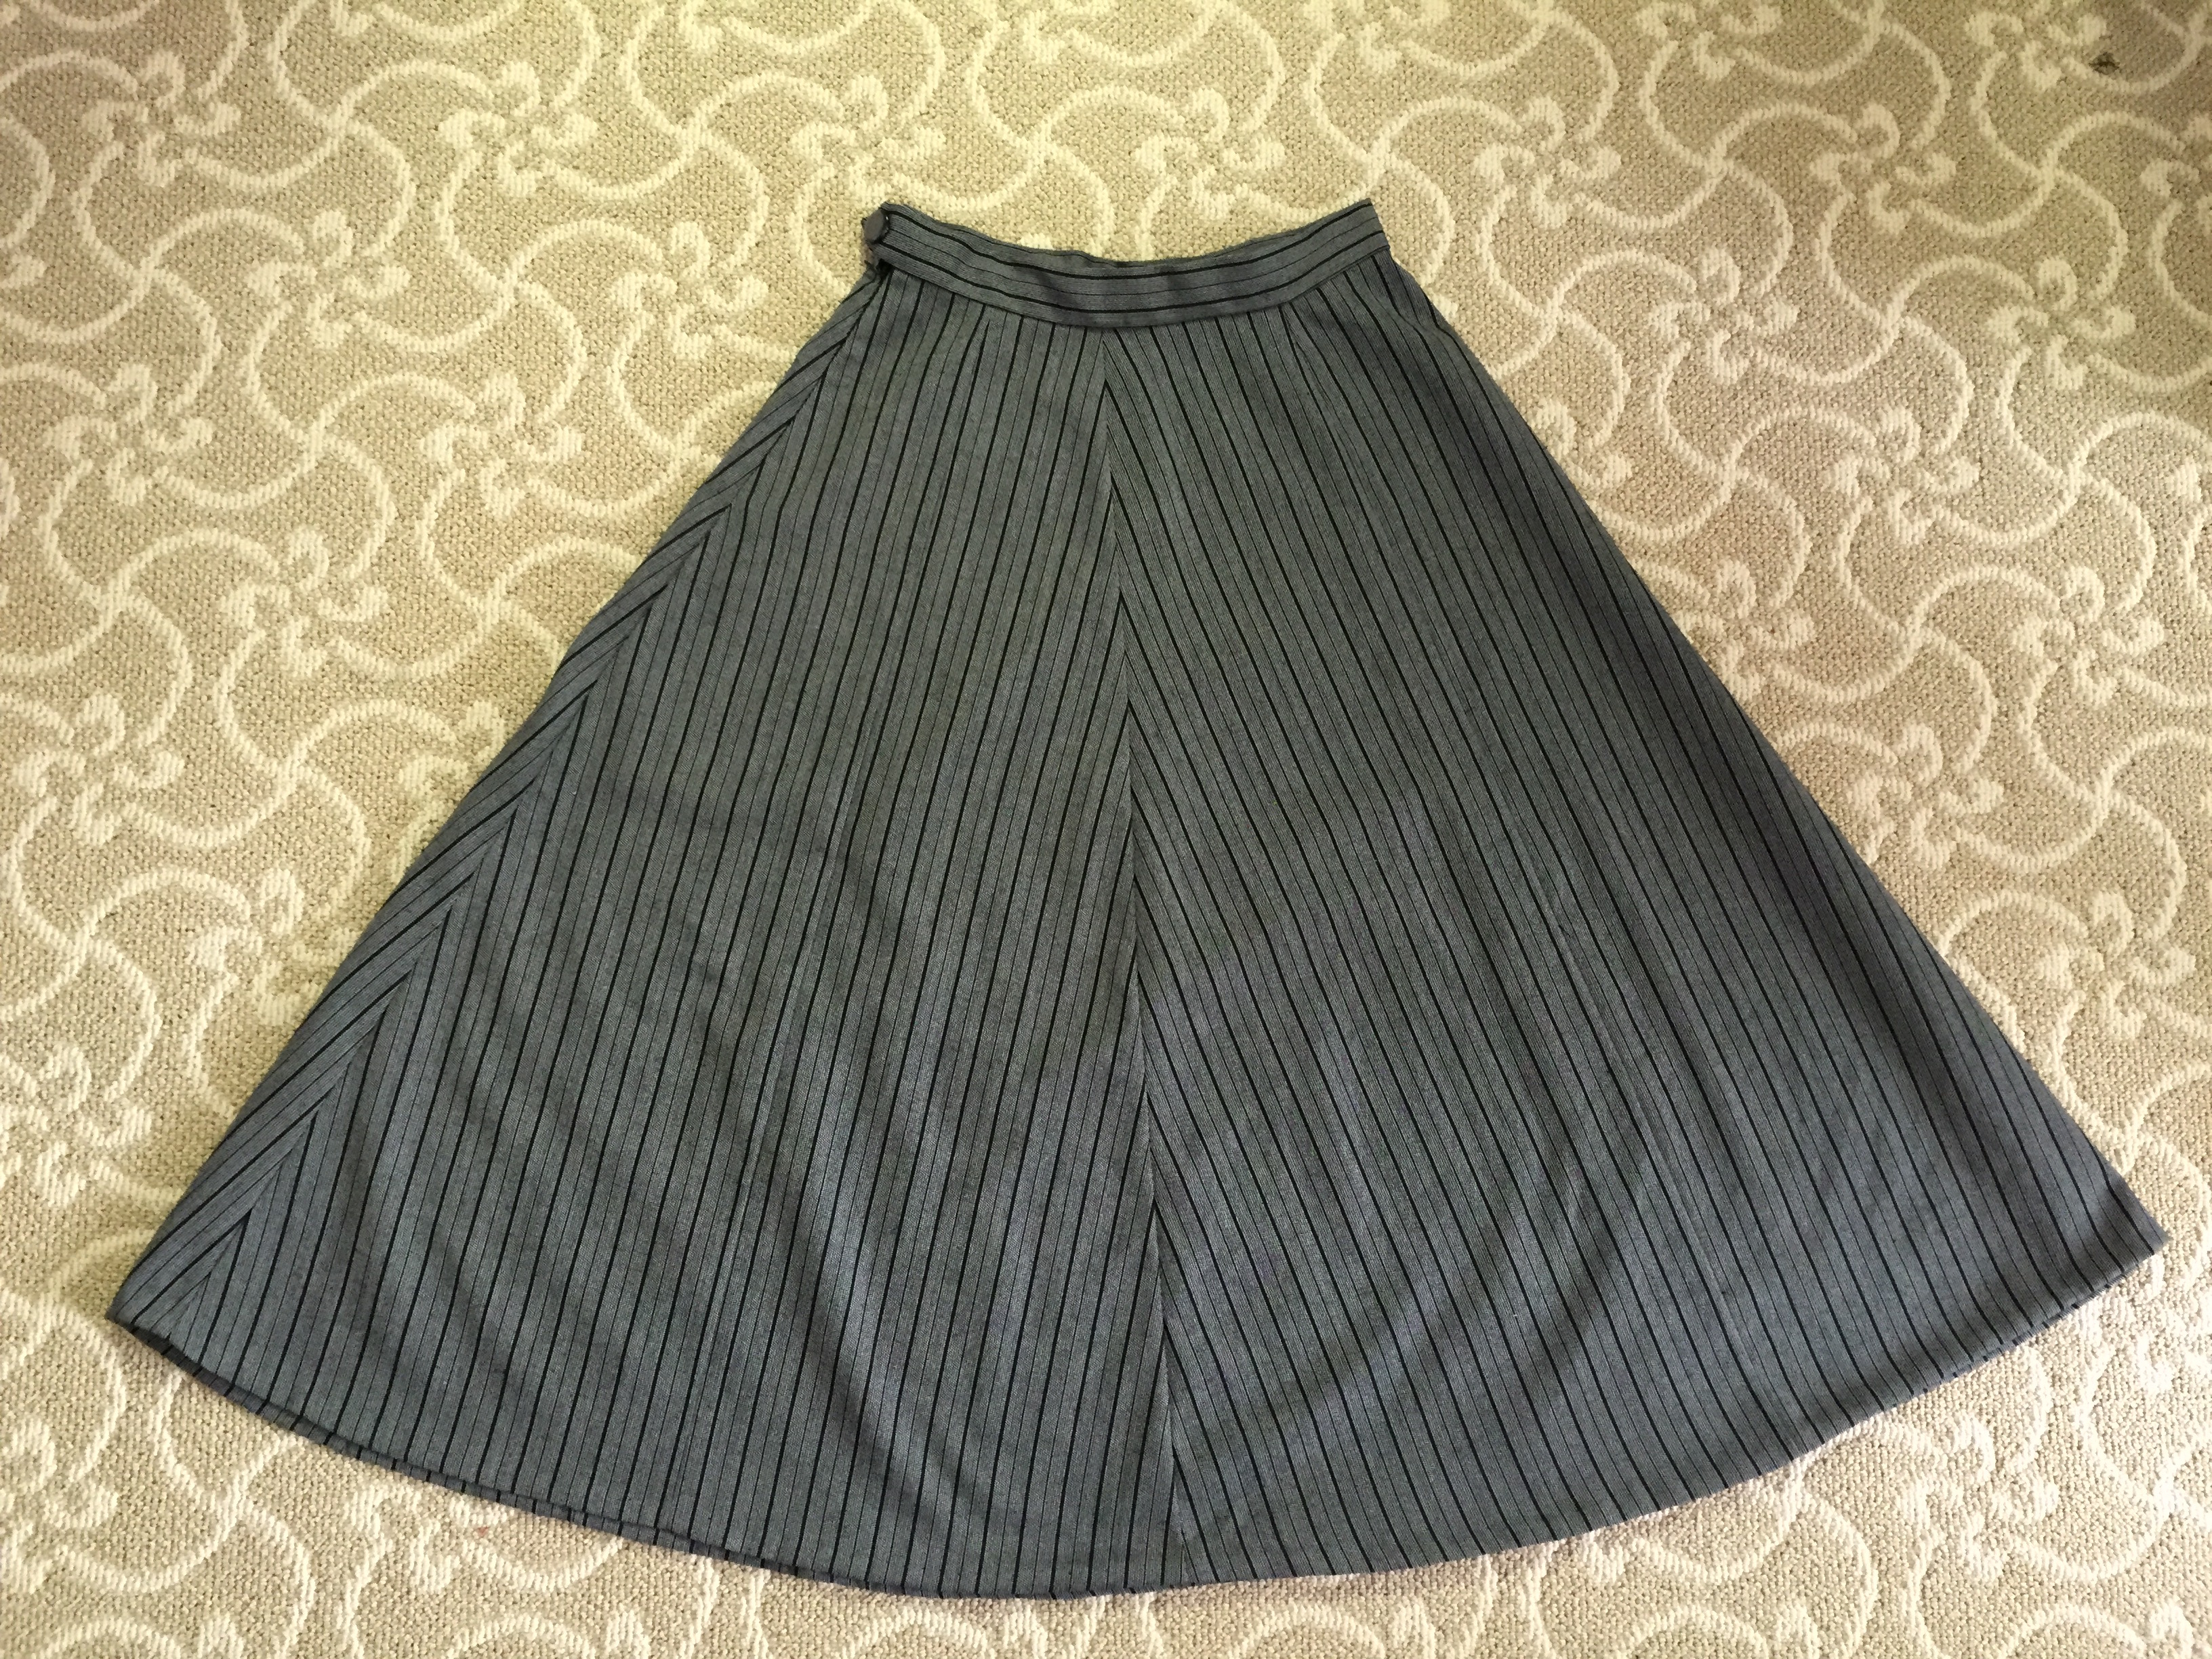
Happy first day of autumn! It’s the perfect time to build up a collection of wool skirts.
I used the last bit of fabric left over from my Victorian bathing suit to make a simple A-line skirt using McCall’s 9900, a vintage 1954 pattern.
The cutting took longer than the sewing because I only had about 1.5 yards instead of the recommended 2, and I had to very carefully line up the pieces and introduce some additional seams in order to match the stripes. To give it a bit more flare when wearing it I’ll probably use a petticoat or maybe add some horsehair to the hem later.
It’s not quite perfect, but was still satisfying!
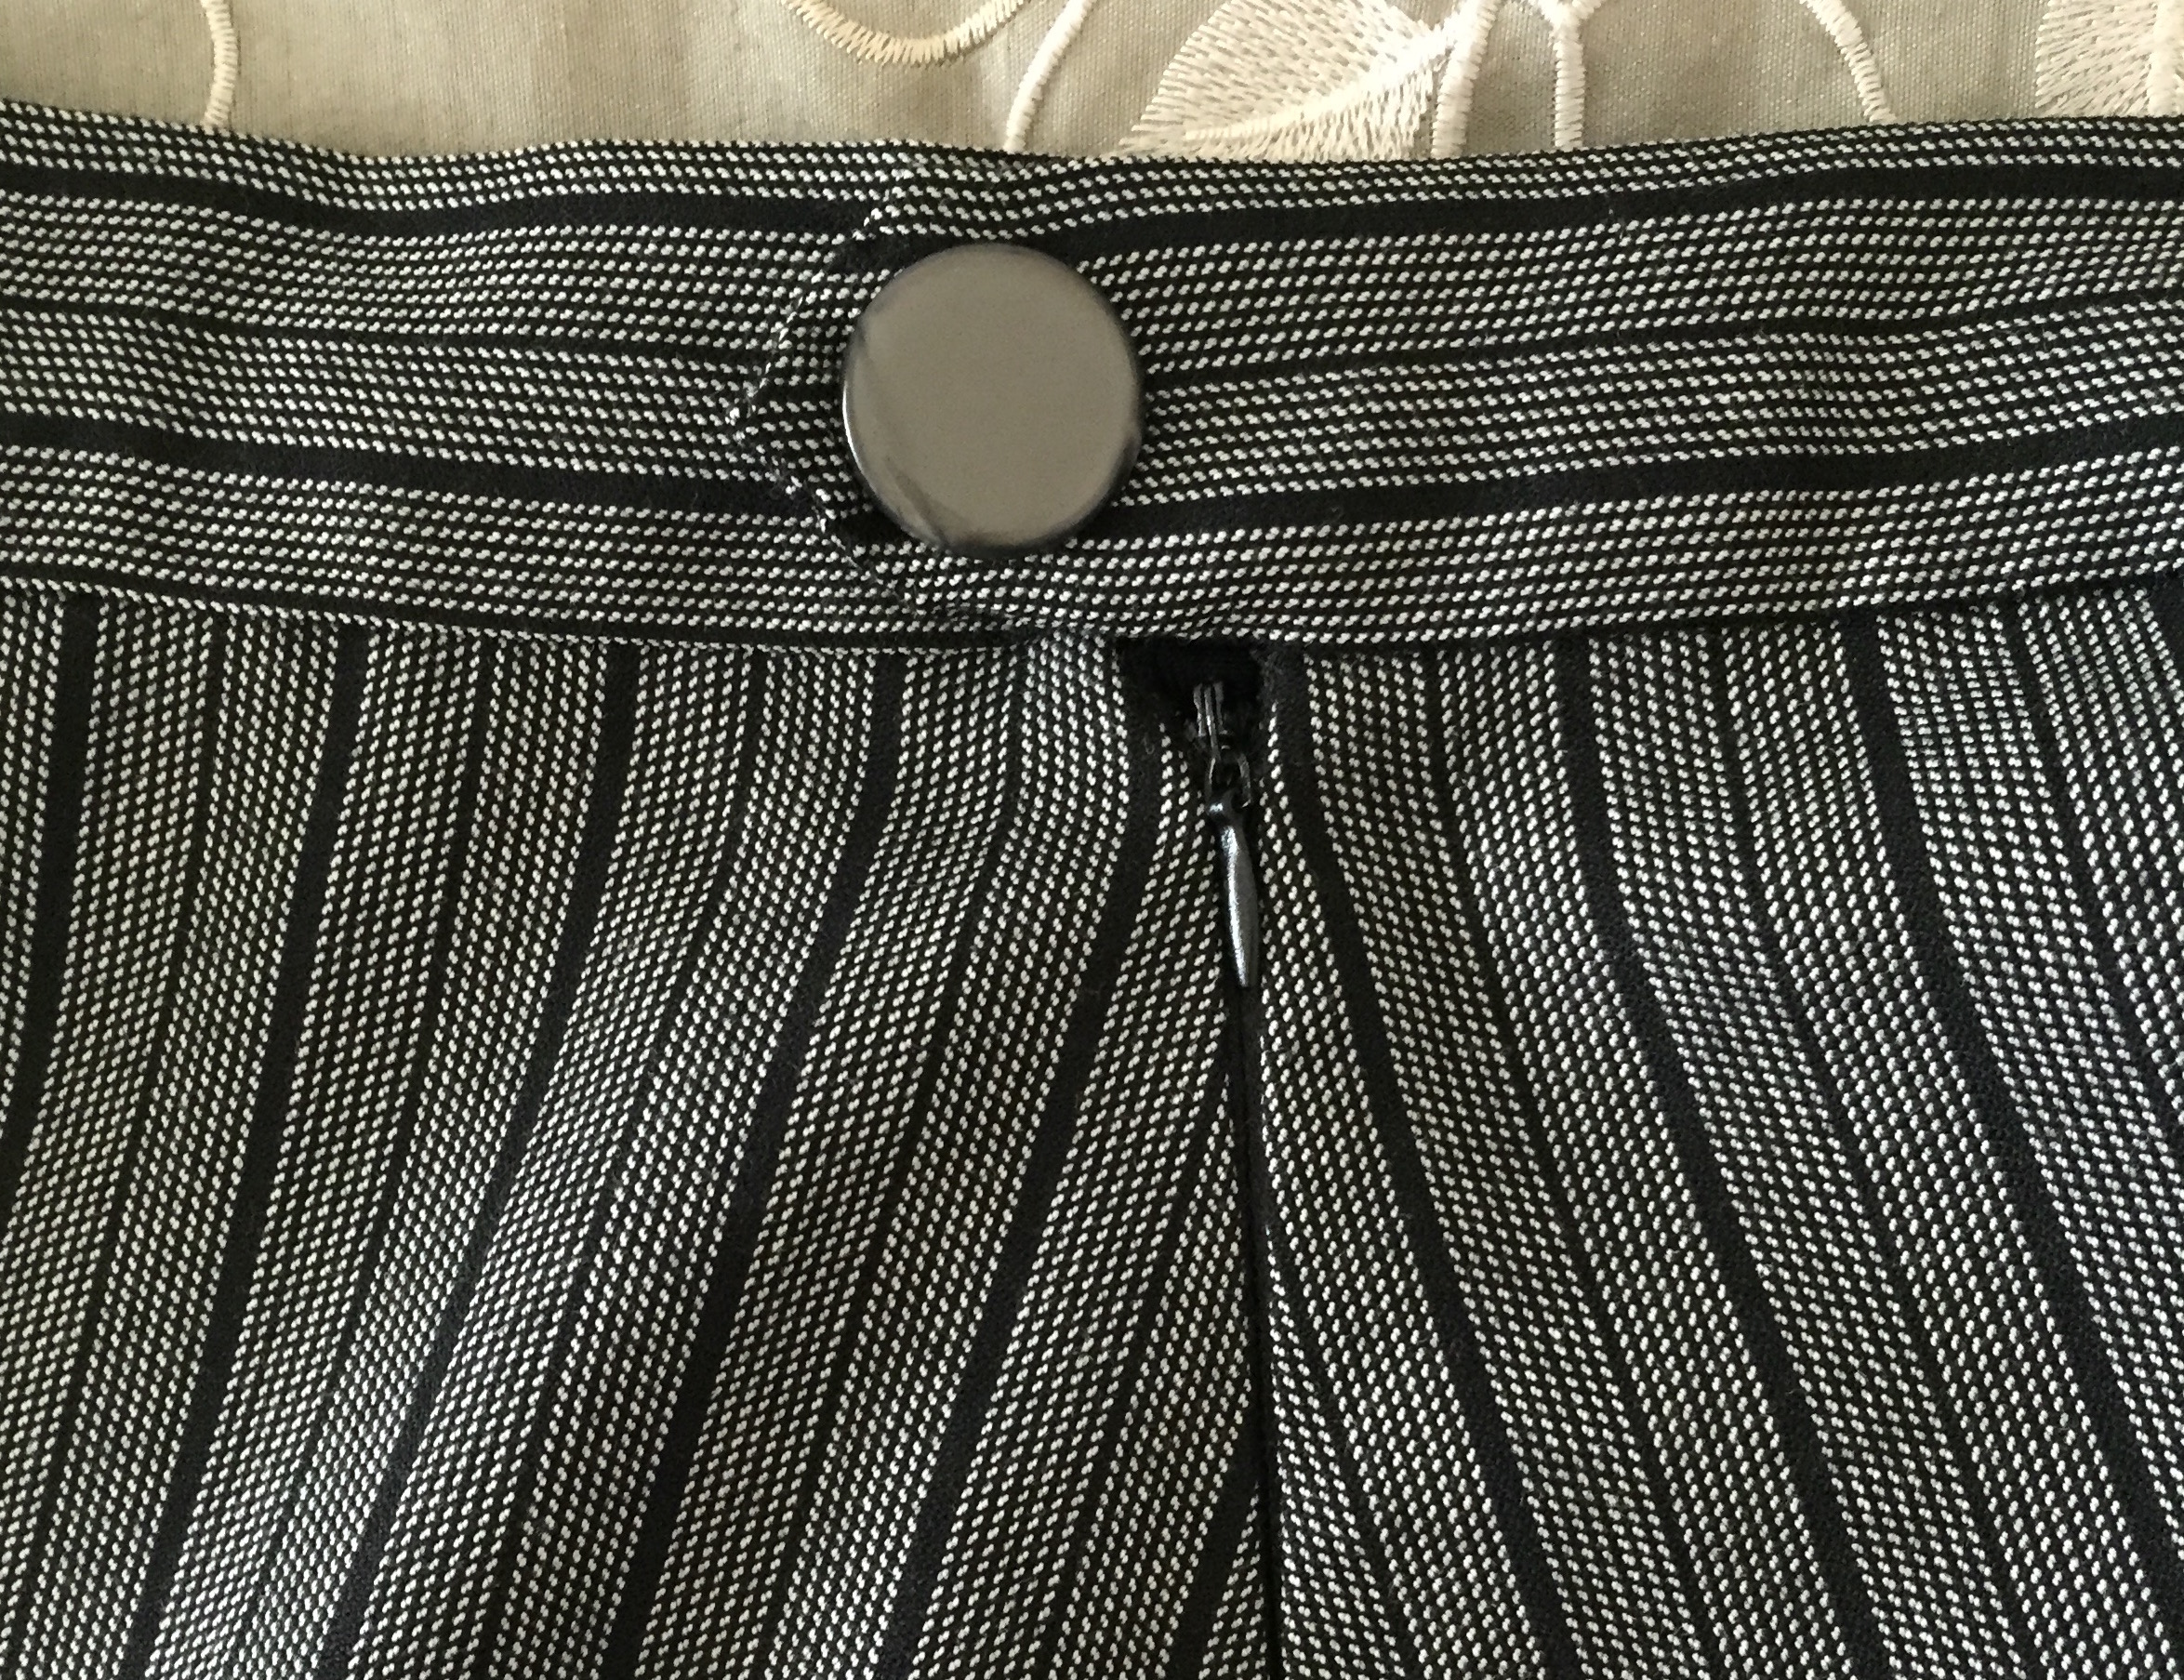
The skirt closure has a side zipper and a button.
It was a nice easy pattern and I will definitely use this again!
I’ve been doing a lot of small tasks lately, like mending, replacing buttons, adding trim, cleaning jewelry, etc. so I don’t have a big sewing project to share. Instead, I am showing you some beautiful vintage items I have recently found.
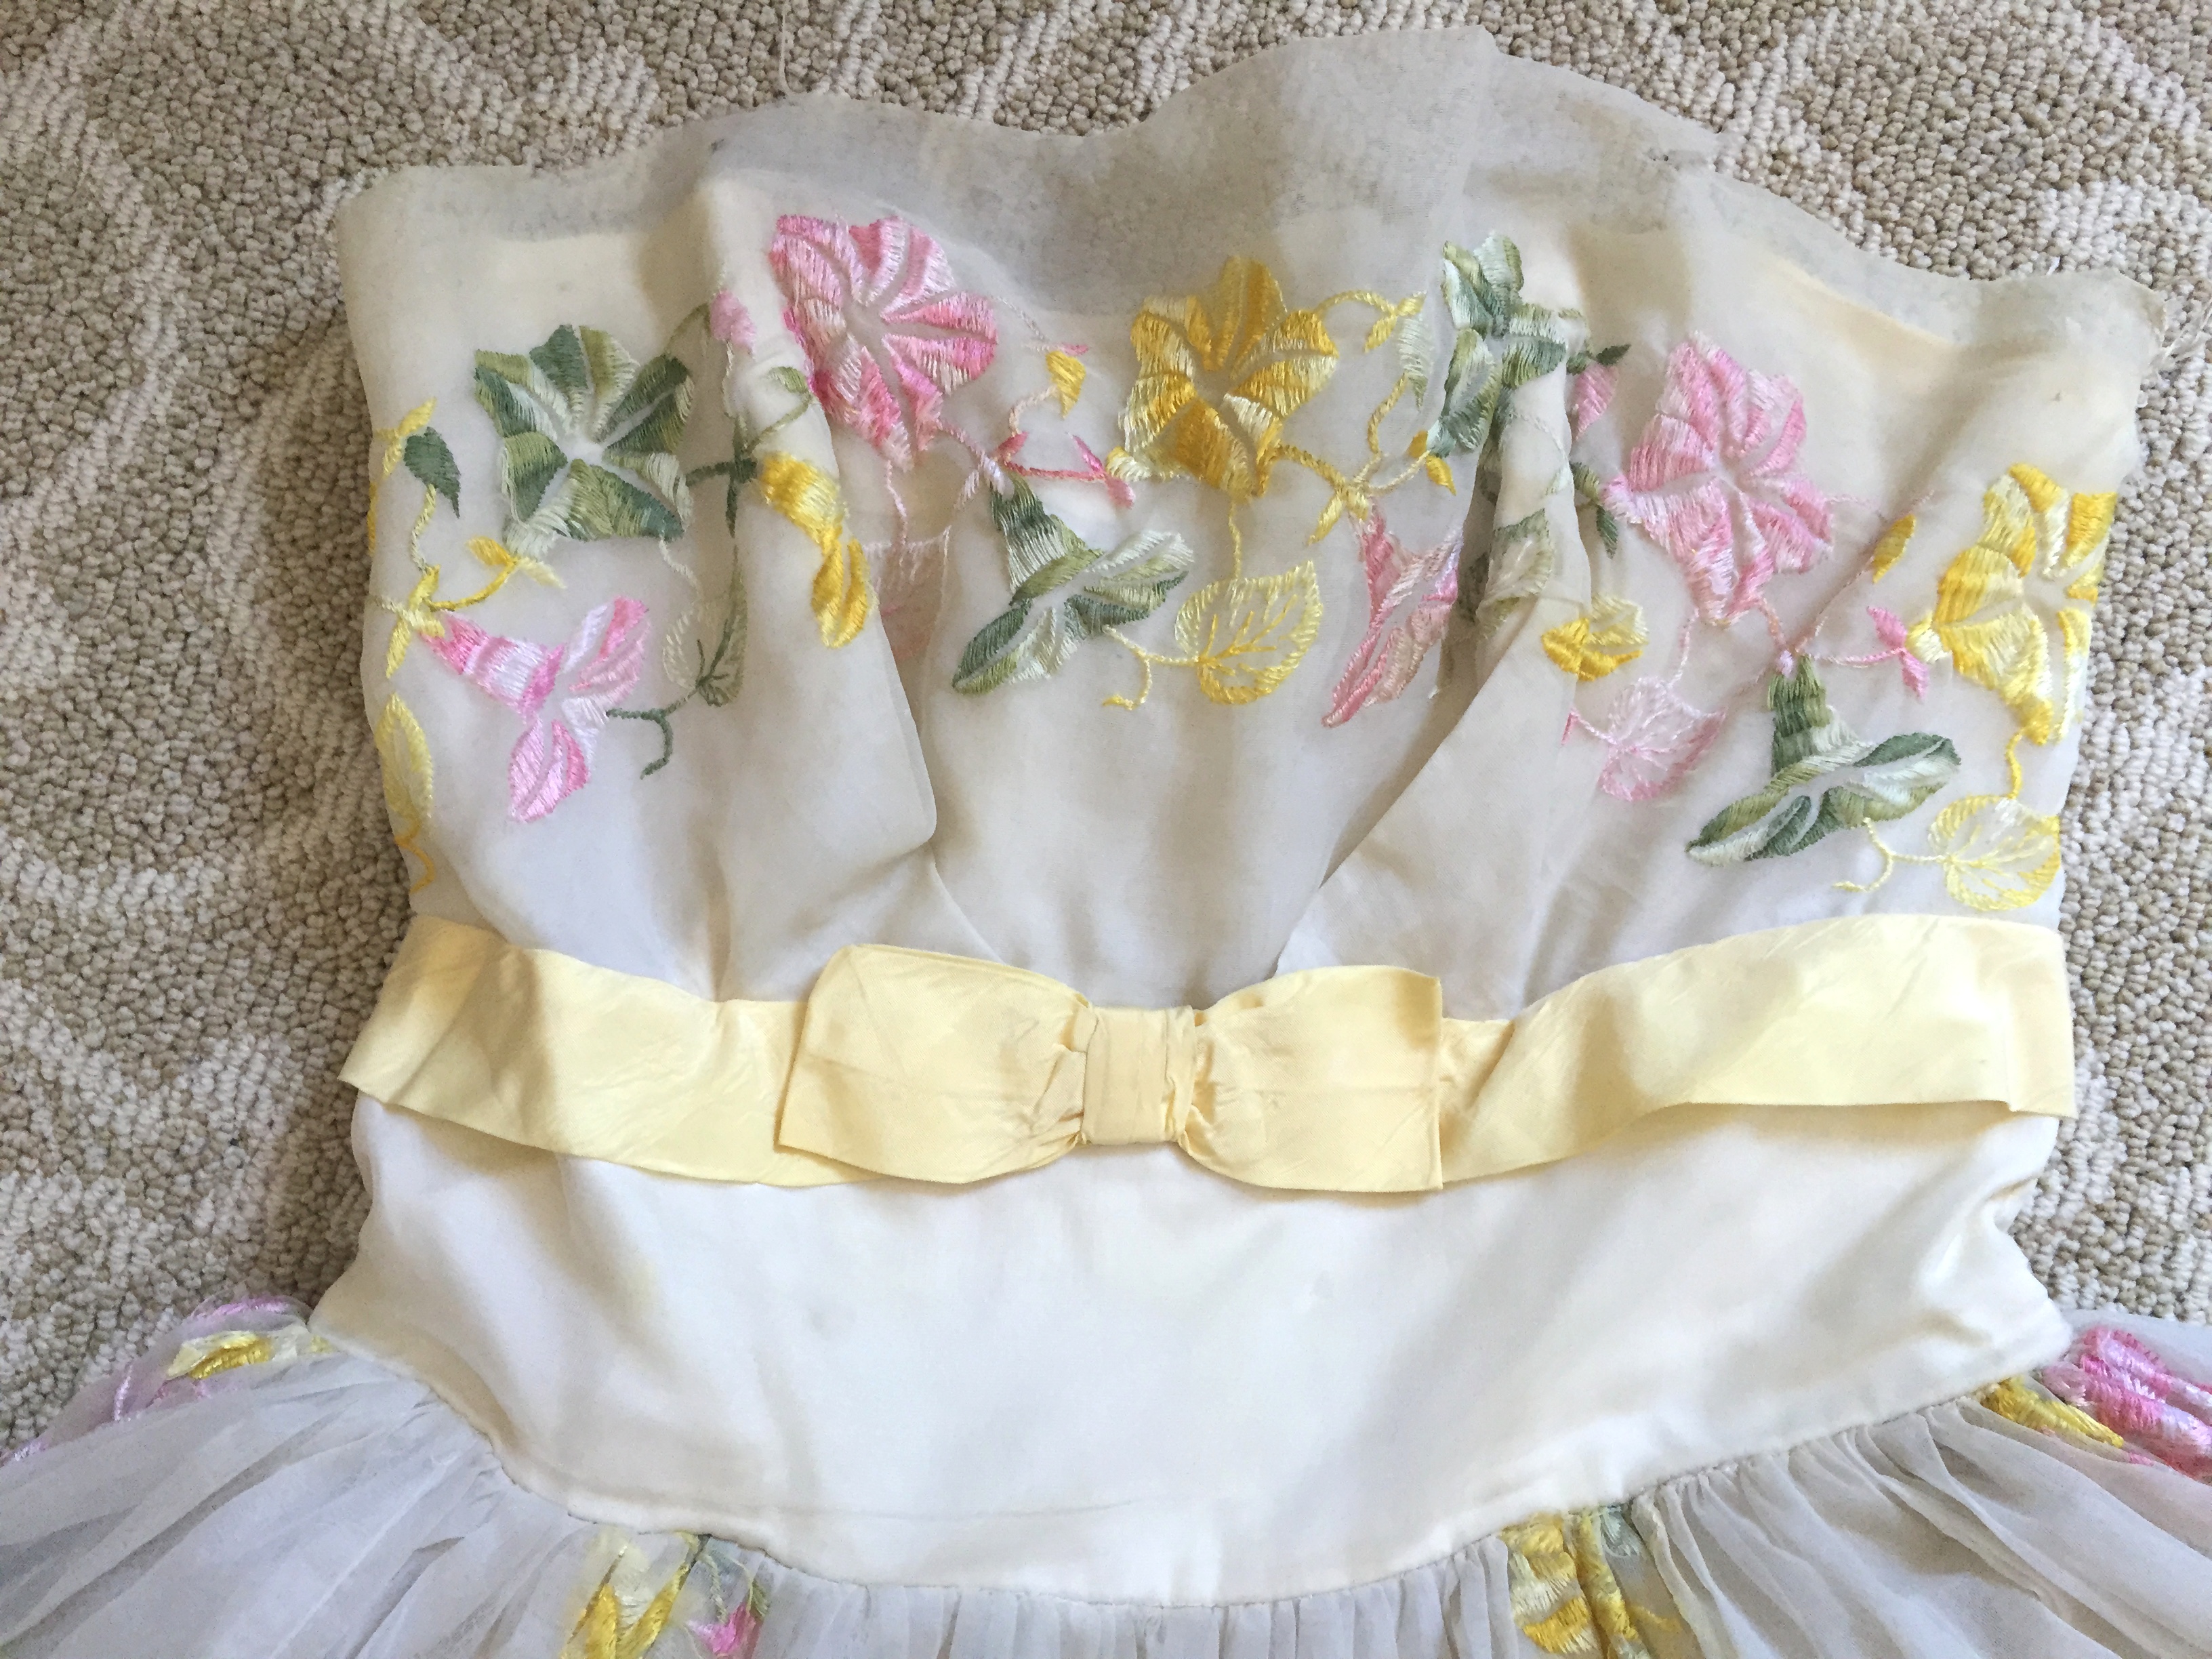
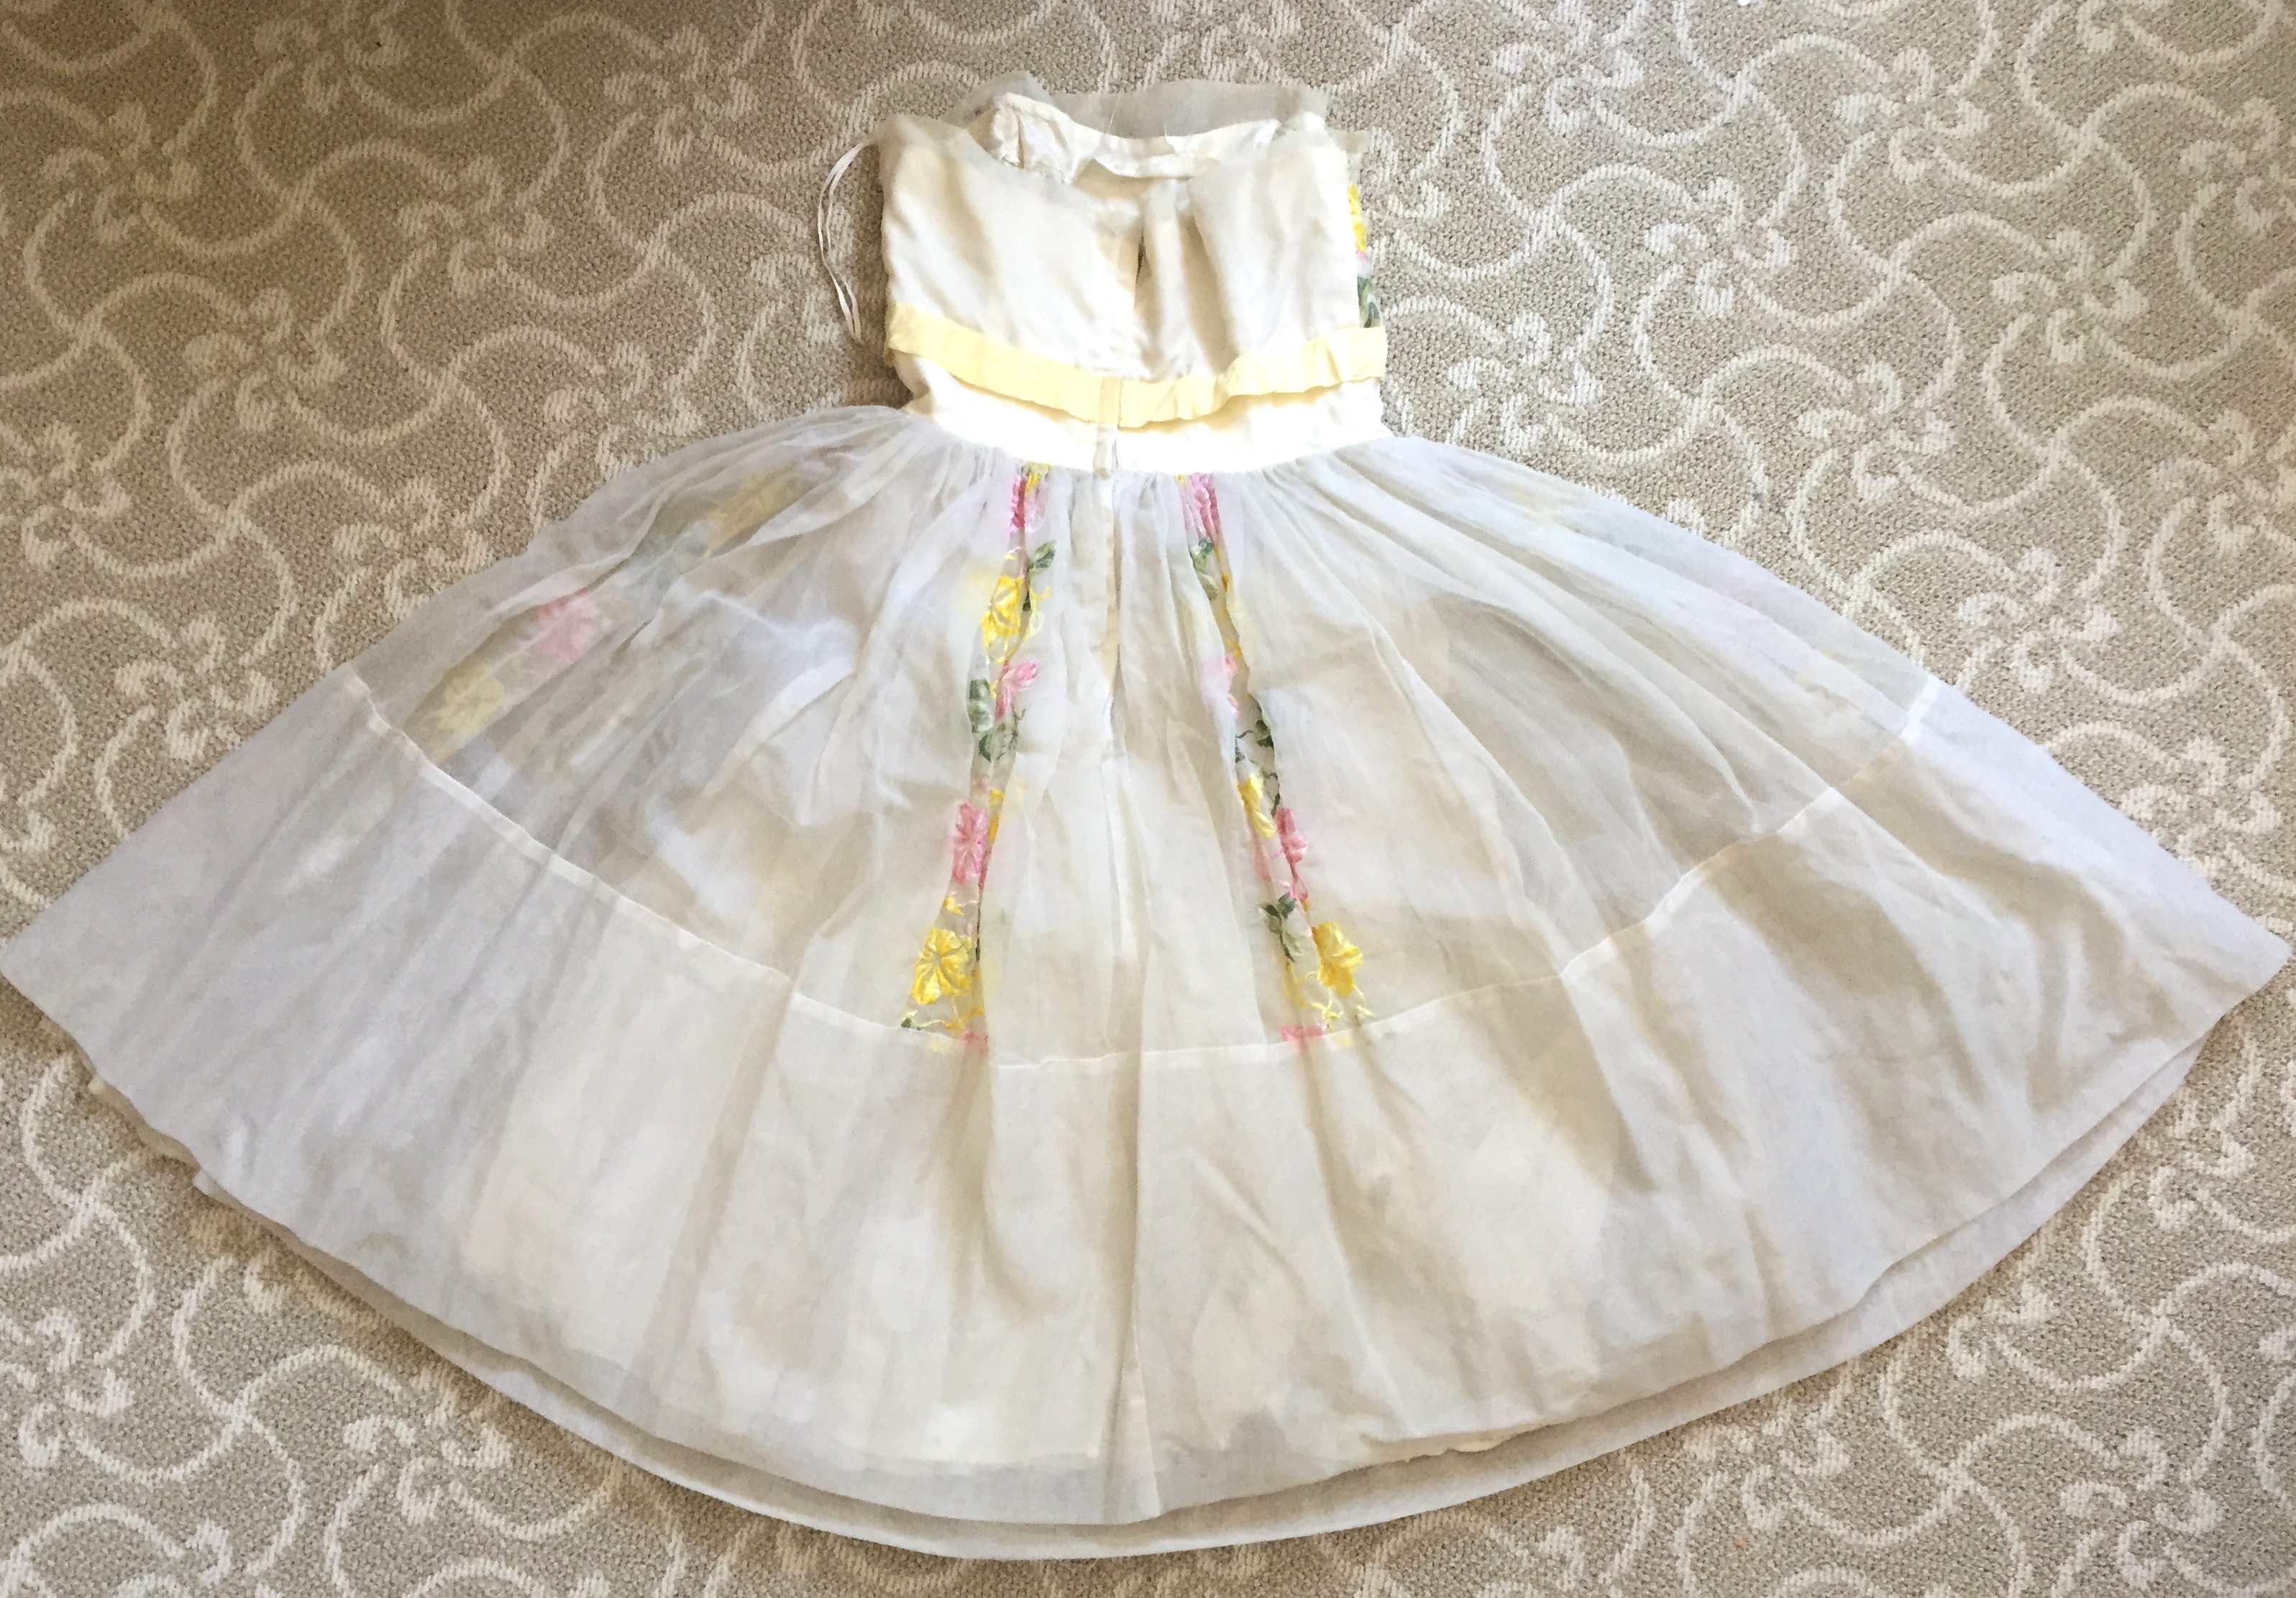
First is this really cute embroidered 50’s dress!
Unfortunately it needs a lot of love and attention. It has many stains and damaged areas, although the embroidery is in good shape. The zipper has some rust, and the bodice lining and outer nylon layer has some holes and tears. There are some tears at the top of the dress so I can’t hang it up until I sew in some hanging loops. The dress fits me perfectly though, so I hope I can rescue it!
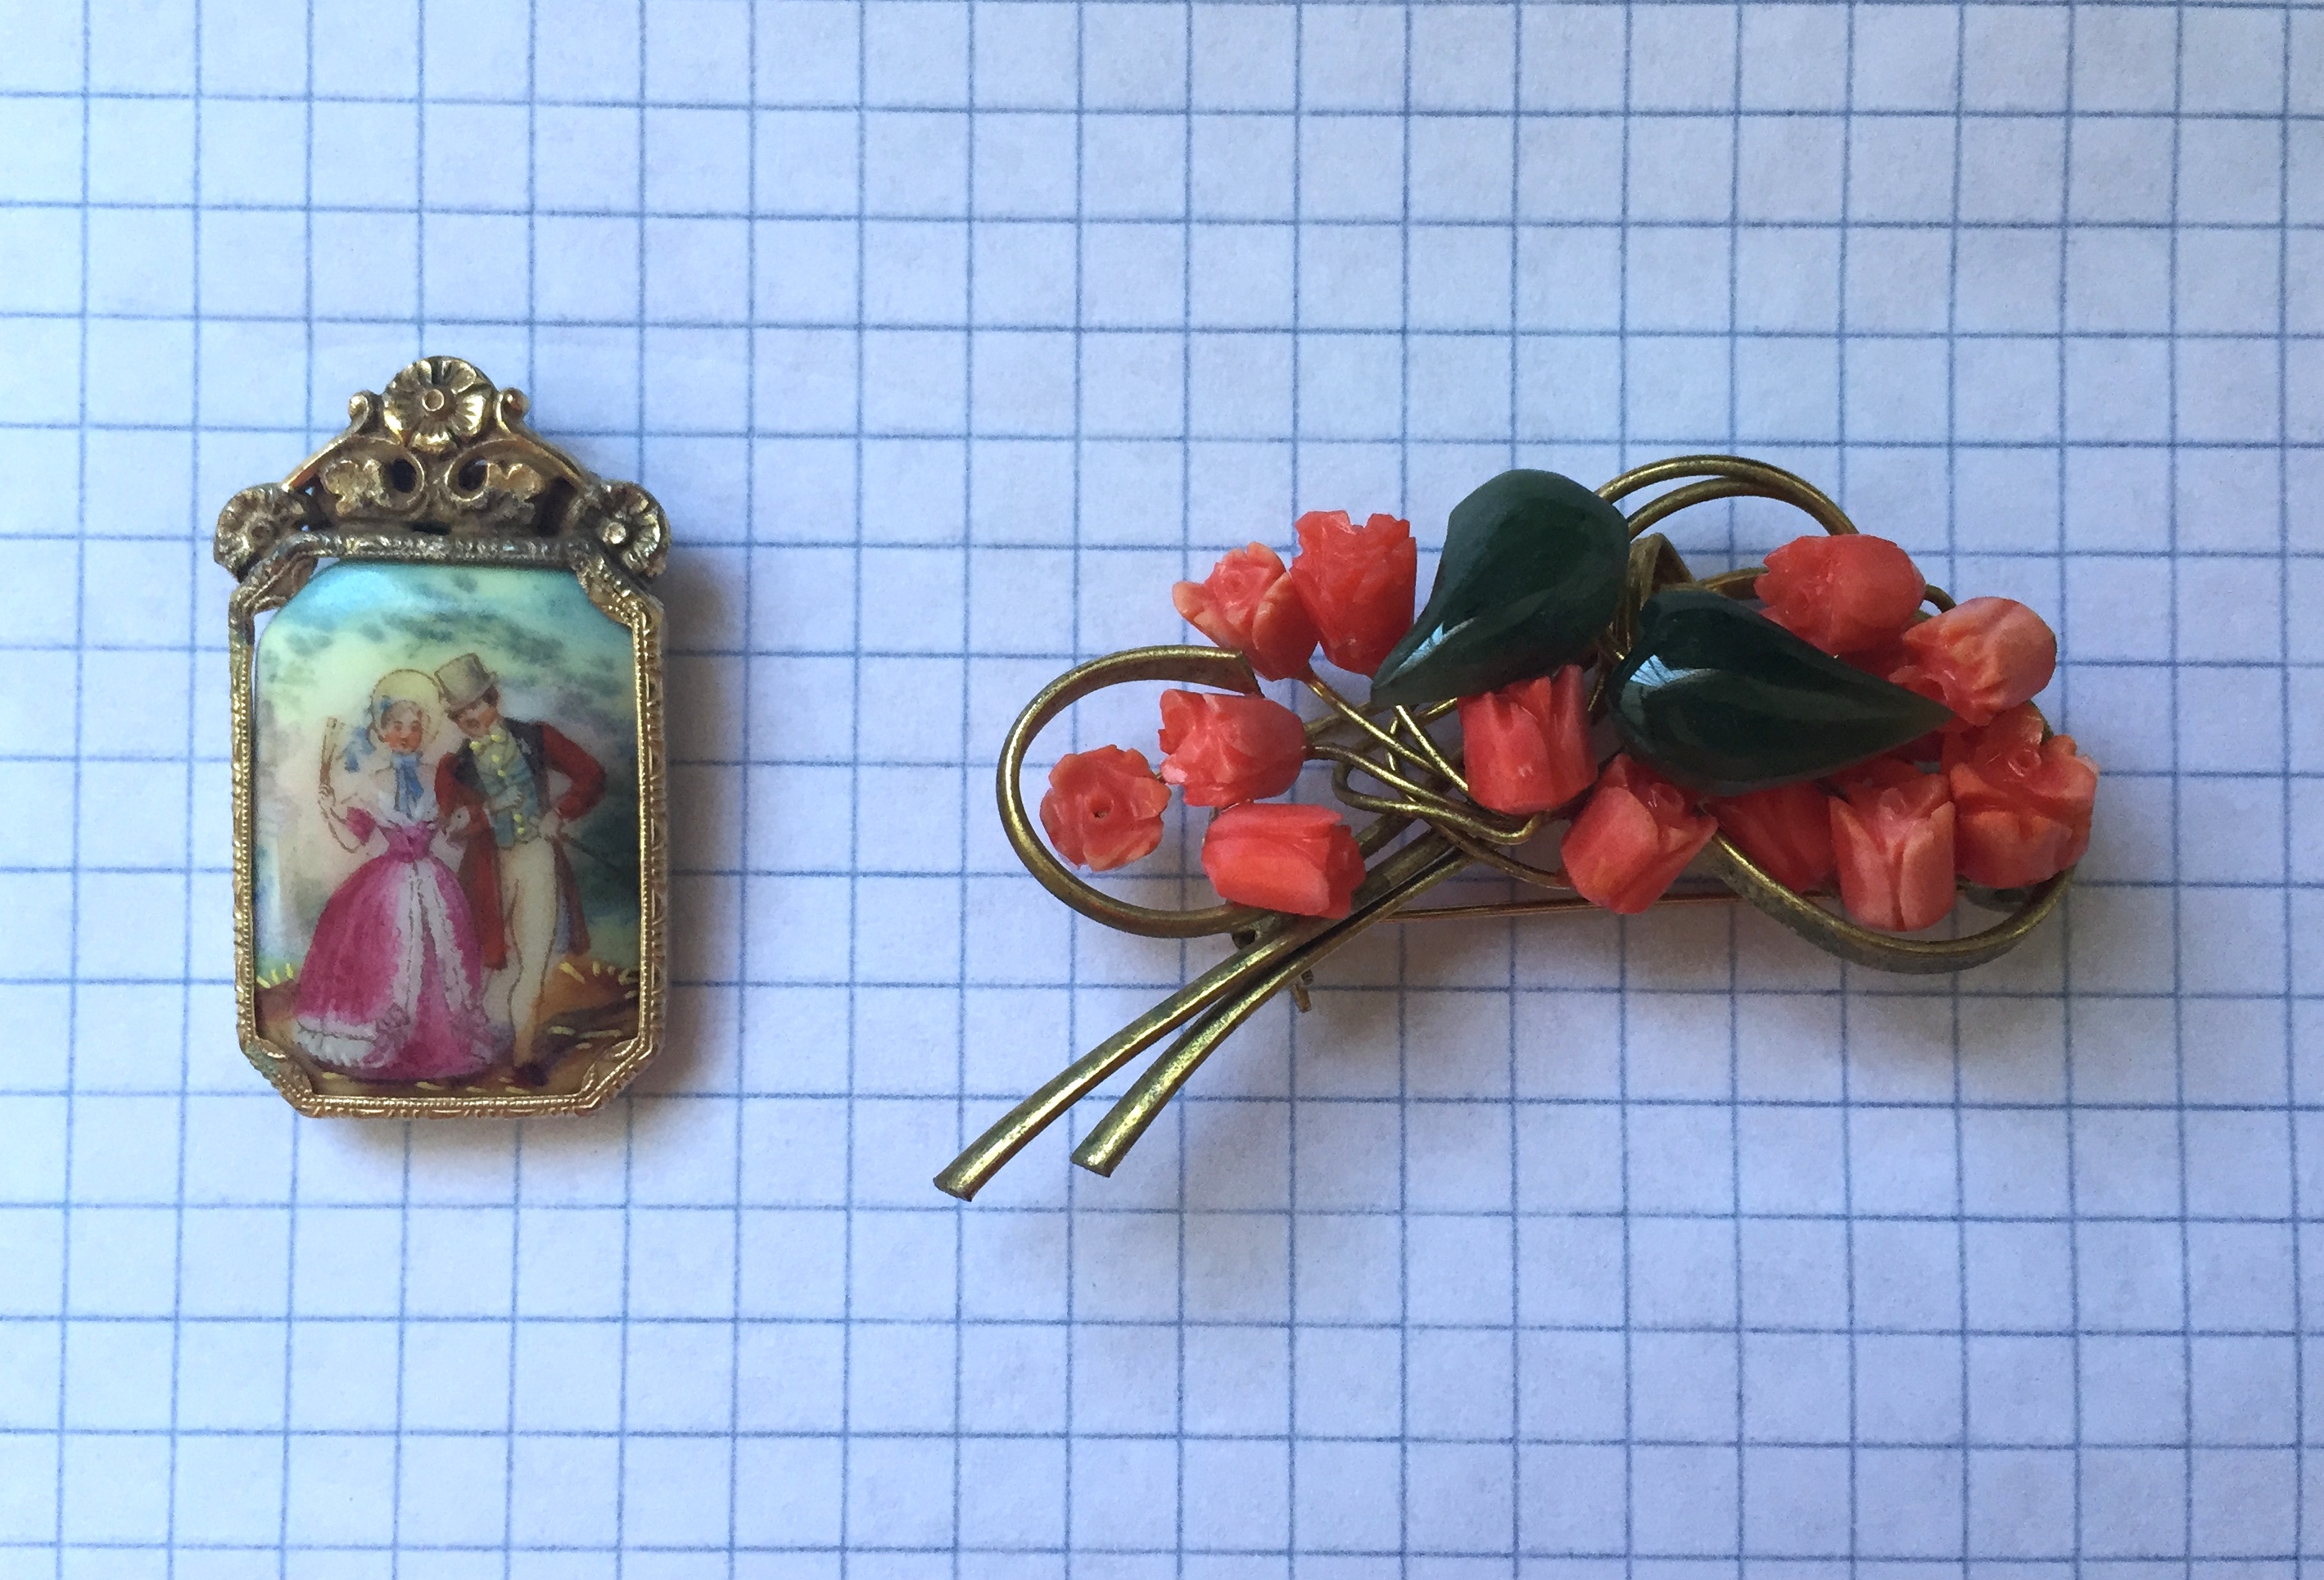
I finally got around to cleaning the jewelry I bought at Costume College, either from the bargain bazaar or a vendor, and here are the pieces.
First is an adorable dress clip with a happy couple. I’m not sure what to wear with it yet, but I’ll figure it out. Next is a brooch featuring carved coral tulips and green stone leaves. I have some other vintage coral tulip jewelry, although not in such a deep pink color.
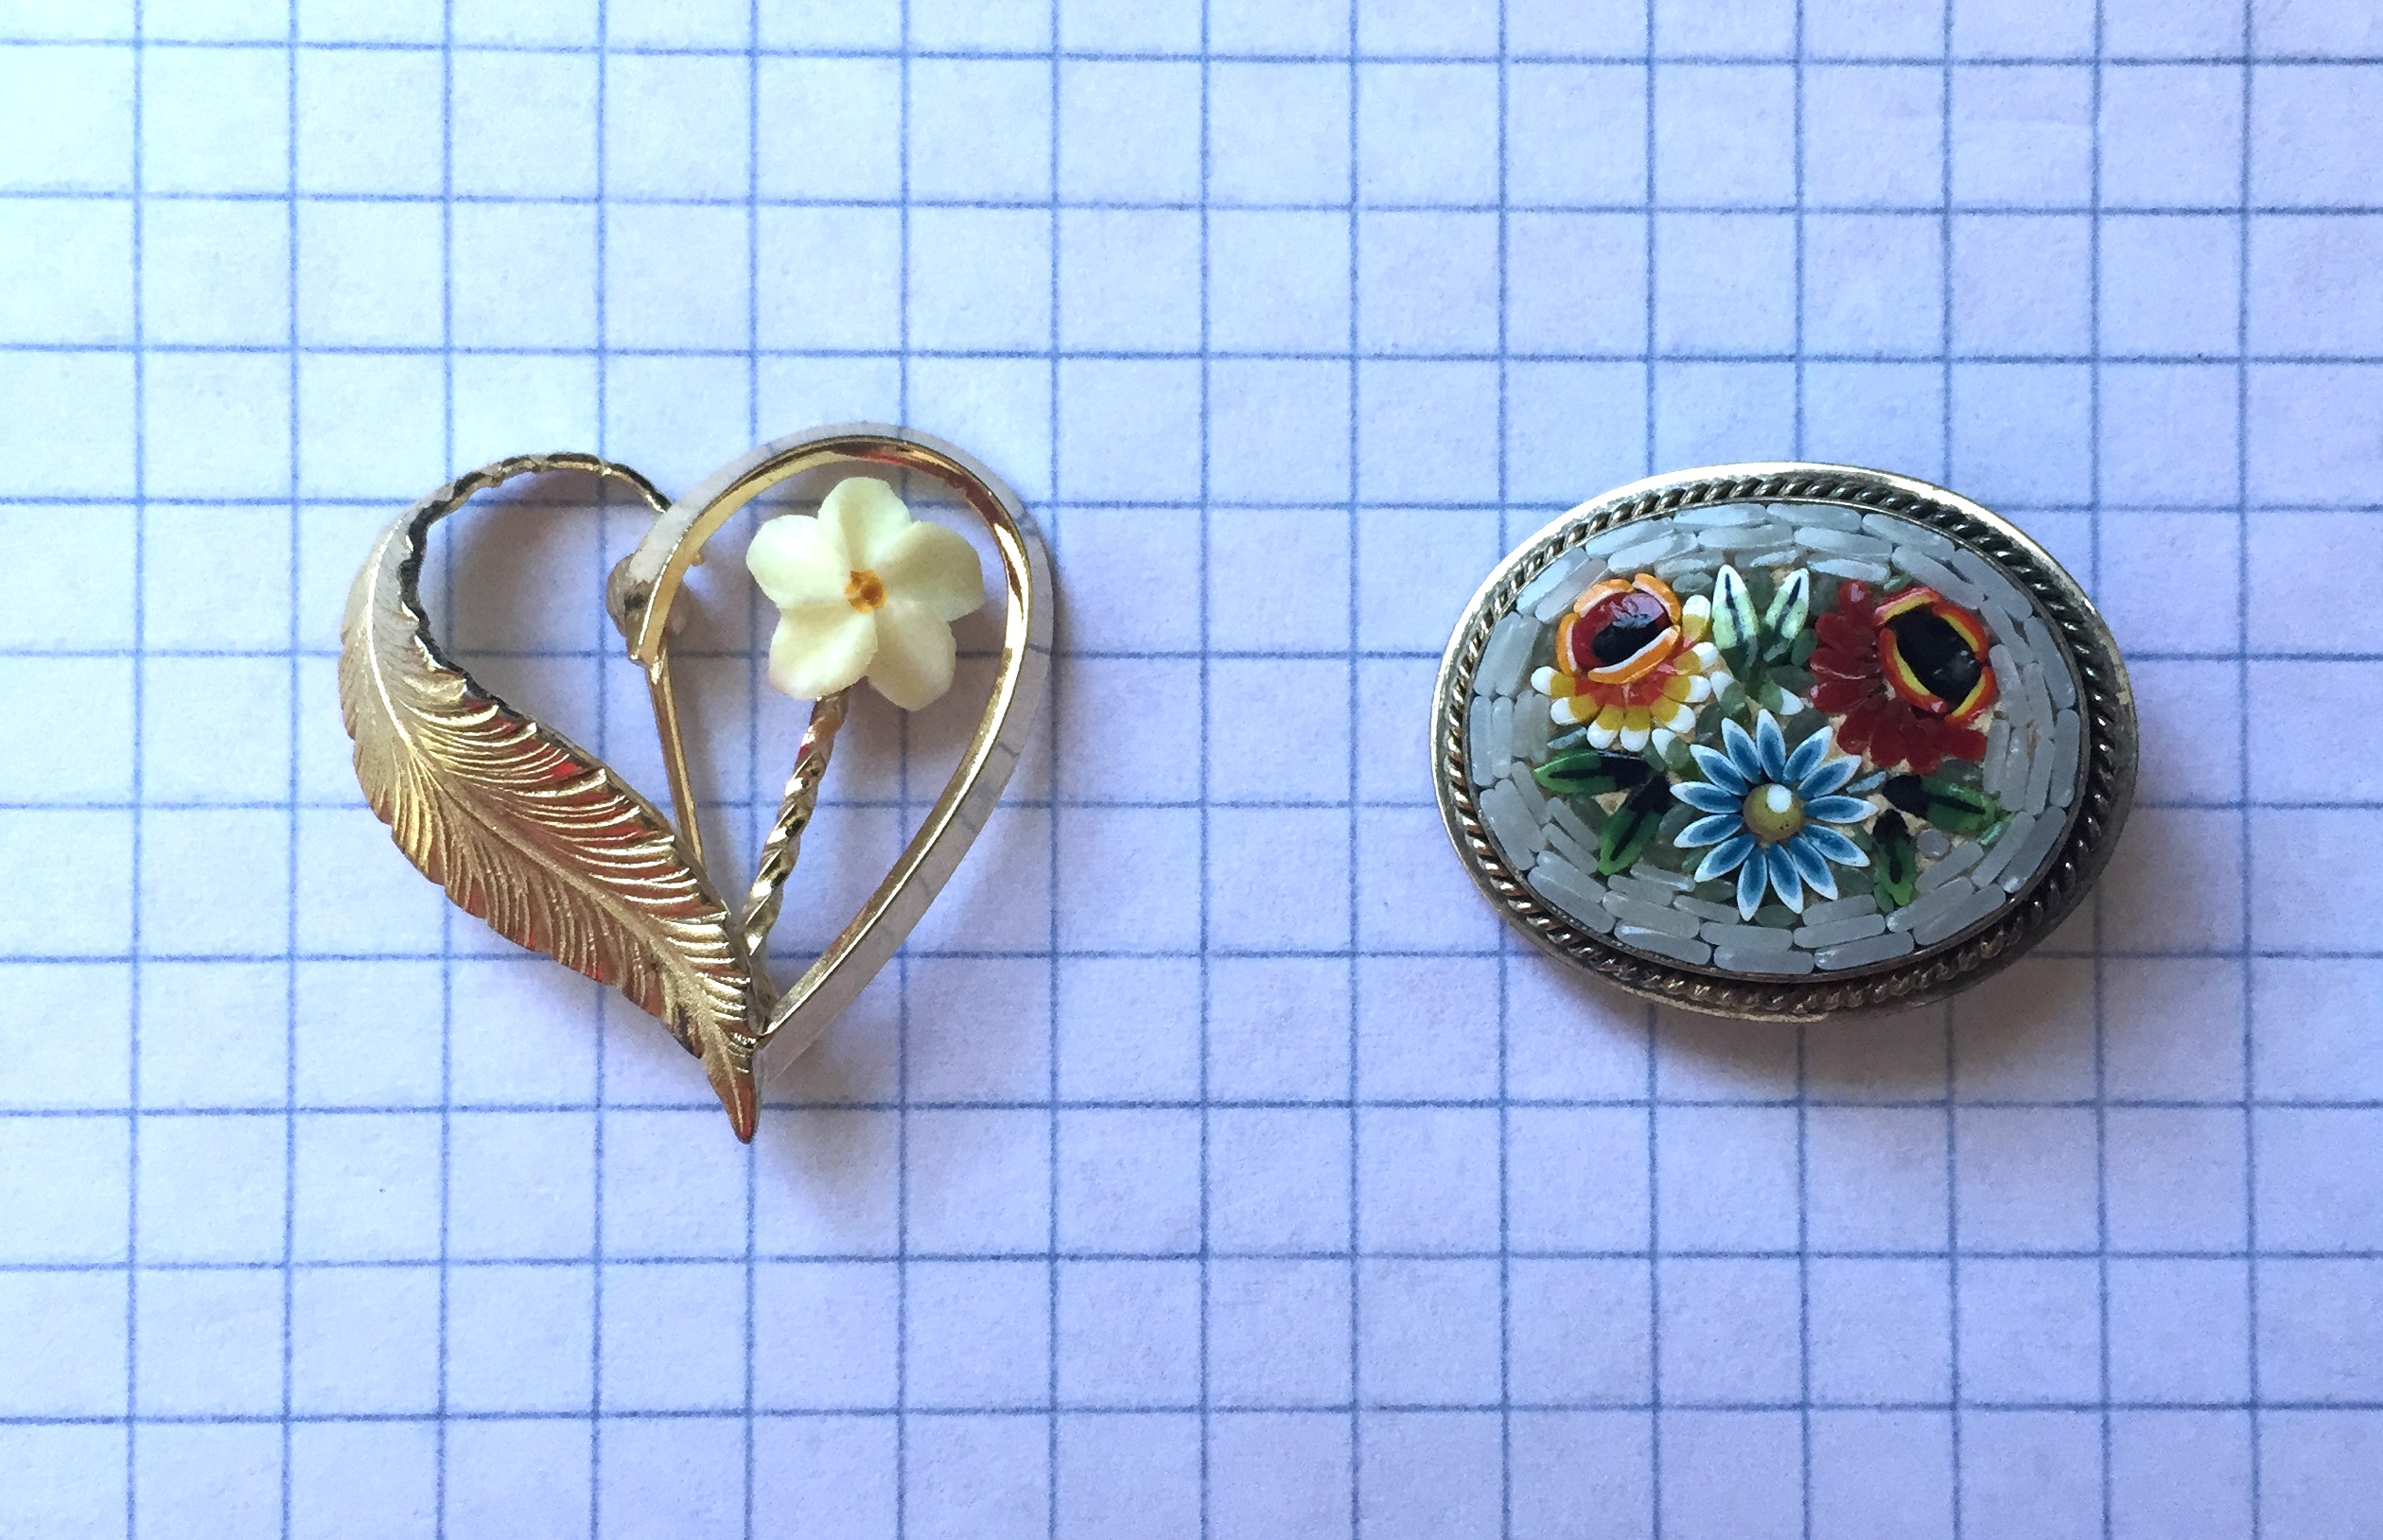
This heart-shaped pin features a little ivory flower. I am in love with this tiny millefiori pin!You can see how tiny it is compared to this other millefiori pin I bought years ago from the Alameda Antiques Fair.
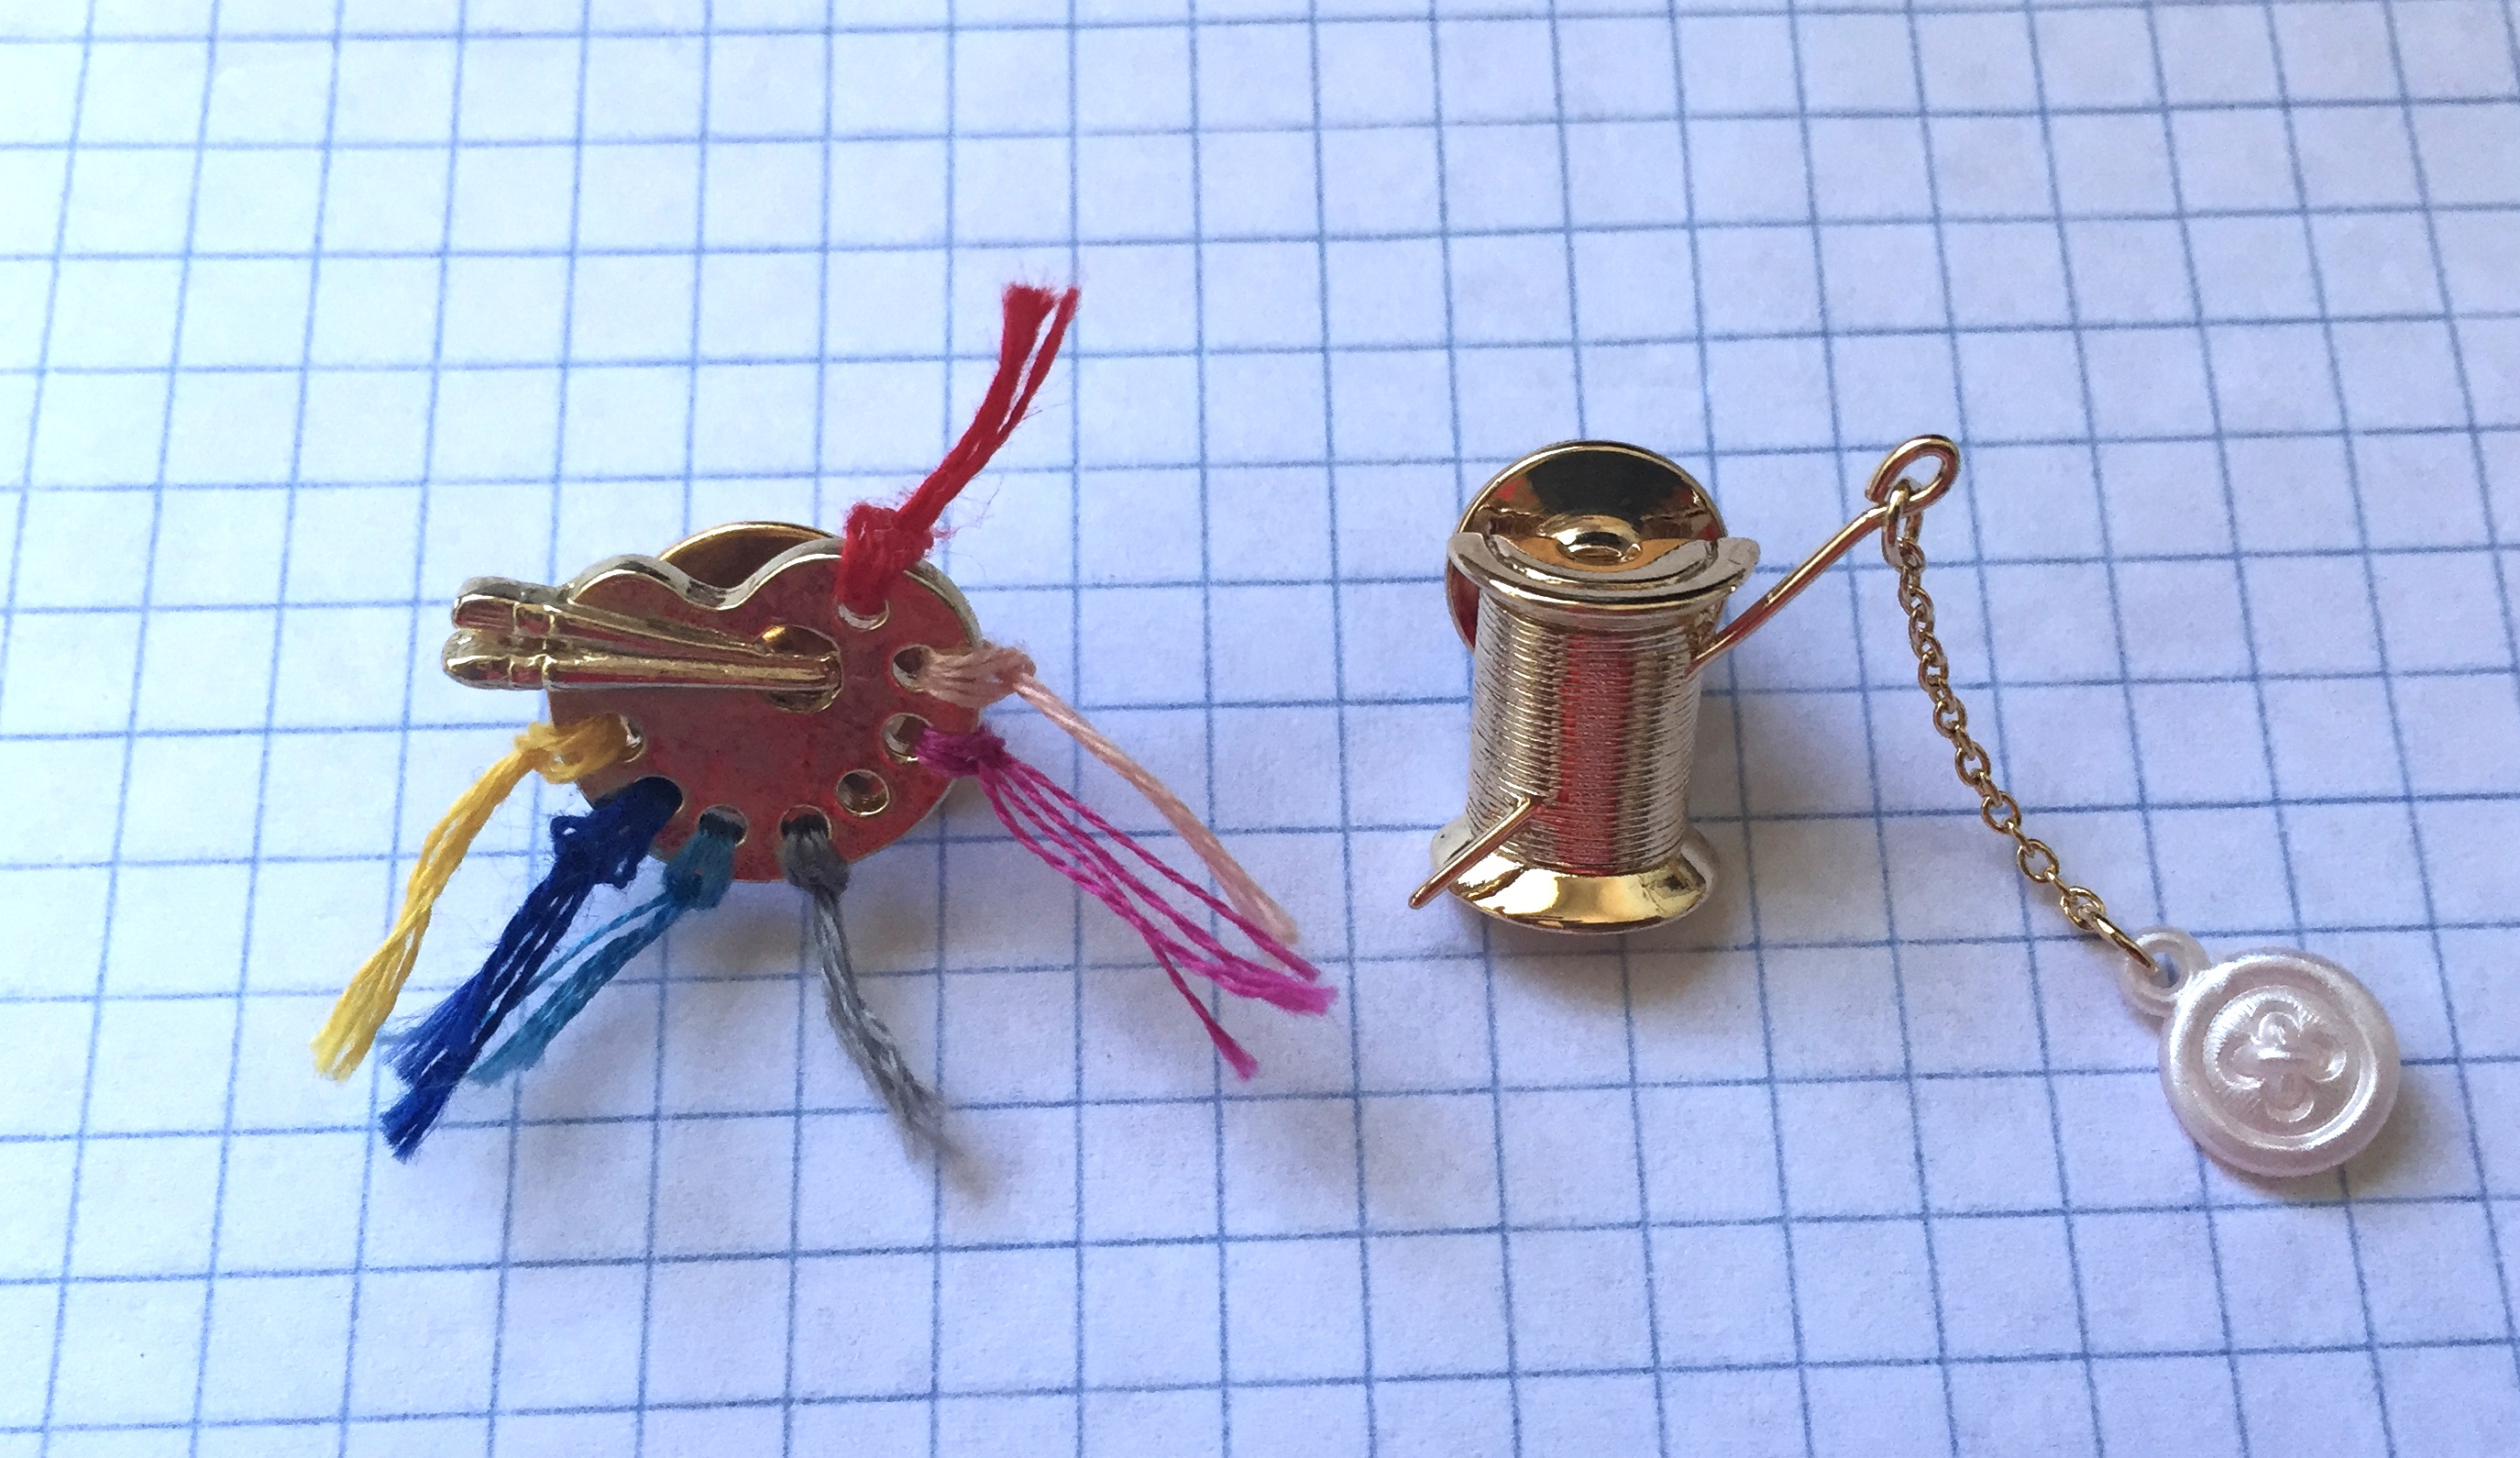
Next are these two little pins that are probably not vintage, but cute anyway. I am going to put some green thread on the artists’ palette to fill in the missing part. Isn’t the little dangling button on the needle just perfect?
The enamel pin is missing its center stone. I’m not sure what it was originally, but I am adding in a faux pearl. The shiny brooch on the right is a piece of modern costume jewelry, but I liked the fun colors, even if it’s missing a few stones. I can repair it, but until then, I don’t think it’s very noticeable if worn at night!Lastly is this pair of hand-embroidered pillowcases. I have a friend who loves to embroider, so I am going to pass these onto her, since I know she will give them a good home.


 12-14-19")
