I recently made a medieval princess dress that isn’t historically correct (although inspired by 14th century cotehardies), but was fun to make, and a gift for teenage me. When I was in high school I wanted to have a medieval princess dress for prom but had neither the sewing skills to make one or the money to buy one, so this is a fulfillment of a dream! 
Yeah, it was a bit breezy that day.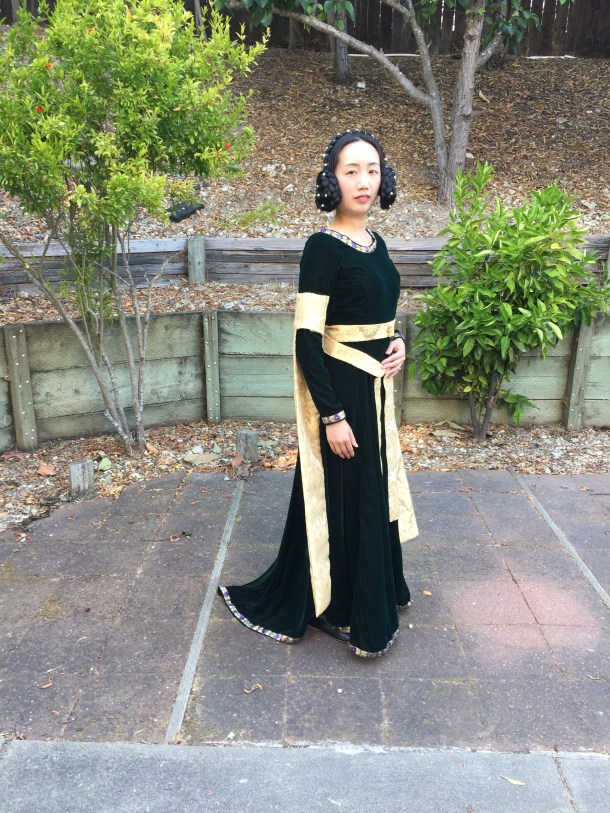
This dress was also a reminder that costuming and sewing is supposed to be fun, even if the details are “wrong.” This dress has inexpensive polyester velvet, a zipper down the back, shiny jacquard trim, polyester sleeve tippets and a wrap belt made from curtain fabric, an impractical train, and princess seams! To someone concerned about historical accuracy these might be a bunch of no-nos, but this gown, despite all its anachronisms, is something I would have loved and felt pretty in back in high school. This dress is a gift for little former me.
I used Butterick B4827 as my pattern base. I skipped the back eyelet lacing and used an invisible zipper instead. The tippets and belt were drafted by me. My goal was to machine-sew as much as possible, so the hem, neckline, and cuffs were machine-stitched and then covered with jacquard trim.
The tippets are T-shaped pieces of fabric sewn together and then turned inside-out to hide the raw edges. The tops of the Ts are then overlapped to make the cuffs.


The hair consists of 2 fake braided buns on a headband:
- Cover a headband in fabric matching your hair; I used black velvet.
- Make a short braid and cover in a hair net to help control flyaways.
- Wire the braid to the headband using gold wire, and insert pearls as you go.
- Make 2 long braids and coil each one into a bun shape.
- Use bobby pins to secure the bun shape.
- Glue pearls to each bun.
- Cover each bun with a hair net to control flyaways.
- Glue the bun to each end of the headband.


Project materials:
- 7 yards micro-velvet from Fabric Wholesale Direct: $62.93 (I had some leftover; if you are petite and cut carefully you might be able to get a dress out of 5-6 yards).
- 1 yard gold jacquard damask 118″ wide from FWD: $10.99
- 6 yards jacquard trim from eBay: $12.62 (including tax and shipping)
- Thread, buttons, pearls, wire, etc. from stash: ~$5
- 2-3 packages of fake braiding hair and headband from stash: ~$10
Total cost: All of the fabric was a gift from my friends at Fabric Wholesale Direct, so my out of pocket cost was about $27.62 (instead of ~$101.54 plus tax and shipping). Thanks FWD!
If you’d like to make a medieval dress of your own, check out this tutorial I made. Happy sewing!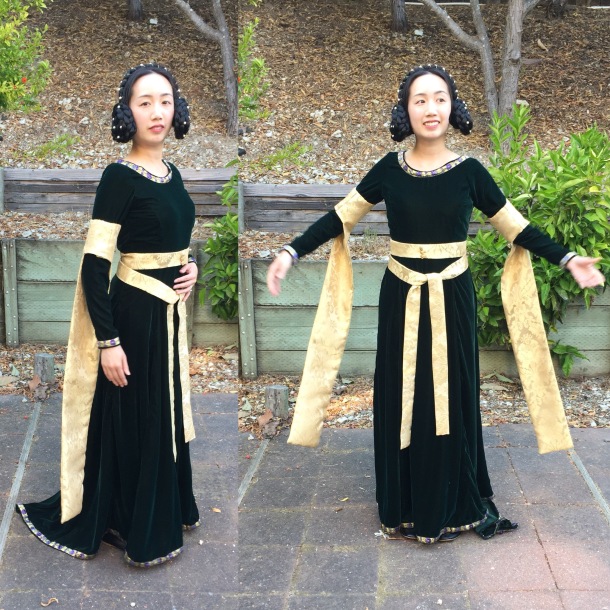


 12-14-19")
