RSS Feed

Tag Archives: 1850s

Past Patterns 702 (Dart Fitted Bodices) Review

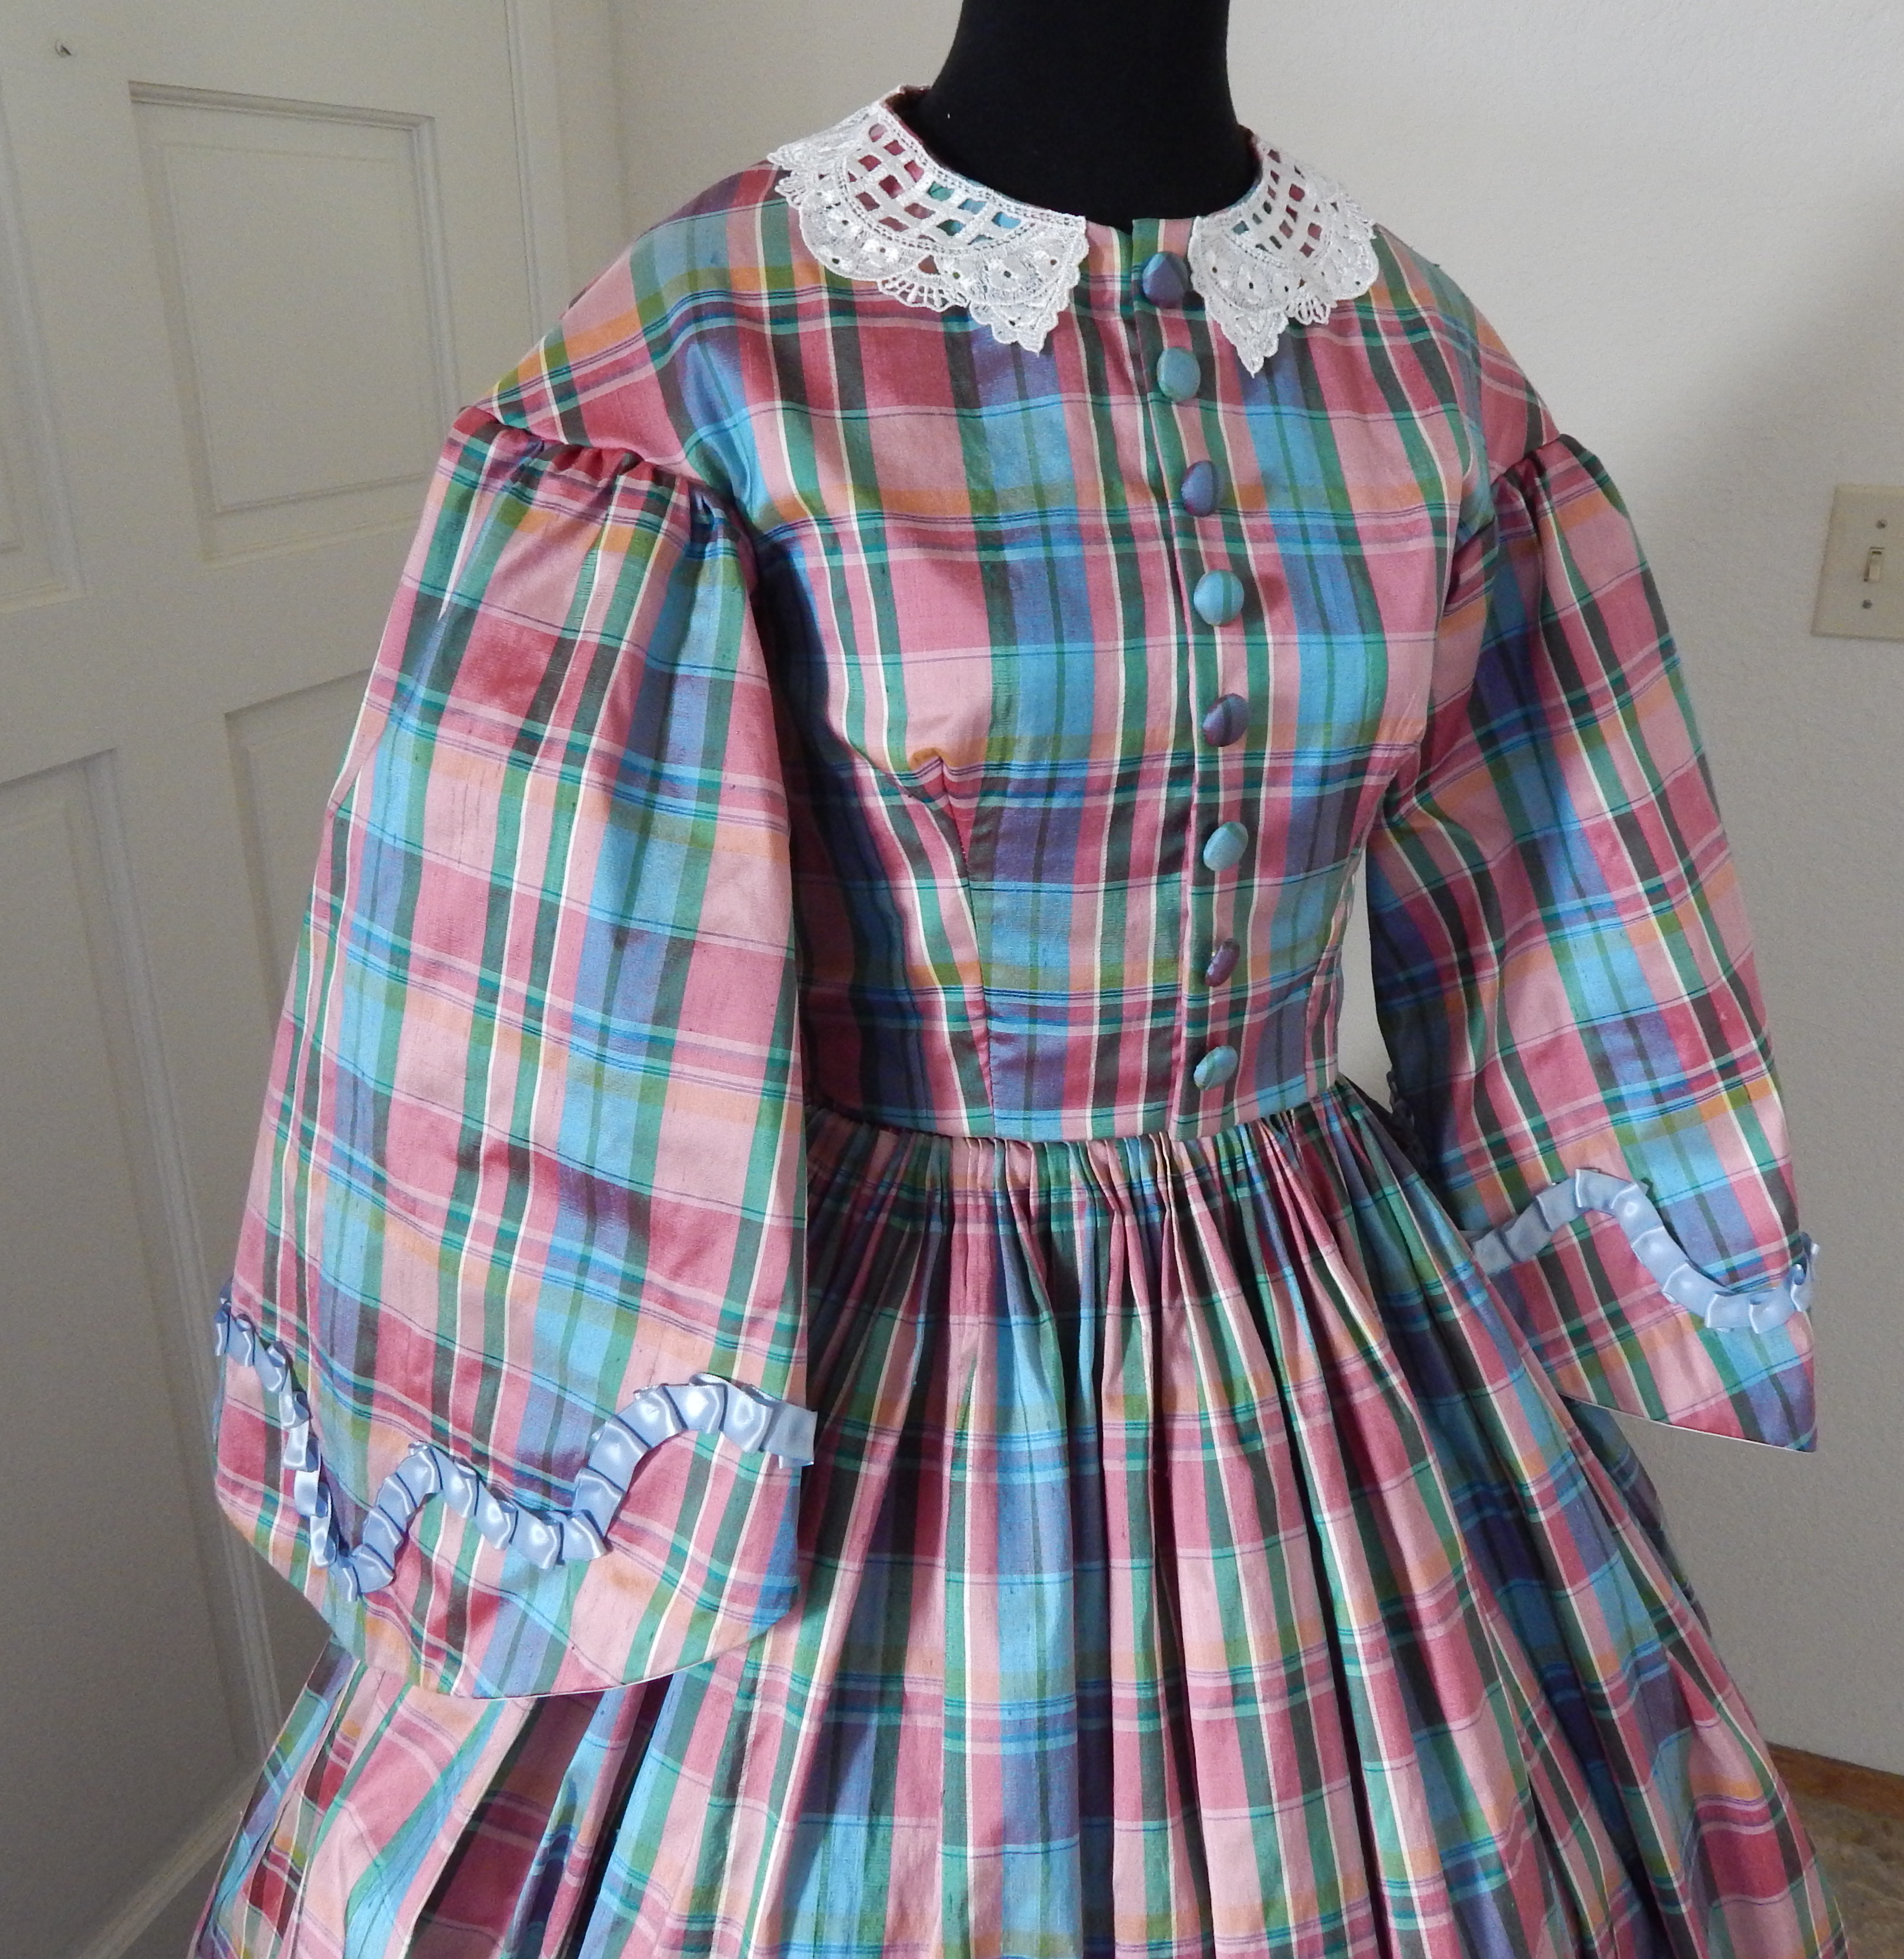
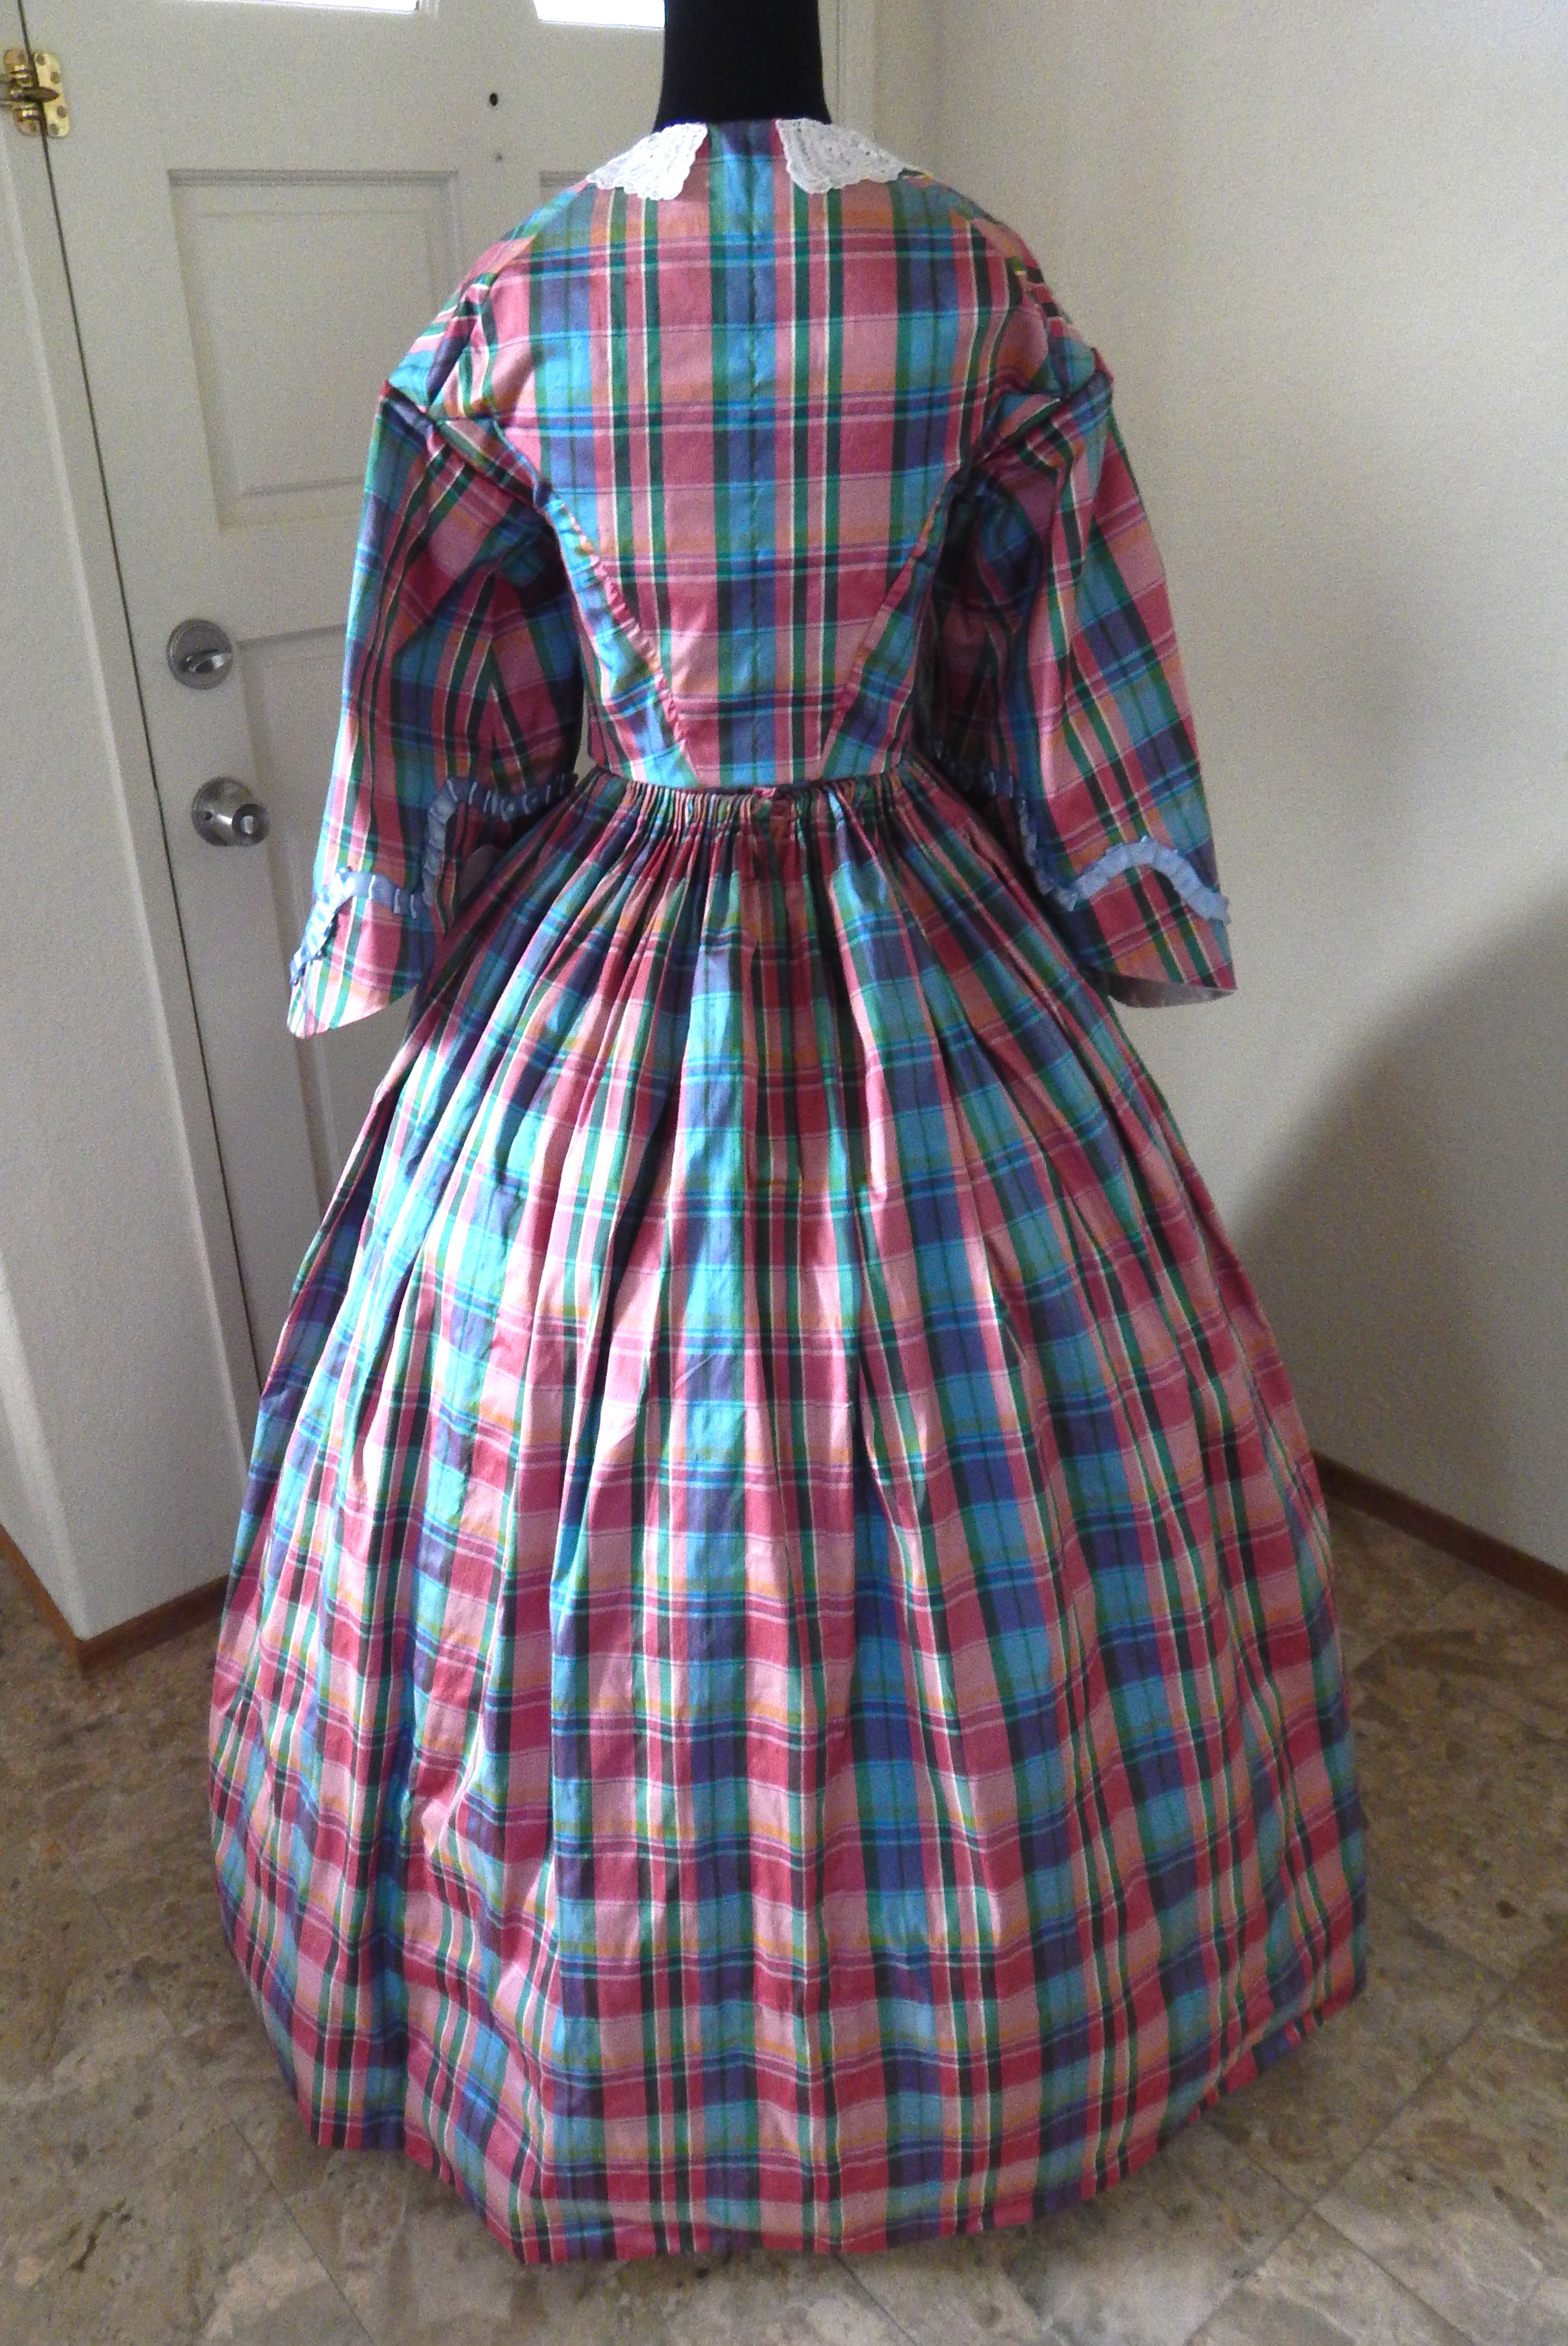
I made my 1850s gown using Past Patterns 702 (Dart Fitted Bodices). I found some good reviews online, especially about the ease of construction, so I decided to give it a try. Although it was a useful starting point, and there are other nice things about the pattern, it is not a pattern I would recommend if you are small-busted and long-waisted.

CONSTRUCTION

Pro: There are not a lot of pieces, so construction is not difficult. The pattern is relatively simple, and consists of pieces for the bodice front, bodice back, side back, your choice of a pagoda or coat sleeve, and an optional epaulet. There is also an undersleeve pattern if you make the pagoda sleeve.

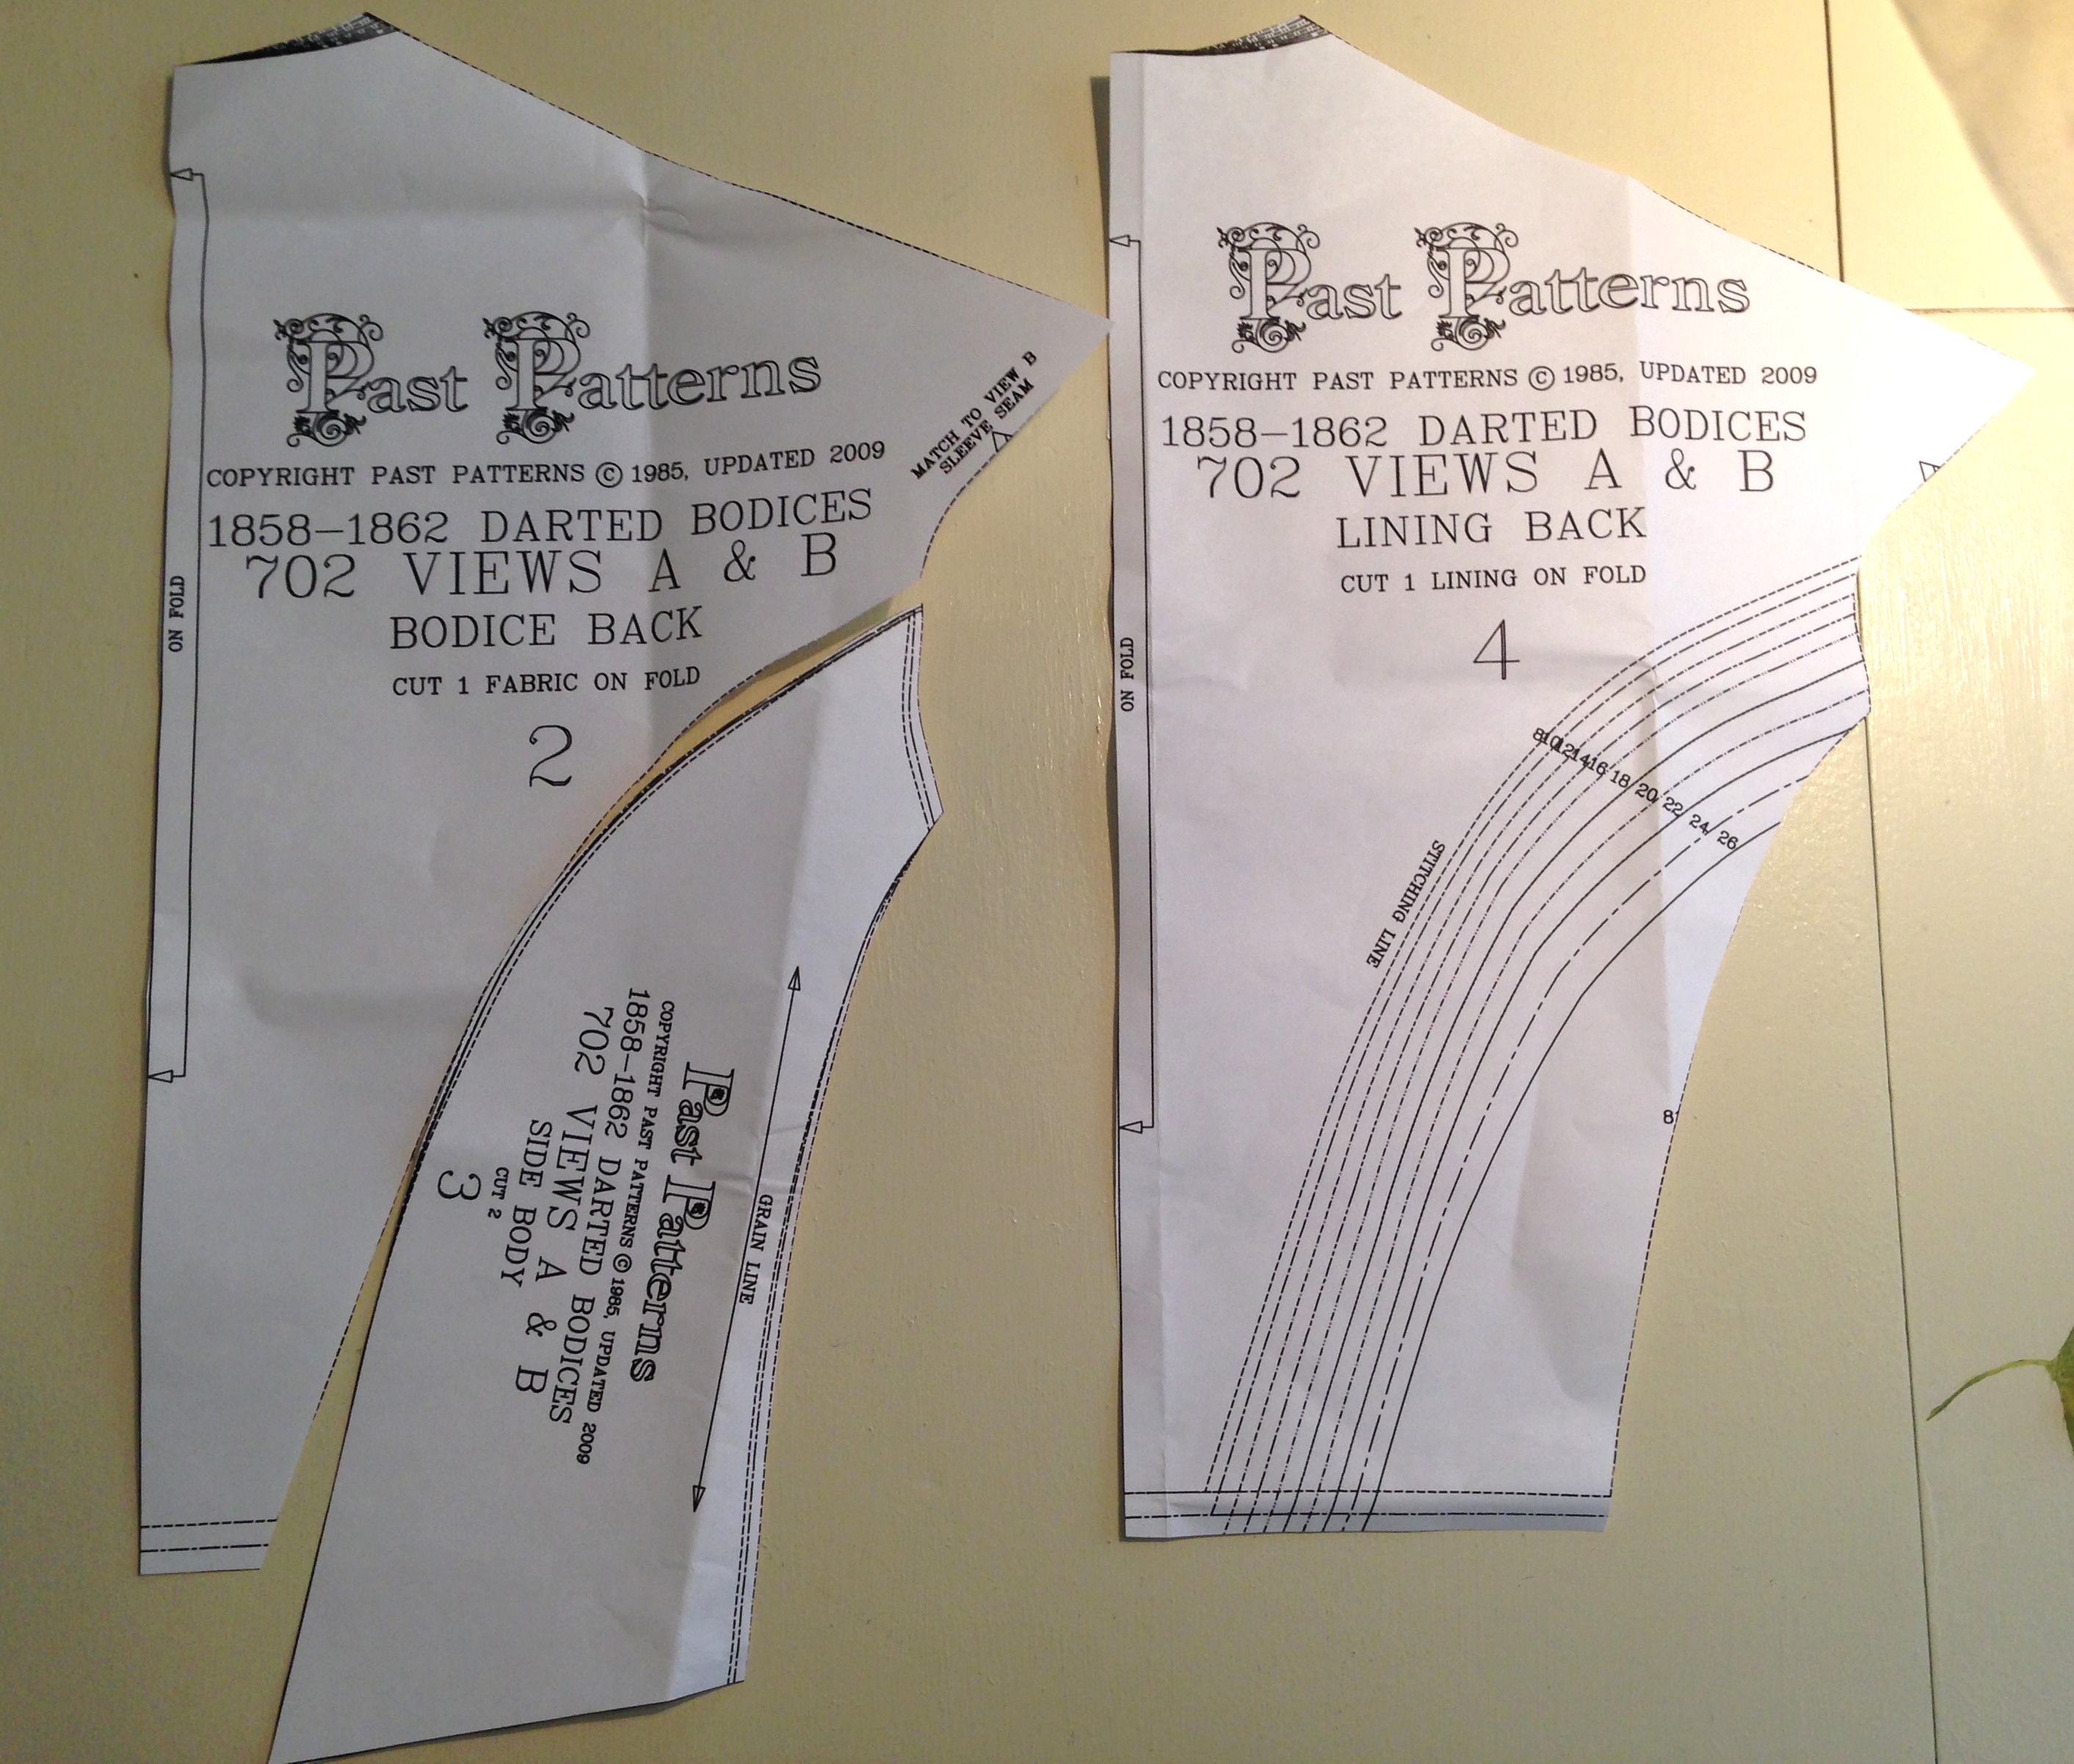
Con: Because of the pattern encompasses sizes 8-26, and appears to be scaled by computer and not hand-drafted, some of the pieces don’t quite fit together. Here are the pattern pieces for the bodice back and bodice side back, compared to the lining for the back:

IMG_2997FIT

Pro: The fitting is done at the shoulders and side seams. The pattern suggests cutting out your lining as a mock-up, then having a friend help you fit it. When you sew your fashion fabric you finish the front closures before taking in the side seams to fit yourself. If it works, it’s very simple.

Con: To employ this technique, you must have a friend help you, or a dress form with shoulders (because of the historically accurate dropped shoulder), or keep putting the bodice on and taking it off.

Con: The lining for the back of the bodice is one larger piece encompassing both the bodice back and side pieces. There is no explanation on how to translate the adjustment you made on one pattern piece into two pattern pieces.

Con: The size chart is inaccurate and the pattern is too large. According to the pattern I am between a size 10 and 12. The size 10 was too large for me. Even when I recut the pieces to size 8, it was still too big.

Con: There was a huge excess of fabric in the chest and shoulder area. Since I have a small bust I am used to taking in patterns a bit, but usually not as much as I needed to this time.  I realized that this pattern is designed to fit someone with enough assets to spill over the top of her corset, and slightly broader shoulders. In the end, to make this fit I had to not only drastically alter the front bodice piece, and a little of the shoulder seam in the back bodice piece, but I had to also stuff my corset with bust pads when wearing the dress. This photo shows my fabric on top of the size 8 pattern (but with the size 12 seam lines at the bottom because otherwise it would have been too short in the front). I also had to move the darts a little bit. (My final pattern still had 2 darts, but I did not cut out the second one).

IMG_2999Con: I am not sure how much of the problem stems from my adjustments, or if this is an issue you would encounter even without such a change, but my sleeves did not fit into the sleeve heads. I had to gather the sleeve to make it fit, and did not have the smooth transition I was expecting.

If you have the ideal Victorian figure, and can fill out a corset, I think this pattern would be quite flatting and easy to put together. If you are on the petite side, it would be easier to find another pattern that does require quite so much adjustment.

Advertisement

1850s Plaid Silk Dress at Dickens

Last Saturday I went to the Dickens Christmas Fair wearing my new 1850s plaid silk dress.

IMG_3477

The bonnet is one I trimmed during a previous year, and I am wearing Tavistock button boots from American Duchess. I am standing in front of Cuthbert’s Tea Shop at the Fair.

I would like to make a matching blue belt for the next wearing. I also didn’t have time to make some new silk undersleeves, so I made do with the sleeves of a frilly blouse peeking out. I’m also thinking of trimming the skirt in the same manner as the sleeves, but perhaps I shouldn’t get too carried away.

The dress is made from a plaid silk dupioni. The bodice is flat-lined with a cotton canvas, and closes with hooks and eyes. The covered fabric buttons are decorative only.

DSCN1383The skirt hem has a circumference of 136 inches, and the skirt is made up of 3 straight panels. I originally planned a skirt circumference of about 150 inches, but after I cut the panels out I realized the blue stripes were not a uniform width, so changed my plan to have the blue stripes go vertically instead of horizontally.

The collar is lace I found on eBay.

DSCN1376The sleeves are a pagoda shape, and lined with ivory silk taffeta left over from my 1830s Romantic dress. They are trimmed with ribbon I had to hand-pleat as I sewed, to make them follow the curve I had chalked out on the fabric.

DSCN1381Originally, I planned to knife-pleat the skirt to save time, but I caught a cold and stayed home from work for 2 days, and cartridge-pleated while watching Netflix. It was my first time doing cartridge pleats, and although time-consuming, I do like the effect, even though I think I should make them a little tighter next time.

DSCN1385I received some advice on my last post to cut the side back panels on the bias, since I was having a little trouble with perfectly matching the plaid along the curved seams, so I changed the bodice.

DSCN1388A few of the things I liked about this dress are things you can’t see, precisely because you can’t see them. The skirt is unlined, except for a self hem-facing of about 10 inches that is hand-sewn. Can you see the horizontal stitch line? (Sorry, I didn’t take photos before wearing at Dickens Fair, and the car ride has rumpled the skirt quite a bit).

DSCN1391I hid a pocket in each side seam, and I had a lot of trouble finding my pockets throughout the day. Let’s play find the pocket.

DSCN1393In the past, I’ve added the skirt placket near the end of construction, but this time I followed Jennifer R’s instructions on how to put in the placket before you even sew your skirt panels together, and I think it came out much neater.

Overall I am quite pleased with this outfit! There are a few tweaks I would like to make, and accessories to add (plus add a little more floof on top of my hoop) but it came out better than expected. I used Past Patterns 702 (Dart Fitted Bodices) as a pattern, and I will write a review about the pattern fit and construction in my next post.

Project Costs:

  • Fabric: 6 yards 54 inch silk: $59.98 + $13.90 shipping (I still have enough left over for an evening bodice!)
  • Pattern: $14 + $3.25 shipping
  • Lining: 1 yard cotton canvas: $12.20 + tax
  • Sleeve lining: $0 (remnants from a previous project)
  • Lace collar: $5.99
  • 3 spools ribbon: $11.30 (I still have plenty left to trim the skirt or make a belt)
  • Hooks and eyes: $3.65

Total cost: $124.27

If I didn’t pay for shipping or the excess ribbon the cost would have been around $100. Not bad for a silk dress. =)

1850s Plaid Silk Dress for Dickens Fair

My next big project was supposed to be a gown for the PEERS Game of Thrones ball in February, but I’ve been distracted by my 18th century stays and now, a new 1850s plaid silk dress for the Dickens Fair.

I wasn’t planning to make a new dress for the fair, but then I ran across some lovely plaid silk for a bargain price of $60 for 6 yards of 54 inch fabric! It is a dupioni and not a taffeta but it’s not too slubby, and the busy pattern and dim light of Dickens will make it look nice.

Here are a couple sneak peeks.

Cartridge pleats! The skirt has its waistband, placket, hooks and eyes, and pockets. It still needs to be hemmed and trimmed. This was my first time doing cartridge pleats. I was originally planning to knife-pleat the skirt for speed, but then was home sick for 2 days with a cold, so what else can one do when Netflix is playing?

IMG_3017The pagoda sleeves are trimmed with satin ribbon.

IMG_3021The bodice is in progress. I still need to iron flat the seams, put in darts and closures, and do a lot of finishing. Matching curved plaid that isn’t symmetrical is driving me nuts! One part of a seam will match, and another not.

IMG_3022I had to pretty much redraft the pattern I’m using (Past Patterns 702), which was not designed for someone with my shape, but I will make a more detailed review in another post.