Winter is here and I wanted a cute and cozy accessory that was a nice shawl, but also a surprise hood and scarf! I made this out of a wool knit jersey but other soft fabrics with a bit of drape would work as well. I added some pompom trim for whimsy but that is optional; this surprise hood would work well untrimmed, or finished with decorative stitching or other touches. This was inspired by Victorian mantelets with front lappets, knit sontags, chic old Hollywood head scarves, and modern cozy.
Note: I am a member of the Janome Maker program and this project was sewn on a Janome Skyline S9. (This post is sponsored by Janome but all content and opinions are mine).


WHAT YOU WILL NEED
- Soft fabric with drape (wool jersey, lightweight cable knit, rayon challis, lightweight wool suiting, etc.)
- The yardage depends on how wide your fabric is. (I used 1.5 yards of a 58″ wide fabric by alternating the wide and narrow ends of the pattern pieces while cutting).
- Thread, scissors, chalk, pins.
- Optional: 5 yards pompom/ball fringe trim, lace, rickrack, etc.
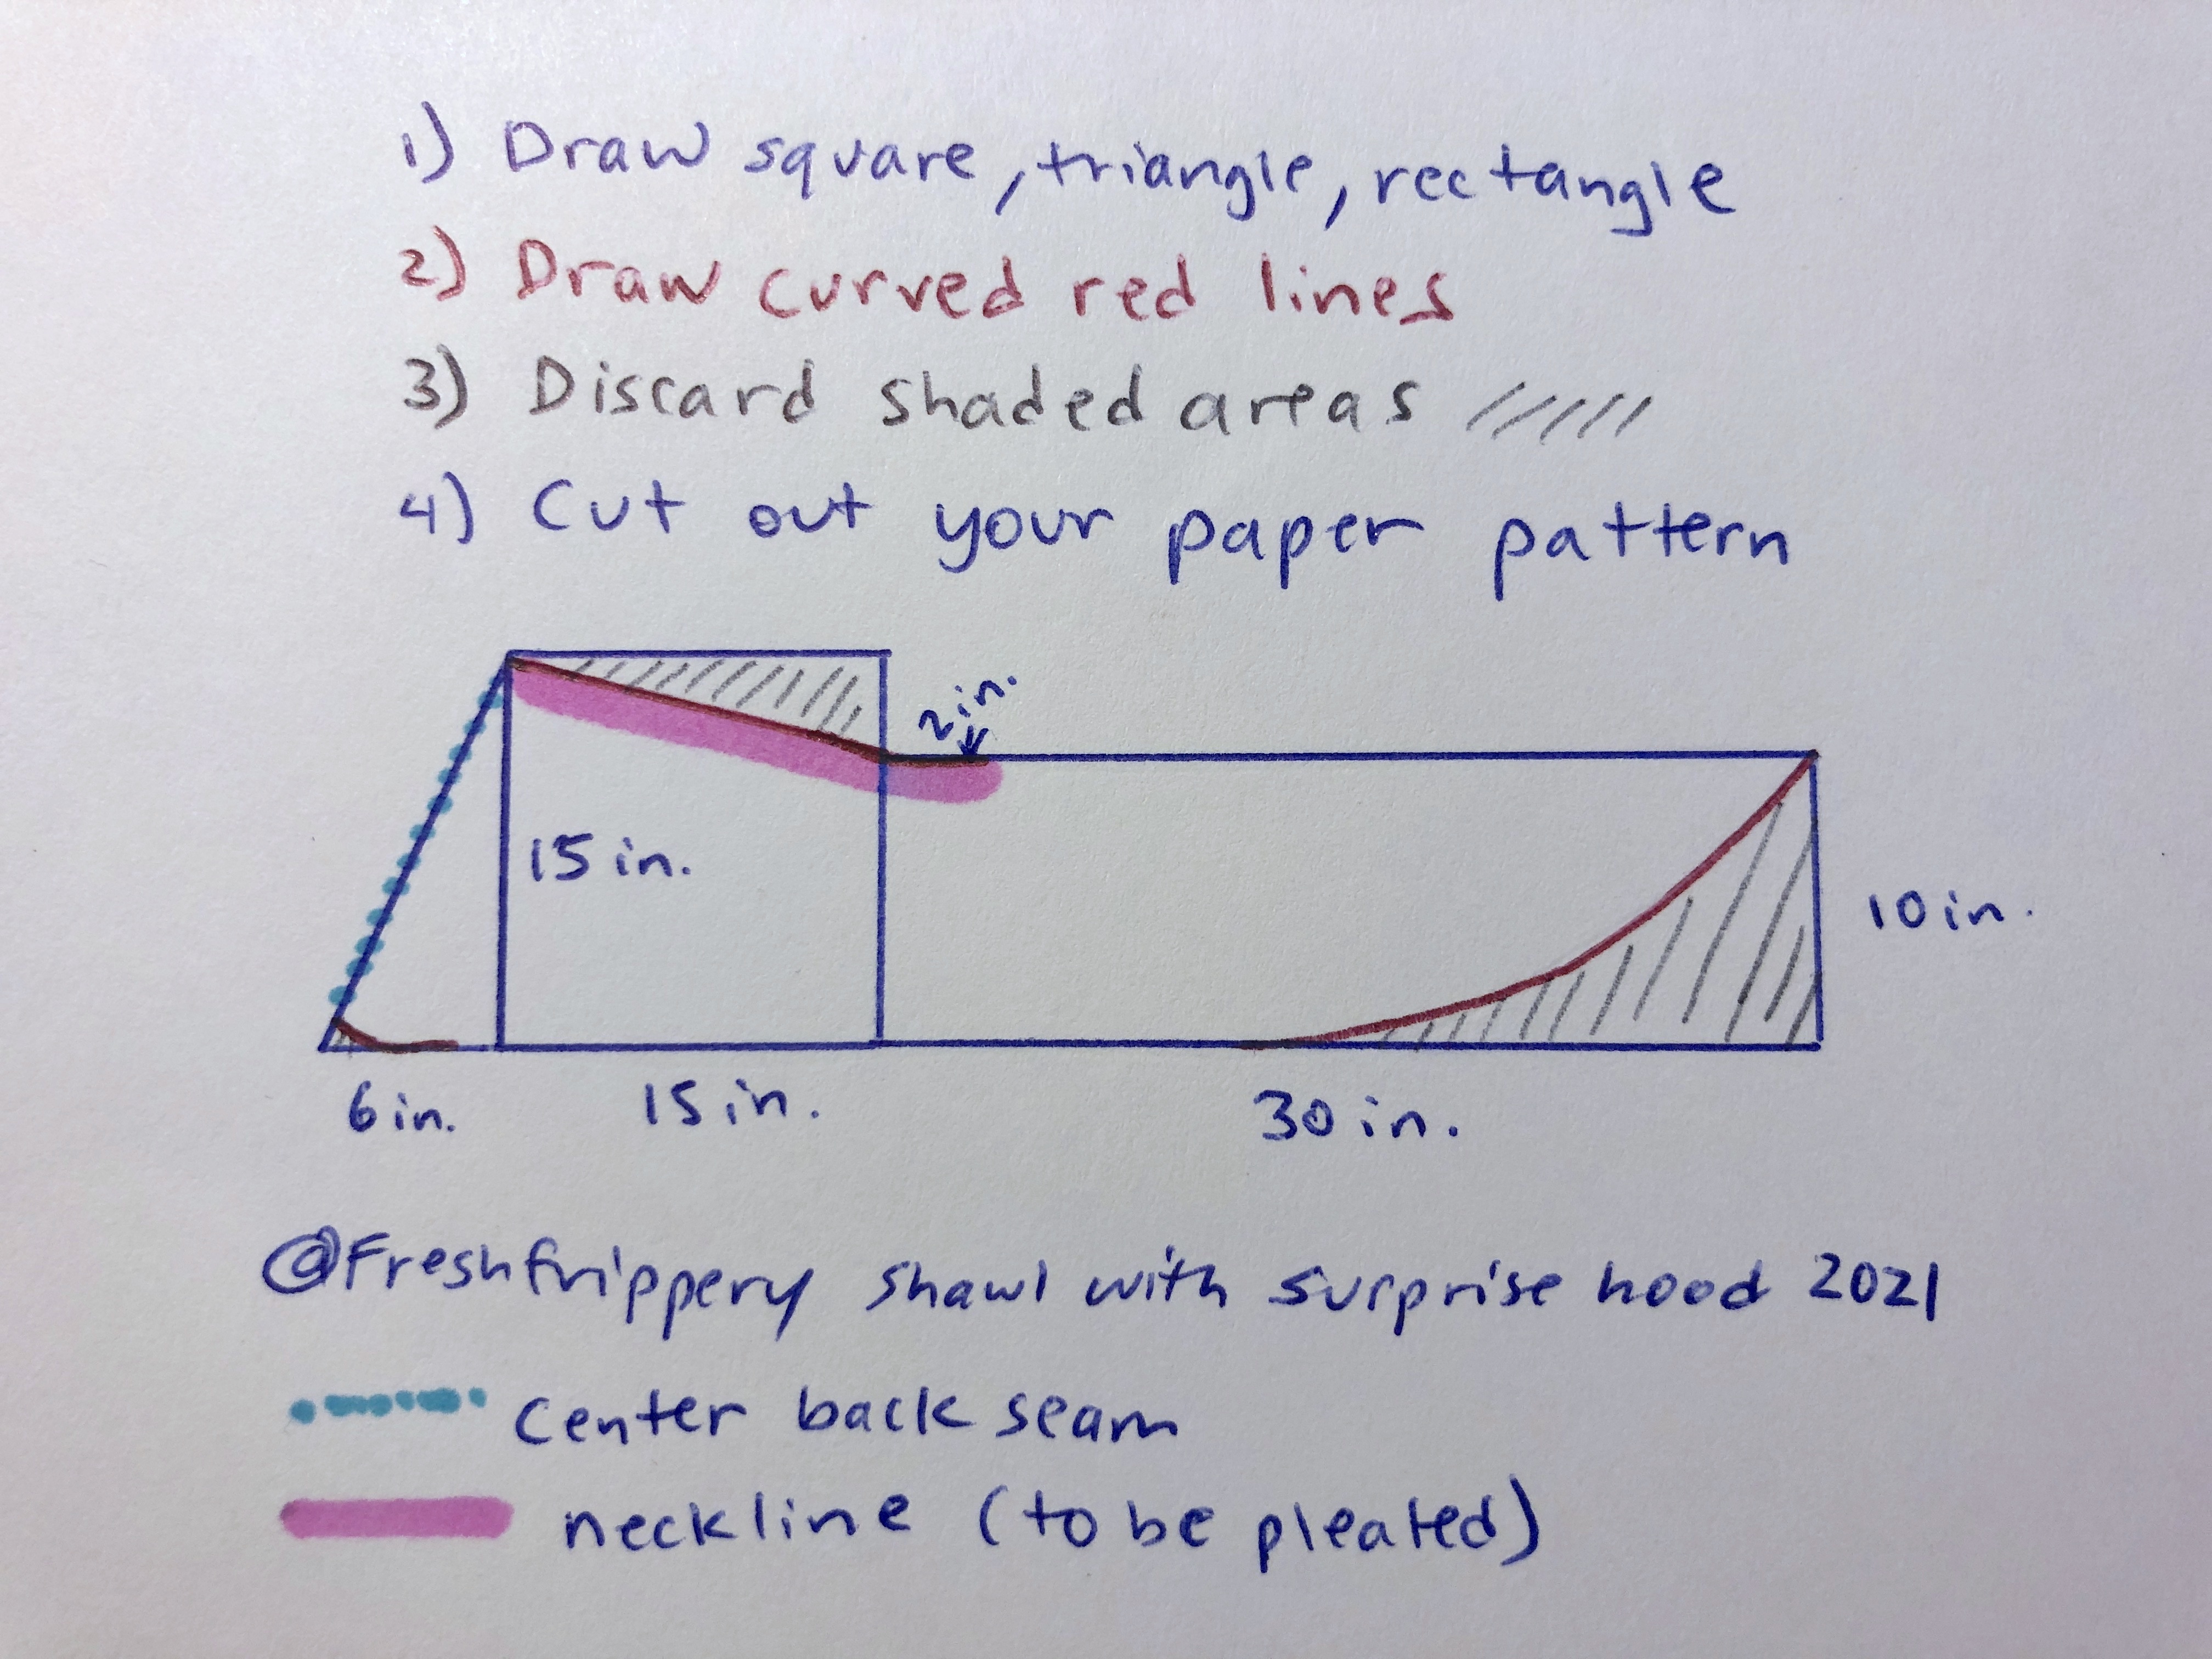
DRAFTING THE PATTERN
Don’t worry if you don’t have any pattern drafting experience! I’ve broken it down into squares/rectangles/triangles so if you have a ruler you can draw these shapes. Start with these basic geometric shapes; I find it is easiest to draw the square first, then the rectangle, then the triangle on a large piece of paper. (It doesn’t have to be fancy or special drafting paper; a roll of gift wrap works great).

Next, draw the curves indicated in red on the diagram. Then, discard the shaded areas.
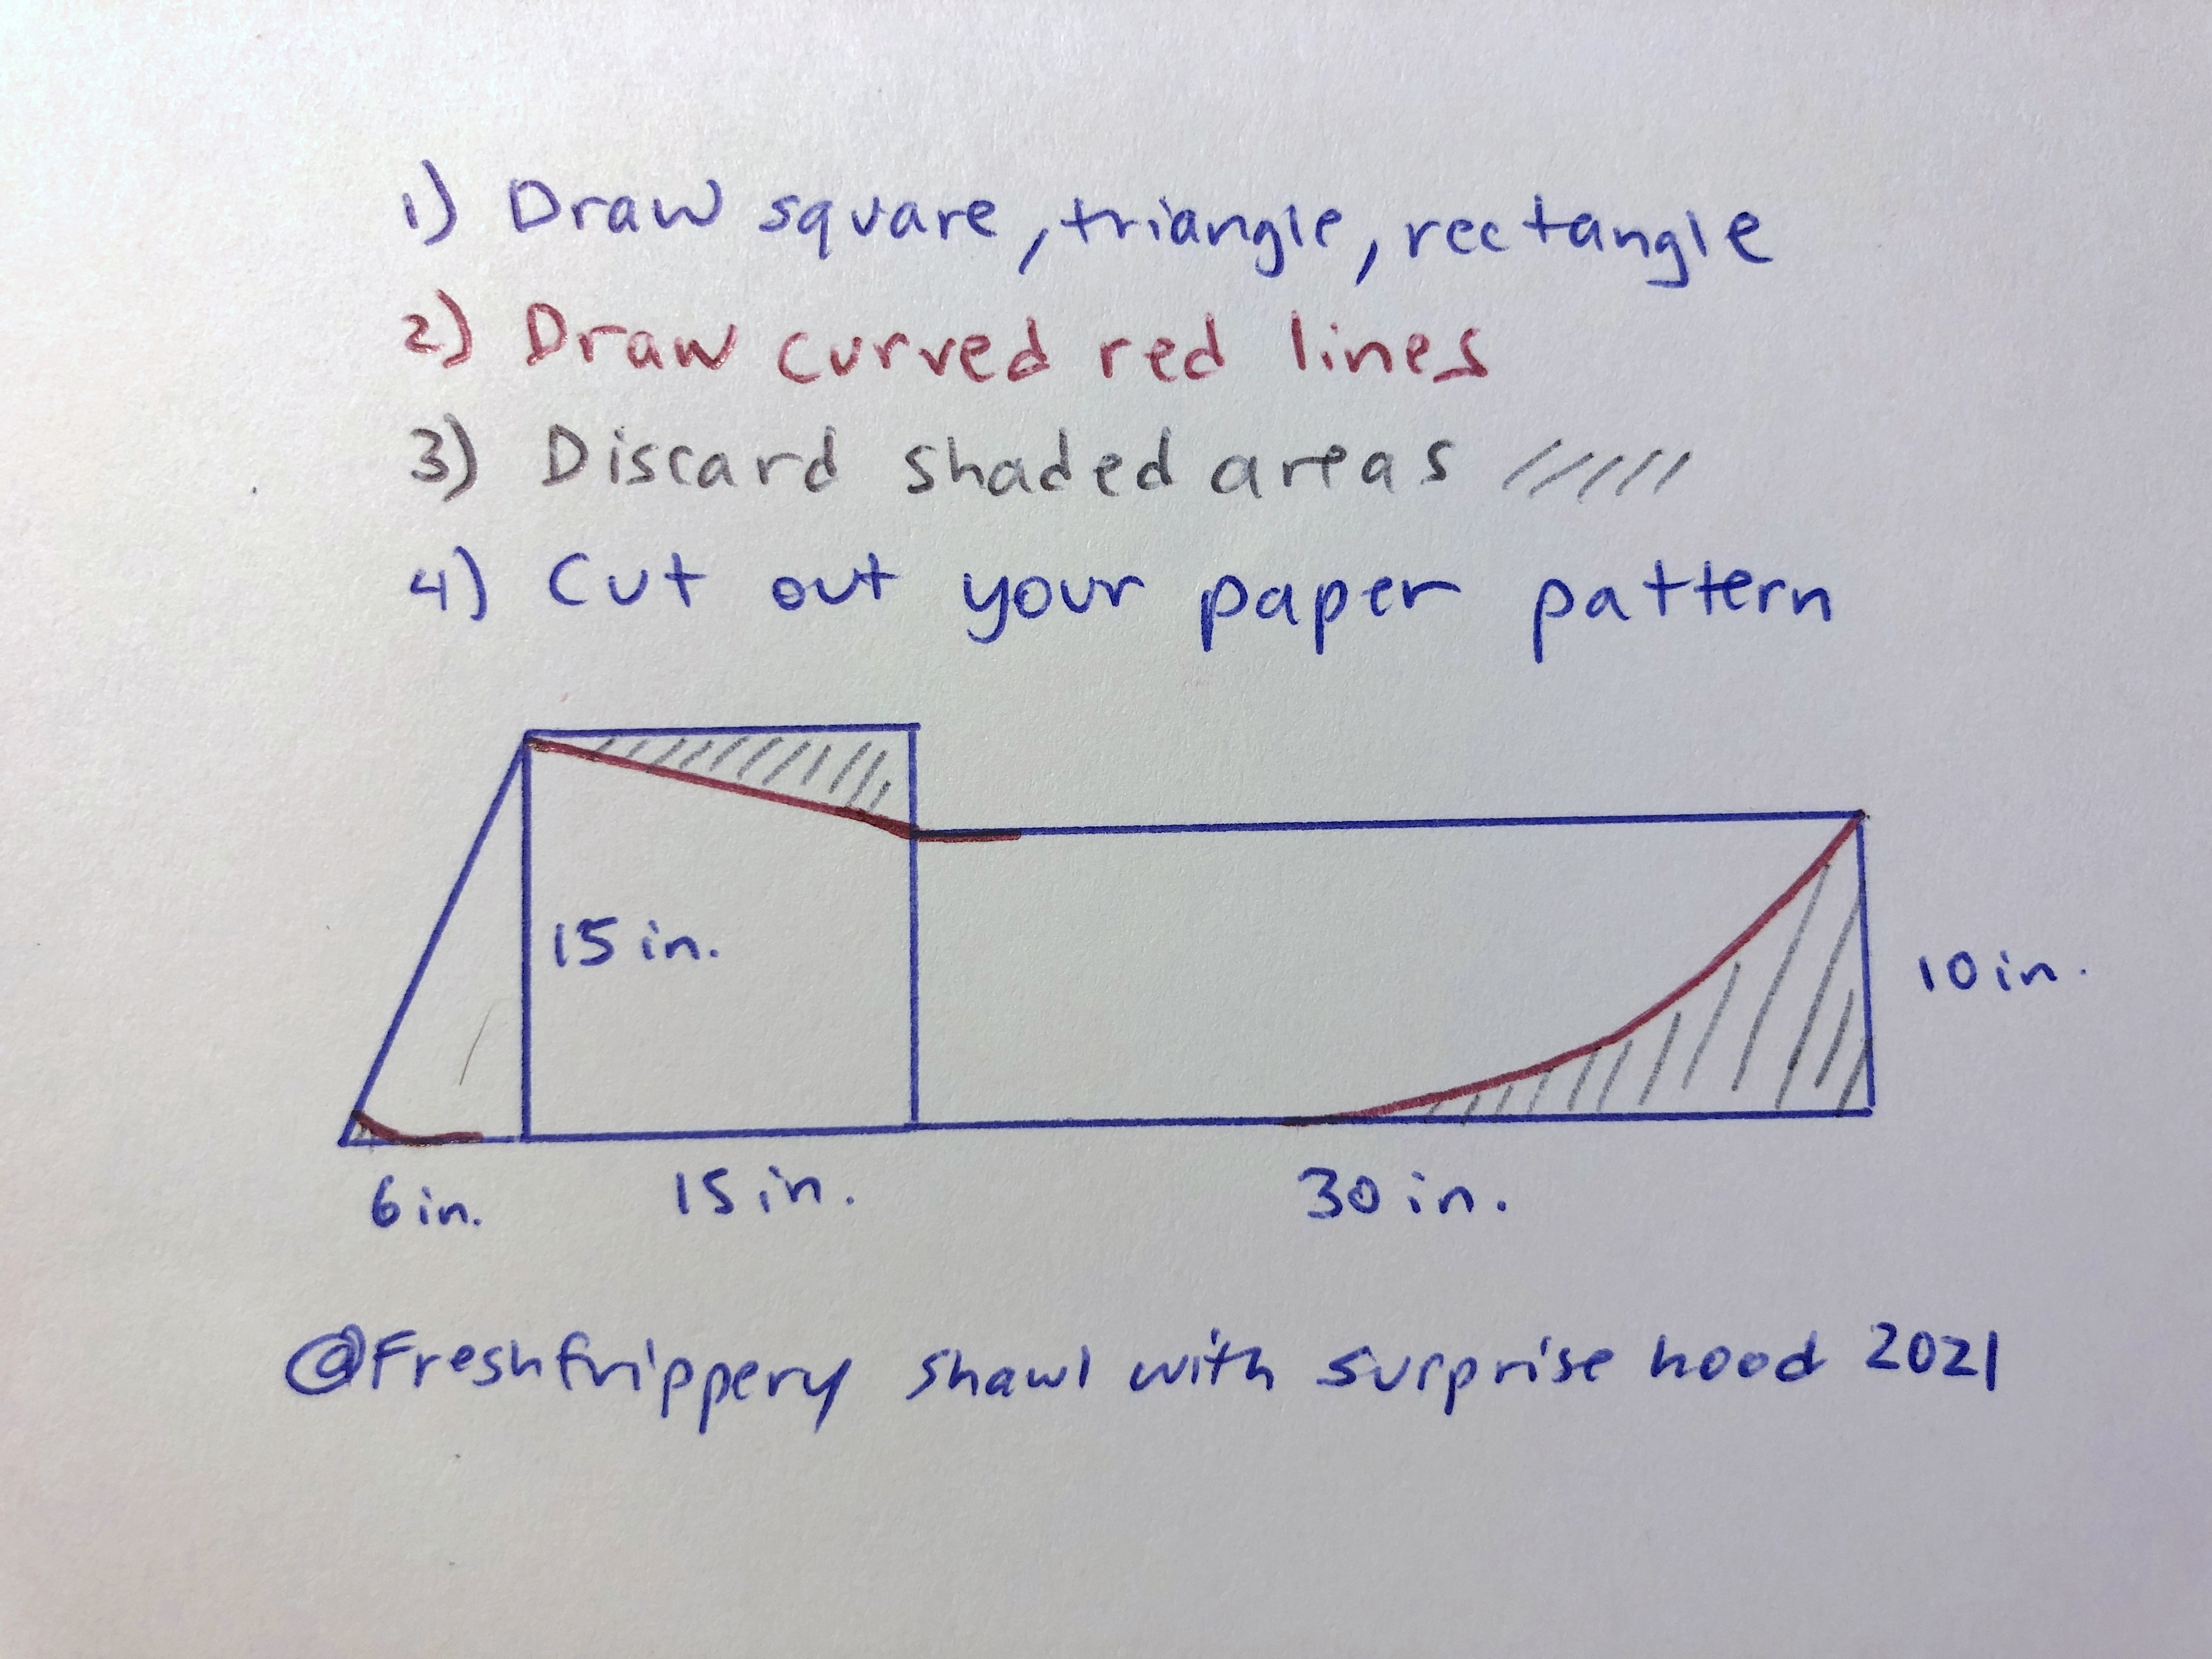
Now you have your pattern that you can cut out of paper and use to trace onto your fabric! (This includes 1/2 inch seam allowance. You can add more when cutting out your fabric if you want your shawl a little wider or are skipping any trim).
CONSTRUCTION
Cut out 4 identical pieces of fabric. 2 will be the fashion layer and 2 will be the lining. (If you want, you can use a different fabric for the lining but then the hood will be a different fabric when flipped up).
Sew the center back seam of the 2 fashion pieces together. Repeat for the lining layer. Press the seams flat.

Put the fashion and lining layers right sides together. If you plan to use pompom trim or lace, this is the time to sandwich your trim in between the two layers as shown, with the edges flush. (This is so that the pompom balls are “inside” when sewing the edges but will be on the “outside” when the shawl is flipped right side out). You will have trim everywhere except the neckline. (If you are using rickrack, instead of sandwiching it in the layers you should sew it to the fashion layer before it is attached to the lining).

Sew all along the outer edges of the shawl, except for the neckline, as shown in the earlier image.
Turn the right sides out through the opening in the neckline, exposing the pompom trim. Fold in the raw edges of the neckline and topstitch closed.

Right now you will have a long flat piece as shown below. (The ends are folded in so I could fit everything in the photo).

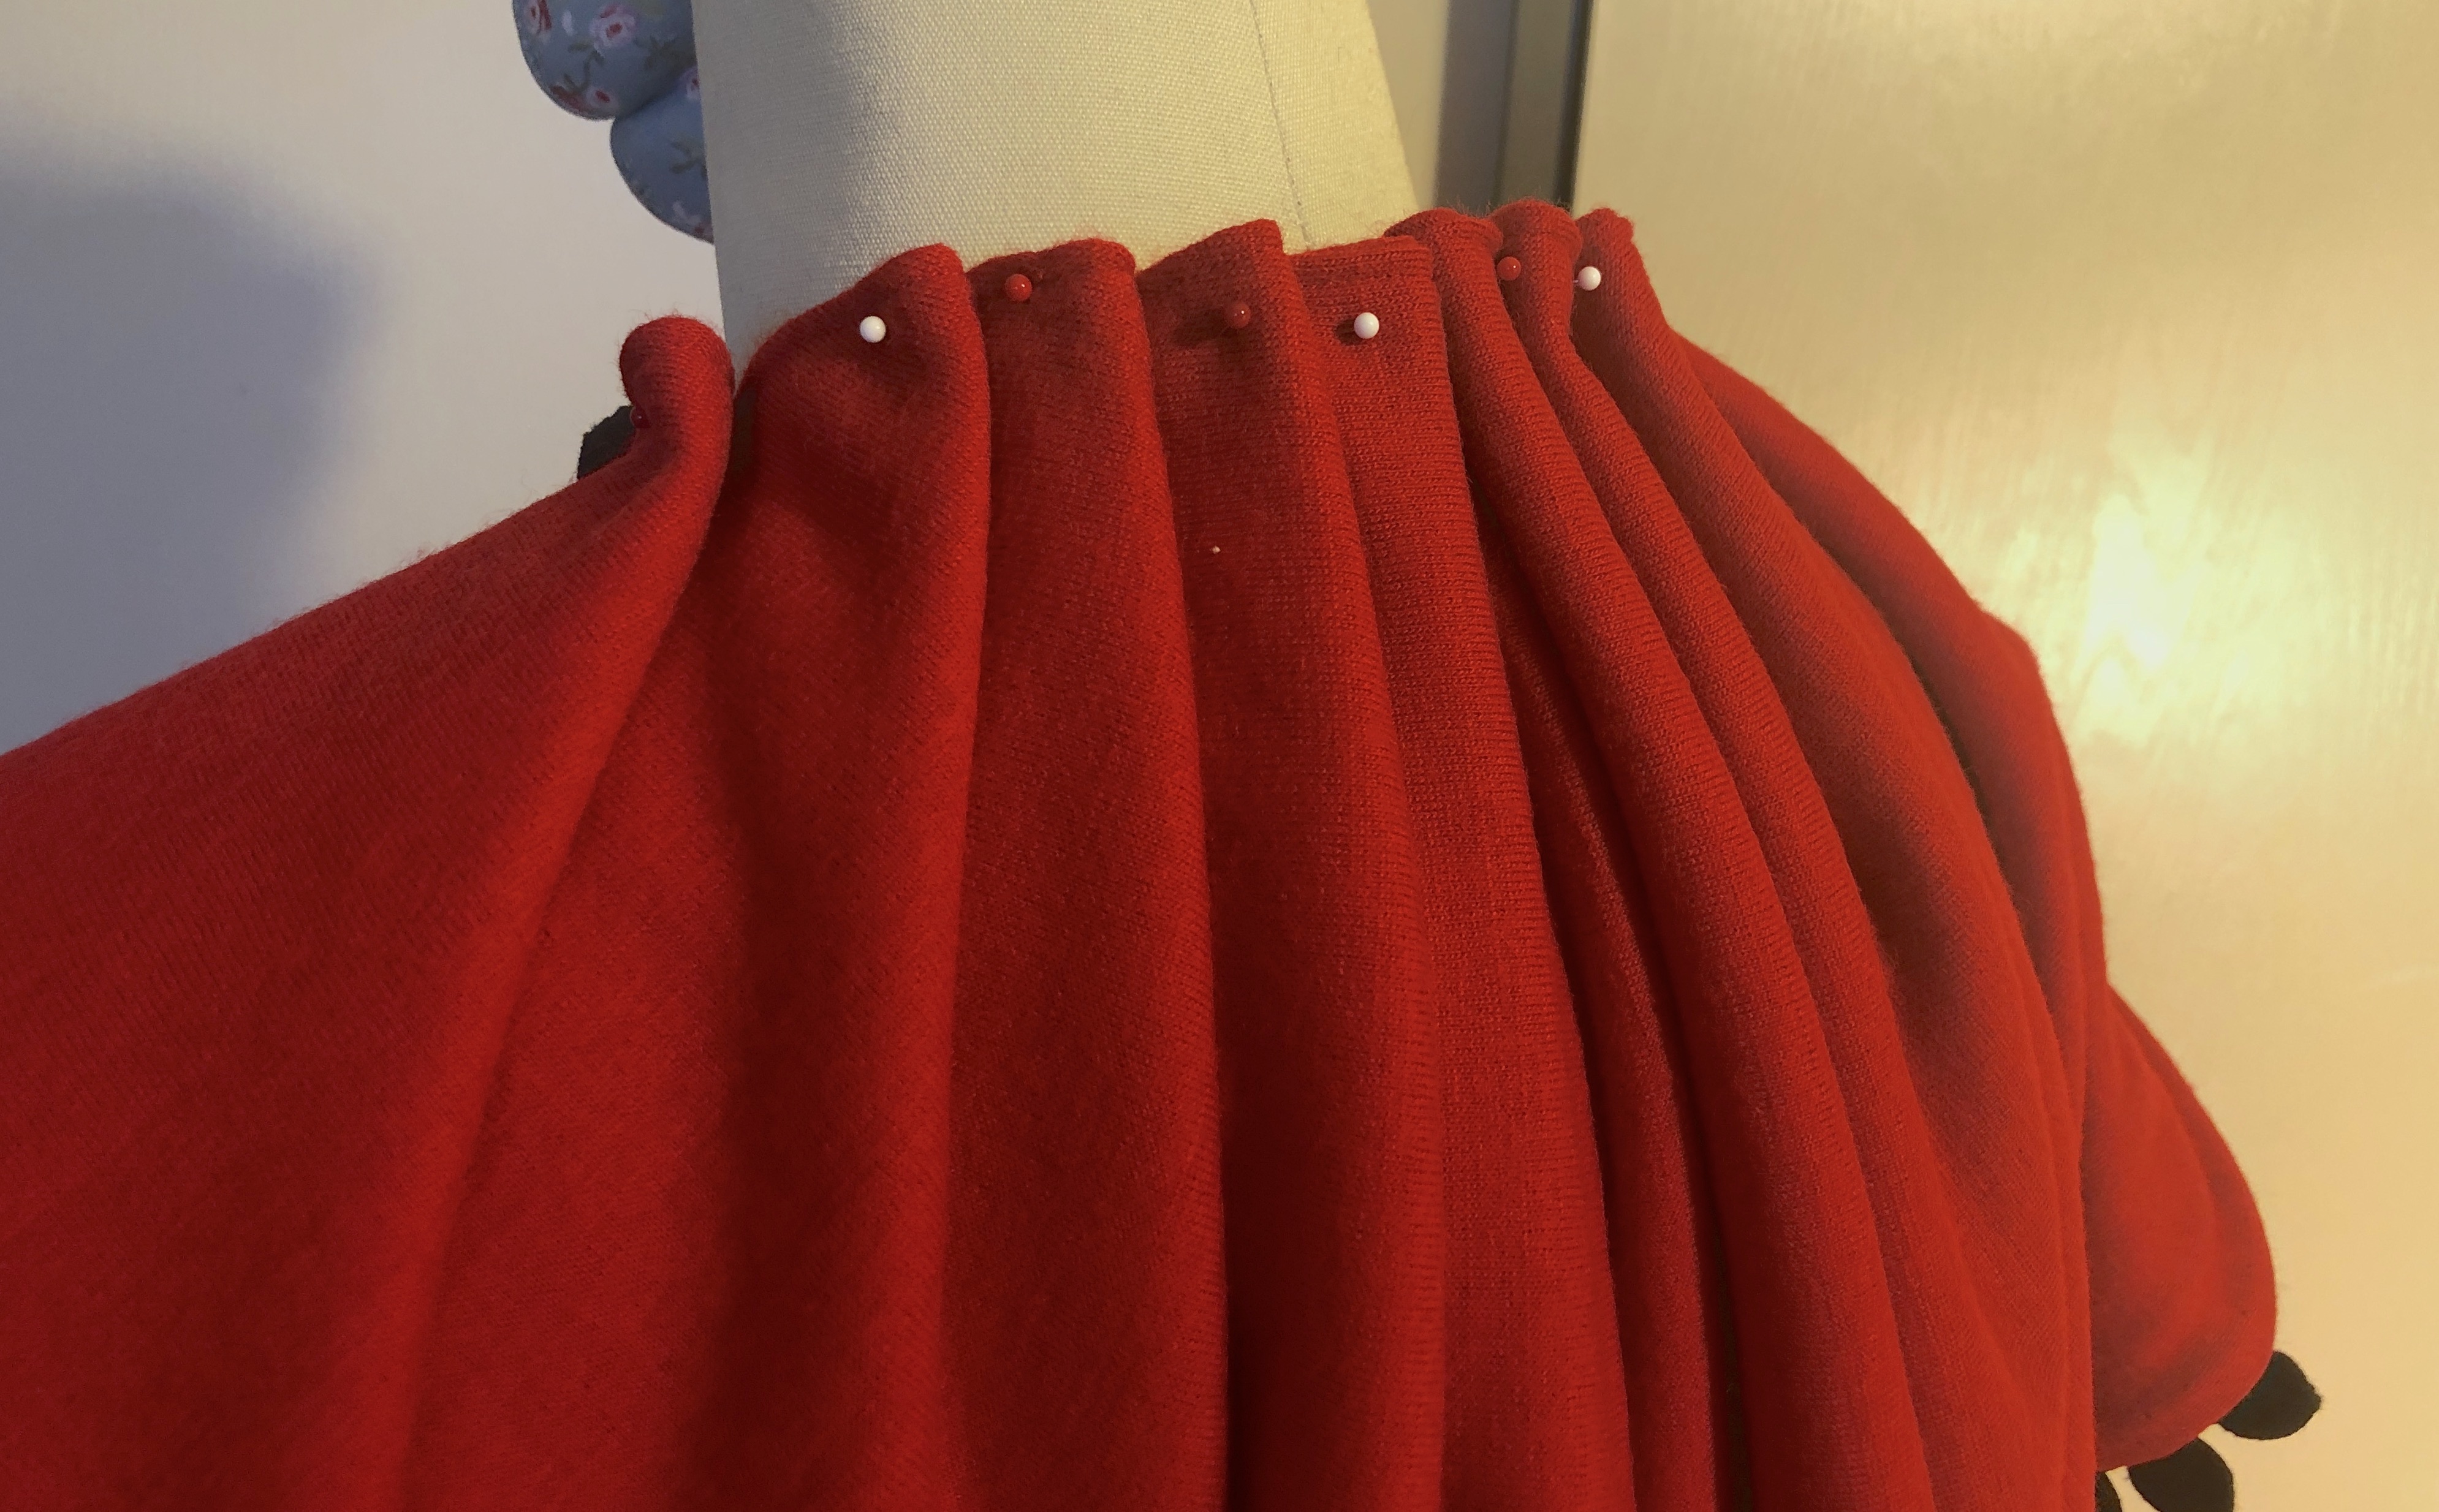
Pleat the neckline area (up to where the pompoms start) to fit the curve of your neck. The finished curved area should cover the back half of your neck. (If you have a dress form handy, an easy way to determine how to do the pleats is to pin the center back seam to the center back of the form, pin where the pompom trim starts to the shoulder point on the form, then pleat using the neck of the form as a guide). To keep the pleats in place, stitch down the pleats over the previous topstitch line either by machine or by hand.
Optional: Use one of the embroidery stitches to add some extra decorative details to your shawl. Some ideas include using a continuous stitch along the edges of the shawl, or putting a monogram on the tails. You can also do a decorative stitch along the edge after the shawl is sewn, rather than using pompom trim. (These examples are under the Decorative stitch menu on my Janome Skyline S9).

HOW TO WEAR
This can be worn multiple ways!
- Wear the draped back and front tails down as a shawl.
- Pull up the draped back over your head as a hood (with the tails in front or pushed behind your shoulders).
- Wrap one or two front tails around your neck like a scarf.
- Combine 2 and 3 for a chic hooded scarf look.
Which one is your favorite?

Thank you for reading! Be sure to follow me on Instagram @freshfrippery for the first peek at any new projects!
I am happy to provide all patterns and tutorials for for free on my blog. It is absolutely optional, but if you would like to donate towards my domain registration and the data costs of hosting the many photos on my site, consider buying me a “coffee”: https://ko-fi.com/freshfrippery. Thank you!


 12-14-19")
