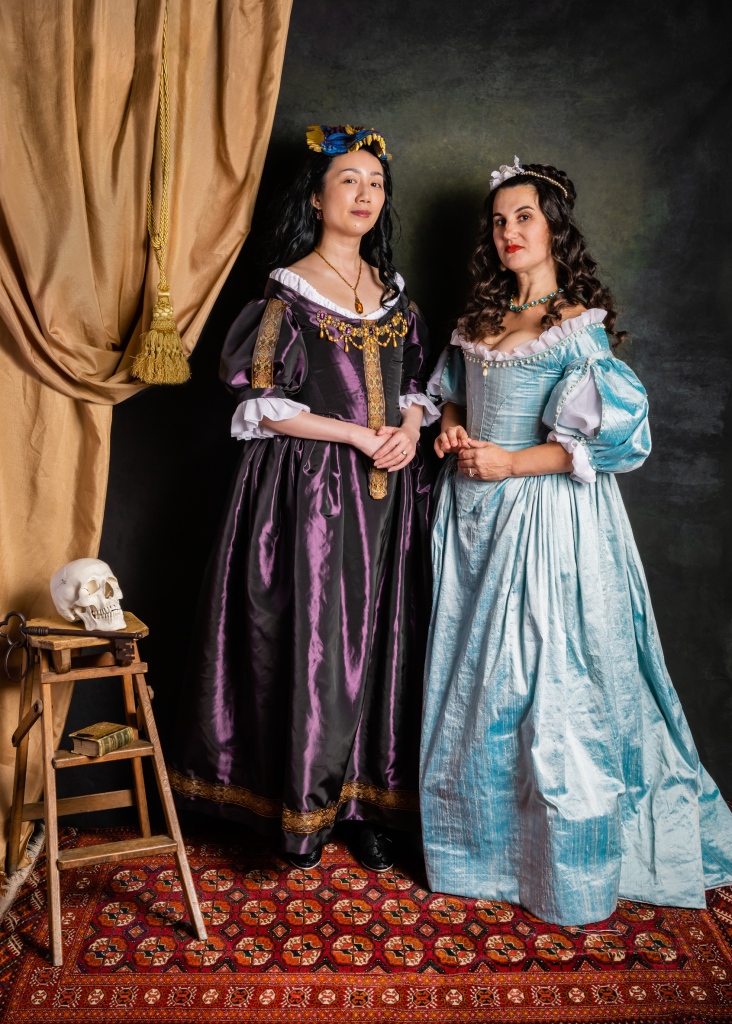
Years ago I made a black 1660s dress but wanted a more colorful one. I finally got my excuse to make one when my local costume guild decided to put on an event called “DuMasquerade,” a dinner event celebrating the works of Alexander Dumas. I made a dress out of purple taffeta and wore a dragon mask perched upon my head.
In this post I’ll show you the dress I wore, plus some tips/tricks to make your sewing faster and/or more polished. I only had a few weeks to make this dress so I definitely took some shortcuts!

I used the Nehelenia 1660s dress pattern since I was familiar with it, having used it before. This style of dress features a long skirt, a fully boned bodice with a pointed center front, and puffy sleeves, made of a purple taffeta fabric. I am happy to brag that I made this dress for less than $25! A friend found the fabric for $2.50/yard at a local shop, and I got the fancy trim on clearance for $1/yard. The ruffles are made from a cotton organdy curtain I got for free. The lining uses scraps from a previous project and the boning is 4 different colors/lengths of zip ties and boning bits I found around the house or was given to me from someone destashing. The bum roll uses scraps from another finished dress. I already owned the pattern, shoes, wig, and petticoats from previous costumes. I was so under budget for this dress I decided to buy those pearly bodice decorations from an Etsy shop called Recycled Rockstah. The dragon mask is a kid’s Halloween mask that I painted and attached to a headband. Some of my costume projects can get pricey but every so often I like to challenge myself to make something for a low cost, to remind myself of how I started costuming, and to let others know that with a little luck and patience (and keeping a stash!) it’s possible to look fancy for less. Yes, I had the privilege of time and experience, but I firmly believe costuming is for everyone and every budget. You don’t have to have silk to be valid.

TIPS/TRICKS
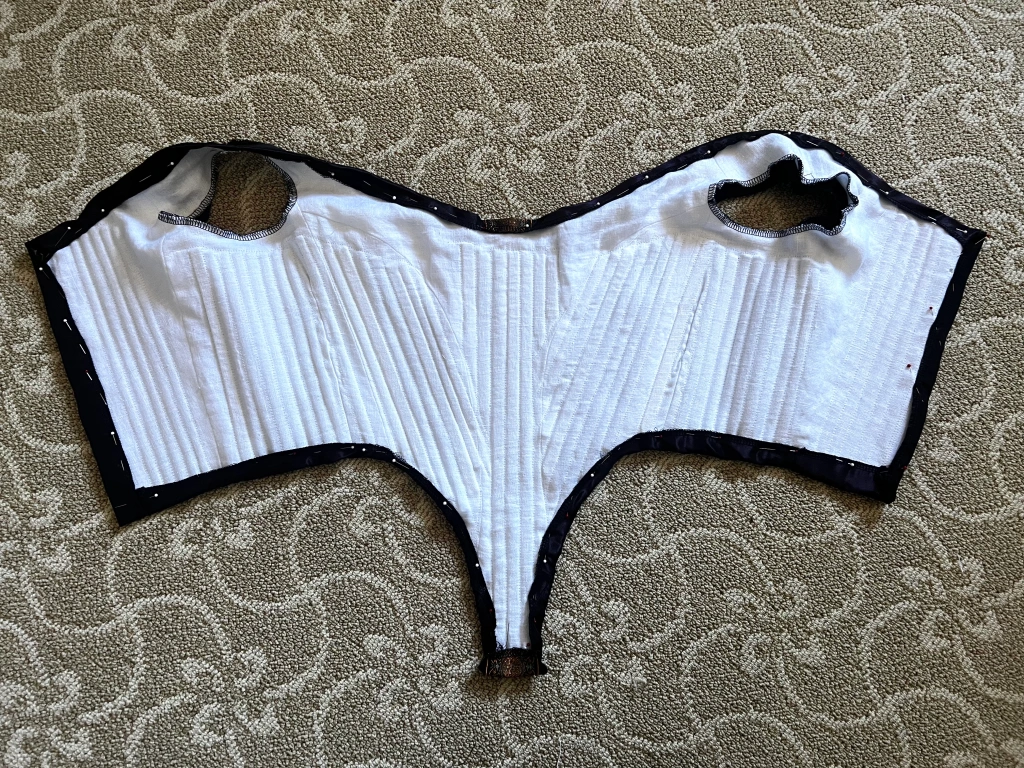
Tip/trick #1: Instead of making a corset as a separate garment, make your bodice fully boned. To do this you will cut out two linings and stitch them together with a series of parallel lines to make channels for your boning! Then you will cover this boned lining layer with your fashion fabric layer.

Tip/trick #2: When you cut out your bodice fashion fabric pattern pieces, extend the sides of the pieces that will make up the neckline, back closure, and bottom edge by about an inch. After you assemble the bodice fashion layer you can serge the raw edges, fold them over, and then whipstitch them to the lining. This way your linings won’t show when worn and you can skip making facings.

Tip/trick #3: To make your curved seams nice and smooth, you will want to clip after sewing. Iron your seam allowances open. Cut notches in the inner curve of the seam allowance and snip or cut notches in the outer curve of the seam allowance. Iron again on the right side of the fabric to make a very neat seam.

Tip/trick #4: To add extra body to thin fabric, flat-line it by adding an extra layer of fabric. However, to save time on cutting your pattern piece out twice, only cut out one layer and put it on the second. Use your serger to sew the pieces together and trim the excess at the same time!

Tip/trick #5: Use knife pleats instead of cartridge pleats. Historically many gowns of this type used cartridge pleating to gather up the skirt. However, this is time-consuming and uses hand-sewing so I prefer knife pleats when I want to make the costume quickly. First serge the raw edges of the top edge of your skirt, then pleat, then stitch down the pleats.

Tip/trick #6: If you want to skip making a waistband for the skirt, and have the convenience of a one-piece dress instead of a separate bodice and skirt, when you stitch down your skirt pleats sew them to a piece of twill tape. Then you will whip-stitch your twill tape to the bodice.

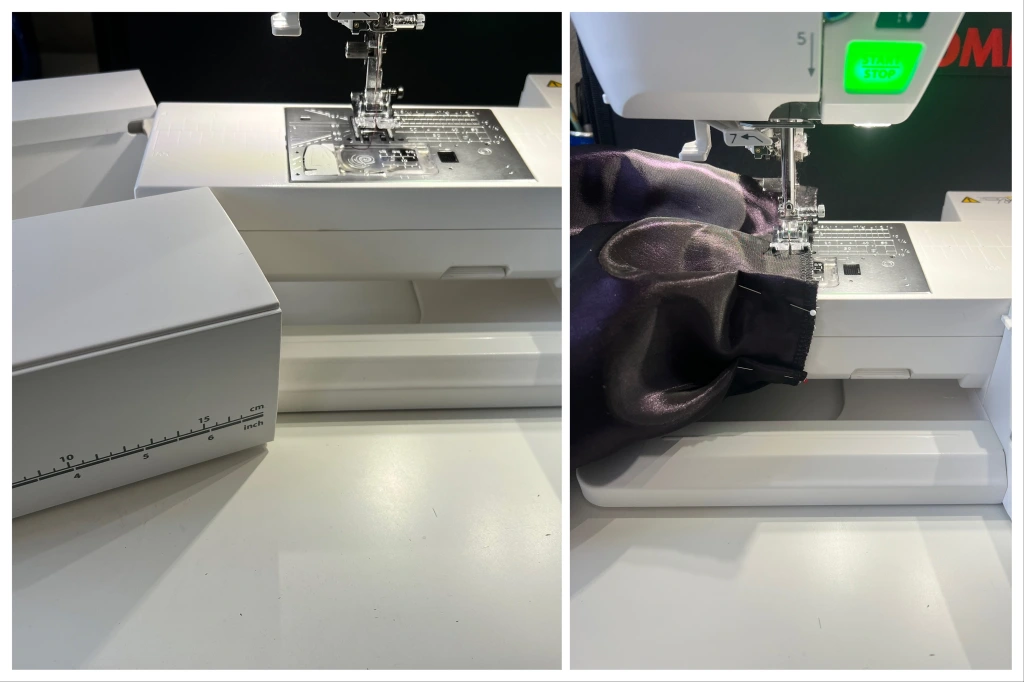
Tip/trick #7: If you are trying to sew thing tubular like a sleeve or cuff, remember you can remove the flatbed/storage tray of your Janome to turn it into a free arm machine, making it easier to maneuver your sewing project.

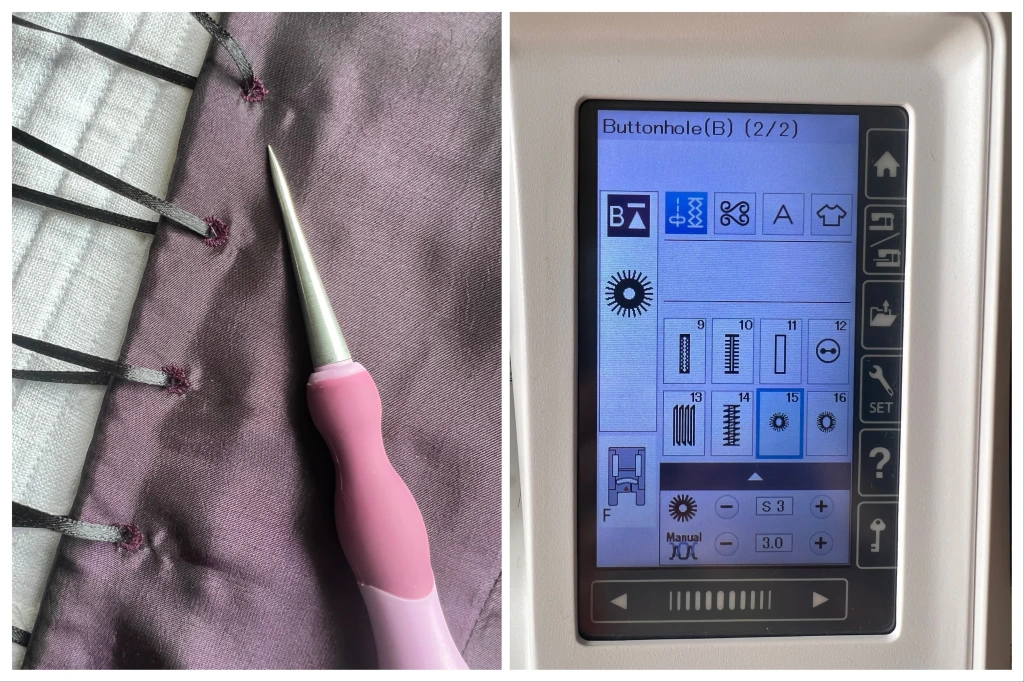
Tip/trick #8: To save time installing metal eyelets or sewing thread eyelets by hand, use the automatic eyelet stitch under your buttonhole menu. After sewing, use an awl to open the holes and put your lacing through. (My dress closes in the back with adjustable lacing).

Tip/trick #9: To save time doing math, use an expandable sewing gauge to mark out where your evenly spaced eyelets should be. This also works for measuring out buttonholes and pleats.

Tip/trick #10: To avoid having an obvious machine-sewn hem, but not have to go through the effort of hemming your skirt by hand, you can cover your machine-sewn hem with a pretty trim. For this hem I serged the raw edge, folded it up inside the skirt, stitched it down, pinned on trim, and then sewed down both edges of the trim using a matching thread.

Thank you for reading and I hope this helps you with your costumes!


