This past week I started the mockup process for making Lady Tremaine’s bodice. Since the sequined fabric is very precious and I won’t have time to make another special order for it before Costume College I definitely wanted to take my time with the patterning.
I am using the Vintage Pattern Lending Library Ladies’ Basque pattern. I picked it because it had the shape I wanted, but cutting out the pattern pieces made me realize it had many more seams than I wanted. (Less seams = less trouble when dealing with sequins, and more screen-accurate).

My goal was to eliminate the center front seam, the two side back seams, and change the four front darts into two. I can do this because I’m not very curvy, I don’t plan to wear this with a corset, and it is a fantasy costume. If this was meant to be a properly fitted historical costume bodice worn over a corset, I would not recommend removing seams.
I started by tracing the paper pattern pieces without modification onto some fabric leftover with another fabric. It was navy blue and I used a silver pen so it ended up looking like architectural plans.
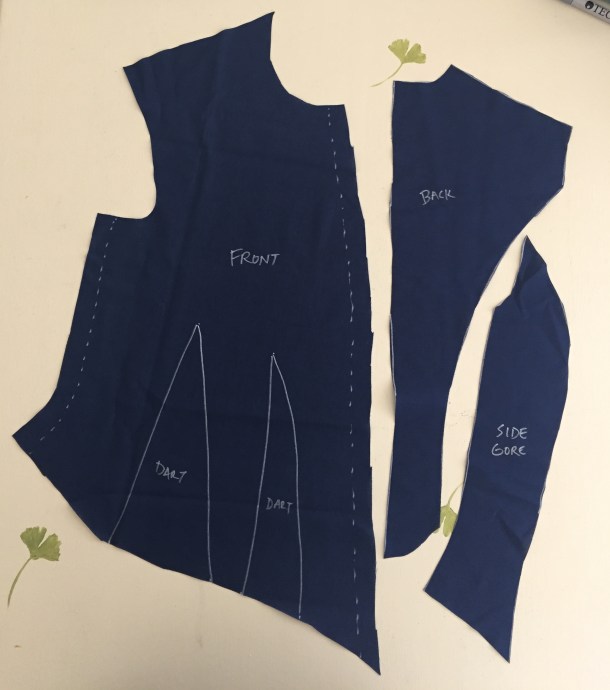
Mockup #1 was not sewn together; it was placed on the dress form to determine general fit, and I was able to see that there was too much fabric in the front. 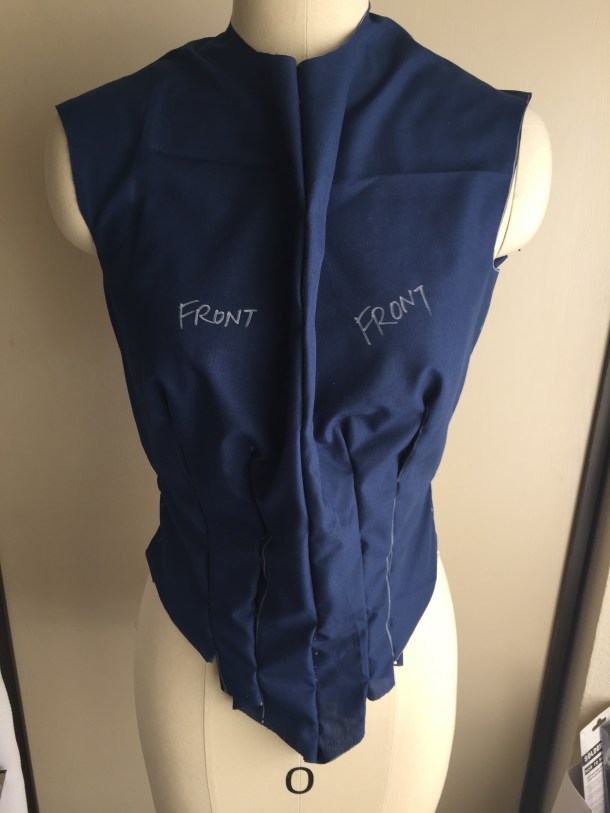
To make adjustments I turned the mockup inside out, and then started pinching out extra fabric and pinning. I also made one giant dart out of the two darts on each side. When satisfied with the general fit I made more notes directly on the fabric with the pen, then disassembled the pieces for my pattern.

The final pattern pieces:
I then made mockup #2, which is wrinkly because I was too lazy to iron the fabric beforehand. =)

Then finally I cut out my sequined fabric! The sequins are on a sheer georgette, so I had to flat-line it with satin so that any raw seams tucked under would not show. The edges were serged because the satin was fraying and the sequins were falling off.
A note about sequins: The “right” way to sew sequined fabric is to unpick the sequins next to your seam allowance to avoid a bulky seam, or having some of the sequins be punctured or bent by your sewing machine needle. I skipped this step for several reasons: 1) I am working with very small sequins which will hide much better in the seam than large ones. 2) I am hand-sewing the bodice pieces together so that I can feel any resistance in my needle that I wouldn’t be able to tell by machine. 3) I am lazy and short on time to unpick so many tiny sequins and sew them back on.
Here is the current bodice. I still need to add sleeves, trim the neckline and bottom, add closures, and start the scary process of flocking!


 12-14-19")

Looks fantastic! I am really curious to see how you are going to flock (why do I have the urge to snicker?).
Thank you Cindy! I am using heat transfer flocking. It comes in sheets that you cut your appliques out of, and then you use an iron or heat press to fuse it to the fabric base.
I am very interested to see how that works out. Right now I have some upholstery fabric that I dyed and and will try to ‘fancy up’ with sequins, but I am debating going your route. Are you going to flock the sleeves before sewing?
Yes I will flock the sleeves before sewing because it will be hard to iron on the appliques once the sleeves are on.
Aw yeah, this is going to be amazing! It must have been terrifying to cut into the sequin fabric.
Yes, it was scary! And now I have little green sequins and sequin pieces all over my house. =)
So shiny! I can’t wait to see it!
I feel like a green disco ball!
Wow, I’d never heard of heat transfer flocking. What an absolutely brilliant idea. I need to find an excuse to use it!
It comes in lots of colors and most people use it for t-shirts. You should give it a try!
Pingback: Lady Tremaine at Costume College | Fresh Frippery