Tag Archives: sewing

Lady Tremaine’s Hat

Today I finished my Lady Tremaine hat!

image

The hat is made of two layers of sinamay with one layer of organza sandwiched inside. My friend Lynne, who made my beautiful 1840s bonnet, helped greatly with the patterning of the brim and loaned me a wooden hat block.

Behold, awkward bathroom selfies!imageimage

The hat brim is bound with bias trim I made from velveteen. The same fabric is used for a band around the bottom of the crown. I upcycled the crown from a wool felt hat I no longer wanted.image

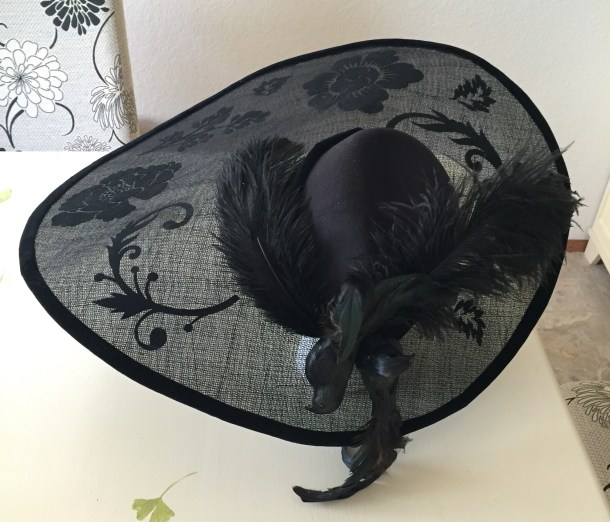
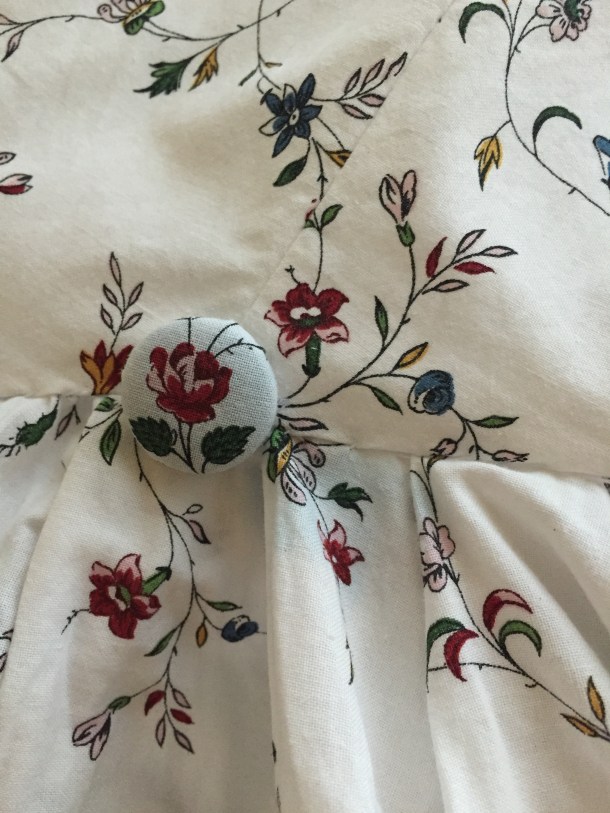
I took some liberties when it came to the exact placement of the flowers and birds, and the type of flowers. The flowers are made from heat-transfer flocking, like the flowers on my skirt.image

The only black birds I could find in the craft store were large Halloween ravens, so I bought smaller birds and spray-painted them black using Krylon Hobby/Craft paint in gloss black.

I don’t have pictures of the process, but the general steps were:

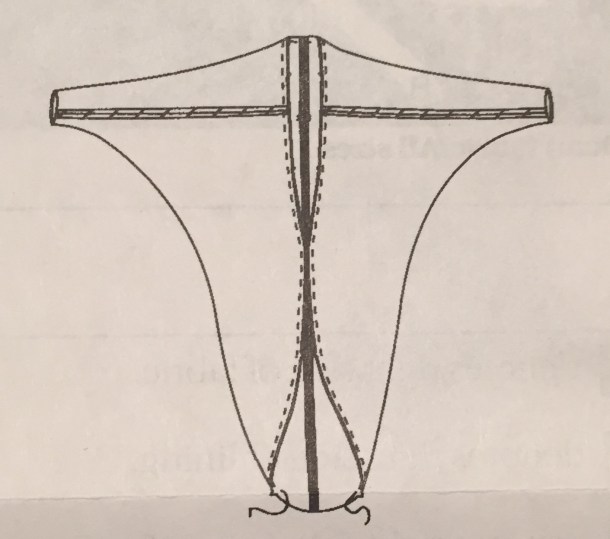
  1. Make a cardboard pattern for the brim.
  2. Cut out 2 layers of sinamay and 1 layer organza according to the brim and pin together.
  3. Sew rayon-covered millinery wire to the edge of the brim.
  4. Bind the edge of the brim with velveteen bias.
  5. Cut and apply floral appliques.
  6. Cut out center head opening and make tabs.
  7. Sew the crown to the tabs.
  8. Add grosgrain hat band to inside crown.
  9. Add velvet band outside crown.
  10. Trim with birds and feathers.

Supply costs (including Amazon affiliate links):

Total: $77.56

It’s not exactly an inexpensive hat, but much nicer than the plain black straw hats I was considering at first, and much cheaper than the $300 Kentucky Derby hats I kept seeing when searching for large sinamay hats!

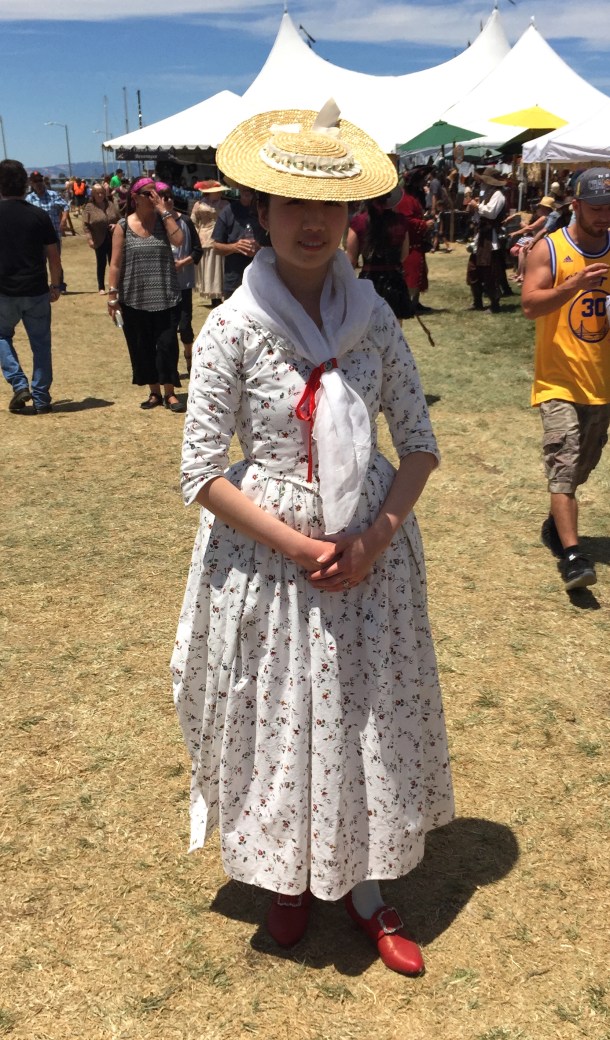
I look forward to wearing this hat with the rest of my Lady Tremaine ensemble at Costume College this year.

Lady Tremaine’s Bodice (Mockup Process)

This past week I started the mockup process for making Lady Tremaine’s bodice. Since the sequined fabric is very precious and I won’t have time to make another special order for it before Costume College I definitely wanted to take my time with the patterning.

I am using the Vintage Pattern Lending Library Ladies’ Basque pattern. I picked it because it had the shape I wanted, but cutting out the pattern pieces made me realize it had many more seams than I wanted. (Less seams = less trouble when dealing with sequins, and more screen-accurate).

IMG_5749

My goal was to eliminate the center front seam, the two side back seams, and change the four front darts into two. I can do this because I’m not very curvy, I don’t plan to wear this with a corset, and it is a fantasy costume. If this was meant to be a properly fitted historical costume bodice worn over a corset, I would not recommend removing seams.

I started by tracing the paper pattern pieces without modification onto some fabric leftover with another fabric. It was navy blue and I used a silver pen so it ended up looking like architectural plans.

IMG_8347

Mockup #1 was not sewn together; it was placed on the dress form to determine general fit, and I was able to see that there was too much fabric in the front. IMG_8350

To make adjustments I turned the mockup inside out, and then started pinching out extra fabric and pinning. I also made one giant dart out of the two darts on each side. When satisfied with the general fit I made more notes directly on the fabric with the pen, then disassembled the pieces for my pattern.IMG_8356IMG_8359

The final pattern pieces:IMG_8362

I then made mockup #2, which is wrinkly because I was too lazy to iron the fabric beforehand. =)IMG_8367IMG_8368

Then finally I cut out my sequined fabric! The sequins are on a sheer georgette, so I had to flat-line it with satin so that any raw seams tucked under would not show. The edges were serged because the satin was fraying and the sequins were falling off.IMG_8383

A note about sequins: The “right” way to sew sequined fabric is to unpick the sequins next to your seam allowance to avoid a bulky seam, or having some of the sequins be punctured or bent by your sewing machine needle. I skipped this step for several reasons: 1) I am working with very small sequins which will hide much better in the seam than large ones. 2) I am hand-sewing the bodice pieces together so that I can feel any resistance in my needle that I wouldn’t be able to tell by machine. 3) I am lazy and short on time to unpick so many tiny sequins and sew them back on.

Here is the current bodice. I still need to add sleeves, trim the neckline and bottom, add closures, and start the scary process of flocking!IMG_8413


Matching “LJUSÖGA” 18th Century Dresses at the NorCal Pirate Festival

Recently a group of us noticed that Ikea has some “LJUSÖGA” duvet covers in an pretty floral print with a pattern, scale, and colors appropriate for 18th century cotton dresses.

We each bought a king size set, which included a duvet cover and 2 pillow cases, to make matching dresses with. We estimate there’s about 11 yards of 40 inch fabric, which is an incredible bargain for $30! (The price has now gone up to $40 on the website).

I decided to make an anglaise, and originally planned to start on it after Costume College, but just a few weeks ago we decided to go to the Pirate Festival together, and having nice cotton dresses would be perfect for the weather. (There will be more of us at the next event; some ladies are still working on their dresses).

IMG_8238

Due to the short time frame my dress is not quite finished, but was wearable, with some things I’d like to improve for next time:

  • I did not have time to put a flounce on my petticoat; it’s a bit shorter than I intended (although it shows off my American Duchess stockings and shoes!)
  • The neckline and front of the bodice has ruffled trim instead of box pleats to save time. Now that it’s on I might be too lazy to replace it, but it was originally meant to be temporary.
  • My sleeves are untrimmed. I would like to add some ruffling or pleating and some button detail.
  • My fichu should be pinned down. I just tied it with a ribbon and it kept riding up until it looked more like a bandana than a fichu.
  • I didn’t have time to get a new plain bergere hat to trim, so I reused the small one I wore with my silk francaise.
  • My hair is not done in a historically accurate style; I just curled it, made a bun, and then hid the mess with flowers.
  • And scandalously, I am not wearing stays(!), so there is a little wrinkling in the bodice. I do own stays, but the festival was outdoors in 90 degree heat, so I decided one less layer was preferable.

Since this is still a work in progress I will do a full post with detail photos, construction notes, and cost breakdown another time, but meanwhile here are a few pictures. The dress consists of a bodice with a front closure, trimmed with ruffles, attached to a pleated overskirt. The petticoat is made of matching fabric. I am wearing those over a bum pad and another petticoat, along with two pockets.

IMG_8222

The back of the skirt can be lifted with cords and looped around covered buttons to be worn as a robe à l’Anglaise retroussée. I’m still thinking about adjusting the length of the cords or the distribution of the fabric because this wasn’t quite the look I was aiming for.

IMG_8223IMG_8224

I did have a mishap with the buttons. I couldn’t locate my button-covering kit so the night before the festival I just wrapped some fabric around some domed plastic buttons until I could buy more of the right buttons. After I laundered the skirt the dye from the black plastic buttons actually bled through two layers of fabric and onto other parts of my skirt!IMG_8262

After several rounds of OxiClean, and a final careful swabbing of diluted bleach, I have the stains out and I’ve learned my lesson about mystery buttons from the stash. I will stick to my usual metal buttons, like this redcoat who was wearing lots of shiny buttons.

IMG_8227

1940s Star Trek Dress (Part 3) Finished

My 1940s style Star Trek dress is finished!  I am looking forward to wearing it to a 1940s party this weekend. (I will post pictures of the event next week).IMG_7949
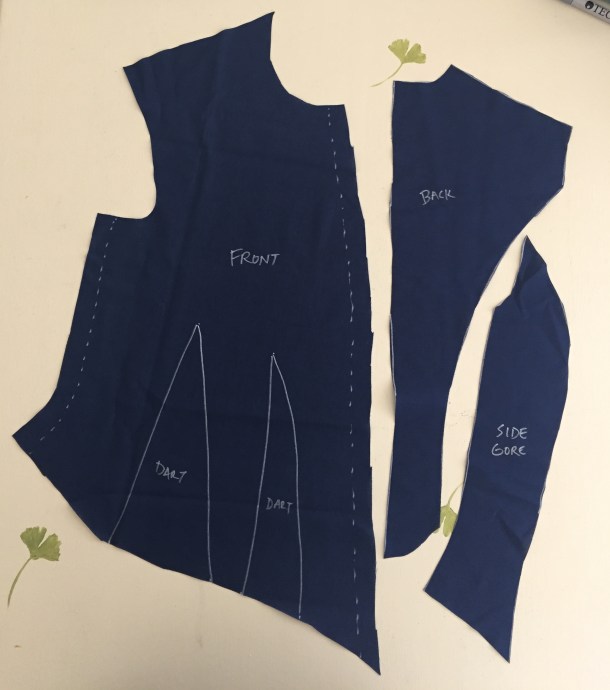
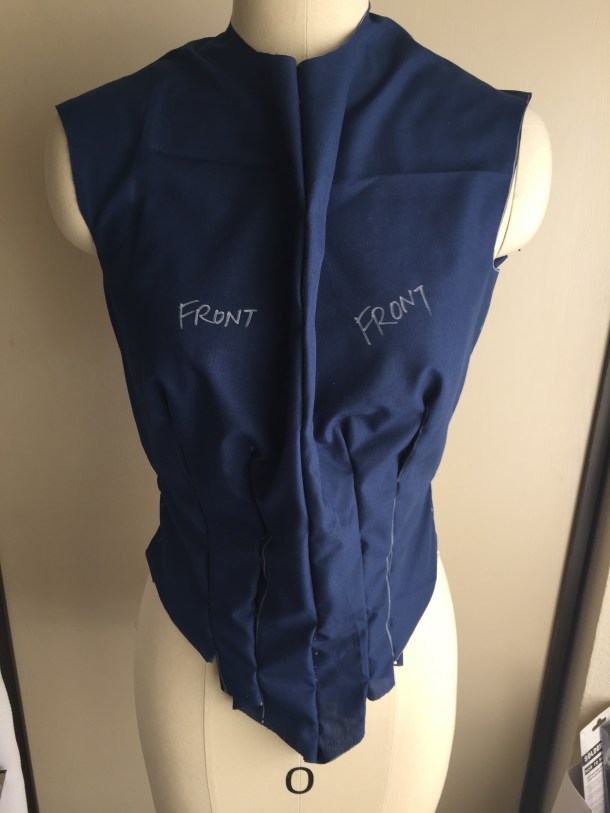
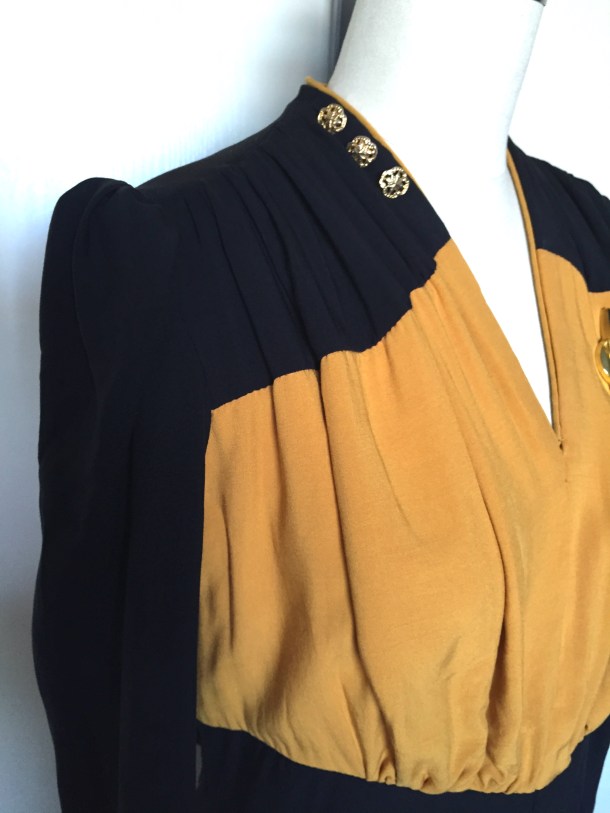
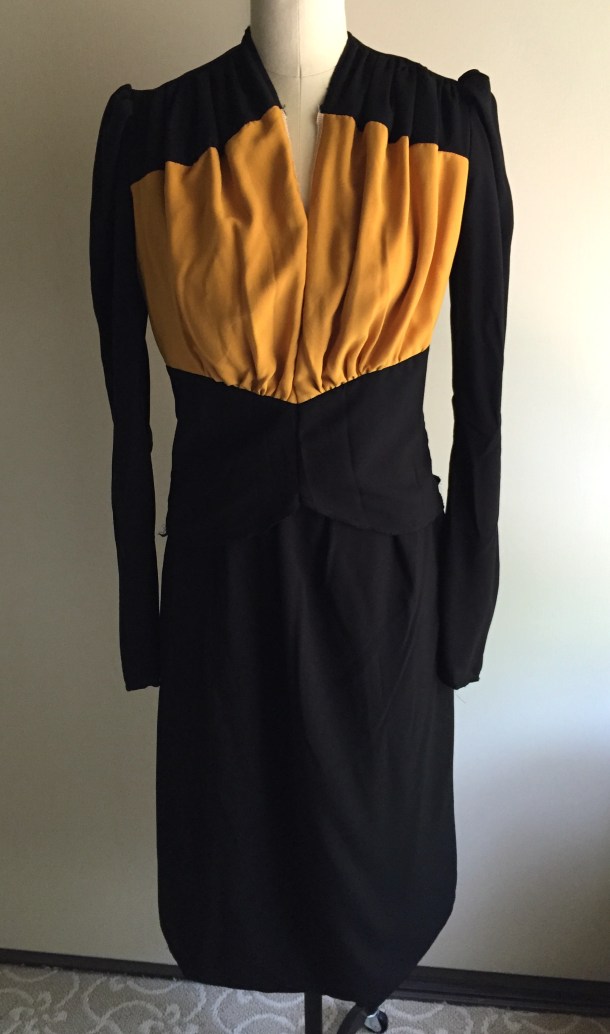
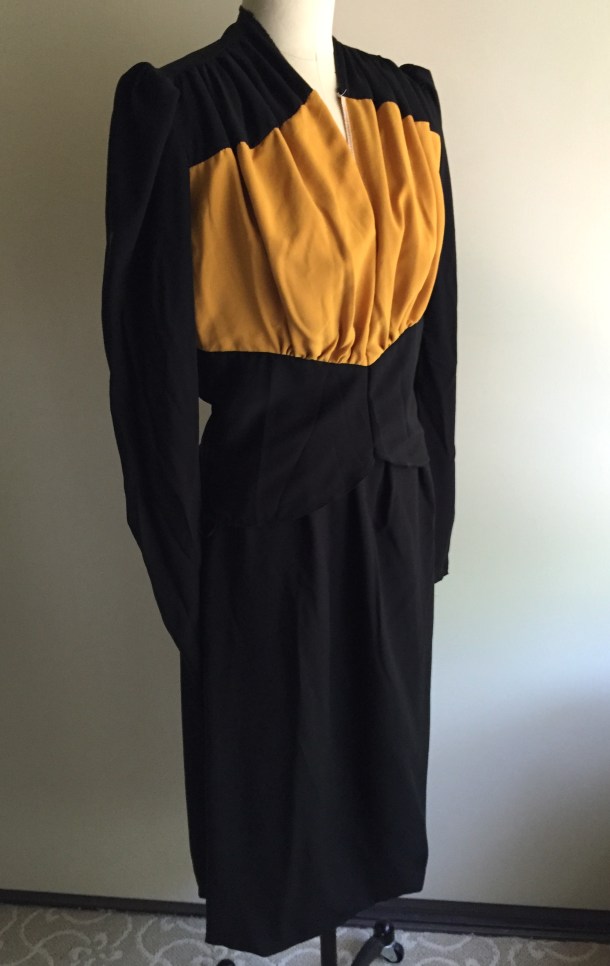
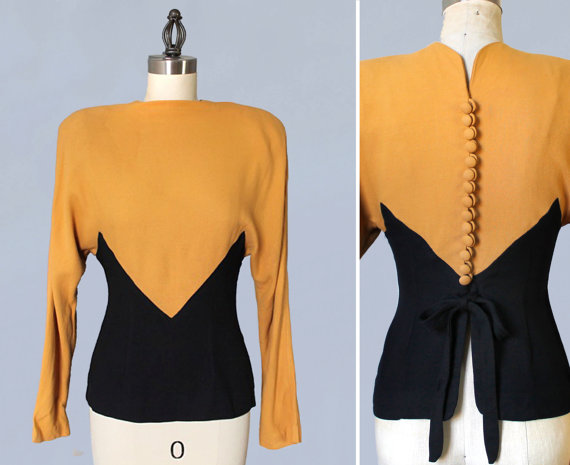
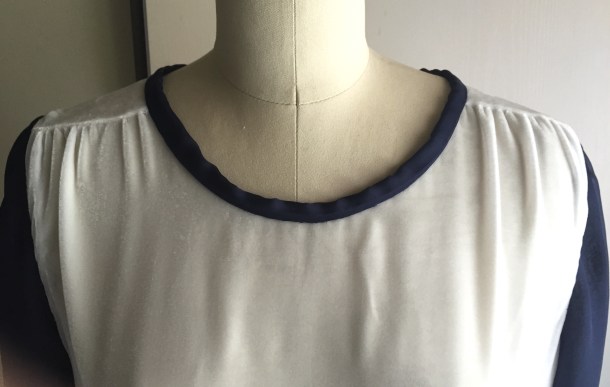
To summarize, the dress is made from 2 layers of rayon challis. The neckline is piped and has several gold buttons for “pips.” IMG_7939

I modified the Dahlia blouse pattern from Wearing History. I added in the extra seams in the front and back to create color-blocking and drafted the skirt myself.IMG_7944

The front is gathered at the shoulders with a puffed sleeve head.IMG_7945

The elbow is gathered, like many 1940s dresses, and the sleeves are extra long.IMG_7946

There is a curved seam where the bodice meets the skirt.IMG_7951

The rayon makes for a very nice, drapey dress. It is very form-fitting, especially around the hips. I’m afraid the construction shows off every bump and lump so proper vintage undergarments are required: a Rago girdle and a slip.IMG_7952

The dress closes on the side with a side-lapped zipper, hand-stitched in. (Originally I used invisible zippers, but this is more accurate to the time period).

I actually thought I completed it a few weeks ago, but when I put it on I wasn’t completely pleased with the way it hung, so I redid it – twice. Originally I made this as a 2-piece outfit, with a somewhat A-line skirt. I decided to change to a pencil skirt, which I felt would work better with the top. Also, I converted the outfit to a one piece, thinking the skirt would weigh down the bodice and keep the edges from flipping up. This meant I had to completely dismantle and recut the skirt, and remove 2 zippers.

Originally I prick-stitched the bodice to the skirt, which made the peplum front stand out, but the back looked a little odd. I took the dress and zipper apart again, and stitched everything together. There’s still little things I’m not 100% happy about, but overall I am very pleased with how it came together!

Final cost $87.93:

  • From Fabric.com: 3 yards black rayon challis, 2 yards mustard rayon challis, 1 spool black thread ($41.10 including tax and free shipping)
  • From Wearing History: a digital pattern bought on sale (I highly recommend you pay to get a paper pattern instead; I bought mine digitally because I needed it right away, but the paper ones are worth it!)
  • From the stash: gold buttons and zipper
  • From Thinkgeek: TNG communicator pin ($19.99 plus $6.95 shipping)
  • From Amazon: TNG phaser ($10.89 plus free Prime shipping)

I especially pleased with the communicator. It’s a quality reproduction that is on a strong magnet so I won’t get pin holes in my dress. The communicator is now available on Amazon (affiliate link) so if you have Prime you can even save on the shipping:

star-trek-the-next-generation-communicator-badge_670

I bought a TNG phaser just because it was fun and cheap. (It makes noise!): IMG_7953

I purchased some incredible Miss L Fire shoes, but sadly they are a bit big for me. I might see if I can get some inserts that won’t show in the peep toe, but for now I’ll have to wear plain black pumps with the dress.

misslfire-lanai-black-1-250x250

I also own these Capezios, which are very comfortable dance shoes, so they might be better for the event I have in mind this weekend anyway.

411ZhApLeSL._SY395_

Read Parts 1 and 2.

Next step is to figure out how to do hair and make-up, which are not things I excel at. Wish me luck!

1940s Star Trek Dress (Part 2)

I’ve made some progress on my 1940s Star Trek dress. I still need to do some finishing touches, but the major parts are done. (The skirt, sleeves, and bodice bottom need to be hemmed, the zippers need finishing, and I need to make piping for the neckline. I’d like to fuss a bit with the front gathers as well).IMG_7809

Obviously it will need a good ironing once it’s done!IMG_7811

I am also trying to decide whether to buy official TNG pips or to use these fancy buttons I have from my stash.IMG_7813

You can read about Part 1 here.

Mustard and Black 1940s Dress

I have not been sewing or blogging much because I am in the middle of a kitchen renovation, and we are doing what work we can ourselves. However, I’m taking a break while waiting for a coat of paint to dry to give you a sneak peek of my next project, a 1940s dress.

Is the color scheme familiar?IMG_7514

How about now?IMG_7517

I and some fellow nerdy costumer friends have taken inspiration from the film noir episode of the first season of Star Trek: The Next Generation to make uniforms in 1940s style. Our goal to to make them from historically accurate fabrics and patterns, but using the color schemes of characters from the show. I am Data!

We were also inspired by this awesome art deco blouse found on Etsy:

il_570xN.838783568_ekux

Photo by Guermantes Vintage

I am modifying the Dahlia blouse pattern from Wearing History. There is no yoke and I needed color blocking so I added extra seams in the front and back to piece together the rayon challis I am using.

The bodice will be flat-lined. I cut out all the pieces twice and serged them together before sewing. Right now I have some seams sewn together and the rest are pinned.

I  fitted my mockup at a friend’s house and started picking it apart while I was there, so I don’t have a dress form photo, but here it is lying flat on her floor. (I happened to have some scraps of gold and black fabric to use for my patterning!)

IMG_7187

The dress will have long fitted sleeves with a slight gather at the shoulders and elbows. I haven’t decided yet whether to make the dress a one or two-piece, but the skirt will be black, possibly with a yellow lining.

Making a Denim Whale Toy from Old Jeans

A while back I saw this great tutorial on a Finnish blog for upcycling an old pair of denim jeans into a stuffed whale toy. Then later another blog put up a printable pattern for the whale.

I had some old jeans of mine that were getting too worn to wear, so I made them into a whale for my son. (This project is actually a few months old, but I’ve had so many other sewing projects to blog about this one was overlooked).IMG_5624IMG_5630

The top of the whale uses the outside of the jeans, while the belly uses the inside for contrast.IMG_5628

It was a fun and easy project and we’ve nicknamed the whale Mr. Pants.IMG_5626

I made him after my son had gone to bed and put the whale on my son’s chair as a surprise for the next morning.IMG_5631

1920s Egyptian Revival (Part 2)

My 1920s Egyptian Revival dress is finished, in time for the event at the Rosicrucian Egyptian Museum!

I used Decades of Style’s zig zag dress pattern. It’s a great pattern that I’ve used before, although in retrospect silk velvet is not the best fabric for it. Velvet slips and stretches so much during cutting and sewing that needing lots of triangles to match up perfectly can be difficult. (After cutting, I had to fuss around with mine a lot to make everything fit, so it doesn’t line up as well as I wanted). I also used very sheer silk chiffon for the sleeves and collar binding. It was so sheer that I had to double up on layers. I originally ordered 1 meter of the navy blue silk, but the shop sent me 4 meters by accident (and told me to keep the rest!) so I’m glad I had the extra since I had to use twice as much as I was planning to.

Here is the dress with an Egyptian collar I purchased on eBay.IMG_6867

I found these really neat appliques on eBay as well! The seller didn’t have any information about them other than they are “vintage,” so I don’t know where they are from. They are a rather stiff, so the folds of the skirt drape a little funny, but I still find them an interesting touch to the project.IMG_6870

The neckline is bound with 2 layers of silk chiffon, and the shoulders are gathered.IMG_6873

The chiffon didn’t work out for binding the zigzags, so I found some fine rayon twill tape to do the job.IMG_6876IMG_6877

I need to iron flat some small details but it’s finished!IMG_6880

Stay tuned for next week, when I will take pictures of myself wearing it at the Egyptian museum, along with some accessories I am excited about (like new shoes from Royal Vintage Shoes!)

Final costs (lots of lucky bargains!):

  • 3 meters white silk velvet and 4 meters navy silk chiffon : $58 including shipping from Halo Silk Shop
  • Appliques: $6 including shipping from eBay
  • 10 yards twill tape: $4.50 plus tax (with extras left over)
  • Pattern: $0 (I already own it and used it before)
  • Collar:  $10.80 including tax and shipping from eBay

Total: ~$79.30 (for a silk dress!)

Read Part 1 here.

Poiret Cocoon Coat (Part 2)

I’m currently hemming my 1920s Egyptian Revival dress, but have been working a little on the Poiret cocoon coat in between.

The Folkwear 503 is a very simple pattern, but the assembly is different than what I was expecting. I’m used to coats and most garments having seams in the shoulders and sides, but this pattern has a long seam down the center back, and then a horizontal seam across the front of the chest, with darts in the shoulder/neck region. It works, but took a little staring to get over the “you want me to do what?” feeling.

Here is a diagram from the inside of the pattern instructions:

IMG_6835

The sleeves and coat body are cut as one huge piece for each side of the body. The top is folded down to make the sleeve (hence the horizontal seam). The pattern piece is very wide, and takes up most of the width of your fabric.

IMG_6806

I’ve cut out the pieces and sewn them together, but I need to press the seams and attach the lining to the outer fabric, and add a closure. The width of the pattern piece makes pattern-matching on the fabric difficult. To match I would have had to line up my pattern piece about a foot in from the edge, and that wouldn’t have been wide enough.  However, the busy pattern helps hide this a bit, and using a solid fabric would make the back and front seams very obvious.

IMG_6826

At the moment I’m considering not using the collar pattern piece included with the pattern, and putting a fur collar on instead. I tucked this fur scarf I have into the coat to get a general idea of what it would look like, but I think I would rather have a chocolate brown fur that matches the fabric, or go for a fluffy cream collar for more contrast.

IMG_6828

So far I would have to say that this pattern is very easy to use – there are definitely not a lot of pieces at least!

Poiret Cocoon Coat (Part 1)

I am still working on my 1920s Egyptian Revival dress, but I am in the middle of tediously hand-stitching the trim, so there isn’t a lot for me to discuss about the progress of the dress.  Meanwhile, let’s talk about cocoon coats! I have been wanting one of Paul Poiret’s luxuriously draped coats, and since the Egyptian event I am attending is during the winter, this is the perfect time to make one.

1912-georges-barbier-illustration-140-0407-de

Illustration by Paul Barbier. Check out that Egyptian print on the dress on the left!

I am using the Folkwear Poiret Cocoon Coat pattern, which seems quite easy and straightforward. Originally I planned to make one out of solid red velvet to highlight the red accents in my 1920s dress, but  . . .IMG_6573

. . . a few weeks ago I was shopping for ribbon when I came across this incredibly beautiful silk velvet burnout fabric!IMG_6575

It has a beautiful blue, purple, and chocolate brown paisley pattern.IMG_6579

I later bought coordinating lining fabric to highlight the blue in the silk.IMG_6735

I’m looking forward to starting this project!