1940s Star Trek Dress (Part 2)

I’ve made some progress on my 1940s Star Trek dress. I still need to do some finishing touches, but the major parts are done. (The skirt, sleeves, and bodice bottom need to be hemmed, the zippers need finishing, and I need to make piping for the neckline. I’d like to fuss a bit with the front gathers as well).IMG_7809

Obviously it will need a good ironing once it’s done!IMG_7811

I am also trying to decide whether to buy official TNG pips or to use these fancy buttons I have from my stash.IMG_7813

You can read about Part 1 here.

Mustard and Black 1940s Dress

I have not been sewing or blogging much because I am in the middle of a kitchen renovation, and we are doing what work we can ourselves. However, I’m taking a break while waiting for a coat of paint to dry to give you a sneak peek of my next project, a 1940s dress.

Is the color scheme familiar?IMG_7514

How about now?IMG_7517

I and some fellow nerdy costumer friends have taken inspiration from the film noir episode of the first season of Star Trek: The Next Generation to make uniforms in 1940s style. Our goal to to make them from historically accurate fabrics and patterns, but using the color schemes of characters from the show. I am Data!

We were also inspired by this awesome art deco blouse found on Etsy:

il_570xN.838783568_ekux

Photo by Guermantes Vintage

I am modifying the Dahlia blouse pattern from Wearing History. There is no yoke and I needed color blocking so I added extra seams in the front and back to piece together the rayon challis I am using.

The bodice will be flat-lined. I cut out all the pieces twice and serged them together before sewing. Right now I have some seams sewn together and the rest are pinned.

I  fitted my mockup at a friend’s house and started picking it apart while I was there, so I don’t have a dress form photo, but here it is lying flat on her floor. (I happened to have some scraps of gold and black fabric to use for my patterning!)

IMG_7187

The dress will have long fitted sleeves with a slight gather at the shoulders and elbows. I haven’t decided yet whether to make the dress a one or two-piece, but the skirt will be black, possibly with a yellow lining.

Lady Tremaine and Cinderella Costumes at FIDM

I haven’t been able to personally visit the current FIDM exhibit of the Oscar-nominated films, which includes costumes from Cinderella! I hoped someone would post detailed pictures of Lady Tremaine’s traveling outfit, because I have been wanting a close-up of the seams to help me with my own project.

Lucky me, wishes do come true. Many wonderful pictures have been posted at the Hollywood Movie Costume Blog, and you should definitely check them out!  Jason, the owner of the blog, has graciously allowed me to repost some of the pictures here.

All pictures below are from and belong to the Hollywood Movie Costume Blog; please do not repost without permission from Jason Morgan.

Here is a front view of the bodice. I have been looking but haven’t been able to find any front bodice seams in any of my previous research. I still do not see it here, and based on the puckering I am starting to suspect there are none.

One interesting detail I had not noticed before is the horizontal seam in the elbow of the sleeve. I presume it is to allow for some ease of movement since the sleeve is tightly fitted, however that means if you look carefully the pattern does not match.lady tremaine hat Cinderella costume

Here is a great shot of Lady Tremaine’s hat and veil; you can see it is translucent. There appears to be some padding in the shoulders of the bodice to make it stand out a bit. The elbow seam is more obvious here.Cinderella lady tremaine costume

This back view shows that the bodice opens in the back. There is one long seam down the center back, possibly closed with hooks and eyes or a hidden zipper?Cinderella movie hats

Please take a look at the Hollywood Movie Costume Blog for additional photos. I will also be updating my costume analysis page with these photos!

Making a Denim Whale Toy from Old Jeans

A while back I saw this great tutorial on a Finnish blog for upcycling an old pair of denim jeans into a stuffed whale toy. Then later another blog put up a printable pattern for the whale.

I had some old jeans of mine that were getting too worn to wear, so I made them into a whale for my son. (This project is actually a few months old, but I’ve had so many other sewing projects to blog about this one was overlooked).IMG_5624IMG_5630

The top of the whale uses the outside of the jeans, while the belly uses the inside for contrast.IMG_5628

It was a fun and easy project and we’ve nicknamed the whale Mr. Pants.IMG_5626

I made him after my son had gone to bed and put the whale on my son’s chair as a surprise for the next morning.IMG_5631

1920s Egyptian Revival and Poiret Cocoon Coat (Part 3) at the Rosicrucian Museum

Yesterday I wore my 1920s Egyptian Revival dress and my Poiret cocoon coat at the GBACG Egyptian Expedition at the Rosicrucian Museum in San Jose, CA.IMG_7051

You can read about the finished dress in my previous posts, but to summarize, both the dress and coat are made of silk velvet. I used the Decades of Style Zig-Zag dress pattern and the Folkwear Poiret coat pattern.IMG_6943IMG_6944

I am wearing a vintage fox fur collar and footwear from Royal Vintage Shoes. I felt so glamorous in this coat!IMG_6946

IMG_7026

I found a place in the museum that had interesting lighting and gave things a slightly eerie glow.IMG_6981

You can see the double-layered silk chiffon sleeves in this photo.IMG_6980

I am wearing golden bee pins in my hair.IMG_6987

Outdoors in the sun the colors of the coat are more obvious.IMG_7017

Here’s a shot of those gorgeous shoes (I got so many people asking where I got them!) with my matching purse. My vintage-style stockings started to pool and slip just like the real ones.IMG_7021

I came in under budget for the dress, so I splurged a little on the coat materials.

  • 5 yards of silk velvet burnout: $82.50 plus tax (from Fabric Depot in El Sobrante; I still have leftovers)
  • 4 yards heavy blue satin: $12.77 plus tax (from Joann’s at 50% off, with an additional coupon!)
  • Folkwear pattern: $19.95 plus $2.75 shipping (from eBay)
  • Tassle: free! (The place where I bought the velvet threw that in for free)
  • Button, thread: from the stash

Total: $119.12

You can see more photos of our museum adventures on Flickr. My friend Kim also has a very nice photo album here.

1920s Egyptian Revival (Part 2)

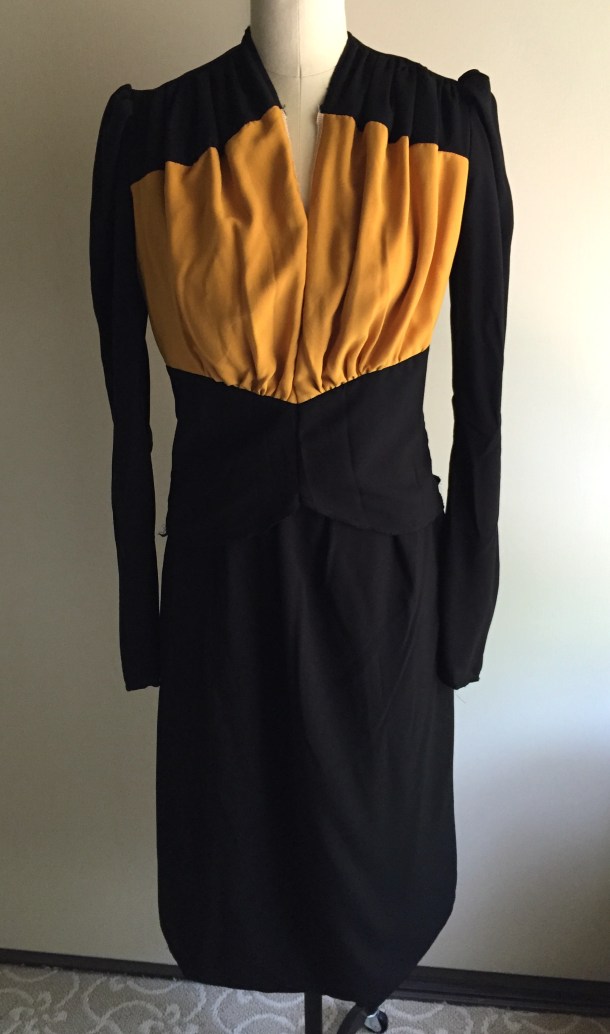
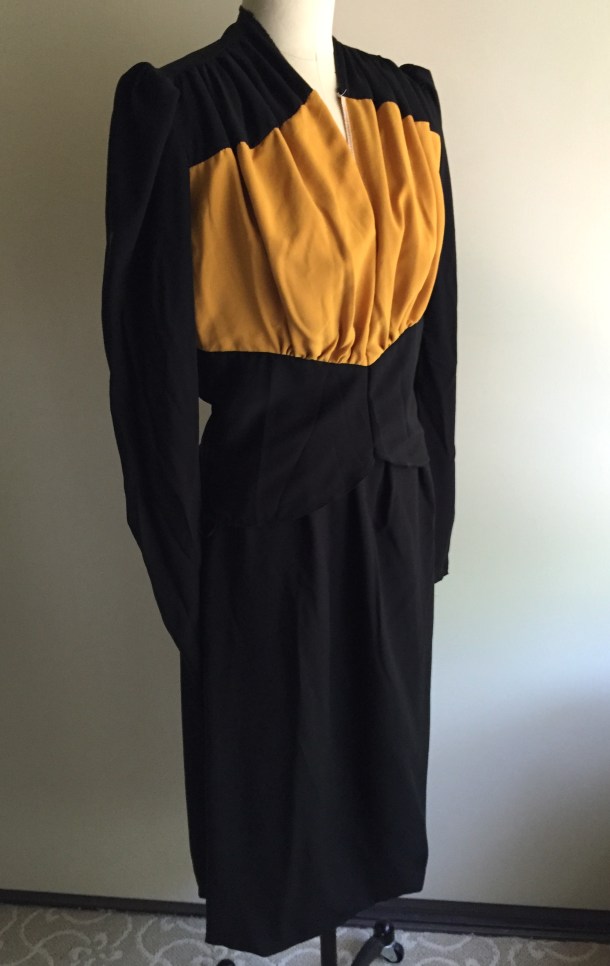
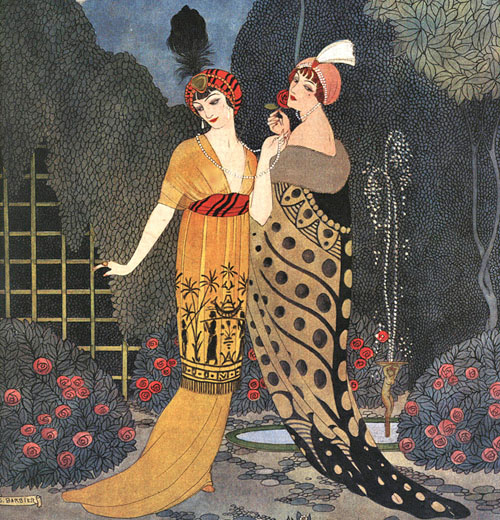
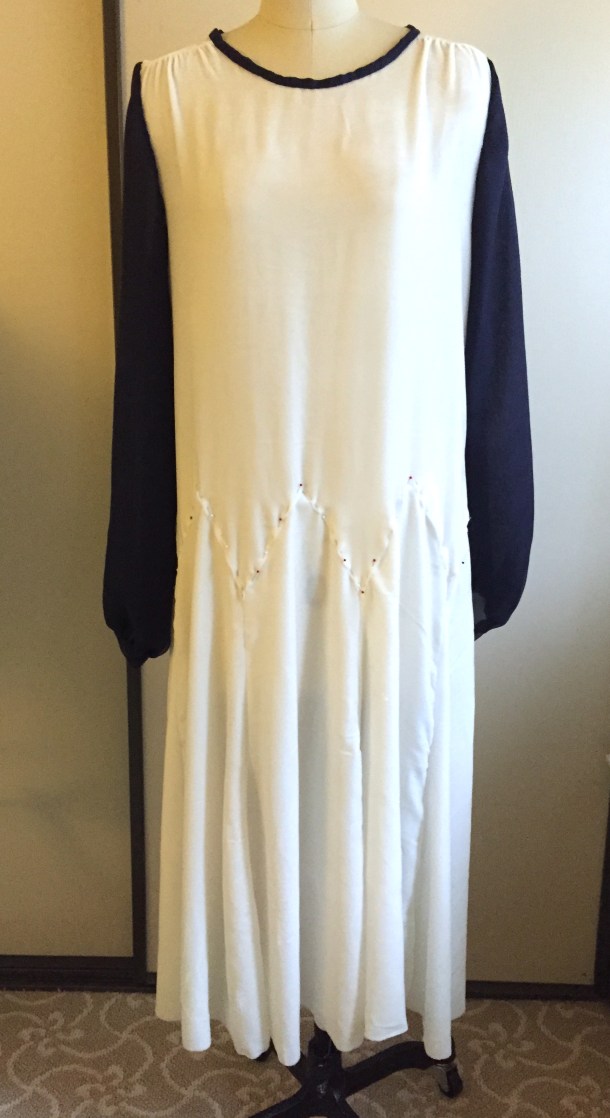
My 1920s Egyptian Revival dress is finished, in time for the event at the Rosicrucian Egyptian Museum!

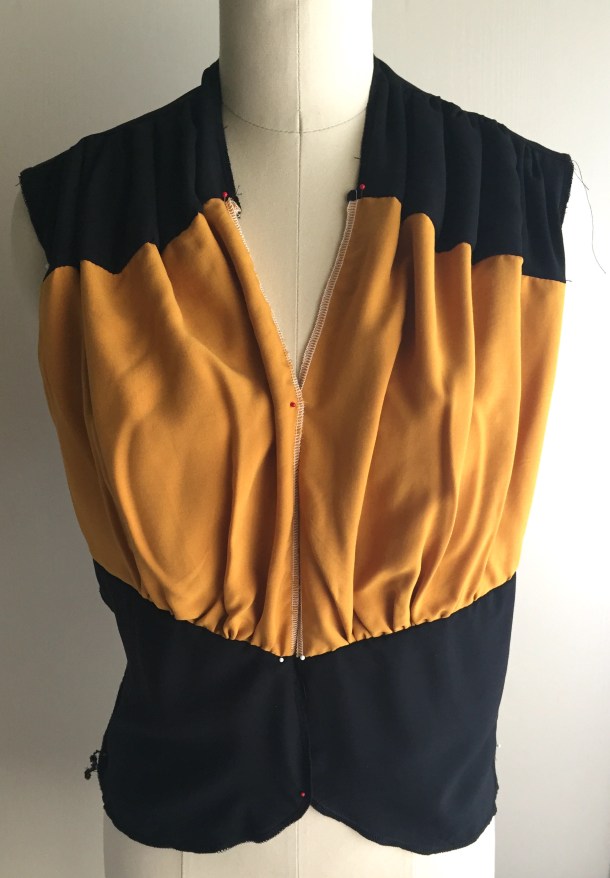
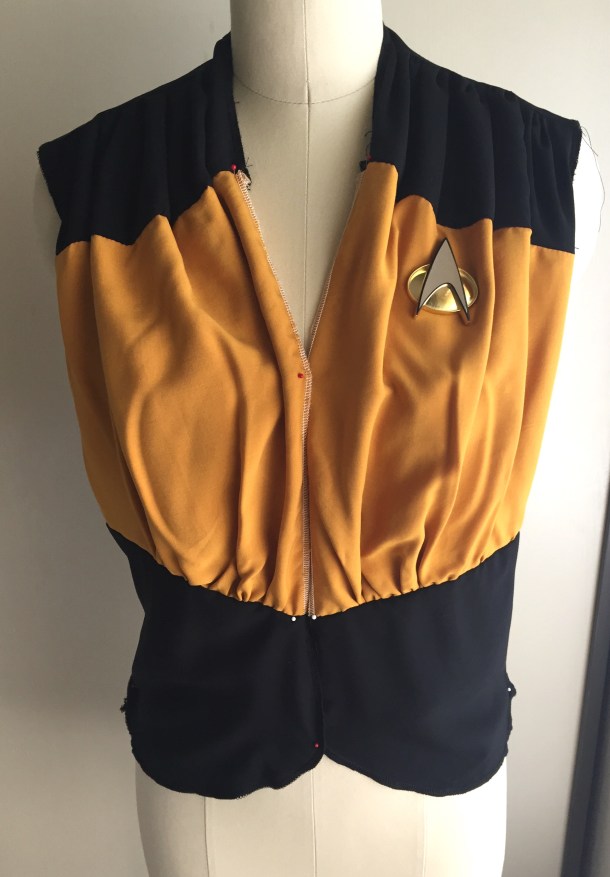
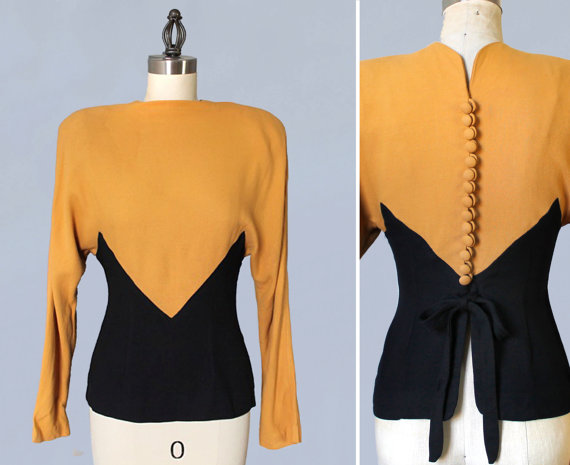
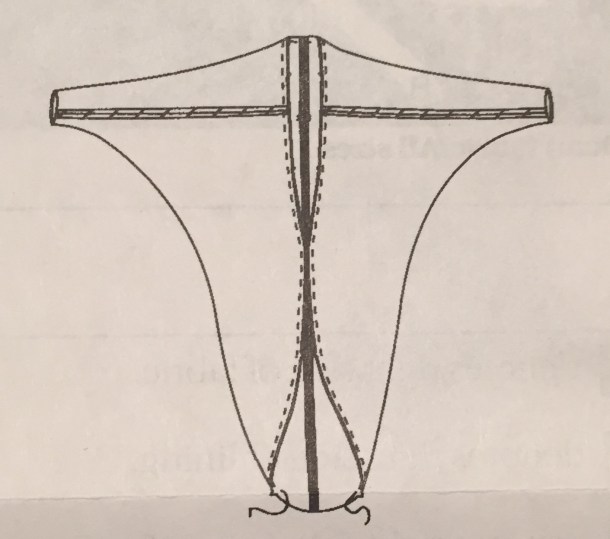
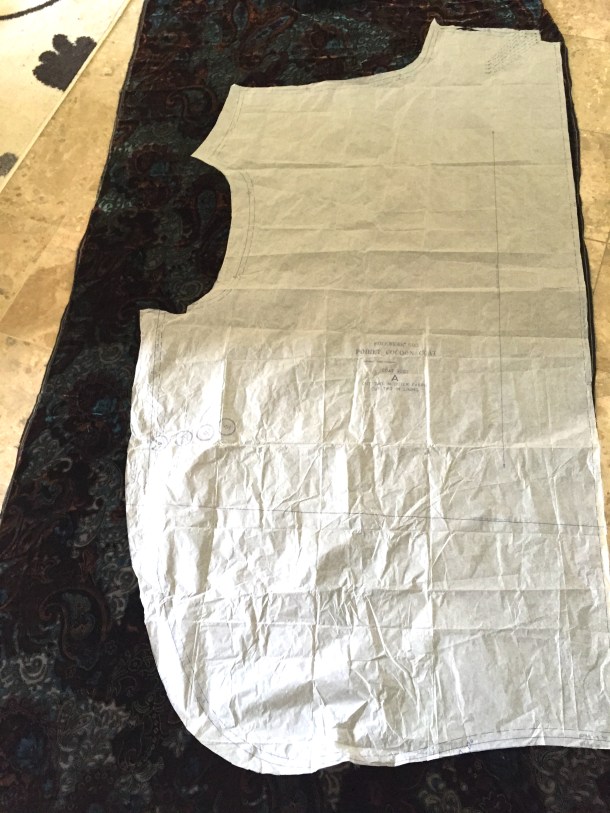
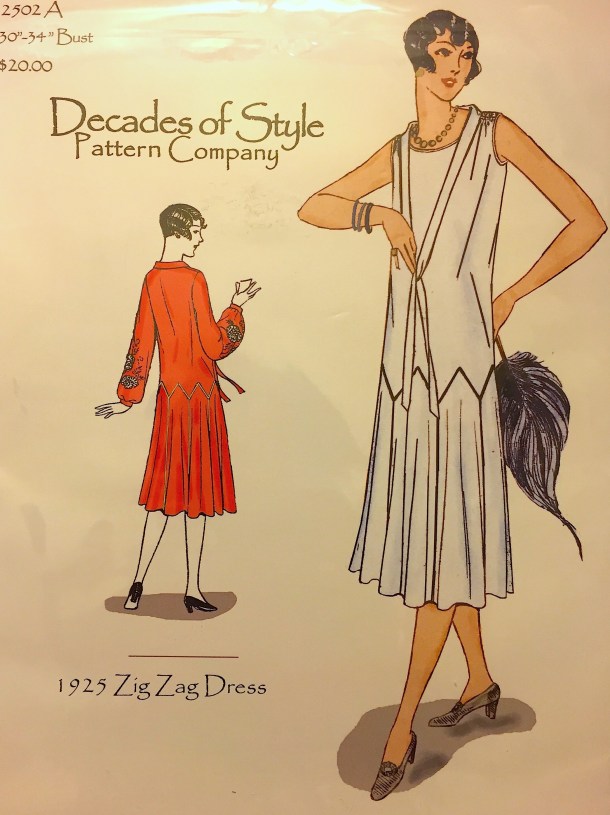
I used Decades of Style’s zig zag dress pattern. It’s a great pattern that I’ve used before, although in retrospect silk velvet is not the best fabric for it. Velvet slips and stretches so much during cutting and sewing that needing lots of triangles to match up perfectly can be difficult. (After cutting, I had to fuss around with mine a lot to make everything fit, so it doesn’t line up as well as I wanted). I also used very sheer silk chiffon for the sleeves and collar binding. It was so sheer that I had to double up on layers. I originally ordered 1 meter of the navy blue silk, but the shop sent me 4 meters by accident (and told me to keep the rest!) so I’m glad I had the extra since I had to use twice as much as I was planning to.

Here is the dress with an Egyptian collar I purchased on eBay.IMG_6867

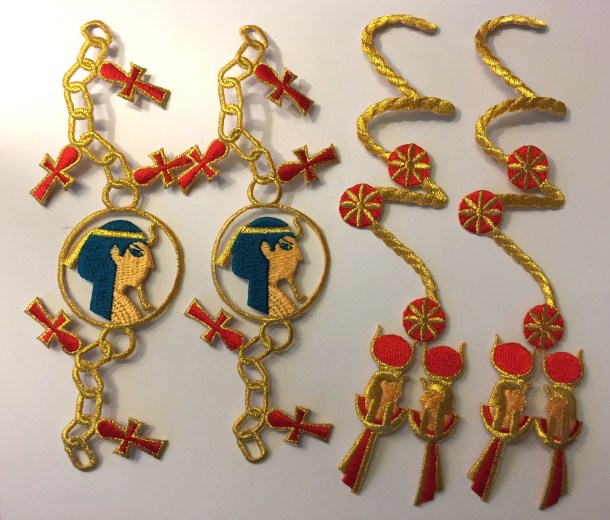
I found these really neat appliques on eBay as well! The seller didn’t have any information about them other than they are “vintage,” so I don’t know where they are from. They are a rather stiff, so the folds of the skirt drape a little funny, but I still find them an interesting touch to the project.IMG_6870

The neckline is bound with 2 layers of silk chiffon, and the shoulders are gathered.IMG_6873

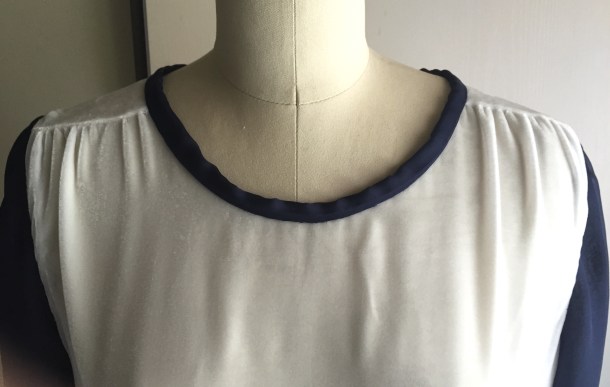
The chiffon didn’t work out for binding the zigzags, so I found some fine rayon twill tape to do the job.IMG_6876IMG_6877

I need to iron flat some small details but it’s finished!IMG_6880

Stay tuned for next week, when I will take pictures of myself wearing it at the Egyptian museum, along with some accessories I am excited about (like new shoes from Royal Vintage Shoes!)

Final costs (lots of lucky bargains!):

  • 3 meters white silk velvet and 4 meters navy silk chiffon : $58 including shipping from Halo Silk Shop
  • Appliques: $6 including shipping from eBay
  • 10 yards twill tape: $4.50 plus tax (with extras left over)
  • Pattern: $0 (I already own it and used it before)
  • Collar:  $10.80 including tax and shipping from eBay

Total: ~$79.30 (for a silk dress!)

Read Part 1 here.

Poiret Cocoon Coat (Part 2)

I’m currently hemming my 1920s Egyptian Revival dress, but have been working a little on the Poiret cocoon coat in between.

The Folkwear 503 is a very simple pattern, but the assembly is different than what I was expecting. I’m used to coats and most garments having seams in the shoulders and sides, but this pattern has a long seam down the center back, and then a horizontal seam across the front of the chest, with darts in the shoulder/neck region. It works, but took a little staring to get over the “you want me to do what?” feeling.

Here is a diagram from the inside of the pattern instructions:

IMG_6835

The sleeves and coat body are cut as one huge piece for each side of the body. The top is folded down to make the sleeve (hence the horizontal seam). The pattern piece is very wide, and takes up most of the width of your fabric.

IMG_6806

I’ve cut out the pieces and sewn them together, but I need to press the seams and attach the lining to the outer fabric, and add a closure. The width of the pattern piece makes pattern-matching on the fabric difficult. To match I would have had to line up my pattern piece about a foot in from the edge, and that wouldn’t have been wide enough.  However, the busy pattern helps hide this a bit, and using a solid fabric would make the back and front seams very obvious.

IMG_6826

At the moment I’m considering not using the collar pattern piece included with the pattern, and putting a fur collar on instead. I tucked this fur scarf I have into the coat to get a general idea of what it would look like, but I think I would rather have a chocolate brown fur that matches the fabric, or go for a fluffy cream collar for more contrast.

IMG_6828

So far I would have to say that this pattern is very easy to use – there are definitely not a lot of pieces at least!

Poiret Cocoon Coat (Part 1)

I am still working on my 1920s Egyptian Revival dress, but I am in the middle of tediously hand-stitching the trim, so there isn’t a lot for me to discuss about the progress of the dress.  Meanwhile, let’s talk about cocoon coats! I have been wanting one of Paul Poiret’s luxuriously draped coats, and since the Egyptian event I am attending is during the winter, this is the perfect time to make one.

1912-georges-barbier-illustration-140-0407-de

Illustration by Paul Barbier. Check out that Egyptian print on the dress on the left!

I am using the Folkwear Poiret Cocoon Coat pattern, which seems quite easy and straightforward. Originally I planned to make one out of solid red velvet to highlight the red accents in my 1920s dress, but  . . .IMG_6573

. . . a few weeks ago I was shopping for ribbon when I came across this incredibly beautiful silk velvet burnout fabric!IMG_6575

It has a beautiful blue, purple, and chocolate brown paisley pattern.IMG_6579

I later bought coordinating lining fabric to highlight the blue in the silk.IMG_6735

I’m looking forward to starting this project!

1920s Egyptian Revival (Part 1): Silk! Embroidery! Flapper Shoes!

Next month the GBACG is hosting an event at the Rosicrucian Egyptian Museum. To celebrate the Egyptomania surrounding Howard Carter’s discovery of King Tut’s tomb in 1922, I will be making a 20s dress with an Egyptian Revival theme.

IMG_6739

I am using white silk velvet and navy blue silk chiffon. Here it is pinned together but still looking rather plain before its embellishments.

IMG_6737

I am using Decades of Style’s zig zag dress pattern, which I used before to make my Daisy dress for the Gatsby Picnic.IMG_6680

I made a bunch of silk chiffon bias tape to trim the zig zags, but sadly they are really too sheer and delicate and the seams show through, so I will have to come up with another plan. (The fabric is so sheer the sleeves are 2 layers of chiffon).IMG_6570

I have 8 of these vintage appliques, one for each panel of the skirt. They might be a little weird, but I am hoping they are just weird enough.IMG_6738

I am excited to wear the dress with these shoes I got from Royal Vintage Shoes. They come in black/gold and navy/silver, but not navy/gold, so I went with the black/gold combination. They are really lovely and I’m glad I’ll have an excuse to wear them!IMG_6565

18th Century at the OT-Tea Party

Back in September I attended a fancy tea event called the OT-Tea Party. (It is a reference to OTT, meaning “over the top”). It was held in the gorgeous French Parlour at the Palace Hotel in San Francisco. Recently I received the official photographs from the event. (Pictures below are by KV Photography, with editing by Nicole Keane).

I wore a silk dress inspired by both 18th century gowns and Japanese lolita fashion. The dress is one of my favorite things I’ve ever made, and I’ve worn it to Costume College, Gaskells and PEERS balls, each time with a little change in the trimming or accessories.

24007948342_1c17f09645_o

I am wearing a pearl necklace and earrings, and a straw bergere I trimmed. My shoes are by American Duchess (the very first run of Georgianas!)23748249499_6142597493_o

I wish my hair had behaved a little better that day, but I had a wonderful time, and ate lots of delightful sandwiches and desserts.24089779936_50bef4e720_o

Here is the whole group together. There were so many amazing outfits and I hope the tea becomes an annual tradition!23488213444_df2dc8fd16_o