Tag Archives: sewing

Tudor Kirtle (Part 1): The Bodice

Near the end of the summer I started on a wool Tudor kirtle to wear for a last minute outing to a Faire. I was so busy sewing that I didn’t blog about the process along the way, but took photos so future me wouldn’t have to repeat the sad mistakes of past me.

I am using patterns from The Tudor Tailor by Ninya Mikhaila and Jane Malcom-Davies to make the wool kirtle and the linen smock. It’s a great book with clear diagrams and historically accurate patterns. (You will have to know some basic drafting and how to scale things to yourself. I lucked out and am close to the measurements of the person the patterns are based on). I bought my copy of the Tudor Tailor on Amazon (affiliate link).

514017pmnzl-_sx413_bo1204203200_

This is the example shown in the book, which is back-lacing. (Mine is side-lacing). More variations on lacing, the shape of the neckline, and sleeves are in the book.5cc1d9067bfceb1a0f1b358f1769eb49

My kirtle bodice is made of a layer of blue worsted wool, a cotton canvas interfacing, and a linen/cotton blend lining. At first I thought it would be a good idea to put in a little bit of reed boning down the front for structure. I was wrong.(Here are the wool and canvas layers before being sewn together).img_9111

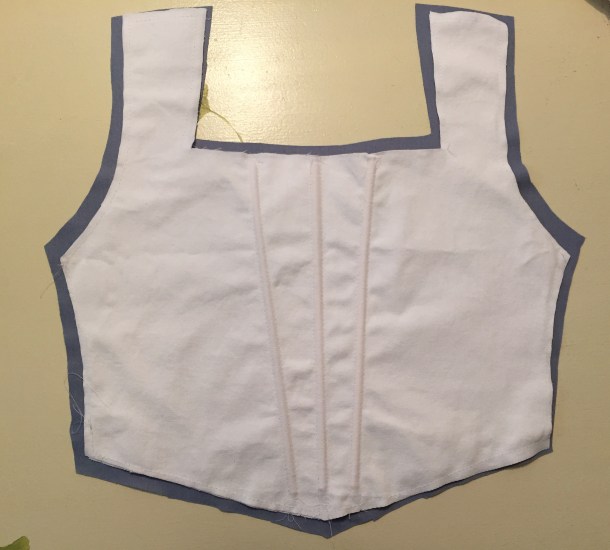
First, boning is not actually needed. Upper class clothing of the era could be highly structured, but the middle class look I am going for has a softer silhouette, and in some period portraits you can see the creases in the front of the bodice. Second, I was using a fine worsted wool, which is not very thick, and you could see the lines of the reed on the outside.img_9112

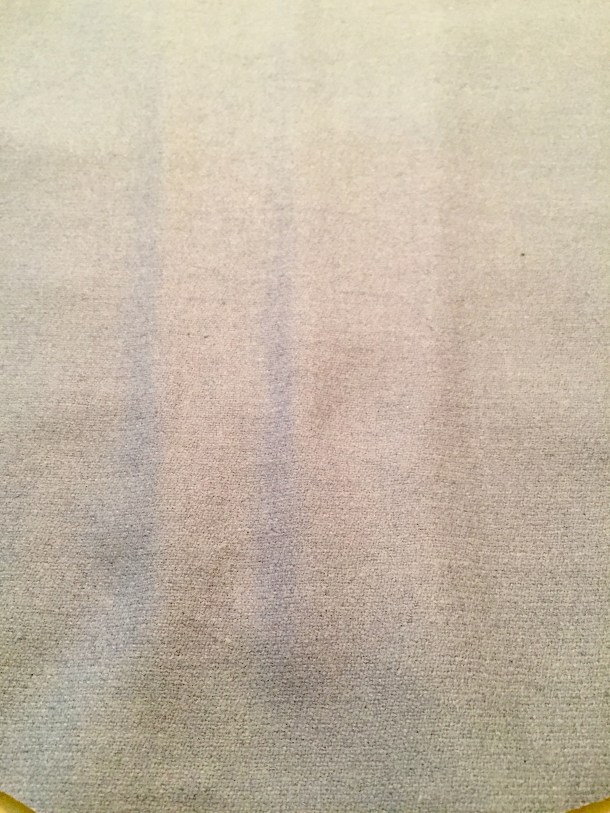
I took out the reed and pinned the canvas to the worsted wool, folding the extra fabric of the wool over the canvas.img_9113

After stitching those together by hand to keep the stitches from showing on the outside of the garment, I put the lining over the canvas and stitched that by hand as well.img_9199

Before I began I thought, “Hey kirtles have an easy shape, it shouldn’t take too long!” I sadly underestimated the amount of hand-sewing required if you are particular about having your stitches show.

Here is the outside when finished. (It looks a little wrinkly on the table, but it’s because it’s not actually flat, and should be slightly curved to fit a human body). The left side is the front, and the right side is the back. I made a slight point in the front bodice, but it can be cut to be curved or straight across.img_9122

I made this bodice to lace on both sides, so I put eyelets on each edge of the front and back pieces. My usual technique is to use metal eyelets that are then bound with matching thread.This gives me a guide to keep them even.IMG_9860.JPG

Next up, skirt successes and fails!

1840s Fan Front Dresses at the Dickens Fair – and Twins!

Last weekend I went to the Dickens Christmas Fair and wore my 1840s fan-front dress, along with a few other friends wearing the same style. One of my friends had the same orange and navy fabric that we purchased independently by coincidence, so we had a good time being twins!img_0498

I made this dress last year so you can read about my construction details on a previous post. I am wearing a bonnet by Lynne Taylor, a shawl from eBay, and ivory silk stockings and Tavistock button boots from American Duchess.img_0538img_0535

Our “backstory” for that day at fair was that Elizabeth had consumption (hence the dark eye make up). As her dear devoted sister I made her many nutritious broths and teas, which tasted like almonds.img_0509

She spent a lot of time coughing while the rest of us enjoyed ourselves!img_0502

I love this cotton print very much, and I think the orange bows that Elizabeth surprised me with were a nice touch this time.img_0507

Black Swan 1950s Ball Gown at the Vampire Ball

Last weekend was the annual Vampire Ball hosted by PEERS. I wore a dress I made from a 1950s pattern that I am calling my “black swan” ball gown because the many organza ruffles remind me of a tutu.image

The skirt of my gown had what seemed like miles of organza ruffles. I was able to save a lot of labor by using fabric that already came pre-ruffled. I thought that the strips of ruffles all ran parallel to each other, but actually change direction every few rows. It made the fabric a little harder to sew, but probably added more visual interest. It was certainly very fluffy! (I had many people asking to pet my skirt).image

The bodice was made using Vogue 8789. I highly recommend this pattern for its flattering shape and ease of construction. The facings for the neckline are cut as part of the bodice pieces, and folded inside and tacked. (I’m used to sewing and wearing historical garments that have more boning and structure up top, so this seemed to go together extremely quickly). The Vogue pattern has a short skirt and is meant for daywear, but I was able to adapt it to an evening gown by making the skirt longer and fuller.  I felt very elegant in this dress; I think my friend Kim captured my mood perfectly in the photo below.image

The sash was made of red stretch taffeta, tied into a large bow in the back. The front was accented by a rhinestone pin from my costume jewelry stash.image

Black dresses are always hard to photograph, so here’s a lightened close-up of the fabric:image

You can’t see my shoes but I was wearing my American Duchess tango boots to give me some extra height as I socialized with the undead.

Project costs:

Total: $109.64

I want to thank Fabric Wholesale Direct for providing all the fabric for this project! The ruffle organza was a very cool fabric and definitely turned heads!  It was also my first time using one-way stretch taffeta, and I found it to have a nice body and opacity, and be very easy to work with.

You can read my tutorial for this dress posted on the FWD site!

Update 12/8/16: Here is a photo courtesy of the talented John Carey, of me sitting on the downstairs steps in my ballgown!vampire-ball-by-john-carey-photographic-imagery


McCall’s 9900 Vintage Skirt Pattern

Happy first day of autumn! It’s the perfect time to build up a collection of wool skirts.

I used the last bit of fabric left over from my Victorian bathing suit to make a simple A-line skirt using McCall’s 9900, a vintage 1954 pattern.img_9587

The cutting took longer than the sewing because I only had about 1.5 yards instead of the recommended 2, and I had to very carefully line up the pieces and introduce some additional seams in order to match the stripes. To give it a bit more flare when wearing it I’ll probably use a petticoat or maybe add some horsehair to the hem later.img_9589

It’s not quite perfect, but was still satisfying!img_9592

The skirt closure has a side zipper and a button.img_9597

It was a nice easy pattern and I will definitely use this again!img_9588

img_9598

1830s Romantics at the PEERS Victorian Gothic Ball

This weekend I went to the PEERS Victorian Gothic Ball. We were invited to wear 1830s or 1840s clothing and dance the night away, along with actors portraying characters from Jane Eyre and readings by Mr. Edgar Allen Poe and other poets. There is a mini-reunion of our Hopeless Romantics group, along with a few new ladies in 1830s clothing.IMG_9359

I wasn’t quite sure until a few hours before the ball that I would be wearing that particular dress because I had a back injury and could not wear a corset or spend a lot of time with my arms above my head doing elaborate hair. Luckily I already had an easy hairpiece from a previous outing (with a tutorial here) and managed to squeeze myself into the dress sans corset by shifting my petticoats down a bit. The silhouette is not perfect, but I made it to the ball!IMG_9365
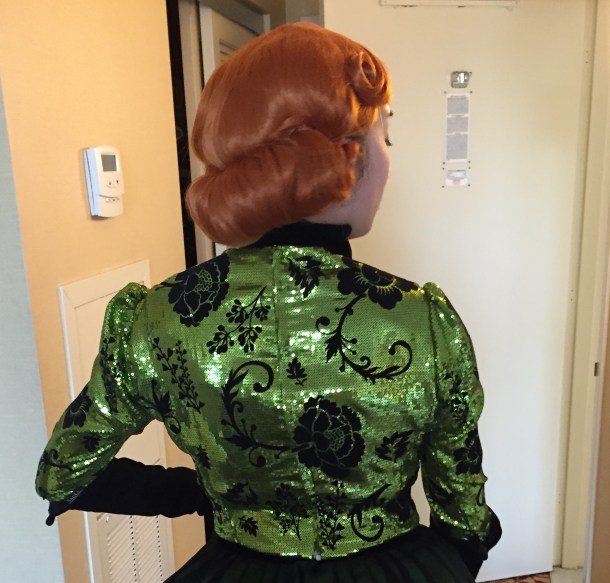
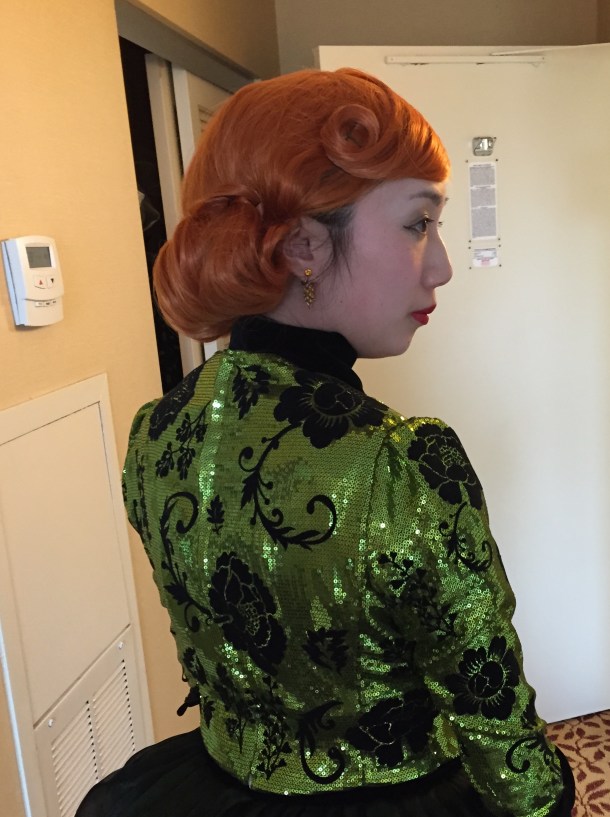
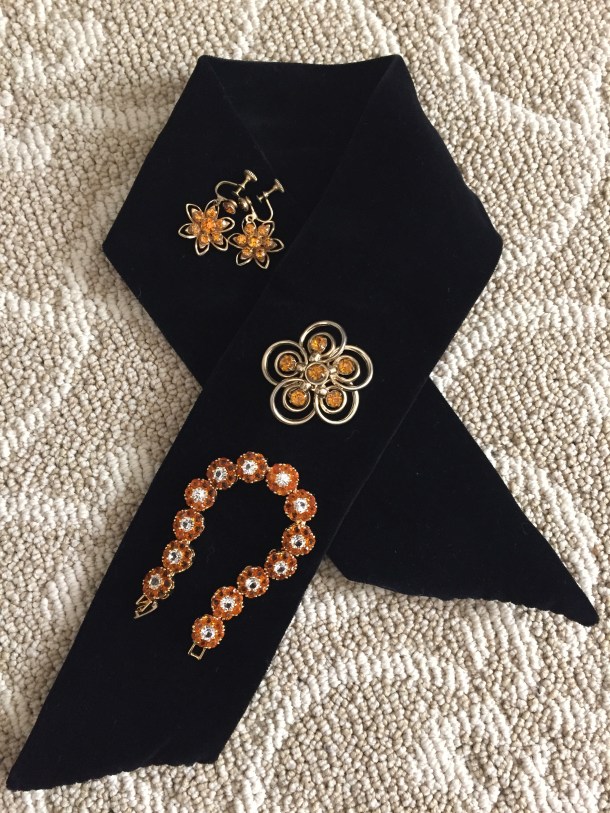
I am wearing jewelry from Dames a la Mode and Pemberly slippers from American Duchess.

I tried to pose like a serious portrait.IMG_9308

A close-up of the hair and jewelry.IMG_9307

And I shall end with the delightfully silly menu from the bar that evening.IMG_9301

1770s Robe à l’Anglaise Retroussée Using Ikea’s Ljusöga Fabric

At Costume College I wore my finished robe à l’Anglaise retroussée, previously debuted in an unfinished form at the Pirate Festival.  I don’t have all my formal portraits yet, but Andrew Schmidt, the official CoCo photographer, put up this picture as one of the preview shots.

18th century elegance by Andy Schmidt

Photo by Andrew Schmidt

The dress is made from one king-sized Ikea duvet cover! And I still have plenty of fabric left over for another project, such as a jacket. The bodice is lined with linen and I used the Period Impressions 1770 Polonaise and Petticoat pattern. (I highly recommend this pattern. It was simple to follow, relatively quick to put together, and I had to make very little adjustment to the fit).IMG_8771

(I am wearing red Kensingtons with paste buckles and clocked silk stockings, all from American Duchess). The back of the dress can be worn down as a regular Anglaise, or retroussée by looping the two twisted rayon cords around the fabric-covered buttons.IMG_8772

IMG_8983

I would like to get a bigger hat (this one goes with a different outfit) but ran out of time. I also attempted hair buckles, but that was a disaster, so I  just put my hair up in a high bump over a rat, then put flowers in the back.IMG_8774IMG_8776


The sleeves also have a little loop of rayon cord and a slightly smaller fabric-covered button.IMG_8982

Unlike the previous time I wore this dress, this time I am wearing the correct stays. Here’s a silly selfie in the hotel bathroom while still in PJs and messy hair. Now you know what I look like in the mornings! (Well, except for the stays).IMG_8731

Project costs:

  • Ikea king-sized duvet cover: ~$30
  • Linen lining: $0, leftover from another project
  • Period Impressions pattern: $13.95 + $4.85 shipping from Etsy
  • Buttons: from stash
  • Rayon cord: ~$5 from Britex

Total: ~$53.80

Way under budget! I got to splurge a little on the accessories. 😉 Onsite I happened to hear about Dames a la Mode’s trunk sale, and bought this lovely set that I wore with my dress.IMG_8973

Costume College: Saturday and Sunday

On Saturday at Costume College I dressed up in my 1770s robe à l’Anglaise retroussée and got together with some other ladies wearing the same “LJUSÖGA” Ikea print. We previously wore the dresses at the Pirate Festival, but my dress was not fully finished at the time. (Close-ups and construction details will be in my next post).IMG_8767

Saturday at Costume College started with the wonderfully informative class “Dark Secrets from the Care and Storage of Museum Objects,” taught by Carolyn Jamerson, a Collections Manager and Mount Maker at FIDM. I learned a lot of about the storage of clothing in museums, and some tips I can use at home. Carolyn also went over what not to do, and had many anecdotes about items donated to the museum in various stages of disrepair.

Later I ran into these dapper military gentlemen:IMG_8753

Rebecca had this fetching plaid ensemble.IMG_8764

Maggie had this great Mad Max outfit that she roughed up to look dirty, but wasn’t. I almost didn’t recognize her out of regency attire!IMG_8780

This Marie Antoinette dress was so charming!IMG_8782

This “Mountain Man” gave me an informative impromptu lecture about the life of a mountain man and the significance of all the little items hanging on his neck.IMG_8762

After lunch I took two more classes before getting ready for the gala. “A Fortnight in 1916” was a great lecture by Leimomi Oakes about life on the homefront during WWII in New Zealand. She lived for 2 weeks like a lady in 1916, even cooking recipes from newspapers of the time. I also took “Fancy Footwear: Vintage Shoes 1920s to 1940s” from Lauren Stowell of American Duchess, and after class I got to try on some of the samples from her new line at Royal Vintage Shoes.

For the evening red carpet, dinner, and gala I dressed as Lady Tremaine. I made a lengthy post with many details that you can read here.IMG_8853

There were so many wonderful costumes at the gala I can’t post them all! I also ran into a lovely Cinderella cosplayer!IMG_8870

Lynne and Natalie (check out that train!) looked impeccable as always.IMG_8839

Molly’s Kaylee Firefly dress set many geek hearts aflutter.IMG_8836

The Dreamstress and the Lady Detalle! So regal!IMG_8844

These 18th century ladies (Lauren, Loren, and two other amazing people) were fabulous in silk.IMG_8848

Christina’s  1830s hair was a work of art.IMG_8863IMG_8866

And of course, Cynthia’s faithful recreation of the Worth Ironwork gown was the talk of the night!IMG_8895IMG_8898

On Sunday I decided to have a more casual outfit by wearing my vintage 1950s purple taffeta dress with my Lady Tremaine hat.IMG_8948

Natalie portrayed the artist Louise Elisabeth Vigee Le Brun.IMG_8932

Christina had this fabulous Bar Suit recreation.IMG_8937

I found Taylor, Jenny, Jen, and Ginger near the hotel lobby. Can you believe the cutwork on Jen’s sleeves were done by hand?IMG_8922

Gloria was also hanging out near the lobby, and wearing 18th century.IMG_8930

On Sunday I took three classes. “Achieving the Perfect Nineteenth Century Silhouette 1830 to 1894” by Luca Costigliolo, the guest teacher from Italy, was an incredible class that emphasized how common padding was to achieving the perfect silhouette, regardless to the lady’s figure. I wish I had had the chance to get into his limited classes! The next class I took was “Creating a Miss Fisher 1920s/30s Wardrobe” by Lauren Stowell, who asked me to come model my 1920s cocoon coat. Afterwards, I asked Lauren to try it on. IMG_8951

My last class of the day was “Wearing Your Food” by Janea Whitacre of Colonial Williamsburg, who discussed names of food being used to describe different colors of dye and it was an interesting lecture. This year I took 3 classes a day and I think that was an ideal amount. There was room in the schedule for more, but it gave me enough time to socialize and eat in between.

I had a wonderful Costume College, and am already planning for the next one!

The rest of my photos are on Flickr.

Costume College 2016: Thursday and Friday

As usual my roommate and I drove from the Bay Area to LA on Thursday. Normally we make a stop in between to visit FIDM before going to the hotel, but the costume exhibit was closed, so we went straight to the hotel. We arrived at 2 PM and found it made a world of difference! There was no line at all for check-in (compared to the huge one last year), and we didn’t have to wait for a porter. We were able to snag 2 luggage carts and within 15 minutes of arriving, we were checked in, the car parked, and all of our things unloaded in the room!

We were able unpack a bit and have a relaxing afternoon looking for friends arriving, until we got changed for the Thursday Night Pool Party. The theme was “Mod” and I wore a vintage 60’s dress.

By accident, Ginger, Vanessa, and I made a Powerpuff Girls team.IMG_8592

My dress had a cape so I guess I was sort of a superhero!IMG_8574

It was late when I started taking pictures, and most of my photos came out dark and of poor quality, so let’s skip straight to Friday.

Natalie and I wore our 1940s Star Trek costumes that we previously debuted at PEERS, and had a blast in them again. “Set phasers to sew!”IMG_8610We even met someone who said said she knew LeVar Burton (Geordi) and took a picture to show him!

There was this fantastic Star Wars group at CoCo, consisting of Loren, Jen, Katherine, Ginger, Twila, and Amy. They were all great, but I have a special fondness for Edwardian Kylo Ren.IMG_8629.JPG

During the day I took a few really great classes. Samantha Bullat of Jamestown-Yorktown Foundation taught two classes: “Because few Taylors” (about the challenges of presenting an accurate living history experience within the confines of modern needs, laws, and budgets) and “Understanding the Oorijzer” (a metal frame Dutch women used to prop up their caps). Both were very informative and presented well. I also took a class called “Accessorizing Your Teens/Twenties Outfits” by Mela Hoyt-Heydon. Her lecture focused on how to get that Downton Abbey look, and Mela is a great speaker and her classes always fun.IMG_8596

After my classes I made a donation to the Scholarship Fund so I could go do some early bird shopping in the dealer’s hall. I spent most of my money at one booth (Acme Notions) which consistently has lovely and interesting things. This time I got many millinery flowers, some odds and ends, and pretty vintage deadstock lingerie.

The Friday Night Social was full of lots of great costumes, as usual. The theme was circus, but it is not mandatory and I wore my 1920s cocoon coat, a beaded 1920s reproduction dress from Unique Vintage, Miss L Fire Vista shoes, and a beaded headband.

Natalie wore a beautiful green bustle dress.IMG_8650

Judy and AJ made really cute Sleeping Beauty fairies.IMG_8666

Merja had a great fox-trimmed ensemble.IMG_8668

Kevin and Kathy rocked the Roman look. (It’s hard to tell from the photo, but Kathy put so many tiny tiny curls in her hair to achieve the historical frizzed look!)IMG_8670

Molly looked so cute in Renaissance.IMG_8662

Bridget, ?, and Lana looked lovely, just out of a painting.IMG_8688

Gretchen’s circus outfit was just smashing, and one of my favorites of the evening.IMG_8724

I took many more photos, so those were just the highlights. I can’t fit them all here so take a look at my Flickr account for more. I will be making another post with the Saturday and Sunday photos, which include the wonderful things people put on for Gala!

Lady Tremaine at Costume College

For the red carpet and gala dinner at Costume College last week I wore my finished Lady Tremaine costume! I mostly do historical costume, but I enjoyed doing cosplay as Cinderella’s stepmother. I started this project last year, and it was So Much Work making all the layers and pieces, and cutting out and applying all the floral appliques on the bodice, skirt, and hat, but it was worth it in the end!IMG_8853IMG_8854IMG_8856IMG_8857

(You can make your own too! At the end of this post I list all the materials and tutorials for the skirts).

I’ve made a number of posts (linked at the bottom) with construction details, but a quick recap of what this costume entails:

  • sequined bodice with black flocking appliques
  • black velvet column skirt
  • overskirt with 2 layers of green satin and 2 layers of black organza, with green flocking appliques
  • giant hat with 2 layers of sinamay and 1 layer of organza, with black flocking appliques, feathers, and birds
  • giant velvet bustle pad
  • velvet scarf
  • suede gloves
  • citrine jewelry: earrings, brooch, bracelet
  • wig

IMG_8977

IMG_9008.JPG

My wig was a little small for my large head, but my friend Natalie still did an amazing job styling my wig! She used a large hair rat to make a big roll in the back, then did a few pincurls.  Here’s a few shots from the hotel room.IMG_8793IMG_8799IMG_8800

The earrings and brooch are vintage, while my gloves and bracelet are new.IMG_8971

IMG_8975

When lining up for the red carpet I ran into another Lady Tremaine!IMG_8804

I didn’t have time to put in boning, and I have terrible posture, so whenever I slouched you could see the bodice wrinkling. My improvements wish list for next time are boning, maybe some black crystals around the flowers (just like the movie version), and possibly a a larger wig.

At the end of the evening I found a shoeshine stand in the hotel to sit on. I felt like a shoe advertisement. “Lady Tremaine prefers American Duchess.” (I am wearing the black tango boots).IMG_8909

I am looking forward to wearing this again!

Ok, the final tally! I normally spend about $100 per costume, but this was a very special project, with its own special budget, and not something I would make every year. Some techniques were new to me, and there was also some trial and error, with some materials purchased but ultimately not used. So here is the list (including some Amazon affiliate links)!

Main materials ($240.14 total):

  • 8 yards green crepe back satin: $23.92 (from Fabric Wholesale Direct)*
  • 10 yards black crystal organza: $19.99 (from FWD)
  • 2 yards black micro velvet: $17.98 (from FWD)
  • 2 yards silky habutai lining: $3.58 (from FWD)
  • Shipping for above: $12.95 (from FWD)
  • 2 yards sequin fabric: $29 including shipping (from Etsy)
  • 5 yards green heat-transfer flocking: $51.80 including shipping from Imprintables Warehouse
  • 2 rolls black heat transfer flocking: $31.64 (including tax from Amazon)
  • 4 yards horsehair braid: $27.41 (from Fabric Depo, a local store)
  • Vintage Pattern Lending Library basque pattern: $15 including shipping (from a Facebook destash group)
  • Green zipper: $6.87 including shipping (from eBay; I eventually got a different one from a friend but still paid for this one)

Not used ($76.80 total):

  • 5 sheets neon green flocking: $21.95 including shipping (from Etsy)
  • 10 yards black Mistyfuse:$21.85 (from Etsy and eBay)
  • 2.2 yards green felt: $33 including shipping (from Etsy)

Hat materials ($77.56 total):

Accessories, not including shoes ($70.87 total):

FINAL COST: $465.37 (holy crap)

FINAL COST – NOT USED: $388.57 (getting better)

*Fabric Wholesale Direct very kindly gave me all the satin, organza, and velvet for free in exchange for two tutorials I wrote for the velvet skirt and the overskirt so if I subtract out what they gave me  . . .

FINAL FINAL COST: $310.15 (slightly less scary, but still not a frequent endeavor)

And 40 yards of materials!

If you’ve made it this far, thank you for reading this monster post! Stay tuned for posts from 4 days of Costume College!

Previous posts:


Lady Tremaine’s Bodice

Costume College is in 2 days! I finished my bodice a few days ago but today was the first time I tried on all the pieces of my Lady Tremaine outfit: bodice, underskirt, overskirt, chemise, bra, waist cincher, bum pad, stockings, shoes, gloves, hat, veil, earrings, scarf, pin, and bracelet. I hope the AC is turned on at the hotel! I’m busy packing and doing other preparations so after CoCo I will make a full post about the outfit and other details.

So sparkly! (The bodice is hand-sewn because of the sequins).image

The back closes with a separating zipper. I was worried about having hooks and eyes snag on the sequins, so a friend had the genius idea of using a jacket zipper that pulls apart! The waist has some extra room in it because the two velvet waistbands for the skirts are rather thick. (The outer skirt has 2 layers of organza and 2 layers of satin pleated into the waistband, which makes it extra bulky).image

And an in-progress shot:image

See you at Costume College!